Danger Canyon: Difference between revisions
From Halopedia, the Halo wiki
Sona 'Demal (talk | contribs) mNo edit summary |
(The easter egg doesn't exist.) |
||
| Line 1: | Line 1: | ||
{{era|H1}} | {{era|H1}} | ||
{{ratings}} | {{ratings}} | ||
{{Multiplayer Map Infobox | {{Multiplayer Map Infobox | ||
|name=Danger Canyon | |name=Danger Canyon | ||
|image=[[Image:Halo_Combat_Evolved-Danger_Canyon.jpg| | |image=[[Image:Halo_Combat_Evolved-Danger_Canyon.jpg|260px]] | ||
|game=''[[Halo PC|Halo: Combat Evolved]]'' | |game=''[[Halo PC|Halo: Combat Evolved]]'' | ||
|location=[[Installation 04]] | |location=[[Installation 04]] | ||
| Line 36: | Line 35: | ||
*4-16 | *4-16 | ||
}} | }} | ||
{{Article Quote|Don't Look Down... Unless You Fall.}} | |||
'''Danger Canyon''' is a [[Halo PC]] and [[Halo Mac]] | '''Danger Canyon''' is a [[multiplayer]] level exclusive only to [[Halo PC]] and [[Halo Mac]]. The level is somewhat similar to the [[Halo (Halo: Combat Evolved Level)|Halo]] and [[The Silent Cartographer (Level)|The Silent Cartographer]] levels in single player [[Campaign]] of [[Halo: Combat Evolved]]. | ||
== Summary == | == Summary == | ||
| Line 45: | Line 44: | ||
The level is best played as a Team [[Slayer]] or [[CTF]] match with many players. It is a large level and teams can get stuck fighting across the second level canyon area for extended periods of time. The tunnels going through the cliffs will lead to your opponents base and a cliff. | The level is best played as a Team [[Slayer]] or [[CTF]] match with many players. It is a large level and teams can get stuck fighting across the second level canyon area for extended periods of time. The tunnels going through the cliffs will lead to your opponents base and a cliff. | ||
== | == Strategies == | ||
*There are 6 ways in and out of the tunnel system. Learning the tunnels' anatomy is ''highly'' ''recommended'' and in CTF, it can lead to getting out of the enemy base with the flag quickly and efficiently. | *There are 6 ways in and out of the tunnel system. Learning the tunnels' anatomy is ''highly'' ''recommended'' and in CTF, it can lead to getting out of the enemy base with the flag quickly and efficiently. | ||
*The map has a few critical capture points: | *The map has a few critical capture points: | ||
**From both passes, a tunnel can be taken that leads to a central room. This room is used to access the bridges. If a team can gain control of it, they can prevent the enemy from passing. This wreaks havoc on the enemy, leaving them no way to escape. | **From both passes, a tunnel can be taken that leads to a central room. This room is used to access the bridges. If a team can gain control of it, they can prevent the enemy from passing. This wreaks havoc on the enemy, leaving them no way to escape. | ||
**The far side of the bridges can be key to a teams success. A [[sniper rifle]], [[M6D|pistol]], [[M9 High-Explosive Dual-Purpose Grenade|fragmentation grenades]] and an [[overshield]] spawn here. A skilled sniper can pin enemies on foot in the tunnels. This sniper can also pick off slower vehicles that may pass, like a scorpion tank or an unsuspecting warthog. Additional teammates can go through the tunnels, across the bridges, and through the teleporters to get to vehicles that may be waiting there. | **The far side of the bridges can be key to a teams success. A [[sniper rifle]], [[M6D|pistol]], [[M9 High-Explosive Dual-Purpose Grenade|fragmentation grenades]] and an [[overshield]] spawn here. A skilled sniper can pin enemies on foot in the tunnels. This sniper can also pick off slower vehicles that may pass, like a scorpion tank or an unsuspecting warthog. Additional teammates can go through the tunnels, across the bridges, and through the teleporters to get to vehicles that may be waiting there. | ||
**Coordinated vehicle attacks can be very effective in CTF. Scorpions and Warthogs can be used to pin the enemy down, while a Ghost user takes the flag back to base. | **Coordinated vehicle attacks can be very effective in CTF. Scorpions and Warthogs can be used to pin the enemy down, while a Ghost user takes the flag back to base. | ||
*Another tactic is to collect both Fuel Rod Gun and a Rocket Launcher in the tunnel system and then raid the enemy base. | |||
*Another tactic is to collect both Fuel Rod Gun and a | |||
*Similar to [[Infinity]], Danger Canyon was designed ''specifically'' so that coordinated team attacks were a necessity for success. | *Similar to [[Infinity]], Danger Canyon was designed ''specifically'' so that coordinated team attacks were a necessity for success. | ||
==Trivia== | |||
=== Glitches === | === Glitches === | ||
*[[Wall Hacking|Wall hacking]] can be performed in Danger Canyon, given that there is at least one [[Ghost (Vehicle)|Ghost]] or [[Warthog]] and friendly fire turned off. Start a new game on Danger Canyon and get in to either vehicle. Get a teammate to get in front of the wall closest to your enemy's base and ram them through the cliff wall. Sometimes, this may fail leading to your teammate falling through the map. If it does work, you will be at the opposing team's base. | |||
== Images == | == Images == | ||
Revision as of 09:43, June 30, 2009
Template:Ratings Template:Multiplayer Map Infobox Template:Article Quote
Danger Canyon is a multiplayer level exclusive only to Halo PC and Halo Mac. The level is somewhat similar to the Halo and The Silent Cartographer levels in single player Campaign of Halo: Combat Evolved.
Summary
Danger Canyon features a long, narrow and winding canyon with an alternate passageway leading to a second level in the center of the canyon. The passageway is large enough to drive a Warthog through and players have been known to drive Warthogs or ghost to a nice platform overlooking the canyon below and open fire.
The level is best played as a Team Slayer or CTF match with many players. It is a large level and teams can get stuck fighting across the second level canyon area for extended periods of time. The tunnels going through the cliffs will lead to your opponents base and a cliff.
Strategies
- There are 6 ways in and out of the tunnel system. Learning the tunnels' anatomy is highly recommended and in CTF, it can lead to getting out of the enemy base with the flag quickly and efficiently.
- The map has a few critical capture points:
- From both passes, a tunnel can be taken that leads to a central room. This room is used to access the bridges. If a team can gain control of it, they can prevent the enemy from passing. This wreaks havoc on the enemy, leaving them no way to escape.
- The far side of the bridges can be key to a teams success. A sniper rifle, pistol, fragmentation grenades and an overshield spawn here. A skilled sniper can pin enemies on foot in the tunnels. This sniper can also pick off slower vehicles that may pass, like a scorpion tank or an unsuspecting warthog. Additional teammates can go through the tunnels, across the bridges, and through the teleporters to get to vehicles that may be waiting there.
- Coordinated vehicle attacks can be very effective in CTF. Scorpions and Warthogs can be used to pin the enemy down, while a Ghost user takes the flag back to base.
- Another tactic is to collect both Fuel Rod Gun and a Rocket Launcher in the tunnel system and then raid the enemy base.
- Similar to Infinity, Danger Canyon was designed specifically so that coordinated team attacks were a necessity for success.
Trivia
Glitches
- Wall hacking can be performed in Danger Canyon, given that there is at least one Ghost or Warthog and friendly fire turned off. Start a new game on Danger Canyon and get in to either vehicle. Get a teammate to get in front of the wall closest to your enemy's base and ram them through the cliff wall. Sometimes, this may fail leading to your teammate falling through the map. If it does work, you will be at the opposing team's base.
Images
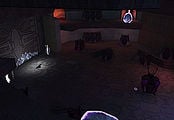
Inside the Red Base
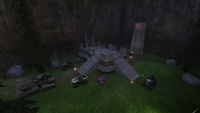
Outside the Red Base
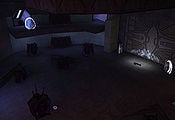
Inside the Blue Base
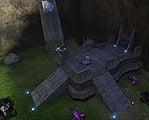
Outside the Blue Base


