H2:Cairo Station
From Halopedia, the Halo wiki
|
Prev: |
|
|
Next: |
|
| Cairo Station | |
|---|---|

| |
|
Game: |
|
|
File name (?): |
|
|
Player: |
|
|
Date: |
|
|
Location: |
|
|
Objective(s): |
Repel Covenant boarders and find the Covenant antimatter charge. |
|
Par Time: |
00:15:00 (Master Chief Collection) |
|
Par Score: |
14,000 (Master Chief Collection) |
 |
Halopedia has a walkthrough guide for this level; see H2:Cairo Station/Walkthrough. |
| “ | Defend the station's MAC gun from Covenant boarders. | ” |
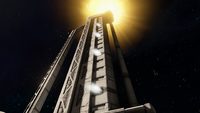
Cairo Station is the third campaign level of Halo 2, taking place in Earth's orbit on the eponymous Cairo Station. The Master Chief and UNSC Marines fight against boarding Covenant troops, culminating in a battle over an Elite-guarded bomb intended to destroy the station. This is the first level in Halo 2 in which enemies are encountered.
Transcript
{Cutscene} {Anniversary Cutscene}
John-117 and Sgt. Mjr. Avery Johnson step from the tram into a crowd of cheering Marines, robot cameras hover around.
- Master Chief Petty Officer John-117: "You told me there wouldn't be any cameras."
- Sergeant Major Johnson: "And you told me you were gonna wear something nice! Folks need heroes, Chief. To give 'em hope. (raises cap, adjusts his hair, puts cap back on) So smile, would ya? While we still got something to smile about!"
Johnson and the Master Chief walk to the end of the room, as the Bridge's blast doors open up.
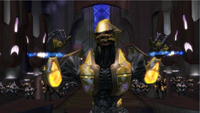
The view changes to High Charity, where Tartarus and two of his Jiralhanae walk Thel 'Vadamee down a walkway leading to an oval-shaped ledge that sports a pair of pincer-like columns. The Anodyne Spirit can be seen in the distance. Sangheili Honor Guardsmen are stationed on either side of the walkway. Covenant Unggoy, Kig-yar and Mgalekgolo have also gathered along the path and begin to heckle 'Vadamee.
- Unggoy: (chanting) "He-re-tic! He-re-tic!"
They reach the ledge, which overlooks the city. Across the chasm are multiple stadium rows, all filled with roaring Covenant aliens. 'Vadamee stands on a seal between the two curved columns. The Jiralhanae fix his arms onto floating cuffs.
- Tartarus: (gleefully) "You've drawn quite a crowd."
- Thel 'Vadamee: (bitterly) "If they came to hear me beg, they will be disappointed."
- Tartarus: (malevolently) "Are you sure?"
The entire crowd cheers as energy beams hit 'Vadamee on either side, and he shakes with pain. (In the Anniversary, the floating cuffs charge up and unleash bolts of electricity across his body.)
The view changes back to the Cairo's bridge, dozens of Naval officers cheer as Master Chief and Sergeant Johnson approach Lord Hood at the end.
Master Chief and Johnson salute to Lord Hood.
- Lord Hood: "Gentlemen, we're lucky to have you back."
An officer whispers in Lord Hood's ear.
- Lord Hood: "Go ahead, Cortana."
Cortana's avatar appears on a nearby holotank.
- Cortana: "Another whisper, sir, near Io. We have probes en route."
Hood looks back to the Chief and Johnson.
- Lord Hood: "I apologize, but we're going to have to make this quick."
Lord Hood turns away.
Cortana looks up at the Chief and Johnson.
- Cortana: "You look nice."
Johnson and the Chief respond simultaneously.
- John-117: "Thanks."
- Johnson: "Thank you."
The Master Chief and Johnson look at each other.
Lord Hood picks up a Colonial Cross medal from a red-clothed case containing two other Colonial Cross medals.
- Lord Hood: "Sergeant Major, The Colonial Cross is awarded for acts of singular daring and devotion, for a soldier of the United Earth Space Corps..."
Hood pins the medal on Johnson's uniform.
The view changes back to High Charity, on Tartarus' face.
- Tartarus: "...There can be no greater heresy! Let him be an example for all who would break our Covenant!"
The Covenant crowd cheers once more. Tartarus barks an order, and his two Jiralhanae underlings grab onto 'Vadamee's now charred armor and pull.
The view once again changes back to Cairo Station, as a young woman joins the Chief and Johnson.

- Lord Hood: "Commander Miranda Keyes. Your father's actions were in keeping with the highest traditions of military service. His bravery in the face of impossible odds reflects great credit, upon himself, and the UNSC. The Navy has lost one of its best."
Hood hands her the Colonial Cross medal. Miranda holds back tears as she accepts the medal.
The view changes back to High Charity again, where a blackened Sangheili Combat helmet falls to the floor, and the naked 'Vadamee hangs limply from his restraints. A glowing brand rises from the floor in front of him, and Tartarus grabs it and strides forward.

Thel 'Vadamee raises his head weakly. Tartarus gives him a fierce look, and presses the brand against the Sangheili's chest with glee, printing the Mark of Shame in it. The tortured Sangheili warrior fights the pain but gives in and screams.
The view once more changes to Cairo Station, where alarms start to sound.
- Cortana: "Slipspace ruptures directly off our battle cluster."
- Lord Hood: "Show me."
Images of Covenant ships appear on a large screen.
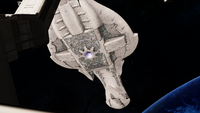
- Cortana: "Fifteen Covenant capital ships holding position just outside the kill zone."
The screen shows UNSC ships approaching the Covenant fleet.
- Fleet Admiral Harper (COM): "This is Fleet Admiral Harper. We are engaging the enemy."
- Lord Hood: "Negative, Admiral. Form a defensive perimeter around the cluster." (to Miranda Keyes) "Commander, get to your ship, link up with the fleet."
Keyes salutes.
- Commander Keyes: "Yes, sir." (leaves)
- Lord Hood: "You have the MAC gun, Cortana. Soon as they come in range, open up."
- Cortana: "Gladly."
Cortana's avatar disappears. Hood turns back to the tactical screen.
- Lord Hood: (Concerned) "Something's not right... The fleet that destroyed Reach was fifty times this size."
An officer faces Lord Hood.
- Officer: (Panicked) "Sir, additional contacts. Boarding crafts, and lots of 'em!"
The view shifts back to the screen.
- Lord Hood: "They're going to try to take our MAC guns offline, give their capital ships a straight shot at Earth." (Looks to the Chief) "Master Chief, defend this station!"

- John-117: "Yes, sir." (to Johnson) "I need a weapon."
- Johnson: "Right this way."
Johnson and the Master Chief leave the bridge, as Lord Hood turns back to his command station. Through the bay windows looking up to the MAC cannon, the fleet turns to engage the Covenant attackers. Longsword fighters hurtle overhead trailed by Marathon-class heavy cruisers.
{Gameplay}
- Cairo Defense Coordinator (Loudspeaker): "Alert! Boarders inbound!"
The Master Chief arms himself and joins Johnson and a squad of Marines. Miranda Keyes and several Navy officers leave on a tram.
- Cairo Defense Coordinator (Loudspeaker): "All hands report to battle stations."
- Cairo Defense Coordinator (Loudspeaker): "This is not a drill. I repeat, this is not a drill!"
- Cairo Defense Coordinator (Loudspeaker): "Seal pressure doors."
- Cairo Defense Coordinator (Loudspeaker): "Open weapons lockers."
The Chief, Johnson, and the Marines enter Recreation R-01.
- Johnson (COM): "How's it going, Malta?"
- Malta Defense Coordinator (COM): "Stand-by... they're latched! Check your targets and watch the crossfires. They're in standard formation: little bastards up front, big ones in back... Good luck, Cairo."
Outside, a Covenant Boarding Craft latches onto the hull, causing the station to shake. Weapons fire is soon heard from outside the doorway.
- Johnson: "Field of fire on that bulkhead. Soon as that door opens, let 'em have it!"
The Marines take up position around a sealed bulkhead. Johnson sets up a stationary gun turret. A bright light and crackling noise, like a welding torch, comes from the center of the door, and is soon followed by an explosion. The door is blasted open and Unggoy rush in, followed by their Sangheili commanders. Soon after, two more Sangheili, both dual-wielding plasma pistols, jump down from the balcony above the breach. With the Master Chief's help, the UNSC defenders eliminate the attackers.
Home Field Advantage

- Lord Hood (COM): "Find the boarders' point of entry, Chief. Cut them off at the source."
If the player stalls:
- Lord Hood (COM): "Chief, if we don't take out their boarding craft, they'll just keep sending reinforcements."
If the player stalls some more:
- Lord Hood (COM): "Concentrate on the boarding craft, Chief. The marines can handle the rest."
The Master Chief and the marines go outside. After eliminating another lance of Covenant, the Chief heads off to find the boarding craft while the marines stay behind to guard the entrance to the Recreation room.
- Female Marine: "This'll be your fallback position, sir."
Or
- Female Marine: "We'll make our stand here, sir."
Or
- Female Marine: "Go on, Chief. We'll hold here."
Or
- Marine: "We've got orders to stay here, Chief."
Or
- Marine: "This is as far as we go, Chief."
Or
- Marine: "Sir, we'll secure the area."
Throughout the battle, the station's defense coordinator continues giving orders over the loudspeaker.
- Cairo Defense Coordinator (Loudspeaker): "Boarders in Habitat Alpha."
(Later)
- Cairo Defense Coordinator (Loudspeaker): "I need a squad in Habitat Alpha, ASAP!"
(Later)
- Cairo Defense Coordinator (Loudspeaker): "Quick response teams to Security Station Three!"
(Later)
- Cairo Defense Coordinator (Loudspeaker): "Seal pressure doors."
(Later)
- Cairo Defense Coordinator (Loudspeaker): "Security Station Four is under attack!"
(Later)
- Cairo Defense Coordinator (Loudspeaker): "Boarders in Section 7!"
(Later)
- Cairo Defense Coordinator (Loudspeaker): "Fireteams, boarders in Section 2."
(Later)
- Cairo Defense Coordinator (Loudspeaker): "Attention! We have boarders in Section 3!"
(Later)
- Cairo Defense Coordinator (Loudspeaker): "Fireteams to Tram Terminal 1."
The Chief heads up a flight of stairs and enters Security R-01. He mans a portable machine gun and assists the Marines below in Commons R-01. He then heads downstairs and engages more Covenant in the Commons.
- Cairo Defense Coordinator (Loudspeaker): "Brace for impact!"
A loud clang is heard as a boarding craft attaches to Cairo station.
After securing the Commons, the Chief goes up another flight of stairs, and steps out onto a catwalk overlooking Hangar A-01, where one of the Covenant boarding craft is docked. The Chief and the Marines engage the Covenant intruders below, including Sangheili Ultras on higher difficulties.
- Cairo Defense Coordinator (Loudspeaker): "We've got boarders in the port Pelican bay!"
(Later)
- Cairo Defense Coordinator (Loudspeaker): "Boarders have breached the Communications deck!"
(Later)
- Cairo Defense Coordinator (Loudspeaker): "Quick-response teams to the Communications deck!"
Once the Master Chief finishes killing all the Covenant boarders in the first hangar bay, Covenant boarding craft are seen through the windows rapidly leaving Malta Station.

- Private First Class Chips Dubbo: "Hey, check it out! The Malta's already driven off its boarders!"
- Cortana (COM): "Malta, what is your status, over?"
- Malta Defense Coordinator (COM): "I don't believe it! They're retreating, we won!"
Malta Station suddenly explodes in a huge ball of fire, the barrel of its MAC gun breaking loose and tumbling away.
- Private Dubbo: "This is bad! Real bad!"
The hangar bay doors explode and another lance of Covenant attack. The Chief kills them, then exits the hangar.
- Cairo Defense Coordinator (Loudspeaker): "All hands, brace for impact!"
The station shakes violently as another boarding craft attaches itself to Cairo.
- Cairo Defense Coordinator (Loudspeaker): "Alert! Hostiles have breached the Port MAC bay!"
If the Chief stalls:
- Lord Hood (COM): "There are more boarding craft in your area, Chief."
If the Chief continues to stall:
- Lord Hood (COM): "Chief, I'm showing active boarding craft nearby. Find them."
If the Chief further stalls:
- Lord Hood (COM): "Take out the remaining boarding craft, Chief."
The Chief and the surviving marines head to Hangar A-02 where they find another squad of marines under fire from several Unggoy-manned plasma turrets mounted on the catwalk above. Another boarding craft is docked here.
- Cairo Defense Coordinator (Loudspeaker): "Alert! We have hostiles on the Command deck!"
Once the Master Chief finishes killing all the intruders in the second hangar bay (including a Sangheili Zealot on legendary difficulty) Covenant boarding craft are again seen through the windows retreating, only this time, from Athens Station.

- Private Dubbo: "Uh oh! Hey, they're leaving the Athens!"
The Athens explodes violently, just like the Malta. The resulting shockwave rocks Cairo Station.
- Lord Hood (COM): "Cortana, assessment!"
- Cortana (COM): "That explosion came from inside the Athens. Same as the Malta. The Covenant must have brought something with them. A bomb."
- Lord Hood (COM): "Then they sure as hell brought one here. Chief, find it."
Priority Shift
If the Chief decides to stall for awhile, Cortana will remind him of the urgency of the situation with some of the following lines:
- Cortana (COM): "Chief, we don't have much time."
- Cortana (COM): "Not a lot of time on the clock, Chief!"
- Cortana (COM): "Where are you?! The bomb is right here!"
- Cortana (COM): "The clock's tickin', Chief. Get down here!"
- Cortana (COM): "Chief, over here, next to the bomb!"
- Cortana (COM): "Ask yourself this question right now: Is doing what I am right now helping Cortana stop this station from blowing into tiny, tiny bits?"
- Cortana (COM): "Just a friendly reminder: Bomb."
- Cortana (COM): "If this thing goes off, I am NEVER talking to you again!"
The Chief takes a route under the hangar bay through MAC Storage, and encounters another lance of Covenant. As he nears the opposite side of the corridor, two Stealth Sangheili emerge. The Chief kills them.
While the Chief is fighting his way to the bomb, the Cairo Defense Coordinator starts issuing evacuation orders.
- Cairo Defense Coordinator (Loudspeaker): "All non-combat personnel to pressure zones."
(Later)
- Cairo Defense Coordinator (Loudspeaker): "All hands to pressure zones."
(Later)
- Cairo Defense Coordinator (Loudspeaker): "All non-combat personnel report to evacuation stations!"
(Later)
- Cairo Defense Coordinator (Loudspeaker): "All hands, report to evacuation stations!"
(Later)
- Cairo Defense Coordinator (Loudspeaker): "All hands, we are abandoning the station!"
(Later)
- Cairo Defense Coordinator (Loudspeaker): "All personnel, prepare to abandon the station!"
As the Chief returns to the armory, he finds the Master Gunnery Sergeant firing a shotgun at a pair of Sangheili. Exactly what he says to them differs depending on what the difficulty level is set to.
- Master Gunnery Sergeant (Heroic): "Call your friends! I got enough ammo for all of 'ya!"
- Master Gunnery Sergeant (Legendary): "Come on, is that a weapon or a flashlight? Oh, dangit—!"
The Master Gunnery Sergeant is hit by bolts of plasma and dies. The Chief proceeds upstairs and eliminates his Sangheili killers.
- Cairo Defense Coordinator (Loudspeaker): "Fireteams to Habitat Delta."
(Later)
- Cairo Defense Coordinator (Loudspeaker): "Hostiles have taken Security Station One!"
(Later)
- Cairo Defense Coordinator (Loudspeaker): "I need a squad in Habitat Delta!"
The Chief exits the Armory and enters Commons B-01, which has been completely overrun by the Covenant. The alien forces have set up multiple plasma turrets which cover the room and assorted Covenant infantry lurk in the corridors.
- Cairo Defense Coordinator (Loudspeaker): "Hang on, everyone!"
The station shakes again, as another Boarding Craft is attached.
The Chief fights his way through the Commons, moves up a flight of stairs, and enters Security B-01, where he dispatches another lance of Covenant.
- Cairo Defense Coordinator (Loudspeaker): "Fireteams to Terminal 2."
The Chief exits Security B-01 and enters the Tram station where Commander Keyes, Sergeant Johnson, and a couple Navy officers are engaged in a firefight just outside a docking umbilical leading to the In Amber Clad.
- Cairo Defense Coordinator (Loudspeaker): "Alert! Boarders in Port Dry dock!"
- Sergeant Johnson: "Come on, Chief, this way!"
- Commander Keyes: "I was almost on board when they showed up."
- Sergeant Johnson: "Don't worry, ma'am, we're on it."
Once they clear the area of Covenant:
- Commander Keyes: "Thanks, Chief. I owe you one."
A second lance of Covenant appears from another umbilical at the end of the corridor. After the Chief and his allies kill the intruders, the Chief enters the umbilical.
If the player stalls:
- Johnson: "Get going. I'll cover the Commander."
Authorized Personnel Only
The Chief exits the station through an airlock and fights several Sangheili Rangers in the vacuum of space.
- Cortana (COM): "Sir, boarders have breached the fire control center. They have a bomb."
- Lord Hood (COM): "Can you defuse it?"
- Cortana (COM): "Yes, but I'll need the Chief's help to make contact with the detonator."
- Lord Hood (COM): "Chief, get to the bomb, double time! Cortana, prioritize targets and fire at will."
The Master Chief re-enters Cairo Station through Portside Shipping, where he is met by Marines near a cargo container. There is a loud buzzing sound and a swarm of Yanme'e appear. The Chief and the Marines eliminate the swarm.
- Fleet Admiral Harper (COM): "First Echelon, you're with me, blanket those cruisers, take ‘em out one by one. Second Echelon, keep those carriers busy."
- Cortana (COM): "Registering all hostile vessels inside the kill zone. Thirteen cruisers, two assault carriers. I'm going loud!"
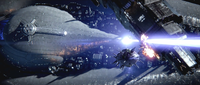
The station's MAC gun begins firing at the Covenant fleet.
A loading platform full of Covenant troops rises from below. The Chief kills them all and rides the platform down to an airlock. He gets off the platform and enters the airlock. The internal door closes behind him and the external door leading outside opens up.
- Fleet Admiral Harper (COM): "The carriers are breaking through, sir! They're heading straight for the Cairo!"
- Lord Hood (COM): "Cortana! Concentrate your fire on the first carrier. Admiral, do what you can against the second."
- Fleet Admiral Harper (COM): "Everyone, form up. Follow my lead!"
The Master Chief watches through the open airlock as a massive Covenant Assault Carrier accelerates right past the Cairo and towards Earth, making the entire station shake.
- Cortana (COM): "The first carrier completely ignored us, sir! Blew through the Malta's debris field and headed straight for Earth!"
After crossing the MAC's recoil arm in vacuum and killing several more Sangheili Rangers - including one manning a plasma turret, the Chief re-enters the station through another airlock.
Return to Sender
The Chief takes an elevator down to the fire control center.
- Cortana (COM): "Just so you know, there are quite a few Elites guarding the bomb. You may need to get creative."
The Chief arrives at fire control, where a sizable group of Sangheili (one of whom is dual wielding a plasma rifle and Needler) and Unggoy are guarding the bomb. The station shakes again. Outside the window, the Chief can see the second carrier bypassing the Cairo, following the first carrier down to Earth.
Once the Chief clears the room of the Covenant guarding the bomb:
{Cutscene} {Anniversary Cutscene}
Cortana's holographic avatar appears on a pedestal near the bomb.
- Cortana: (urgently) "Me. Inside your head. Now."
The Master Chief touches the pedestal, and Cortana downloads directly into his armor. He steps over to the bomb, and touches the flashing red activation pad at its center. It blinks and turns blue. The threat is neutralized.
- John-117: "How much time was left?"
- Cortana: "You don't want to know."
- Commander Keyes (COM): "Cairo, this is In Amber Clad."
The view changes to the bridge of In Amber Clad, where Commander Keyes and Sergeant Johnson are present. Keyes is now wearing her service uniform and Johnson is fully geared up in Marine armor.
- Commander Keyes: "The carrier's shield is down. I'm in position and ready for immediate assault."
The view goes back to Cairo's bridge, showing Lord Hood alone. (In the Anniversary, there is another officer with him.)
- Lord Hood: "Negative, Commander. Not against a ship that size. Not on your own."
- John-117 (COM): "Sir..."
The view changes back to the bay, where the Chief is waiting with one hand on the bomb.
- John-117: "...Permission to leave the station."
The view returns to Cairo's bridge.
- Lord Hood: (distractedly) "For what purpose, Master Chief?"
- John-117 (COM): "To give the Covenant back their bomb."
Hood pauses to think, and then agrees.
- Lord Hood: "Permission granted."

In the bay, the Chief grabs the bomb by two of its pointy protrusions and drags it across the floor, causing sparks to erupt as it scrapes across the metal plating. He drags it into an elevator, and ascends.
- Cortana: "I know what you're thinking, and it's crazy."
- John-117: "So, stay here."
- Cortana: "Unfortunately for us both... I like crazy."
The elevator reaches an empty Longsword launch bay, and the Chief steps out, watching through the huge bay door. A Seraph fighter flies by, pursued by two Longswords (Original version only). The UNSC fleet streams down toward Earth, chasing the Covenant ships. The Master Chief then steps up to the door's release handle, which drops down above him.
- Cortana: "Just one question. What if you miss?"
- John-117: (calmly) "I won't."
The Master Chief pulls down the handle and the bay doors cycle open, the bay decompressing rapidly. Debris lifts off the floor and hurtles into space, and the bomb slowly begins to slide toward the doors, scratching sparks across the floor. The Chief grabs hold of it as it passes, and is pulled out into space.
In free-fall, the Chief descends in the general direction of northern Africa. The first carrier is miles below him, too far to reach. The second carrier passes right below his position, and opens up with an energy projector, narrowly missing him. A cruiser rockets below him and takes an Energy projector round right through its spine, explosions lighting all over its hull (In the Anniversary, the cruiser is hit by the same energy projector beam that narrowly misses the Chief). The Master Chief plummets past it, watching as its engines fail and try to relight themselves.
A pair of Longsword fighters dive past him, and make a strafing run on the carrier. They open fire on the carrier, and make a staccato beat of fire along the back of the carrier, allowing the Chief to slip through the narrow hole the blasts have created.
The carrier's center is a huge, open chamber, a massive fusion core casting white light across its inner surface. The carrier has taken a lot of abuse; the far side of the chamber is torn open, showing the Earth outside. The Master Chief crawls up the bomb, presses its activation panel, and spins around. His legs flex, and he vaults off the bomb, aiming for the split in the carrier's armor.

He plummets from the carrier, straight for Earth, as behind him minor blue explosions flicker up and down the alien warship. A pause, and the entire ship detonates in a huge plasma conflagration.
As the Chief falls towards Africa, the In Amber Clad passes beneath him, matching trajectories.
Inside the In Amber Clad's bridge, Johnson and Keyes watch a tactical display. A thud resounds throughout the ship, and Johnson and Keyes look up.
Johnson looks at Keyes and grins.
- Johnson: "For a brick... he flew pretty good!"
- Commander Keyes: "Chief, get inside, gear up. We're taking this fight to the surface."
In Amber Clad banks hard and dives towards the Earth's atmosphere, and a massive, gray city along the East African coast comes into view.
Level ends.
Achievements
The following achievements can be unlocked on Cairo Station across the Windows Vista and Halo: The Master Chief Collection editions of Halo 2: Anniversary. The original Xbox release of Halo 2 did not contain achievement unlocks.
| Halo 2 (Windows Vista) | Halo: MCC (Xbox One, Xbox Series X|S) | Halo: MCC (Steam) | Title | Unlock requirement | Games |
|---|---|---|---|---|---|
 |
 |
 |
Beat Cairo Station on any difficulty. | Halo: The Master Chief Collection | |
 |
 |
Beat the par time on Cairo Station. | |||
 |
 |
Beat the par score on Cairo Station. | |||
 |
 |
Activate Terminal 1 on Cairo Station. | |||
 |
 |
Find and claim the Thunderstorm Skull. | |||
 |
 |
She's not picking up. |
Production notes
Halo 2
The level was known in development simply as "spacestation".[2] While the station is static in the game, it was originally going to be mobile and move itself around constantly to align its main gun on targets. The player was also supposed to be able to take control of the station's MAC gun.[3] Environmental artist Mike Zak noted that the station's design contrasted with the interiors of the UNSC Pillar of Autumn in Halo: Combat Evolved, which lacked a sight lines to a reference point like the MAC gun on the Cairo, and did not give players a sense of the Autumn's scale.[4]
According to Director of Cinematics Joseph Staten, during development, there was an idea for an Easter egg in the opening cinematic on Legendary to depict Huragok in the crowds in High Charity, "with a little ballpark tray of wieners and caramel corn and cotton candy" akin to real-world sport games held in stadiums.[5]
Originally, Bungie had planned a level after Cairo Station, in which the Master Chief would land on a Covenant ship, break in, and destroy it from the inside. This was shown in the announcement trailer, which depicts the Chief jumping out of the airlock without as bomb. However, because of time and budgetary constraints, the level was cut from the final game. Early revisions to the ending would have had the player carry the bomb on the back of a Warthog and driving the vehicle across the space station, which would have been a zero-gravity training facility with a flat open environment. Ultimately, it was decided that level ends with a cinematic as seen in the final game, which Project Lead Jason Jones jokingly said it created just as much work as an entire level.[5]


Halo 2: Anniversary
For the Anniversary remake of the level, early drafts of the level's cutscenes had Cairo's position over Earth adjusted. The Return to Sender cutscene for example was to take place over Eastern and Central Europe as opposed to Northern Africa and the Mediterranean in the final version.[6]
Trivia
Glitches
- It is possible to get inside of the boarding ships by walking to the corner of the shield barrier, then walking into the barrier and jumping. This may take a few tries to successfully complete. Inside there is only a crate. When the player exits the craft, there is another glitch: the enemies that the player fought when they entered the room will respawn directly behind them.
- It is possible to reach areas that are supposed to be inaccessible to the player in this level.
- In the sub-level "Return to Sender", it is possible to be pushed through the wall by standing in front of the moving firing pin. The player will be pushed forward at an incredible speed directly into the wall. After running into the wall, the wall will appear as a textured line that is incredibly thin. After seeing this, they will fall through the wall, to their death.
- It is possible to fall below the MAC gun's pump. If the player tries to jump on the middle of the MAC at the end of the level, it will launch them out of the station. Sometimes, the player will hit an invisible barrier stopping them from getting to the scenery.
- If the player kills the Drones as the elevator is rising, one of their bodies might get caught on the edge of the elevator and look as if it's falling indefinitely.
- If the player melees the Grunts operating the turrets in the Pelican bay, sometimes their bodies get stuck through the floor and can be seen underneath.
- It is possible to see the outside of a Covenant boarding craft on this level up close. Just before the player enters the first elevator, they can use one of the structures near the edge to jump to a lower ledge, where they can view a craft.
- There is some odd dialog where Miranda Keyes would say "Thanks, Chief. I owe you one. Take me now!" [citation needed]
- When the player reaches the armory and sees one of the stair doors is closed, they can get on top of the door, which should be going up the ceiling. When the door closes, they will fall through the door and be back to normal instead of dying.
- It is possible to get into the airlock room Master Chief jumps out of. On the chapter "Return to Sender", the player can walk up to where the firing pin shoots forward, walk up to the front track, and when the pin moves forward, the Chief's body will fall through the floor and down to the airlock below.
- When the player gets outside of the Station, it is possible to get inside the FFG-142 In Amber Clad's reactors.
- Right when the level begins, Johnson's commemorative hat can be found lying on a case by heading down the stairs and looking to the right; if the player melees the case, the hat will be floating about one meter above the ground, as if the case were still there.
- Right after killing the Elites with jet packs for the first time, the player can walk to the left of the area they came from instead of walking to the area where they're supposed to go and hop onto a nearby platform, which will lead them to getting on top of most closed in areas they had previously walked through. It is impossible to get on top of the tower.
- It is possible to have two Sergeant Johnsons in the same place. The one that appears at the start of the level can be meleed to the area right before "Authorized Personnel Only" where another one is waiting. This is easier if the player has an Energy Sword because, if left alone for any amount of time, Johnson will run backwards.
- On the elevator that leads to the bomb room, if the player keeps running into the diagonal doors they can see not only the outside of the elevator, but also the lower half of John-117's body running up against the wall.
- At the very beginning of the level, unlike in The Armory, it is possible to zoom the HUD while unarmed. However, while zooming unarmed the edges of the screen do not darken in the shape of the Mark VI visor like they normally do. Instead, the entire screen remains bright. Although the motion sensor disappears, the grenade counters remain visible.
- If the player gets to the airlock quickly enough after they save Keyes & Johnson and kill the first wave of enemies (specifically before Keyes says "Thanks Chief. I owe you one."), the second wave of enemies which normally appear (Grunts and an Elite) will not spawn. A similar glitch is found in Regret.
- Occasionally, a female Marine will spawn under the Pelican in the first Hangar bay and will be killed as soon as she spawns.
- While the Chief is outside the station, all sounds save those made by his MJOLNIR armour are muffled, reflecting the silent nature of the vacuum of space. This muffling effect is not present, however, when Halo 2 is played on an Xbox 360 or when playing Halo 2 (Windows Vista).
- If a Marine is killed and falls into the area before the MAC Round storage area, their body will disappear when the loading point is changed.
- During the part where the player meets up with Johnson and Miranda, they can melee attack one of them into the airlock where they proceed to the bomb. They will not die from the vacuum and can be strong allies due to their invincibility.
- It is possible to get friendly AI outside into space. They will not die despite not having any way to breathe in space.
- Occasionally, Cortana will spontaneously prompt the Chief to hurry up, even if the player is not actually stalling.
Mistakes
- Although Sergeant Johnson receives a medal in the ceremony before the mission and it is seen being placed on his chest, on the actual mission, it does not appear on his uniform except for the Purple Heart.
- In Halo 2, when Thel 'Vadamee was bound to the energy cuffs, his elbows were at chest level, while his wrists were at face level. After his armor was removed, his elbow was at face level, and his wrists were above his head.
- Although the MJOLNIR armor system has only 90 minutes worth of oxygen, the player can stay in vacuum indefinitely.
- If the player kills the enemies while in the vacuum of space they can still hear them scream upon death. This is impossible, since sound cannot travel through space due to a lack of air.
Easter eggs
- The Thunderstorm Skull is located in this level.
- Johnson's cigar is also found in this level, but it is put out, unlike in the Armory level, the cigar was lit up and smoke could be seen. The player can see this if they find the Thunderstorm Skull on this level.
- It is possible to hear Lord Hood saying something on the intercom about Megg in this level.
- Also on the chapter "Return to Sender", the player can find one surviving Marine. To do this, they must enter the room underneath the firing pin and walk away from the Elites' position. Here, they should find a lone Marine survivor, armed with a Battle Rifle or an SMG. The Marine is a different model every time.
- This level contains the only Halo 2 Marine model covered in wounds and blood. He is found in the first Pelican hangar and is usually without a helmet.
- The Cairo Station console message can be found on several consoles throughout the level.
- The first terminal is one of the computer consoles located in Cairo Station's Armory A-01, on the wall to the left of the doors leading into Commons B-01. The console's screen flashes "INCOMING MESSAGE" in red.
References
- Just like in the first level of Halo: Combat Evolved, there are no Jackals in this level.
- The Covenant bomb had seven seconds left before it detonates when disarmed by Cortana in the cutscene.
- The part where John-117 enters space with the Covenant Bomb was in an early Halo 2 trailer, except it did not feature the bomb.
- In the beginning cutscene, Lord Hood says United Earth Space Corps. This seems to be a reference to Marathon, the name of the military branch of the Human government. In Halo, the military branch is called United Nations Space Command.
- Athens, Malta, and Cairo, the cities which the Athens Station, Malta Station, and Cairo Station were located over, were all involved in the 1985 hijacking of Egyptair Flight 648, which was en route to Cairo from Athens and forced to land in Malta.
Miscellaneous
- This is the only level in which Elites wield Plasma Pistols, and also the only level where Plasma Pistols are dual-wielded by characters other than the player.
- The turret that appears in the first Pelican bay is not present on harder difficulties.
- It is possible to see an Ultra Elite with a dual-wielded Okarda'phaa-pattern plasma rifle and Needler on this level.

- If the player melees or shoots Commander Keyes, she grimaces in pain and glares at the player resentfully.
- In the final fight by the bomb, if the player kills the Covenant forces in the right positions, it's possible for the bomb to move their bodies around while being dragged in the cutscene.
- In this level, and in others like The Armory or Outskirts, the player can see some equipment cases, where there is written information about some UNSC equipment such as Marine helmets and body armor. The information shows their weight and the number of items included in the case.
- In the room where the bomb is, the player can find a Marine hiding in the back from the Covenant.
- This level features a music piece that didn't make it onto either volume of the soundtrack. It is played in the Armory and Commons Area B-01, after the player kills the two Elites that killed the Master Gunnery Sergeant. This "lost song" reappears on the level Gravemind.
- In the airlocks at the top and bottom of the elevator platform, and the Port shipping bay are four ODST bodies (one at the top, one in the Port shipping bay, two at the bottom.) These are the only ODSTs seen in the level. This is also the first in-game appearance of ODST armor.
- The machine gun turret used by Johnson at the beginning of the level sometimes will not be usable, although the player can order Johnson to stay away from it.
- At the point in the level when you meet up with Miranda and Johnson, located up the stairs that lead to the tram station there is a large, unexplained blood splatter on the wall and floor. This is only visible in classic mode on Halo 2: Anniversary.
Gallery
Development images
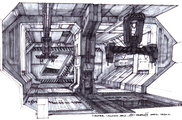
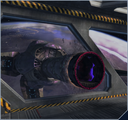
Concept art of Cairo Station's fighter launch bay.
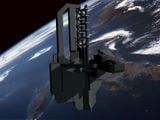
A work-in-progress model of Cairo early in Halo 2's development.
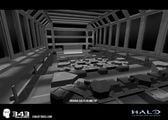
The geometry used for the bridge in Halo 2.
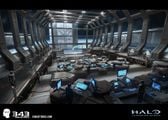
Paintover of the previous image used for Halo 2: Anniversary concept art.
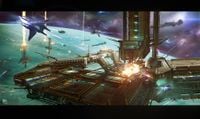
Halo 2: Anniversary concept art for the space battle around Cairo Station.


Halo 2

Cairo Station's fighter launch bay pre-release screenshot.
Preview of the level in Halo 2 menu.
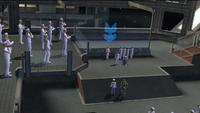
UNSC personnel at the ceremony onboard Cairo Station.
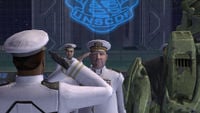
Master Chief and Sergeant Johnson saluting to Lord Hood.
Thel 'Vadamee shackled and about to be publicly tortured.
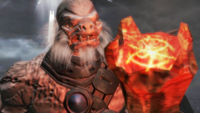
Tartarus prepares to brand the Mark of Shame on 'Vadamee.
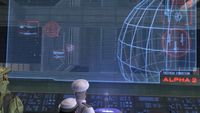
A readout on Cairo Station displays the incoming Covenant fleet.
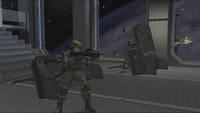
Marines prepare to defend Cairo Station against the imminent Covenant assault.
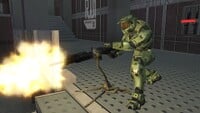
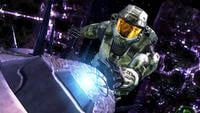
The Master Chief firing the turret.
The Master Chief fighting Grunts.
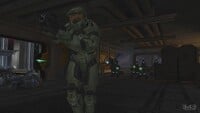
The Master Chief aboard Cairo Station.
Commons R-01.
John-117 about to transfer Cortana to the antimatter charge.

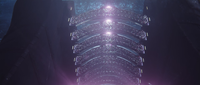
John-117 and the antimatter charge leaving Cairo Station.

An energy projector beam narrowly misses John-117 and the antimatter charge.
John-117 and the antimatter charge inside Day of Jubilation.
John-117 prepares to re-arm the antimatter charge.

A wallpaper of Cairo Station.


Halo 2: Anniversary
The Covenant gather for the public branding of Thel 'Vadamee for his heresy.
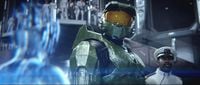
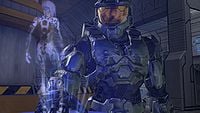
Cortana, John-117, and Avery Johnson.
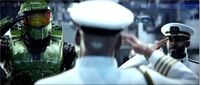
Sergeant Johnson and John-117 salute Admiral Hood.
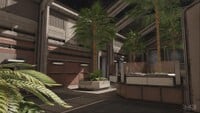
Recreation R-01's windows showing Earth.
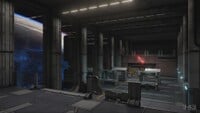
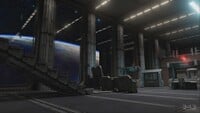
Recreation R-01 before the Covenant assault.
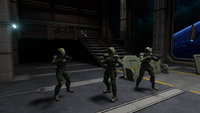
Marines prepare to defend Cairo Station against the imminent Covenant assault.
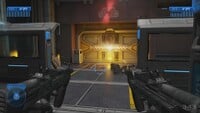
The Covenant burning through the blast door.

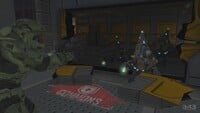
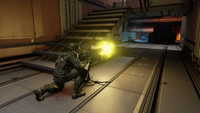
John-117 engaging Sangheili Minors and Unggoy Minors aboard Cairo Station.
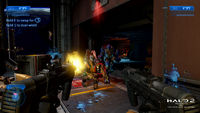
First-person view of John-117 fighting the Covenant.
A Marine defends his position against the advancing Covenant.
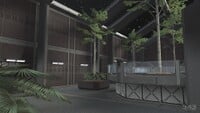
Commons R-01.
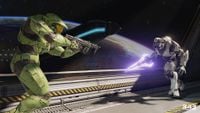
John-117 fighting a Sangheili Ultra.
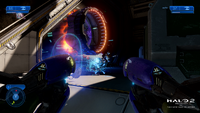
First-person view of John-117 repelling boarders.
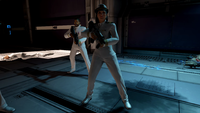
Sergeant Johnson and Commander Keyes in combat aboard Cairo Station.
Cairo Station fires its MAC cannon.
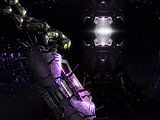
Regret's flagship plows past Cairo Station towards Earth.
John-117 falls past the UNSC Feeling Lucky being hit by an energy projector.
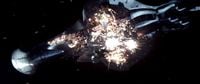
The Master Chief succeeds in returning the Covenant their bomb.


Sources
- ^ Halo 2 Editing Kit, game file
H2EK\tags\scenarios\solo\01b_spacestation\01b_spacestation.scenario - ^ EDGE magazine, July 2026 (Issue #2004) - Full circle: "One whiteboard catches our eye. 'Block 4'is the title, followed by 'Spacestation', 'Flood Lab', 'Forerunner ship', and 'Delta Control'" [archive]
- ^ Picasa, Paul Russel > Halo2 Cairo Station Concepts 1/11 (Retrieved on Jun 12, 2023) [archive]
- ^ Halo 2, Limited Collector's Edition: First Look: Halo 2
- ^ a b Halo 3, Legendary Edition: Halo 2 developer commentary
- ^ Halo 2: Anniversary marketing, Halo 2: Anniversary cinematic trailer
| Preceded by The Armory |
Halo 2 Campaign Missions Cairo Station |
Succeeded by Outskirts |
| |||||||||||||||||||||||||||||||


