Normal
From Halopedia, the Halo wiki
| This article is currently under construction and needs to be improved. Please refer to the talk page for more info. You can help by editing the page. |
- "Hordes of aliens vie to destroy you, but nerves of steel and a quick trigger finger give you a solid chance to prevail."
- — Description from Halo: Combat Evolved, Halo 2, Halo: Combat Evolved Anniversary, and Halo: The Master Chief Collection.
Normal is the default difficulty setting present in mainline games within the Halo franchise.
Summary[edit]
Normal is not too hard, but correspondingly not as easy. Enemies will behave more competently than they did in Easy, and they can deal a reasonable amount of damage. Players are expected to put forth the effort and think on their feet. While Normal mode represents strength, firepower, and health for Master Chief, Elites, and all other Covenant and Marines, Heroic accurately depicts intelligence, enemy accuracy, and enemy numbers.
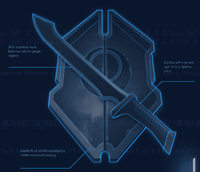
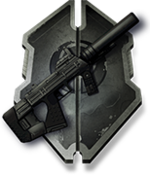
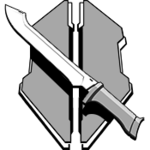
The icon for the Normal difficulty setting is represented with a shield that has the Marathon Logo encrusted into the center. Over the shield is a UNSC machete from right to left; in Halo 3: ODST, the knife is replaced with an M7S SMG.
Halo Wars and Halo Wars 2 are some of the only Halo titles to not include achievements for completing the campaign on Normal.
General differences[edit]
Elites, Brutes, and Hunters are the more challenging enemies the player must prioritize on taking down first. The most dangerous threats at close range are Elites with Energy Swords and Brutes armed with Gravity Hammers. From a distance, the player must also watch out for Hunters with their Fuel Rod Cannons, Brutes armed with Brute Shots, and Jackal Snipers. Grunts can easily be dispatched of. However, they will seldom throw Plasma Grenades and can potentially overwhelm a careless player in groups. But if the Elite or Brute leading them is slain, they will often flee in terror. Drones will come in swarms, but they are manageable if the player can engage them properly. Jackals can easily be dispatched if the player can utilize the weakness on their shielding. However, precautions should be made on Majors, as will often rely on charging their Plasma Pistol shots to disable the player's shields.
When the player encounters the Flood, the biggest threats to consider are Combat Forms armed with Rocket Launchers and Shotguns. The Shotgun and Energy Sword are generally the best weapons to take down the Combat Forms and Carrier Forms, while the Assault Rifle, SMG, and the Plasma Rifle can dispatch swarms of Infection Forms. As the Flood often comes in large swarms, it is best to avoid getting surrounded or cornered, as that will lead players to get killed quicker.
Sentinels will often come in swarms of at least 2 to 3. In clusters, they can easily drain the player's shields. But if the player can access plasma weapons, they can quickly eliminate them.
Marines are well-balanced as allies. They can dispatch a file of Grunts, Jackals, and Drones with minimal effort. And in squads, they can easily prevail against lower ranking Elites and Brutes. However, they will not fare well if facing against higher ranking Elites and Brutes, and Hunters. To maximize the Marines' effectiveness and survival, the player must prioritize on engaging the stronger enemies while letting the Marines focus only on the weaker ones. Alternatively, the player must often provide allies with the appropriate weaponry to efficiently take out such stronger enemies.
Halo: Combat Evolved and Halo: Anniversary[edit]
Difficulty values[edit]
| Difficulty setting | Normal value | Description |
|---|---|---|
| Health | ||
| Enemy Damage | 1 | Enemy damage multiplier |
| Enemy Vitality | 1 | Enemy maximum body vitality scale |
| Enemy Shield | 1 | Enemy maximum shield vitality scale |
| Enemy Recharge | 1 | Enemy shield recharge scale |
| Friend Damage | 1 | Friend damage multiplier |
| Friend Vitality | 1 | Friend maximum body vitality scale |
| Friend Shield | 1 | Friend maximum shield vitality scale |
| Friend Recharge | 1 | Friend shield recharge scale |
| Infection Forms | 0 | Toughness of infection forms (may be negative) |
| Ranged Fire | ||
| Rate of Fire | 1 | Enemy rate of fire scale |
| Projectile Error | 1 | Enemy projectile error scale, as a fraction of their base firing error |
| Burst Error | 1 | Enemy burst error scale; reduces intra-burst shot distance |
| New Target Delay | 1 | Enemy new-target delay scale factor |
| Burst Separation | 1 | Delay time between bursts scale factor for enemies |
| Target Tracking | 0 | Additional target tracking fraction for enemies |
| Target Leading | 0 | Additional target leading fraction for enemies |
| Overcharge Chance | 1 | Overcharge chance scale factor for enemies |
| Special Fire Delay | 1 | Delay between special-fire shots (overcharge, banshee bombs) scale factor for enemies |
| Guidance vs Player | 0.5 | Guidance velocity scale factor for all projectiles targeted on a player |
| Melee Delay Base | 0 | Delay period added to all melee attacks, even when berserk |
| Melee Delay Scale | 1 | Multiplier for all existing non-berserk melee delay times |
| Grenades | ||
| Grenade Chance Scale | 1 | Scale factor affecting the decisions to throw a grenade |
| Grenade Timer Scale | 1 | Scale factor affecting the delay period between grenade thrown from the same encounter (lower is more often) |
| Placement | ||
| Major Upgrade (normal) | 0.25 | Fraction of actors upgraded to their major variant when mix = normal |
| Major Upgrade (few) | 0.1 | Fraction of actors upgraded to their major variant when mix = few |
| Major Upgrade (many) | 0.5 | Fraction of actors upgraded to their major variant when mix = many |
General differences[edit]
 This section is a stub. You can help Halopedia by expanding it.
Specific differences[edit]
- The Pillar of Autumn: A unique version of Johnson's speech plays.
Halo 2[edit]
Difficulty values[edit]
| Difficulty setting | Normal value | Description |
|---|---|---|
| Health | ||
| Enemy Damage | 0.7 | Enemy damage multiplier |
| Enemy Vitality | 1 | Enemy maximum body vitality scale |
| Enemy Shield | 1 | Enemy maximum shield vitality scale |
| Enemy Recharge | 1 | Enemy shield recharge scale |
| Friend Damage | 0 | Friend damage multiplier |
| Friend Vitality | 1 | Friend maximum body vitality scale |
| Friend Shield | 1 | Friend maximum shield vitality scale |
| Friend Recharge | 1 | Friend shield recharge scale |
| Infection Forms | 0 | Toughness of infection forms (may be negative) |
| Ranged Fire | ||
| Rate of Fire | 1 | Enemy rate of fire scale |
| Projectile Error | 1 | Enemy projectile error scale, as a fraction of their base firing error |
| Burst Error | 1 | Enemy burst error scale; reduces intra-burst shot distance |
| New Target Delay | 1 | Enemy new-target delay scale factor |
| Burst Separation | 1 | Delay time between bursts scale factor for enemies |
| Target Tracking | 0 | Additional target tracking fraction for enemies |
| Target Leading | 1 | Additional target leading fraction for enemies |
| Overcharge Chance | 1 | Overcharge chance scale factor for enemies |
| Special Fire Delay | 1 | Delay between special-fire shots (overcharge, banshee bombs) scale factor for enemies |
| Guidance vs Player | 1 | Guidance velocity scale factor for all projectiles targeted on a player |
| Melee Delay Base | 1 | Delay period added to all melee attacks, even when berserk |
| Melee Delay Scale | 1 | Multiplier for all existing non-berserk melee delay times |
| Grenades | ||
| Grenade Chance Scale | 1 | Scale factor affecting the decisions to throw a grenade |
| Grenade Timer Scale | 1 | Scale factor affecting the delay period between grenade thrown from the same encounter (lower is more often) |
| Placement | ||
| Major Upgrade (normal) | 0.1 | Fraction of actors upgraded to their major variant when mix = normal |
| Major Upgrade (few) | 0 | Fraction of actors upgraded to their major variant when mix = few |
| Major Upgrade (many) | 0.3 | Fraction of actors upgraded to their major variant when mix = many |
| Vehicles | ||
| Player Vehicle Ram Chance | 0.1 | Chance of deciding to ram the player in a vehicle |
General differences[edit]
 This section is a stub. You can help Halopedia by expanding it.
Specific differences[edit]
- Outskirts: Unique Cortana dialogue plays.
- Metropolis: A unique version of Johnson's speech plays.
- Delta Halo: During the opening cutscene there is a grunt playing on the ground, on Normal he will be holding two plasma grenades.
Halo 3 and Halo 3: ODST[edit]
- "Face firm resistance from competent, determined enemies, but burn through enough ammo and you will eventually triumph."
- — Description from Halo 3, Halo 3: ODST and Halo: Reach
Difficulty values[edit]
| Difficulty setting | Normal value | Description |
|---|---|---|
| Health | ||
| Enemy Damage | 0.775 | Enemy damage multiplier |
| Enemy Vitality | 1 | Enemy maximum body vitality scale |
| Enemy Shield | 1 | Enemy maximum shield vitality scale |
| Enemy Recharge | 1 | Enemy shield recharge scale |
| Friend Damage | 0 | Friend damage multiplier |
| Friend Vitality | 1 | Friend maximum body vitality scale |
| Friend Shield | 1 | Friend maximum shield vitality scale |
| Friend Recharge | 1 | Friend shield recharge scale |
| Infection Forms | -0.5 | Toughness of infection forms (may be negative) |
| Ranged Fire | ||
| Rate of Fire | 1 | Enemy rate of fire scale |
| Projectile Error | 1 | Enemy projectile error scale, as a fraction of their base firing error |
| Burst Error | 1 | Enemy burst error scale; reduces intra-burst shot distance |
| New Target Delay | 1 | Enemy new-target delay scale factor |
| Burst Separation | 1 | Delay time between bursts scale factor for enemies |
| Target Tracking | 0 | Additional target tracking fraction for enemies |
| Target Leading | 1 | Additional target leading fraction for enemies |
| Overcharge Chance | 0.1 | Overcharge chance scale factor for enemies |
| Special Fire Delay | 2 | Delay between special-fire shots (overcharge, banshee bombs) scale factor for enemies |
| Guidance vs Player | 0.5 | Guidance velocity scale factor for all projectiles targeted on a player |
| Melee Delay Base | 1 | Delay period added to all melee attacks, even when berserk |
| Melee Delay Scale | 2 | Multiplier for all existing non-berserk melee delay times |
| Grenades | ||
| Grenade Chance Scale | 0.5 | Scale factor affecting the decisions to throw a grenade |
| Grenade Timer Scale | 1.25 | Scale factor affecting the delay period between grenade thrown from the same encounter (lower is more often) |
| Placement | ||
| Major Upgrade (normal) | 0.1 | Fraction of actors upgraded to their major variant when mix = normal |
| Major Upgrade (few) | 0 | Fraction of actors upgraded to their major variant when mix = few |
| Major Upgrade (many) | 0.3 | Fraction of actors upgraded to their major variant when mix = many |
| Vehicles | ||
| Player Vehicle Ram Chance | 0.1 | Chance of deciding to ram the player in a vehicle |
General differences[edit]
- In Halo 3, Normal difficulty or higher is required for the player to collect skulls.
 This section is a stub. You can help Halopedia by expanding it.
Halo: Reach[edit]
Difficulty values[edit]
| Difficulty setting | Normal value | Description |
|---|---|---|
| Health | ||
| Enemy Damage | 0.9 | Enemy damage multiplier |
| Enemy Vitality | 1 | Enemy maximum body vitality scale |
| Enemy Shield | 1 | Enemy maximum shield vitality scale |
| Enemy Recharge | 1 | Enemy shield recharge scale |
| Friend Damage | 0.5 | Friend damage multiplier |
| Friend Vitality | 1 | Friend maximum body vitality scale |
| Friend Shield | 1 | Friend maximum shield vitality scale |
| Friend Recharge | 1 | Friend shield recharge scale |
| Ranged Fire | ||
| Rate of Fire | 1 | Enemy rate of fire scale |
| Projectile Error | 1 | Enemy projectile error scale, as a fraction of their base firing error |
| Burst Error | 1 | Enemy burst error scale; reduces intra-burst shot distance |
| New Target Delay | 1 | Enemy new-target delay scale factor |
| Burst Separation | 1 | Delay time between bursts scale factor for enemies |
| Target Tracking | 0 | Additional target tracking fraction for enemies |
| Target Leading | 1 | Additional target leading fraction for enemies |
| Overcharge Chance | 0.5 | Overcharge chance scale factor for enemies |
| Special Fire Delay | 2 | Delay between special-fire shots (overcharge, banshee bombs) scale factor for enemies |
| Guidance vs Player | 0.5 | Guidance velocity scale factor for all projectiles targeted on a player |
| Melee Delay Base | 1 | Delay period added to all melee attacks, even when berserk |
| Melee Delay Scale | 2 | Multiplier for all existing non-berserk melee delay times |
| Grenades | ||
| Grenade Chance Scale | 0.5 | Scale factor affecting the decisions to throw a grenade |
| Grenade Timer Scale | 1.25 | Scale factor affecting the delay period between grenade thrown from the same encounter (lower is more often) |
| Placement | ||
| Major Upgrade (normal) | 0.1 | Fraction of actors upgraded to their major variant when mix = normal |
| Major Upgrade (few) | 0 | Fraction of actors upgraded to their major variant when mix = few |
| Major Upgrade (many) | 0.3 | Fraction of actors upgraded to their major variant when mix = many |
| Vehicles | ||
| Player Vehicle Ram Chance | 1 | Chance of deciding to ram the player in a vehicle |
General differences[edit]
 This section is a stub. You can help Halopedia by expanding it.
Halo 4[edit]
- "Face firm resistance from determined enemies. Fight hard and you will triumph"
- — Description from Halo 4
Difficulty values[edit]
| Difficulty setting | Normal value | Description |
|---|---|---|
| Health | ||
| Enemy Damage | 0.8 | Enemy damage multiplier |
| Enemy Vitality | 1 | Enemy maximum body vitality scale |
| Enemy Shield | 1 | Enemy maximum shield vitality scale |
| Enemy Recharge | 1 | Enemy shield recharge scale |
| Friend Damage | 0.5 | Friend damage multiplier |
| Friend Vitality | 1 | Friend maximum body vitality scale |
| Friend Shield | 1 | Friend maximum shield vitality scale |
| Friend Recharge | 1 | Friend shield recharge scale |
| Ranged Fire | ||
| Rate of Fire | 0.8 | Enemy rate of fire scale |
| Projectile Error | 0.8 | Enemy projectile error scale, as a fraction of their base firing error |
| Burst Error | 0.8 | Enemy burst error scale; reduces intra-burst shot distance |
| New Target Delay | 1.2 | Enemy new-target delay scale factor |
| Burst Separation | 0.9 | Delay time between bursts scale factor for enemies |
| Target Tracking | 0 | Additional target tracking fraction for enemies |
| Target Leading | 1 | Additional target leading fraction for enemies |
| Overcharge Chance | 0.1 | Overcharge chance scale factor for enemies |
| Special Fire Delay | 2 | Delay between special-fire shots (overcharge, banshee bombs) scale factor for enemies |
| Guidance vs Player | 0.5 | Guidance velocity scale factor for all projectiles targeted on a player |
| Melee Delay Base | 1 | Delay period added to all melee attacks, even when berserk |
| Melee Delay Scale | 3 | Multiplier for all existing non-berserk melee delay times |
| Grenades | ||
| Grenade Chance Scale | 0.25 | Scale factor affecting the decisions to throw a grenade |
| Grenade Timer Scale | 2 | Scale factor affecting the delay period between grenade thrown from the same encounter (lower is more often) |
| Placement | ||
| Major Upgrade (normal) | 0.1 | Fraction of actors upgraded to their major variant when mix = normal |
| Major Upgrade (few) | 0 | Fraction of actors upgraded to their major variant when mix = few |
| Major Upgrade (many) | 0.3 | Fraction of actors upgraded to their major variant when mix = many |
| Vehicles | ||
| Player Vehicle Ram Chance | 0.5 | Chance of deciding to ram the player in a vehicle |
| Trick Dodge Chance Scale | 2 | Multiplies the chance that a flying vehicle will trick to dodge danger |
General differences[edit]
 This section is a stub. You can help Halopedia by expanding it.
Halo 5: Guardians[edit]
- "Hordes of enemy forces converge to destroy you. Show no mercy. Recommended for players with first person shooter experience."
- — Description from Halo 5: Guardians
Difficulty values[edit]
| Difficulty setting | Normal value | Description |
|---|---|---|
| Health | ||
| Enemy Damage | 0.88 | Enemy damage multiplier |
| Enemy Vitality | 1 | Enemy maximum body vitality scale |
| Enemy Shield | 1 | Enemy maximum shield vitality scale |
| Enemy Recharge | 1 | Enemy shield recharge scale |
| Friend Damage | 0.5 | Friend damage multiplier |
| Friend Vitality | 1 | Friend maximum body vitality scale |
| Friend Shield | 1 | Friend maximum shield vitality scale |
| Friend Recharge | 1 | Friend shield recharge scale |
| Ranged Fire | ||
| Rate of Fire | 1 | Enemy rate of fire scale |
| Projectile Error | 1 | Enemy projectile error scale, as a fraction of their base firing error |
| Burst Error | 1 | Enemy burst error scale; reduces intra-burst shot distance |
| New Target Delay | 1 | Enemy new-target delay scale factor |
| Burst Separation | 1 | Delay time between bursts scale factor for enemies |
| Target Tracking | 0 | Additional target tracking fraction for enemies |
| Target Leading | 1 | Additional target leading fraction for enemies |
| Overcharge Chance | 0.4 | Overcharge chance scale factor for enemies |
| Special Fire Delay | 2 | Delay between special-fire shots (overcharge, banshee bombs) scale factor for enemies |
| Guidance vs Player | 0.5 | Guidance velocity scale factor for all projectiles targeted on a player |
| Melee Delay Base | 1 | Delay period added to all melee attacks, even when berserk |
| Melee Delay Scale | 3 | Multiplier for all existing non-berserk melee delay times |
| Grenades | ||
| Grenade Chance Scale | 0.25 | Scale factor affecting the decisions to throw a grenade |
| Grenade Timer Scale | 2 | Scale factor affecting the delay period between grenade thrown from the same encounter (lower is more often) |
| Grenade Detonation Timer Scale | 1 | Scale factor affecting how long grenades will take before exploding |
| Grenade Arming Timer Scale | 1 | Scale factor affecting the minimum possible time before grenades explode |
| Grenade Velocity Scale | 0.8 | Scale factor affecting how fast grenades are initially thrown |
| Placement | ||
| Major Upgrade (normal) | 0.1 | Fraction of actors upgraded to their major variant when mix = normal |
| Major Upgrade (few) | 0 | Fraction of actors upgraded to their major variant when mix = few |
| Major Upgrade (many) | 0.3 | Fraction of actors upgraded to their major variant when mix = many |
| Vehicles | ||
| Player Vehicle Ram Chance | 0.5 | Chance of deciding to ram the player in a vehicle |
| Trick Dodge Chance Scale | 2 | Multiplies the chance that a flying vehicle will trick to dodge danger |
| Vehicle Boarding Chance Scale | 0.5 | Enables a random dice roll for vehicle boarding (1.0 is the default behavior of no dice roll as long as all other conditions are met) |
| Cover | ||
| Hide Time | 0 | Scalar for time spent in cover |
| Shield Fraction Hide | 1 | Scalar for what percentage shield left before entering cover behavior |
| Cover Vitality Threshold | 1 | Scalar for what percentage vitality left before entering cover behavior |
| Bunker Open Duration | 1 | Scalar for how long to stay open while bunkering |
| Bunker Closed Duration | 1 | Scalar for how long to stay closed while bunkering |
General differences[edit]
- Promethean Crawlers' built-in Boltshots start exhibiting tracking behavior.
 This section is a stub. You can help Halopedia by expanding it.
Halo Infinite[edit]
- "Brutal enemies threaten humanity and test your indomitable spirit. First-person shooter experience recommended."
- — Description from Halo Infinite
Difficulty values[edit]
| Difficulty setting | Normal value | Description |
|---|---|---|
| Health | ||
| Enemy Damage | 0.8 | Enemy damage multiplier |
| Enemy Vitality | 1 | Enemy maximum body vitality scale |
| Enemy Shield | 1 | Enemy maximum shield vitality scale |
| Enemy Recharge | 1 | Enemy shield recharge scale |
| Friend Damage | 1 | Friend damage multiplier |
| Friend Vitality | 1 | Friend maximum body vitality scale |
| Friend Shield | 1 | Friend maximum shield vitality scale |
| Friend Recharge | 1 | Friend shield recharge scale |
| Ranged Fire | ||
| Rate of Fire | 1 | Enemy rate of fire scale |
| Projectile Error | 1 | Enemy projectile error scale, as a fraction of their base firing error |
| Burst Error | 1 | Enemy burst error scale; reduces intra-burst shot distance |
| New Target Delay | 1 | Enemy new-target delay scale factor |
| Burst Separation | 1 | Delay time between bursts scale factor for enemies |
| Target Tracking | 0 | Additional target tracking fraction for enemies |
| Target Leading | 1 | Additional target leading fraction for enemies |
| Overcharge Chance | 0.4 | Overcharge chance scale factor for enemies |
| Special Fire Delay | 2 | Delay between special-fire shots (overcharge, banshee bombs) scale factor for enemies |
| Guidance vs Player | 0.5 | Guidance velocity scale factor for all projectiles targeted on a player |
| Melee Delay Base | 1 | Delay period added to all melee attacks, even when berserk |
| Melee Delay Scale | 3 | Multiplier for all existing non-berserk melee delay times |
| Grenades | ||
| Grenade Chance Scale | 1 | Scale factor affecting the decisions to throw a grenade |
| Grenade Timer Scale | 1 | Scale factor affecting the delay period between grenade thrown from the same encounter (lower is more often) |
| Grenade Detonation Timer Scale | 1 | Scale factor affecting how long grenades will take before exploding |
| Grenade Arming Timer Scale | 1 | Scale factor affecting the minimum possible time before grenades explode |
| Grenade Velocity Scale | 0.8 | Scale factor affecting how fast grenades are initially thrown |
| Placement | ||
| Major Upgrade (normal) | 0.1 | Fraction of actors upgraded to their major variant when mix = normal |
| Major Upgrade (few) | 0 | Fraction of actors upgraded to their major variant when mix = few |
| Major Upgrade (many) | 0.3 | Fraction of actors upgraded to their major variant when mix = many |
| Vehicles | ||
| Player Vehicle Ram Chance | 0.5 | Chance of deciding to ram the player in a vehicle |
| Trick Dodge Chance Scale | 2 | Multiplies the chance that a flying vehicle will trick to dodge danger |
| Vehicle Boarding Chance Scale | 0.5 | Enables a random dice roll for vehicle boarding (1.0 is the default behavior of no dice roll as long as all other conditions are met) |
| Cover | ||
| Hide Time | 0 | Scalar for time spent in cover |
| Shield Fraction Hide | 1 | Scalar for what percentage shield left before entering cover behavior |
| Cover Vitality Threshold | 1 | Scalar for what percentage vitality left before entering cover behavior |
| Bunker Open Duration | 1 | Scalar for how long to stay open while bunkering |
| Bunker Closed Duration | 1 | Scalar for how long to stay closed while bunkering |
| Global Kung Fu | ||
| Max Attackers | 100 | |
| Threat Tokens | ||
| Max High Tokens | 3 | |
| Max Low Tokens | 6 | |
| Max Engagement Tokens | 40 | |
| Grenade Tokens | ||
| Max Grenade Tokens | 3 | |
| Min Grenade Tokens | 2 | |
| Grenade Clump Threshold | 4 | |
| Grenade Token Cooldown | 15 | |
| Effectiveness Tokens | ||
| Max Effectiveness Tokens | 4 | |
| Weapon Fidget Chance per Second | 0.13 | |
General differences[edit]
 This section is a stub. You can help Halopedia by expanding it.
Halo Wars[edit]
General differences[edit]
 This section is a stub. You can help Halopedia by expanding it.
Halo Wars 2[edit]
- "The enemy will not relent, but a considered strategy should earn you a victory. Recommended for players with RTS experience."
- — Description from Halo Wars 2
General differences[edit]
 This section is a stub. You can help Halopedia by expanding it.
Awards[edit]
- In Halo 2 Vista:
- Each campaign level awards an achievement for completing on Normal or higher.
- Completing the campaign on Normal awards the Warrior achievement.
- Completing a level without dying on Normal or higher awards the Demon achievement.
- In Halo 3:
- Each campaign level awards an achievement for completing on Normal or higher.
- Completing Tsavo Highway on Normal awards the The Road achievement and unlocks the EVA chest for use in multiplayer.
- Completing The Ark on Normal awards the Refuge achievement and unlocks the EVA shoulders for use in multiplayer.
- Completing the campaign on Normal awards the Campaign Complete: Normal achievement and unlocks the EVA helmet use in multiplayer.
- In Halo 3: ODST:
- Completing Tayari Plaza on Normal awards the Tayari Plaza achievement and unlocks Buck's appearance for use in firefight.
- Completing Uplift Reserve on Normal awards the Uplift Reserve achievement and unlocks Dutch's appearance for use in firefight.
- Completing Kizingo Boulevard on Normal awards the Kizingo Boulevard achievement and unlocks Mickey's appearance for use in firefight.
- Completing ONI Alpha Site on Normal awards the ONI Alpha Site achievement and unlocks the Alpha Site firefight map.
- Completing NMPD HQ on Normal awards the NMPD HQ achievement and unlocks Romeo's appearance for use in firefight.
- Completing Data Hive on Normal awards the Data Hive achievement and unlocks the Chasm Ten firefight map.
- Completing Coastal Highway on Normal awards the Coastal Highway achievement and unlocks the Last Exit firefight map.
- Completing the campaign on Normal awards the Campaign Complete: Normal achievement.
- In Halo: Reach:
- Each campaign level awards an achievement for completing on Normal or higher.
- Completing the campaign on Normal awards the The Soldier We Need You To Be achievement.
- In Halo: Combat Evolved Anniversary:
- Each campaign level awards an achievement for completing on Normal or higher.
- Completing the game on Normal awards the Birth of a Spartan achievement.
- Completing a level on Normal in cooperative play awards the Standard Operating Brocedure achievement.
- In Halo 4:
- Each campaign level awards an achievement for completing on Normal or higher.
- Completing the campaign on Normal awards the Wake Up, John achievement.
- In Halo: The Master Chief Collection:
- Each campaign level awards an achievement for completing on Normal or higher.
- Completing Halo: Combat Evolved Anniversary on Normal awards the Birth of a Spartan achievement and unlocks the blue Normal nameplate.
- Completing Halo 2: Anniversary's campaign on Normal awards the Warrior achievement and unlocks the bronze Normal nameplate.
- Completing Halo 3's campaign on Normal awards the Prophet's Bane achievement and unlocks the silver Normal nameplate.
- Completing Halo 4's campaign on Normal awards the Wake Up, John achievement and unlocks the gold Normal nameplate.
- Completing all campaigns (except Halo 3: ODST and Halo: Reach) on Normal awards the Veteran achievement and unlocks the platinum Normal nameplate.
- Completing all Spartan Ops chapters on Normal awards the Term of Enlistment achievement.
- Completing a level in Halo 2: Anniversary without dying on Normal or higher awards the Demon achievement.
- Completing Halo 3: ODST's campaign on Normal awards the Urban Warfare Badge achievement and unlocks the silver Superintendent nameplate.
- Completing a Firefight set in Halo: Reach on Normal or higher awards the Enemies Everywhere! achievement.
- In Halo 5: Guardians:
- Completing the campaign on Normal awards the Legacy achievement.
- In Halo Infinite:
- Completing the campaign on Normal awards the Bare Your Fangs achievement.
Production Notes[edit]
- Each campaign level awards achievements in Halo Wars, Halo 5: Guardians, Halo Wars 2, and Halo Infinite for completion regardless of difficulty.
Sources[edit]
- ^ Halo: Combat Evolved Editing Kit, game file
tags\globals\globals.globals - ^ Halo 2 Editing Kit, game file
tags\globals\globals.globals - ^ Halo 3 Editing Kit, game file
tags\globals\globals.globals - ^ Halo: Reach Editing Kit, game file
tags\globals\globals.globals - ^ Halo 4 Editing Kit, game file
tags\globals\globals.globals
|
| |||||
