H3:The Ark
From Halopedia, the Halo wiki
|
Prev: |
|
|
Next: |
|
| The Ark | |
|---|---|

| |
|
Game: |
|
|
File name (?): |
|
|
Player: |
|
|
Date: |
|
|
Location: |
Installation 00, in and around a Cartographer |
|
Objective(s): |
|
|
Par Time: |
00:20:00 (Master Chief Collection) |
|
Par Score: |
25,000 (Master Chief Collection) |
 |
Halopedia has a walkthrough guide for this level; see H3:The Ark/Walkthrough. |
| “ | Search the waste for the Cartographer. | ” |
The Ark is the seventh campaign level of Halo 3. It takes place in a desert that comprises one of the center-most regions of the Ark, located 218 light-years outside the Milky Way galaxy's center. In this level, the Sangheili and the humans side with 343 Guilty Spark and his Sentinel allies to access the Cartographer and find The Prophet of Truth. Beating this level on Normal unlocks the EVA-class Mjolnir shoulder pads. Beating this mission on Heroic unlocks the shoulder pauldrons to the Elite Flight Harness armor permutation. Beating this level on Legendary gets you the EOD-class Mjolnir shoulder pads. Getting more than 50,000 Meta Game points will unlock the Ranger achievement, worth 10 Gamerscore.
Summary[edit]
The joint UNSC-Sangheili fleet crosses the Portal and arrives in orbit over a massive Forerunner structure. While Commander Miranda Keyes and Shipmaster Rtas 'Vadum engage Truth's much larger fleet, John-117 and a contingent of Marines and ODSTs are deployed to the surface of the Forerunner structure. Upon landing, John-117 and a team of ODSTs head out on foot and clear out two large Covenant-held positions and stop the Jiralhanae from setting up an anti-aircraft battery. Keyes orders the Master Chief to clear a landing zone for the UNSC Forward Unto Dawn.
The Chief and the ODSTs meet up with a group of Marines whose Pelican was shot down. The Marines inform the Chief that there's a good landing zone for the Forward Unto Dawn nearby. After retaking the Pelican crash site, John-117 and his allies commandeer an assortment of vehicles and drive off to secure the LZ. Along the way, the Chief discovers a large Forerunner wall built between the cliffs. The entrance to the wall is guarded by Sentinels which attack the Covenant but leave the humans alone. Johnson arrives in a Pelican and informs Commander Keyes that Hocus has found a structure located on the other side of the wall. Keyes deduces it's a Cartographer which they can use to locate the Prophet of Truth.
The Chief arrives at the Forward Unto Dawn's intended landing zone and defeats the Covenant forces occupying it including a pair of Anti-Air Wraiths. With the landing zone secure, the Forward Unto Dawn enters the installation's atmosphere and deploys reinforcements, including Scorpion tanks. Keyes orders the Master Chief to take the convoy through the wall and locate the Cartographer. John-117 takes a tank and leads the armored convoy against a large force of Covenant vehicles and infantry. 343 Guilty Spark accompanies the humans and opens the entrance to the wall, allowing John-117 to enter on foot. Inside, he activates a light bridge, allowing the UNSC convoy to pass through the wall.
Upon reaching the other side, the UNSC encounters another large force of Covenant vehicles, including a Scarab, guarding the structure containing the Cartographer. After a prolonged battle, the Chief and his allies prevail. At the same time, Shipmaster 'Vadum reports that Truth's fleet has been defeated. The Chief heads up to the top of the structure, where he teams up with Thel 'Vadam and a pair of Marines. 343 Guilty Spark opens the doors, allowing the Chief and his allies to enter. The group fights their way into the lower depths of the building and finally locate the Cartographer. Upon accessing the Cartographer, John-117 discovers that they are outside the Milky Way galaxy, and that this installation is, in fact, the real Ark. Guilty Spark locates the Prophet of Truth, who has activated a protective barrier around himself. Spark then discovers something else, but before he can reveal what it is, a hostile Phantom arrives. Johnson contacts the Chief and warns him that additional Covenant forces are heading their way. Thel 'Vadam hijacks a Banshee and engages the Phantom, while the Chief and the Marines head to the lower level to meet up with their evac. After defeating more Covenant troops, including a Jiralhanae Chieftain, the Chief is picked up by Johnson's Pelican. As they leave, a massive force of Sentinels are seen departing on an unknown priority mission. Though Guilty Spark wants to focus on finding Cortana's solution to the Flood, Commander Keyes states that they must stop the Prophet of Truth first.
Transcript[edit]

The Sangheili Ket-pattern battlecruisers and CAS-class assault carrier arrive at the other side of the slipspace portal. A colossal structure is below them, and a Covenant fleet straight ahead.
Cut to the bridge of the Shadow of Intent.
- Sangheili Major: "Brute ships. Staggered line! Shipmaster, they outnumber us, three-to-one!"
- Shipmaster Rtas 'Vadum: "Then it is an even fight. (COM) All cruisers, fire at will! Burn their mongrel hides!"
ODSTs and Marines board a Pelican with John-117. Cuts to the cockpit of the same Pelican.
- Commander Miranda Keyes (COM): "Truth's ship isn't taking part in the attack. He must've gone to ground!"
- Sergeant Major Avery Junior Johnson: "Roger that, Ma'am! We're on him! (to Hocus) Kick the door."
Hocus nods, and presses a button on the controls. The Pelican drops out of the UNSC Forward Unto Dawn along with six other Pelicans. The massive underside of the Shadow of Intent can be seen flying on top of the Forward Unto Dawn, which is seen leaving the Shadow of Intent's underside. As the dropships breach through the Covenant fleet, one of the Pelicans takes a hit from a Kai-pattern Seraph fighter-interceptor. Its starboard engine bursts into flame and it spirals out of control and explodes. The other Pelicans make it through unscathed. As they enter the atmosphere, the Chief checks on Johnson and Hocus in the cockpit, then returns to the back, where several Marines and ODSTs sit, readying themselves for battle.
- Johnson (COM): "We good, Hocus?"
- Hocus (COM): "She's a little cooked, Sergeant Major... But she'll hold."
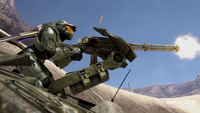
The Master Chief picks up a sniper rifle holstered in the troop bay.
- Johnson (COM): "Alright. Pop the hatch!"
The Master Chief slams a magazine into his rifle. The troop bay hatch opens, revealing a massive desert (In Co-op, the Arbiter, with a Type-50 particle beam rifle, stands up from the right side of the troop bay and moves to sit on the left side). The Chief walks to the right side and sits down.
{Gameplay}
- ODST #1: "That's some view."
- Johnson (COM): "Enjoy it while you can, Marines. Soon as we land, we're right back to it. Priority one: secure a landing zone for the Commander's Frigate. Keep your eyes and ears open. We need all the intel we can get... on wherever the hell we are."
The Pelicans touch down on a cliff side.
- Johnson (COM): "Stand to, Marines!"
- Marines: "Oo-rah!"
- Johnson (COM): "Go, go, go!!"
Installation 00[edit]
Sharpshooter.

The Master Chief (and the Arbiter, in co-op) and two ODSTs jump out of the Pelican. The Marines remain on-board. Another Pelican lands, dropping off two more troopers (In 3-4 player Co-op, N'tho 'Sraom and Usze 'Taham will come from the second Pelican). As the team moves on, one spots what looks like a galaxy in the sky.
- ODST #2: "Hey, check it out. In the sky. Is that-?"
- ODST #1: "Hey, focus! We got a job to do."
The Marines take up positions on a ledge, overlooking a Covenant encampment.
An ODST with red armor trim (Squad Leader) turns to the Chief.
- ODST leader: "Chief, eyes on."
The ODST leads the team up the hill.
- ODST leader: "Got a good angle."
The team sets up firing positions.
- ODST leader: "You take the first shot."
- Prophet of Truth (Hologram): "My Dreadnought cannot rise. Even now it is engaged, turns deftly in the wards of this new world. Do not relent until the heretic ships are smashed!"
The Chief fires, and the rest of the team opens fire. Through tactical advantage and sniper fire, the enemy soldiers are wiped out. The team continues on.
- ODST #1: "We got more enemy contacts ahead, move out!"

The team goes through a cave. A Phantom is assembling an anti-aircraft battery on the other end.
- ODST leader: "They're setting up an AA battery. That thing'll tear the Dawn apart... We'll wait for you to take the shot."
The team engages the enemy. The Phantom abandons a piece of the battery and flees. Having the lower ground, the Covenant soldiers start to retreat. Another Phantom drops off a Mgalekgolo pair. The Master Chief finally takes them down, and the team continues up the hill, engaging a large group of Unggoy and a Jiralhanae Captain.
- Keyes (COM): "Chief, I'm giving the Brutes all I've got...but this is a heavy-weight fight! The Dawn's only got the tonnage to last a few rounds. Find me a place to set her down. Over!"
If the player stalls:
- ODST #1: "The area is secure, let's move ahead."
or
- ODST #2: "Chief, Commander Keyes is counting on us to clear the LZ."
If the player continues to stall:
- Johnson (COM): "Come on Chief, move ahead. Go, go, go!"
The Master Chief and the team head through the structure at the top of the hill. Coming out on the other side of the structure, they see a squad of dead Unggoy. A burning Longsword roars through the canyon ahead.
- Longsword Pilot (COM): "Thrusters are gone, I can't control it!"
A muffled crash is heard a few seconds later.
A pair of Marines reveal themselves.
- Private First Class Chips Dubbo: (whispering) "Flak got our Pelican too, sir. But before we went down, we spotted a good LZ. If we can get to our vehicles, we'll lead you to it."
The Chief and the others look at an area at the bottom of the ledge they are standing on. Several Unggoy and Jiralhanae are guarding a crashed Pelican and Mongooses which presumably fell out when the Pelican was shot down. The Chief and his allies engage the Covenant patrol and annihilate them.
If Chief stays by the downed Pelican he can pick up radio transmissions of the ongoing space battles above the installation. These play in a random order, though some phrases are played in quick succession as responses to others. There are several Longsword pilots. All pilots have been marked as "unknown" here.
- Rtas 'Vadum (COM): "Hit them again! And again! And again!"
- Unknown Longsword Pilot (COM): "Got a lock! Fox, Fox!"
- Keyes (COM): "Negative, protect the Pelicans!"
- Rtas 'Vadum (COM): "Now, close for the finish!"
- Unknown Longsword Pilot (COM): "Negative, get out of there!"
- Rtas 'Vadum (COM): "Let your cannons roar."
- Rtas 'Vadum (COM): "Broadside! What fools to face our guns!"
- Keyes (COM): "Fire pods one through twelve. Archers away."
- Keyes (COM): "New contacts at point two-three-eight!"
- Unknown Longsword Pilot (COM): "Affirmative. I see it...."
- Rtas 'Vadum (COM): "No! I will handle those myself."
- Unknown Longsword Pilot (COM): "Seraphs, on my six!"
- Rtas 'Vadum (COM): "Stay away from those cruisers!"
- Keyes (COM): "Understood. Engage those Seraphs!"
- Unknown Longsword Pilot (COM): "Splash one, coming about."
- Keyes (COM): "Let the Elites handle those cruisers."
- Rtas 'Vadum (COM): "Full shields! Ramming speed!"
- Unknown Longsword Pilot (COM): "Point laser fire, break off!"
- Unknown Longsword Pilot (COM): "I'm hit, I'm hit!"
- Keyes (COM): "Watch your fire, watch your fire!"
- Unknown Longsword Pilot (COM): "I've lost avionics - going to try and hit their carrier! Goodbye, guys."
- Unknown Longsword Pilot (COM): "All squadrons, form up! Form up!"
- Rtas 'Vadum (COM): "A mark of honor for that kill."
- Rtas 'Vadum (COM): "Suppress with main point laser batteries."
- Rtas 'Vadum (COM): "Forward lances, draw their fire."
- Rtas 'Vadum (COM): "...burn."
- Keyes (COM): "Affirmative, that's a hit."
- Rtas 'Vadum (COM): "They have been gutted stem to stern."
- Rtas 'Vadum (COM): "Look at it blister and burn."
- Keyes (COM): "Charge the MAC. Give me a firing solution."
- Keyes (COM): "Stand by to jettison the [unintelligible: "HEVs"?] on my mark."
Two Brute Prowlers show up. One parks near the Mongooses and its Jiralhanae occupants all leap out while the other circles the area, firing at the UNSC forces. Once the Jiralhanae are all killed, the Marines mount up on the Prowlers and working Mongooses.
- Dubbo: "Mount up. Let's find that LZ. Follow us, sir, all the way down this canyon."
The team mounts up and moves on through the canyon, clearing Covenant patrols and passing the Longsword's wreckage. There's a working Warthog nearby that the Chief can use.
The team continues on, wiping out a small group of Covenant camped around a crashed Phantom. Transmissions from Jiralhanae warships can be heard from the Phantom.
- Jiralhanae Commander (COM): "Nooooo! Hit the carrier! Kill the Half Jaw and his crew!"
- Jiralhanae Commander (COM): "Keep these fools at bay. Drive the heretic ships back through the Portal!"
- Jiralhanae Commander (COM): "Their cruisers mixed with ours! Watch your fire!"
- Jiralhanae Commander (COM): "Do not fear the Prophets' wrath, because if you fail I will have your hide!"

The assault team heads into another canyon with a large Forerunner wall built in between the cliffs. Fighting their way through a large enemy force, the team makes it to the higher level, where Covenant troops are engaged with Aggressor Sentinels.
- ODST #2: "Careful, sir! Brutes must've tripped a defense system."
The UNSC forces and the Sentinels clear the top floor. The Sentinels don't open fire on the humans. Johnson's Pelican flies over the wall and hovers.
- Johnson (COM): "Ma'am, Hocus almost got her wing shot off. But we spotted a structure on the other side of this wall. It matches Cortana's description of the map room on the first Halo ring."
- Keyes (COM): "A Cartographer. Good. Should help us fix Truth's location. Secure the LZ, then we'll push through that wall."
- Johnson (COM): "Roger that. Follow my Pelican, Chief! The LZ's this way."
The Sentinels follow Hocus' Pelican. The Marines are nervous about their presence.
- ODST #1: "Tidy little bastards. Hope they never decide to clean us up."
- Marine #1: "It's like they don't even see us."
- ODST #1: "Oh, they see us all right. They just haven't decided what to do with us yet."
The team and the Sentinels continue along the other canyon, towards the LZ. Wiping out a pair of Ghosts under a large Forerunner structure, the force presses on. Near a cave, they find two Marines pinned down by a large assault group of Covenant, including another pair of Ghosts (on higher difficulties, a Jiralhanae wielding a fuel rod gun is also present). The Sentinels and the Marines clear the area. The UNSC forces meet up with the two Marines.
- ODST #1: "The LZ's through this cave, sir. Watch yourself; got Covenant heavy armor!"
The team heads through the cave. A large Covenant force is encamped in the next area, including a Wraith, a brace of Ghosts, Jiralhanae and Unggoy-operated turrets. After a struggle, the team eventually prevails. Out on a sandy plateau, two Anti-Air Wraiths are filling the sky with fuel rod fire. The team takes out the Anti-Air Wraiths and any remaining Covenant.
- Johnson (COM): "That did it. LZ's clear."
or
- Marine #1: "Oo-rah! The LZ's clear!"
or
- ODST #1: "OK. Tell us what you need."
- Johnson (COM): "Commander? Bring her down."
- Keyes (COM): "Roger that. Beginning my descent."
- ODST #2 or Dubbo: "Look! Up high! Here she comes!"
- ODST #1: "Is the Dawn rated for atmosphere?"
- ODST #2 or Dubbo: "Guess we're gonna find out...hey! Take cover!"
The UNSC Forward Unto Dawn swoops in dramatically, kicking up dust and sending the vehicles and debris from the previous battle tumbling and flying across the plateau.
Forward Unto Dawn[edit]
Armor up.

- Keyes (COM): "Thanks, Chief. I wouldn't have lasted much longer up there. Come to the back of the frigate."
If the player is away from the back:
- Johnson (COM): "C'mon, Chief! Let's see what the Commander has in her arsenal..."
The Forward Unto Dawn's hangar lowers, revealing three Scorpion tanks and a Warthog. 343 Guilty Spark descends as well.
- Keyes (COM): "Did the Elites get a fix on the Cartographer?"
- Johnson (COM): "Yes, ma'am; just on the other side of that wall. But it's surrounded by Brute heavy armor."
If the player skipped the wall section leading to the Cartographer:
- Keyes (COM): "Johnson, have the Elites found anything?"
- Johnson (COM): "A structure on the other side of that wall, ma'am. But it's surrounded by Brute heavy armor."
- Keyes (COM): "Don't worry; I've got a plan. If we can't fly over the wall, we'll go right through it. Chief, take one of the tanks, lead the way. If you find any locked doors, Spark will be happy to pry them open."
- 343 Guilty Spark (COM): "I will certainly try my best, though I am unfamiliar with this facility."
- Johnson (COM): "Alright then, you heard the lady."

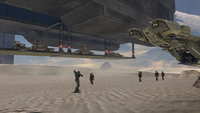
The tanks and Warthog leave the hangar bay, and Johnson's Pelican drops off Gunnery Sergeant Stacker and a few of his Marines to commandeer the vehicles. Any surviving ODSTs from the first part of the level will board the Pelican.
The Monitor hovers near one of the Scorpions.
- 343 Guilty Spark: "Shall I help you choose a vehicle, Reclaimer? This one seems in very good condition, primitive armor not withstanding."
- Johnson (COM): "A tank's a tank, light-bulb. Pick one, Chief. Get back to the wall. I'll help the Commander secure the Dawn. Then we'll meet you at the Cartographer."
The player chooses a vehicle while the rest of the Marines mount up.
- Johnson (COM): "Mount up - let's roll!"
- Marines: "Oo-rah!"
The convoy starts to move out.
Ghosts and a Prowler pour out of the cave in the cliff. The Scorpions immediately open fire.
After the convoy scores a kill:
- Gunnery Sergeant Stacker (COM): "Hey, how does 90 millimeters of tungsten strike you?"
The convoy destroys all hostile vehicles.
- Marine #2 (COM): "Tank beats Ghost!"
A Mgalekgolo pair charge out of the cave. The UNSC forces destroy them with little effort.
- Marine #2 (COM): "Tank beats Hunter!"
On the other side of the cave, a Phantom is setting up a Covenant watchtower. If the Chief shoots it down and destroys the tower:
- Marine #2 (COM): "Tank beats everything! Oh, man! I could do this all day!"

The convoy makes its way back to the wall where a locked door prevents any entry into the Forerunner facility. Armor resistance in the form of Wraiths, Choppers, and Ghosts along with various Covenant infantry defend it.
- Stacker (COM): "All armor, form up on the lower doorway. Chief, get upstairs; have your robot pick that lock!"
- 343 Guilty Spark (COM): (indignant) "I beg your pardon? I am 343 Guilty Spark, Monitor of Installation 04."
- Stacker (COM): "Yeah, well...you're also our ticket through this wall. So if you don't mind?"
- 343 Guilty Spark (COM): "I will gladly aid the Reclaimer's progress."
The Chief and the Marines attack the facility's upper level.
- 343 Guilty Spark (COM): "Reclaimer, come to the upper doorway, the others can take the lower one."
If the player waits:
- Stacker (COM): "We'll go along, Chief, you check the upper floor. Make sure we have a path through the wall!"
If the player still doesn't follow 343 Guilty Spark:
- Johnson (COM): "Armor's gotta go along, Chief, you take the upper floor, make sure they have a path through the wall!"
While the Master Chief storms the upper level, the other two tanks and other vehicles meet up at the lower door, clearing any resistance along the way. The Chief secures the top floor. 343 Guilty Spark arrives on the scene.
- 343 Guilty Spark: "Please, use caution; avoid collateral damage! While this facility looks quite hardy on the surface, there are undoubtedly delicate structures below the façade. (pause) Odd, for a doorway to require such robust security protocols. One moment, Reclaimer."
The Monitor opens the door.
- 343 Guilty Spark: "There we are. Please, follow me."
If the player goes back to the bottom of the wall:
- Johnson (COM): "Chief! Get back up there and make sure we have a clear path through the wall."
The Chief hops out of the Scorpion and follows Guilty Spark into the Security Wall. The Marines take the Scorpion down to the lower doorway.
Inside the structure, the Chief encounters a Sentinel. It stares at him as he passes by. The Monitor opens another door; the escorting Sentinel follows. Spark leads the Chief to a platform overlooking a deep chasm. The UNSC forces have gathered below on the left side of the chasm, and are waiting to cross.
Spark shows the Chief a control panel at the edge of the platform.
- 343 Guilty Spark: "Here, this panel will activate a bridge."
If the player stalls:
- 343 Guilty Spark: "Allow your companions to cross below."
If the player still waits:
- 343 Guilty Spark: "Place your hand on the pad, Reclaimer."
The Master Chief activates the panel. The bridge immediately lights up. The tanks and Warthogs move across; Guilty Spark opens another door. The Terminal behind the Chief is now accessible.
- 343 Guilty Spark: "Excellent. This way!"
Guilty Spark looks at the Sentinels, studying their differences in behavior and the odd high security levels.
- 343 Guilty Spark: (hums) "Sudden clarity! These Sentinels were trying to deny access to the lower levels of this facility. A wise decision, given the Meddlers' preference for...destructive acquisition."
- Keyes (COM): "Good work, Chief. Link up with our armor on the far side of the wall. Make your way down to the Cartographer."
As the Chief continues on, the building shakes violently. Guilty Spark opens a door leading outside.
- 343 Guilty Spark: "Hurry! To the Cartographer!"
As the Chief walks out, a massive leg slams down as a Scarab walks right over him.
- Johnson (COM): "Heads up, Marines! We got trouble."
A Warthog with an M68 Gauss Cannon appears from the rocky area. Pursuing Ghosts kill the Gunner. The Warthog driver finds the Chief and pulls over. In the distance, two other Warthogs have already engaged the Covenant heavy armor (they are usually destroyed before the Chief can help them).
- Marine #3 or Dubbo: "Sir, Hog's all yours! Let's hit that hostile armor!"
The Master Chief mounts up. The Warthog heads back down through the rocky area, encountering more Ghosts, infantry and gun emplacements. They break through, enabling the Scorpions to begin their assault.
The Scorpions emerge from the wall.
- Stacker (COM): "All armor, form up! Hit 'em where it hurts!"
The UNSC forces push down the hill. Hostile Wraiths, Choppers, Ghosts and a Phantom engage the Platoon.
- Female Marine (COM): "Target those Wraiths!"
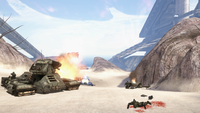
The tanks and the Chief take out the first two Wraiths.
- Stacker (COM): "First line, clear! Move up!"
The tanks move on to the next line of Wraiths, which are assisted by Ghosts and other heavy units. The UNSC forces clear them out.
- Stacker (COM): "Second line, clear! Push forward!"

The Scarab crawls down the side of the Cartographer building and onto the battlefield.
- Marine #4 (COM): "Scarab's back! This time it means business!"
- Stacker (COM): "Bravo, flank and cover! I want everybody supporting the Chief; he'll take it down!"
If the player stalls:
- Stacker (COM): "Take out the legs, Chief!"
If the player continues to stall:
- Stacker (COM): "Take out its legs! Climb on board!"
If the player still continues to stall:
- Stacker (COM): "The back plating looks vulnerable, light that sucker up!"
or
- Johnson (COM): "Back plating looks vulnerable; light it up!"
If the player still doesn't take down the Scarab:
- Stacker or Johnson (COM): "Hit it in the knees, Chief!"
The Chief moves in on the Scarab. The tanks provide long range cover fire. Choppers try to assist the Scarab, but the tanks have superior firepower. The Chief can either jump onto the Scarab using the canyon's natural terrain, or damage a leg forcing the Scarab to lower itself.
The Chief boards the Scarab:
- Johnson (COM): "Find that power core, Chief."
A sermon broadcast by Truth can be heard inside the Scarab:
- Prophet of Truth (COM): "I opened the Portal to this hallowed place, this shelter from Halo's fire, in the hopes that more of our Covenant would follow. Alas, save for a rabble of Heretics and their Demon allies, we are all that made the passage. Thus we must temper joy with sorrow. Keep in our hearts those left behind."
A group of Kig-Yar, including several marksmen, as well as a Jiralhanae Captain and several Unggoy try to stop the Chief's progress. The Spartan eliminates them and goes to the back of the Scarab and destroys its core, then flees before the Scarab detonates in a deafening explosion. The Shadow of Intent can be seen entering the atmosphere at extreme distance.
Alternatively, the Chief can target the power core on the Scarab from the ground with the main cannon on a Scorpion after taking out its legs. The Chief first has to blast off a massive plate covering the area with the power core, but once it is gone, just a few shots to the power core from the Scorpion's main cannon will overload it and destroy the Scarab.
Once all remaining hostiles in the immediate area have been neutralized:
- Rtas 'Vadum (COM): "Not bad, Spartan. I saw that explosion from orbit. Truth's fleet lies in ruin. Find where the liar hides...so I may place my boot between his gums!"
- Keyes (COM): "We'll know soon enough, Shipmaster."
The Chief heads up the spire.
- Johnson (COM): "Infantry on the spire! Mop 'em up!"
The Chief and the remaining Marines clear out the Covenant infantry on the spire. The Marines hold position.
- Johnson (COM): "Meet the Arbiter at the top of the spire, Chief."
If the player stalls:
- Johnson (COM): "Chief, Spark's found an entrance inside. Follow him inside."
The Chief makes it to the top, where Pelican Kilo 023 arrives with the Arbiter and two Marines. 343 Guilty Spark is also present.
- Thel 'Vadam: "Well done, Spartan."
Spark opens the entrance door. The team enters the facility.
Real Men Don't Read Maps[edit]

Bang and clear.
The team enters a small room littered with Unggoy corpses and Sentinel wreckage leftover from a previous battle. 343 Guilty Spark starts to open the next door, but has trouble unlocking it.
- Marine #5: "Hey, what gives?"
- 343 Guilty Spark: "It seems I've crossed a circuit."
- Marine #5: "Well, let me have a look."
When the Marine approaches, Guilty Spark faces the Marine and fires a blue laser at him. He yelps in pain and jumps back.
- Thel 'Vadam: (alarmed) "Oracle!"
'Vadam raises his weapon and walks around Guilty Spark cautiously just in case Spark becomes rampant.
- Marine #5: "Little bastard stung me!"
- 343 Guilty Spark: "I did not want you to come to any harm."
- Marine #5: (muttering) "You've got a funny way of showing it."
Guilty Spark gets back to work. He succeeds.
- 343 Guilty Spark: "Excellent! This way."
Unggoy are sleeping while a Jiralhanae Captain is urinating in a corner of the room. The team decides to take a stealthy approach.
- Thel 'Vadam: "Slothful runts. Kill them as they sleep."
- Marine #5: (whisper) "Chief, tap 'em out."
They stealthily take out the sleeping Unggoy patrol and the Jiralhanae urinating against the wall. (Alternatively, they can just shoot as normal).
- 343 Guilty Spark: "Come, Reclaimer. All you seek is close at hand."
If the player remains inside the room and stalls:
- Johnson (COM): “Keep going, Chief! We’ll meet you further down the spire. Commander rounded up some air support. They'll stop any hostile reinforcements, but the Brutes already inside? They're all yours.”
If the player comes close to the room where the terminal is you can hear 343 Guilty Spark say a few lines from it. If anyone enters the room or 343 Guilty Spark is hit, he will stop talking.
- 343 Guilty Spark: "Sincere apology. But how --", "The archive is intact?! Then our makers' plan --", "A what?", "A Foundry?".
The team quietly makes their way down to the second part of the facility; the Chief encounters an Unggoy patrolling next to a stack of plasma batteries. He eliminates it, and proceeds into the next room where a group of Unggoy are sleeping and a Jiralhanae is patrolling a ramp at the top of the room. The team kills the Covenant troops, quietly or not.
- 343 Guilty Spark: (happily) "Your goal is just below!"
Or
- 343 Guilty Spark: "Reclaimer, continue downward."
On the third level down, a Jiralhanae spots them and the team is forced to engage. After clearing out the Jiralhanae and Kig-Yar inside, the team heads outside to a large platform in front of a waterfall. A terminal to the Cartographer sits at the ledge.
- 343 Guilty Spark: "The Cartographer! Come, it awaits your approval."
If the player hesitates
- 343 Guilty Spark: "You must activate the Cartographer, Reclaimer."
The Arbiter and the Marines keep watch, while the Master Chief activates the Cartographer.

Upon activating the Cartographer, a holographic projection of the Milky Way appears. A small dot outside of the Milky Way is labelled.
- Master Chief Petty Officer John-117: (surprised) "That's...our galaxy. We're beyond the rim."
- 343 Guilty Spark: "Two to the eighteenth light years from galactic center, to be precise."
The hologram zooms in to the small dot, which changes to a map of Installation 00.
- John-117: "What is this place?"
- 343 Guilty Spark: "The Ark."
- John-117: "This is the Ark?"
Spark flies away from the console, to the top of the holographic map.
- 343 Guilty Spark: "I always assumed it was part of a... shield installation, but it seems I was mistaken."
- John-117: (sarcastically) "That's a first."
Guilty Spark turns around and looks at the Master Chief.
- 343 Guilty Spark: " (smugly) Not at all. While I had a complete understanding of Installation 04, my makers wisely limited my knowledge of all other strategic facilities. Compartmentalization - in case I was ever captured by the Flood."
- John-117: "Can you tell me where we are exactly?"
- 343 Guilty Spark: "Here."
A specific area on the hologram is highlighted.
- John-117: "And Truth?"
- 343 Guilty Spark: "Near one of the Ark's superluminal communication arrays, I'm afraid. Unfortunate. The Meddler has triggered a barrier; a defensive perimeter around the Ark's core."

In the distance, two Covenant Banshees can be seen flying by the Cartographer. 'Vadam gives the Chief a concerned glance. The Master Chief walks further around.
- 343 Guilty Spark: "The barrier will be difficult to disable... how odd that my makers would place such a comprehensive defense around a single - (shocked) Oh my."
Guilty Spark notices the enormous ring, highlighted in purple, surrounding the Ark's core.
- John-117: "What is it?"
Before Spark can answer, a Covenant Phantom approaches.
- Thel 'Vadam: "Phantom!"
The Arbiter and the Chief get into position to engage the approaching Covenant ship as 343 Guilty Spark continues to hover over the map, deep in thought.
- John-117: " (urgently) Spark! Move!"
The Monitor finally notices the Phantom and flies towards the Chief as 'Vadam engages the Covenant ship from the ground. The Phantom's side gunner returns fire.
- 343 Guilty Spark: "We must get past that barrier! Or the Meddler will destroy it all!"
{Gameplay}
- Johnson (COM): "Chief, you got a whole mess of hostile air inbound! Get back inside while we take 'em out."
A Banshee makes a slow attack run on 'Vadam.
- Thel 'Vadam (COM): "Follow the Oracle, Spartan."
The Arbiter boards the Banshee, kills the Jiralhanae pilot and takes control.
- Thel 'Vadam (COM): "I will help your Sergeant clear the sky."
'Vadam intercepts the Phantom (if not destroyed by the Chief), which breaks off and retreats. The Arbiter gives chase in his Banshee. The Chief returns to the entrance to the room, and a Marine approaches him.
- Dubbo: "Sir, Pelicans are gonna land... one level down!"
As the Chief heads back into the room, there is a possibility that the female Marine guarding the door will get killed by a plasma grenade. Covenant reinforcements, led by a Jiralhanae War Chieftain wielding a detached plasma cannon, enter the room. While the Chief and the others fight, 343 Guilty Spark talks to himself about the original Halo.
- 343 Guilty Spark: "Protocol dictates action. The installation was my responsibility, if my suspicions are correct... no! I must not jump to any conclusions."
The Chief and any surviving Marines clear out the Covenant attackers. They exit the room and head downward. Jiralhanae Chieftain Cethegus is waiting for them on the bottom floor of the lower level, wielding a gravity hammer.
The Chieftain runs off outside, leaving a pack of Jiralhanae Stalkers to deal with the Chief. The Stalkers deploy a radar jammer and activate their cloaking as they engage the Chief, but he eliminates them all. A pair of Kig-Yar enter the room, and the Chief quickly kills them too.
- Johnson (COM): "Hang tight, Chief! We're on our way!"

The Chief goes outside, where he finds Cethegus conferring with the Prophet of Truth via a holo-pedestal. Jiralhanae Jumpers gather around Cethegus. Truth orders Cethegus alone to take out the Chief.
- Cethegus: "Fight me, I'm right here!"
- Prophet of Truth (hologram): "You must win this fight on your own. Failure will bring a fate worse than death - abandonment, as we step forward without you."
Truth terminates communications. Cethegus charges the Master Chief, while the other Jiralhanae hold back, observing the fight.
The Chief eliminates Cethegus. The Jiralhanae Jumpers and two Kig-Yar sharpshooters spring into action. The Chief takes them down while the Marines provide long range cover fire.
Once all hostiles are neutralized:
- Johnson (COM): "ETA: damn quick! Standby for pickup!"
The Chief and the Marines meet up with the Pelicans.
As Johnson's Pelican arrives to pick up the Chief (and the Arbiter in Co-op), a massive flock of Sentinels rise up. Alarmed, the Chief raises his weapon.
- John-117: "Commander!"
- Keyes (COM): "Johnson! Look sharp!"
- Johnson: (spinning up the AIE-486H Heavy Machine Gun) "I got it!"
- 343 Guilty Spark (COM): "No, don't shoot! They mean us no harm! Those units have a priority task."
- Johnson: (slightly annoyed) "Oh, yeah? And what might that be?"
- 343 Guilty Spark (COM): "I really can't say... not for sure. But if you allow me to find a terminal closer to the Core-"

A Sentinel comes up to the Chief and inspects him. The Arbiter interrupts Guilty Spark.
- Thel 'Vadam (COM): "No, Oracle. We must keep the Prophet of Truth firmly in our sights."
The Sentinel closes back up and rejoins the flock.
- 343 Guilty Spark (COM): "But what about your construct? Her solution to the Flood? With more data, I might-"
Keyes interrupts.
- Keyes (COM): "The Arbiter's right. We have priorities too. Until we kill Truth, stop the rings from firing..."
The Chief boards the Pelican. (In Co-op, 'Vadam will join him.)
- Keyes (COM): "...nothing else matters."
The flock of Sentinels speeds off, with the Pelicans in trail. Fade to black.
Level ends
Achievements[edit]
The following achievements can be unlocked on this mission on the Xbox 360 edition of Halo 3.
| Icon | Name | Description | Gamerscore |
|---|---|---|---|

|
Refuge | Finish the sixth mission of the Campaign on Normal, Heroic, or Legendary. | 30 |

|
Famine | Find and claim this skull. | 10 |
Trivia[edit]
Glitches[edit]
- Main article: Glitches
- Strangely, while playing co-op at Mission Start, while riding in the Pelican, Player 2 (Thel 'Vadam) will be looking out the sides of his head, no matter where he looks. Once he gets out of the Pelican however, he will see out the front of his head.
- In Theater mode, right at the part where the player snaps to Master Chief's HUD, pauses and unsnaps the camera, then plays, they will see the Pelican fly normally and then fly slanted to the drop zone.
- At the structure with the light bridge, killing all the tanks and Warthogs at the bottom will cause the Marine who drops off the Gauss Warthog in the next area to be invincible. He will still react normally and say his line "Chief, 'Hog's all yours," before proceeding to attack the player. It should also be noted that even if the player kills all the tanks and Warthogs by the light bridge, they will still come out of the cliff in the next area, and will not be hostile. This is probably due to the fact that, if the tanks are watched in Theater mode (right after activating the light bridge), they simply disappear and new tanks and Warthogs appear out the other door.
- For a similar reason, any Mongooses, Prowlers, or Choppers brought to the light bridge will not appear on the other side. However on some occurrences they may come out the other side.
- It is possible to board and destroy the Scarab when the player first exits the Forerunner building and sees the Gauss Warthog being attacked by Ghosts. To do this, the player must grab a Ghost and destroy it at the correct time, so the Ghost part can launch the player directly into the Scarab's doorway. Once destroyed, the player will see the Scarab again in the area where they would normally fight it; half of the Scarab will be missing, and smoke will billow out from its main cannon.
- A player can easily navigate a Chopper the full way down to the Chieftain fight at the end of the level. With a large amount of patience and time, a player can (with a partner) also navigate a Warthog to the Chieftain fight at the end of the level. This second option may take hours, however.
- If the player has a Plasma Pistol where the Arbiter is about to board the Banshee, they can overcharge the Plasma Pistol to disable the Banshee. However, the player won't be able to board it or even shoot the pilot. The Arbiter will also disappear from the level.
- After activating the Silent Cartographer, if Thel 'Vadam doesn't board the Banshee in time, or if it flips, he will get up and disappear. Given time, the Banshee will disappear as well.
- If the player destroys the Phantom in the Cartographer, the Arbiter will board the Banshee as usual, but then jump out of it and fall once it clears the walkway.
- If the player gets an Invisibility equipment then enters the Cartographer, it will disappear from their inventory.
Mistakes[edit]
- The Milky Way seen throughout the level is represented as a barred spiral galaxy, but when Master Chief activates the Cartographer it is represented as a spiral galaxy. In reality, the Milky Way is a barred spiral galaxy.
- During the beginning cutscene, the seats on the left side of the cargo space of the Pelican Kilo 023 appear to be occupied by ODSTs; however immediately it appears that the left side seats are now unoccupied and the ODSTs are seemingly gone (though Master Chief is blocking the view of the right side seats). When gameplay starts, one can clearly see marines sitting on both sides of the cargo space, ODSTs returning to the left side. This is most likely an oversight by Bungie, though the NPCs could have switched seats for some reason between the two shots.
- When activating the light bridge to allow the Scorpion tanks and Warhogs passage to the final area with the Scarab encounter, a Gauss Warthog can be seen, despite no Gauss Warthog being delivered by the Forward Unto Dawn with the rest of the Warthogs. Curiously, the Gauss Warthog is not seen exiting the building alongside the Scorpion tanks like the other Warthogs. Presumably, this Gauss Warthog is the same as the one which is provided to the player after leaving the building, but it is unclear how it reached the top of the cliff before the other vehicles even left the building.
Easter eggs[edit]
- Main article: Easter eggs
- The Famine and Cowbell Skulls can be found on this level.
- Farther down the room with sleeping Grunts is a Brute urinating in the corner.
References[edit]
- This level has similarities to the levels The Truth and Reconciliation, The Silent Cartographer, and Assault on the Control Room, in that the player begins the level as a stealth mission, armed with a sniper rifle (The Truth and Reconciliation), then spending the better part of the level searching for the map room, shutting down security systems, and fighting Covenant (The Silent Cartographer), and ultimately acquire a tank, and lead an armored assault convoy against an entrenched enemy position swarming with Covenant (Assault on the Control Room).
- Whilst it is more likely a coincidence than not, the opening cinematic shares some similarities with the ending cutscene of The Pillar of Autumn - several Marines and the Chief escape a space battle (The UNSC Pillar of Autumn against the Covenant armada and the Covenant loyalist and separatist battles) by flying a small craft (A Bumblebee escape pod and Pelican dropship) towards a Forerunner installation (Installations 04 and 00 respectively). A further similarity is in transit, John-117 looks over the shoulder of the pilot at the approaching structure.
- The first cinematic section, just before gameplay begins but after the cutscene, bears a solid resemblance to the opening of The Silent Cartographer; the Chief (and several Marines) stare out the back of a Pelican as it approaches a Forerunner structure crawling with Covenant.
Miscellaneous[edit]

- This is the only level in Halo 3 in which all Covenant vehicles and weapon emplacements make an appearance, including the incomplete "Mantis" anti-air cannon.
- From the first time the player sees a Chopper the player can play this whole level through in it (Besides activating the light bridge and the Cartographer). At the end cutscene if the player uses the Chopper in the whole level, a Chopper could be seen in the background.
- After passing the crashed Pelican, one can see a couple of SOEIVs left in a ditch, and their occupants dead beside them.
- When the player plays this level at the part where the UNSC Forward Unto Dawn comes in, the musical segment Forward Unto Dawn, which is a remake of the Truth and Reconciliation Suite (part of the track Behold a Pale Horse), plays when the frigate lands. However, when the player starts at Rally Point Alpha, the Forward Unto Dawn has already landed and the musical segment starts playing during the part with the Scorpion tanks.
- It is possible to attack and kill the Brute Chieftain as he yells "The pack will feast on you!". Jump down, melee him, and he will turn around and fight. Once the player kills him, the "cheering brutes" will attack the player on sight. Remember to kill every other enemy before proceeding to the end as the Brute Stalkers will attack the player. This is not recommended on the Legendary Difficulty.
- When the player reaches the crashed Pelican, there is a destroyed Warthog, but its turret is still usable.
- It is possible to methodically set-up for the final battle first by triggering the Brute Chieftain spawning in. Next, if playing on fan difficulties SLASO or CLASO, kill the remaining Brute Stalkers and/or Jackals, and stockpile Plasma Pistols and/or Equipment via taking them to where the Chief activates the Cartographer. It is possible for the Chief to drop Plasma Pistols and Equipment down to the bottom level from the terminal. Once the Chief is set-up, it is also possible for him to carefully fall down from the terminal down onto the bottom level, where the Chieftain will only cheer and will be alone. In order to fall down safely, it is best to slowly inch your way off the top level of the terminal until you fall or, alternatively, fall down back first into the Chieftain, killing him. After that, it is best to stockpile any spare Plasma Rifle, Covenant Carbine, Equipment, or Plasma Pistol for the deloaded Jetpack Brutes. In order to spawn the Jetpack Brutes in, after setting everything up, backtrack to the area where you recently killed the Brute Stalkers and turn around. If done right, you'll hear Johnson say "Hang tight, Chief! We're on our way!" This provides you with a better chance in the aforementioned fan difficulties.
- After the cutscene near the end of the level if the player looks down the spot where the player fights the Brute Chieftain, the hologram pedestal is there and the player can destroy it, but it will be repaired when the player reaches the bottom floor.
- Originally, the platform at the end of the level where the player fights the Brute Chieftain was supposed to be a station for a train leading to a level that was later cut from the game. After the level got cut, Environment Artist Paul Russel suggested it be replaced by the Chieftain fight arena seen in the final game.[3]
- This is the only Halo 3 level where the regular Wraiths are rigged to explode when its driver dies unless you use the RB and shoot driver method.
- Strangely enough, ODSTs will not follow the player to clear the Forward Unto Dawn's landing zone unless they are carried there in a vehicle. Otherwise, they will stay behind near the entrance of the cave with the Marines.
- On rare occasions, ODSTs at the Landing Zone will not board the Pelican once the Forward Unto Dawn arrives. This includes any ODSTs that stay behind at the cave entrance, as they will accompany the player up until the end of the Scarab fight.
- The Scarab was at risk of being removed from the mission save for the advocacy of Jaime Griesemer. [4]
Gallery[edit]
Concept art[edit]
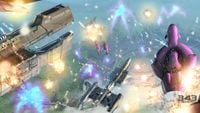
Concept art of the opening space battle.
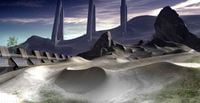
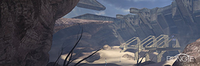
Concept art of the desert in the level.


Design Documentation[edit]
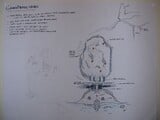
Early paper sketch known as "Grandfather Lands"
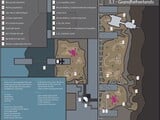
Digital design document titled "3.1 Grandfatherlands".
Revised digital design document titled "070 - Waste".


Storyboards[edit]


Screenshots[edit]
Preview of the level in Halo 3 menu.
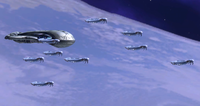
The Sangheili fleet arrives at the Ark.
The Forward Unto Dawn deploying Pelican dropships at the Ark.
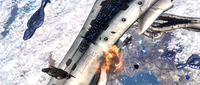
The Pelicans descend during the ongoing space battle.
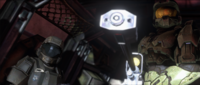
John-117 and an ODST preparing to deploy on the Ark.
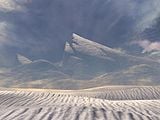
The vast desert on the Ark.

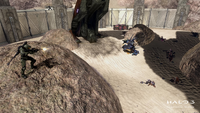
John-117 and two ODSTs moving towards a Covenant encampment.
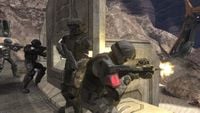
ODSTs fighting on the surface of the Ark.
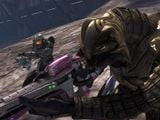
The Arbiter and John-117 in battle.

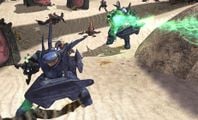
N'tho 'Sraom and Usze 'Taham on the Ark during cooperative play.
John-117 fighting Covenant troops at the base of the anti-air battery.
A pair of Mgalekgolo in combat.
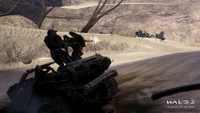
John-117 using a wrecked Warthog's turret.
Close-up of John-117 using a Warthog's turret.

John-117's Warthog fighting a Wraith.
The Forward Unto Dawn deploys vehicles to help the assault on the Cartographer.
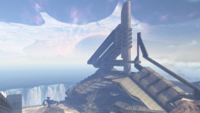
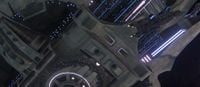
A view of the Cartographer of Installation 00.
A Scorpion fires its cannon during a battle near the Cartographer.
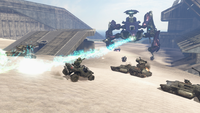
UNSC vehicles charging the Scarab outside the Cartographer.
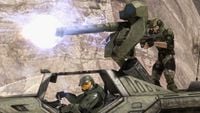
Chips Dubbo fires the Gauss cannon on John-117's Warthog.
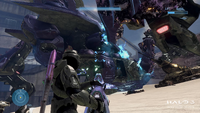
John-117 using a plasma cannon against a Scarab.
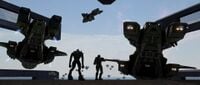
John-117 and Thel 'Vadam watch as a large group of Aggressor Sentinels appear behind the Pelicans at the Cartographer.


Sources[edit]
- ^ Halo 3 Editing Kit, game file
H3EK\tags\levels\solo\070_waste\070_waste.scenario - ^ Halo Waypoint: Hero-Fortitude
- ^ Picasa: Paul Russel > HALO3 8/25
- ^ YouTube - @nilessankey, How we made Halo 3: "The Ark": 22:25 as stated by Francois Boucher-Genesse (Retrieved on Jul 3, 2026)
| Preceded by Floodgate |
Halo 3 Campaign Missions The Ark |
Succeeded by The Covenant |
| ||||||||||||||||||||||||||||||||||||||||


