Alpha-Nine
From Halopedia, the Halo wiki
| Alpha-Nine | |
|---|---|

| |
|
Active: |
|
|
Affiliation: |
|
|
Branch: |
|
|
Type: |
|
|
Size: |
|
|
Engagements: |
|
|
Commanders: |
|
Alpha-Nine is a small fireteam of Spartan-IV supersoldiers under the command of Spartan Edward Buck.[1][2] Formerly a small team of UNSC Marine Orbital Drop Shock Troopers,[3] the team's roster changed drastically over the Human-Covenant War and the post-war era, with the remnants eventually becoming Spartan-IV supersoldiers within a single fireteam. After Operation: COALPEPPER, the team was disbanded and the remaining active members reassigned to other locations.[4] Following the outbreak of the Created conflict, the scattered members of Alpha-Nine were reunited to help combat the new threat.[1]
Squad roster[edit]

- Spartan Edward Buck (formerly Gunnery Sergeant) - Squad CO until the team's initiation into the SPARTAN-IV program in 2554 and reassigned to Fireteam Osiris by 2558. Reinstated in late 2558. Married to teammate Veronica Dare.
- Spartan Taylor "Dutch" Miles (formerly Corporal) - The team's heavy weapons specialist until retirement in 2554. Came out of retirement by 2558 and reinstated. Married to teammate Gretchen Ketola.
- Spartan Kojo "Romeo" Agu (formerly Lance Corporal) - The squad's marksman until reassignment before 2558. Reinstated in late 2558.
- Spartan Michael "Mickey" Crespo (formerly Private First Class) - The squad's explosive ordnance expert and unofficial pilot. Defected to the United Rebel Front and incarcerated after Operation: COALPEPPER in 2555, but reinstated during squad's reformation as of 2558.
- Spartan Gretchen Ketola - A former Marine who served with Miles and Agu until discharge by 2552. Newest team member as a SPARTAN-IV as of late 2558. Married to teammate Taylor Miles.
Affiliates
- Captain Veronica Dare - An Office of Naval Intelligence operative who assumed operational command of the squad for ONI's purposes on several occasions. Married to teammate Edward Buck.
Former
- Baruti "Gramps" Komen - The oldest member until his death during the Fall of Reach. (deceased)
- "Gogo" Gomez - One of the original members. Served during the Battle of Sargasso. (deceased)
- Lance Corporal Jonathan "Rookie" Doherty - The newest member of the squad by the Battle for Earth. Killed during the Draco III rebellion. (deceased)
- "Daughter" Svensdottir - One of the original members. Served during the Battle of Sargasso. (deceased)
- "Sammy" Samrat - One of the original members. Served during the Battle of Sargasso. (deceased)
History[edit]
Human-Covenant War[edit]
Battle of Sargasso[edit]
- Main article: Battle of Sargasso
During the battle on Sargasso, ONI tasked Alpha-Nine—then composed of Buck, Gomez, Svensdottir and Samrat—with retrieving Lethbridge Industrial's research data before the Covenant did.[5] As Alpha-Nine completed their mission and prepared to leave the town of Belisk, Buck overheard Sarah Palmer of Gamma-Six questioning Command about their lack of extraction. Command informed Palmer that the amount of hostiles at her position made extraction infeasible, and ordered for her to retreat to a safer location. Buck ignored ONI's orders and led his squad to rescue Palmer and Gamma-Six. By the time Alpha-Nine arrived, Palmer was the last remaining member of her squad. Together, the ODSTs eliminated the Jiralhanae, Kig-Yar, Unggoy and Banshees assaulting their position and returned back to base in a civilian truck.[6]
Fall of Reach[edit]
- Main articles: Fall of Reach, Siege of New Alexandria
Alpha-Nine was part of the 11th Shock Troops Battalion during the Covenant invasion of the planet Reach. During the battle of Reach, Baruti "Gramps" Komen was killed when a burst of plasma impacted his chest and blew out his heart. At the time of his death, the squad was merely holding a piece of ground for reasons undisclosed to them, leaving Buck to later wonder if Baruti had died for a noble cause. Komen's death left an open spot in Alpha-Nine, which was soon filled by another Shock Trooper nicknamed the Rookie.
Buck and at least two members[7] of Alpha-Nine were present during the failed defense of New Alexandria.[8] On August 23, he requested assistance from SPARTAN-B312 of NOBLE Team. After receiving assistance from the Spartan, Buck left the center of the city.[7] He was later evacuated, escaping to Earth.
Battle of Mombasa[edit]
- Main article: Battle of Mombasa
During the Battle of Earth, the squad—now consisting of Buck, Taylor "Dutch" Miles, Kojo "Romeo" Agu, Michael "Mickey" Crespo and the "Rookie"—was assigned to the UNSC Say My Name and were part of the 103rd Shock Troops Battalion. They were a part of a larger ODST unit with the mission to board the Prophet of Regret's flagship, Solemn Penance, by dropping in SOEIVs from low orbit. Before the drop, however, ONI officer Veronica Dare took over command of the squad in order to use them in her mission to gain access to New Mombasa's urban infrastructure artificial intelligence, the Superintendent, below the city and retrieve critically important data collected by the construct. She did not, however, reveal the new mission to the squad until mid-drop, when she ordered them to alter their course towards the city's ONI Alpha Site from where they could access the Superintendent. Dare also gave the squad clearance codes to access the Superintendent's systems, allowing them to utilize the AI for assistance, such as providing a three-dimensional map of the city.
Just as they were on their way down, the vessel jumped into slipspace, releasing a devastating shockwave and an electromagnetic pulse which disabled the squads' drop pods' electronic systems, resulting in them landing uncontrollably around the city.[9]
Dare and Buck landed relatively close to each other. Dare's pod hatch was jammed by the hard landing, and Buck rushed to her position in order to help her. However, Covenant forces converged on Dare's position before Buck managed to reach her. When he finally discovered her pod, he found it to be empty, just as he was confronted by a mysterious Covenant creature, which was holding Dare's severely damaged helmet. Romeo appeared and killed the creature. After reviewing the situation with Romeo, Buck decided to get the squad out of the city, as they assumed Dare had been killed.[10]

During the rest of the day, the squad regrouped, and fought the Covenant for control of the city. Finally together, minus the Rookie and Dare, the squad fought waves of incoming Covenant on the top of the NMPD headquarters building, where Agu was injured by a Jiralhanae Chieftain.[11] The squad then made their way to Kikowani Station, where they, upon seeing that escape through train tunnels was impossible, hijacked a Type-52 Phantom and found a way out of the city. However, Buck suddenly discovered he knew where Dare was, and ordered Crespo to turn back to the city.[12] Meanwhile, the Rookie woke up in his pod. After wandering around the city for a while, he received a transmission from Dare, who was pinned down in the data center below the city. The Rookie made his way to the data center, and eventually found Dare.[13] Together, they fought their way to the Superintendent's core, where they discovered a Huragok that had absorbed the Superintendent's data, namely its "Vergil" subroutine, into itself. As they prepared to leave, Buck arrived to the data center and they made their escape back to the surface.[14] Traveling along the Waterfront Highway, they faced heavy Covenant resistance. Eventually, they were picked up by the Phantom piloted by Mickey. They left the city as it was glassed by the Covenant fleet.[15]
Respite and redeployment[edit]
After the Battle of Mombasa, Alpha-Nine guarded the Huragok, now known as Vergil, in the ONI-appropriated Crimson Wing of the Quito Space Tether's terminus for the following weeks.[16] Approximately one month after the battle, Sergeant Major Avery Johnson arrived to interrogate the creature.[17] Alpha-Nine was returned to the field shortly afterward and continued to remain in the Sol system fighting against the Prophet of Truth's occupational forces while other UNSC forces deployed for the Battle of Installation 00,[18] including Operation: JOINT MONITOR at some point following the Battle of Voi.[16][19]
Post-war[edit]
Draco III[edit]
- Main article: Draco III rebellion
In 2554, Alpha-Nine took part in a combat operation against the United Rebel Front during an uprising on Draco III, where the Rookie was eventually killed in action. The Rookie's death prompted Taylor Miles to retire from UNSC service.
Other SPARTAN missions[edit]
Buck, Crespo and Agu would subsequently become Spartan-IVs, though they would continue to operate as a three-man fireteam. They would be deployed to at least three locations where they sledded the burning sands of New Caracas, swam through snake-infested waters of Charion VI, and burrowed through the snowdrifts of Gaenir Beta.[20]

Betrayal and disbanding[edit]
- Main article: Operation: COALPEPPER
In August 2555, they participated in a mission on the moon of Talitsa to recover Quick to Adjust and his human handler, Sadie Endesha, from a United Rebel Front facility. The mission was a success, but saw Crespo's defection to the URF and subsequent capture.[21] Afterwards, Buck and Agu were reassigned to a Spartan fireteam at Buck's request, with Buck opting to be a member, not a leader, of the squad.[22]
Following their service on this squad, both men were eventually again reassigned; Buck was reassigned to UNSC Meriwether Lewis and acted as Spartan Commander for the Spartan contingent on the ship,[19] and Agu was reassigned by ONI on a specialized solo mission at Concord. Afterwards, he was reassigned to a classified Spartan fireteam,[23] while Buck was reassigned to Fireteam Osiris.[24] Alpha-Nine itself was officially disbanded around 2558.
Created uprising[edit]
With the onset of the Created uprising, ONI decided to reform Alpha-Nine in order to reach out to the United Rebel Front for help, particularly the faction on Cassidy III that had unknown Forerunner technology protecting their colony Hole in the Wall. The hope was that the Front could help them use the technology to protect human worlds and ships from Cortana and the Created, but it required releasing Mickey Crespo from prison.[1]
Battle of Balaho[edit]
- Main article: Battle of Balaho
Departing the UNSC Infinity in a Condor, Edward Buck and Veronica Dare traveled to the Unggoy homeworld of Balaho where Romeo had been reassigned, rumored to be because he slept with an admiral's wife. The Unggoy having submitted to Cortana's rule, they and Forerunner armigers destroyed the UEG embassy. When Buck and Dare arrived, Romeo was on the run. The two rescued him and attempted to aid Romeo in rescuing the survivors from the embassy. However, the attempt failed and they were forced to flee while the survivors were killed.[25]
Mission to Luna[edit]
- Main article: Mission to Luna
After rescuing Romeo, Dare directed the team to a secret ONI facility on Luna where ONI kept several of their Huragoks, including Vergil, who would be needed to retrieve Mickey. The three found the facility heavily damaged by the Guardians during the Subjugation of Earth, but otherwise relatively intact with the Huragoks having repaired several of the systems, including some life support. However, Vergil refused to leave without his handler Sadie Endesha who had been taken by armigers to an observation deck in another part of the station along with the surviving staff. As the armigers had restored power to that part of the station, Dare blew out the windows with the Condor's weapons and sent the armigers into space while force fields kept the humans safe. Having completed their objective, the team departed with Vergil and Sadie while the rest of the Hurgaok and human survivors moved to a safe house below the facility set up by the Huragok before the armigers could return.[26]
Skirmish on the Spartan-IV training station[edit]
With the addition of Vergil and Sadie, the team traveled to the Spartan-IV training station where Mickey was being held prisoner for his acts of treason. However, the mission was complicated by a comms blackout imposed on the station by its AI Leonidas that kept the residents from knowing of the recent events, Chief of Staff Jun-A266 being "indisposed" and the high likelihood that Leonidas had joined the Created. However, the team had the advantage of Vergil and their Condor's cloaking abilities which kept Leonidas from knowing that anyone but Buck was on board. As Vergil attempted to take over the station's systems, Buck visited Mickey, but quickly became frustrated with his former friend's Insurrectionist views. Recognizing the potential danger that the inhabitants of the station were in from Leonidas, Buck decided to take the AI offline even if he hadn't been compromised as a precaution. Leonidas quickly revealed his true allegiance to the Created and attempted to have Buck arrested, going so far as to declare Buck STOLEN GAUNTLET, or a rogue Spartan. After Buck came close to convincing three Spartans ordered to arrest him to wait until Jun could handle the situation, Leonidas murdered them by evacuating the air from the room, Buck's armor saving him from the same fate. As Leonidas was poised to do the same to the rest of the station, Vergil managed to knock out power to the station briefly, giving Buck enough time to remove Leonidas' data crystal chip from a terminal in Jun's office, effectively taking Leonidas off-line.
The brief power loss knocked out the force fields on the station's cells and released Mickey and two other imprisoned Spartans. Mickey killed the other prisoners and subdued his guards, but he and Buck became pinned down by the station's Spartans who believed Buck to be rogue thanks to Leonidas. In order to prevent Leonidas getting reactivated if they were captured, Buck destroyed his chip and apparently the AI. With the unexpected help of Dutch and Gretchen Ketola, on the station for their own Spartan training, Alpha-Nine managed to escape with Dutch and Gretchen joining them. As the team departed, they were contacted by Jun who had been kept unconscious by Leonidas and who, thanks to the team's efforts, had regained control of the station. Warned that Leonidas might've alerted Cortana's Guardians to the station's location, Jun promised that the personnel were making preparations to move and expressed gratitude for Alpha-Nine's help in resolving the problem.[27]
Cassidy III[edit]
- Main article: Battle of Cassidy III
After being reunited, Alpha-Nine traveled to the United Rebel Front colony of Hole in the Wall on the planet Cassidy III. There, Dare underwent negotiations with Mayor Wells to gain access to what the Front knew about the Forerunner technology that was cloaking the location. Dare finally got Wells to see the seriousness of the situation with the Created and she explained the little the Front's scientists had figured out about the technology. Dare proposed a deal to Wells where they would lend the Front Vergil and Sadie to study the device and then trade them Mickey, treated as a hero by the Front for actions, to get the two back when the research was completed.
However, during negotiations, Vergil discovered that Leonidas had embedded fragments of himself into the armors of Dutch and Gretchen and possibly other Spartans from the training station. Though Leonidas was removed from Dutch and Gretchen's armors and placed into a tablet, it was too late to stop him from sending a signal to the Created who dispatched a Guardian and a massive force of armigers to pacify the colony. During the battle that followed, Alpha-Nine worked alongside the Front to defend the colony, helping to buy Vergil time to repair the colony's transports and allow as many people, particularly scientists and leaders, as possible to escape with Wells promising to provide their intended location to Mickey. Out of other options once the ships were gone, Wells agreed to surrender to the Created through Leonidas who attempted to depart with the Guardian. However, Romeo was able to destroy Leonidas' fragments with an M99 Stanchion. Alpha-Nine attempted to evacuate in their Condor, but were intercepted by the Guardian who knocked out power to the ship. Vergil managed to repair the Condor, but both he and Buck nearly fell to their deaths before the rest of Alpha-Nine came together to save them. With the Guardian having expended its power attacking them, the team was able to escape to slipspace.[28]
Further actions[edit]
After returning to the UNSC Infinity, Buck convinced Captain Thomas Lasky and Commander Sarah Palmer to reinstate Mickey for at least the remainder of the conflict instead of returning him to jail. Buck left Fireteam Osiris to command Alpha-Nine once more on a permanent basis with both teams attending Buck and Dare's wedding on the Infinity.[29]
Not long after Buck and Dare's honeymoon, Alpha-Nine was sent out on another classified mission. Out of contact with Command and with nothing but their armor, weapons and each other to rely upon, the team worked together better than ever after all of the hardships that they had been through.[30]
Trivia[edit]
- If the player reloads their weapon, then exchanges their weapon with a fellow squad member during the reload animation, the squad member will reload the weapon, and if the player takes back their weapon, there will be the same amount of ammo in reserve before trading as well as a full magazine loaded. The squad member will also say a dialogue randomly chosen when the player takes control of that particular squad mate and reloads.
- Despite every squad member being able to wield Type-25 Brute Shots in campaign and Firefight, the player cannot trade Brute Shots with them in campaign when they are controlled by AI. This is most likely because the squad and marines share the same AI program, and done for gameplay balance.
- Though Halo: New Blood gives no indication of what Mjolnir armor variants are worn by the Spartan members of Alpha-Nine, author Matt Forbeck has implied that they continue to wear ODST armor or variants derived from it.[31]
- Alpha-Nine is one of the few Spartan-IV Fireteams that do not use standard Fireteam names, retaining its name from when it was an ODST fireteam.
Gallery[edit]
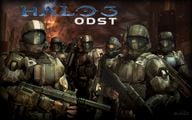
Promotional image featuring the squad.
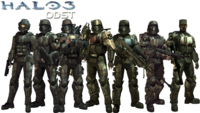
The squad, from left to right: Dare, Buck, Dutch, Mickey, Romeo, Rookie. Johnson, on the far right, and Dare, on the far left, were not part of the squad.
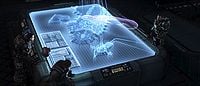
Three members of the squad at a briefing table, discussing the mission.
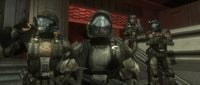
The squad in New Mombasa, minus the Rookie and Dare.
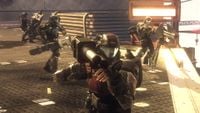
Buck, Romeo, Dutch, and Mickey in combat on the roof of NMPD HQ.
Veronica Dare
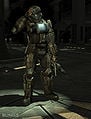
Edward Buck
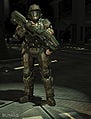
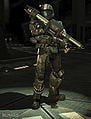
Taylor "Dutch" Miles
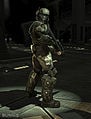
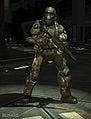
Kojo "Romeo" Agu
Michael "Mickey" Crespo
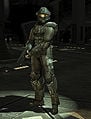
The Rookie
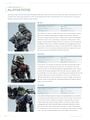
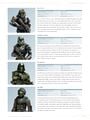
A page from the 2022 edition of the Halo Encyclopedia featuring Edward Buck, Michael Crespo, and Kojo Agu.
A page from the 2022 edition of the Halo Encyclopedia featuring Taylor Miles, Gretchen Ketola, Jonathan Doherty, and Veronica Dare.


List of appearances[edit]
- Halo 3: ODST (First appearance)
- Halo: Reach
- Halo: New Blood
- Halo 5: Guardians
- Limited Edition dossiers (Mentioned only)
- Halo Mythos
- Halo: Bad Blood
- Halo: The Master Chief Collection
- Halo: Venezian Sonata
Sources[edit]
- ^ a b c Halo: Bad Blood
- ^ Halo Waypoint, The New Halo Encyclopedia is Out Today (Retrieved on Mar 11, 2023) [archive]
- ^ Waypoint: Superintendent
- ^ Halo: New Blood
- ^ Halo: New Blood, page 25
- ^ Halo: New Blood, pages 38-44
- ^ a b Halo: Reach, campaign level New Alexandria
- ^ Halo Waypoint: Buck
- ^ Halo 3: ODST, campaign level Prepare to Drop
- ^ Halo 3: ODST, campaign level Tayari Plaza
- ^ Halo 3: ODST, campaign level NMPD HQ
- ^ Halo 3: ODST, campaign level Kikowani Station
- ^ Halo 3: ODST, campaign level Mombasa Streets
- ^ Halo 3: ODST, campaign level Data Hive
- ^ Halo 3: ODST, campaign level Coastal Highway
- ^ a b Halo: New Blood, Chapter 9
- ^ Halo 3: ODST, Epilogue
- ^ Halo Waypoint: Outpost Outro
- ^ a b Halo 5: Guardians Limited Edition, Spartan Locke's Classified Orders
- ^ Halo: New Blood, chapter 16
- ^ Halo: New Blood, chapter 18
- ^ Halo: New Blood, pages 175-179 (Google Play edition)
- ^ Halo Waypoint: Canon Fodder - Lore of the Rings
- ^ Halo 5: Guardians
- ^ Halo: Bad Blood, Chapters 3-4
- ^ Halo: Bad Blood, Chapters 5-7
- ^ Halo: Bad Blood, Chapters 8-11
- ^ Halo: Bad Blood, Chapters 11-20
- ^ Halo: Bad Blood, Chapter 21
- ^ Halo: Bad Blood, pages 330-331
- ^ Twitter: Matt Forbeck - "You know, I never sat down and picked any out. Wouldn't be surprised to see them in ODST style though."
| ||||||||


