Battle of Installation 00
From Halopedia, the Halo wiki
|
Previous: |
||||||||||||||||||||||||||||
|
Concurrent: |
||||||||||||||||||||||||||||
|
Next: |
||||||||||||||||||||||||||||
| Battle of Installation 00 | ||||||||||||||||||||||||||||
|---|---|---|---|---|---|---|---|---|---|---|---|---|---|---|---|---|---|---|---|---|---|---|---|---|---|---|---|---|
| ||||||||||||||||||||||||||||
|
Conflict: |
||||||||||||||||||||||||||||
|
Date: |
||||||||||||||||||||||||||||
|
Location: |
||||||||||||||||||||||||||||
|
Outcome: |
Decisive UNSC/Sangheili victory
| |||||||||||||||||||||||||||
| ||||||||||||||||||||||||||||
- "Our fight is through the Portal, with the Brutes and the bastard Truth!"
- — Shipmaster Rtas 'Vadum[10]
The Battle of Installation 00, also known as the Ark Conflict,[11] and designated by United Nations Space Command forces as Operation: BLIND FAITH,[12][13] was a large battle between the UNSC-Fleet of Retribution alliance, the Covenant, the Flood, and Forerunner Sentinels on December 11, 2552.[2][1][3][5] It was the final overarching battle of the Human-Covenant War and was the last stand of the Covenant,[5][14] making it one of the few major engagements in the entire war in which the Covenant were on the defensive.
After the collapse of the Covenant and the Battle of Installation 00, the Great Schism would continue as the Sangheili-Jiralhanae war and still ongoing as of 2559, after the Created uprising in late 2558.[15] In early 2559, the Ark would become the home of a new conflict as the Banished fought with the forces of the long-lost UNSC Spirit of Fire for control over the installation.[16]
Background[edit]
Battle of Installation 04 and 05[edit]
- Main articles: Battle of Installation 04, Battle of Installation 05
During the Battle of Installation 04 in September 2552, the UNSC AI Cortana intercepted the Installation's Index as it was being inserted by John-117 into the Core in the control room. Having prevented the activation of the ring, she kept the index even after she had been removed from the Installation's control room. She had also spent over twelve hours inside the control room's computer, gaining an incredible amount of information about the Halo installations,[17][18] making her possibly the most knowledgeable regarding the operation of the Halo rings, the Forerunners, and the Ark - perhaps even more so than 343 Guilty Spark, who admitted he was quite ignorant of the Forerunner structures beyond Installation 04.[1]
In November 2552, another battle on the next discovered Halo ring, the Battle of Installation 05, included many events that would become major factors in the Battle of Installation 00. Cortana remained aboard the Covenant holy city, High Charity, as the Flood and its central consciousness, the Gravemind, took control of it.[19] From there, the Gravemind interrogated her, and she willingly answered its questions.[20] Meanwhile, the Covenant civil war, termed the Great Schism, begun in High Charity and the space around Installation 05.[21] The recently-appointed Arbiter Thel 'Vadam and his Sangheili allies, in an effort to prevent Chieftain of the Jiralhanae Tartarus from activating the ring, formed an alliance with humans on the surface of Installation 05. With the help of Thel 'Vadam, Commander Miranda Keyes aborted the activation of Installation 05, but the installation's failsafe protocol had set all of the Halo rings to standby, where they could be activated from the central location of the Installation 00.[22]
Battle for Earth[edit]
- Main article: Battle for Earth
Shortly after escaping the Flood on High Charity, the High Prophet of Truth had arrived on Earth, along with the rest of many Covenant loyalist ground and naval survivors from the Battle of Installation 05,[22][23] where the excavation of a Forerunner structure under the planet surface was almost completed by the Jiralhanae-led support and excavation fleet sent by Truth earlier.[24] Eventually Truth's forces uncovered and activated the structure, opening a slipspace portal that would take them to Installation 00, the Forerunner structure from which Truth can fire all of the Halo installations at once. As he departed through the Portal, the Flood-captured ship Indulgence of Conviction arrived on Earth and crashed, though its arrival was followed by a portion of the Sangheili Fleet of Retribution of at least 16 warships, led by Shipmaster Rtas 'Vadum.[25][26] From it, John-117 was able to extract a message from Cortana, alerting them that High Charity was heading for Earth and cryptically stating that the "solution" to the problem of the Flood lays beyond the portal.[10]
While Lord Terrence Hood was suspicious of Cortana's warning and objected to going through the portal, Commander Keyes, John-117, and Rtas 'Vadum all indicated their wish to proceed through the Portal. Unwilling to leave Earth defenseless against the incoming Flood threat, Lord Hood remained on Earth. He gave Miranda Keyes command of the UNSC Forward Unto Dawn for the human commitment to the mission and the fleet of ships chased after the High Prophet of Truth.[10]
Battle[edit]
Space battle[edit]
- Sangheili Major: "Brute ships. Staggered line! Shipmaster, they outnumber us, three-to-one!"
- Rtas 'Vadum: "Then it is an even fight... All cruisers, fire at will! Burn their mongrel hides!"
- — Rtas' Vadum and a Sangheili Major upon reaching the Ark.[1]
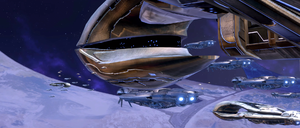
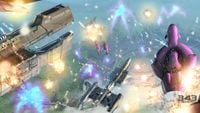
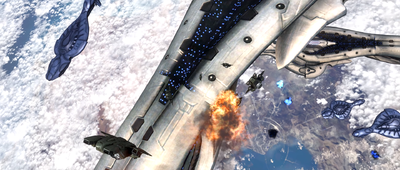
The Fleet of Retribution exited slipspace in the vicinity of the Ark on December 11, 2552, where they found the Prophet of Truth's fleet waiting for them. Despite being outnumbered three-to-one, Rtas 'Vadum declared that they were fairly matched, and the Sangheili ships and the Forward Unto Dawn promptly engaged Truth's fleet. In the ensuing space battle, the Jiralhanae and Sangheili cruisers blended into each other.[27] 'Vadum and Keyes coordinated their attacks against the Covenant fleet; whereas the Sangheili ships and the Dawn focused their attacks on the Covenant cruisers,[28] the Dawn's Longsword fighters engaged the Seraphs.[29][30] However, the Dawn was ill-equipped to fight against large opponents like CAS-class assault carriers and Ket-pattern battlecruisers. Thus, at the start of the battle, the Dawn deployed six D77H-TCI Pelicans to the surface to search for a landing zone for the Dawn and gather intelligence on Truth's location.[1]
The Forerunner Keyship, Anodyne Spirit, did not participate in the space battle.[1] Instead, it landed amidst a Forerunner city within a region of the Ark later referred to as Mahsko by the Banished.[31] A detachment of Covenant warriors were assigned to protect the vessel as Truth left to activate the Halo Array.[31]
Although the space battle went on concurrently with the opening skirmishes on the surface of the Ark, the Sangheili fleet would make short work of the Covenant fleet due to the Jiralhanae being outmatched by the Sangheili in their knowledge of naval warfare.[32] At least two Sangheili ships would survive the battle: the flagship CAS-class assault carrier Shadow of Intent and the Ket-pattern battlecruiser Pious Inquisitor.[1][33] On the Covenant side, the Varric-pattern heavy cruiser Gathering of Praise, led by Jiralhanae Chieftain Hekabe, abandoned the Covenant forces and landed on the installation surface in search of a device known as the vertex.[6]
Search for the Cartographer[edit]
- Main article: Battle for the Cartographer (Installation 00)
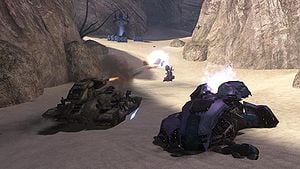
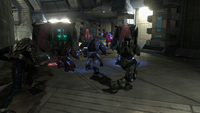
The Pelicans from the Forward Unto Dawn arrived on the surface of the Ark, where they deployed Marines and UNSC vehicles to search for a landing zone for the Dawn. Kilo 023 and another Pelican deployed Master Chief Petty Officer John-117 and a squad of ODSTs at a cliff edge, near a series of Forerunner structures built into the desert terrain. Nearby, a third Pelican, which carried a Warthog, two Mongooses, and Marines including Chips Dubbo, found a wide cliff which could serve as a landing zone for the Dawn, but the Pelican was shot down by Covenant anti-air defenses.[1]
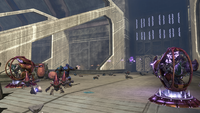
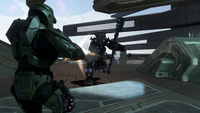
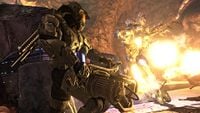
With support from his accompanying ODST squad and his SRS99D-S2 AM sniper rifle, John-117 cleared out two Covenant camps of Jiralhanae, Unggoy, and Kig-Yar. At the second camp, they disrupted the Covenant's efforts to assemble a Mantis. Emerging on the other side of the Forerunner structures, they linked up with Dubbo and other survivors seeking refuge from the downed Pelican, where a lance of Covenant searched for survivors. Dubbo informed John-117 of the potential landing zone for the Dawn. Upon defeating the Covenant patrol at the Pelican, a pair of Prowlers arrived at the area, but their operators were eliminated by the UNSC. Salvaging both UNSC and Covenant vehicles, John-117 and his team advanced into the Covenant-occupied canyon. At this point, the Covenant have set up an attack force of infantry and Rizsheda-pattern Shades at a nearby Forerunner wall, which was defended by Aggressor Sentinels. John-117 and his team eliminated the Covenant attackers, and the Sentinels, recognizing the humans as Reclaimers, withheld their attacks. Sergeant Major Avery Johnson, onboard Kilo 023, spotted a structure that was similar to the Cartographer of Installation 04 on the other side of the wall, and Keyes set the structure as the objective.[1]
The landing zone was occupied by Ghosts, a Wraith, several Covenant watchtowers, Jiralhanae and Unggoy infantries, and two Anti-Air Wraiths that were firing into an aerial battle between Banshees and Hornets. John-117 and his team, having gathered more Marine survivors, cleared the landing zone, allowing the Forward Unto Dawn to disengage from the space battle and descend to the surface of the installation, landing safely. From the Dawn's hangar, the UNSC was reinforced with three Scorpion tanks, a Warthog and a unit of Marines led by Gunnery Sergeant Marcus Stacker. With 343 Guilty Spark having arrived to guide them, the mechanized force then fought their way back to the Forerunner wall, destroying numerous Covenant vehicles and ground troops. The Covenant had retaken the wall, bolstering their defenses with Wraiths, Choppers, and Shade turrets, but they failed to deter the UNSC's progress.[1]
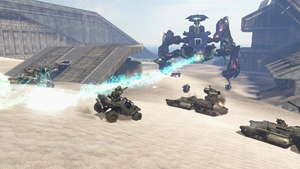
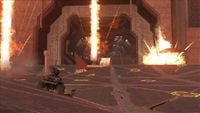
After entering the wall and emerging from the other side, the UNSC encountered a Scarab. Although the Scarab quickly left the area, the canyon leading from the wall to the Cartographer was defended by a battalion-sized force of Covenant heavy armor, including Choppers, Ghosts, Wraiths, and infantry with heavy weapons, reinforced by a Phantom. Two of the three Warthogs, which emerged from the wall first, were quickly overwhelmed, and their operators were killed. A single M12G1 Gauss Warthog, taking a winding path to the side, was harassed by Ghosts and lost its gunner, though it regrouped with John-117, who had left the group earlier when they travel across the wall. The Spartan commandeered the vehicle and rejoined the Scorpion tanks. John-117 and Stacker then led the Scorpions against the Covenant armor. When the UNSC forces broke through the Covenant defenses, the Scarab returned to the area, with Choppers as its escorts. Stacker ordered Marines from Bravo unit to flank the Scarab to cover John-117's assault on the Scarab. They succeed, with John-117 personally taking down the Scarab. After the Scarab's destruction, the Shadow of Intent arrived at the Cartographer, and Rtas 'Vadum announced that his fleet had destroyed Truth's fleet.[1]
Encountering resistance from Jiralhanae and Kig-Yar on the way, John-117 climbed a series of ramps towards the entrance to the Cartographer. At the top, he met with Thel 'Vadam, who dismounted from Kilo 023 along with a pair of Marines. While Commander Keyes assembled an air support force to prevent Covenant reinforcements, 343 Guilty Spark unlocked the sealed door at the entrance, allowing John-117 and Thel 'Vadam to advance inside. Their arrival caught most of its Covenant occupants off-guard, and they eventually arrived at an exterior platform hosting the Cartographer terminal. The Chief and 343 Guilty Spark accessed the terminal, learning the installation as the "Ark" and that Truth had already fortified himself at the core of the Ark, where he could remotely activate the entire Halo Array. Furthermore, Truth had activated a large barrier around the entire core to ward off the attacking forces.[1]
After learning of Truth's location, they were attacked by a Phantom, one of the many aircrafts from the Covenant's aerial attack on the Cartographer. Thel 'Vadam drew the Phantom's fire, allowing the Chief to escort Spark clear. 'Vadam then hijacked a Banshee and joined Keyes' air support to repel the Covenant attack. Notified by Dubbo, John-117 was instructed to descend to a platform underneath the Cartographer for extraction. The Spartan fought his way down, defeating a War Chieftain, his Bodyguards, and a group of camouflaged Jiralhanae Stalkers along the way.[1] At the platform underneath the Cartographer terminal, Jiralhanae Chieftain Cethegus regrouped with the Jumpers from his pack. Cethegus and the members of his pack were charged with halting the UNSC-Sangheili progress. Believing he would ascend to the title of Chieftain of the Jiralhanae for killing the Spartan, the ambitious Chieftain challenged John-117 to a duel.[34] Despite being outnumbered, John-117 defeated Cethegus' pack as well as two Kig-Yar marksmen. Meanwhile, the Hornets under Keyes' command had destroyed the Banshee attack force, putting an end to the conflict at the Cartographer.[1]
Kilo 023 arrived to pick up John-117, but a massive swarm of Sentinels approached the Pelicans. Initially, the UNSC prepared to attack, but they stopped when 343 Guilty Spark asked them not to attack the Sentinels, stating that the Sentinels had a "priority task" of unknown nature. Instead of attacking, the Aggressors flew off into the distance, and the UNSC and Sangheili followed suit, making their way to the Installation 00 Citadel to stop the Prophet of Truth.[1]
Battle of the Citadel[edit]
- Main article: Battle of the Citadel
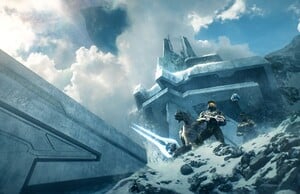
On the same day, December 11, 2552, the UNSC-Sangheili alliance arrived at vicinity of the core of Installation 00. AV-14 Hornets were sent in to contest for airspace around the barrier. An assault team, composed of five Pelican dropships and a pair of Sangheili Phantoms, began their attack on a trio of towers that, once disabled, would deactivate the barrier protecting the Citadel in which the Prophet of Truth was located. Two Pelicans, including Kilo 023 which carried John-117 and an ODST squad led by Gunnery Sergeant Stacker, would attack the Tower One. The Phantoms, which carried Thel 'Vadam and his Sangheili (including N'tho 'Sraom and Usze 'Taham),[35] would assault the middle tower. The other Pelicans, ferrying Sergeant Johnson and his squad, would disable the final tower. Kilo 023 deployed John-117, along with Stacker and his ODSTs, at a distance from the first tower after an Anti-Aircraft Wraith shot down the second Pelican carrying Marines and a Warthog. After John-117 defeated the War Chieftain, his entourage, and the Anti-Air Wraith, Commander Keyes' Pelican deployed a new Warthog and a Mongoose at the beachhead for the team. Meanwhile, the Shadow of Intent began a diversionary bombardment against the barrier, firing plasma torpedoes at the barrier shield.[3]
While John-117 and his team traveled to the first tower, 'Vadam and Johnson, along with their teams, touched down at the second and third towers, respectively. Although John-117 and 'Vadam succeed in disabling two of the three towers, Johnson was ambushed by enemy reinforcements, and lost contact with the UNSC soon after. The Jiralhanae captured Johnson, and took him to the Citadel. The UNSC-Sangheili forces launched a second assault on the third tower, with John-117 escorting the dropships in an AV-14 Hornet. They first destroyed Covenant Banshees and a Phantom, securing air control outside the barrier. The third tower was heavily defended by a pair of AA Wraiths, Shades, another standard Wraith, and a huge group of Jiralhanae led by War Chieftain. Destroying the Brute defenders outside the third tower, John-117, Thel 'Vadam, and a team of five Sangheili proceeded inside, where they discovered the corpses of Johnson's team, except for Johnson. After the defending forces of Mgalekgolo, Yanme'e and Jiralhanae were eliminated, John-117 disabled the barrier tower, finally deactivating the barrier. The Shadow of Intent advanced towards the Citadel, but 'Vadum's attack was interrupted by the arrival of the Flood-infested High Charity, which arrived via slipspace. High Charity launched debris that crippled the carrier and its weapons systems, forcing the Shadow of Intent to retreat. It also launched Flood dispersal pods and began spreading Flood across the Ark. Keyes insisted that the Flood's arrival would only pressure Truth into activating the rings, and ordered the remaining ground forces to attack the Citadel.[3]
During this time, the Jiralhanae Chieftain Hekabe decided to use the distraction from the Flood arrival to locate the vertex hidden on the Ark. The control device for the Sharquoi, the vertex would allow Hekabe to control the creatures. Though the Prophets had some Sharquoi themselves, they had lacked the vertex and so could not control them and never unleashed them. Hekabe intended to use the vertex and the Sharquoi to gain power for himself and so fled the Ark with his loyalists before the battle ended despite fighting on the side of the Covenant.[6]
Fighting through the Flood to exit the third tower, John-117 and the Sangheili regrouped with Gunnery Sergeant Stacker's Marines, now supported by a Scorpion, a Gauss Warthog, and a Mongoose. The humans and Sangheili fought through the cliffs to the area outside the Citadel, where the Covenant had set up lookout towers, Shade turrets, and ground vehicles. The Covenant attempted to reinforce their troops by a large amount of Banshees and Phantoms, but the UNSC air forces counterattacked with Hornets and Pelican gunships. The ground forces led by John-117 punched through the remaining Covenant armor on the mountainside. With the UNSC's arrival imminent, the Covenant deployed two final Scarabs, each commanded by a Jiralhanae War Chieftain, at the entrance to the Citadel, further supported by Prowlers, Ghosts, and Banshees. However, their efforts were in vain, and, with the Scarabs destroyed by John-117, any remaining Covenant stragglers were soon moped up by the UNSC.[3]
While the Flood began climbing up the Citadel's far wall, John-117 and Thel 'Vadam led a small attack force, including N'tho 'Sraom, Usze 'Taham, as well as a few Marines and Sangheili, into the Citadel.[36] Inside, the Prophet of Truth was giving a speech attempting to reassure his remaining followers, declaring that he was about to activate the Halo Array by forcing Johnson into interacting the control panel. Realizing that they had very little time left, John-117 and Thel 'Vadam hastily made their way to the elevator that would carry them to Truth's level, but the elevator's immense height meant that they would not be able to intervene in time.[3]
Johnson attempted to goad the Chieftain that was holding him into killing him, but Truth, realizing this, stopped the Chieftain. With John-117 and the Arbiter too far away to stop Truth, Commander Keyes took her Pelican dropship and crashed it directly into the facility in an attempt to rescue Johnson, but she was killed by Truth himself when she hesitated to kill Johnson and herself to deny Truth a means to activate the rings. Johnson, struck by grief and shock, was easily made to activate the Array. However, Keyes' actions delayed Truth long enough for John-117 and the Arbiter to stop him. The Gravemind dispatched a swarm of Pod infectors and Flood combat forms, led by two Flood tank forms, to assist the UNSC-Sangheili force in preventing the Halos' activation. They were met by the Jiralhanae Chieftain and his Unggoy, Kig-Yar and Jiralhanae.[3]
The defending Covenant forces quickly collapsed under the combined assault from the humans, Sangheili, and the Flood. With all Covenant in the Citadel eliminated, John-117 and 'Vadam reached the final room where they found Johnson cradling the dead body of Commander Miranda Keyes. 'Vadam confronted the Prophet of Truth, who was already partially infected by the Flood. 'Vadam allowed the Prophet to live long enough to see John-117 deactivate the rings, and 'Vadam personally killed Truth. With the Halo threat eliminated, the Gravemind betrayed the humans and the Sangheili, sending a large group of Flood combat forms and carrier forms after John-117 and Thel 'Vadam. The two attempted to escape on Keyes' Pelican, now piloted by Johnson, but they were knocked off by one of Gravemind's tentacles. With Johnson's Pelican spiraling out of the control, Johnson instructed the two to return to the elevator.[3]
With the assistance of Aggressor Sentinels, the pair fought their way back to the elevator, which had been disabled. Without another choice, the two dropped down a small shaft in the room. At the bottom, John-117 followed flickers of Cortana to a control panel, and, upon its activation, they found Installation 08 departing from the Ark's Foundry. Realizing this was Cortana's "solution" for the Flood, John-117 decided he needed to activate the ring at the Ark's isolated location, where the pulse would not destroy the sentient life in the Milky Way galaxy. 343 Guilty Spark concurred, that a tactical pulse would eliminate the Flood infestation on the Ark, and made his way to the ring to oversee the final preparations. However, this new Halo lacked an activation index. The only way they could get another index was to rescue Cortana from High Charity, since she still possessed the index from the original Installation 04.[3]
Master Chief's raid on High Charity[edit]
- Main article: Raid on High Charity
While Johnson, 'Vadam, and 'Vadum rounded up the UNSC and Sangheili survivors from the battle, John-117 took a Banshee and infiltrated the Flood-infested High Charity. The Spartan fought through swarms of Flood and successfully recovered Cortana, who indeed still held the activation index from Installation 04. Under Cortana's guidance, John-117 sabotaged the city's reactors, causing a series of explosions that crippled the Gravemind and destroyed High Charity. 'Vadam arrived shortly after, and the trio fled onboard a crashed Pelican.[4]
Finishing the fight[edit]
- Main article: Raid on Installation 08
- Rtas 'Vadum: "We are aboard, humans...and Elites. Will you not come with us, brother?"
- Thel 'Vadam: "No. This is our fight. And I will see it finished."
- — Thel 'Vadam wishing to finish the fight alongside John-117.[5]
With the index secured, Thel 'Vadam ordered Rtas 'Vadum to take the human and Sangheili survivors to leave the Ark, using the slipspace portal to Earth. 'Vadam accompanied John-117 and Cortana to the incomplete Halo. Sergeant Major Johnson piloted the UNSC Forward Unto Dawn, which was left behind for their escape, to a safe location near the control room, then drove a Warthog to the control room. The Gravemind, meanwhile, had begun to rebuild itself on the new ring, and sent Flood dispersal pods to stop the three interlopers. John-117, 'Vadam, and Johnson, with the assistance of local Sentinels, fought through the Flood and entered the Control Room. Inside, Spark explained that the new Halo would be ready to fire within days, to which the group, particularly Johnson, protested. When Guilty Spark informed the three that activating Halo now would destroy both the Ark and the installation, Johnson told him to "deal with it" and prepared to activate the ring.[5]
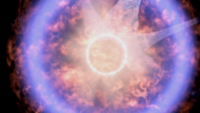
Unwilling to let "his" ring be destroyed again, 343 Guilty Spark attacked the trio. He mortally wounded Johnson, took down the Master Chief's shields, and blew 'Vadam out of the room. Spark cornered John-117, but with the help of Johnson and his Spartan Laser, John-117 defeated Guilty Spark and initiated the firing sequence of the new Halo. The incomplete Halo began ripping itself apart under the charging sequence. Fighting past the Flood and the Sentinels that have turned on them, John-117 and 'Vadam took Johnson's Warthog and rushed towards the Dawn as the incomplete Halo powered up and started breaking apart. The two drove their way through hordes of battling Flood and Sentinels. The two made it onto the Dawn's hangar bay, from where 'Vadam ran to the bridge while John-117 inserted Cortana into a holotank in the hangar bay, so she could activate the Dawn's engines. The Dawn left the ring just as it fired.[5] The firing sequence shook the ring into pieces and heavily damaged Installation 00. The Slipspace portal collapsed as the Dawn entered it, and while the forward half with 'Vadam made it to Earth, the rear half fell out of Slipspace at an unknown location, leaving John-117 and Cortana stranded in space.[14]
Aftermath[edit]
The Flood[edit]
On December 14, 2552, just three days after the battle and the ring's activation, 000 Tragic Solitude marshalled his Sentinels to construct a containment shield around the remains of High Charity's ruins, in fear that any few surviving Flood remnants would escape the crash site. Furthermore, he instructed his Sentinels to raze a perimeter, and the local refugia modified to ensure no nearby sentient life survived, thus depriving the Flood of any host bodies in close proximity.[37] By February 19, 2553, the Flood remnants were contained within the rubble of High Charity,[38] with a battalion of Sentinels patrolling in the vicinity of the shield to prevent both the Flood from escaping and future "invaders" from releasing them.[37]
However, their defenses were proven to be ineffective, with Banished forces, led by Jiralhanae Voridus, releasing the Flood from the ruins of High Charity and providing them with hosts to infect during the Second Ark Conflict on June 4, 2559.[39] This inadvertently caused a Flood outbreak onto the installation, leading to a desperate struggle between the Banished and the parasite. Ultimately, the Banished managed to destroy a Proto-Gravemind that was moments away from becoming a Gravemind and the Ark's Sentinels and the Banished managed to once again contain the Flood.[40]
The Covenant[edit]
- Main articles: Dhas Bhasvod's Covenant, Covenant remnants
Despite the death of Truth and the vast majority of his forces, as well as the ravaging of the Ark, a small sliver of the Jiralhanae loyalist forces remained inside the Anodyne Spirit which shielded them for the firing of Installation 08. The survivors guarded it for years using stocked supplies as well as Covenant-issued equipment[31] and had access to numerous Covenant vehicles.[41]
Although the Battle of Installation 00 marked the end of the Human-Covenant War, numerous new splinter factions from the Covenant were created in its wake. These factions ranged from pragmatic mercenaries to fanatical religious cultists.[42] These factions would come into conflict with each other, with notable conflicts like a war between the Sangheili and the Jiralhanae following the Great Schism, and numerous civil conflicts fought between the Swords of Sanghelios and various other Sangheili factions.[43]
UNSC Forward Unto Dawn[edit]
- Main article: Battle of Requiem
The Portal between Installation 00 and Earth collapsed while UNSC Forward Unto Dawn was still inside it. As a result, the ship was cut in half; the front arriving at Earth and the back half being lost in space. Thel 'Vadam, sitting on the bridge at the time, was part of the front half but, without any engines, soon crashed into the ocean, from where he was rescued by UNSC forces on Earth. John-117 and Cortana were in the rear half, and though they survived the Portal’s collapse, they were stranded in space and declared MIA. John-117 went into cryo-sleep while Cortana activated a distress beacon indicating their status.[14] After drifting in an unknown region of space for over four years until 2557,[44] the rear half of the Dawn was caught in the gravity well of a Forerunner shield world known as Requiem,[45] where they would come into conflict with Jul 'Mdama's Covenant.[45]
Legacy[edit]
Voi Memorial[edit]
- "For us, the storm has passed. The war is over. But let us never forget those who journeyed into the howling dark, and did not return. For their decision required courage beyond measure; sacrifice, and unshakable conviction that their fight, our fight, was elsewhere. As we start to rebuild, this hillside will remain barren. A memorial to heroes fallen. They ennobled all of us, and they shall not be forgotten."
- — Fleet Admiral Terrence Hood in the memorial ceremony[14]
A monument was made near the town of Voi, not far from the portal structure. It read, "In memory of those fallen in the defense of Earth and her Colonies. March 3, 2553." On it were photos of UNSC personnel who went through the portal but did not return; John-117 was honored with an etching of the number "117". With the exception of Thel 'Vadam, the Sangheili were not present at the dedication service, instead remaining aboard Shadow of Intent. After the ceremony, Lord Hood, despite being unable to forgive the Sangheili for what they did to humanity at the beginning of the war, shook 'Vadam's hand and thanked him for standing beside the Master Chief at the Ark. The Arbiter then joined Rtas 'Vadum on the bridge of Shadow of Intent, both agreeing to return to Sanghelios to ensure its safety. Thel 'Vadam was given command of the carrier and all Sangheili onboard departed for their homeworld.[14]
Installation 00[edit]
- Jerome-092: "Isabel, where did all this wreckage come from?"
- Isabel: "There was a battle here near the end of the war. The Master Chief saved us all."
- Jerome-092: "It's good to know John's still out there."
- — Isabel and Jerome-092 while fighting the Banished on Installation 00.[46]
The wreckage from the Battle of Installation 00 remained on the surface of the Ark.[46][39] Over two years later on March 20, 2555, during Operation: FAR STORM, Luther Mann and N'tho 'Sraom arrived at the Citadel to stop the Halos from firing. Scattered around the basin were the remains of human and Covenant vehicles left over from the battle, including the empty husks of the two Scarabs.[36] The firing of the Halo ring caused unprecedented damage to the Ark while sterilizing most of the Flood forces around and on the installation, including the Gravemind commanding the massing Flood amid the battle. Installation 00 was severely damaged,[14] and its monitor 000 Tragic Solitude, although inflicted with a state of rampancy from the ring's explosion, began repairing the installation.[47]
In March 2555, 000 Tragic Solitude sought revenge against humanity for damaging the Ark years prior. To do so, the ancilla placed the remaining Halos on a brief countdown to activation, prompting a joint UNSC-Swords of Sanghelios mission to the installation to stop the rings from firing. After Solitude's plan was thwarted, the UNSC established research facilities on the Ark.[48] The UNSC's research team was able to repair the Ark from the damage done in the battle by directing the Ark's Retriever Sentinels to mine lifeless systems for the needed materials for repairs.[49]
In September 2558, the Jiralhanae Chieftain Hekabe attempted to unleash the Sharquoi on the planet Carrow, having retrieved the Sharquoi control device, the vertex, from the Ark during the Battle of Installation 00. Hekabe's plan was narrowly foiled by Gray Team, Rojka 'Kasaan and elements of the Surakan Militia Volunteers.[6]
The Banished arrived on the fully-repaired Ark in November 2558, killing UNSC personnel across the installation. In March 2559, the crew of the newly arrived UNSC Spirit of Fire engaged the Banished with help from Isabel, the logistics AI of one of the UNSC research facilities.[46] Over the course of the battle, they would engage not only the Banished, but the few surviving Covenant forces under the command of Prelate Dhas Bhasvod allied with forces from the Keepers of the One Freedom.[41]
Participants[edit]
Gallery[edit]
Concept art of the space battle above Installation 00.
List of appearances[edit]
- Halo: First Strike
- Petra (Mentioned only)
- Halo 3 (First appearance)
- Halo Legends
- Halo: Evolutions
- The Return (Flashback only)
- From the Office of Dr. William Arthur Iqbal (Mentioned only)
- Halo: Broken Circle (Indirect mention)
- Halo: Hunters in the Dark (Mentioned only)
- Halo Mythos: A Guide to the Story of Halo (Mentioned only)
- Halo: Tales from Slipspace
- Dominion Splinter (Flashback only)
- Halo Wars 2 (Mentioned only)
- Halo: Envoy (Mentioned only)
- Halo: Legacy of Onyx (Indirect mention)
- Halo: Bad Blood (Mentioned only)
- Halo: Shadows of Reach (Indirect mention)
- Sacrifice (Mentioned only)
- Halo: Divine Wind (Mentioned only)
- Halo Infinite (Indirect mention)
- Halo: Outcasts (Indirect mention)
- Halo: Empty Throne (Mentioned only)
- Halo: Fifth Canticle
Notes[edit]
- ^ a b c See Truth's fleet's Notes section regarding the size of Truth's fleet and the joint UNSC-Sangheili combined fleet.
- ^ a b See here.
- ^ The Charon-class light cruiser UNSC Aegis Fate can be seen in the skybox of the Halo 3 map Sandtrap, which is confirmed to be set on Installation 00 (Bungie's Sandtrap postmortem states that the Sandtrap takes place on "Waypoint," which was the in-development name for Installation 00). However, it is unknown if the map is set during the Battle of Installation 00 or at some later date following the UNSC's return to the installation in 2555. As such, it cannot be stated with reasonable certainty that the Aegis Fate was present for the battle. Additionally, while it is possible that other Charon-class light frigates from Battle Group Victory accompanied the UNSC Forward Unto Dawn to Installation 00, the Forward Unto Dawn is the only UNSC vessel depicted or described to have joined the Fleet of Retribution for the journey and ensuing battle.
- ^ Although present during the Battle of Installation 00, it did not participate in the space battle over Installation 00 as it landed in "Mahsko," a region of the Ark.
Sources[edit]
- ^ a b c d e f g h i j k l m n o p q r s t u v w x y z aa ab ac ad ae af ag ah ai aj ak al am an ao ap aq ar as at au av aw ax ay az ba bb bc bd be bf bg bh bi bj bk Halo 3, campaign level The Ark
- ^ a b Halo Waypoint, Hero-Fortitude (Retrieved on May 9, 2012) [archive]
- ^ a b c d e f g h i j k l m n o p q r s t u v w x y Halo 3, campaign level The Covenant
- ^ a b c d Halo 3, campaign level Cortana
- ^ a b c d e f g Halo 3, campaign level Halo
- ^ a b c d e f Halo: Envoy
- ^ a b c d Halo Legendary Crate - Data Drop #5: Apollo Leader To CDR S. Palmer
- ^ Halo Wars 2, multiplayer map Ashes
- ^ Halo Wars 2, Phoenix Logs: Ashes
- ^ a b c Halo 3, campaign level Floodgate
- ^ Halo: Warfleet, page 48
- ^ a b Halo Encyclopedia (2009 edition), page 57
- ^ Halo Encyclopedia (2011 edition), page 29
- ^ a b c d e f Halo 3, campaign level Epilogue
- ^ Halo: Evolutions - The Return
- ^ Halo Wars 2
- ^ Halo: Combat Evolved, campaign level Assault on the Control Room
- ^ Halo: Combat Evolved, campaign level Two Betrayals
- ^ Halo 2, campaign level High Charity
- ^ Halo: Evolutions - Human Weakness
- ^ Halo 2, campaign level Gravemind
- ^ a b Halo 2, campaign level The Great Journey
- ^ Halo 3, campaign level Crow's Nest: "The Prophet of Truth's ships breached the Lunar perimeter. Smashed what was left of the Home Fleet." - Miranda Keyes
- ^ Halo Waypoint - Ten Twenty
- ^ Halo 3, campaign level The Storm
- ^ Halo 3, multiplayer map Heretic
- ^ Halo 3, campaign level The Ark: "Their cruisers mixed with ours! Watch your fire!" - Jiralhanae Commander
- ^ Halo 3, campaign level The Ark: "Let the Elites handle those cruisers!" - Miranda Keyes
- ^ Halo 3, campaign level The Ark: "Stay away from those cruisers!" - Rtas 'Vadum
- ^ Halo 3, campaign level The Ark: "Understood. Engage those Seraphs!" - Miranda Keyes
- ^ a b c d Halo: Shadows of Reach - Adjunct: Sacrifice
- ^ Halo Mythos, page 122
- ^ Halo: The Thursday War, ?
- ^ Halo Waypoint, Canon Fodder - Brute Force (Retrieved on Oct 11, 2021) [archive]
- ^ Halo: Hunters in the Dark, ?
- ^ a b Halo: Hunters in the Dark, ?
- ^ a b Halo Wars 2, Phoenix Log – "Idle Hands II"
- ^ Halo Wars 2, Phoenix Log – "An Uncomfortable Truth I"
- ^ a b Halo Wars 2 - Awakening the Nightmare, campaign level What Could Go Wrong?
- ^ Halo Wars 2 - Awakening the Nightmare, campaign level Manifestation
- ^ a b Halo: Divine Wind, chapter 2
- ^ Halo: Escalation, issue 5
- ^ Halo Waypoint, Universe - Locations - Sanghelios (Retrieved on Oct 20, 2021) [archive]
- ^ Halo 4, campaign level Dawn
- ^ a b Halo 4, campaign level Requiem
- ^ a b c Halo Wars 2, campaign level A New Enemy
- ^ Halo Mythos, page 154-155
- ^ Halo: Hunters in the Dark, ?
- ^ Halo Wars 2, Phoenix Logs - "The Healing of Old Wounds"
- ^ Halo: The Essential Visual Guide, page 124
- ^ a b bungie.net, The Tru7h About Co-Op in Halo 3 (Retrieved on Nov 14, 2014) [archive]
|
| |||||
| ||||||||||||||||||||||||||
