Battle of Installation 04
From Halopedia, the Halo wiki
|
Previous: |
|||||||||||||||||||||||||||||||||||||
|
Concurrent: |
|||||||||||||||||||||||||||||||||||||
|
Next: |
|||||||||||||||||||||||||||||||||||||
| Battle of Installation 04 | |||||||||||||||||||||||||||||||||||||
|---|---|---|---|---|---|---|---|---|---|---|---|---|---|---|---|---|---|---|---|---|---|---|---|---|---|---|---|---|---|---|---|---|---|---|---|---|---|
| |||||||||||||||||||||||||||||||||||||
|
Conflict: |
|||||||||||||||||||||||||||||||||||||
|
Date: |
|||||||||||||||||||||||||||||||||||||
|
Location: |
|||||||||||||||||||||||||||||||||||||
|
Outcome: |
UNSC victory
| ||||||||||||||||||||||||||||||||||||
| |||||||||||||||||||||||||||||||||||||
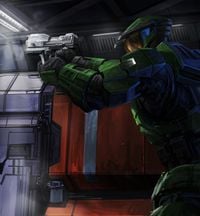
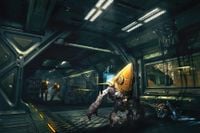
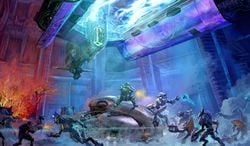
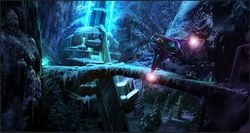
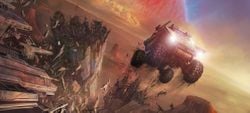
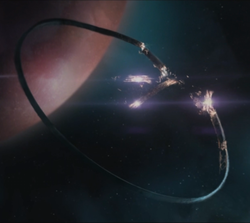
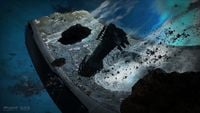
The Battle of Installation 04[6] refers to a series of skirmishes between the United Nations Space Command and the Covenant on the surface of Halo Installation 04, a Forerunner megastructure orbiting the gas giant Threshold. The Flood and the Forerunner Sentinels joined the conflict in its later stages. The battle became the turning point of the Human-Covenant War and ultimately led to the Great Schism.
The battles at Installation 04 have also been called the Halo Event,[7][8] Alpha Halo Conflict[9] and the Halo Conflict.[2][3][10][11]
Background[edit]
Operation: RED FLAG[edit]
- Main article: Operation: RED FLAG
In the later stages of the Human-Covenant War, it was clear that the UNSC was losing. To try and force an end to the conflict, the Office of Naval Intelligence devised Operation: RED FLAG. Using the fortress world of Reach as bait, the operation would use a specially-modified ship to forcibly board a Covenant capital ship, steal it, capture a Hierarch and use the hostage as negotiating leverage to end the war.[citation needed]
To undertake this task, the old Halcyon-class light cruiser UNSC Pillar of Autumn was chosen and given an extensive series of refits to improve its combat potential against Covenant ships. The plan would additionally call for the use of all remaining active-duty SPARTAN-II personnel and a "mission specialist" AI. Additionally, a battalion of Orbital Drop Shock Troopers commanded by Major Antonio Silva were assigned to the vessel for additional support.[12] Following his performance at the Battle of Sigma Octanus IV, Captain Jacob Keyes was chosen to lead the mission.[citation needed]
The Fall of Reach[edit]
- Main article: Fall of Reach
Ultimately, RED FLAG never went ahead due to the UNSC's disastrous defeat at Reach. During the battle on August 30, the majority of the ship's SPARTAN-II complement was deployed groundside to defend the orbital defense generators, with Spartans John-117, Linda-058 and James-005 deployed to Gamma Station to execute the Cole Protocol on the ONI vessel UNSC Circumference. In the engagement, James was seemingly killed and Linda severely injured. Additionally, Staff Sergeant Avery Johnson and Fire Team Charlie assisted the Spartan team and eventually evacuated back to the Pillar of Autumn. With Linda clinically dead, she was placed into a cryo chamber with the hopes of reviving her later. With this, John-117 remained the only operational Spartan left on the Pillar of Autumn when it finally escaped Reach.[citation needed]
With the loss of a third of her technical staff, the Pillar of Autumn made an apparently blind jump through slipspace from where they would then make their way to Earth. In reality, the slipspace jump was planned by the AI Cortana, using coordinates from an artifact found on Sigma Octanus IV as well as from an object found under the Babd Catha Ice Shelf on Reach.[13][14] The Pillar of Autumn departed from the Asźod ship breaking yards on August 30, 2552, and entered slipspace above Reach while the Covenant fleet continued to wreak destruction on the planet.[15]
The Covenant, primarily the Fleet of Particular Justice led by Supreme Commander Thel 'Vadamee had acquired the trajectory of the Autumn's jump and pursued,[5] arriving before the Autumn due to their faster slipspace drive technology.[16] Following the battle, some UNSC AIs would incorrectly suggest that the Covenant did not follow the Autumn to Halo, but had in -fact already discovered the ring, and wanted to prevent the humans from finding it too.[17]
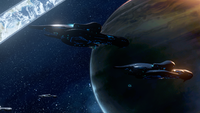
The Autumn and the approximately 1,100 humans on it arrived in orbit above the planet Threshold at 01:20 hours on September 19, 2552.[18] At some point after this time, Captain Keyes made a transmission that would later be picked up by NAVCOM.[19] By this time, at least twelve Covenant vessels were already in station, with four battlegroups consisting of three Ket-pattern battlecruisers per group, the destroyer Blameless Conceit, the Mjern-pattern agricultural support ship Infinite Succor, the Ruma-pattern light carrier Ascendant Justice and the CAS-class assault carrier Seeker of Truth. The Covenant additionally established a series of recon pickets around the ring's orbit, which were promptly engaged by the Autumn's GA-TL1 Longsword escort.[16]
Battle in space[edit]
Assault on the Autumn[edit]
- Main article: Battle Over Installation 04
Following their arrival in the system, The Fleet of Particular justice established a presence on the far side of the ringworld and sent out a number of recon picket fighter squadrons to intercept the Pillar of Autumn. Due to the ongoing squabbles between the Supreme Commander Thel 'Vadamee and Minor Prophet of Stewardship, Covenant forces were initially ordered to send out fightercraft and boarding craft containing boarding parties to the human cruiser for fear of damaging the ring, though 'Vadamee later returned fire anyway.[5] The UNSC cruiser's Longsword escort mopped up the initial recon pickets,[16] though eventually a Seraph was able to slip its way through the defenses and land a blow across the Autumn's Titanium-A armor that those on the bridge could feel. The small craft had evidently managed to slip past their patrolling Longswords by powering down. Lieutenant Aki Hikowa sent new orders to the squadron and the Seraph was destroyed almost immediately. Just as Captain Keyes plotted a course to bring his ship closer to the gas giant, sensors picked up the approaching squadron of Covenant fighters, followed by boarding craft. Installation 04, a massive ring-shaped superstructure, made its first appearance to those on the Autumn as the ship came around the planet and found it suspended at a lagrange point between it and its moon.[20]
While the Covenant fleet was initially hesistant to open fire on the Autumn, the humans had no such qualms and Cortana was able to estimate three or four kills on Covenant ships before the Autumn could be taken out.[16] The Truth and Reconciliation was one such vessel, forced to retreat to ground to make repairs, later becoming the new HQ for the Covenant ground forces. Meanwhile, the Pillar of Autumn was sent wave after wave of Banshees, Morsam-pattern Seraphs[21] and Brhi Xur-pattern Leech boarding craft[16] to force the humans out of their shell.[20]
As Covenant forces began boarding the Autumn, Captain Jacob Keyes ordered Tech Chief Thom Shephard and Petty Officer Third Class Samuel Marcus to release Master Chief Petty Officer John-117 from his cryo-chamber. Both officers were killed by Covenant invasion forces while preparing the SPARTAN-II for immediate combat. Shortly thereafter, the Autumn's Magnetic Accelerator Cannon was sabotaged by the Covenant boarding teams and rendered inoperable.[16][20]
During the battle, installation Monitor 343 Guilty Spark prepared the defensive Confidence-class weapon array, preparing to fire on all vessels who did not return to a minimum one light-year safe distance. Unfortunately, the Pillar of Autumn was not able to receive this transmission. Luckily, the Monitor accessed the ship's databases and upon learning of the humans' status as reclaimers, took the weapons offline and granted them safe passage onto the ring.[22]
Evacuating ship[edit]
- "I'm initiating Cole Protocol, Article Two. We're abandoning the Autumn."
- — Captain Jacob Keyes to Cortana.[16][20]
Given the loss of their magnetic accelerator cannon, Captain Keyes made the decision to initiate Article Two of the Cole Protocol.[16][20] He made the determination that it had become necessary to abandon the cruiser, and in accordance with the protocol, that meant someone would need to be entrusted with the protection of Cortana during the retreat. The captain planned to stay behind to attempt put the ship down himself on the surface of the ring. Cortana protested what she saw as a suicidal decision on Keyes' part, but he simply ordered that she locked in a selection of emergency landing zones and upload them to his neural lace. As for guardianship of the A.I., the job naturally fell to the Master Chief. Her data crystal chip was transferred from a pedestal on the Autumn's bridge to the housing within the Spartan's MJOLNIR armor. Keyes offered his own M6D magnum to John and wished him good luck just before the Spartan took his leave.[16][20] John would bring Keyes' magnum with him to the surface of Halo.[23]
By the time John, with Cortana now in tow, left the bridge, the Covenant boarders had pushed beyond the areas adjacent to the airlocks they had entered by and had encroached toward the ship's command deck. A wave had been repulsed by the Autumn's defenders, but it had come close to reaching the bridge. Ammunition for the captain's sidearm was provided in the form of that which John collected from a fallen ensign. The first to fall to its 12.7x40mm M225 Semi-Armor-Piercing High-Explosive rounds was a group of Unggoy.[16][20]
Now armed with an MA5B assault rifle, John fought his way through the Covenant infesting the ship's corridors in the direction that Cortana led him. He traveled up one level, felling Unggoy, Kig-Yar, and Sangheili as he went. His efforts enabled marines around him to launch a hastily organized counterattack on the boarders. All the while, the Autumn continued to take hits from enemy vessels. Cortana urged the Master Chief to hurry as lifeboats began to launch for the safety of solid ground.[20]
As fighting within the ship raged on, a small detachment of Unggoy led by one known as Yayap found a way to avoid the violence. Yayap directed those in his charge to take hold of a wounded Special Operations Sangheili and bring him safely back to one of the assault boat they had come in on.[20]
The Orbital Drop Shock Troopers aboard had been charged with protecting the network of fusion engines that made up the Pillar of Autumn's experimental power plant. Under the command of Major Antonio Silva, the ODSTs had managed to hold their position successfully. Once he finally got orders from Captain Keyes that they were abandoning ship, he ordered them to the SOEIVs that would carry them to the alien ringworld below.[20] Only Fireteam Raven, having been separated from the others, did not launch with Silva and the rest.[21] Raven instead fought against boarders on the ship to repel the invasion, under the guidance of the AI Wellsley. During the fighting, the ODSTs conducted an space-walk to man the Pillar of Autumn's M910 Rampart point defense network to fend off incoming waves of space Banshees and Seraph starfighters.[21] The fireteam were eventually forced to retreat back into the ship, however.
Finally nearing the lifeboats, John-117 paused long enough to grab a marine who fell while running for the safety one offered.The Master Chief effortlessly scooped up the man and tossed him inside the Bumblebee designated Lima Foxtrot Alpha 43. He confirmed to the escape lifepod's pilot that they could leave and it blasted free of the ship.[16][20] Fireteam Raven witnessed the Chief and a few others escaping but did not join them, instead remaining behind to continue engaging the enemy on the way to their SOEIVs. Wellsley contacted them at this moment and urged speed on its members' part. The team fought through many Covenant troops in order to make it to the drop pods and get off the doomed ship.[21]Among those escaping was Flight Officer Captain Carol Rawley, who, alongside four other pilots, fought her way to the ship's launch bay where its D77 Pelicans lay waiting. The Pilots were successfully able to maneuver their craft out of the cruiser's hangar bays as the ship began to enter the ring's atmosphere and were eventually able to put down on the surface.[20] The surviving dropships later played a crucial part in the UNSC campaign on the ring.

The Minor Prophet of Stewardship had additionally ordered the deployment of an Ossoona, Isna 'Nosolee, onto the cruiser. Armed with six plasma grenades and a plasma pistol and cloaked in active camoflage, the Sangheili was to use his helmet-mounted cameras to record the ship for intelligence purposes and try to capture the ship's AI or essential bridge crew. Hidden from plain sight, he avoided direct confrontation when a group of marines backed around a corner toward him, pursued by a pack of Unggoy and Kig-Yar. The Ossoona made his way to the bridge, where he was able to successfully evade being noticed by the humans.[20]
To avoid its evacuating personnel from being shot down by the Covenant warships, Captain Keyes piloted the Autumn manually, diverting all Covenant attention to the ship as it plummeted towards the Forerunner construct. As the ship was shot down by Covenant warships, most of the cryo-chambers, including Linda-058's, were ejected as per standard UNSC procedure.[24] Once the Autumn was set on the course, Keyes and the bridge crew would make for their own escape pods followed by 'Nosolee. Although the Sangheili was able to prevent detection, he eventually died at the hand of Keyes inside the escape pod, the captain having noticed the distinct shimmer in the air of the elite's active camouflage systems.[20]
UNSC ground campaign[edit]
Capture of Alpha Base[edit]
- Main article: Capture of Alpha Base
The ODSTs battalion under Major Silva made landing on the ring via orbital insertion, in an area roughly three kilometers in diameter. They were quick to organize, meeting up with Silva and Lt. McKay to establish a temporary base of operations. Relying on data provided the AI Wellsley, Silva instructed Lieutenant Melissa McKay to take the battalion's B Company and capture a Covenant-held butte to gain a tactical advantage in fighting off Covenant forces. The group had also received word of a group of Pelican pilots who had landed their craft some distance away, and C Company was sent to meet them and prepare for aerial insertion to reinforce McKay. The remaining A Company and D Company remained under the command of Silva directly, and took some time to reinforce their temporary foothold and get some rest. This peace would not last long as the temporary base of operations was assaulted by Covenant ground forces consisting of 50 Sangheili, 100 Karo'etba-pattern Ghosts and, later, Type-26 Banshees. The defending ODSTs managed to fend off the assault but suffered a loss of 23 ODSTs killed and 16 ODSTs wounded.[23]
Around the time of the Covenant attack, McKay's force engaged the Covenant at the butte and began a slow climb up to the base proper. In the assault, the ODSTs advanced into the butte using a spiraling ramp. Covenant forces responded to this advancement by raining down plasma grenades and unleashing volleys of plasma bolts. The Covenant defense was soon relaxed when a number of ODST companies performed aerial assaults on the defending Covenant forces. McKay's advancement into the butte was halted by a rockfall. Fortunately, McKay managed to find an access into the butte which led to a chamber filled with Covenant explosives. The lieutenant fired a rocket into the chamber, subsequently killing any Covenant force, and led her ODSTs on a lift up to the surface, where they met Major Silva who had arrived and eliminated the remaining Covenant forces.[23][25]
Capture of the captain[edit]
- Main article: Capturing the command crew
Following the death of the Covenant spy, the rest of the command shuttle's ride down onto the surface of Installation 04 was uneventful, with the crew disposing of 'Nosolee's body in a nearby crevice once landed. The group would proceed to be harassed and pursued by Covenant Banshees, Spirit dropships and infantry through the rugged terrain, never able to rest for more than a few minutes. After hours of this treatment, Ensign Ellen Dowski began to crack, and seriously suggest giving up and allow themselves to be taken prisoner. To prevent her from being a burden on the group any longer, she was allowed to do so - but only after she was relieved of her firearm, supplies and left tied up for the Covenant to find.[25]
As the day wore on, the remaining group would eventually find themselves in a box canyon, with a Spirit looming overhead. Realising they were finally trapped, the group put down their weapons only to find Dowski emerge from the Covenant dropship with a squad of Sangheili warriors. She identified the Captain, leading to the aliens executing all of the other humans before finally using Dowski's own pistol to kill her - leaving Keyes the only survivor. Keyes was then taken by the Sangheili back to the Truth and Reconciliation and interrogated for hours.[25][26]
Rescue of stranded survivors[edit]
- Main article: Rescuing the survivors
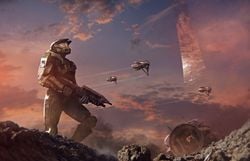
In a state of disarray, several evacuating UNSC personnel eventually landed on the Forerunner construct. Some were killed in the landing while others attempted to get hold of one another and survive the Covenant patrols.
After crash-landing on the Forerunner construct, John-117, the sole survivor of Lima Foxtrot Alpha 43's crash-landing, headed out to get away from Covenant patrols and, under the instructions provided by Cortana, attempted to establish some contact with any surviving human personnel. After evading several patrols and a brief skirmish with a small Covenant lance, John-117 managed to find a group of survivors defending themselves against the aggressive Covenant forces in a Forerunner structure. John established contact with Staff Sergeant Johnson and the survivors and assisted them in eliminating and defeating the Covenant forces, later reinforced by three waves. Foe Hammer of Echo 419 soon arrived to retrieve the survivors after the elimination of Covenant forces. Witnessing three lifepods flying overhead, Cortana instructed Foe Hammer to disengage her Warthog to support the Spartan's efforts in retrieving and securing the survivors. Two Marines assisted the Spartan in the rescue efforts.[27] At some point, John would find a Terminal and record its data.[28][29] Around this time, 343 Guilty Spark would begin using the terminals to show the history of the ring.[30][Note 1]
After successfully rescuing the survivors from all three lifepods, Cortana informed everyone of her findings after hacking into the Covenant battlenet; Captain Keyes and a number of personnel survived the landing on the Installation, but have been captured by Covenant forces. The survivors eventually returned to Alpha Base to devise a rescue plan for the Captain.[23][27]
Not all of the troops, however, were able to make landfall and regroup swiftly, with at least one known group able to make landfall in a forested region of the ring overlooking a large Forerunner relay structure and forming a staging area there. Unfortunately, they were soon wiped out by the Covenant.[31][32][33][34] Another group of ODSTs were able to land on the ring near a Beacon tower tower, holding off the Covenant until rescue finally came.[32][34][35] Fireteam Raven were able to make landfall on the ring, separated from other UNSC forces. Under the guidance of Wellsley through a mobile communication link, they made their way across the installation's surface.[1]
At least three UNSC Marines would later be captured by the Covenant and taken to the Truth and Reconciliation, locked in the same brig as Captain Keyes.[36]
Rescue on the Truth and Reconciliation[edit]
- Main article: Raid on the Truth and Reconciliation
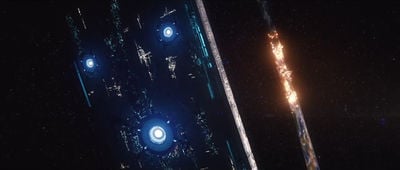
The surviving human personnel launched a mission to recover Captain Keyes, who was being held aboard the Ket-pattern battlecruiser Truth and Reconciliation. Under the cover of night, John-117 and a fireteam of ODSTs boarded the ship via its gravity lift.[37] After several brief engagements aboard the ship, the rescue team managed to establish a secure control of the ship's command center. John-117 went ahead and freed Captain Keyes and several other captured Marines. When they returned to the command center, they found out that the ODSTs had been slaughtered by Stealth Sangheili. Furthermore, Echo 419 was unable to retrieve the rescue party due to Covenant air patrols. Following Cortana's suggestion, Captain Keyes manned a Covenant dropship and returned everyone to Alpha Base.[36]
Raiding the Pillar of Autumn[edit]
- Main article: Raid on the Pillar of Autumn
While Covenant forces were distracted by the ongoing battle at the Truth and Reconciliation, ODST Lieutenant McKay was ordered to stage a raid on the crashed Pillar of Autumn, in order to gain extra supplies to finance the battle effort. The raid was successful; the UNSC forces managed to salvage several of the ship's Warthogs, trailers and four Scorpion tanks along with food supplies and ammunitions. However, when returning the salvaged vehicles to Alpha Base, the convoy was ambushed by Covenant forces led by Noga 'Putumee using Wraiths, Banshees and Ghosts. Despite sizeable Covenant opposition, the UNSC forces managed to withhold the ambush and inflict greater damage on the Covenant forces. During the raid, Fireteam Raven was able to link up with friendly UNSC forces for the first time since landing on the ring twenty-eight hours earlier, and contributed to the raid by manning the mounted machine guns on the convoy's Warthogs.[38]
Battle of the Silent Cartographer[edit]
- Main article: Battle of the Silent Cartographer
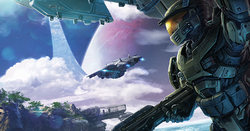
Using the intelligence gathered by Captain Keyes and Cortana, the human forces amassed a squadron for an assault on the Silent Cartographer island, in their attempt to uncover more information of the Installation. John-117 and a handful of Marines, supported by Echo 419 and Bravo 022, penetrated the Covenant defenses, journeyed deep within the island's chambers and access-ways, and discovered the location of the Installation's control room.[39]
Events leading to the discovery was not easy; the Covenant managed to temporarily lock access to the chambers within the island, prompting John-117 and the Marines to navigate to the island's security chamber. As they deactivated the security, Bravo 22 and its payload fell prey to Covenant fire.[39][40]
Assault on the Control Room[edit]

- Main article: Assault on the Control Room (conflict)
After the Battle of the Silent Cartographer, Cortana instructed Foe Hammer to deploy them using navigations she gathered from the discovery of the control room. Alone, John-117 was inserted into a network of tunnels occupied by Covenant forces. The Spartan then received a radio transmission from Fireteam Zulu, who were pinned down in a valley, as he fought his way through the network of tunnels. John-117 assisted Fireteam Zulu in eliminating local Covenant forces and their armor support, then journeyed through a system of adjacent canyons until reaching a dead end, where Fireteam Zulu requested to be evacuated.[41]
John-117, with Cortana providing guidance, eventually discovered a large pyramidal structure built into a cliff, on top of which was the control room. Upon reaching the chamber, Cortana accessed the Installation's systems and discovered a terrible secret quarantined within the Installation. Fearing for Captain Keyes' safety, she instructed Foe Hammer to take John-117 to head to his last known location.[42]
The Flood escapes[edit]
- Main article: Outbreak at the Containment Facility
At the same time of the Battle of the Silent Cartographer, Captain Keyes, supported by 2nd Squad and Pelican dropship Victor 933, devised a plan to infiltrate a presumed weapon cache within a swamp, as per intelligence gathered from a captured Sangheili.[citation needed] They later met up with Fire Team Charlie, led by Staff Sergeant Johnson, which had proceeded to the structure and engaged the few scattered Covenant forces they encountered in the upper levels of the facility.[43]
While exploring the lower levels, the UNSC forces came across a sealed door, locked down by the Covenant. With increasing curiosity, the UNSC unlocked the door and explored the containment room. Shortly after, Fire Team Charlie was contacted by a desperate Marine requesting help as he was overwhelmed by non-Covenant hostiles. Seconds later, the fireteam was attacked by a swarm of Pod infectors, infecting Captain Keyes, Privates Riley, Kappus, Mendoza, Jenkins, Bisenti and several others. Two Marines managed to avoid the infection, one of whom was killed just outside and another who escaped by playing dead.[43] Staff Sergeant Johnson shrugged off the Pod infectors due to his SPARTAN-I enhancements and managed to escape the facility.[44]
Three hours after the assault on the Control Room, John-117 arrived near Victor 933's crash site via Echo 419. His travel towards Captain Keyes' last known transmission was met with an abnormally small concentration of Covenant forces, which was easily handled. Upon unlocking the door to the Containment Room, he found Private Jenkins' helmet and accessed its video records. Shortly after, John-117 was attacked by the remaining Flood forms that spewed out of nearby chambers. The Spartan quickly proceeded to escape the facility, combating Pod infectors and Combat forms. He soon caught up with Corporal Lovik's squad, who were advised by Echo 419 to take refuge at a nearby structure.[43]
The survivors fought their way through the swamp in search of the structure for immediate evacuation. On the site, the survivors were aided by unknown constructs later identified as the Sentinels, under the command of the Installation's Monitor, 343 Guilty Spark. The Monitor teleported the Spartan into the Library, leaving the other survivors to be evacuated by Echo 419.[43]
The Library[edit]
After discovering a Reclaimer was within reach, 343 Guilty Spark, without hesitation, teleported John-117 into the Library, where he was tasked with the retrieval of the Activation Index. Proceeding into the bowels of the huge structure, the SPARTAN fought off wave after wave of Flood, before the Monitor called in Sentinels to assist him. Upon reaching the central shaft of the Library, John-117 rode another elevator down to the Index to deactivate the security protocols around it. 343 Guilty Spark then took over his role and stored the Index within himself.[45]
Covenant fleet unrest[edit]
Following the arrival of the Autumn in the system, the Fleet of Particular Justice experienced a great amount of unrest, due to conflicting leadership between the Supreme Commander Thel 'Vadamee and the Minor Prophet of Stewardship. The two initially met aboard the flagship Seeker of Truth to contact High Charity and ascertain how to proceed with interpreting Covenant holy scripture. High Charity was unavailable, and the Prophet departed again for Ascendant Justice, declaring that no Covenant ships were to open fire for fear of damaging the holy ring, instead ordering a boarding action to take place.[10] Thel would disregard this order and open fire aggressively.[5][16]
What would follow was a great deal of bickering and arguing between the two commanders, with the Prophet appropriating fleet military resources for his own personal goals. He would secretly order the Undiminished Entelechy and sister ship Purity of Spirit to perform close-range surveys of the ring.[46] The Prophet would later order an expeditionary force led by Sesa 'Refumee and Loka 'Bandolee to investigate the Threshold gas mines, leading to 'Vadamee ordering all military forces be concentrated on the human threat. The Prophet would ignore this decree, and order secondary and tertiary artifact recovery groups to investigate the Flood containment facility, believed a weapons cache. The two groups fell silent, leading a fourth group to be dispatched. 'Vadamee would once again order a cease and desist of these actions, with no response given by the Prophet. The Supreme Commander would then dispatch an infantry unit to Ascendant Justice to relieve the Prophet of command, leading to the boarding party being shot down and 'Vadamee warned that repeated actions would result in further lethality.[5]
The Last Voyage of the Infinite Succor[edit]
- Main article: Skirmish on Infinite Succor
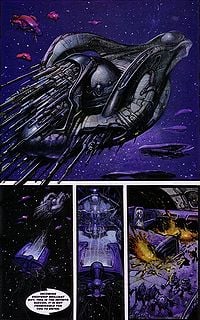
Covenant forces around the Flood containment facility were in disarray due to the release of the Flood. Several dropships were shot down with some captured by the Flood. One particular dropship, the Brilliant Gift, was manned by the Flood towards the Covenant fleet currently hovering over the Installation. The dropship eventually crash-landed on the Mjern-pattern agricultural support ship Infinite Succor and infected its personnel, unbeknownst to those around the Infinite Succor. Supreme Commander Thel 'Vadamee responded by deploying a Special Operations unit led by Special Operations Commander Rtas 'Vadumee. The Special Operations unit engaged with its invading aggressor, eventually leaving the injured 'Vadumee as the only survivor of the engagement.[47]
The presence of the Flood and its potential of being space-borne was reported to Supreme Commander 'Vadamee, who would proceed to order an emergency quarantine response for the fleet, ordering all vessels evacuate the ring[48] and to report a full biometric scan of their crew, and for uninfected vessels to fire on those who did not respond.[5] The Undiminished Entelechy would be among those infected by the Flood and shot down by 'Vadamee, crash-landing on the ring. The ring's environmental control systems would quickly accelerate plant growth on the wreckage in the short time the wreckage remained intact.[46]
With the failure of the Covenant forces on the ground to control the Flood outbreak, the Minor Prophet would order the execution of Soha 'Rolamee, and proceed to move himself and his security contingent to Truth and Reconciliation, ordering the crew to police the ship and detain anyone who would threaten the consecration, even the Supreme Commander.[5] The Prophet presented 'Rolamee's severed head to Zuka 'Zamamee as a warning against repeated failures like the failure of 'Rolamee to contain the Flood, or Zuka to kill the Master Chief.[49] 'Vadamee would later proceed to personally lead a team to take control of Ascendant Justice, taking the ship without firing a shot.[5]
As the Flood continued to spread, the Covenant battlenet would fall into chaos.[48] Jiralhanae troops assigned to the fleet relayed several accounts of the ground actions to the fleet, but these accounts were later considered unreliable due to panic, confusion and excuse for failure.[50] The fleet also deployed Kig-Yar Sniper teams armed with T-50α beam rifles during the Flood onslaught.[51][52]
Late stages of conflict[edit]
Battle of Alpha Base[edit]
- Main article: Battle of Alpha Base
In the early hours of September 21, the Covenant returned to assault Alpha Base, initiated by an air insertion and then followed by a ground advancement. Using a captured Pelican dropship and its captured pilot, the Covenant attempted to insert 30 Special Operations Sangheili, led by Special Operations Officer Zuka 'Zamamee to assassinate the apparently absent Spartan and clear a landing zone for six Spirit dropships for immediate evacuation. The officer had been successfully able to convince the prophet to allow the attack, aiming to kill the Spartan before he could cause the Covenant any more trouble.[49]
The air insertion was quickly discovered by the human forces on Alpha Base, who flooded the Pelican dropship with jet fuel before igniting it, killing twenty-four Sangheili. The six Sangheili managed to escape into the base, neutralizing the human control rooms and liberated the captured Covenant soldiers. However, the MLA auto-cannons and various other defense systems employed by the human forces managed to destroy several incoming Spirit dropships. A large amount of Covenant troops were able to make it into the base, however, including Hunters and Grunts, thanks to the deployment of the Kmiro'sish-pattern Lich Upright Chalice.[1][53] The Covenant forces landing on the butte were soon either killed or captured, and the assault on Alpha Base stalled. During the midst of the fighting, Fireteam Raven were recalled to the ice canyons near the Installation's control room to assist John-117 in fighting a new threat near the Installation's Control Room.[1][53]
The ground assault, led by Field Master Noga 'Putumee, made significant progress against the humans due to their use of Spirit dropships to clear the way ahead of the ground forces. However, the seeming route was designed to lure the Covenant into the firing range of a pair of concealed Scorpion tanks, which then tore into the ranks of the aliens and inflicted major casualties. Field Master 'Putumee was killed by the third shot from the tanks, throwing the Covenant forces into chaos - of the 150 infantry with him, only a few survived to retreat. Meanwhile, the surviving Covenant Special Operations team from the air insertion phase and the freed Covenant troops ran into an ambush devised by the Marines, in which all members of both sides were killed other than Zuka 'Zamamee and Yayap, both of whom fled in a recaptured Banshee. By this time, however, the Covenant ground assault was in full retreat.[54]
Battle for the Control Room[edit]
Following the Master Chief and Fireteam Zulu's capture of the control room, the Covenant returned in force to retake the structure and heavily fortified the ice canyons surrounding the region, with numerous Banshee air patrols and heavy vehicles. However, they were unable to breach the facility and were locked out. The Flood began to pour into the region to combat the Covenant and Sentinels there, likely intending to take the control room offline and prevent the activation of the ring. By the time 343 Guilty Spark was able to teleport the Spartan back to the control room to prepare for firing, the Flood and Covenant were heavily entrenched.[55]
As the two prepared to activate Halo, Cortana stopped the firing - having discovered the Installation's true purpose after extended time inside the control room's systems. The UNSC AI then revealed the installation's true purpose to the SPARTAN; destroy all life in the galaxy to starve the Flood of its food source. 343 Guilty Spark, unable to purge Cortana from the installation's system due to her having merged with the Index, instructed his Sentinels to eliminate the Spartan and retrieve the UNSC AI from the Spartan's helmet.[55]
John-117, after destroying the Sentinels and eliminating the patrolling Covenant forces, followed Cortana's instructions to destroy the three Phase Pulse Generators to delay the firing process, should the Monitor manage to circumvent the firing protocols. As the Spartan joined the now-four way skirmish in the region, Fireteam Raven were airlifted in from Alpha Base to assist in weakening enemy forces in the region to allow the Master Chief to escape. They would provide close air support coverage in their UH-144 Falcon for a time before deploying onto the ground to begin combat - at one point being saved by the Spartan from an encroaching Flood Juggernaut. Flood and Covenant forces in the area would be severely weakened thanks to Raven's actions, allowing the Spartan to complete his task much quicker. Upon the destruction of the third generator, Cortana suggested they destroy Halo to prevent future use of the installation by enabling the Autumn's self-destruct system. She then utilized the teleportation grid to transport the two to the damaged Truth and Reconciliation to rescue Captain Keyes to obtain the proper authorization.[55]
Fireteam Raven would ultimately hold off long enough to be extracted via Falcon, though a luckily-timed Wraith plasma mortar hit the helicopter, rendering it severely damaged.[1][56]
Ambush on the Covenant[edit]
The morning following the Covenant attack on Alpha Base, Silva and McKay met to review the situation of the ODST battalion on the ring. With Keyes out of the picture, command fell back to the Major, who surmised that the best defense is a good offense. Silva proposed to engage the Covenant forces in a medium conflict and instructed Lieutenant McKay to plan out the operation. McKay decided to use the burned-out remains of Charlie 217, mock-injured Marines, and a phony distress call as baits to lure the Covenant into an ambush. This operation was further strengthened when Wellsley informed them of the Covenant's increased interest in intelligence gathering by monitoring the radio traffic and conducting reconnaissance flights after the human raid on the Truth and Reconciliation.[57]
The operation began when the human forces "informed" a patrolling Banshee of the hostile location, using 3rd Squad - made to look like they had been injured in the "crash" - as bait. When the Banshee retreated presumably to report its findings of the enemy location, human forces abandoned their mock location and waited for the incoming Covenant forces. The first wave was a Spirit dropship with a lance of Unggoy, Kig-yar and Sangheili along with a pair of Mgalekgolo. The first wave was handled rather quickly; Lieutenant McKay ordered those with heavy weapons to concentrate on the Hunters before engaging the lance. Soon, the dropship returned and unleashed volleys of plasma on the entire area, forcing the human forces to take cover. Covenant ground forces were deployed as the dropship retreated and began engaging the human forces into the rocks. The human snipers managed to eliminate five Covenant soldiers before the dropship exacted the position; unfortunately, their positions was exposed and resulted with two snipers killed and one wounded by plasma fire. The operation turned awry as the Covenant had the advantage over the human forces' territory.[57]
Just as Lieutenant McKay was about to issue a retreat order, both forces were attacked by a newer force, the Flood. While the Covenant had some experience in combating the Flood, the human forces had none. Both forces were in disarray and were massacred by the Flood. After the combat forms slashed their way through combatants, the Pod infectors burrowed themselves into corpses and helpless victims and turned them into even more combat forms. In the ensuing horror, Lieutenant McKay was confronted by Jenkins, now a combat form with limited control of his body and desperately trying to make McKay kill him. The Lieutenant, however, disarmed and restrained the Flood form, hoping to use it as a specimen to study the Flood. The attack forced both human and Covenant to join forces and fend off the Flood. After successfully eliminating the Flood threat, both groups returned to killing one another. At the end, the human forces claimed a pyrrhic victory with heavy casualties.[57]
Chaos spreads[edit]
During their extraction, Fireteam Raven's Falcon would be shot down, crashlanding on a remote part of the ring. In this region, the Covenant had made fortification inside another Forerunner structure, with dozens of infantry including Evocati and Mgalekgolo. By the time Raven arrived, the Flood were besieging the outpost. Retreating into the structure, Raven would fend off hordes of Flood and Covenant including Flood Juggernauts. A Pelican was dispatched to rescue the ODSTs, but constant Banshee attacks made landing difficult, though they were eventually able to reunite with UNSC forces and make an assault on the crash site of the Autumn.[1][58]
Elsewhere, elements of the 79th Infantry Battalion would be engaged by the Flood. One Private would reach his escape pod, Lima Foxtrot Alpha 19, and attempt to make an SOS call. He was ultimately killed by the Flood.[59] The other group of humans who had formed a staging ground on the ring would be wiped by a Covenant attack.[31][32][33] Following the raid on the Pillar of Autumn, the Covenant under command of 'Ontomee retook control of the cruiser crash site and fortified it with more infantry and vehicles including Banshees, Ghosts and Wraiths.[57] However, the ongoing conflict around the ring left the garrison severely understaffed and exhausted. The Flood began to attack the ship, seizing control of the engineering decks. As if the garrison was cursed, an army of Aggressor Sentinels arrived not long after. Zuka 'Zamamee and Yayap arrived at the cruiser, with Zuka taking the identity of Huki 'Umamee, a Sangheili Special Operation Officer who was slain at Alpha Base - and were immediately put on duty, with 'Ontomee glad for the reinforcement. Yayap was given command of twenty Kig-Yar and put on patrol work. Ultimately, his orders to double-check every shipment of supplies that came in would prove useful, with his cohort narrowly avoiding bringing a crate full of infection forms onto the ship.[citation needed]
Threat under Alpha Base[edit]
Having narrowly survived the ambush by the Flood and battle with the Covenant, McKay's platoon returned to Alpha Base with several specimens of dead Flood forms and a captured Jenkins. She briefed Major Silva on what was understood of the Flood threat, before the Major ordered the bodies burnt. Jenkins was locked up in a cell under heavy guard, where he attempted to commit suicide twice, before lunging at McKay and breaking a bone in his arm in the process. The extreme pain was enough to temporarily subdue the infection form controlling Jenkins' body, giving him just enough control to point down in response to Silva's question; where would the Flood attack Alpha Base?[57] McKay and a team led by Sergeant Lister prepared near a large grate at the bottom of the mesa; the grate had been battered by hundreds of energy weapons - the Flood had been trying for days to break through and attack the human stronghold. Within a matter of days, they may just succeed. A full company was summoned to drop down into the pit below and cover a team of engineers, who would weld large panels in place to prevent the Flood from breaking through for a few more days - enough to buy time to get off the ring. A team of six Helljumpers fast-roped into the pit and used their helmet-mounted cameras to provide data for the Navy technicians to create four "plugs" to seal the breach. The team were attacked from the darkness by a handful of Flood combat forms, leading them to retreat while grenades were dropped into the hole.[48]
Ten minutes later, a larger combat team was inserted into the hole with four tech teams, and were successfully able to seal the breach without incident before repairing the grate. The defense wouldn't hold out forever, but long enough to let the humans plan out their escape route.[48]
Battle for the Truth and Reconciliation[edit]
- Main article: Battle for the Truth and Reconciliation
Following the fleet-wide order to evacuate, the Truth and Reconciliation was beset upon by the Flood, attempting to capture the cruiser and use it to escape the ring. The Covenant deployed a strike team to cleanse the ship and ready it for departure, but the security forces would remain bogged down in the fight on the surface against a tidal wave of the parasite.[48] After getting teleported by Cortana into the halls of the Truth and Reconciliation, John-117 continued with his objective in rescuing Captain Keyes and having him authorize the self-destruction of the Autumn. The pair found themselves in the middle of an ongoing battle between Covenant forces and the Flood forms for the control of the damaged battlecruiser. The SPARTAN fought his way through waves of Covenant and Flood forces and arrived at the bridge where Keyes was located. The pair soon discovered that the captain had been turned into one of the Flood, a Proto-Gravemind. With no other choice, John-117 forcefully obtained the captain's command neural interface from his skull and quickly retreated for the hangars, stealing a Banshee to make haste for the Autumn.[60]
By September 22, only 312 humans (236 Marines and 76 Navy personnel) remained alive at Alpha Base. In order to escape back to Earth, Major Silva concocted a plan to capture the Flood-infested Truth and Reconciliation, and use it to bring the remaining troops plus captured samples of Covenant technology and Flood forms to Earth. Despite the AI Wellsley's warnings, the humans proceeded with the attack, inserting several Pelicans' worth of troops into the cruiser's shuttle bays while an additional team led by McKay captured the gravity lift. Thanks to the previous raid, McKay had the advantage of foreknowledge of the ship's layout, and established control of the command center, engineering and eighty percent of the rest of the ship. The lightning raid was so successful that the troops even managed to capture the Minor Prophet of Stewardship and his security detail,[61] though the Prophet was able to send out an emergency rescue request to all Covenant vessels in the vicinity.[5]
The humans quickly began to lift the Truth and Reconciliation off the ringworld, with the activity spurring the Flood inside the ship's engineering corridors to attack the UNSC personnel stationed there. Although the Flood in engineering were quickly killed, Lieutenant McKay was worried about more potential Flood attacks. She urged Major Silva to eliminate the Flood aboard the ship before leaving the ring. Silva, however, refused to do so, as he wanted to bring live Flood specimens back to Earth for study. Knowing that Silva's ambitions would likely doom Earth to Flood infestation, McKay decided to sabotage the ship's system by severing the fiber-optic passage connecting the engines to the command center. The ship was destroyed shortly after as a result, killing all aboard.[1][61]
Destroying the Autumn[edit]
Having been extracted from the war between the Covenant and Flood, Fireteam Raven were deployed via M12B Warthog with a new mission; assist a convoy of UNSC Marine forces making one final assault on the Pillar of Autumn. The assault consisted of a handful of Falcon gunships, Warthogs and Pelicans attempting to distract Covenant forces to buy time for John-117 to complete his mission. The convoy fought through heavy Covenant resistance, including Phantoms and Wraiths before being alerted to the arrival of the Spartan in a Banshee commandeered from the Truth and Reconciliation.[62] Although the Covenant aircraft largely ignored the Banshee - thinking it one of their own[61] - the Deutoros-pattern Scarab in the region began to bear down on it, chased by Fireteam Raven.[62]
The Spartan, through Cortana's instruction, fought his way to the ship's bridge. The UNSC AI started the ship's self-destruct sequence, only to discover to her dismay that the Guilty Spark had halted the sequence. Cortana deduced that the Monitor was in Engineering and was attempting to take the Autumn's engines offline. John-117 decided to overload the engines by manually cracking the engine's magnetic containment fields.[63]
During the battle aboard the Autumn, the few remaining UNSC survivors rallied for a final defensive action around the crash site to prevent the Covenant or the Flood from interfering with the Chief's mission, having learned of his intentions to destroy the ring. The Covenant sent a Deutoros-pattern Scarab to destroy the UNSC forces and then to ambush the Chief aboard the cruiser, but this assault was thwarted by the ODSTs of Fireteam Raven. The remaining Marine forces were then overrun and all survivors in the immediate vicinity were left at the mercy of the Autumn's imminent detonation.[1][62]
The Spartan fought his way through Cryo B to reach Engineering. Following Cortana's instructions, he destroyed each of the four engines by launching explosives into the open shafts, destabilizing the containment fields. Cortana calculated that the pair had 15 minutes to evacuate the ship before the engines detonated. The Spartan headed for the shaft of elevator V-1269, where he was ambushed by Zuka 'Zamamee. The trap almost succeeded, but with Cortana's help, the Chief killed Zuka 'Zamamee by knocking the Sangheili to the bottom of the shaft. He then rode the elevator to a Class-7 Service Corridor located along the ship's dorsal structure. Using a Warthog, he drove along the length of the Corridor to External Access Junction 4C, where Echo 419 was to pick the Chief up one last time. However, two Banshees shot down the Pelican, killing Foe Hammer. John-117 was then forced to drive to Launch Bay 7, where a single Longsword fighter was still docked. The Spartan successfully boarded the ship and escaped Halo. Moments later, the Autumn's engines detonated, blowing a five-kilometer hole in the region around the ship and destroying Halo - bringing the battle to an end.[63][61]
Realising the impending fate of the ringworld, Supreme Commander 'Vadamee ordered all remaining ships of the Fleet of Particular Justice to take cover behind the gas giant Threshold, ignoring the request made by the Minor Prophet.[5]
Aftermath[edit]
- Cortana: "Just dust and echoes… we're all that's left… We did what we had to do! For Earth! An entire Covenant armada obliterated and the Flood! We had no choice! Halo… it's finished."
- John-117: "No. I think we're just getting started."
- — Conversation between Cortana and the Master Chief following their escape.[63]
Immediate aftermath[edit]
Although the ringworld was destroyed, it did not mark the end of conflict in the Soell system. After the destruction of Installation 04 and John-117's successful escape, Cortana scanned the installation's debris field for survivors. Soon, multiple Covenant capital ships entered the system. Cortana discovered several cryo pods jettisoned from the Pillar of Autumn during the initial battle, one of which contained Linda-058, and a Pelican dropship with several survivors. John-117 picked up the survivors in the Longsword, and with their help, boarded and hijacked the Covenant flagship Ascendant Justice and headed for Reach.[64] The Seeker of Truth and Supreme Commander 'Vadamee would soon depart for High Charity. During the interim, 'Vadamee would write a report on the Atrocity at Halo, detailing his failure to protect the ring and combining the intelligence on John-117 and the UNSC taken from his engagements at Reach and Installation 04[50] as well as send a copy of a Priority Broadcast Log taken from transmissions detailing the conflict between 'Vadamee and the Prophet to Lak 'Vadamee, wishing for Lak to know the truth of events before his hearing.[5] The commander was tried in front of the High Council and stripped of rank,[65] ultimately only spared a public execution due to the machinations of the Prophet of Truth, who esteemed the title of Arbiter on the disgraced Sangheili. 'Vadamee was given a new mission; eliminate the group of heretics led by Sesa 'Refumee now holed up in the gas mines of Threshold.[66]
'Refumee had been tasked to explore the gas mines of Threshold by the Minor Prophet of Stewardship during the battle at Installation 04, and was eventually the one to receive 343 Guilty Spark following the ring's destruction. The Monitor was able to survive the destruction of the Installation, and had similarly arrived at the gas mines, wherein he proceeded to tell 'Refumee the truth about the Halo Array.[67][68] Following the Monitor's revelations, 'Refumee devoted himself to spreading the truth of Halo to all the Covenant. A month later on October 20, the now-rebranded Arbiter and fellow Installation 04 veteran Rtas 'Vadumee would lead a team to raid the gas mines and destroy the heretics once and for all, capturing the Monitor in the process.[66][69]
The battle on Alpha Halo resulted in more than just a UNSC victory, however. It sparked a series of events that would change the course of the entire war. The new Arbiter would play a major role in the events of the Battle of Installation 05 and the Battle for Earth. The High Prophets also would exploit the political fallout resulting from Halo's destruction to further their own plans to supplant the Sangheili ranks with their rivals among the Jiralhanae, whose blind faith they favored over the Sangheili's pragmatism. This led to the Great Schism upon learning the truth of Prophet of Truth's plan to replace Sangheili with Jiralhanae.[70][71]
Triggered by the destruction of Installation 04, the Ark immediately initiated the construction of a replacement to Installation 04. Before the replacement ring was completed, John-117 and Cortana activated it to defeat the Flood and the Gravemind. By 2559, the Ark had finished the construction of a second replacement, which the crew of the UNSC Spirit of Fire attempted to launch to the Soell system to signal the UNSC, but the ring was ultimately intercepted by a Guardian en route.[72][73] The ring's destruction would trigger other Forerunner installations, emitting a signal that placed them all in standby mode. One such installation would be the specialized Sentinels guarding the shield world of Onyx, leading to their awakening and the start of the Onyx Conflict.[74]
UNSC survivors[edit]
Only six known members of the Pillar of Autumn's crew survived the Halo event. A Pelican hiding in the debris field carried four survivors, Warrant Officer Shiela Polaski, Sergeant Avery Johnson, Shock Trooper Corporal Locklear, and an ONI Lieutenant, Elias Haverson.[64] John-117 had managed to retrieve three cryo-tubes, one of which contained his fellow Spartan team member, Linda-058. Linda, who had been clinically dead since the Fall of Reach, was resuscitated at a later time. The people in the other two tubes had died in sleep due to malfunctions. It is not known whether this was a malfunction in one of the cryo storage rooms, or if it happened to almost every tube. Every other person at the battle presumably died when Installation 04 was destroyed.[Note 2] The Museum of Humanity would later list a Sergeant Thomas Chang as having survived the battle.[75][Note 3]
Following the battle, this group of UNSC survivors led by John-117 would proceed to board and capture the Ascendant Justice and use it to make their way back to Reach. This sequence of events would lead the group to commencing Operation: FIRST STRIKE, ultimately destroying a fleet of over 500 Covenant warships assembled by the Prophet of Truth in preparation to assault Earth. The survivors would return back to Earth by October 19, leading the UNSC to deploy several recovery convoys of Prowlers.[76] One such Prowler, the UNSC Red Horse, would be sent to investigate the ONI vessel Mona Lisa and Operations: RED CLOUD and WHITE SAND.[77] During the operations, the Mona Lisa would take aboard several samples of the Flood, eventually experimenting with the Flood on Covenant and human prisoners alike, leading to an outbreak on the ship. The Red Horse would investigate shortly following the departure of the Covenant fleet from the system on October 25, leading to a brief skirmish between the Marine survivors and infected Flood, resulting in the deaths of nearly all involved.[78] The Red Horse was able to gather data on several outlying installations such as one structure similar to the Threshold gas mines employed by Sesa 'Refumee, later employed in the War Games as "Colossus".[79]
During the return journey home, Cortana would write a report on the conflict,[80] while also using the downtime to begin collating the data recovered from being in the Forerunner and Covenant networks.[64] The AI kept control of the Installation's Activation index, unbeknownst to everyone including John-117.[81] This experience would be one of the major factors later assuring the AI's descent into rampancy, and attributed to as the cause of a number of believed-software glitches that would later display in John-117's MJOLNIR armor during the later Battle of Earth.[81] Nonetheless, the data recovered by Cortana and the Master Chief - including his recording of the mysterious Terminals - would become later known to ONI Section Three, and later used to assist in unlocking further Forerunner mysteries.[28][29] By October 20, news of the destruction of Installation 04 had reached the civilian populace of Earth, and a ceremony was held to honor the Spartan.[82] Naval intelligence AIs continued to disagree on the Covenant's motives on the ring, with some falsely believing that the Covenant had already found the ring and wanted to prevent humanity from find it also.[17] As part of public awareness campaigns conducted by the ONI Section Two including initiatives like Outpost Discovery, the Battle of Installation 04 was one of many subjects covered by Director Schaefer in File CHELAN 20200303.[83] A recount of the battle was later included in the UNSC's Official Spartan Field Manual.[9]
Following the end of the Human-Covenant War, the UNSC and Swords of Sanghelios declared a 500 light-second[79] exclusion zone around the site of Installation 04 as part of the Treaty of 2552.[84] The area around Threshold would continue to be extremely dangerous due to uncontrolled Sentinels, volatile Halo fragments, micro-debris, malfunctioning Forerunner artifacts, and the ever-present danger of the Flood making even surreptitious exploration and scavenging too dangerous for most.[79] Nonetheless, in 2556, Spartan Fireteam Apollo would breach the zone and recover the black box of the Undiminished Entelechy, detailing records of transmissions between Thel 'Vadamee and the Minor Prophet of Stewardsahip during the battle. The data recovered would later go on to be used to simulate the War Games simulations "Truth", "Regret" and a variant of "Parallax".[10][46] During the simulations, the war-era vessels of the Fleet of Particular Justice would be replaced by Hekar Taa-pattern blockade runners.[85]
Part of the transcript recovered there would be translated by Diplomatic Corps member Melody Azikiwe and would be included in a message from General R. Dellert to Fleet Admiral Terrence Hood in the same year.[81]
Alpha Shard[edit]
- Main article: Alpha Shard
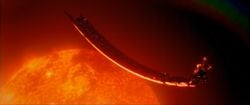
Before the Autumn exploded, Installation 04 attempted to activate a safety measure and make a slipspace jump. However, the self-preservation protocol was partly successful, and only a small portion of the ring managed to enter slipspace. After the battle, the fragment reentered into normal space in the vicinity of a red giant star some distance away from the Orrichon system. The extreme heat of the Autumn's explosion, comparable to that of a supernova, caused the formation of an entirely new element - Element 120.V - in the fragment, which caused catastrophic breakdown of DNA in certain humans but did not affect other species. The element was refined into a bioweapon and unleashed on Sedra, killing or hospitalizing many of the planet's citizens. An automated survey drone deployed by the Pillar of Autumn prior to the ring's destruction, Recon-14, survived this event and was later employed for remote-survey of the now-designated Alpha Shard.[86] An investigation by Locke's team led them to trace the bioweapon to the shard of Installation 04 and launch a joint mission with the Sedran Colonial Guard to destroy the new element with a HAVOK tactical nuclear weapon. The mission was ultimately successful though only two people survived.[84]
Other debris from the ring would find its way to land on Threshold's moon, Basis. The heretic faction led by Sesa 'Refumee would use it for a time before their destruction by the Arbiter,[87] with the UNSC eventually deploying SPARTAN-IV personnel in the post-war era to assess the wreckage of Alpha Halo across the moon in one of the first tests of the VECTOR-class Mjolnir armor.[88]
Timeline of events[edit]
- Main article: Timeline of the Battle of Installation 04
The battle took place between September 19 and September 22, 2552. The Pillar of Autumn exited slipspace and landed troops on the ring on the 19th, leading to the capture of Alpha Base and eventual raid on Truth and Reconciliation on the same day. Roughly eighteen hours later, in the early hours of September 20, Lieutenant McKay's raid on the Pillar of Autumn began, with the Master Chief leading the assaults on the Silent Cartographer and the Control Room on the same day simultaneously to Captain Keyes' investigation of the Flood. By September 21, the Master Chief had investigated the Flood facility and the Library, leading to his and the ODSTs' assault on the Truth and Reconciliation again, before the ringworld's destruction on September 22.
| ||||||||||||||
Participants[edit]
- Main article: Participants in the Battle of Installation 04
The battle's primary participants were the UNSC forces of the Pillar of Autumn and the Covenant forces of the Fleet of Particular Justice. The Covenant deployed vast amounts of ships and infantry onto the ring, compared to the small force of crew that escaped the Fall of Reach aboard the Autumn.
List of appearances[edit]
- Halo: Combat Evolved (First appearance)
- Halo: The Flood
- Halo: First Strike (Mentioned only)
- Halo 2 (Flashback)
- Halo Graphic Novel
- Halo Wars (Mentioned only)
- Halo: Evolutions
- Wages of Sin (Mentioned only)
- Halo: Combat Evolved Anniversary
- Halo 4 (Mentioned only)
- Halo: Broken Circle (Mentioned only)
- Halo: Nightfall (Indirect mention)
- Halo 2: Anniversary (Flashback)
- Halo: Hunters in the Dark (Mentioned only)
- Halo 5: Guardians (Mentioned only)
- Halo: Shadow of Intent (Indirect mention)
- Halo Mythos
- Halo: Tales from Slipspace
- Dominion Splinter (Flashback)
- Halo Wars 2 (Mentioned only)
- Halo: Fireteam Raven
- Halo: Official Spartan Field Manual
- Halo: Shadows of Reach (Mentioned only)
- Halo: Divine Wind (Mentioned only)
- Halo Infinite: Memory Agent (Mentioned only)
- Halo Infinite (Indirect mention)
- Halo: Outcasts (Mentioned only)
- Halo: Battle for the Blood-Moon (Indirect mention)
- Halo: Empty Throne
- Halo: Ascension on Atropos (Mentioned only)
- Halo: Campaign Evolved
Notes[edit]
- ^ Although never confirmed as such, John-117 finds the first terminal on the ring's surface during the events of the level "Halo", which begins the telling of the story of Installation 04. Thus, Guilty Spark's statements in the Terminal Teaser would most logically coincide with this event.
- ^ Marines such as Gunnery Sergeant Marcus Stacker and Private Chips Dubbo, were seen again in later battles throughout the trilogy, however their canonical statuses during the battle remain in limbo; as they are never mentioned following media set during the events nor does any canonical source explain their fates.
- ^ Thomas Chang's status is uncertain, and it is likely the character was made up by the Museum of Humanity for their display.
Sources[edit]
- ^ a b c d e f g h Halo Waypoint, Canon Fodder - That's So Raven (Retrieved on Dec 11, 2019) [archive]
- ^ a b The Halo Conflict
- ^ a b c Halo Waypoint, The Halo Conflict - Timeline (Retrieved on Oct 28, 2015) [archive]
- ^ Halo: Combat Evolved, campaign level The Pillar of Autumn: "A dozen Covenant superior battleships against a single Halcyon-class light cruiser. Given those odds I'm content with three...make that four kills."
- ^ a b c d e f g h i j k Halo: The Flood: Adjunct - Priority Broadcast Log/Eleventh Cycle, Third Unit
- ^ Halo Encyclopedia (2011 edition) - Introduction, page 8-9
- ^ Halo Wars, campaign level Alpha Base
- ^ Halo 4, campaign level Dawn
- ^ a b Halo: Official Spartan Field Manual, page 62-65: The Alpha Halo Conflict
- ^ a b c Halo Legendary Crate - Data Drop #3: The Approach
- ^ Halo: Outpost Discovery - Hall of History: OD_003_HOH_Humanity_Overview
- ^ Data Drop: 6
- ^ Halo: The Fall of Reach, page 376 (2010 edition)
- ^ Halo: Reach, campaign level The Package
- ^ Halo: Reach, campaign level The Pillar of Autumn
- ^ a b c d e f g h i j k l m Halo: Combat Evolved, campaign level The Pillar of Autumn
- ^ a b Bungie.net, Jason Jones Interviewed By You (Retrieved on Oct 12, 2014) [local archive] [external archive]
- ^ Halo: Reach, campaign level Epilogue
- ^ Anniversary Campaign Trailer
- ^ a b c d e f g h i j k l m n o p Halo: The Flood, chapter 1
- ^ a b c d Halo: Fireteam Raven, campaign level Escape
- ^ Halo: Combat Evolved Anniversary: Terminal 1
- ^ a b c d Halo: The Flood, chapter 2
- ^ Halo: First Strike, page 185 (2010 edition)
- ^ a b c Halo: The Flood, chapter 3
- ^ Halo: The Flood, chapter 4
- ^ a b Halo: Combat Evolved, campaign level Halo
- ^ a b Halo Waypoint forums, CLASSIFIED - HYDRAI THREAD - GLYPH CODES: "PREVIOUSLY, SPARTAN 117 CAME ACROSS A SET OF CURIOUS TERMINALS WHEN FIGHTING HIS WAY THROUGH ALPHA HALO. EACH TERMINAL CONTAINED A VIDEO TRANSMISSION WITH INCREDIBLY VALUABLE INTEL." (Retrieved on Oct 13, 2015) [archive]
- ^ a b Halo Waypoint forums, //CLASSIFIED//SECTION 3 DECODING CENTER//: "OVER FOUR YEARS AGO, ONI RESEARCHERS DISCOVERED A NEW WAY TO UNLOCK HIGHLY ENCRYPTED DATA, USING A SUBSET OF ARCANE FORERUNNER SYMBOLS. THIS DISCOVERY CAME AFTER ANALYSIS OF VIDEO TRANSMISSIONS UNCOVERED ON ALPHA HALO BY SPARTAN 117." (Retrieved on Oct 14, 2014) [archive]
- ^ Halo: Combat Evolved Anniversary terminals teaser
- ^ a b Halo: Reach, multiplayer map Ridgeline
- ^ a b c Halo Waypoint, The Halo Bulletin: 11/9/11 (Retrieved on Apr 30, 2013) [archive]
- ^ a b Halo Waypoint, Halo: Reach maps - Ridgeline (Retrieved on Oct 17, 2012) [local archive] [external archive]
- ^ a b Xbox Live's Major Nelson: News From Halo Fest (Retrieved on Sep 9, 2011) [archive]
- ^ Halo: Reach: Firefight
- ^ a b Halo: Combat Evolved, campaign level The Truth and Reconciliation
- ^ Halo: The Flood, page 122 (2010 edition)
- ^ Halo: Fireteam Raven, campaign level Rubble
- ^ a b Halo: Combat Evolved, campaign level The Silent Cartographer
- ^ Halo: The Flood, page 176 (2010 edition)
- ^ Halo: The Flood, page 201 (2010 edition)
- ^ Halo: Combat Evolved, campaign level Assault on the Control Room
- ^ a b c d Halo: Combat Evolved, campaign level 343 Guilty Spark
- ^ Halo Graphic Novel - Breaking Quarantine
- ^ Halo: Combat Evolved, campaign level The Library
- ^ a b c Halo Waypoint, Canon Fodder - Beta Late Than Never (Retrieved on Dec 23, 2019) [archive]
- ^ Halo Graphic Novel - The Last Voyage of the Infinite Succor
- ^ a b c d e Halo: The Flood, chapter 11
- ^ a b Halo: The Flood, chapter 7
- ^ a b Halo 2 Limited Collector's Edition Manual: Report on the Atrocity at Halo
- ^ Halo Waypoint, Canon Fodder - Buzz Generating (Retrieved on Sep 14, 2016) [archive]
- ^ Halo 5: Guardians: Type-50 Alpha beam rifle REQ card
- ^ a b Halo: Fireteam Raven, campaign level Alpha Base
- ^ Halo: The Flood, chapter 8
- ^ a b c Halo: Combat Evolved, campaign level Two Betrayals
- ^ Halo: Fireteam Raven, campaign level Ice Canyon
- ^ a b c d e Halo: The Flood, chapter 10
- ^ Halo: Fireteam Raven, campaign level Raven Down
- ^ Halo: The Flood: Adjunct - Entry 47-2396/10763
- ^ Halo: Combat Evolved, campaign level Keyes
- ^ a b c d Halo: The Flood, chapter 12
- ^ a b c Halo: Fireteam Raven, campaign level Last Stand
- ^ a b c Halo: Combat Evolved, campaign level The Maw
- ^ a b c Halo: First Strike
- ^ Halo 2, campaign level The Heretic
- ^ a b Halo 2, campaign level The Arbiter
- ^ Halo: Combat Evolved: Terminal 11
- ^ Halo 2: Anniversary: Terminals
- ^ Halo 2, campaign level The Oracle
- ^ Halo 2
- ^ Halo 3
- ^ Halo Wars 2, campaign level Hold the Line
- ^ Halo Wars 2, campaign level Last Stand
- ^ Halo: Ghosts of Onyx
- ^ Halo 3: Believe - Diorama
- ^ Eleventh Hour reports: Part 5 - Subject: Heirlooms
- ^ Halo Waypoint, Catalog Interaction (post 2963929) (Retrieved on Oct 9, 2015) [local archive] [external archive]
- ^ Halo: Evolutions - The Mona Lisa
- ^ a b c Halo Waypoint, Threshold (Retrieved on Error: Invalid time.) Error: Invalid time.000000/https://www.halowaypoint.com/en-us/universe/locations/threshold [archive]
- ^ Halo 2 Manual: Secret Transmission + Master Chief Section
- ^ a b c Halo Legendary Crate - Data Drop #9
- ^ i love bees, Axon Clips, Chapter 12: Jersey: "Just a Little Sting"
- ^ ONI Archive – Conflict Evolved - Halo: CE Anniversary
- ^ a b Halo: Nightfall
- ^ Halo 5: Guardians, multiplayer map Truth
- ^ Halo: Nightfall: RECON-14
- ^ Halo 2, multiplayer map Burial Mounds
- ^ Halo 5: Guardians: VECTOR armory description

