Mission to Alpha Shard
From Halopedia, the Halo wiki
| This article does not meet the wiki's general standards and/or standards on layouts. You can help by cleaning this article. |
|
Previous: |
|||||||||||||||||||
|
Next: |
|||||||||||||||||||
| Mission to Alpha Shard | |||||||||||||||||||
|---|---|---|---|---|---|---|---|---|---|---|---|---|---|---|---|---|---|---|---|

| |||||||||||||||||||
|
Conflict: |
|||||||||||||||||||
|
Date: |
On or after February 7, 2556[1] | ||||||||||||||||||
|
Location: |
|||||||||||||||||||
|
Outcome: |
ONI/Sedran pyrrhic victory
| ||||||||||||||||||
| |||||||||||||||||||
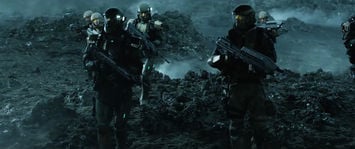
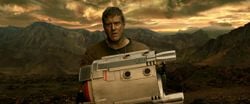
The Mission to Alpha Shard was an operation on the surface of Alpha Shard in February 2556, conducted by a joint expedition consisting of an Office of Naval Intelligence team led by Lieutenant Commander Jameson Locke and a detachment of the Sedran Colonial Guard led personally by its commander, Colonel Randall Aiken. Their primary task was to locate and cease mining operations of an element lethal only to humans as witnessed on February 7, 2556 in an attack on Sedra City.
The mission[edit]
The crew arrived at Alpha Shard using the Colonial Guard's Condor, a dropship capable of slipspace jumps. Donning their powered Nightfall armor, the ONI operators jumped out of the Condor at a significant height while the Sedrans, with their less sophisticated combat suits, rappelled down. Private Talitha Macer remained to pilot the dropship while most of the others moved to secure an Alerian tug belonging to smugglers who were mining the element used to create the bioweapon unleashed on Sedra. The freighter was empty but was accompanied by a compartment used to store horses, as well as hoof prints leading away from the site. The ONI-Sedran Colonial Guard team moved to the tracks' direction and came across two smugglers—Arris Le and Haisal Wari—mining the element in a cave. The smugglers attempted to escape but were quickly caught and restrained by the ONI agents.[3]
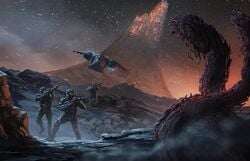
The group headed back to the Condor for extraction; however, while the dropship was setting down, a large number of Thanolekgolo appeared and began to swarm all over its airframe, plunging it out of control. Macer was thrown out of the Condor, which then flew off erratically and crashed in the distance. More of the worms appeared in large gestalt formations and killed the horses and three of the Sedrans. Fast and agile, the Lekgolo began to pursue the group who escaped to a narrow crevice where Locke used a special appliance to holographically camouflage their position from the aliens, but the aliens quickly noticed the camouflage projector and devoured it. Arris was able to reveal that the creatures could sense active technology and movement, prompting the group to shut down the electronics present in their equipment. The Lekgolo examined the group, who avoided detection by remaining completely still. Eventually the worms left and the group moved out of the crevice.[3]
The joint-team then moved out to obtain the HAVOK warhead from the wreckage of the Condor to destroy the deposits of the element. To prevent detection by the Lekgolo, the group removed their armor, although they retained the ONI operatives' oxygen packs due to the limited amount of oxygen in the local atmosphere. Later, the group took a break to refill on oxygen from the ONI agents' packs. As they continued onward, Samantha Wisner dropped her breather and she fell behind in an attempt to retrieve it. However, the device was activated upon rolling down a hill and attracted the Lekgolo. Ramos came to check on Wisner, who desperately grabbed him for help as the Lekgolo swarmed over her. Ramos attempted to pull Wisner to safety but one of the Lekgolo bit his hand and he lost his grip. The worms then devoured Wisner while Ramos escaped with the rest of the team.[4]
With less than three hours left until sunrise, the remaining members began to despair. Mimicking Wisner's silhouette, a Lekgolo swarm approached and attacked the group. Horrigan threw Haisal to the worms, killing him and giving the team time to escape. After a while the group arrived at a cliff. Upon climbing, Estrin tripped off the cliff edge and urged Ramos to help him, to no avail; Estrin then fell into the abyss below. Once off the cliff, the survivors prepared to have an oxygen break, but a standoff ensued as Horrigan threatened Colonel Aiken and demanded him to gave up the sole remaining oxygen tank. Locke trained his pistol on Horrigan and ordered him to stand down, but Ramos sided with Horrigan and the two forced Locke to yield. Horrigan and Ramos then took Arris as a hostage and left to the tug. Unbeknownst to the betrayers, the Condor had crashed in the bottom of the canyon, which Aiken had noted. Aiken, Locke and Macer headed to the Condor, in hopes to retrieve the nuclear warhead.[5]
While Ramos, Horrigan and Arris attempted to go back to the tug, Arris tried to put Ramos against Horrigan by saying Horrigan is using both of them. Ramos confronted Horrigan but he replied to him that the tug has autopilot but also a biometric scan which is the reason why they needed Arris in the first place. Meanwhile in the Condor, Locke, Aiken and Macer found some weapons and found that the Condor, now damaged, did not have the capacity to get them out of the ring, but would manage to fly to the tug. With less than 30 minutes left, Aiken and Locke tried to start the countdown for the HAVOK nuke's detonation, but Macer revealed that there was a problem: the Condor had enough thrusters to fly but its cells were damaged, meaning they could not get out of the canyon. Aiken then made a plan: if they used the HAVOK's emergency cell, the Condor would have energy. Aiken ordered Macer to put it into the Condor's system, but Locke pointed out they could not leave the bioweapon source intact. Aiken replied that the only way they could complete the mission was if only two of them go to the tug and the third manually activates the HAVOK. Near the tug, Ramos began to suffocate, and he and Horrigan began to use the last air source. Meanwhile, Arris managed to escape with the help of a laser cutter which he used to cut his binds.
In the Condor, Macer managed to activate the ship and Aiken ordered to both of them to go to the tug, but both refused. Aiken then broke his daughter's necklace and emptied some of the beads in his hand. He then explained that it will be decided by luck: the one who would pick a red bead from his enclosed hand would stay behind while those with white ones would be spared. In the end, it seemed the one who would activate the HAVOK was Aiken. When Locke and Macer left in the Condor, Aiken revealed he cheated by hiding his white bead from view; there were no red beads in his hand since he wanted both of them to survive. Almost reaching the tug, both groups were attacked by Lekgolo worms; Horrigan betrayed Ramos by activating his backpack, breaking his leg, and leaving him to be killed by the worms. The Condor crashed, Locke helped a crippled Macer and raced to the tug. Arris started the tug and the Lekgolo started going to the tug. Horrigan desperately turned on his assault rifle and killed Arris, but on his way to the ship, he was devoured by the worms, and they began to envelope the tug. With no means to escape, Locke and Macer hid behind a few rocks. With few minutes to the sunrise left, Aiken activated the HAVOK and, unconsciously, drew the Lekgolo out of the tug and towards him. Locke and Macer entered the tug and escaped the ring. After a close escape, the nuke detonated and killed Aiken and the Lekgolo and destroyed the deposits.[6]
List of appearances[edit]
- Halo: Nightfall (First appearance)
- Halo Mythos
Sources[edit]
- ^ Halo: Nightfall
- ^ Halo Encyclopedia (2022 edition), page 345
- ^ a b Halo: Nightfall: Chapter 2
- ^ Halo: Nightfall: Chapter 3
- ^ Halo: Nightfall: Chapter 4
- ^ Halo: Nightfall: Chapter 5

