CE:The Truth and Reconciliation
From Halopedia, the Halo wiki
|
Prev: |
|
|
Next: |
|
| The Truth and Reconciliation | |
|---|---|

| |
|
Game: |
|
|
File name (?): |
|
|
Player: |
|
|
Date: |
|
|
Location: |
In the canyon below and aboard the Truth and Reconciliation |
|
Objective(s): |
Board the Covenant battlecruiser and rescue Captain Keyes |
|
Par Time: |
00:20:00 (Master Chief Collection) |
|
Par Score: |
19,000 (Master Chief Collection) |
 |
Halopedia has a walkthrough guide for this level; see CE:The Truth and Reconciliation/Walkthrough. |
| “ | Board a Covenant ship in an attempt to rescue Captain Keyes. | ” |
The Truth and Reconciliation is the third campaign level in Halo: Combat Evolved. The Master Chief and a team of UNSC Marines must rescue Captain Keyes, who is being held prisoner aboard the Covenant ship, the Truth and Reconciliation. After boarding the ship by using its gravity lift, the Master Chief fights his way through the interior of the Covenant battlecruiser to rescue Captain Keyes and several other prisoners from the ship's brig. This is the first level in which Mgalekgolo, Sangheili Zealots, and Stealth Sangheili are encountered.
In 2026 the level was remade entirely for inclusion in Halo: Campaign Evolved.
Transcript
The Truth and Reconciliation
{Original Cutscene} {Anniversary Cutscene}

The view pans across a plateau with a Covenant Ket-pattern battlecruiser above it.
- Cortana: "The enemy has captured Captain Keyes, and are holding him aboard one of their cruisers, the Truth and Reconciliation. The ship is currently holding position approximately three hundred meters above the other end of this plateau."
Pelican Echo 419 comes into view, it starts to land.
- Marine #1: "So how do we get inside the ship if it's in the air? The Corps issued me a rifle, not wings."
- Staff Sergeant Parker:[Note 1] "There's a gravity lift that ferries troops and supplies between the ship and the surface. That's our ticket in."
The Pelican lands in an unoccupied area.
{Gameplay}
- Cortana: "Once we get inside the ship, I should be able to lock on to the tracking signal from Captain Keyes' neural implants."
- Sergeant Parker: "Hit it, Marines, go go go! The Corps ain't payin' us by the hour!"
Fire Team Charlie and the Master Chief get off the Pelican and head forward.
- Cortana: "Stick to the higher ground on the right. We should be able to recon the Covenant position without being spotted. I'm detecting Covenant Stationary Guns near the next pass. I recommend using your Sniper Rifle to take out the gunners while I call for Marine support."
- Cortana (COM): "Get ready to move in to support us, Sergeant. The Master Chief is going to covertly take out as many of the Covenant as he can. Don't open fire until you hear the enemy return fire on us. That should let us keep the element of surprise."
The Master Chief takes out as many Covenant troops as he can, before being spotted by the Covenant, who open fire at him.
- Parker: "Let 'em have it!"
The Marines open fire.
One of the Unggoy runs for a Shade turret.
- Cortana: "Alert! A Covenant is making a run for that stationary gun. (NAV point appears on the Unggoy) Take him out!"
More Covenant troops enter the area, but are eventually all eliminated. The area is secure.
- Marine #1: "Hey, we did it! We're right behind you, Chief!"
The Chief starts to move up the slope.
- Cortana: "Stop. Motion tracker shows movement around the next bend."
- Parker: "We're ready to advance as soon as you call for us, Cortana."
As Fire Team Charlie move further up the plateau.
- Cortana: "Covenant forces detected up ahead. The path up on the left should let us sneak up around them."
- Sergeant Parker: "We'll hang back while you get into position, Chief."
If the Chief takes the left flank:
- Cortana: "Cortana to Fire Team Charlie. The Chief has the left flank covered. Recommend you move up the middle."
If the Chief moves up the middle:
- Cortana: "Cortana to Fire Team Charlie. The Chief has secured the middle. Get ready to move up the left, you should be able to flank the enemy."
- Marine #1: "Roger that."
As the UNSC forces takes out the last of the Covenant infantry, a Spirit dropship lands nearby and drops a lance of Covenant.
- Cortana: "Alert! Covenant dropships are inbound!"
After clearing the area, they walk through a path and reach the cruiser's landing zone, which is defended by a number of troops.
- Cortana: "We're directly under the ship now."
- Sergeant Parker: "Good work, Marines."
- Marine #1: "Alright! Are we bad or what?"
- Marine #2: "Mother of God...I'd never thought I'd get close to one of these things. How the hell are we suppose to get inside that monster?"
or
- Marine #2: "If we're gonna board that thing, we need a plan."
- Cortana: "The Covenant use a Gravity Lift to ferry troops and supplies between the ship and the surface. We need to ambush them at the Grav Lift's loading zone, and use the lift to enter the ship."
- Marine #2: "Oh, is that all! That's us, the few, the proud, the expendable."
If three or more Marines from the team are killed:
- Cortana (COM): "Cortana to Echo 419, requesting reinforcements from our position."
- Flight Captain Carol Rawley (COM): "Roger, Cortana, Echo 419 on approach."
The team engages the Covenant defense, while Echo 419 enters the landing zone and drops another team of marines.
- Marine #1: "Crap, those stationary guns are gonna tear us to pieces!"
or
- Marine #2: "Sir, those freakin' guns have us pinned down!"
Another Spirit approaches, dropping a group of Unggoy
- Cortana: "Alert! Covenant Dropships are inbound!"
- Marine #1: "Man, there's always something..."
Numerous Covenant troops soon drop from the cruiser's Gravity Lift, engaging the team.
- Marine #1: "Contact, enemy in sight!"
or
- Parker: "Covenant forces sighted! Let's hit 'em, Charlie Team!"
The team eliminates all Covenant resistance, including a pair of Mgalekgolo.
- Parker: "We've secured the area. Let's square away the grav lift. Marines! Prepare for boarding action."
or
- Parker: "This area's clear. No hostiles present. Marines, secure the grav lift and prepare for boarding!"
- Marines: "Yes, sir!"
The Marines gather under the grav lift.
- Cortana: "Once we're inside the ship, I can home in on the Captain's command-neural interface. He'll probably be in or near the ship's brig, which should narrow our search."
If any of the Marines are KIA:
- Cortana (COM): "Cortana to Echo 419. We've reached the Gravity Lift and are ready for reinforcements."
- Rawley (COM): "Copy that, Cortana. Hang tight, gentlemen. Foe Hammer out."
- Cortana: "Once we're inside the ship, I can home in on the Captain's command-neural interface. He'll probably be in or near the ship's brig, which should narrow our search."
Pelican arrives
- Rawley (COM): "Echo 419 inbound, clear the drop zone."
Marines exiting the Pelican greet the Chief before taking position around the lift.
Into the Belly of the Beast
{Original Cutscene} {Anniversary Cutscene}

- Marine #1: "Whoa!"
The Master Chief looks around as the Marine begins to hover into the air.
- Marine #3: "Yee-haw!"
After all the Marines ascended into the ship, the Chief looks up and begins to hover upwards.
Fades to white.
{Gameplay}
The team find themselves at the cruiser's cargo bay. No Covenant troops are present.
- Cortana: "We're in. I've got a good lock on the Captain's CNI transponder. No Covenant defenses detected."
- Marine #1: "What, there's no Covenant here? Maybe nobody's home..."
The bay doors open and a Stealth Sangheili attacks the squad, shortly followed by more Covenant troops.
- Marine #2: "Contacts! Lots of contacts!"
- Marine #3: (sarcastically) "No Covenant! Ya had to open your mouth!"
The Chief and the Marines fight off multiple waves of Covenant reinforcements attacking from all sides. After the last wave has been defeated, a pair of massive blast doors open to reveal a few Kig-Yar (or a pair of Mgalekgolo on higher difficulties). The team eliminates them.
- Marine #2: "Area secure, sir. We'd better keep moving. How about that door?"
The team exits the cargo bay through the open doors the Kig-yar (or Mgalekgolo) came through. They head down the corridor but are stopped by a second set of blast doors:
- Marine #2: "The door's locked, sir. I can't bypass it. We can't get through here."
or
- Marine #3: "The door's locked, sir. No way through."
- Cortana (COM): "We can use the side passages to find a way around."
- Parker: "We'd be sitting ducks in that narrow space. We can hold this position if you can find your way around and open the door from the other side, Chief."
- Cortana: "Chief, let's see if we can find a way to open this door."
The Chief goes alone and makes his way through the corridors, eventually reaching a balcony overlooking another cargo bay.
- Cortana: "Wait. That's the locked door down there. The Marines are waiting on the other side. The controls to open it must be somewhere in this room."
The Chief makes it to the ground level and opens the door, letting the rest of the team inside.
Covenant troops enter the cargo bay, attempting to fend off the boarders, but are soon eliminated.
- Marine #3: "All clear, sir!"
- Cortana: "We should get moving."
- Marine #1: "Alright, everybody stay cool. Yell if you see anything."
The team soon enters a large docking bay just in time to witness a Spirit dropship taking off.
If three or more Marines are dead:
- Cortana (COM): "Cortana to Echo 419, requesting reinforcements at our position."
- Rawley (COM): "Foe Hammer here, Cortana... I read you, but you're inside the Covenant ship. I'm not sure I can — "
- Cortana (COM): "Lock onto my signal and approach fast and low. There's a shuttle bay on the ship's starboard side."
- Rawley (COM): "Roger, Cortana - Echo 419 on approach."
The Chief and the rest of the team go around the docking bay, battling multiple waves of Covenant.
The team reaches the door on the other side, but the door is locked.
- Marine #3: "Hey, which way should we go now? All the doors on this level are locked!"
- Cortana (COM): "Wait a moment. I'm going to access the Covenant Battlenet and locate an override code to open a door."
- Marine #2: "You'd better hurry Cortana, we can't hold them off all day."
- Cortana (COM): "Working on it." (To the Master Chief) "I'd like to see you crack a 128,000-bit modulating encryption key."
More Covenant, including another pair of Mgalekgolo, enter the shuttle bay, but are eliminated soon.
- Cortana: "Got it. The door is open. Everyone should move through now. I can't guarantee that it won't lock again when it closes."
The Chief leads the team up to the second level.
If every Marine on the team is dead:
- Cortana: "I'm going to call for reinforcements. There's no sense going in with anything less than full strength."
- Cortana (COM): "Cortana to Foe Hammer. We need additional support troops. We're going to open the shuttle bay door again. Move in and drop off reserve troops on my signal."
- Rawley (COM): "I copy, Cortana. Echo 419 standing by for your signal."
The Chief disengages the energy shield over the bay doors.
- Cortana (COM): "Cortana to Echo 419. The shuttle bay door is open. You can start your approach."
- Rawley (COM): "Roger. Echo 419 inbound."
The Chief leads the Marines up to the third level. The team eventually reaches the ship's bridge and kills all the Covenant forces inside, including the Shipmaster Lat 'Ravamee.
- Cortana: "This looks like the ship's command center. The Captain's transponder signal is strong, he must be close."
- Marine #1: "This is a good spot, Chief. We'll mind the store here while you go find the Captain. Good luck, sir."
or
- Sergeant Parker: "This looks like a good spot. We'll mind the store here while you go after the Captain. Good luck."
The Chief heads off alone to rescue the Captain. He makes his way through corridors, and comes across an empty brig. Some of the holding cells have dead Marines in them.
- Cortana: "We must be in the brig. These look like holding cells. There are probably multiple detention stations. The Captain must be in one of them. We need to keep looking for him."
The Chief exits and comes across an occupied detention center:
- Marine POW #1: "It's the Chief!"
- Marine POW #2: "Chief! Chief! Let me out, man!"
- Captain Jacob Keyes: "Watch out Chief, the Covenant guards are using some sort of stealth armor."
The Chief kills all the Covenant guards, including two Stealth Sangheili and another Zealot.
- Keyes: "Good work, Chief."
- Marine POW #3: "That was amazing, sir, you really kicked the shi—"
- Captain Keyes: "Stow it, Corporal! Chief, open these cells, and let's get the hell out of here. The power control's along the back wall."
The Chief opens all the cells.
{Original Cutscene} {Anniversary Cutscene}

The Chief helps Keyes to his feet.
- Keyes: "Coming here was reckless. You two know better than this...Thanks."
Keyes and the Chief leave the cell. Keyes addresses the freed Marines.
- Keyes: "Marines! Lock and load your weapons, let's be ready to move."
- Marine POW #1: "Okay, Sir."
- Marine POW #2: "Yes, Sir."
The three freed Marines, each armed with a Okarda'phaa-pattern plasma rifle, assemble in front of the Captain.
- Keyes: "While the Covenant had us locked up in here, I overheard the guards talking about this ring world. They call it... "Halo"."
- Cortana (COM): "One moment, sir. Accessing the Covenant Battlenet. (Pause) According to the data in their networks, the ring has some kind of deep religious significance. If I'm analyzing this correctly, they believe that "Halo" is some kind of weapon. One with vast, unimaginable power."
- Keyes: "Then it's true... The Covenant kept saying that whoever controls Halo controls the fate of the universe."
- Cortana (COM): "Now I see... I have intercepted a number of messages about a Covenant search team, scouting for a "control room". I thought they were looking for the bridge of a cruiser that I damaged during the battle above the ring. But they must be looking for Halo's control room."
- Keyes: "That's bad news. If Halo is a weapon, and the Covenant gain control of it, they'll use it against us and wipe out the entire human race." (Pause) "Chief, Cortana. I have a new mission for you. We need to beat the Covenant to Halo's control room. Marines! (points to the exit) Let's move!"
- Marine POW #1: "Yes, Sir."
- Marine POW #2: "Okay, Sir."
The Captain picks up a fallen Needler.
- Keyes: "Chief, you have the point."
Shut Up and Get Behind me... Sir
{Gameplay}
- Cortana: "We should head back to the shuttle bay and call for evac."
A pair of Stealth Sangheili armed with Plasma Rifles charge into the brig and the fighting resumes.
If Keyes dies at some point between here and the end of the level:
- Cortana: "No! Without the Captain... (sad and slow) the Covenant have already won..."
or
- Cortana: "No! We lost the Captain..."
The game then reverts to the last checkpoint.
After fighting their way back to the bridge, the Chief and the others discover that Sergeant Parker and his squad have been killed by two Stealth Sangheili with Energy Swords (three on Legendary). The Chief and the rescued UNSC survivors kills the Sangheili.
- Cortana: "We made it!"
- Cortana (COM): "Cortana to Echo 419 - We have the Captain and need extraction on the double."
- Rawley (COM): "Negative, Cortana. I've been engaged by Covenant air patrols, and I'm havin' a tough time shakin' 'em. You'll be better off findin' your own ride... sorry."
- Cortana (COM): "Acknowledged, Foe Hammer. Cortana out."
- Cortana: "Air support is cut off, Captain. We need to hold here until she can move in."
- Marine POW #1: "Aw, man! We're trapped in here! We're screwed! We're screwed, man!"
or
- Marine POW #2: "Oh great! Now we're trapped here. We're screwed!"
- Keyes: "Stow the bellyaching, soldier. Remember you're a leatherneck. Cortana, if you and the Chief can get us into one of those Covenant dropships, I can fly us outta here."
- Cortana (COM): "Yes, Captain. There's a Covenant dropship still docked."
The doors to the bridge open and a horde of Unggoy attack from all sides. The Chief and the others repel the attackers. The Chief then takes the Captain and the Marines back to the hangar.
They return to the shuttle bay, encountering a lance of Covenant, who are quickly dealt with. The Chief releases the dropship from the clamps or opens the shuttle bay doors on the floor below.
{Original Cutscene} {Anniversary Cutscene}

The Chief presses the holographic buttons. The Spirit dropship shakes.
- Cortana: "That's it. The dropship is loose."
The Spirit dropship shifts and opens up its troop bay doors for the Marines.
- Keyes: "Everybody, mount up! Let's get onboard."
- Cortana (COM): "Give me a minute to interface with the ship's controls."
- Keyes: "No, no need. I'll take this bird out myself."
A pair of Mgalekgolo exits the doors in front of the Spirit and takes aim at the dropship.
- Cortana (COM): "Captain! Hunters!"
- Keyes: "Hang on!"
Keyes rams the two Mgalekgolo with the dropship.
- Marine POW #3: "Nice one, sir!"
- Keyes: "Time for a little payback."
The Spirit flies out of the hangar. Fade to black.
Level ends.
Achievements
The following achievements can be unlocked on The Truth and Reconciliation across the Xbox 360 and Halo: The Master Chief Collection editions of Halo: Combat Evolved Anniversary. The original Xbox and PC and Macintosh releases of Halo: Combat Evolved did not contain achievement unlocks.
| Halo: Combat Evolved Anniversary (Xbox 360) | Halo: MCC (Xbox One, Xbox Series X|S) | Halo: MCC (Steam) | Title | Unlock requirement | Games |
|---|---|---|---|---|---|
 |
 |
 |
Beat The Truth and Reconciliation on any difficulty. | Halo: The Master Chief Collection | |
 |
 |
 |
Kill the first group of enemies on The Truth and Reconciliation without being detected. | Halo: The Master Chief Collection | |
 |
 |
 |
Complete The Truth and Reconciliation with at least four rounds left in the Sniper Rifle. | Halo: The Master Chief Collection | |
 |
 |
Beat the par time on The Truth and Reconciliation. | |||
 |
 |
Beat the par score on The Truth and Reconciliation. | |||
 |
 |
Find the Terminal on The Truth and Reconciliation. | |||
 |
 |
Find the Foreign Skull on The Truth and Reconciliation. |
Production notes
- Main article: Development of Halo: Combat Evolved

Paul Bertone, Jr. was the main gameplay designer for The Truth and Reconciliation,[3] while artists David Dunn and Paul Russel worked on the level as environmental artists.[4]
During the initial design, there were concerns for the Truth and Reconciliation model in the skybox due to engine limitations, and Jaime Griesemer believed the level would be split into two levels.[4] Early design of the level also involved a ramp the player would walk up to access the ship, intended to be low to the ground. However, the art team didn't want to have the player be able to inspect the ship up-close due to the low resolution of the in-game asset, so the gravity lift technology was conceived to to help provide the player with a way of entering the ship while keeping the vessel airborne. This idea proved to be more visually interesting that the level was structured around the gravity lift.[5] The gravity lift had also allowed Bertone to spawn in enemy reinforcements after artist Stephan Okasaki developed animations for Covenant troops being deployed from the lift. After his rescue, Captain Keyes was deliberately given a Needler, so players can easily locate Keyes without giving Keyes a high damage output.[4] A bug was present during the development in which Keyes had the AI behavior to "taunt enemy corpse". Being armed with the Needler, he would fire it into a dead Covenant soldier, which would explode and kill himself.[3]
There was a level cut from the final game that necessitated the exposition during cutscene in which the Master Chief frees Captain Keyes and the marines. According to Director of Cinematics Joseph Staten, the level, in a more elegant way, described the theory about Halo.[3]
In the initial release of Halo: The Flood, Master Chief was accompanied by a squad of Orbital Drop Shock Troopers led by a Sergeant Parker (who appeared in lieu of David Scully's Avery Johnson in-game). In-game, even in the Anniversary version of the level, the Master Chief is accompanied by Marines wearing regular Marine BDUs as opposed to their characteristic armor, which had not yet been established in canon at the time the novel was written. For example, Halo: The Flood describes ODSTs using eye-screens like regular Marines as opposed to full helmets.[6] Additionally, in The Fall of Reach and First Strike, ODSTs were only distinguished from regular Marines by the unit patches on their shoulders, as opposed to their conspicuously different armor as depicted in later media.[7][8] This was amended in the 2010 reprint, where the squad are referred to as regular Marines, as implied by their in-game appearances.
The Halo: Reach campaign level Nightfall would pay homage to The Truth and Reconciliation, featuring sniper combat and enemy territory infiltration during nighttime.[9] Similar to the Master Chief in this level, the Sniper Rifle given to Noble Six at the start of the level has more ammunition capacity than normal.
August 2000 version
Below is an overview of the mission, known as A50 internally, from August 2000 design documents for 'Halo: Combat Evolved'. Notable differences include the human forces rescuing the Captain and replacing him with a "Captain Bomb", and ending the mission with blowing up the Covenant ship.[10]
Overview: The Captain is being held in a Covenant pursuit ship that is also serving as the Covenant base of operations on this section of Halo. The Player and a highly skilled Marine sniper are dropped near the ship’s docking point and begin clearing the surrounding area of sentries and enemy snipers. Once the surrounding area has been cleared, the Player uses the hills surrounding the ship to clear the sentries underneath it. Then a dropship full of Marines lands and helps the Player attack the ramp, move through the ship to where the Captain is being held and rescue him. The Captain and the Player then escape in a shuttle after setting a bomb to blow up the ship.
|
Trivia
Easter eggs
- In Anniversary, the Foreign skull can be found in one of the Truth and Reconciliation's corridor, specifically the one where Mgalekgolo exit from to enter the hangar bay's ground floor.
- The third Terminal in Anniversary can be found within the vessel's bridge, in the middle of the front holographic displays. The section is indicated with a red color that stands out from the rest.
Glitches
- Right before the player goes into the valley where the Gravity Lift is, if the player moves fast enough the checkpoint will be reached before any of the Marines, Cortana will call for more men to be dropped while the player's Marines will follow up behind. If careful, there will be ten Marines to fight against the reaction force that is sent to battle. The same glitch can be performed when the player first enters the hangar, meaning Echo 419 can say (scripted) “Roger Cortana, Echo 419 inbound” three times.
- Before reaching the second level of the shuttle bay, there is a dead Unggoy lying on the ground with a fully charged weapon and two grenades. If the player walks out the door and walks back in, he will disappear.
- In the brig where Captain Keyes is being held, the player can actually kill him and the three Marines while the energy shields are still up just by aiming in a precise location while standing up against the shields. If the player kills Keyes and the Marines and then deactivates the shield doors, after the cutscene, not only Keyes and the Marines will be still alive, they will also turn against the player and open fire.
- It is possible to keep Sergeant Parker and his men alive by getting them stuck outside the bridge.
Mistakes
- The actual Truth and Reconciliation is only a few meters above the map as when fired at with an explosive weapon, the projectile impacts on the ship are very close to the ground.
- Somewhere within the hallways of the vessel, there is a small patch of Flood blood on the ground. This is odd as the Flood were not released until later in the game. There is only one patch, and it is the same sickly green as the player encounters from the level 343 Guilty Spark onward.
- The dead Stealth Elite lying next to the active camouflage in the hanger bay is, for unknown reasons, seen as a Sangheili Minor in Halo: Combat Evolved Anniversary's graphic mode.
References
- Keyes called a Marine a "leatherneck". The term, "leatherneck" is a slang referring to a U.S. Marine during the 20th century.
- When the Marine starts to panic and says when the Pelican can't extract them, his line sounds very similar to that of Pvt. Hudson from Aliens when the drop ship carrying them crashed. The Marine says "We're screwed man!" while Hudson says "Game over man, game over!"
Miscellaneous
- The player starts this level with a Sniper Rifle with a total of 68 rounds, exceeding the usual maximum of 28. When the player's ammo is less than 28, the normal cap will be in place.
- This is the only level in the game where the player cannot find an M6D Magnum at any point.
- It is possible to perform a grenade jump that skips much of the level. A video is here: [1]; the jump occurs after about 13 minutes. A video is also available on YouTube: [2]; the jump is at around 2:47. This jump includes 3 plasma grenades and 1 frag. Three plasma grenades are thrown near the Overshield, each one is lower than the other. Then, a frag is thrown at the ground. Grab the Overshield before jumping, so no damage occurs.
- If the player pays attention while searching for Captain Keyes throughout the level, the player will find random groups of marines lying dead in the hallways of the Truth and Reconciliation. This is odd considering that all the marines that were with Captain Keyes went to the brig with him and the only other marines to enter the ship were with the Master Chief. It is also possible that they were a reconnaissance force sent in before the strike team. It is reinforced by the fact that in Halo: The Flood, it says that reconnaissance had confirmed Keyes was captured and there are also dead Sangheili below the ship and in the launch bay. However, it was also mentioned that Chief passed several groups of dead marines when traveling through the ship's corridors. It may also be that these Marines were captured along with Keyes and killed on the way to their holding cells, perhaps for trying to escape.
- When the player is just outside the bridge after rescuing Captain Keyes, it is possible that the player can sometimes hear the Stealth Sangheili attacking and killing Sergeant Parker's squad.
- After clearing the entire area outside the ship, if one returns to the entrance of the second area, there is a small alcove where a Sangheili was hiding. It is covered by two thin rocks forming a ceiling. If one turns their volume up and walks in and out of the cave lightly, several different "ghost" noises can be heard including hissing, distant "birds" and wolves sounds. The bird sounds seem very similar to the ones from Halo 2 on High Charity. This place is just one of multiple locations where these sounds can be heard on the map.
- If the Stealth Elite manages to successfully kill at least one marine upon entering the ship, there is a possibility that a pair of Hunters will enter through the blast doors instead of a pair of Jackals. But if the Elite is killed before managing to kill any of the marines, the Hunters will be replaced with the said pair of Jackals. On Legendary difficulty, Hunters will ALWAYS enter through the blast doors.
- In the beginning of the level, Cortana will never mark the Grunts heading to the Shades with NAV points nor will she alert the Master Chief as long as the player is not spotted or taking fire.
- In Halo: The Flood, the body count for this level is given as around thirty-six humans while the Covenant suffered six-score or one hundred and twenty loses. Six Shade turrets were also stolen for the defense of Alpha Base.
- In a rare occasion, Captain Keyes can be killed by a fellow Marine through friendly fire when engaging in a firefight regardless of any difficulty.
- The corridors for the level were textured by Bungie artist Paul Russel.[11]
Gallery
Halo: Combat Evolved
Preview of the level in Halo: Combat Evolved menu.
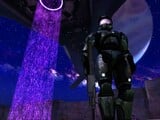
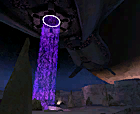
The Master chief next to the gravity lift of the Truth and Reconciliation in a promotional screenshot.
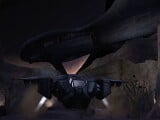
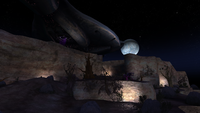
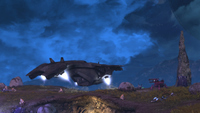
A view of the Truth and Reconciliation's bow.
The Pelican prepares to deploy marines underneath the ship.
Two Spartans sniping at Covenant during cooperative play.
Promotional screenshot depicting John using an M7057 flamethrower to fight Jackals.
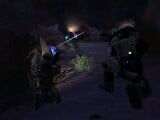
John and marines fighting Unggoy.
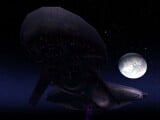
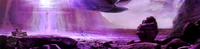
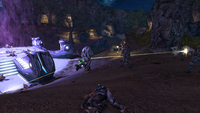
The Truth and Reconciliation looming over the landscape.
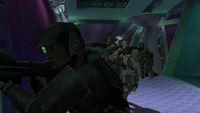
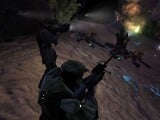
Marines securing the hallways of the ship.
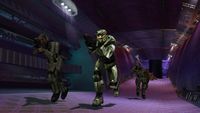
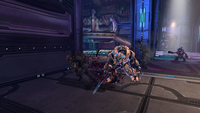
John-117 leads a Marine squad through the Truth and Reconciliation's interior.
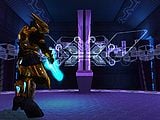
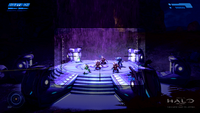
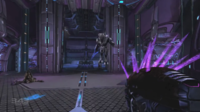
Lat 'Ravamee, the Truth and Reconciliation's Shipmaster, guarding the bridge.
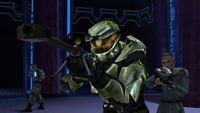
The Master Chief takes point, backed up by the rescued UNSC personnel.


Halo: Combat Evolved Anniversary

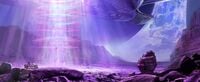
Concept art of a cliff edge below the Truth and Reconciliation's landing zone.
Concept art of John-117 using the Truth and Reconciliation's gravity lift.
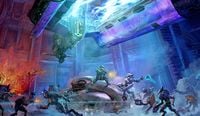
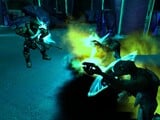
Concept art of the Chief fighting alongside Marines in the Truth and Reconciliation's hangar bay.
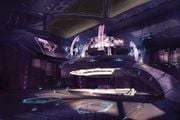
Concept art of the bridge.
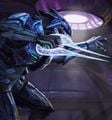
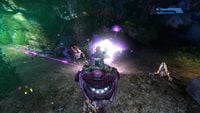
Concept art of a Sangheili armed with an energy sword on the ship.
Preview of the level in Halo: Combat Evolved Anniversary menu.
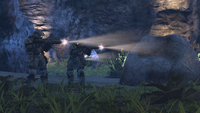
Marines in the plateau underneath the ship.
John-117 operating a T-29 Shade in the plateau.
John-117 using his sniper rifle's scope.
Marines fighting Mgalekgolo at the gravity lift.
Echo 419 drops off reinforcements.
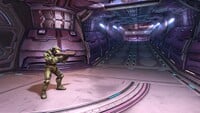
John-117 in a hallway aboard the ship.
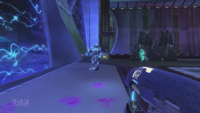
John-117 encounters a Sangheili Minor in the shuttle bay.
Lat 'Ravamee fighting UNSC forces in the bridge.
John-117 encounters a Sangheili Zealot in the brig.
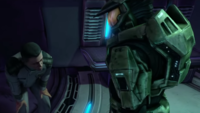
John-117 finds Captain Keyes in the brig.


Notes
- ^ The Sergeant Johnson NPC appears in Parker's place in the game, although due to the character's death and his establishment as a separate character in Halo: The Flood, this particular appearance of Johnson is not considered canonical.
Sources
- ^ Halo: Combat Evolved Editing Kit, game file
HCEEK\tags\levels\a50\a50.scenario - ^ Halo Waypoint, The Halo Bulletin: 10.2.14 (Retrieved on Oct 12, 2014) [archive]
- ^ a b c Halo 3, Legendary Edition: Halo: Combat Evolved developer commentary
- ^ a b c YouTube - IGN, Halo: Combat Evolved Devs React to Speedrun (Martin O’Donnell, Marcus Lehto)
- ^ The Art of Halo, page 85
- ^ Halo: The Flood, page 58, 63
- ^ Halo: The Fall of Reach, page 248
- ^ Halo: First Strike, page 48
- ^ Halo: Reach, Legendary Edition: developer commentary "This is our hats off to one of Halo 1's missions." - Marcus Lehto
- ^ Halo Waypoint, Digsite Deep-Dive (Retrieved on Jun 20, 2024) [archive]
- ^ X.com, Paul Russel (@docabominable): "@Halo posted this image, yesterday, so I’ll add that I built and textured the flood elite combat form and did the textures and materials for this environment." (Retrieved on Nov 22, 2024) [archive]
| Preceded by Halo |
Halo CE Campaign Missions The Truth and Reconciliation |
Succeeded by The Silent Cartographer |
| |||||||||||||||||||||||


