CE:Assault on the Control Room
From Halopedia, the Halo wiki
|
Prev: |
|
|
Next: |
|
| Assault on the Control Room | |
|---|---|

| |
|
Game: |
|
|
File name (?): |
|
|
Player: |
|
|
Date: |
|
|
Location: |
On the surface of Installation 04, in and around the Control Room |
|
Objective(s): |
Get to Halo's Control Room before the Covenant |
|
Par Time: |
00:15:00 (Master Chief Collection-only) |
|
Par Score: |
18,000 (Master Chief Collection-only) |
 |
Halopedia has a walkthrough guide for this level; see CE:Assault on the Control Room/Walkthrough. |
| “ | Defend the Control Room against wave after wave of Covenant troops. | ” |
Assault on the Control Room is the fifth and longest campaign level in Halo: Combat Evolved. It is the first and only level that the player can utilize a Scorpion tank, and the first level the Ghosts and Wraiths are seen in action.
In 2026 the level was remade entirely for inclusion in Halo: Campaign Evolved.
Plot[edit]
The level follows the Master Chief on a mission to reach Halo's Control Room. The Covenant are deployed in greater numbers and in a more superior force than previously seen in the game, using Wraiths, Ghosts and Banshees. The majority of the level is set in a snowy, outdoor environment. Although the level seems to be natural, there are networks of tunnels and elevators built by the Forerunners that connect sections of the constructs into the Control Room.
The level is known for its variety and well roundness. It allows the player to use every weapon and vehicle in the game (except the shotgun), and is the only level in Halo: Combat Evolved that allows the Master Chief to use a Scorpion tank. Although the level is famous for its snowy outdoor battles and large bridges, there are also a variety of indoor skirmishes, including standoffs with Sangheili Zealots. There is a mix of vehicle, long-range, and close quarters combat. The player is assisted by a handful of Marines after their Pelican crashes, but the level is mostly a solitary experience.
At the end, the Master Chief reaches the Control Room and Cortana interfaces with the computers. She is horrified to learn that Halo houses the Flood, and the weapons cache that Captain Keyes is looking for will lead him straight to the parasite. Cortana elects to stay behind, while the Chief rushes off to find the Captain.
Transcript[edit]
I Would Have Been Your Daddy...[edit]
{Original Cutscene} {Anniversary Cutscene}

Fade in to the interior of a large Forerunner dome. Pan down to a long shaft. A single Unggoy Minor paces on an open platform.
Close up of the walking Unggoy. Other Unggoy are sleeping nearby. He stops as he hears jets, he sniffs the air, and yelps as a Pelican rises up from the chasm in front of him, screams and runs towards the door.
{Gameplay}
- Carol "Foehammer" Rawley (COM): "This is as far as I can go!"
- Cortana (COM): "Roger that. We can find our way to the Control Center from here."
- Rawley (COM): "Good luck. Foehammer out."
The Pelican hovers at the edge of the platform, the Chief gets out. He proceeds into a series of circular rooms and begins clearing them of Covenant.
- Cortana: "The Covenant presence here is stronger than I anticipated. They seem to have the entire region secured."
The Chief emerges onto a bridge, where he discovers that it is snowing. On Legendary a Banshee fighter flies around the area.
- Cortana: "Interesting... the weather patterns here seem natural, not artificial. I wonder if the ring's environment systems are malfunctioning... or if the designers wanted the installation to have inclement weather."
A Pelican dropship flies over the bridge. The Covenant forces on the bridge (including the Banshee on Legendary) open fire at it.
- Fireteam Zulu Sergeant (COM): "This is Fire Team Zulu requesting immediate assistance from any UNSC forces. Does anyone copy? Over."
- Cortana: "I didn't think there were any human forces left on this part of the ring."
- Cortana (COM): "Cortana to Fire Team Zulu, I read you. Fire Team Zulu, this is Cortana. Hold position. We're on our way."
- Fireteam Zulu Sergeant (COM): "Roger that. Make it quick."
The Pelican descends to the area below the bridge.
A Sangheili Zealot runs out of a door at the opposite side of the bridge and awaits the Chief, supported by a lance of Unggoy. The Chief kills them all and enters another structure and descends to the ground level, where he returns to the canyon. A large number of Covenant have three Marines with an overturned Warthog cornered. More dead Marines lie nearby. A Covenant Wraith tank fires plasma mortars as Shade turrets and Ghost vehicles strafe the Marines.
- Marine #1: "Glad you could join the party, sir!"
or
- Marine #2: "Master Chief, Sir! Good to see you!"
The Chief assists and they eliminate all of the enemies in the area
- Marine #1: "They gave it their best shot, but they didn't count on running into the biggest squad of Marine bad-asses in the Corps!"
or
- Marine #2: "That's all of them. The area's secure."
The Chief finds a second group of Marines fighting near a Scorpion tank. With his assistance they clear the area.
- Marine #1: "Enemy forces eliminated. The area's secure."
or
- Fireteam Zulu Sergeant: "That's the last of 'em - area secure. Stand down, team! They did their damnedest, that's for sure. This is all that's left of my platoon! The Covenant are down here in force... and they brought plenty of toys! I wouldn't have given us a snowball's chance until you showed up, Chief."
The Chief and the Marines advance.
- Marine #3: "Aw, crap. Let's get the hell outta here, man! Somebody call the dropship!"
- Fireteam Zulu Sergeant: "You stow that garbage right now, mister. You're a Marine, so act like it, dammit! We've got a job to do here."
or
- Marine #2: "Shut up! Show some backbone, amigo. We're all in this together!"
- Cortana (COM): "Negative, team. No evac available at this time. But the Chief and I could use some assistance."
- Fireteam Zulu Sergeant: "Okay, Marines. Time to pay back the Chief for pulling your sorry tails out of the fire. Prepare to move out!"

The Chief reaches a second large open area, where one Wraith hovers on the ice and another lurks on top of the cliff at the far end of the canyon. More Ghosts, Shades and Covenant infantry are also present.
- Marine #1: "Enemy mortar tanks sighted at my position... it's gonna be a busy day."
or
- Marine #2: "Dang, they got armor support! Watch out for those tanks!"
or
- Marine #3: "Bloody hell! Enemy forces have armor support... It's time to earn our pay."
or
- Marine #4: "Contact, contact! Covenant mortar tanks are moving in!"
- Cortana: "The Covenant placed their tanks to defend the entrance to the tunnel."
The Chief destroys the first Wraith tank.
- Marine #1: "Looks like that armor wasn't so tough after all! Let's mop up the rest of 'em!"
The Chief enters the tunnel, killing a pair of Mgalekgolo and comes across a large cavern. More Covenant wait inside, including another Mgalekgolo pair.
- Marine #1: "More Covenant sighted! Man, these guys are like cockroaches!"
or
- Marine #2: "Contact, more Covenant sighted!"
or
- Marine #3: "Aw man, more Covenant!"
or
- Marine #4: "More Covenant!"
The Chief crosses the cavern and exits into another tunnel, which soon turns into a rocky slope heading upwards.
Rolling Thunder[edit]
The Chief clears the area of Covenant, including another Wraith and two Mgalekgolo.
- Fireteam Zulu Sergeant: "You monkeys almost look like golden boys!"
- Marine: "Damn straight!"
The Chief comes across two more Mgalekgolo chasing after a squad of Marines, where the path switches back and goes down to a frozen river leading to the cave to the last area of the second chasm.
- Cortana: "I thought the Covenant had eliminated all the Marine forces in this area."
After the Chief engages and defeats the Mgalekgolo, a Covenant Spirit appears from behind the cliffs and drops in on the ridge he just descended from.
- Marine #1: (whispers) Hey, Anybody else hear that? Aw, man... Covenant dropship inbound, take cover!"
or
- Marine Sergeant: "Look sharp, boys! Covenant dropship inbound, let's move!"
or
- Marine #4: "Quiet... Anybody hear something? Covenant! Covenant dropship inbound!"
- Marine #3: "The Covenant are dropping in behind us! We're trapped!"
The Chief nears some switchbacks leading up to final area of the second chasm.
- Marine #2: "Master Chief, the Covenant have stationary guns dug up in those rocks!"
or
- Marine #3: "Whoa, sir! The Covenant are dug up in those rocks! They've got us pinned down here!"
or
- Marine #4: "Covenant Forces are diggin' in those rocks sir, we can't move."
- Cortana: "We need to get up this ridge."
- Cortana (COM): "Marines, hold your positions. We'll handle those guns."
- Cortana: "Master Chief, we should scale the ridge and get below those stationary guns."
- Marine #2: "Roger that. Marines, stay here and cover the Master Chief."
or
- Marine #3: "I'm in no hurry for a heroic charge on those guns, Cortana. Holding position."
or
- Marine #4: "Holding position. Everybody, keep your eyes peeled and cover the Master Chief."
They eliminate all enemies in the area, including a Banshee fighter and two Ghosts, and approach a door in the cliffs.
- Cortana (COM): "Cortana to Fire Team Zulu. I've sent a distress signal tagged with your current position. Hold your position and await evac. The Master Chief and I are going to continue on ahead."
- Marine #1: "That's affirmative! Fire Team Zulu out!"
or
- Marine #2: "Affirmative! Okay people, evac bird's on the way!"
or
- Marine #3: "Give 'em hell, sir! Fire Team Zulu out!"
or
- Marine #4: "Roger, good luck."
The Chief battles his way through more interior areas and across two more bridges. In the last room, the Chief kills a pair of Mgalekgolo and a mixed group of Unggoy and Kig-Yar and finds another door.
- Cortana: "Resistance appears to be increasing. We must be close to the Control Center."
If I Had a Super Weapon...[edit]
The Chief reaches a door to the third chasm. Covenant infantry patrols the rock bridge he is on, and a massive structure can be seen on his left.
- Cortana: "Analyzing. This must be the control room. Subtle. The entrance to the Control Room is at the top of that pyramid structure. Bring me up there and I should be able to get us inside."
The Chief fights through the bridge and another indoor area before reaching the valley's bottom.
- Cortana: "The entrance to the control room is at the top of the pyramid. Let's get up there. We should commandeer one of those Ghosts, we're going to need the firepower."
The Chief battles his way up the pyramid and through big doors into a large corridor, where he kills all of the Covenant inside, including a Sangheili Zealot.
- Cortana: "Scanning... Covenant forces in the vicinity have been eliminated. Let's move on to Halo's Control Room."
The Chief opens the final door.
{Original Cutscene} {Anniversary Cutscene}

- Cortana: "This is it. Halo's control center."
The Master Chief walks through the door and to a control panel at the center of a circular glass walkway projecting into the middle of a massive open chamber. A holographic map of Halo surrounds a smaller holographic map of the system, which shows Basis and Threshold, and Halo itself between them. Also noticeable are the red areas shown on the lands of Halo, possibly indicating where the Flood is currently spreading.
- Cortana: "That terminal, try there."
The Chief unplugs Cortana's chip from his helmet and places her chip in the terminal. A moment later, she appears above the display (In the original, data streams out from her in all directions, her eyes are now red and her body is green, shifting occasionally to blues/purples).
- Master Chief Petty Officer John-117: "You all right?"
- Cortana: "Never been better! You can't imagine the wealth of information. The knowledge! So much! So fast! It's glorious!"
- John-117: "So, what sort of weapon is it?"
- Cortana: "What are you talking about?"
- John-117: "Let's stay focused. Halo... how do we use it against the Covenant?"
- Cortana: "This ring isn't a cudgel, you barbarian, it's something else... something much more important. The Covenant were right... this ring... it's Forerunner. Give me a second to access... yes, the Forerunner built this place, what they called a "fortress world", in order to... no, that can't be. Oh, those Covenant fools, they must have known, there must have been signs!"
- John-117: "Slow down. You're losing me."
- Cortana: "The Covenant found something, buried in this ring, something horrible, and now... they're afraid."
- John-117: "Something buried? Where?"
- Cortana: "The Captain, we've got to stop the Captain!"
- John-117: "Keyes? What do we-"
- Cortana: "The weapons cache he's looking for. It's not really- We can't let him get inside!"
- John-117: "I don't understan-"
- Cortana: "There's no time. Get out of here, find Keyes, stop him! Before it's too late!"
The Chief turns and runs from the Control Room.
Level ends.
Achievements[edit]
The following achievements can be unlocked on Assault on the Control Room across the Xbox 360 and Halo: The Master Chief Collection editions of Halo: Combat Evolved Anniversary. The original Xbox and PC and Macintosh releases of Halo: Combat Evolved did not contain achievement unlocks.


Production notes[edit]
- Main article: Development of Halo: Combat Evolved
Bungie designer Paul Bertone led the gameplay design of Assault on the Control Room. The level design led to the development of AI NPCs operating vehicles to support vehicle combat. Chris Lee was one of the artists that worked on the environmental design, though the bridges were designed by Bertone and artist Chris Barrett.[3]
A level was supposed to take place between the previous level The Silent Cartographer and this level, however it was cut. Instead, it was replaced by the cinematic in which Echo 419 enters the tunnel to explain the drastic change in setting from a tropical island to a snowy canyon.[4] In Halo: Combat Evolved Beta 1749, the level was titled "Fortress World".
The snowy canyon terrain and control room design was later revisited in Halo, the final level of Halo 3. Furthermore, the mission start description is "Assault on the Control Room", referencing the name of this level.
In Halo PC, Cortana does not shift colors during the final cinematic, instead only appearing green. Due to Halo: Combat Evolved Anniversary being built using the PC version, this error is retained in the game's original graphics mode.
Trivia[edit]
Glitches[edit]
- At the very beginning of the level, "Press X/E to enter side seat of Pelican" will appear. The player will be placed back on the Pelican as it flies back the way it came and can get off at any time. However, if the player doesn't get out the Pelican, it will crash and the player will die. This is known as the Pelican Death Glitch. The glitch is not present in the Anniversary remake.
- By jumping at the right point, it is possible to board Fireteam Zulu's Pelican. It flies down, drops off the Warthog, then flies along the canyon. It crashes near to but not right on top of the preexisting Pelican wreck.
- When Fireteam Zulu's Pelican flies by the bridge, the vehicle's shadow is also seen on the lower part of the bridge.
- In the original Xbox version, it is possible to acquire a Banshee from one of the platforms in the chasm above, shortly after finding the Scorpion. The Banshee can be launched off the platform with explosions from the Scorpion's main gun or a well-placed shot from a rocket launcher. This glitch doesn't work in any later versions.
- Any Covenant, except for the Mgalekgolo and Banshees, left alive near the Control Room will instantly die when the cutscene is triggered.
- If the player brings a Banshee into the control room and kill themself and destroy the Banshee by using the Fuel Rod on the Banshee, the player will still move on to the cutscene, and the Banshee will be blue.
- If player rides a Banshee with full speed before the cutscene is triggered, there's a chance that the player will die by splatter when the cutscene begins. The cutscene will still carry on but the player can see that the Master Chief is dead or frozen, due to the Banshee landing on the player, killing them.
- If the player manages to descend the cliff at the entrance to the first bridge without dying, the script that would normally spawn enemies fails to trigger, and so no enemies spawn in for the rest of the level.[5] This is a common technique used by speedrunners to traverse most of the level unopposed.[6]
- Despite the doors being locked, it's possible to enter the rooms where the Pulse Generator are located in Two Betrayals. This can be done by forcing yourself through the doors by ejecting from a Banshee, with the hatch facing the locked door. The rooms are somewhat different, however, as they are dimly lit and the pulse generators are not online.
Easter eggs[edit]
- The Three dead Grunts Easter egg is found on this level.
- The song, Siege of Madrigal can be found at the end of this level by flying a Banshee on the second bracket above the Control Room. Land the Banshee on the bracket and walk to the right until you reach the edge. After a few seconds the music will play. It can also be found at the beginning if you fly a Banshee down the big shaft and stand on the right spot on the ledges.
- In Anniversary, the Fog skull can be found on a raised platform in the center of the room after crossing the first bridge and taking the elevator to ground floor. The Malfunction skull can be found in the first underground chasm area, on one of the pipes sticking out and dropping to the chasm's bottom.
- The fifth Terminal in Anniversary can be found in the hole at the end of the Control Room's giant beam, right under the beam and beside a few Marines' corpses.
Mistakes[edit]
- Despite its name, the level's in-game description outlines a defensive mission, rather than the lengthy offensive that takes place in the level itself.
- In The Art of Halo the level is mistakenly called "Attack on the Two Control Rooms." However, this may have been an early name for the level, or perhaps an accidental combination of the level's name with another level, Two Betrayals. Both share the same map design and are canonically in the same place, a snowy valley, featuring the Control Room.
- The Pelican wreckage near the second group of marines from Fire Team Zulu uses Echo 419's model and numbers.
- When crossing the bridge in the cavern in a Scorpion tank the glass can be heard breaking, despite the glass on the bridge being unbreakable.
- Unggoy sleeping in the level will still say their lines (e.g. "He's unstoppable!") when killed silently by melee. Their cries will not alert the other AI characters of the player's presence. This glitch also happens on other levels.
References[edit]
- The first chapter in this level is "I Would Have Been Your Daddy", which is also a line Sergeant Stacker says in Halo: Combat Evolved and is the name of a skull in Halo 2, Halo 3 and Halo Infinite.
- The Control Room is shaped like the Marathon symbol if observed from a bird's eye view.
- During the level's ending cutscene, Cortana phases between a pattern of three symbolic colors being green/yellow, blue/crimson, and red/blue. These three color patterns may reference the colors of the three UESC AIs encountered throughout the Marathon franchise: Durandal, Leela, and Tycho.
- In Forza Horizon 4, the Winter Showcase Remix version of The Halo Experience Showcase is named Assault on the Control Room.
- Upon entering the cavern with the bridge, off to the right can be found seven dead marines and a single dead Hunter, as well as an ammo cache including rockets, sniper, assault rifle, and pistol rounds. In the same area, you can found a dead Unggoy but this have the same trail of blood that Flood does with their bodies, this is likely a mistake but also a foreshadowing of the enemy.
Miscellaneous[edit]
- The "Lost Muse", which was accidentally left out of the Halo: Original Soundtrack, is played on this level in the series of rooms where the player fights a group of Stealth Sangheili and a pair of Mgalekgolo, immediately before the rock bridge overlooking the Control Room.
- This level features the largest number of Mgalekgolo in a campaign level in Halo: Combat Evolved, a total of 20. As many are encountered in places the player has access to vehicles, they are particularly vulnerable to splatters.
- The second Marine Sergeant (the one who is part of the Marine squad being chased by Hunters) uses a Marine Sergeant model but with a Marine regular's combat dialogue, the only such instance in Halo: Combat Evolved.
Gallery[edit]
Development images[edit]

John fighting alongside two Scorpions.

Halo: Combat Evolved[edit]
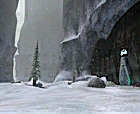
Preview of the level in Halo: Combat Evolved menu.

The first room of the level.
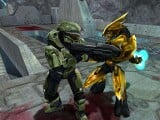
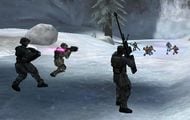
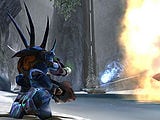
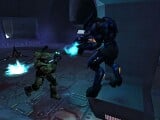
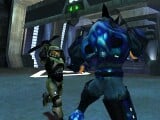
John fighting a Sangheili Zealot.
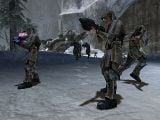
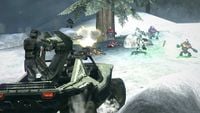
Fireteam Zulu securing the area after exiting the Pelican.
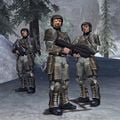
A trio of Marines from Fireteam Zulu deployed from the Pelican.
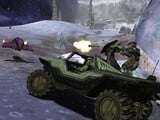
John's Warthog charges at Covenant forces.
John's Warthog engaging an enemy Ghost.
Fireteam Zulu's Sergeant spots enemy forces in the valley.
A marine operating a Ghost.
John's Scorpion destroys a Banshee.
Johnson firing a Ghost's dual plasma cannons.
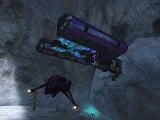
A Mgalekgolo approaching the Scorpion.
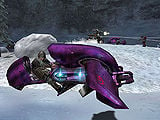
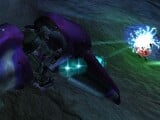
A Banshee and a Spirit in flight.
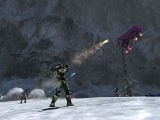
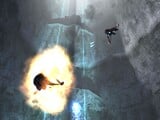
John fires a rocket at a Banshee.
One of the rooms in the level.

John fighting a group of Unggoy.
John fighting a Sangheili Minor at close range.
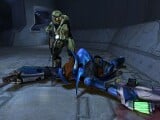
John standing atop a dead Mgalekgolo.
John's Banshee destroys another Banshee.
John prepares to melee with a shotgun.
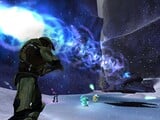
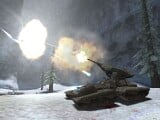
John fighting against an enemy Wraith.


Halo: Combat Evolved Anniversary[edit]
Concept art for Halo: Combat Evolved Anniversary.
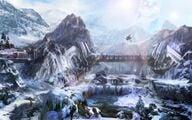
An alternate variant of the previous artwork, featuring a Banshee attacking the Warthog.
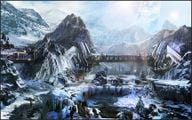
Concept art of the level for Halo: Combat Evolved Anniversary.

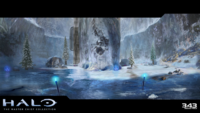
Preview of the level in Halo: Combat Evolved Anniversary menu.
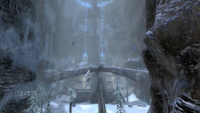
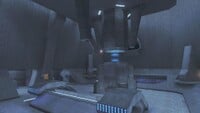
A frontal view of the Control Room.


Sources[edit]
- ^ Halo: Combat Evolved Editing Kit, game file
HCEEK\tags\levels\b40\b40.scenario - ^ Halo Waypoint, The Halo Bulletin: 10.2.14 (Retrieved on Oct 12, 2014) [archive]
- ^ YouTube - IGN, Halo: Combat Evolved Devs React to Speedrun (Martin O’Donnell, Marcus Lehto)
- ^ Halo 3, Legendary Edition: Halo: Combat Evolved developer commentary
- ^ Halo 1 LEGENDARY SOLO - Mission 5 - Assault on the Control Room
- ^ Halo 1: "Assault on the Control Room" - Legendary Speedrun Guide (Master Chief Collection)
| Preceded by The Silent Cartographer |
Halo CE Campaign Missions Assault on the Control Room |
Succeeded by 343 Guilty Spark |
| |||||||||||||||||||||||


