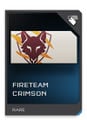
Fireteam Crimson
From Halopedia, the Halo wiki
| Fireteam Crimson | |
|---|---|

| |
|
Active: |
|
|
Affiliation: |
|
|
Branch: |
|
|
Size: |
Five operators (see production note.) |
|
Engagements: |
|
- "I need a fireteam I can depend on and, until you prove otherwise, you’re it."
- — Sarah Palmer
Fireteam Crimson is a team of Spartan-IV supersoldiers. Crimson was assigned to UNSC Infinity during the ship's second expedition to the Forerunner shield world Requiem in February 2558. Operating on Requiem, Crimson is frequently assigned on ground missions in which they combat the shield world's resident Promethean constructs and Jul 'Mdama's Covenant forces.[1]
Members
At some point Fireteam Crimson had the following team configuration:[2]
- Unidentified Spartan-IV Mark VI Mod
- Unidentified Spartan-IV Enforcer
- Unidentified Spartan-IV Orbital
- Unidentified Spartan-IV Recruit
- Unidentified Spartan-IV Scout
Former Members
- Spartan Sigrid Eklund
History
Early Missions
By 2554, Fireteam Crimson participated in operations BELLINGHAM and LATE TAXI, with both being successful. In both operations, Spartan Sigrid Eklund's skills were noted by Jun-A266, who would recommend Eklund for more isolated endeavors. Musa Ghanem would approve this transfer request, pulling Eklund out of Crimson.[3]
Deployment on Requiem
Operation: CHATTERBOX
- Main article: Operation: CHATTERBOX
On February 9, 2558, Crimson, alongside Fireteam Majestic were assigned by Commander Palmer to eliminate Covenant cultists at two identical structures in order to establish a base at REQ-626-C as part of a prelude to the UNSC's campaign on Requiem. Crimson was to clear out a structure known as REQ-814-B while Majestic cleared out REQ-814-D. Despite facing more enemies, Crimson was able to clear out their structure before Majestic.[4]
Further Operations
Crimson was deployed in a joint UNSC military operation on Requiem alongside Fireteams Castle, Domino, Ivy, and Majestic. Spartan Jared Miller was personally assigned to Crimson as their mission handler. Crimson was dropped behind-enemy-lines to assist Marines in neutralizing Covenant forces in the area. In an attempt to stop Jul 'Mdama's Covenant from establishing permanent bases throughout Requiem, Crimson was also given the objective to destroy four power cores acting as short-range wireless transceivers, and was successful. After mopping up whatever Covenant forces were left in the area, Miller sent a Pelican dropship for extraction. Commander Sarah Palmer congratulated them on their mission success.[5]
Subsequently Crimson was sent to capture a Covenant-held power station on Requiem in "Sniper Alley." They were tasked with eliminating all Covenant forces within the area. Miller concluded that 'Mdama's Covenant were siphoning large amounts of energy from a nearby Forerunner structure. Spartan Robert Dalton came online and readied an orbital-strike from the Infinity to destroy the target energy source. The target was destroyed by Infinity, and Fireteam Crimson was extracted from the area.[6] Crimson and Majestic were sent north of the UNSC's area of operations in Requiem in order to shut down Forerunner power generators at the "Fortress." Both teams were sent to their individual locations to complete their objectives. Upon insertion, both Crimson and Majestic had their long-range communications jammed, but deactivated the jammers. The area was quickly swarmed with Promethean Crawlers and Promethean Watchers as Crimson fought to disable the arrays powering the Forerunner structure. Initiated by Palmer, the mission turned into a competition where both fireteams were trying to complete their mission objectives first. Majestic temporarily took the lead, but Crimson eventually beat Majestic. Dalton arrived in a Pelican dropship for Crimson's extraction.[7]
Next Crimson was sent to "the Refuge," a jungle Forerunner structure that scientists were preparing to set up shop in. They were attacked by more Promethean forces and activated a star map. Miller processed the data and Palmer tried to get them extracted. The door locked, shutting Crimson in the facility, and Promethean Knights arrived in the area. Crimson beat off the foes while Miller opened the door allowing Crimson to escape on Dalton's Pelican.[8] Crimson was then sent into a Covenant dig site at "the Cauldron," a Forerunner area. 'Mdama's Covenant resistance was strong, leading Palmer to wonder what they were guarding. Crimson fought their way to a mysterious artifact guarded by Promethean Knights. After fighting them off, Crimson recovered the Artifact, boarded the Pelican, and brought it back on Infinity.[9]
Later Crimson was sent in to "the Gate," a location that the Marines had failed to take from Jul 'Mdama's Covenant. After fighting through Kig-Yar and Unggoy they faced Promethean resistance. The incoming Prometheans were dispatched by Crimson, and Miller tasked the team with disabling pylons controlling Forerunner turrets. Dalton came in and evacuated Crimson after they faced more translocating Knights and Crawlers. They were sent to respond to a science team's distress call.[10] The aforementioned science team hid behind a forcefield when 'Mdama's Covenant attacked, and were the science team assigned to the Cauldron. Crimson destroyed Covenant communications arrays, and found beacons and IFF tags from the science team. Dr. Morgan Rivera was brought on comms who gave Crimson her location. Crimson fought through 'Mdama's Covenant and rescued her and her team.[11]
Next Crimson was sent in to evacuate Marine squad Hacksaw who was attacked by Covenant at the Fortress. They were dropped in and beat back waves of Covenant forces to rescue the Marines. The group moved to the top of the Fortress to be evacuated by Dalton, but Phantoms arrived carrying Sangheili Warriors and Sangheili Zealots. Crimson destroyed the Phantoms and Sangheili and were evacuated.[12] En route to "the Refuge," Crimson was shot down in "Sniper Alley" by nearby anti-air turrets and were thought to have died. Miller learned that Fireteam Crimson was still alive and they were sent to take out the turrets. Covenant forces arrived supplanted by Gloto'kas-pattern Assault Carapaces, but Crimson eliminated 'Mdama's Covenant forces and the turrets and continued with their mission.[13] Reaching "the Refuge," Crimson saw no sign of Gagarin team, the science team based there. They learned Gagarin activated Forerunner artifacts, and Crimson deactivated them under resistance from Promethean forces. They got on a Pelican and left, not having found Gagarin team.[14]
Hunting a terrorist
Commander Palmer deployed Crimson team to a rocky area of Requiem to hunt for Parg Vol, a Sangheili terrorist and associate of Jul 'Mdama. After facing heavy Covenant resistance, they were unable to kill Vol and he escaped.[15] Crimson was then sent to Galileo Base, a science facility on Requiem under heavy attack by Covenant forces. They managed to beat back Jul 'Mdama's Covenant and drive them away from Galileo Base.[16] Next Crimson arrived at Two Giants, a canyon with two Beacon towers, to assist Spartan squad Mountain. Beating off Covenant forces Crimson retrieved the marines and activated Forerunner technology in the towers.[17] 'Mdama's Covenant responded by sending an entire fleet of foes from a Zanar-pattern light cruiser. Palmer dropped in several Mantis mech suits which Crimson used to beat back the fleet while the cruiser was destroyed by Infinity Sub-Vessel 3.[18] Vol was once again located, this time re-taking "the Gate" location with his Covenant forces. Crimson neutralized him and several Covenant and Promethean warriors.[19]
Chasing Jul 'Mdama
Soon after, Crimson was then sent to disable a Covenant communications array at the site Jul 'Mama's Covenant had previously had anti-air turrets. The array had led to the death of Fireteam Castle, and Crimson rushed the location and tapped into the array before disabling it.[20] UNSC Infinity found data possibly leading to Jul 'Mdama's location. The data placed 'Mdama at the "Two Giants" where a tower had been retaken by Covenant forces. Activating Forerunner technology, a portal opened and Crimson stepped through.[21] They emerged in "the Fortress" and re-established communications primarily with the AI Roland. After fighting off enemy forces Crimson steped through another portal, chasing 'Mdama.[22] Crimson emerged in the middle of Covenant enemies at "the Cauldron", and fought through them to reach 'Mdama. Infinity bombed 'Mdama's location causing him to drop the Didact's Gift, which was recovered by the UNSC and subsequently brought to Galileo Base.[23] However, 'Mdama's Covenant attacked Galileo Base with the intent of recovering the gift. Crimson beat them back and activated the base's defense systems, holding back 'Mdama's Covenant but Prometheans translocated in the base. Crimson fought them off and left Fireteam Majestic to take the Didact's Gift to Infinity.[24]

On Crimson's next deployment, they were sent to "the Gate" to investigate Dr. Leslie Boyd's power fluctuations back at "the Refuge" with only Roland and Miller to help them. They were being caused by translocating Prometheans, and they were at risk of destroying Boyd's scientific instruments. They defended them from raids of Prometheans until Boyd could finish his work and block their translocations. Boyd opened a portal for Crimson, now able to control the portal's locations.[25] At "the Refuge," the science base came under attack by Prometheans, which were driven off by Crimson.[26] A Zanar-pattern light cruiser began sending a Covenant army down to "the Refuge," and Crimson defended the location while Fireteam Shadow took out the cruiser. Successfully defending Dr. Boyd, Crimson team left on a Pelican to their next objective.[27] Crimson arrived at Magma Base to defend power generators from Covenant forces. After doing so, Roland found Gabriel Thorne's IFF tag in the area, and found it along with signs of a struggle.[28] Crimson was dropped off in the "Quarry" to try and find Thorne. Despite defeating a large amount of Covenant, Thorne was not found. A Pelican arrived for evac but was destroyed by Jul 'Mdama's Covenant. Phantoms and Banshees then converged on Crimson's position, along with a single light cruiser.[29]
Capture and escape
Fireteam Crimson was eventually captured and brought to a Covenant detention facility. After Roland located Crimson, Miller ordered a diversionary bombardment by Dalton. The resulting explosion distracted the guards, which allowed Crimson to escape. Crimson then neutralized the remaining guards and fended off waves of reinforcements as they attempted to escape. They deactivated a shield door and engaged more Covenant including Shade turrets. Miller decided Crimson must hijack a Phantom to escape, however after entering the next area a Marine squad known as Icebreaker was detected. Crimson engaged the guards, which included Promethean Crawlers. After freeing the Marines, one of them, Lieutenant TJ Murphy, said he could remotely take over a nearby Phantom. Crimson covered him while he did so, holding off several waves of Covenant troops. Eventually Lieutenant Murphy was able to take over the Phantom, allowing Crimson and the surviving Marines to escape.[30]
Covert operations
Fireteam Crimson used their captured Phantom to great use. They first infiltrated a secure Covenant facility and retrieved vital intelligence from the computers there.[31] This led them to a central intel facility based in the "Warrens." Crimson attacked the facility and gained access to a Covenant computer, which revealed the locations of a Covenant archaeological dig and a plasma supply depot. Crimson was sent to destroy the supply depot while Fireteam Switchback was sent to stop the dig.[32]
Crimson successfully infiltrated the supply depot at "Cyclone" and destroyed the plasma stockpiles. However, they also discovered that Jul 'Mdama's Covenant had stolen a large amount of UNSC weaponry - including nuclear weapons. The warheads themselves could not be found. They then received a distress call from Switchback, who were at the dig site.[33] Crimson headed over to the dig site to help Switchback, but discovered no trace of the team except for their IFF tags. On Commander Palmer's orders, Crimson attacked and disabled the Harvester 'Mdama's Covenant were using in their dig.[34]
Defending the Infinity
Later, when the Infinity came under attack by Covenant and Promethean forces, Crimson was recalled to help defend the ship. Because Crimson was already engaged in an operation at Apex when the Infinity was attacked, Crimson had to clear the area of enemy forces in order to let Murphy pick them up. Murphy assisted by delivering Crimson a Mantis, which greatly aided in clearing out Apex. Murphy then picked Crimson up in his Phantom and took them back to Infinity.[35]
On their way back to Infinity, Crimson's stolen Phantom was damaged by the ship's own automated defenses. They crashed into a hangar bay, but survived. After clearing out the initial Covenant boarders inside the hangar, Crimson tried to seal the hangar doors to block off further intrusions in that area. However, the door controls malfunctioned due to the effects of the artifact. Roland instructed Crimson to head to the server room and power cycle the systems there. Crimson did so, and restored hangar controls. They then fought their way back to the hangar and closed the doors again.[36]
Crimson then had to face another crisis: Jul 'Mdama's Covenant had broken into the engine room and were planning to destroy the ship with the stolen HAVOK tactical nuclear weapons. After a quick detour to the server room - where they stopped 'Mdama's Covenant from detonating one of their HAVOKs - Crimson entered the engine room. They cleared out the initial Covenant intruders and disarmed all of the warheads.[37] A new wave of Covenant soon attacked the engine room, but Crimson successfully repelled them. They then sealed off the engine room by closing the emergency bulkhead doors.[38]
At that point, Jul 'Mdama's Covenant disabled Infinity's aft weapons. On Miller's orders, Crimson headed over to aft weapons control, where they destroyed 'Mdama's Covenant hardware jamming devices preventing the guns from firing. They then brought the ship's weapons back online, destroying at least one of the Zanar-pattern light cruisers attacking the ship.[38] Crimson was then ordered to retake the server room, which had again been invaded by enemy forces. They secured the server room for a third and final time, then returned to the hangar bay. There, they battled and defeated a large force of Hunters. By now, the tide had turned in the UNSC's favor.[39]
Return to Requiem
After Infinity was secured, Crimson was redeployed to Requiem, where they performed a number of operations. They first retook "Apex" from Jul 'Mdama's Covenant and shut down several portals.[40] They then destroyed Covenant artillery batteries besieging Fireteam Majestic.[41] They then aided Fireteam Lancer in destroying a Covenant base hidden in the "Warrens". During this mission, they found and rescued the survivors of Fireteam Switchback. During these operations, Miller noted that 'Mdama's Covenant seemed to be able to predict their moves.[42] After Miller and Palmer learned about a Covenant listening post from a captured Elite, Crimson was sent to the outpost to investigate. There, they discovered a captured UNSC Pelican being used to listen in on the UNSC's communications. Crimson cleared 'Mdama's Covenant defenders and Infinity launched an aerial bombardment that destroyed the Pelican.[43]
Dr. Glassman then requested Crimson's aid in deciphering a holographic map of Requiem. To this end, Crimson attacked a Covenant base located at a specific Forerunner structure. Glassman was able to use the map to guide Crimson in activating the structure's automated defense systems, which easily destroyed Covenant reinforcements.[44]
Searching for Halsey

After Doctor Catherine Halsey's abduction by Covenant forces, all Spartan fireteams were dispatched to find her. Fireteam Crimson was first sent to a location in "Cyclone" where they investigated a transmission seemingly sent by Halsey. After clearing out Jul 'Mdama's Covenant forces guarding the base, they delved deeper into the structure and found a Covenant comm terminal with a message from Jul 'Mdama, ordering all forces to head to Librarian's Rest. While investigating, Crimson came under attack by Prometheans. The Spartans were unexpectedly aided by Sentinels under the control of the Librarian who they aided in transmitting herself to the Absolute Record.[45] Roland eventually traced Halsey's transmission to another Covenant-occupied Forerunner structure at "Control." Upon investigating, Crimson learned the transmission had been sent to "Lockup."[46] Crimson then investigated another transmission sent by Halsey through Apex this time. Using Scorpion tanks, the Spartans fought their way through Covenant and Promethean forces and reached the terminal where Halsey's transmission had been sent to. This transmission had also been relayed to "Lockup."[47]
Upon being deployed at "Lockup," Crimson stormed the facility and defeated 'Mdama's Covenant guards.[48] However, Covenant and Promethean reinforcements soon showed up, forcing them not only to fend for themselves, but also assist the Marine squad that had accompanied them. After repelling the attackers, Crimson found a grav lift that led them to the top of the structure. There they discovered that 'Mdama's Covenant had previously (and unsuccessfully) tried to force a captured Marine squad to activate a Forerunner device. Crimson defeated a final counterattack by Covenant forces, then activated the device themselves.[49] The device revealed a holographic map of Requiem similar to the one Fireteam Majestic had found on Gek 'Lhar earlier.[50] Roland determined they could use this map to find a way to free Infinity from Requiem.[49]
Escaping Requiem
During the final phase of the Requiem Campaign, Fireteam Crimson was dispatched to locate and disable one of two Forerunner artifacts on Requiem that were binding Infinity to Requiem. Their task was made all the more urgent when Jul 'Mdama sent Requiem on a course with the sun.[51]
Following the coordinates that Dr. Glassman had derived from the map, Crimson returned to the dig site. There they discovered that Jul 'Mdama's Covenant itself had been after the artifact, which was buried deep within the mountain. Miller ordered them to recapture the Harvester they'd previously disabled, and use its plasma drill to breach the rocks. The Harvester was shielded and air support was needed to disable it. After Crimson destroyed three Forerunner anti-aircraft guns guarding the area, Murphy arrived in a Pelican and disabled the Harvester's shield. Crimson then boarded the Harvester and eliminated 'Mdama's Covenant crew. They also rescued some captured scientists who 'Mdama's Covenant were forcing to fix the Harvester. Unfortunately, the Harvester's power supply had been destroyed by Crimson during their previous raid. Roland came up with a plan to find a new power source located at "Apex."[52]

Due to heavy enemy activity at "Apex," Crimson was unable to go there directly. Instead, they landed at the "Warrens" and took a back route to Apex through a Covenant base.[53] Once at "Apex," Crimson joined forces with Fireteam Forest, a Spartan Fireteam that had been trapped on Apex earlier. Crimson and Forest fought their way to a Covenant communications terminal, and, on Roland's orders, activated it. This summoned a Lich to the scene. Roland explained his plan for Crimson to board the Lich and steal its power core. Despite the numerous waves of troops the Lich sent at them, Crimson boarded the ship, eliminated its crew, and stole the engine core.[54] They then returned to the "Warrens," where they disabled the power source for the Forerunner AA guns in the area. They then used a salvaged Mantis to fight their way back outside, where they were picked up by a Pelican.[55]
Crimson recaptured the Harvester and powered it back up using the Lich's engine core. They used the Harvester's plasma drill to carve out an entrance in the rocks, exposing a cave. Crimson entered the cave and fought their way through numerous Prometheans before finally reaching the artifact, which was housed within a massive Forerunner structure. They deactivated the artifact and escaped as the cavern began to collapse. Near the exit, Crimson encountered one last group of Sangheili. After defeating the Elites, Crimson exited the cave and made it back outside, where Murphy arrived in a Pelican to pick them up.[56]
Shortly afterwards, Commander Palmer and Fireteam Majestic located and disabled the second artifact. They too left Requiem in a Pelican. Crimson and Majestic made it back to the Infinity just in time to escape Requiem's destruction.[51]
Return from Requiem
Upon returning from Requiem, Crimson was quietly tasked with assisting the Office of Naval Intelligence in formulating effective anti-Promethean tactics.[57]
Production notes
- Fireteam Crimson are the playable protagonists of Halo 4's Spartan Ops cooperative campaign. Like Noble Six in Halo: Reach, their appearance, gender, and equipment are determined by the players. Even the size of the team is not established in the game, as Spartan Ops supports between one and four players per chapter. Presumably Crimson has four members, though, as that is the recommended team composition for Spartan Ops sessions (as well as the default team size in matchmaking). Nonetheless, dialog and the Fireteam designation clearly indicate that Crimson canonically has multiple members.
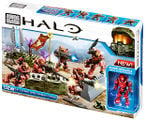
- A set of MegaBloks is specifically dedicated to Fireteam Crimson. It includes five Spartan-IVs clad in red Recruit, Mark VI, Orbital, Enforcer and Scout armors.[2] As MegaBloks is accorded a certain degree of artistic freedom, it is unlikely that they necessarily represent the canonical appearance of Fireteam Crimson.
- The Halo 4 downloadable content Crimson Map Pack is named after Fireteam Crimson.
Gallery
The Fireteam Crimson emblem as an unlockable emblem in Halo 5: Guardians. Note the gradient on the claw marks.

A variation of the emblem.

Another variant of the emblem as depicted by Mega Bloks.
Fireteam Crimson as they appear in Mega Bloks form.
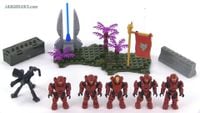
Fireteam Crimson as they appear in Mega Bloks form.
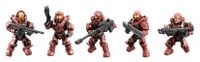
Another view of the Mega Bloks Fireteam Crimson.


List of appearances
- Halo 4
- Spartan Ops (First appearance)
- Infinity Briefing Packet (Mentioned only)
- Halo 5: Guardians (Emblem only)
- Halo Mythos (Mentioned only)
- Halo Infinite
- Season 02: Lone Wolves (Emblem & mentioned only)
- Halo: Vertical Umbrage (Mentioned only)
Sources
- ^ Joystiq: Halo 4's 'Infinity' multiplayer to introduce Spartan Ops, War Games
- ^ a b Toywiz: UNSC Fireteam Crimson Set Mega Bloks 97349 Halo
- ^ Halo Waypoint, Halo Infinite - Lone Wolves Intel (Retrieved on Nov 3, 2022) [local archive] [external archive]
- ^ Halo 4 Limited Edition, Infinity briefing packet
- ^ Halo 4 - Spartan Ops, episode Departure, level Land Grab
- ^ Halo 4 - Spartan Ops, episode Departure, level Sniper Alley
- ^ Halo 4 - Spartan Ops, episode Departure, level The Challenge
- ^ Halo 4 - Spartan Ops, episode Departure, level Sacred
- ^ Halo 4 - Spartan Ops, episode Departure, level Core
- ^ Halo 4 - Spartan Ops, episode Artifact, level Clean Up
- ^ Halo 4 - Spartan Ops, episode Artifact, level For Science
- ^ Halo 4 - Spartan Ops, episode Artifact, level Hacksaw
- ^ Halo 4 - Spartan Ops, episode Artifact, level Pelican Down
- ^ Halo 4 - Spartan Ops, episode Artifact, level Gagarin
- ^ Halo 4 - Spartan Ops, episode Catherine, level The VIP
- ^ Halo 4 - Spartan Ops, episode Catherine, level Galileo
- ^ Halo 4 - Spartan Ops, episode Catherine, level Spartan Mountain
- ^ Halo 4 - Spartan Ops, episode Catherine, level Shootout in Valhalla
- ^ Halo 4 - Spartan Ops, episode Catherine, level Hunting Trip
- ^ Halo 4 - Spartan Ops, episode Didact's Hand, level Hairy Call
- ^ Halo 4 - Spartan Ops, episode Didact's Hand, level Rally Point
- ^ Halo 4 - Spartan Ops, episode Didact's Hand, level Random Transport
- ^ Halo 4 - Spartan Ops, episode Didact's Hand, level The Chase
- ^ Halo 4 - Spartan Ops, episode Didact's Hand, level The Didact's Gift
- ^ Halo 4 - Spartan Ops, episode Memento Mori, level Spartan Miller
- ^ Halo 4 - Spartan Ops, episode Memento Mori, level Nothing Can Go Wrong
- ^ Halo 4 - Spartan Ops, episode Memento Mori, level Everything Has Gone Wrong
- ^ Halo 4 - Spartan Ops, episode Memento Mori, level The Cauldron Base
- ^ Halo 4 - Spartan Ops, episode Memento Mori, level Spartan Thorne
- ^ Halo 4 - Spartan Ops, episode Scattered, level Escape Plan
- ^ Halo 4 - Spartan Ops, episode Scattered, level All The Secrets
- ^ Halo 4 - Spartan Ops, episode Scattered, level Need To Know
- ^ Halo 4 - Spartan Ops, episode Scattered, level Search and Destroy
- ^ Halo 4 - Spartan Ops, episode Scattered, level Switchback
- ^ Halo 4 - Spartan Ops, episode Invasion, level Backup
- ^ Halo 4 - Spartan Ops, episode Invasion, level Home Field
- ^ Halo 4 - Spartan Ops, episode Invasion, level Engine of Destruction
- ^ a b Halo 4 - Spartan Ops, episode Invasion, level The Guns of Infinity
- ^ Halo 4 - Spartan Ops, episode Invasion, level Victory Lap
- ^ Halo 4 - Spartan Ops, episode Expendable, level Unfinished Business
- ^ Halo 4 - Spartan Ops, episode Expendable, level Majestic Rescue
- ^ Halo 4 - Spartan Ops, episode Expendable, level Lancer
- ^ Halo 4 - Spartan Ops, episode Expendable, level Crystal Ball
- ^ Halo 4 - Spartan Ops, episode Expendable, level Glassman
- ^ Halo 4 - Spartan Ops, episode Key, level The Search for Halsey
- ^ Halo 4 - Spartan Ops, episode Key, level Clean Up
- ^ Halo 4 - Spartan Ops, episode Key, level Science Mountain
- ^ Halo 4 - Spartan Ops, episode Key, level Revenge
- ^ a b Halo 4 - Spartan Ops, episode Key, level The Hammer
- ^ Halo 4 - Spartan Ops, episode Expendable
- ^ a b Halo 4 - Spartan Ops, episode Exodus
- ^ Halo 4 - Spartan Ops, episode Exodus, level Artifact
- ^ Halo 4 - Spartan Ops, episode Exodus, level In One Way
- ^ Halo 4 - Spartan Ops, episode Exodus, level Seize the Power
- ^ Halo 4 - Spartan Ops, episode Exodus, level Out the Other
- ^ Halo 4 - Spartan Ops, episode Exodus, level One Last Time
- ^ Halo Encyclopedia (2022 edition), page 74


