Fireteam Shadow
From Halopedia, the Halo wiki
| Fireteam Shadow | |
|---|---|
 Fireteam Shadow in their GEN2 armour configurations (c.2557-2558), during Operation: VERTICAL UMBRAGE. Clockwise: Horatio Fry, Nina Kovan, Jason Kidman, Bonita Stone[1] Fireteam Shadow in their GEN2 armour configurations (c.2557-2558), during Operation: VERTICAL UMBRAGE. Clockwise: Horatio Fry, Nina Kovan, Jason Kidman, Bonita Stone[1]
| |
|
Active: |
Active as of 2560 |
|
Affiliation: |
|
|
Branch: |
|
|
Size: |
Four operators |
|
Engagements: |
|
|
Commanders: |
|
Fireteam Shadow is an elite special operations team of four SPARTAN-IV supersoldiers. They were assigned to the UNSC Infinity and fought on the Forerunner shield world Requiem in July 2557.[2] They later fought in the Requiem Campaign of February 2558 under the handle of Spartan Carmichael,[3] and then played a pivotal role in the Battle for Zeta Halo.[4]
Known members[edit]

Throughout their service, Fireteam Shadow's team callsigns have not remained static - resulting in several members holding various callsigns at different points in time depending on operational priority.[1]
- Spartan Horatio Fry (Shadow Leader or Shadow One)[1] - Team leader[5]
- Spartan Jason Kidman (Shadow Two)[6][Note 1]
- Spartan Bonita Stone (Shadow Three)[1] - Recon specialist - KIA[7]
- Spartan Nina Kovan (Shadow Four)[Note 1] - Marksman[8]
History[edit]
Formation[edit]
Fireteam Shadow was formed circa 2550, after the final year of the SPARTAN-IV program's experimental phase. The fireteam was specialized in covert operations to support other fireteams.[9] Two members, Bonita Stone and Nina Kovan, had previously met onboard the stealth cruiser UNSC Relentless Watch.[4]
Battle of Requiem[edit]
- Main article: Battle of Requiem
On July 21, 2557, Fireteam Shadow was attached to the UNSC Infinity when the ship was pulled into the shield world Requiem. Following the ship's crash inside the shield world, Fireteam Shadow was deployed to the flight deck to investigate movements detected outside the ship. The Spartans could not see what was causing the reports of movement outside the ship, but reported that they were experiencing technical difficulties.[2] Shortly after, the Infinity was attacked by the combined forces of Jul 'Mdama's Covenant and Ur-Didact's Prometheans.[10]
Requiem campaign[edit]
- Main article: Requiem Campaign
On February 14, 2558, Fireteam Shadow was dispatched to Requiem to neutralize a Covenant base established two days earlier. After Stone eliminated patrols around the site, Kidman's TQ-8 seeker drones were to create a breach allowing Stone and Horatio Fry to break into the base to shut down production. Kovan observed from afar.[6] However, in the midst of the operation, Jared Miller reassigned the team on a priority operation to destroy the Covenant Zanar-pattern light cruiser Panom's Canticle, which was deploying forces to "The Refuge".[5] Being too far from their Pelican, Shadow stole a Phantom from the Summit to get there.[6]
While Fireteam Crimson protected the science team from the Covenant ground forces at "The Refuge", Shadow took advantage of the stolen Phantom to rush into the Panom's Canticle hangar before the crew activated the shields. Shadow made rapid progress through the ship, but encountered heavy resistance as they approached the core. As Fry, Kovan, and Kidman cleared out the last Covenant soldiers in the hallway leading to the main reactor room, Stone had already infiltrated there, armed with her active camouflage. While Stone fought the shipmaster and his Sangheili, Nina Kovan fired her Selene's Lance at the ship's power core, causing the reactor to overload. Kidman located a nearby drop pod bay, and led his squad mates to their means of egress before the cruiser's impending explosion. With the power core overloaded, the cruiser was destroyed, bringing an end to the Covenant's attack. Kidman and the rest of Shadow escaped onboard a Gloto'kef-pattern assault carapace.[6][3]
During the Requiem Campaign, Fireteam Shadow wore and tested GOBLIN-class Mjolnir,[11] with Horatio Fry using it in Operation: VERTICAL UMBRAGE.[6]
Other operations[edit]
At another point, Fireteam Shadow wore ARGUS, HELIOSKRILL, WAR MASTER, and OPERATOR-class Mjolnir.[12]
Installation 07[edit]

- Main article: Battle for Zeta Halo
On December 12, 2559, Fireteam Shadow was onboard UNSC Infinity when it was ambushed by Banished forces upon arrival at Installation 07. With the Infinity taking heavy damage, Captain Lasky ordered the crew to abandon ship.[13] Spartans Bonita Stone and Nina Kovan were ordered to evacuate while Horatio Fry and Jason Kidman remained with Fireteam Taurus to repel Banished boarders from a hangar bay.[8] Their fates following the space battle became unknown to Stone and Kovan.[9]
Stone and five marines evacuated from the ship on a lifeboat, Echo India Bravo 08, and landed on an unoccupied area of the ring.[8][14] When an explosion on the ring fractured its surface, Stone ordered the marines to take cover in the lifeboat, but the ground beneath the lifeboat began to crumble.[15] With the support of her armor's thrusters,[15] Stone pulled the lifeboat out of the breach, saving the lives of the marines.[16] The five marines remained with Stone, saving more soldiers along the way,[17] before she tracked down the distress call from Murphy's lifeboat. It had been lodged inside a crevice, leaving its occupants trapped.[18] Stone tore open the lifeboat's hull to pull out each survivor.[17]
Meanwhile, Kovan left the Infinity on a drop pod, and she entered the ring's stratosphere, she adjusted her drop pod trajectory for a deployment of Banished Phantoms in an attempt to board one.[19] Kovan successfully took control of a Phantom and landed on the ring's surface, where she provided sniper overwatch for members of Fireteam Taurus as they attacked a Banished anti-air artillery.[20] While Taurus advanced towards the artillery, Kovan approached the shuttlepod and saved the survivors from an attacking Banshee by destroying the aircraft with two rounds from her SRS99-S7 AM sniper rifle. Kovan then instructed the survivors to gather the weapons, rations, and supplies from the shuttle.[21]
Over the next six days, Stone and Kovan led their respective groups of survivors across the region. They eventually rendezvoused with each other; the combined group of non-combatants became the "boat crew".[22] Although the marines were from both groups were eventually killed in combat against the Banished,[22] led by Stone and Kovan, the boat crew travelled to the UNSC stronghold at the wreckage of the UNSC Mortal Reverie;[23] they arrived on December 19.[24]
On January 20, 2560, Stone and Kovan conducted a recon sweep deep inside Banished-occupied territory.[9] They observed that Banished forces were only unified under Escharum, with internal competition among its members. Kovan reported their findings to Griffin, and suggested that an attempt on Banished War Chief Escharum's life may fragment the Banished leadership.[25] On January 23, Spartan Griffin led Spartans Panago, Henri Malik, and Sarkar in an assassination mission on the Banished War Chief Escharum.[26] However, the assassination on Escharum failed. Griffin sent an encrypted message to the Reverie on January 31 before he was captured and handed over to Chak 'Lok for torture. In his message, Griffin warned the Reverie of an impending Banished assault.[27] Under the combined leadership of Bertold Vettel and counsel of Makovich, the UNSC forces at the Reverie braced for the Banished's attack; Kovan was among the Spartans that remained to defend the Reverie.[28] Stone conducted a reconnaissance mission with Boulder Squad, reporting that a massive Banished force led by Chieftain Tremonius was gathered at Riven Gate in Sector 63.[29] Despite the UNSC defenses, the Banished assault forced the UNSC forces to retreat from the Reverie on February 2.[30] As the Banished forces overwhelmed the secondary barricade, Stone arrived at the Reverie and reunited with the boat crew, saving Browning from the Banished.[31] While the UNSC forces scattered into the valley, Stone and Kovan split off from the boat crew repeatedly to fight off pursuit parties, and eventually Stone did not return after leaving the group. Kovan and the boat crew hid in a nearby cave from Banished hunting parties. As one group neared the cave, Kovan's damaged armor malfunctioned left her temporarily immobilized. As the Banished approached, Browning ran from the cave and drew the enemy away. As soon as her armor rebooted and she was able to move, Kovan left to search for him, with no success.[32] The surviving members of the boat crew waited until Kovan returned with supplies, then set off on the morning of February 5.[33]
Over the next month, Kovan led the boat crew across the region; with the enactment of the Rubicon Protocol, they were resolved to deter the Banished's efforts.[34] Led by Kovan, the boat crew carried out numerous guerilla operations against the Banished.[35] On approximately April 20, Stone and Kovan spotted each other in their sniper scopes; Stone made her way to Kovan, and reunited with the rest of the boat crew.[36] They noticed the increased air traffic from Escharum's personal fleet towards the Reverie—now a Banished outpost named after the Chieftain who led the assault on the wreckage—and decided to investigate. Arriving at the area on 22 April, while the rest of the boat crew made a supply run to scavenge from a ledge that caught some of the supplies the Banished had thrown into the chasm below the outpost,[4] Kovan and Stone investigated the newly-constructed outpost.[37]
On April 23, when Spartan Stone was scouting out the Banished outpost, she recognized Browning in the outpost from afar, then returned to Kovan to share her findings. That evening, while Stone provided overwatch, Kovan snuck into Outpost Tremonius and into the Phantom that held Browning. He couldn't be rescued, however, as the Harbinger and the Banished had put a pair of shackles on Browning's wrists, with a node on the Phantom's hull that would detect the sensors and detonate explosives within the shackles if Browning left the Phantom. Browning informed Kovan of the Harbinger, and opted to stay under captivity. Kovan gave him several recording transmitters, instructing Browning to learn whatever he could about the Harbinger or the Banished, and left a tracking beacon to Browning's neck. The Spartan made a promise to find Browning, then left as a pair of Jiralhanae patrol approached.[37] Seeing two Jiralhanae patrols approaching Kovan, Stone created a distraction to allow Kovan to escape, but was unable to regroup with Kovan, because the Banished was tracking her closely.[38] Only Kovan returned to the camp to link up with the boat crew.[4]
By April 26, Stone had infiltrated the underground Forerunner structures near Outpost Tremonius, having seen the artifacts up close and determined them to be stasis pods. She made one final transmission to Makovich and Sorel, reporting her findings, but stopped short when she realized that she was not alone.[39] Shortly after, Stone discovered the Banished using a human prisoner to access the Conspectus network; they took a data node with information on the ring's defensive systems and location. Stone attacked the Banished and Skimmer forces, including Blademaster Jega 'Rdomnai and the Bloodstar Gorian. After she fought off multiple Banished, Stone fought 'Rdomnai directly, hampered by his active camouflage, shields and the damage that her armor had taken over the past several months. However, Stone managed to steal the data node and had Ouco copy the data and then corrupt the node. Ouco was successful before Gorian slammed into Stone with a Ghost and dragged her back towards the lift before Stone managed to break free and jerk the Bloodstar from the Ghost. Fighting through more Banished forces, including Hectarius, Stone attempted to reach the surface, but she was ambushed and killed by 'Rdomnai. As Stone's last act, she removed the corrupted data node which was taken by Gorian and 'Rdomnai to Escharum, unaware of Stone's sabotage. Stone died pleased that she had succeeded in throwing a wrench into Escharum's grand scheme.[38]
On April 27, Murphy confronted Kovan—questioning why Stone had not rejoined the group at the camp and why Kovan refused to divulge why—and it was revealed that Stone had entered the Forerunner subterranean structure underneath the outpost. More importantly, Browning was alive, and the Spartans kept that a secret, knowing the rest of the boat crew would want to launch a rescue. At Murphy's decision, the boat crew followed Kovan back to Outpost Tremonius to track down Stone. They snuck into the outpost and took the Banished elevator into the Forerunner subterranean structure underneath. There, they discovered Stone's lifeless body and recovered a data chip Stone had hidden away from her killer. with the Banished taking the elevator down, the boat crew was forced to escape by venturing deeper into the facility. Hours later, while they were resting, the boat crew was approached by submonitor 091 Adjutant Veridity, who revealed Stone's data chip contained data the Banished had stolen from the ring's Conspectus network, including the ring's galactic coordinates. The boat crew realized they could transmit the data to the UNSC to summon reinforcements, but doing so required the Installation's monitor 117649 Despondent Pyre's support to decrypt the data. Under Veridity's guidance, the boat crew set out to the monitor's facility, the Conservatory, to free Pyre from Cortana's lockdown.[4]
On May 3, while en route to the Conservatory, the boat crew linked up with Spartan Tomas Horvath, who was separated from UNSC forces since the ring fractured nearly six months ago.[40] That evening, they caught up with Horvath on the status on the larger UNSC resistance in the fragmented region of the ring. They decided to use one of ring's beacon towers as a supraluminal communications array to broadcast the ring's location to UNSC space and summon reinforcements. In order to access the beacon tower, however, they still needed to release Despondent Pyre.[41]
On May 9, the team arrived at the Conservatory's main chamber, Pyre's Cradle. Pyre, along with a number of submonitors, were sequestered by Cortana within an energy barrier. As a human and thus, a Reclaimer, Horvath was able to deactivate the barrier and awaken the monitors. Although Pyre was initially uninterested in offering any assistance, upon hearing news of the Harbinger being released, the monitor granted access to the beacon towers. She also gave the humans a data key that they must insert into the central plinth of a beacon tower in order to transmit the ring's location and data to human-occupied space. However, Pyre ordered Veridity to remain with her to counter the Harbinger, leaving Kovan and the boat crew to travel to the beacon tower without Veridity’s presence.[42]
On May 14, the team translocated to the vicinity of a beacon tower near the Conservatory. Kovan led Bender and Murphy into the beacon to transmit the ring's data; while Kovan protected the control plinth and interfaced with its panel, Bender and Murphy defended the chamber entrance from Sangheili Enforcers that were guarding the beacon. After Bender ran out of ammo, his chestplate was hit by a plasma round, forcing him to discard the armor before the plasma burnt through to his skin. While Bender was occupied, it left an opening for a Sangheili to fire at the plinth, but Murphy jumped in and blocked the bolts with his body. Kovan then killed the Sangheili while Bender slid to Murphy's aid, only to watch the lieutenant passed with a smile on his face. At the same time, the beacon tower fired its supraluminal message to UNSC space.[43] As Kovan and Bender exit the beacon, Bender tossed an energy sword hilt, which he took from a dead Sangheili Enforcer, to Horvath.[44]
Having caught attention of UNSC activity at the beacon tower, Jega 'Rdomnai led a massive reinforcement from their nearby excavation site into the Conservatory to the beacon tower. Before he could reach the beacon, Cameron was run down and killed by a Banished Terror Wraith. After Bender managed to kill the Wraith's pilot, Kovan hurried to Cameron—knowing he had passed—and dragged his lifeless body by the collar behind cover at the beacon.[44]
In the ensuing battle, while Kovan fought off Banished troops,[45] Horvath managed to kill Gorian, but was teleported away.[46] At around the same time, Dimik took a plasma round in the shoulder from Banished forces while she scrambled to rejoin Bender and Kovan.[44] As the Banished surrounded the trio, they were rescued by Veridity, who flew in and fired her focus beam at the Banished, then teleported the survivors to another location before disappearing. The three spent the next four days treating their wounds and repairing equipment; Kovan's armor in particular proved to have taken much more effort for Bender and Dimik to repair. As they rested and contemplated their wins and losses at the beacon tower, they agreed their next step would be rescuing Browning from the Tower.[45]
By June 7, Kovan, Bender, and Dimik joined a group of UNSC survivors in a sheltered rock canyon in the alpine region of one of the island fragments. Four Swords of Sanghelios brought Fernando Esparza to them in Echo 216 on June 7 after rescuing him from the Banished. The group subsequently regrouped with the large UNSC camp located at Lifeworker Central on the stable part of the ring. Esparza and the Swords brought back the Master Chief and the body of Browning who had been rescued by the Master Chief from Rdomnai Keep, but was killed by the blademaster at the Silent Auditorium. The three were devastated by their friend's death and attended his funeral on June 8.[47]
Over the next few days, the Master Chief and Kovan conducted guerilla operations against Banished patrols and outposts in the hills beyond Lifeworker Central. At Joyeuse's behest, the boat crew also scavenged a damaged submonitor carapace.[48] On June 12, Kovan led the Master Chief to a briefing regarding large groups of UNSC survivors found on the intact areas of the ring and they began organizing search and rescue.[49]
That same day, a Swords of Sanghelios relay satellite past the edge of the Urs system picked up the boat crew's message. Arbiter Thel 'Vadam shared it with Spartan Olympia Vale, opening the possibility of the UNSC survivors receiving reinforcements thanks to the efforts of the boat crew.[50]
Gallery[edit]

Fireteam Shadow as Mega Construx figures.
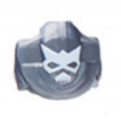
The emblem of Fireteam Shadow displayed on a MJOLNIR pauldron.


List of appearances[edit]
- Halo 4 (First appearance)
- Halo 5: Guardians (Mentioned only)
- Halo Infinite
- Halo: The Rubicon Protocol
- Halo: Vertical Umbrage
Notes[edit]
- ^ a b In Halo: The Rubicon Protocol, other than Nina Kovan and Bonita Stone, the two remaining members of Fireteam Shadow were only identified as Shadow One and Shadow Two. This article assumes only the callsigns of Nina Kovan and Jason Kidman—formerly Shadow Two and Shadow Four in Halo: Vertical Umbrage—were swapped, while Bonita Stone retained the callsign of Shadow Three.
Sources[edit]
- ^ a b c d Halo Waypoint, Canon Fodder - Fourward Unto Dawn (Retrieved on Nov 10, 2022) [archive]
- ^ a b Xbox, Halo 4 promotional site (Retrieved on Jul 15, 2013) [local archive] [external archive]
- ^ a b Halo 4 - Spartan Ops, episode Memento Mori, level Everything Has Gone Wrong
- ^ a b c d e Halo: The Rubicon Protocol, chapter 30
- ^ a b Halo Waypoint, Canon Fodder: Rubicon Rundown (Retrieved on Aug 3, 2022) [archive]
- ^ a b c d e Halo Waypoint, Halo 4 - Vertical Umbrage (Retrieved on Nov 7, 2022) [archive]
- ^ Halo Encyclopedia (2022 edition), page 102
- ^ a b c Halo: The Rubicon Protocol, chapter 1
- ^ a b c Halo: The Rubicon Protocol, chapter 14
- ^ Halo 4, campaign level Infinity
- ^ Halo 5: Guardians, Armor customization: GOBLIN - Helmet Description "The UNSC Infinity's Fireteam Shadow tested GOBLIN suits during the Requiem Campaign."
- ^ Mega Construx, UNSC Fireteam Shadow (Retrieved on Aug 4, 2022) [archive]
- ^ Halo Infinite, UNSC Audio log: Infinity's Approach #12 - Abandon Ship
- ^ Halo Infinite, Spartan Audio log: Ringfall #02 - The Calm Before
- ^ a b Halo Infinite, Spartan Audio log: Ringfall #08 - Breach Maneuver
- ^ Halo Infinite, Spartan Audio log: Reverie #02 - Debrief
- ^ a b Halo: The Rubicon Protocol, chapter 5
- ^ Halo: The Rubicon Protocol, chapter 3
- ^ Halo Infinite, Spartan Audio log: Evacuation #04 - Perfect Aim
- ^ Halo Infinite, Spartan Audio log: Evacuation #05 - Overwatch
- ^ Halo: The Rubicon Protocol, chapter 2
- ^ a b Halo: The Rubicon Protocol, chapter 7
- ^ Halo: The Rubicon Protocol, chapter 8
- ^ Halo: The Rubicon Protocol, chapter 9
- ^ Halo Infinite, Spartan Audio log: Reverie #06 - Weakness
- ^ Halo Infinite, Spartan Audio log: Retaliation #02 - Those Left Behind
- ^ Halo Infinite, Spartan Audio log: Retaliation #05 - Encroachment
- ^ Halo Infinite, Spartan Audio log: Retaliation #06 - Drawing the Line
- ^ Halo Infinite, Spartan Audio log: Retaliation #07 - Red Tide
- ^ Halo Infinite, Spartan Audio log: Retaliation #08 - The Retreat
- ^ Halo: The Rubicon Protocol, chapter 17
- ^ Halo: The Rubicon Protocol, chapter 18
- ^ Halo: The Rubicon Protocol, chapter 19
- ^ Halo: The Rubicon Protocol, chapter 21
- ^ Halo: The Rubicon Protocol, chapter 23
- ^ Halo: The Rubicon Protocol, chapter 24
- ^ a b Halo: The Rubicon Protocol, chapter 26
- ^ a b Halo: The Rubicon Protocol, chapter 28
- ^ Halo Infinite, Spartan Audio log: Scattered #05 - Uncharted
- ^ Halo: The Rubicon Protocol, chapter 31
- ^ Halo: The Rubicon Protocol, chapter 32
- ^ Halo: The Rubicon Protocol, chapter 34
- ^ Halo: The Rubicon Protocol, chapter 35
- ^ a b c Halo: The Rubicon Protocol, chapter 36
- ^ a b Halo: The Rubicon Protocol, chapter 39
- ^ Halo: The Rubicon Protocol, chapter 38
- ^ Halo: Edge of Dawn, chapter 39
- ^ Halo: Edge of Dawn, chapter 40
- ^ Halo: Edge of Dawn, chapter 42
- ^ Halo: Edge of Dawn, Epilogue


