H3ODST:Kikowani Station
From Halopedia, the Halo wiki
|
Concurrent: |
|
| Kikowani Station | |
|---|---|

| |
|
Game: |
|
|
File name (?): |
|
|
Player: |
|
|
Date: |
October 20, 2552, 2101 hours |
|
Location: |
|
|
Objective(s): |
Capture and protect the Squad's Phantom |
|
Par Time: |
00:10:00 (Master Chief Collection) |
|
Par Score: |
42,000 (Master Chief Collection) |
 |
Halopedia has a walkthrough guide for this level; see H3ODST:Kikowani Station/Walkthrough. |
| “ | Aerial combat in the flooded city. | ” |
Kikowani Station is a campaign level in Halo 3: ODST. In this level, the player takes control of Buck. Chronologically, this is the last flashback level of the game, and also the last time the player play as any of the other squad members other than the Rookie.[2]
Summary[edit]
Five hours after the drop, after the skirmish atop NMPD headquarters, the squad carries a wounded Romeo toward Kikowani Station. Buck has a plan to escape the city through the Maglev train tunnels leading to Old Mombasa, only to realize that the area has been flooded by water. Out of options, Buck administers biofoam to Romeo's wound and, in a risky move, decides to hijack a Phantom and fly it out of the city. Buck and Mickey make their way through heavy Covenant defenses on a station platform, where Mickey manages to steal a Phantom. While Dutch and Romeo man its turrets, Buck pilots a Banshee and escorts the Phantom though Covenant lines, which include Banshees, Shades, and Anti-Air Wraiths. After surviving close-quarters aerial dogfights and a few foot skirmishes through tunnels, between high-rises, and over flooded areas of the city, the squad encounters and defeats a Scarab. Clear of the city, Buck ditches his Banshee mid-air and boards the Phantom to rejoin his men. A comment by Romeo allows Buck to realize where Dare is, and he abruptly orders Mickey to turn around the ship so he can go find her.[2]
Transcript[edit]
BUCK
Kikowani Station
5 hours after drop
Cutscene opens as the Squad approaches the entrance to Kikowani Station. Buck is helping Romeo to walk, while Mickey jumps the rail to scout ahead.
- Gunnery Sergeant Edward Buck: "We're almost there."
Romeo starts to have difficulty breathing and protests.
- Lance Corporal Kojo "Romeo" Agu: (wheezing) "Put... Put me down, put me down for a sec."
Buck puts Romeo against a wall.
- Buck: "Dutch, medkit."
Dutch kneels down, Buck looks through Dutch's pack for a medkit.
- Corporal Taylor "Dutch" Miles: "What's wrong with him?"
- Buck: "He's got a punctured lung, can't breathe."
Romeo begins coughing and choking, Buck finds a Biofoam Canister and fills the wound with biofoam, Romeo takes in several deep breaths.
- Buck: "Better?"
- Romeo: "N...now what?"
- Buck: "Trains ran underground up to the old city, we're gonna find one of the tunnels, walk on outta here."
Romeo pulls out the canister.
- Romeo: "Ugh...you gonna carry me all the way, sweetheart?"
- Buck: "Was planning on it, but, now that you're feeling better..."
A Phantom suddenly flies overhead, carrying some Engineers underneath it.
- Buck: "Get the door!"
Dutch reaches inside a ticket booth and hits the button to close the security shutter. The view switches to a Superintendent's camera. It watches the Phantom flies away, then shows a confused face at the closing shutter.
- Superintendent: "LOST-AND-FOUND ITEM! DISABLING SECURITY SHUTTER!"
The shutter stops just before being fully closed. The view switches back to the ODSTs, Buck offers Romeo a hand up and Romeo places the empty canister in Buck's hand. Romeo gets up, and Buck casually tosses the Canister away, where it rolls under the door for the Rookie to find later.
- Private First Class Michael "Mickey" Crespo (COM): "Gunny...you're gonna wanna see this."
Buck, Dutch and Romeo head down the stairs into the tunnel, the view switches to another Superintendent camera, this one in the tunnel; it shows the tunnels have been flooded. The camera than starts to zoom in on the squad, the avatar showing a happy face. The view switches back to them, as Buck looks around.
- Mickey: "This means we're screwed, right?"
The camera then shows two trains, one apparently damaged, before returning to the squad. Buck looks up.
- Buck: "Not yet."
They watch a Phantom pass by, then the view switches to Buck's point of view.
- Buck: "Wait here. We're gonna steal that ride. It's landing, now's our chance! Mickey! You're with me!"
Mickey looks and shrugs, Buck nods.
{Gameplay}
- Mickey: "Gunny, I can fly a Pelican, but a Phantom? It's been years since I even ran a simulation!"
- Buck: "Well, let's see what you remember trooper, move!"
If the player stalls:
- Romeo: "Sure, what's the hurry, right? I'll just sit here bleeding through my foam."
- Dutch: "Better get going, Gunny. The sooner we get him out of here, the better."
Buck and Mickey advance, engaging the Covenant troops dropped off by that Phantom and another that lands soon after, also dropping off some Huragok. The second Phantom leaves after it drops off its troops, but the first stays.
- Mickey: "Gunny, more of those floating squids. Should we smoke 'em?"
- Buck: "They're between us and that Phantom, what do you think?"

Once the area is clear, the two of them advance towards the first Phantom.
- Buck: "Go, Mickey. Up the lift, kill the pilots."
- Mickey: "Here goes nothing!"
Mickey goes up the Phantom's lift, soon SMG shots are heard as Mickey takes out the pilots.
- Mickey (COM): "Ugh, cabin secure. Flight controls read green across the board...well, purple, but she's good to go...I think."
- Buck: "OK, I'll grab a Banshee, you go get Dutch and Romeo."
- Mickey (COM): "On my way."
Buck finds a Banshee while Mickey goes and picks up Dutch and Romeo.
- Mickey (COM): "All set back there?"
- Dutch (COM): "Affirmative. Romeo, let's man these turrets."
If the player flies upward, he can see Ket-pattern battlecruisers flying around a burning crater.
- Mickey (COM): "What do you see, Gunny?"
- Buck: "A whole lot of Covenant, gathering around that slipspace crater. I wonder what they're looking for."
- Mickey (COM): "I bet the Captain would have known."
- Buck: "Yeah... I bet you're right."
If Buck's Banshee takes too much damage at any point between here and the end of the level:
- Mickey (COM): "Banshee's pretty beat up, Gunny. Might want to grab a new one."
The squad moves forward, being engaged by Covenant from nearby platforms and balconies. After they clear the area, the door opens and a pair of Banshees fly out.
- Romeo (COM): "Ah! Banshees, comin' through the tunnel."
- Buck: "That's the way we're headed, take 'em out!"
The squad quickly defeats them and heads into the tunnel, engaging more Covenant forces including a tower, and a Wraith.
- Mickey (COM): "Head through the tunnel, Gunny. Go on Gunny, take the lead! Everyone watch their elbows, it's gonna be a tight squeeze."

The squad makes it out into the next area where a Phantom is dropping off Huragok at a Recharge Station
- Dutch (COM): "Well, look at that. I think we found us a squid house."
- Romeo (COM): "Give me an angle, I'm gonna burn it to the ground."
The squad destroys the Recharge Station.
- Romeo (COM): "That's right, you damn aliens. Doesn't feel so good does it?"
- Dutch (COM): "Well, like the good book says, payback's a bitch."
- Mickey (COM): "I don't think it actually says that, Dutch."
- Dutch (COM): "I'm paraphrasin', ya heathen!"
The squad approaches the door, but it doesn't open.
- Mickey (COM): "Damn! Covenant must've locked the door to the next area. I see an override switch, Gunny. Hang on, I'll set a beacon."
If the player hesitates, or engages the newly arrived squad of Banshees:
- Mickey (COM): "We're stuck here until you open that door, Gunny!"
If the player stalls:
- Dutch: "Gunny! Get out of your Banshee and hit the switch!"
Buck lands near the door and opens it manually.
- Buck: "Door's open, I'll go first."
- Mickey (COM): "Roger that, following your lead."
Inside the next section, a large squad of Grunts are waiting, but, are easily destroyed by the Banshee. Farther in, another Phantom is dropping more Huragok into another Recharge station, but Buck fires on the station blowing it up, causing the Huragok still on the Phantom to explode, damaging the dropship. The Phantom then tries to take off towards the next area but is easily destroyed.
In the next area there are several more Recharge stations, and a Phantom drops off an AA Wraith. Heavily armed Grunts and Brutes also fire on them from a balcony. The squad soon defeats the Covenant defenders. The door to the next area, like before, is locked.
- Mickey (COM): "Gunny, another locked door, hit the override."
Buck hits the override but only the smaller doors open, the larger section remains closed.
- Mickey (COM): "Damn, door's jammed. Must've lost power."
- Buck: "I'll head through on foot, see if I can find a work around inside the tunnel."
- Dutch (COM): "Go on in, Gunny, we'll cover the door, make sure no one gets in behind you."
Buck heads into the tunnel, and is engaged by multiple enemy forces, including Brute Stalkers and a Brute Chieftain; he soon defeats them.
- Mickey (COM): "Gunny, check the far end of the tunnel, might be a back up generator."
If the player stalls:
- Mickey (COM): "I bet there's a generator right here! Let me place a beacon."
Buck soon finds another room, and another switch, which opens both doors.
- Mickey (COM): "That did it! Door's open."
Buck makes his way back to his Banshee, heads to the other end of the tunnel and spots a Scarab near the next door.
- Buck: "Troopers, I got bad news."
- Romeo (COM): "What, you really are gonna make us walk outta this city?"
- Buck: "We got a Scarab, right by our exit."
- Romeo (COM): "Ah! This is the best mission ever!"
- Dutch (COM): "Take out its legs, and it'll stop moving, Gunny!"
Buck fires at one of the Scarab's legs, immobilizing it.
- Dutch (COM): "Get behind it! Shoot it in the ass!"
Buck destroys the Scarab.
- Dutch (COM): "Oorah Gunny, let it burn!"
- Mickey (COM): "Head into the tunnel, before another one shows up."
The squad heads into the last tunnel, which is covered with Recharge Stations.
- Romeo (COM): "Ah, damn! We hit the squid jackpot!"
- Dutch (COM): "Take 'em out, Gunny, so we can get through."
- Buck: "Stay clear, this is gonna be one hell of a chain reaction!"
If the player stalls:
- Dutch (COM): "I'll do it, Gunny. Move back!"
The Phantom advances. Dutch and Romeo fire on the Recharge Stations, causing a large explosion.
Quick fade to white.
The explosion from the Recharge Stations reaches outside, as Buck and the others burst through. Buck flies up to the Phantom, exits the Banshee, and is picked up by the grav lift. The Banshee falls into the water.
- Buck: "Keep her steady Mickey. (to Romeo) You doin' okay?"
- Romeo: "Just glad we didn't go with your first plan. Look at those tunnels. Ones that aren't flooded are probably...packed with Buggers. Hell, I wouldn't go down there even if you ordered me to."
This triggers something in Buck's memory.
- Buck: (flashback) "Come on, Veronica! What could be more important than that carrier?"
- Dare: (flashback) "My orders. And Buck? Call me Captain."
Buck suddenly realizes where Dare could be.
- Buck: "Mickey, turn around! Find a safe place to set us down!"
- Mickey: "What? Why?"
- Buck: "I lost something! (whispering) Now I know where to find her."
Mickey turns the Phantom around and they head back into the city.
Cutscene ends. Fade to black.
Achievements[edit]
The following achievements can be unlocked on Kikowani Station across the Xbox 360 and Halo: The Master Chief Collection editions of Halo 3: ODST.
| Halo: 3: ODST (Xbox 360) | Halo: MCC (Xbox One) | Halo: MCC (Steam) | Title | Unlock requirement | Games |
|---|---|---|---|---|---|
 |
 |
 |
Complete Kikowani Station on Normal, Heroic, or Legendary. (Halo 3: ODST) Complete Kikowani Station on any difficulty. (Halo: The Master Chief Collection) |
Halo: The Master Chief Collection | |
 |
 |
Beat the par time on Kikowani Station. | |||
 |
 |
Beat the par score on Kikowani Station. | |||
 |
 |
Splatter 7 enemies with a Banshee on Kikowani Station. | |||
 |
 |
Find a legendary hidden music cue. |
Trivia[edit]
- From the start if you go right and follow the train tracks above the sparking train on the right side of the bridge on the door you can find a Da Vinci code door switch, one of the only ones you can find in bounds with no glitching.
- The beacon object of this level is a biofoam canister, used by the squad to heal Romeo, found lying on the floor outside the Kikowani train station. This is the only flashback beacon that has appeared at the beginning of the level, rather than the end like most of the others.
- This is the only level where Huragok Recharge Stations appear.
- This is also the only level in campaign where no Firefight maps are based off on.
- The Phantom and the Ghost that appear near the first close Huragok Recharge Station in the alleyway can be easily destroyed by destroying the Station itself.
- This is the last flashback mission and the only time the player gets to fly a Banshee in the campaign. This is also the second time the player plays as Buck.
- Even if Mickey is given another weapon before going up the lift, an SMG can still be heard killing the pilots.
- Try to stay away from the Huragok Recharge Stations, as they cause a huge explosion and may kill the player instantly.
- This level is similar to Halo: Combat Evolved's Two Betrayals and Halo 2's The Arbiter as they both require the player to pilot a Banshee to complete an objective.
- The Siege of Madrigal can be heard on this level, as well as a hidden Marty O'Donnell easter egg on Legendary.
- In Halo: The Master Chief Collection, Marty O'Donnell was replaced with Hamish Beamish.
- After Mickey has hijacked the Phantom and heads over to pick up Romeo and Dutch, Romeo can be seen struggling to get up and then jogging over to the Phantom, completely ignoring his injury. He may have been motivated by the escape.
- There is a Wraith in this level that the player can use without using the AA-Wraith glitch.
- Originally, the level was apparently supposed to be set at a metro station in Kilindini district, but the name was changed at one point, possibly to avoid confusion with Kilindini train station featured in the Halo 2 multiplayer map Terminal.[3]
Gallery[edit]
Concept art[edit]
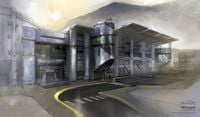
Near-final concept art of the station exterior. Note the labeling as "Kilindini Metro Station".
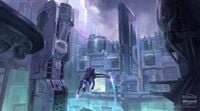
Concept art of the level's environment.
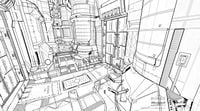
Initial linework of the transition spaces.
A conceptual design of one of the interior spaces connecting the open areas in the level.
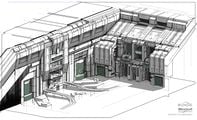
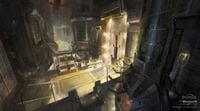
A detailed concept piece of the station.
Concept art of the flooded tracks.


Screenshots[edit]

The Da Vinci code door switch.
Preview of the level in Halo 3: ODST menu.
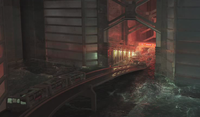
Alpha-Nine arrives at the flooded train station.
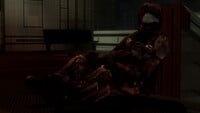
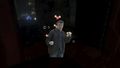
Romeo, wounded, waits for Buck and Mickey to hijack a Phantom.

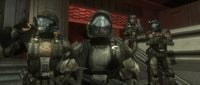
Dutch remains with Romeo.
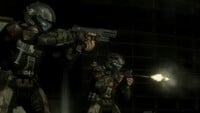
Buck and Mickey in combat.
Dutch enters Mickey's Phantom.
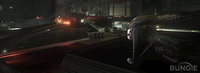
The slipspace crater with three Ket-pattern battlecruisers circling above.
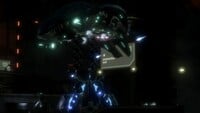
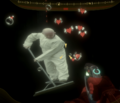
Alpha-Nine's Phantom fires at a Huragok.
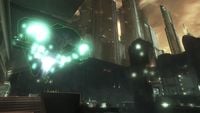
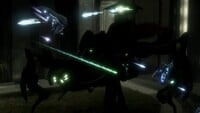
A Phantom hovering above a Huragok recharge station.
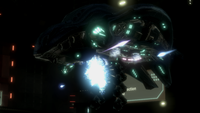
Alpha-Nine destroys the Huragok being carried by a Phantom.
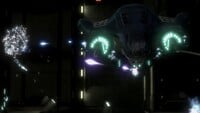
Buck's Banshee comes across a Scarab.
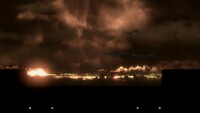
The Martin O'Donnell Easter egg found with the Siege of Madrigal on Legendary (Xbox 360 version).
The Beamish Easter egg found with the Siege of Madrigal on Legendary (The Master Chief Collection version).


Sources[edit]
- ^ Halo 3: ODST Editing Kit, game file
H3ODSTEK\tags\levels\atlas\sc150\sc150.scenario - ^ a b Halo 3: ODST level, Kikowani Station
- ^ Halo 3: ODST concept art
| |||||||||||||||||


