H2:Metropolis
From Halopedia, the Halo wiki
|
Prev: |
|
|
Next: |
|
| Metropolis | |
|---|---|

| |
|
Game: |
|
|
File name (?): |
|
|
Player: |
|
|
Date: |
|
|
Location: |
|
|
Objective(s): |
Enter New Mombasa through the bridge, regroup at city-center and disable the Protos-pattern Scarab. |
|
Par Time: |
00:15:00 (Master Chief Collection) |
|
Par Score: |
9,000 (Master Chief Collection) |
 |
Halopedia has a walkthrough guide for this level; see H2:Metropolis/Walkthrough. |
| “ | Take the bridge, break the Covenant's grip on the city-center. | ” |
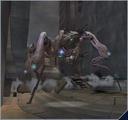
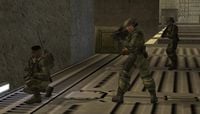
Metropolis is the fifth campaign level of Halo 2. It is the first level where the player is able to drive the Scorpion Tank and the first level with Wraiths and Banshees. Metropolis is one of two levels where the player can acquire the Gauss Warthog (the other being Quarantine Zone). It takes place in New Mombasa, and starts as soon as the player emerges from the highway tunnel that was the last part of Outskirts.
In this stage, the Master Chief and two Marines must battle across a long bridge guarded by Covenant forces and another but shorter tunnel than the one at the end of Outskirts. After that, there is a small park, where another Marine-controlled Warthog lurks, and an open urban area with Wraiths, before going onto catwalks attached to buildings in order to attempt to board the Protos-pattern Scarab and take out the Covenant piloting it.
Transcript[edit]
{Cutscene} {Anniversary Cutscene}
A Marine sitting on the ground, breathing erratically, watches as the Master Chief approaches. The Chief steps over him and walks up behind a standing female Marine.
- Female Marine: "It blew right through us. (They watch as the Scarab ramps over the bridge, out of view) 50-cal, rockets... didn't do a thing."
A Pelican drops a Scorpion tank. Sergeant Major Avery Johnson gets out; the Master Chief and Marines walk over.

- Sergeant Major Avery Junior Johnson: "Where's the rest of your platoon?"
- Female Marine: "Wasted, Sarge."
- Marine #1: "And we will be, too, sir, if we don't get the hell outta here!"
- Sergeant Johnson: (Puts a hand on Marine's shoulder) "You hit, Marine?"
- Marine #1: "N-no, Sir."
- Sergeant Johnson: "Then listen up!"
(Note: The following dialogue varies according to difficulty)
- (Easy): "You had your chance to be afraid before you joined my beloved Corps. But to guide you back to the true path, I brought this motivational device. Our big green style cannot be defeated!"
- (Normal): "The Chief is gonna jump in this tank, roll across the bridge, and blow up any inhuman-son-of-a-bitch dumb enough to get between him and the Prophet of Regret! Pull yourself together, because you're going with him!"
- (Heroic): "When I joined the Corps, we didn't have any fancy-shmancy tanks. We had sticks! Two sticks, and a rock for the whole platoon - and we had to share the rock! Buck up, boy, you're one very lucky Marine!"
- (Legendary): "Usually the good Lord works in mysterious ways. But not today! This here is sixty-six tons of straight up, H-E-spewing dee-vine intervention! If God is love, then you can call me Cupid!"
- Female Marine: "What about that Scarab?"
- Sergeant Johnson: "We've all run the simulations, they're tough, but they ain't invincible. Stay with the Master Chief, he'll know what to do."
- Female Marine: "Yes, sir, Sergeant!"

Sergeant Johnson climbs back on the Pelican, and cocks its machine gun.
- Sergeant Johnson: (smirks) "Oh, I know what the ladies like."
Ladies Like Armor Plating[edit]
{Gameplay}
(Note: On Heroic, the chapter will be called "Ladies like Grinding Treads". On Legendary, it will be called "Ladies Like Superior Firepower").
The Chief starts out standing next to the tank and damaged Warthog to his right. The burning skyline with the Covenant assault carrier hovering over it is visible in the distance. The suspension bridge is strewn with the wreckage of cars, trucks and buses. A multitude of Ghosts as well as a Wraith tank patrol the bridge.
About halfway across, Banshees swoop in for an attack from either side, and three Phantom dropships fly by, deploying troops and another Wraith tank. A lone Marine (or two, if one of the two accompanying the Chief was killed) stationed on the bridge joins the Chief and the other two Marines (if he took the Scorpion). At the other end of the bridge, a group of Banshees flies in over the rooftops.
As John-117 approaches the second speed tunnel:
- Cortana: "That's quite a welcome party."
A pack of Ghosts skitter into view and open fires. They are soon joined by a pair of Wraith tanks which come in from the nearby highway tunnel, as well as another pair of Banshees.
The team enters the Kilindini Underpass meeting little resistance until a barrier prevents them from taking their vehicle any further. A Warthog pulls up and its occupants joins the fight, while a trio of Kig-yar stationed on the barrier fires down at the team. The Chief and his allies neutralize these enemies and regroup.

- Female Marine: "Secure the area!"
Or
- Female Marine: "Form a perimeter!"
Or
- Female Marine: "Defensive positions!"
Another female Marine walks up to the Chief and offers him a Shotgun.
- Corporal Palmer: "It's tight quarters on the other side, sir. Use this."
They enter a dark section of the highway tunnel filled with wreckage and Covenant troops. A pair of Sangheili Minors and a large group of Unggoy attack, while a pair of Kig-Yar Snipers fire on the team from a distance with their Beam Rifles. At the end of the tunnel, the team encounters more Unggoy and Sangheili (including a pair of Stealth Sangheili on higher difficulties), as well as another trio of Kig-Yar. On legendary difficulty a Sangheili Zealot attacks the team. After clearing this section of tunnel, the team enters a series of sewage tunnels that open out into the Kilindini Park Cultural Center.
This Town Ain't Big Enough For Both Of Us[edit]
A Kig-Yar Sniper is seen near the exit, standing with its back turned to the marines. The team eliminates it and continues on into a wide area, where they engage more Kig-Yar Snipers, along with several Sangheili and two plasma turrets. The Scarab can be seen in the distance, although it leaves quickly.
A Gauss Warthog pulls up to the Chief.
- Gunnery Sergeant Stacker: "Could use you on the gun, Chief!"
The team secures the area and continues into a smaller portion of the park, where a few Ghosts, a pair of Kig-Yar Snipers, a Sangheili Major, and a Wraith tank guard the tunnel at the far end. Another pair of Ghosts enters the fray, but are quickly eliminated. The team continues into a large room with a waterfall, and then out onto the streets of New Mombasa as another Warthog joins the team.
They come upon a Marine outpost in Sector B that is under siege from a trio of Wraith tanks, supported by Kig-Yar Snipers.
- Cortana: "There are a number of Marines trapped inside that building, Chief. Concentrate on the Wraiths, they're the biggest threat."
The Chief and his allies engage the Covenant troops, catching the enemy from behind. A Phantom delivers a pair of Ghosts, but they are neutralized easily by the combined support fire from the Warthogs.
After the Chief deals with the Covenant in the immediate area:
- Cortana: "There's a Marine Command Post in that building. We'll need to help them deal with that Scarab."
If the Chief stalls:
- Cortana: "Head for the Command Post, Chief."
A Pelican delivers a squad of Marines, while another Pelican drops off a Scorpion Tank. The Chief walks into the base. A Marine greets him at the entrance.
- Corporal Perez: "Sir! Corporal Perez, A-Company! CP's this way! The Lieutenant got hit as soon as we dropped in."
- Cortana (COM): "Who's in charge now, Corporal?"
Corporal Perez leads the team up the heavily guarded stairs to a balcony overlooking the streets where the previous battle took place. Sergeant Banks and another Marine manning a machine gun are waiting for him. The recently-deployed Scorpion now sits on the staircase leading to the pedestrian walkways on the street. A huge plasma beam can be seen firing at something in the distance, and the Scarab lumbers into view. The Sergeant turns and greets the Chief.
Field Expedient[edit]
- Staff Sergeant Banks: "When I asked for reinforcements, I didn’t think they’d send a Spartan. (Turns around) We got trouble!"
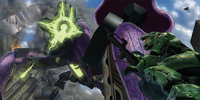
The Scorpion fires its main cannon twice at the Scarab, to no effect. The Scarab aims its beam and destroys the tank in a single blast, then starts walking toward the base, demolishing the pedestrian walkways in the process.
- Marine 2: "See this look? It's terror!"
- Sergeant Banks: "Marine, did I give you permission to bitch?"
They fire at the Scarab, but it keeps advancing.
- Sergeant Banks: "I don't think it's stopping; get your heads down!"
The Scarab walks right over the Chief's position, knocking over an antenna.
- Sergeant Banks: "That thing is really starting to PISS ME OFF! Marines, time to kill us a Scarab!"
- Corporal Perez (COM): "It's over here, sir!"
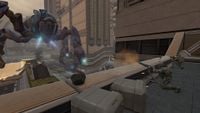
The team enters a large building in pursuit of the Scarab. They end up on a series of walkways above a large water-filled canal. Weapons and crates litter the walkway. As the Scarab walks through the canal below, Covenant troops rush out onto the upper deck and fire at the Chief. The team continues to pursue and engage the troops on the Scarab until the Scarab reaches the end of the canal, and can go no further.
- Cortana: "It can't go any further this way. We have it trapped."
If the Chief doesn't board the Scarab:
- Cortana: "Chief, you're going to have to board the Scarab."
If the Chief still doesn't board the Scarab:
- Cortana: "We can't do anything more to that Scarab from here. We need to get inside it."
Groups of Pelicans fly by in front of the Scarab. Occasionally, one will turn and unleash a barrage of missiles onto the Scarab.

The Chief jumps from the walkway and lands on the Scarab's upper deck. After dealing with any Covenant troops present, he moves down a ramp and enters the Scarab. Inside, he finds a couple of Unggoy Ultras and a Sangheili Ultra, along with two Sangheili Majors piloting the Scarab.
- Cortana: "Careful, Chief. That Elite was an Ultra, and those pilots are no pushovers either."
The Chief eliminates all the Covenant troops inside the Scarab.
{Cutscene} {Anniversary Cutscene}
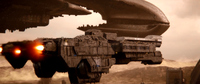
The Scarab falls apart and the Master Chief walks out. Holding his primary weapon, the Chief watches as the Solemn Penance deactivates its gravity lift nearby. A Pelican, with Johnson in it leading the pilots, lowers behind the Chief.
- Sergeant Johnson (COM): "That's right, you mothers! Run!"
- Commander Miranda Keyes (COM): "Not if we can help it, Sergeant."
Cut to bridge of the UNSC In Amber Clad.
- Commander Keyes: "Extract the Chief, and return to In Amber Clad."
- Sergeant Johnson (Video COM): "Roger that!"
Lord Hood appears on the video screen.
- Lord Hood (Video COM): "Status?"

- Lord Hood: "Negative, Commander. I'll vector two heavies for starside intercept."
The assault carrier begins to accelerate. A purple glow appears in front of the ship.
- NAV Officer Remi: "Ma'am, slipspace rupture off the target's bow! It's going to jump, inside the city!"
- Commander Keyes: "There's no time, sir!"

- Lord Hood (Video COM): "Green light! Green light to engage!"
Cut to underside of the In Amber Clad. Johnson's Pelican docks via a hatch under the ship.
- Commander Keyes: "Punch it! Get us close!"
Cut back to bridge of In Amber Clad.
- NAV Officer Remi: "Ma'am, without a destination solution—"
- Commander Keyes: "We are not losing that ship!"
The assault carrier enters Slipspace followed at the last second by In Amber Clad. The jump creates a massive shockwave and electromagnetic pulse that engulfs the whole of New Mombasa.
Fades to white.
Level ends.
Achievements[edit]
The following achievements can be unlocked on Metropolis across the Windows Vista and Halo: The Master Chief Collection editions of Halo 2: Anniversary. The original Xbox release of Halo 2 did not contain achievement unlocks.
| Halo 2 (Windows Vista) | Halo: MCC (Xbox One, Xbox Series X|S) | Halo: MCC (Steam) | Title | Unlock requirement | Games |
|---|---|---|---|---|---|
 |
 |
 |
Beat Metropolis on any difficulty. | Halo: The Master Chief Collection | |
 |
 |
Beat the par time on Metropolis. | |||
 |
 |
Beat the par score on Metropolis. | |||
 |
 |
Activate Terminal #3 on Metropolis. | |||
 |
 |
Find and claim the Catch Skull. | |||
 |
N/A | N/A | Acquire the Scarab gun on the Metropolis level, any difficulty. | ||
 |
 |
Acquire the Scarab Gun. | |||
 |
 |
View both signs in the level Metropolis. | |||
 |
 |
Shoot the soccer ball in the level Metropolis. | |||
 |
 |
Complete Metropolis without entering a vehicle on Heroic or Legendary. |
Scarab Gun[edit]
- Main article: Scarab Gun
The Scarab Gun can be found in this level: to obtain it start at the bridge part of Metropolis where Sergeant Johnson gives you a tank, and kill all of the Marines. Get to the end of the bridge via tank. Then destroy everything apart for one Banshee. Go down the tunnel and it should follow, so shoot off its wings but do not destroy it. Kill any Marines in the tunnel on foot or in the Warthog or they may destroy your banshee. Get to the very end with it still following you, and then you encounter the tricky part. when you are going to the exit make sure it follows you to the left/forward tunnel; if it goes to the right one it will get stuck in a vent. Go a little further and before it says "LOADING...DONE" you must hijack it before "DONE" appears on the screen or the Banshee will disappear. Get in and out of the tunnel in the Banshee and fly up, up, up, to the bridge. Go on top, save your Banshee to get down. On top of the bridge there it is, the Scarab Gun above a traffic cone.
Trivia[edit]
Glitches[edit]
- During Field Expedient, if the player walks back into the building, the Scarab will continue firing its main cannon, the beam will continue to Sgt. Bank's balcony, killing him and the marine beside him, thus leave a dark mark in the area. This glitch won't happen if player sees the Scarab, so it is recommend to stand at where the Marines with turret and shotgun are.
- Because Metropolis is the second part of a two-part level, the player's weapons will carry over from Outskirts, unless one of the weapons is a Rocket Launcher or a Magnum. If the player finishes Outskirts with a Rocket Launcher they will start Metropolis with a Battle Rifle and an SMG. This is most likely done so that the player cannot have both Marines at the beginning of the level armed with Rocket Launchers.

- It's possible to save the tank that gets destroyed by the Scarab. Instead of going up the stairs on foot, take a Ghost or Warthog and drive off the roof and get the Marine out of the Scorpion Tank and reverse. The driver will have no armor, weapons, and occasionally, no face. This Marine is different every time. If given a chance to sit on the tank's hull will position his hands as though he is holding an weapon though he is not. Also, saving the tank will often cause the scripted dialogue to play out of order.
- The tank can also be saved by firing one rocket at it, which will kill the driver but leave the tank alive. The Scarab's gun will go through the firing animation but nothing will come out of it.
- It is possible to get the tank over the stuck doors in the tunnel (as it is with a Warthog or Ghost). The first is rather easy, the second takes a bit of positioning. However, beyond that, the player will have to continue on foot (or use a Warthog or Ghost, as they will fit in the pipe). They must aim the right treads so they are lined up with the wall, then go partially up the wall and quickly steer left. It should go through the gap. This is very useful for Legendary. It is also found to be easier backing up over the doors.
- If the player takes the Wraith tank on the bridge, and use the mortar on the Phantom continuously that carries another Wraith, it will get "stuck" on the cables holding up the bridge. The Phantom cannot be destroyed, like others in Halo 2, but repeated shots with the mortar will slide it slightly on the cable it gets stuck on.
- When you've performed the Banshee glitch, destroy the three Wraiths that are attacking the pinned down Marines. Then land your Banshee on the top of the building. Jump off the building, progress at the normal procedure and when you see the Scarab firing, get into your Banshee and head for the Scarab, land on it and get inside. You can see that no one is controlling the Scarab. When you wait a little longer, you will see that Elites and Grunts are spawning in the Scarab.
- When the Scarab climbs over the player, he or she can jump double the height of what they jump normally.
- If you get a Warthog on top of the Scarab it will float above the ground. You can use this trick to also put Marines on the Scarab. Before you drive the Warthog onto the Scarab you get the Marines in the turret and passenger seat. Once on the Scarab get them off and they will fight.
- You can use the Zip-Line Glitch in this level by carrying Excalibur from Outskirts to Metropolis, and taking your Marine's Rocket Launcher. The Zip-Line helps, because at the peak of the bridge you can board Banshees much easier with it.
- Sometimes at the end of the level where the Pelicans keep flying by one will hit and stick into a wall behind the Scarab.
- Sometimes a Warthog may never appear in single player.
- In the area where some Marines on Warthogs are fighting Ghosts (when Cortana talks about the Marine Command Post in the building), at the end of the battle there will be a Pelican dropping some Marines on a catwalk; get under the part of the Pelican where the Marines jump off, jump and hold the X button: you will board the Pelican, get a little ride and crash somewhere. The ride is very rough and you eventually will land on either a wide ledge or some sort of solid water surface.
- It is possible to get the Scorpion into the tunnel with all the overturned cars. However, if you clear out the tunnel and leave the tank and keep going until it says loading, The tank and all the Marines riding it will have disappeared if you return to the tunnel.
- If you jump from the Scarab onto the main gun without dropping down, there is a place somewhere where you can jump up and shoot the enemies inside the Scarab through the wall.
- In the part where you have to board the Scarab, there is a Rocket Launcher on top of a crate. If you melee the crate off the edge (Sputnik makes it easier, but is by no means necessary), the Rocket Launcher will remain hovering.
- In the same area as mentioned above, there are two crates beside each other with a medic box on the top and rocket ammo on the side. If you have sputnik on jump on top of the crates,crouch and energy sword the medic box then you will mysteriously die.
- When on the bridge, if you are under the Phantom that drops off the Wraith at the end of the bridge then the Phantom will not drop the Wraith and will fly away with the Wraith still attached to it.
- If you jump aboard the Scarab after the first bridge bit and kill all Covenant on board, in the cut scene it will still be docked at the end.
- If you jump on the rear leg of the Scarab at the end of the level and walk forward your legs will detach from your body and end up in the gap between the scarabs body and leg. you can also use this position to look inside the scarab and kill anyone inside but first you must go inside the scarab to make the elites spawn as there is no way off the leg once on it.
- During the part of the level where you meet up with Sgt. Banks, if you betray the marines stationed there, the soldiers posted on the stairs will not attack, but the reticule will still go red when aiming at them.
Mistakes[edit]
- If you give the Marine holding the Shotgun in the city center a Rocket Launcher, she will hold it with one hand like it was a small-arm and salute you.
- All of the overhead street signs in the level display the same destinations and distances, regardless of their location or direction.
- In the Beginning cut scene, Johnson lights a cigar and puts it in his mouth, however, when he says "Oh, I know what the ladies like," the cigar is gone.
- The Marine at the start of the level has a Battle Rifle, but on the level he has a rocket launcher.
- At the part of the level just before the Scorpion tank is destroyed, if you jump down to the ground and look up in time the Pelican with the tank still has the tank attached to the bottom when it was supposed to be dropped off on the bridge (however the tank is still there).
- It is also possible to blow the tank up on the bottom of the Pelican with 3 rockets or using the Gauss Warthog, the body of the tank can sometime be sent flying off appearing to be weightless (This would look much more hilarious if the Sputnik Skull was obtained.)
- The Marines dropped off by the Pelican near A-Company are invincible until they leave the Pelican.
- If you give Corporal Perez, Sergeant Banks, or the gunner a Rocket Launcher before the Scarab gets stuck at the end of the canal, they might accidentally kill themselves with it up on the bridge.
Easter eggs[edit]
- This level houses the Catch Skull.
- The Scarab Gun can be found in this level. It is on top of one of the bridges that connects two skyscrapers above the rally point and command post. A glitch must be performed in which a Banshee is coaxed through the tunnel at the end of the bridge.
- A large soccer ball is found on top of the building that's destroyed, with the large broken window.
- The male Marine talking in the beginning cut scene was voiced by David Cross, an actor best known for his portrayal of Tobias in Fox's "Arrested Development".
- The female Marine in the beginning cut scene was voiced by Michelle Rodriguez, an actress best known for her role in ABC's "Lost" and the movie, "The Fast and The Furious".
- The other female Marine, the one who offers you her shotgun in the tunnel, was voiced by Laura Prepon, an actress best known for playing Donna Pinciotti on Fox's "That 70's Show."
- The "Sign in Metropolis" can be found near the area where the player fights a trio of Muz-pattern Wraith, right before you enter the Marine command post. You can find it by following the road which curves around in a detour to the left. The sign is holographic and is next to a shut door and a weapon cache. Unlike most other signs on the level, the sign is destructible and will explode violently. It is similar to signs seen in the Halo 2 E3 Demo.
- It is possible to obtain the Scarab Gun without using the Banshee glitch, but it requires the Sputnik skull and a rocket launcher. On the last bridge of the level a small green supply box must be lined up exactly where the bridge meets the walkway leading to it. You must stand on the box and fire the rocket at or near the other exploitable metal box on your left facing the bridge. Usually the blast sends you way past the bridge with the SG or kills you, but if you do it right you'll have just the right momentum to land on the bridge with the Scarab Gun.
- Prior to entering the command post, traverse up the ramp leading to the weapons cache. There you will find an information monitor with a propaganda message demanding New Mombasa citizens to join a 'freedom fighter brigade'. The propaganda message is similar to the one made by the propaganda officer in Sadie's Story.
- When you are near the end where you have to fight the Scarab, there will be lots of weapons positioned all over the place. There will be a rocket launcher on top of a green box. If you hit the box off, you will see a floating rocket launcher.
- UNSCDF painted on a hull of a Scorpion Tank during cutscene could be referred to the JSDF (Japan Self-Defense Force) where the UNSCDF could stand for (United Nation Space Command Defense Force)
- The third terminal is a computer screen located near the stairs at ground floor of the Marine command post, after being greeted by Perez. The console's screen flashes "INCOMING MESSAGE" in red.
References[edit]
- Tterrab, the name of a fictional company seen in the level, is "Barrett" spelled backwards, a reference to Bungie level designer Chris Barrett.
Miscellaneous[edit]
- If you try to take the Banshee from the bridge into the tunnel, an invisible wall will send you back. If you hijack a Banshee while past the "wall", you will be shot back a few hundred meters.
- Contrary to popular belief, the Slipspace explosion did not completely eradicate New Mombasa but severely damaged it, as seen in Halo 3: ODST.
- If you take the Warthog instead of the Scorpion, you can drive it to the end of the level.
- The streetlights on the bridge and the toll booths at either end are destructible.
- You can take a Ghost all the way to the top of the passageway where you defeat the Scarab, and you can board with it. However, it slides off the moving sides easily, and you cannot take it inside.
- In the first garden area where you meet Sergeant Stacker with a Gauss Warthog, the part in which Jackal Snipers usually appear, unless you go to their sniping spot, there will actually be an unlimited number of them, so it's recommended to go to the position, otherwise more and more will keep showing up.
- After you have eliminated the Wraiths and caused the Phantom to flee, a Pelican, equipped with a Scorpion will hover above the Marine building. It is possible to destroy this tank, causing the Scarab not to fire when it rounds the corner.
- If you start the level with the Sputnik Skull and get a Rocket Launcher, you could shoot at the Pelican and move it, mostly with a tank.
- In the Field Expedient chapter, when the Scarab climbs up onto the garden, there is a small metal pillar that could be knocked over by the Scarab, there is a chance that Sergeant Banks and the Marine operating the turret can be killed by the pillar falling on them or sweeping the floor.
- If the Scarab steps directly on top of you as it climbs overhead, it will kill you.
- When you reach the other end of the bridge, with the Wraith and Banshees, you can steal the Banshee with a little luck, but can only drive in through the tunnel, before reaching the small mini-tunnel outside.
- The state of the first Warthog depends on how you are playing. In single player, it will be slightly damaged, with its windshield broken. In co-op, the Warthog will be undamaged.
- It's possible to get the Warthog on the Scarab if you go up the building with it. You can drive on top of the Scarab or stay on the building so Marines inside the vehicle can shoot at it.
- It is possible to save all the Marines in this level until the very end of the mission.
- In the area place on the bridge where you pick up an extra Marine with a Rocket Launcher, instead of picking up one, you'll pick up two if one of your other Marines died. One Marine has a Sniper Rifle and the other has a Rocket Launcher.

- The inside of the Scarab deflects sniper rounds. This can be deadly and may inflict heavy enemy casualties as well as friendly fire if not careful.
- The Warthog inside the tunnel with the Shotgun wielding Marine is indestructible until all the Marines get out. This can be proven by shooting the Warthog with a tank. However, while the vehicle is invincible, its occupants are not.
- This is the first level in Halo 2 in which you get to drive a Scorpion.
- According to the Halo 3 Legendary Edition bonus disc, the part after the bridge where you get the Shotgun from a fellow Marine was originally supposed to be flooded. But since the water effects didn't work and they ran out of time, the water was removed.
- When the Scarab comes to the building, the Warthogs, Ghosts and Wraiths disappear except if you park them near the stairs in the building.
- When the Scarab is trapped at the end of the level, if you watch long enough, a Pelican will break off from the direction the Scarab is facing and fire a volley of rockets at it.
- This is the first level in the Halo Trilogy in which the Gauss Warthog is ever encountered.
- It is possible, with the Sputnik skull active, to jump from the bridge where you fight the Scarab, to the other side of the river in a Ghost. Get as close to the third vent as possible, then shoot the vent and it will explode damaging your Karo'etba-pattern Ghost giving you enough propulsion to reach the other side. You can do this with any vent, but there is a large pit that you fall in if you use the first or second explosive vent jump.
- In the official Halo 2 trailer the Slipspace explosion is more like a human-made explosion with the fire colors of white, mixtures of red, yellow and orange, but in-game it is actually a mixture of blue and purple and waves of white like Covenant plasma.
- If you need help taking down the Scarab, it's possible to simply push the marines off the bridge and on to the Scarab to help you out. But watch where you're pushing the marines, because sometimes they fall into the water.
- When the Scarab climbs over the hotel, any weapons fired towards it will go right through.
- It is never shown how the Master Chief destroys the Scarab after killing all the Covenant inside. Presumably he destroys its power core as seen in Halo 3.
Gallery[edit]
Halo 2[edit]
Preview of the level in Halo 2 menu.
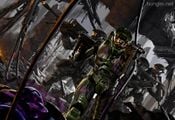
Concept art of ODSTs fighting alongside John-117 in New Mombasa.
Concept art of John-117 confronting the Scarab.
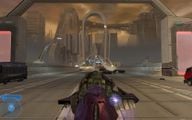
John-117 speeding through the bridge with a Karo'etba-pattern Ghost.
Banks and two Marines following the Scarab through the canal.
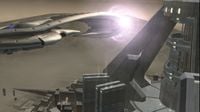
The Solemn Penance escapes New Mombasa via slipspace.


Halo 2: Anniversary[edit]
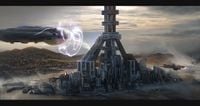
Concept art of the level's opening.
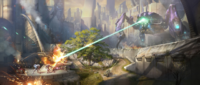
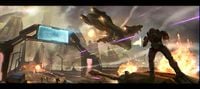
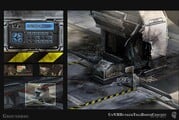
Concept art of an encounter with the Scarab.
Concept art of the level's ending.
Concept art for the tollbooth at the level start.
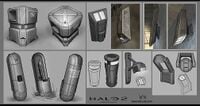
Concept art of several props used in the level.
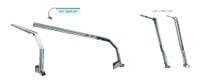
Concept art for the street lamps in the level.
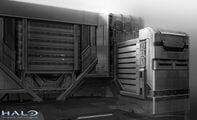
Concept art of a building in the level.
Concept art of another building in the level.
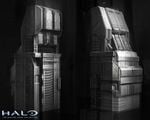
Concept art of another building in the level.
Concept art of another building in the level.
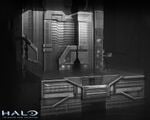
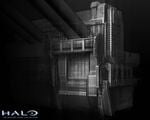
Concept art of another building in the level.
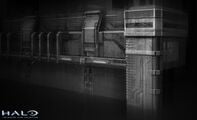
Concept art of another building in the level.
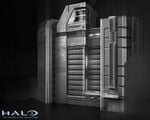
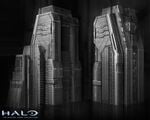
Concept art of another building in the level.
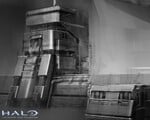
Concept art of another building in the level.
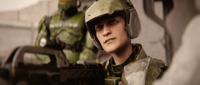
A marine at the bridge tells John-117 that the Scarab broke through the UNSC line.
Johnson and his Pelican drop off an M808 Scorpion.
Johnson with a cigar.
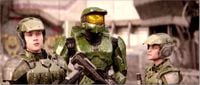
John-117 and two Marines prepare to launch an assault on the bridge.

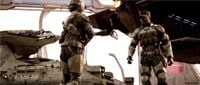
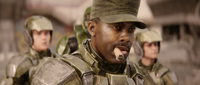
Marines in New Mombasa.
The Scarab approaches the command post.
The In Amber Clad approaches the carrier.
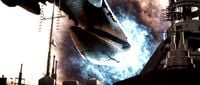
The Solemn Penance enters slipspace.


Sources[edit]
- ^ Halo 2 Editing Kit, game file
H2EK\tags\scenarios\solo\03b_newmombasa\03b_newmombasa.scenario
| Preceded by Outskirts |
Halo 2 Campaign Missions Metropolis |
Succeeded by The Arbiter |
| |||||||||||||||||||||||||||||||


