Sadie's Story
From Halopedia, the Halo wiki
While primarily experienced inside Halo 3: ODST, Sadie's Story was also hosted as an interactive web experience on Bungie.net, allowing players to listen to the drama and see the artwork online. While Bungie.net has since gone down, it can still be accessed and experienced via the Wayback Machine, here.
This page primarily covers the overall story and plot of Sadie's Story. For transcripts of the audio logs and their in-game locations, see here.
Plot summary[edit]
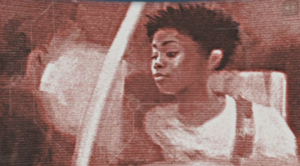
On October 20, 2552, 19-year old Sadie Endesha is leaving New Mombasa by train to enlist in the UNSC. To her dismay, she is caught by Vergil, a sub-routine of the New Mombasa Superintendent written by her father, Dr. Daniel Endesha, to monitor and take care of her. As soon as Sadie convinces Vergil to let her go, the Covenant arrive in New Mombasa.
Sadie contacts Dr. Endesha at the Superintendent's data center, who tries to tell her about a discovery made the previous day. Sadie cuts him off and (over his protest) states her intent to go downtown and save him from the Covenant.
As Sadie cuts off contact with her father, NMPD Commissioner Kinsler and NMPD officer Mike Branley arrive in a HuCiv Genet car modified for use by the NMPD, and Kinsler offers to pick her up. She accepts, only to be told that Kinsler was abducting her to rape her. When Mike hears this, he stops the car and kicks Kinsler out of it, leaving him on the street. He refuses, however, to bring her to the war zone in the city center. After a brief argument, Sadie tells him to stop the car so that she can go look for her father on foot, to which he obliges, leaving her in the market district.
Sadie continues toward the city center on foot, talking to her father on her chatter. He tells her that the Covenant only came to New Mombasa presumably for Vergil's discovery. Before he can continue, Sadie interrupts the conversation to meet Jonas, an 800lb butcher who is giving out free kebabs to the fleeing refugees. While expressing her gratitude for his admirable efforts in helping the city's populace, Sadie urges the man to flee from the Covenant with the rest of the refugees. Jonas calmly informs her that, due to his massive size and weight, he is unable to keep up with the boisterous mob around him, and accepts the fact that he was going to die. Sadie still persistently pleads with him, telling him that she will try to find a forklift or a garbage truck that she could use to transport him, to which he makes doubtful, but appreciatively humored remarks to her efforts, calling her his "brave warrior princess" coming to rescue him while riding "her mighty forklift". Unable to get through to him, Sadie accepts Jonas' final offering of two kebabs and continues her journey, now leading into the casino district.
Sadie tries to resume her conversation with her father in the casino district, but widespread looting has ruined all of the ATMs. She finds one that is operational, but a looter (referred to in the audio logs as the Crone) forces her away with a shotgun. Sadie hides behind a dumpster while a pack of Brutes rip the ATM from the wall and throw it on top of the Crone before killing her with Maulers. Sadie remains silent whilst hiding in the dumpster, but she is discovered by the alien patrol after her father contacts her on her Chatter. Before the Brutes can kill Sadie, Mike returns, running them over with his police car. Sadie then explains who Vergil is to Mike while he follows her over the bridge leading to the main island of New Mombasa.
As they cross a bridge, Kinsler, now armed with an SMG, arrives in a modified Pelican dropship decked in police livery and forces Mike to throw his holstered service pistol off the edge. Just before Mike and Sadie board his Pelican, Vergil saves them, crashing an Olifant into the Pelican and emptying its contents onto the Commissioner. Sadie then opts to use the garbage truck to continue across the bridge toward the city.
Once Sadie and Mike get inside the Olifant, Sadie continues talking to her father. While traversing the war-torn megalopolis, Sadie and Mike meet Tom Uberti, a salesman who has hitched a ride on the Olifant. Dr. Endesha tells her that seven Engineers were trying to repair the Superintendent before they attempted to escape their Covenant captors, and then that six of the Engineers sacrificed themselves for their brother, the seventh. Tom, overreacting to the news that Covenant were trying to help the Superintendent, eagerly opens the Olifant's top hatch, then looks around and shouts to grab the attention of any nearby Covenant so that he could "negotiate" with them. There is a Zurdo-pattern Wraith patrolling which, until now, ignored the garbage truck because it was an automated machine controlled by the city's AI. The Wraith soon notices Tom's shouting and responds to his offerings of peace with a plasma mortar. Mike and Sadie narrowly escape out of the machine's rear just before it is obliterated.
After Sadie tries to contact her father again, Kinsler shuts down the Superintendent. Mike tells Sadie that Vergil could be re-activated at the NMPD headquarters. Upon entering the structure's lobby, the two are immediately taken hostage by Marshall Glick, an unstable ex-cop who had apparently had a run-in with Mike earlier in his career. During the encounter, a man named Jim Odingo enters the lobby via elevator. Glick promptly kills him, his justification being that Jim regularly used his half-and-half despite Glick's many requests for him not to. Shortly afterward, a SWAT team storms the lobby with a flashbang grenade and finally manage to kill Glick after losing a couple of men in the preceding firefight. The two then continue to the Communications Headquarters, where Sadie borrows a stapler, concealed it in her pocket, and attempt to persuade the duty officer "at gun-point" to turn the Superintendent back on. The officer, wanting to get back to her work, "gives in" to the two's demands and reactivates the AI.
Throughout their travels, Mike had been hearing numerous propaganda messages, and he is now getting tired of them. Realizing that they are being broadcast from inside the building, he confronts Stephen, the announcer, about the propaganda-induced lies. Stephen says that the only people listening are frightened citizens hiding from the Covenant, and tells Mike that the lies give them hope before death. When they go back on the air, Mike, under the name "Harris 'Two Shot' Kibaki", tries to tell the truth, only to find himself telling the same kinds of lies the announcer had told.
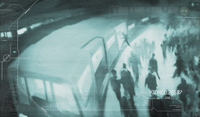
Kinsler overhears the broadcast, and contacts the propaganda station, telling Sadie that her father is being held hostage in the data center. He instructs her to meet him at a train station—alone. Sadie and Mike arrive at the train station and find Kinsler's private train car, guarded by corrupt officers firing into the crowd of refugees trying to leave the city. Once Sadie was on board, Kinsler tells her that he had killed Dr. Endesha, and that he is planning on capturing the stray Engineer and becoming a war hero. Meanwhile, Mike rallies the refugees to storm the corrupt cops, and Sadie tells Vergil to open the doors to the train for them. When the mob gets to Kinsler, it tears him to pieces.
Sadie wants to go and save the Engineer, but Vergil, using pre-recorded dialogue from the Superintendent, Mike, Jonas, the Duty Officer, Stephen, Sadie, and Dr. Endesha, tell her that the ONI would come get it and urges her to leave the city, telling her in her father's voice that it is "very, very proud [of her]". Sadie pleads with Vergil to let her stay, acknowledging that it is all that she had left of Mombasa and of her father, but Vergil refuses to do so. Finally Vergil, with the help of Mike, convinces Sadie to stay on the train. It then pulls out of New Mombasa, en route to "Makupa, Nairobi Road, Hope Station... And beyond."
Appearances[edit]
Characters
SpeciesOrganizationsLocations
|
Technology and equipment
|
Gallery[edit]
Sources[edit]
- ^ YouTube - Bungie, Bungie PAX Panel 2009 - Part 5 (Retrieved on Nov 13, 2025)
External links[edit]
|
| |||||
