H5G:Blue Team
From Halopedia, the Halo wiki
|
Prev: |
|
|
Next: |
|
| Blue Team | |
|---|---|

| |
|
Game: |
|
|
File name (?): |
Cutscene: |
|
Player: |
|
|
Date: |
|
|
Location: |
Onboard Argent Moon |
|
Objective(s): |
Investigate Argent Moon. |
|
Par Time: |
00:29:00 |
 |
Halopedia has a walkthrough guide for this level; see H5G:Blue Team/Walkthrough. |
| “ | The Master Chief is reunited with his Spartan II Blue Team for a routine investigation of the lost ONI research station Argent Moon. | ” |
Blue Team is the second campaign level of Halo 5: Guardians.
Completing the level grants the player the achievement "Argent Moon", worth 10 gamerscore points. Escaping the Hunter pair in the laboratory and fighting them in the Prowler's hangar unlocks "I Thought I'd Lost You" , worth 10 gamerscore points. In cooperative play, assassinating two Elites simultaneously unlocks "On My Mark", worth 10 gamerscore points.[1]
Transcript
{Cutscene}
Fade in on an enormous human starship, the UNSC Infinity. A Pelican zooms past to dock inside the spacecraft.
- Roland (COM): "Fireteam Osiris, you are clear to land in docking bay 11."
Cut to inside the Infinity. The Pelican flies over an enormous hangar filled with other Pelicans, moving pads, and a few Mantises walking by. As the Pelican lands, two figures approach: Tom Lasky, Captain of the Infinity, and Sarah Palmer, commanding officer of the Spartans-IVs of Infinity.
The Pelican's rear door opens, allowing Osiris to exit with Dr. Catherine Halsey. She hurriedly walks up to Lasky.
- Halsey: "Captain Lasky, I sent you my position three weeks ago! I told you this was happening!"
- Lasky: "We'll discuss that in private, Doctor. Palmer."
He gestures to Palmer, who grabs Halsey's arm and pulls her away.
- Halsey: "What has she done? How far has it already gone?"
- Lasky: "Good work, Osiris."
The three of them walk away, while Buck and Locke watch them.
- Buck: "What do you think that's about?"
Locke doesn't answer. He stares ahead impassively, unconcerned about the matter.
Fade to black.
Fade in to the pilot sear of a Pelican. John-117 is seated there, and is looking at his helmet face to face. He then rotates it and prepares to put it on before pausing to look at the AI data crystal chip port in the back of his helmet. He mournfully slides his thumb over the port.

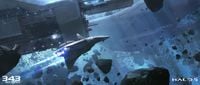
Cut to the Pelican's exterior: it is flying towards an abandoned ship drifting in an asteroid belt, the Argent Moon.
Frederic-104, Kelly-087, and Linda-058 are in the Pelican's troop bay preparing their gear.
- Fred-104: "I haven't seen Chief press himself like this since we were in boot camp."
- Kelly-087: "He's fine, Fred."
Kelly passes a DMR to Fred.
- Fred: "This many missions non-stop isn't fine."
John puts on his helmet and activates a COM link to the UNSC Infinity.
- John: "Sierra-117 to Infinity, Blue Team has located Argent Moon. Signs of hostile activity but she's still here."
- Infinity Comms (COM): "Copy that, 117. Eliminate all hostiles, secure Argent Moon. You may deploy when ready."
- John: "Affirmative, Infinity. 117 out."
John-117 cuts the feed and slows the Pelican down. He enters the Pelican's troop bay.
- Kelly: "Here you go."
Kelly-087 passes John-117 an MA5D assault rifle.
- John: "Thanks, Kelly. Everyone ready?"
- Linda-058: "Affirmative."
Linda opens the Pelican's exit ramp. John-117 starts to walk towards the rear of the Pelican when Fred stops him.
- Fred: "You good?"

John nods. He then walks to the back of the Pelican.
- John: "Blue Team. Fall out."
Blue Team activates their thrusters and jump out of the Pelican. They maneuver through a cluster of asteroids and head towards Argent Moon.
Inside Argent Moon a group of Sangheili soldiers are inside a room. A Sangheili Storm walks up to his Commander.
- Sangheili Storm: "The Unggoy are resisting."
- Sangheili Commander: (growls) "Throw the Unggoy out the airlock!"


Blue Team approaches the large window that leads to the room with the Sangheili. As they get close John opens fire to weaken the window and they all shatter the glass on impact. Entering the room, they use their thrusters to slow themselves down and land in front of the Sangheili Commander.
The Sangheili all activate their energy swords and charge towards Blue Team but are blown out into space. The Spartans activate the magnet systems in their boots which keep them attached to the floor. The Sangheili Commander lunges at the Spartans with his sword but they dodge the attack and the Sangheili is blown out into space. The window's blast door closes and Blue Team prepares to move. Fade to black.
BLUE TEAM
{Gameplay}
- System (PA): "Hull breach contained. Re-pressurization of affected area completed."
- Fred: "What do we know about Argent Moon?"
- Linda: "ONI research station. Went dark nineteen months ago. Last week, Kig-Yar scavengers found it, and sold the find to Jul 'Mdama's people."
- John: "We clear the Covenant and return this station to ONI."
- Kelly: "Fastest route to retrieval is to seize Central Control. Eliminate hostiles between here and there, then deactivate gravity and life support systems."
- Linda: "Ship data center is just ahead. We can pull down Argent Moon's schematics there."
If the player stalls
- John: "Move toward the data center, Blue Team."
The Spartans leave their landing site. They pass a catwalk overlooking an enormous assembly bay, where an unknown ship is docked.
- Fred or Kelly or Linda: "Impressive. Looks like they were designing a new stealth class vessel."
or
- John: "Looks like they were designing a new stealth class vessel."
- Kelly: "They lost years of expensive R&D with this station."
If the player stalls.
- Fred: "So this station was just drifting? For two years?"
- Linda: "Apparently."
- Fred: "How's an asset this big go missing for that long?"
- Linda: "Its location was not consistent with expected drift patterns."
- Fred: "Meaning?"
- Linda: "Someone didn't want it to be found and sent it in a direction no one would expect."
There are dead bodies around, skeletons in ONI uniforms. If the player examines the bodies.
- Linda: "What do we know about the experiments they were doing here?"
- John: "We don't. And we don't ask."
- Fred: "But I'd keep your helmet on tight just the same."
The Spartans open a door, to a room where two Unggoy manage computer terminals.
- Unggoy 1: "Why do we have to do downloading? So boring! Uh! It takes forever!"
- Unggoy 2: "Wish we were breaking glass. I like breaking glass."
- Any member of Blue Team: "Hostile contact."
If the Unggoy are alerted to the Spartans' presence.
- Unggoy: "Humans! How did humans find us?"
The Spartans kill the Unggoy and encounter more Covenant in the room past them.
- Kig-Yar 1: "Demon!" *Rest of the dialogue is ineligible.*
- Kig-Yar 2: "Kill it. Collect its head."
- Sangheili: "The demon walks among us."
After they kill them all and head to the next room, where a map terminal awaits.
- Any member of Blue Team: "Data center is just ahead. Let's go."
- Linda: "We've got a complete set of datasec keys for this station. We should be able to pull down Argent Moon's schematics and find a path to Central Control."
The player activates the data terminal. A hologram of the Argent Moon appears above it.
- PA: "Datasec entry accepted."
- Any member of Blue Team: "Accessed the databanks."
- John: "Grab the data and current population map."
- Fred: "Should be a straight shot to Central Control through the assembly bay ahead. There are still Prowlers in the hangar bays... Nobody from ONI got out of here alive, did they?"
- Linda: "No."
- John: "Let's go."
If the player stalls.
- Kelly: "The Covenant seem particularly disorganized lately."
- Fred: "They're falling apart."
- Linda: "Finally."
- Fred: "Would be strange, wouldn't it? Not to be fighting them? After all these years."
- Kelly: "I wouldn't miss it."
If the player stalls further.
- Linda: "Central Control is across that bay."
The Spartans find an elevator leading down to the assembly bay. A ship with torn plating can be seen out its window.
- John: "Elevator."
or
- Fred or Kelly or Linda: "Elevator here."
If the player stalls.
- Fred: "Need to get this elevator moving. Find the controls."
The Spartans enter and descend down the elevator.
- Fred: "Central Control's straight across this bay."
- Linda: "Everything's ripped up."
- Kelly: "They must be stripping that experimental ship for parts."
- Fred: "Scavengers. Taking what supplies they can find. The Covenant's war against the Arbiter must not be going well."
- Linda: "Jul 'Mdama is a lot of things, but he's no Prophet."
The elevator opens to a platform, where Covenant troops pass below. A shed door blocks the entrance to their site.
- Fred: "Most direct route to the shipyard is through the wall ahead."
- John: "Let's charge through."
If the player stalls.
- John: "Let's go, Blue Team."
John charges through the door, smashing it and falling to the assembly bay below, which is full of Covenant.
- Any member of Blue Team: "Contact."
- Sangheili: "Fight for the glory of 'Mdama."
After battling through Jackals, Grunts, and Elites, including a Zealot, the Spartans come to a platform overlooking a larger bay ahead.
- Any member of Blue Team: "Area's clear."
Near the stairs are weapons cases.
- John: "Hydra launcher."
or
- John: "Hydra here."
If a teammate sees it first.
- Fred or Kelly or Linda: "There's a Hydra here."
The Spartans leap into the arena, engaging numerous Ranger troops.
- Kelly: "Push through this resistance and reach Central Control!"
After battling them all, Blue Team clears the area.
- Fred or Kelly: "Nobody's left standing. Let's move on to Central Control."
If the player stalls.
- Linda: "Central Control is beyond this bay. Let's go."
John leads the team to a catwalk leading to a nearby open room.
- John: "Central Control is through those doors."
or
- Fred: "Central Control is just beyond those doors."
or
- Linda or Kelly: "Signage here for Central Control. Through those doors."
A stack of crates go flying as a Mgalekgolo bursts out from a wall. The impact causes the walkway to shake and tilt.
- Any member of Blue Team: "Hunter!"
The Hunter slams its shield arm into the walkway, breaking it and sending the Spartans plummeting down.
{Cutscene}
John lands at the bottom of a dark rocky cave. Unharmed, he raises his assault rifle in prep for threats. Seeing nothing, he slowly lowers it.
- John: "Blue Team, report. ...Sierra 117 to Blue Team, report. ...Sierra 117. Does anyone copy?"
- Cortana: "Chief..."
John turns at the sound of a faint familiar voice. Behind him is a small blue light, coming from some rocks a few yards away. John walks to the light cautiously, a low hum heard from it. It appears to be a data chip, glowing brightly in the dark. John kneels to pick it up, and it vanishes. The humming stops.
- Cortana: "John."
John looks to his right. There's more light coming from further in the cave. John follows it to its source, and comes to a cliff. A dark chasm is before him, with smoky clouds in the sky. John looks down the chasm, as small rocks fall. He cannot see the bottom; the clouds obscure his view.
- Cortana: "Chief."
John looks up. At the other side of the chasm, he sees a rocky peak framed by a bright moon. A silhouette of a woman can be seen walking up the rocks.
- John: "Cortana?"
- Cortana: "John! The Reclamation is about to begin!"
Cortana raises her arms, and a rumble is heard coming from deep beneath the chasm. John steps back as the rumble turns into a roar, and an enormous construct rises out of the abyss. It creates a dust cloud, blotting out the moon. John raises his assault rifle at the gigantic creature. The construct continues to rise, sprouting titanic spiked wings. John suddenly feels faint, and collapses.
- Kelly: "Chief? What's wrong?"
John comes to. He's on his knees, back on the Argent Moon. His teammates are with him standing guard. John gets back on his feet.
- John: "She's on Meridian."
- Kelly: "Who?"
- John: "Cortana."
THAT FAIR AND WARLIKE FORM
{Gameplay}
The Spartans are in a dark room, full of crates and exit tunnels.
- Fred: "That's not possible."
- Linda: "You said she was gone."
- John: "I watched her die. We have a mission to focus on. We can talk about this later. Lights on."
The Spartans activate flashlights on their weapons and helmets.
- John: "Frederic, get us back on course for Central Control."
- Fred: "Bringing up schematics. There's an elevator we can use, but access is four levels down."
- John: "Mark a path."
If the player stalls.
- Fred: "Path to Central Control is down. Don't follow ramps up."
The Spartans go into the tunnels, where they encounter Unggoy guards.
- Any member of Blue Team: "Hostile contact."
The Spartans exit the tunnels and find a room full of sleeping Unggoy. When the Grunts are killed, the opposite door opens, letting in more Grunts and two Elites who are cloaked.
- Any member of Blue Team: "Elites. Active camouflage."
- Sangheili: "Kill the Demon and his allies! They must not interfere!"
After Blue Team kills the enemy troops.
- John: "This area's clear."
or
- Fred: "This area's clear. Move forward."
- John or Fred: "We've reached level two. Keep moving down."
- Kelly: "Chief. What did Cortana say to you?"
- John: "Not enough. Something about Meridian."
- Fred: "Meridian's a backwater. If she's active, what's she doing so far out on the frontier?"
If the player stalls
- Fred: "We've got a lot of ground left to cover. We should keep moving down."
Blue Team leaves the room and enters another tunnel. As they go further down, they encounter suicide Grunts. Deeper still, their tunnel shakes. A Mgalekgolo is dimly visible through a window, smacking it and cracking the glass, also knocking a large crate over.
- Any member of Blue Team: "Hunters. They're keeping pace with us."
The other Hunter dents another window with an arm then its head.
A suicide Grunt rushes at them, wielding lit grenades. After the suicide Grunt is a pair of Jackals and another suicide Grunt.
- Grunt: "Big ones gonna get you. Big ones gonna get you."
They pass a level lower and reach a room where Unggoy and Kig-Yar are chatting. After killing them, the opposite door opens, letting in a cloaked Sangheili Zealot.
- Zealot: "Fight for the glory of 'Mdama!"
- Any member of Blue Team: "Zealot with an energy sword!"
The Spartans exit through the tunnel the Zealot came from. As they approach the door, it shakes from the Hunters following them.
- Fred or Kelly or Linda: "Reached level three. One more level down to the elevator for Central Control."
or
- John: "Reached level three. One more level down to elevator for Central Control."
- Kelly: "Covenant battlenet just lit up."
- Fred or Linda: "Because a pack of Covenant ships just arrived."
or
- Kelly: "Covenant battlenet just lit up. And I think I know why. Covenant ships exiting slipspace."
Blue Team enters the room, and sees numerous Hekar Taa-pattern blockade runners coming out of slipspace portals. Phantoms fly past with them.
- John: "Covenant ships exiting slipspace."
- Fred: "We're outnumbered here, Chief. A few thousand to one."
- John: "Surrendering Argent Moon is not an option."
- Linda: "Neither is fighting half the Covenant in close quarters."
- John: "Then forget about reaching Central Control. The plan changes to asset denial. We scuttle the Argent Moon."
Blue Team enters an armory with many available weapons.
- Any member of Blue Team: "Ship's reactor core is near here."
- Fred: "Same plan as the Perpetual Devotion?"
- John: "We overload the reactor and evac. Ship explodes, destroying any ships nearby."
- Fred: "The reactor is below the lab just ahead. We can use air ducts to travel between them. Marking the access panel."
if the player stalls.
- Fred: "Our path to the reactor room is through that lab."
John opens the access panel and puts in the password. Its door opens, revealing an elevator.
- PA: "Green Five clearance accepted. Authorizing entry."
Blue Team enters the elevator, which starts traveling down.
- Kelly: "There's chatter about Jul 'Mdama on Covenant comms. The new arrivals say he's dead."
- Fred: "Somebody cut the head off the Covenant. Bravo."
As the elevator approaches the bottom, a few alien worms crawl down its windows. At the bottom, they slither into armored shells below, which form into two massive hulking beasts.
- John: "Hunters..."
- Fred: "They're strong, but slow. Use the lab equipment to keep above them and out of their reach."
The Hunter closest to them roars and slams its arms in the elevator windows, cracking it. The doors open and Blue Team battles the Hunters.
After a tough fight, the Hunters go down.
- Any member of Blue Team: "Hunters down."
- Fred: "The reactor core is just below us. Let's go."
If the player stalls.
- Linda: "We can use the air ducts to reach the reactor room."
The Spartans approach a tube over their waypoint.
- Any member of Blue Team: "Schematics show a path to the reactor through here."
The player breaks the lock on it, and the cap lifts up to reveal a hole leading to further below.
- PA: "Venting system released."
The Spartans land in the air vents, with no Covenant in sight.
- Fred: "Reactor room is just ahead. We can light this fuse and bolt."
- Linda: "No salvage for the Covenant."
- Kelly: "Right. Let's go."
John breaks through a shutter door, arriving at the reactor room. Many Elites and Jackals patrol the room.
- Jackal 1: "What is happening? Why has the fleet come?"
- Jackal 2: "Jul 'Mdama is dead! Regroup! Attack Sanghelios!"
- Any member of Blue Team: "Reactor controls are on the far side of the room."
- John: "Eliminate the Covenant forces and get to those controls."

The Spartans battle for control of the reactor room, eventually clearing the Covenant.
If the player stalls in clearing the Covenant.
- Fred or Linda: "Still seeing hostiles. Clear them out so we can initiate the overload."
Once the Covenant hostiles are eliminated.
- Kelly or Fred: "Area's clear. Initiate the overload."
If the player stalls after clearing the Covenant.
- Fred: "Controls for the reactor will be nearby. Keep looking."
The player puts the password into the control panel. A wave of energy bursts off the reactor, and electrical sparks surround it.
- PA: "Reactor failsafe disarmed. Failure imminent."
- Any member of Blue Team: "Got it. Reactor's overloading."
- John: "Move for the hangar bay-"
- PA: "Containment protocol initiated."
- John: "Containment?"
- Fred: "The station's going to try to cool the reactor."
- Kelly: "I guess the UNSC has better reactor safety protocol than the Covenant."
- John: "We can stop that. Board the reactor."
- Kelly: "Board the reactor?"
- John: "If it's being moved, we should go with it."
If the player stalls.
- Fred: "Climb on the reactor before the station ejects it."
The Spartans climb on top of the reactor, which descends down a tunnel leading to the coolant site.
- PA: "Coolant chamber readied. Stand clear of deployment bay."
- Fred: "The safety systems are set to pump coolant to the reactor."
- Linda: "This whole plan fails if that coolant gets a chance to work."
- Kelly: "Shame to lose the Argent Moon, but I'd love to see the look on the Covenant's faces when she goes supernova."
The reactor reaches the bottom and enters its cooling chamber. Blue Team arrives at an enormous facility, open to vacuum where Banshees fly about.

- John: "How do we stop it?"
- Fred: "There are sheds located on either side of the cooling chamber. Those are our targets."
- John: "Reach the control sheds. Get the cooling system offline."
If the player stalls.
- Fred: "Shades are still closed on those coolant pipes. Find a way to open them."
John breaks into a shed and finds a control switch.
- John: "Override controls."
Or if a teammate gets into the shed instead.
- Fred or Kelly or Linda: "Located override controls."
- PA: "Warning: security shutters disengaged."
- Any member of Blue Team: "Override activated."
- PA: "Warning. Cooling system shutters exposed to open space."
- Fred: "Perfect. Coolant inner system workings are exposed."
- John: "Eliminate the targets, Blue Team."
- Kelly: "Grab Banshees. We can target the pipes more easily from the air."
- Fred: "The armada's been alerted to our presence. Reinforcements inbound. They're sending Phantoms."
John's Banshee shoots and breaks a coolant pipe, which explodes.
- PA: "Coolant system damaged. Pressure falling."
- Fred or Linda: "It's working! Keep firing!"
If the Spartans stall in destroying the coolant pipes.
- John or Fred: "Keep firing on those coolant pipes!"
The Spartans destroy all the coolant pipes in the area.
- PA: "Coolant system failing. Reactor core temperature rising. Evacuation advised."
- John: "Blue Team, evac now."
- Fred: "Banshees aren't fast enough to get clear of the reactor explosion."
- Kelly: "Calling in the Pelican. No signal on autopilot retrieval. Armada must've taken it out."
- John: "Frederic, find the nearest hangar bay. We're taking a Prowler."
The Spartans fly their Banshees through the shield door and exit to go back into the station. John spots a docked Prowler through the windows.
- John: "There's the hangar entrance."
or
- Fred or Linda or Kelly: "Hangar entrance here."
- Fred: "Prowler's just inside through an airlock."
If the player stalls.
- John: "This station's about to be slag. Move to the Prowler."
Blue Team arrives at the door to the hangar, which slowly opens.
- PA: "Reactor core temperature has exceeded 1373 Kelvin. Failure imminent. Immediate evacuation advised."

- Any member of Blue Team: "There's the Prowler."
- Linda or Fred or Kelly: "But the hangar's full of Covenant."
or
- John: "More Covenant."
- John: "Clear 'em out and prep for launch."
- Fred: "Do it quick. I'd rather not be here when the station melts around us."
The Spartans drop into a room right before the hanger.
- PA: "Evacuation protocols in effect. Proceed to escape vehicles immediately."
The Spartans engage the numerous Covenant infantry inside the hangar.
- Sangheili: "The Demon and his crewmates."
- Linda: "Marking the Prowler's control panel."
John presses the launch control switch, activating the vehicle.
- Any member of Blue Team: "Launch controls are here."
- PA: "Vehicle launch preparation. Fuel cells at zero percent. Initiating refueling."
- Fred: "Hold off the Covenant while the Prowler preps for launch."
or
- John: "Hold off the Covenant while we prep for launch."
While the Spartans are fighting the PA will say this.
- PA: "Cascading failure. Fires on all decks. All essential systems offline. Immediate evacuation advised."
Many more Covenant fall in from the roof, mainly Grunts, Jackal Rangers, and a Hunter pair.
- John: "More Hunters."
or
- Kelly or Linda or Fred: "More Hunters!"
The Spartans battle the swarming Covenant.
- PA: "Reactor containment failure. Immediate evacuation advised."
- PA: "Prowler fuel cells at 25 percent."
The Spartans take down most of the enemies, but more Grunts and then Elites arrive in the hangar.
- PA: "Prowler fuel cells at 50 percent."
- Fred or Kelly: "Covenant reinforcements inbound!"
When most of the Covenant are killed.
- PA: "Prowler fuel cells at 75 percent."
When almost all of the Covenant are killed.
- PA: "Prowler fuel cells at 100 percent. Launch is primed."
- Linda: "Prowler is ready."
- John: Board now, Blue Team.
The Spartans get to the boarding point.
{Cutscene}
Linda surveys the area with her sniper rifle.
- Linda: "Clear."
John walks toward a terminal with a dead Unggoy on it.
- John: "Time, Linda?"
- Linda: "89 seconds."
John pushes the dead Grunt off and hits the "Launch" button on the screen. The floor rises to lift them into the Prowler.
Cut to fire bursting through hallway. John sees it and activates his comm.
- John: "Sierra 117 to Infinity. Argent Moon scuttled. I've reassigned Blue Team, destination Meridian. Potential contact from Cortana."
- Infinity Comms: "Negative, 117. Another team is already being prepped to deal with her."
Fred turns to face Chief, confused.
- Fred: "What the hell...?"
- Infinity Comms: "You're to return to Infinity immediately."
- John: "Negative, Infinity."
John presses a button to open the Prowler's bay door.
- John: "I don't like it."
The Prowler's bay door opens. Kelly walks aboard up its ramp.
- Kelly: "Whoever they are, let's get to Meridian before they do."
- John: "Kelly. No."
Linda steps on as well.
- Linda: "No need to do this by yourself, Chief."
John looks up, a little exasperatedly. More explosions burst in the room. The hangar starts to fall apart.
Fred enters the Prowler, patting Chief on the arm as he passes.
- Fred: "They won't court-martial all of us, right?"
John looks back, sighs, and then joins them in the ship. Arriving inside, he presses a button to close its bay door. John watches it close.
The security latches come off and the Prowler rises into the air. At full height it aims down a long runway. Its engines charge and then blast, propelling it through and out of the exploding starship.
The Prowler flies out of the sinking Argent Moon, away from the expanding fireball, past exploding Covenant ships, through an asteroid field, and then vanishes as its cloaking activates.
Level ends.
Trivia
Easter eggs
- Eight pieces of Mission Intel can be found on the level.
- The Black Eye skull is hidden in the reactor room, inside a secret room reached by climbing pipes and breaking a shed roof.
- The Blaze of Glory Shotgun can be found in the level, on a ledge by a Mission Intel pad, just before the catwalk to Central Control when leaving the assembly bay.
- Activating a hidden alien figurine and then a hidden switch over the vessel Blue Team observes will cause eight Banshees to fly out of it, which will still be there after passing through the data center. The hidden switch is marked by a glowing red light.
- A poster stating "AUTHORIZED [sic] FOR USE SO LONG AS IT'S SUPER SECRET ONI STUFF" can be found at various, hard to access emplacements in the level.
- A Banshee Ultra can be spawned by activating a hidden alien figurine along a pipe at the reactor coolant center, which the player can then hijack since the Banshee does not attack.
- However, this easter egg can only be activated on solo.
Mistakes and glitches
- Enemies saying scripted lines (such as the first two Grunts) may continue saying them after being killed or in the middle of an assassination.
- If Blue Team is sent in front of John for the part where the Hunters break the bridge, they will gesture as though drawing a Magnum regardless of whatever weapon they're carrying.
- One can skip the Hunter encounter at the bridge by jumping off of it.
- On co-op, if a human player kills themselves just as another player activates the Hunter cutscene, a clone of their Spartan will be created when gameplay resumes. This clone will have no AI, be invincible, and not be noticed by enemies. It will also appear in the end cutscene if brought all the way to the hangar.[2]
- If the player looks carefully, they can see behind the glass hit by the Hunters. It is an area in space, making it impossible for the Hunters to have been there.
Production notes
- The opening cutscene was first revealed as a trailer on September 23, 2015.
- The achievement "I Thought I'd Lost You" is earned by skipping the first Hunter fight in the lab. Going past them to the ventilation shaft will cause them to follow the Spartans and emerge at the final hangar fight, resulting in battling four Hunters at once.[1]
Miscellaneous
- Though there is no explanation in the level for what caused Argent Moon to end up in that condition or the experiments being conducted there, Halo: Retribution reveals that it was a bioweapon program set up by Intrepid Eye in 2553. Blue Team and Veta Lopis' Ferrets thought they had foiled it during Operation: RETRIBUTION but Intrepid Eye was able to avoid discovery and continue Project SLEEPING STAR on Argent Moon undetected. The escape of the asteroidea merozoite bioweapon caused Argent Moon's state during the game. The Mission Intel reveals some of the history during the bioweapon incident on Argent Moon while Halo: Retribution reveals the backstory to the incident.
- This is the first of two levels in Halo 5: Guardians that feature neither the Prometheans nor their weapons.
- In Halo: Divine Wind, its revealed that Intrepid Eye was locked down on the station ever since her actions were exposed and she was believed to have been destroyed along with Argent Moon. However, Intrepid Eye survived by latching onto Blue Team's Prowler as they escaped in the Acrisius.
Gallery
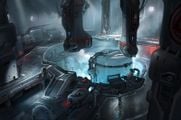
Concept art
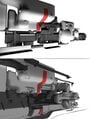
Concept art of architecture aboard the station.
Concept art of architecture aboard the station.
Concept art of architecture aboard the station.
Concept art of architecture aboard the station.
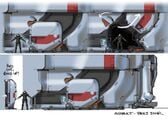
Concept art of generic technical details.
Concept art of generic technical details.
Concept art of generic technical details.

Concept art of generic technical details.
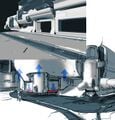
Concept art of one of the elevators.
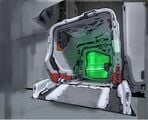
Concept art of Argent Moon's reactor room.
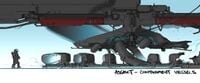
Concept art of Blue Team's escape.


Screenshots

The corridors of Argent Moon.
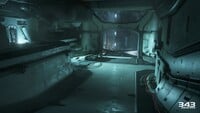
The corridors of Argent Moon.

The corridors of Argent Moon.
The corridors of Argent Moon.
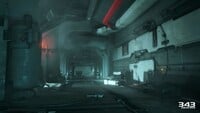
The corridors of Argent Moon.
The corridors of Argent Moon.
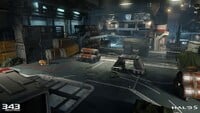
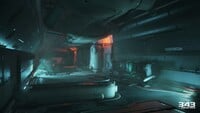
The assembly bay of Argent Moon.
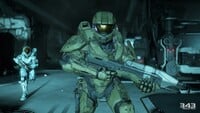
John-117 on the level.
John-117 using Spartan charge on the level.
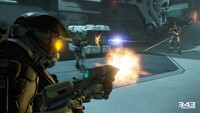
An early first-person screenshot of John-117 with an MA5D assault rifle after losing his energy shields.
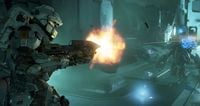
First-person screenshot of John-117 fighting Covenant forces after losing his shields and most of his health.
First-person screenshot of John-117 fighting a Sangheili Warrior.
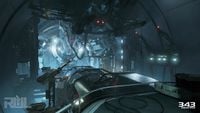
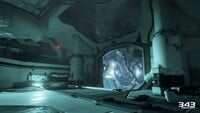
Argent Moon research station.
Blue Team boards the station.
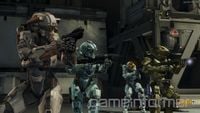
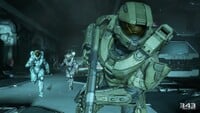
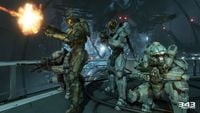
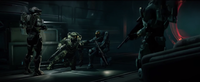
Blue Team fighting onboard Argent Moon.
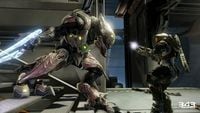
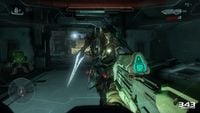
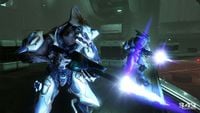
John encounters a Sangheili Zealot.
John fires his assault rifle.

John fires his SAW at a Sangheili Warrior.
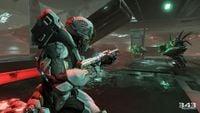
Fred fires his assault rifle at an Unggoy.
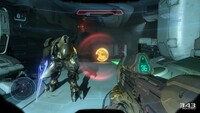
Kelly engages a pair of Mgalekgolo.
Kelly revives Linda.
A Sangheili Warrior and a Sangheili Commander fire their weapons.
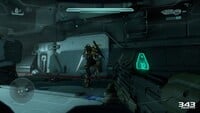
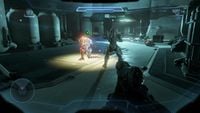
Blue Team regrouping deep within Argent Moon.
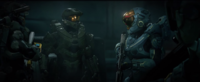
Blue Team discussing their next move.
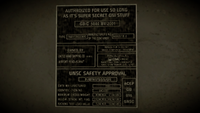
An Easter egg poster mentioning "super secret ONI stuff".
Space can be seen behind the glass hit by the Hunters.


Sources
| |||||||||||||||||||||||||||||||||||


