Warship Gbraakon
From Halopedia, the Halo wiki
|
Prev: |
Manifestation (chronologically) |
|
Next: |
|
| Warship Gbraakon | |
|---|---|

| |
|
Game: |
|
|
Player: |
|
|
Date: |
December 12, 2559[1] (intro) |
|
Location: |
Onboard Ghost of Gbraakon, orbiting Installation 07 |
|
Objective(s): |
|
 |
Halopedia doesn't currently have a walkthrough for this level; could you write one? |
| “ | Board the Banished ship, locate the bridge and disable whatever hit the Pelican. | ” |
Warship Gbraakon is the first campaign main mission in Halo Infinite, under the first campaign section "Ringfall".
Plot
| “ | After months adrift in the vacuum surrounding the shattered Zeta Halo, the Master Chief is retrieved and revived by a UNSC pelican pilot mere moments before the vessel is swallowed by a Banished warship. While securing an escape for the Pelican, Chief learns of the newly-installed War Chief of the Banished — the mighty brute Escharum — and his plans to control the Ring. Chief disables the Banished warship and plots a course to a broken fragment of the Ring, deep in enemy territory, in pursuit of a mission-critical signal. | ” |
During the Battle for Installation 07, John-117 is defeated by the Banished leader Atriox aboard the UNSC Infinity, and thrown into space. Six months later, he awakens aboard Pelican Echo 216 and is informed of the UNSC's catastrophic defeat by the pilot Fernando Esparza. When the Banished warship Ghost of Gbraakon captures Echo 216 in its stasis beam, the Master Chief must board the enemy vessel in order to shut off the beam. While infiltrating the ship, John learns that Atriox is presumed dead but that the Banished are nearly in control of Zeta Halo. Unable to deactivate the stasis beam, he overloads the ship's engines, destroying it. During his escape, he's contacted by the new leader of the Banished, War Chief Escharum, who vows to hunt the Chief down. Upon escaping the craft, he receives a message indicating that the Weapon's mission has been a success. He is then instructed to retrieve the Weapon.
Foundation immediately begins when this mission is complete.
Transcript
Intro cinematic
{Cutscene}
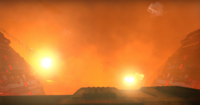
Open to a shot of a fully intact Zeta Halo in orbit over Ephsu I.
- Infinity bridge officer: (over the radio) "We are under attack! I repeat! We are under attack!"
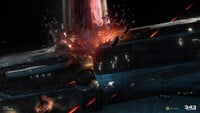
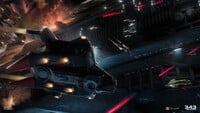
Scene pans right to reveal the UNSC Infinity under attack by Banished forces. A Banished dreadnought smashes into Infinity from the side. UNSC Pelicans flee the supercarrier while under heavy fire from swarming Banished Phantoms. Another dreadnought smashes into Infinity from the side.
- Whispers: (voiceover) "Would you humor me?"
Zoom in on one of Infinity's hangar bays. A Pelican tries to escape, only to take a plasma blast from a Phantom and explode.

Inside a chaotic, burning hangar bay, UNSC personnel are in full retreat. A pursuing Jiralhanae Warrior is gunned down from behind. His body falls forward, revealing his killer: Spartan-II Master Chief John-117, the only human not fleeing. A Kig-Yar Freebooter tries to rush by him, but the Master Chief slams it in the face with his MA40 assault rifle, knocking it to the floor. He finishes off the fallen Kig-Yar with a quick burst from his weapon before turning his attention to the other Banished.
Another Pelican takes off as the Master Chief fires his assault rifle at the Banished around him. Plasma pistol bolts strike the Master Chief, causing his energy shields to flare. The Chief guns down the Kig-Yar Freebooter shooting at him, then kills another Brute Warrior. Out of ammunition, he discards the empty assault rifle, drops to one knee, and uses his Grappleshot to retrieve an Mk50 Sidekick. He kills another Kig-Yar Freebooter before it can fire its needler at some retreating marines. He then turns and guns down a pair of Unggoy Conscripts.
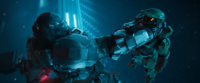
Suddenly, there's a roar from behind. John-117 turns around just in time to see Atriox bringing his gravity mace, Chainbreaker, down upon him. John blocks the blow with his left shoulder. He tries to bring his Sidekick up, but Atriox grabs his hand, forcing the gun away. With another roar, Atriox slams Chainbreaker into the Master Chief's side, sending the Spartan-II flying. The Chief crashes into a loading crane and falls to the floor, his weakened shields flickering.
Stunned by the blow, the Chief groans in pain and clutches his chest as Atriox approaches him.
- Whispers: (voiceover) "If you knew how you were going to die..."
Gripping his mace with both hands, Atriox raises Chainbreaker above his head, ready to deliver the killing blow. John-117 jumps to his feet and punches Atriox in the stomach three times, before delivering an uppercut to the Brute's jaw. Atriox is briefly staggered, but swiftly recovers and counters with a vicious punch to the side of John-117's helmet that knocks the Spartan back to the floor. Before the Chief can get back up, Atriox spins him around by the shoulder and hoists the Chief up by the neck with one hand. With the other hand, Atriox brings Chainbreaker crashing down on John-117's head, smashing him to the floor once more. Red energy from the mace engulfs the Chief and his shields fail. A data chip flies off of him and bounces across the floor several times before coming to a rest.

- Whispers: (voiceover) "How would you live your life differently?"
Scene zooms in on the chip as the Master Chief, groaning in pain, crawls toward the chip, desperate to retrieve it. Just as he grabs the chip, Atriox seizes him by the right leg and effortlessly swings him around, smacking the Chief into the side of a Warthog. The Banished leader then drags the Chief to the edge of the hangar bay, before throwing him into a heap on the ledge.
Atriox kneels down, grabs the Chief by the neck and thrusts him up, so that they're staring face to face. Scene circles around the pair before closing in on Atriox's face.
- Atriox: "My name is Atriox. And I am the last face you will ever see."
Scene shifts to the Master Chief's POV as Atriox hurls him off the ship. As the Chief falls, he sees a triumphant Atriox staring down at him from the ledge. Explosions erupt all over the hangar. The Chief fires his Grappleshot but it falls short. He passes through the hangar's energy barrier and into the void.
Fade to black.
Discover Hope
Scene opens up on "Warning" message flashing in front of a sleeping Pelican pilot. Suddenly something jolts the dropship violently, causing the pilot to wake up with a gasp. An alarm blares.
- Ship AI: "WARNING. WARNING. WARNING."
The pilot looks around in a panic. The Pelican continues to shake violently.
- Ship AI: "PRESSURE BUILDING IN LINES FOUR, SEVENTEEN, and THIRTY-THREE."
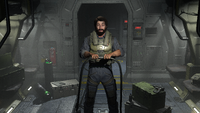
The pilot hastily unfastens himself from his seat. He moves the seat back allowing him to get up.
- Ship AI: "PRESSURE BUILDING IN LINES FOUR, SEVENTEEN, and THIRTY-THREE."
The pilot pulls out two security cards, one of which he inserts into a computer in front of him. He strains to insert the second card into another computer off screen.
- Ship AI: "PRESSURE BUILDING IN LINES FOUR, SEVENT-"
The alarm stops.
- Ship AI: "PROTOCOL ACCEPTED."
Suddenly a piece of debris flies by the window. The Pelican shakes again. The alarm resumes.
- Ship AI: "BREACH DETECTED."
The pilot rushes to the cockpit doors. He grunts as he tries to force them open.
- Ship AI: (on continuous loop) "BREACH DETECTED."
The pilot manages to pry the doors open and rushes out. Red warning lights are flashing inside the Pelican's bay, which is in a state of total disrepair. The pilot grabs a crate and stacks it on top of a pair of troop seats. He climbs onto the crate and reaches for an emergency valve. The pilot grunts profusely as he struggles to turn the valve. Desperate, he grabs the valve with both hands. Finally he turns the valve all the way. A moment later, he loses his footing and tumbles to the floor with a yell.
The red warning lights turn off and the alarm stops.
- Ship AI: "BREACH CONTAINED."
Scene circles around the pilot, as he lies on the floor, exhausted, before he notices a recording device next to him. The device blinks with a green light before fully activating itself, generating a holographic recording of a mother and her daughter.
- Woman (recording): "Okay, Daddy's listening. Can you say "Hi"?"
- Child (recording): "Hi!"
Zoom in on the hologram.
- Woman (recording): "And... show Daddy how big you are."
- Child (recording): "Sooo big."
- Woman (recording): "Sooo big. Good and can you sing?"
- Child (recording): (singing) "Mary had a little lamb."
- Woman (recording): "Good singing."
Scene circles around the recording.
- Woman (recording): "How about "I miss you"?"
- Child (recording): "I miss you."
The pilot's hand enters the view. He picks up the recording.
- Woman (recording): "And "I love you"?"
- Child (recording): "I love you, Daddy."
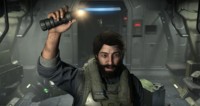
The pilot holds the recording in both hands. He's now grown a beard, indicating the passage of time.
- Woman (recording): "And... (laughs) good. And can you say, "I can't wait to see you again"?"
- Child (recording): "I can't wait to see you again."
- Woman (recording): "Okay, now say, "bye-bye!"."
- Child (recording): "Bye-bye!"
The pilot tearfully mouths the words "bye-bye" back. The recording ends and the device shuts itself off. Despairing, the pilot lowers his head and closes his eyes.
A console offscreen lights up, emitting a green glow.
- Ship AI: "SIGNAL DETECTED."
The startled pilot opens his eyes.
- Ship AI: "SIGNAL DETECTED. TAG DESIGNATION: FRIENDLY. SIGNAL DETECTED. TAG DESIGNATION: FRIENDLY."
The pilot gasps, jumps up, and rushes to the cockpit.
- Ship AI: "SIGNAL DETECTED. TAG DESIGNATION: FRIENDLY."
The pilot runs to the cockpit, the pelican readouts looking over "Local Ref Zeta" and the readouts reading the tag designation as "S_117". The pilot flips a few switches and picks up a headset.
The Pilot wipes the condensation off the Pelican's window to reveal John-117 floating in front of it in space near debris.
Time skip happens and the Pilot has gotten John-117 onboard and hooked his MJOLNIR GEN3 up to the Pelican.
- Pilot: "Looks like the main power cells are fried. Armor shutdown, triggering survival mode. I'm going to try to override."

The pilot picks up two cables.
- Pilot: "Okay, if you can hear me in there, I hope you're ready. Please don't die. Please don't die."
The pilot plugs the cables together and they spark.
Switch to John-117's POV.
John-117's VISR activates and cycles though several processes. Note: Any "xxxxx.xxxxx.xxxxx.xxxxx.xxxxx" was a cycle of codes.
VISR

SYSBOOT\>: RUN

.::.:::: .::.:... ..:..... .::.:... .::..:.: .::::..: ...........................

00001   Booting up... \
00002   Exiting Survival Mode ::::: <> [ Power Restored ] <>
+-------------------------------------------------------------------------------+

00003   ARMOR BIOS // MJOLNIR // VER_12.22.19 / ID_117

    CREATED BY Materials Group (c), 02.10.2559
    LAST MODIFIED BY C. HALSEY, 09.19.2559

00004   [[MJOLNIR Powered Assault Armor]] System // GENERATION III
00005   LOAD\>: VISR.HUD.PASSIVE.BIOS.BETA
00006   ADJUSTING IPD .... [58.4, 58.2]

            |::::::::::::::::::::::::::::::::::::::::::::::::|
            |: AUTH-KEY // >  xxxxx.xxxxx.xxxxx.xxxxx.xxxxx :|
            |::::::::::::::::::::::::::::::::::::::::::::::::|

            +-----------------------------------------------+
00007       PROGRAM-ID. VISR.
00008       ********************************************************************
00009       *    MODULE NAME = VISR                                            *
00010       *                                                                  *
00011       *    DESCRIPTIVE NAME = VISUAL INTELLIGENCE SYSTEM, RECONNAISSANCE *
00012       *               SPARTAN PROGRAM                                    *
00013       *               UNSC                                               *
            *                                                                  *
            ********************************************************************

|-----------------------------------------------------------------------------|
+--------------+ PREPARING A.I. INTRUSION COUNTERMEASURES +-------------------+
|::::::::::::: .::.::::.::.:.....:......::.:....::..:.:.::::..: ..............|

00100   LOAD\> VISR.HUD.SYS.SPDR ... /
00110   LOADING .................. [System Peril Distributed Reflex , S.P.D.R.]
00120   S.P.D.R .......................................................[ACTIVE]

-- ---- --- +    :         :    +    :    +    :    +    :    +    :    +    :
[] SPDR_00  | 42 | 09 | 2a | 07 | 02 | 82 | 11 | 32 | 25 | 6c | 69 | 65 | 76 |
[] SPDR_01  | 11 | 19 | 6c | 2b | 18 | 36 | 17 | 44 | 69 | 01 | aa | 12 | 11 |
[] SPDR_02  | 56 | 84 | 1d | 83 | 13 | 37 | 56 | 65 | 09 | 6c | 69 | 65 | 2a |
-- ----- -- |----|----|----|----|----|----|----|----|----|----|----|----|----|
[] SPDR_03  | 37 | 1b | 6c | 09 | 65 | 76 | 65 | 1a | 65 | 6c | 2c | 6a | 3b |
[] SPDR_04  | 98 | 6f | 1d | 19 | 2d | 6b | 6a | 2a | 63 | 56 | 00 | aa | 7a |
[] SPDR_05  | 18 | 11 | 6c | 84 | 65 | 76 | 65 | 2f | 65 | 6c | 69 | 65 | 76 |
-- -------- +    :    +    :    +    :    +    :    +    :    +    :    +    :

        +-------------------------------+-------------------------------+
        :           [XBC-001]           :           [XBC-002]           :
        +-------------------------------+-------------------------------+
        | xxxxx.xxxxx.xxxxx.xxxxx.xxxxx : xxxxx.xxxxx.xxxxx.xxxxx.xxxxx :
        +-------------------------------+-------------------------------+
        | xxxxx.xxxxx.xxxxx.xxxxx.xxxxx : xxxxx.xxxxx.xxxxx.xxxxx.xxxxx :
        +-------------------------------+-------------------------------+
        | xxxxx.xxxxx.xxxxx.xxxxx.xxxxx : xxxxx.xxxxx.xxxxx.xxxxx.xxxxx :
        +-------------------------------+-------------------------------+
        | xxxxx.xxxxx.xxxxx.xxxxx.xxxxx : xxxxx.xxxxx.xxxxx.xxxxx.xxxxx :
        +-------------------------------+-------------------------------+
        | xxxxx.xxxxx.xxxxx.xxxxx.xxxxx : xxxxx.xxxxx.xxxxx.xxxxx.xxxxx :
        +-------------------------------+-------------------------------+
        | xxxxx.xxxxx.xxxxx.xxxxx.xxxxx : xxxxx.xxxxx.xxxxx.xxxxx.xxxxx :
        +-------------------------------+-------------------------------+
        | xxxxx.xxxxx.xxxxx.xxxxx.xxxxx : xxxxx.xxxxx.xxxxx.xxxxx.xxxxx :
        +-------------------------------+-------------------------------+

\> Running system diagnostics ...

|-----------------------------------------------------------------------------|
+----------------------+ PRIMARY SUPPORT SYSTEM CHECK +-----------------------+
|:::::::::::::::::::::::::::::::::::::::::::::::::::::::::::::::::::::::::::::|

--   -------   ---------    -----------------------------   -------   ---  ------
01   SYS_CHK   SYS-ID-JC    xxxxx.xxxxx.xxxxx.xxxxx.xxxxx   MOD-021   [+]  [PASS]
02   PWR_CHK   SYS-ID-MC    xxxxx.xxxxx.xxxxx.xxxxx.xxxxx   MOD-331   [+]  [PASS]
03   LFS_CHK   SYS-ID-PA    xxxxx.xxxxx.xxxxx.xxxxx.xxxxx   MOD-171   [+]  [PASS]
04   VSR_CHK   SYS-ID-DS    xxxxx.xxxxx.xxxxx.xxxxx.xxxxx   MOD-019   [+]  [PASS]
05   VHF_CHK   SYS-ID-JS    xxxxx.xxxxx.xxxxx.xxxxx.xxxxx   MOD-105   [+]  [PASS]
06   UHF_CHK   SYS-ID-SW    xxxxx.xxxxx.xxxxx.xxxxx.xxxxx   MOD-019   [+]  [PASS]
--   -------   ---------    -----------------------------   -------   ---  ------
07   WPN_CHK   SUB-ID-AW    xxxxx.xxxxx.xxxxx.xxxxx.xxxxx   SUB-778   [+]  [PASS]
08   ABL_CHK   SUB-ID-WU    xxxxx.xxxxx.xxxxx.xxxxx.xxxxx   SUB-293   [+]  [PASS]
09   RUN_CHK   SUB-ID-CC    xxxxx.xxxxx.xxxxx.xxxxx.xxxxx   SUB-918   [+]  [PASS]
--   -------   ---------    -----------------------------   -------   ---  ------

visr_sys.module.common.bios_mk_iii....................................[09 PASSED]

--   -------   ---------    -----------------------------   -------   ---  ------
10   SRV_CHK   SYS-ID-XS    xxxxx.xxxxx.xxxxx.xxxxx.xxxxx   MOD-919   [-]  [FAIL]
11   PCS_CHK   SYS-ID-ML    xxxxx.xxxxx.xxxxx.xxxxx.xxxxx   MOD-901   [-]  [FAIL]
12    AI_CHK   SYS-ID-WU    ?????.?????.?????.?????.?????   MOD-???   [-]  [????]
--   -------   ---------    -----------------------------   -------   ---  ------


          /////////////////////////////////////////////////////////
              <!> <!> <!> WARNING - NO AI DETECTED <!> <!> <!>
          /////////////////////////////////////////////////////////


visr_sys.modules.common  bsystems  ..................................[2 FAILED]
visr_sys.modules.common.ai........................................ [1 BYPASSED]

\> Generating system report...

[visr_sys] Time Elapsed     .....+.....+.....+.....+........... 0.12 sec(s)
[visr_sys] Total Systems    ........................................... 432
[visr_sec] Modules FAILED   ........................................... 002
[visr_sec] Modules PASSED   ........................................... 009

SYS. ... OK - (3) <!> Warnings.

//BOOT COMPLETE.
{Gameplay}
- Pilot: (Hopeful gasps)
The Pelican starts to light up again as the armor's fusion reactor recharges the dropship's depleted batteries, and the pilot jumps up and down in excitement.
- Pilot: "Yes! Yes! Yes! We're going home! Haha! Welcome back, Chief. I rerouted what little power I had into your suit."
The pilot looks at some readings on a data pad.
- Pilot: "I'm seeing a fault on the calibration matrix. At least I think it's a calibration matrix. Okay, follow the light."
The pilot lifts up his flashlight.
- Pilot: "Look up."
As John-117 looks up, the light turns green.
The pilot lowers the light.
- Pilot: "Now let's look down."
John-117 follows the light down and it turns green again.
- Pilot: "That seems fine. Let's try right."
John-117 follows the light to the right until it turns green.
- Pilot: "And now left."
John-117 follows the light to the left until it turns green.
- Pilot: "Your visor feed and motor functions seem to be operational, but it looks like there's a problem with the servos in your hands. Try moving it."
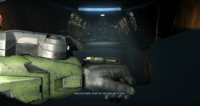
The Chief looks down and flexes his left hand. He withdraws his grappleshot back into its wrist launcher.
- Pilot: "Stay calm, you've been out there awhile."
The pilot goes to check some equipment lying around.
- Pilot: "I know I saw something in here to check your armor's diagnostics."
Chief looks down at his right hand and opens it. In his palm is the data chip with the AI serial number "CTN 0453-0" engraved on it. He proceeds to put it into his helmet. This makes a prompt appear on the VISR.
WEAPON CONTAINMENT DEVICE INSERTED
VERIFICATION ID [309-270-238]
> > AI NOT DETECTED < <
CONTINUE?
(player selects "continue")
{Cutscene}
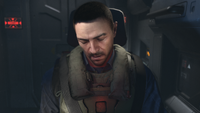
Chief proceeds to walk forward, disconnecting himself from the Pelican. This causes the pilot to be careful regarding him.
- Pilot: "Whoa, whoa, whoa, whoa! Easy there, big guy. You're not-"
- John-117: "Status report."
- Pilot: "Status report? What? There's something you need to see, Chief."
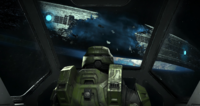
He glances at the cockpit of the Pelican. Following the pilot's gaze, the Chief enters the cockpit and stares outside the window. He sees a heavily damaged Zeta Halo. Ephsu I is nowhere to be seen.
- Pilot: "We lost. Lost everything. There's nothing left for us here. I don't even know where here is..."
The Pelican gets hit by an EMP-like shock, causing systems to go into flux.
- Pilot: "No, no no no! Not them! Not again! We need to run!"
The Master Chief grabs him by the shoulder and turns the pilot around to face him.
- John-117: "I need a weapon."
- Pilot: "Weapon? This is all I've got."
He hands John-117 a sidearm.
- John-117: "It's enough."
The Pelican is jolted violently, causing the Pilot to stumble forward. He briefly braces himself against the Chief's armor. The Chief looks up, then turns and leaves the cockpit.
- Pilot: "What, what? What are you gonna do?"
- John-117: "Improvise. Close the door."
The pilot hits the controls and the cockpit doors shut. John-117 walks over to the troop bay door and opens it. A bright light from the Ghost of Gbraakon floods the Pelican's interior. Some loose containers fly out into space. The light dims enough to reveal a massive debris field between the Pelican and the Banished vessel. John-117 walks to the threshold and prepares to jump.
Warship Gbraakon
- Pilot (COM): "Argh! The main batteries are shut down. We're stuck out here."
John leaps out of the Pelican and into space. He pulls and pushes himself forward in space using various pieces of debris. He comes across the corpses of two Marines, moving one away carefully. He floats into a corpse-ridden interior of a ship.
- Pilot (COM): "You have one bullet, against an entire army."
John picks up a fusion coil and throws it forward into debris blocking his path ahead.
- Pilot (COM): "What can you do on your own?"
John fires the pilot's Mk50 Sidekick at the fusion coil, detonating it. The muffled explosion clears his path.
- John-117: "I told you. It's enough."
John continues to propel himself forward in space, pushing the bodies of Unggoy and Kig-Yar out of his way.
- Pilot (COM): "So I see."
John grabs a floating magazine and reloads his Mk50 Sidekick. He then comes to the rear section of an M12B Warthog. He looks into the roll cage to find a dead Marine and an MA40 assault rifle. He picks up the rifle.
- Pilot (COM): "No, no, no, no. They're powering up a stasis beam. We can't escape!"
- John-117: "You work on the batteries. I'll buy us some time."
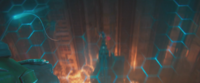
The Master Chief navigates his way through more debris as he approaches the Ghost of Gbraakon. He fires his grappleshot onto a piece of debris and slings himself forward, crosses the dreadnought's energy barrier, and lands in a wreckage-strewn hangar. The crossing drains his shields but he otherwise lands unharmed.
- Pilot (COM): "I don't believe it! You made it!"
{Gameplay}

- Pilot (COM): "Now what? We can't go anywhere while that stasis beam is active."
- John-117: "Then we shut it down. Stasis beam. Weapons. All of it."
- Pilot (COM): "But... how will you get back?"
- John-117: "I'll figure something out."
John-117 moves across the hangar.
- Jiralhanae Officer (loudspeaker): "Enemy vessel contained in stasis beam. Initial scans inconclusive. Deploy squad to Hangar One! Eliminate all survivors!"
- Pilot (COM): "Eliminate?! Chief, whatever you're planning to do, do it fast."
The Master Chief comes across a sleeping Unggoy. He quickly and quietly kills it, then moves on. Two other sleeping Unggoy are encountered throughout the hangar, while a third one is awake and on patrol.
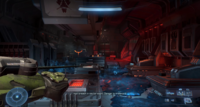
The Chief makes his way out of the hangar and starts searching for the ship's bridge. Along the way, he encounters some Unggoy patrols which he quickly eliminates.
Ascending to the upper level, he approaches the hangar control room. Nearing the door, he overhears an argument between an Unggoy Assault and a Jiralhanae.
- Unggoy 1: "Send help! The Spartan is here!"
- Jiralhanae (COM): "What? You are wrong. He is dead."
- Unggoy 1: (frantically pounds his console) "The Spartan is alive! Alive!"
- Jiralhanae (COM): "It cannot be. Hold your position."
- Unggoy 1: "Hold the Spartan back? Alone?! He's going to kill me! He's going to kill us all!"
The other Unggoy spot the Chief.
- Unggoy 2: "Hey! You're supposed to be dead!"
- Unggoy 3: "Aaaah! The demon's alive!"
- Unggoy 4: "No. No. No. Green man is here!"
- Unggoy 5: "Kill him! Before he kills me!"
The Chief storms the hangar control room and kills all the Unggoy inside. He then heads deeper into the ship.
{Cutscene}
The corridor the Chief has entered suddenly goes dark. Scene zooms in on the doors at the other end. A furious Jiralhanae Berserker pries the doors apart and forces its way inside, tearing one of the doors out of its frame in the process. Upon seeing John-117, the Brute snarls and throws the door down the hallway. The door slides across the floor, sending up sparks. A piece of the door breaks off and continues rolling down the corridor. John-117 watches the debris roll past him before turning his attention back to the Brute.
{Gameplay}

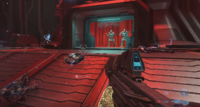
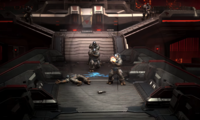
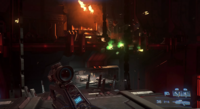
The Master Chief kills the Berserker. He then proceeds down the corridor and into the room the Brute came out of. Inside is a massive hologram of Atriox. A recorded voice is heard giving praise.
- Escharum (voice recording): "Remember his example. We do not bow our heads. We do not kneel before false idols. We stand together! Fight together! Lay down our lives to protect our creed! (labored rasp) Atriox showed us the way! Together... we are invincible! We are the Banished!"
John-117 approaches the hologram.
- Pilot (COM): "That... that hologram. It's Atriox. He led the attack on the Infinity. He was looking for... something. He... he killed everyone."
- John-117: "I know. We met."
In the next room is another hologram of Atriox, along with some Grunts and ammo crates. John clears the Grunts out and replenishes his ammunition.
- Escharum (voice recording): "Atriox! His actions inspire us! No more Prophets! No more lies. We stand together. Brothers to the end. We are his will. We are his legacy! We are the Banished!"
John proceeds to the next room, which contains another hologram of Atriox, as well as more Brutes. The Brutes are in mid-conversation and do not notice John at first.
- Jiralhanae 1: "Impossible. Your eyes deceive you, brother!"
- Jiralhanae 2: "He's aboard the Gbraakon this very moment! We MUST alert the War Chief!"
- Jiralhanae 1: "And if you are wrong?"
- Jiralhanae 2: "I am NOT WRONG!"
The Brutes spot the Chief.
- Jiralhanae: "Look, there he is! ATTACK!"
John-117 kills all the Brutes. He then exits the room and enters the massive deployment bay, where drop bases are being prepared to be deployed to the surface of Zeta Halo. The Jiralhanae Officer is heard giving commands over the loudspeaker.
- Jiralhanae Officer (loudspeaker): "Drop-base seven-six-three, capacity reached. Prepare for deployment."
- Jiralhanae Officer (loudspeaker): "Power extractor two-five-six, prepare for deployment."
- Jiralhanae Officer (loudspeaker): "Sensor tower three-three-four damaged. Pull from the line."
- Jiralhanae Officer (loudspeaker): "Stronghold four-five coordinates received. Deploy immediately."
- Jiralhanae Officer (loudspeaker): "Drop-base six-six-two, commence final preparations."
The Chief engages a group of Jiralhanae and Kig-Yar.
- Kig-Yar: "Spartan invades ship! Kill Spartan NOW!"
Or
- Kig-Yar: "Spartan aboard! Kill Spartan! For Banished!"
After defeating the Banished troops, the Chief enters an elevator and activates it. The elevator begins its ascent, and John-117 can now see row upon row of Banished drop-bases waiting for deployment.
- Pilot (COM): "Drop ships. An invasion force. How do we stand a chance against all this? The Banished won already. We could be the only two humans left alive out here."
- John-117: "Then there's still hope."
The elevator reaches its destination. The Master Chief exits and proceeds deeper into the ship.
- Jiralhanae 1: (seeing the Chief) "So it's true! The Spartan lives!"
- Jiralhanae 2: "Not for long!" (roars)
The Chief continues forward and fights more Brutes, Jackals, and Grunts.
- Jiralhanae: "Human! How dare you step upon this craft!"
Finally, the Chief reaches the ship's bridge.
{Cutscene}

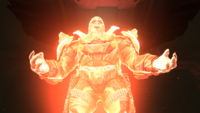
A massive hologram of the Brute War Chief materializes on the bridge. The Jiralhanae present all turn towards the hologram as their new leader addresses them.
- Escharum (hologram): "The hour approaches. Soon the Banished will stand victorious. Atriox... hear these words. Even from beyond this life, your will is served. Your forces occupy the Ring. Within hours, it will be under our control. Humanity will cower before your legacy. They will burn. Their brazen defiance will be all but a memory."
The Brutes on the bridge cheer. The hologram disappears.
{Gameplay}
- John-117: "We have a new problem."
- Pilot (COM): "We? We need to get out of here!"
- John-117: "I'm working on it."
- Pilot (COM): "Work faster. This Pelican's nearly on board and the power's still out. Don't let them get me."
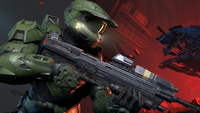
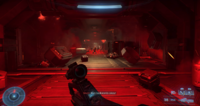
The Master Chief storms the bridge and eliminates the crew, including a Jiralhanae Captain armed with a Veporokk Workshop Ravager. The Chief then locates the controls for the ship's stasis beam, but can't access them.
- John-117: "It's locked down. Requires a hack."
- Pilot (COM): "Okay. And you can do that?"
- John-117: "No."
He punches the control panel, destroying it. Alarms begin blaring.
- John-117: "New plan. Scuttle the ship."
- Pilot (COM): "You are going to destroy this ship... with us in it? (pause) I'm going to die here."
- John-117: "There are cooling pipes running towards the main engines."
- Pilot (COM): "So?"
- John-117: "I'm gonna warm things up."
Banished troops, having heard the alarms, attack the bridge in an effort to retake it.
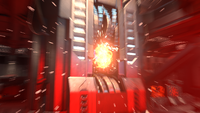
The Master Chief destroys the first cooling manifold.
- Pilot (COM): "Did it work? Nothing seemed to happen."
- John-117: "I'm not done yet."
- Pilot (COM): "Well hurry. I can see them. Brutes. And the little things. All waiting. Don't let them get me. Please."
The Chief destroys the second cooling manifold.
- John-117: "Get ready."
- Pilot (COM): "(sighs) Okay, okay. Fire up those engines, Chief. Maybe we'll survive."
The Master Chief finds the controls for the engines.
If the Chief tries to activate the controls before killing all the Banished on the bridge:
- Pilot (COM): "Not yet, big guy! Kill all the threats on the bridge."
Or
- Pilot (COM): "That won't work, Chief! Take out the Banished forces first."
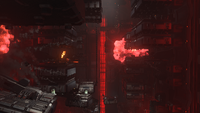
The Chief finishes killing all the Banished on the bridge. He then pulls the left lever all the way down, triggering an overload. Explosions erupt across the ship's hull.
{Cutscene}
- Escharum (hologram): "Report!"
John-117 turns around to find the hologram of the Brute War Chief has reappeared. The Brute stares down at him, intrigued.
- Escharum (hologram): "A Spartan? No. (grins) Something better. The Master Chief returns. We thought you dead. Tossed into the void, yet here you stand. Humans call you their savor. The Covenant... Demon. The Banished? Prey. (chuckles) Destroy this craft if you must. It matters not. The Banished will hunt you down. Pursue you wherever you run."
The hologram deactivates.
{Gameplay}
- Pilot (COM): "Who is that? Do you know him?"
- John-117: "No."
- Pilot (COM): "Well, he knows you. He knows all about you."
The ship shakes violently.
- Pilot (COM): "You need to hurry. Get back here. I don't know how long the ship will hold together."
John-117 exits the bridge and starts making his escape. Explosions erupt everywhere. Most Unggoy run around in panic, but the Jiralhanae stand their ground and try to stop the Chief.
As the ship continues to fall apart, the Brute Officer gives multiple commands over the loudspeaker.
- Jiralhanae Officer (loudspeaker): "Hull breach confirmed! Guard rounds must continue!"
- Jiralhanae Officer (loudspeaker): "Shield integrity failing! Discomfort breeds strength!"
- Jiralhanae Officer (loudspeaker): "Hull breach in sector thirteen. Unggoy casualties confirmed."
- Jiralhanae Officer (loudspeaker): "Impulse engine stability failure! All Grunts to central engineering!"
- Jiralhanae Officer (loudspeaker): "Breaches confirmed on decks four and seven!"
- Jiralhanae Officer (loudspeaker): "Structural integrity at forty-nine percent!"
- Jiralhanae Officer (loudspeaker): "Hull breach in sector eight. Danger is irrelevant!"
- Jiralhanae Officer (loudspeaker): "Hull breach in sector twenty-one. Marshal your courage!"
- Jiralhanae Officer (loudspeaker): "Interior temperature increasing!"
- Jiralhanae Officer (loudspeaker): "Thrusters at critical. Orders remain unchanged! Stay at your posts!"
- Jiralhanae Officer (loudspeaker): "Structural integrity at twenty-seven percent!"
- Jiralhanae Officer (loudspeaker): "Abnormal temperature spike in the cargo hold!"
- Jiralhanae Officer (loudspeaker): "Shield integrity at fifty-six percent! We will prevail!"
- Jiralhanae Officer (loudspeaker): "Crew capacity at thirty-seven percent. Only the strongest remain! Fight, brothers!"
- Jiralhanae Officer (loudspeaker): "Hull strength at twenty percent! We are not dead yet, you mongrels!"
- Jiralhanae Officer (loudspeaker): "Bridge compromised! Ghosts of Lodon and Tiacoro have been hailed!"
- Jiralhanae Officer (loudspeaker): "Engine instability approaching critical levels!"
- Jiralhanae Officer (loudspeaker): "Structural integrity at fourteen percent! Remain at your posts!"

John-117 enters the room containing the elevator to the main hangar bay. The room has now been flooded with a hazardous blue liquid. John-117 uses his Grappleshot to safely avoid the hazardous material and reaches the elevator. He leaps down the elevator shaft and onto the platform. He tries to access the elevator controls, but they're offline. Suddenly the elevator platform plummets violently before coming to a halt between decks. There's a large enough gap for the Master Chief to get through.
Leaving the elevator, the Master Chief finds another hologram of the Brute War Chief waiting for him.
- Escharum (hologram): "Do you think this disruption will be enough? Victory is already ours. So, run, Spartan. We will meet on the battlefield."
The hologram disappears.
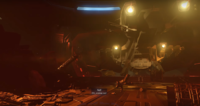
The Master Chief exits the room and steps out into the deployment bay where all the Banished drop-bases were preparing for deployment.
- Pilot (COM): "Where are you? The Pelican's surrounded. They're... Oh God. They're trying to get in!"
- John-117: "On my way."
The Master Chief uses his Grappleshot to swing himself across the deployment bay. He runs on top of and/or through the various structures.
A series of explosions erupt throughout the deployment bay.
- Pilot (COM): "What was that? It felt... bad. Even the Banished seem freaked. We are running out of time."
- John-117: "The batteries?"
- Pilot (COM): "Charging. Slowly. I don't know. It's gonna be close. Too close."
The Master Chief makes it to the other side of the deployment bay.
- Pilot (COM): "Okay, so, ninety seconds 'till full charge. I hope this place holds together that long. Charge faster!"
The Master Chief kills the few remaining Banished soldiers trying to stop him. He reaches the door to Hangar One where he infiltrated the ship from.
{Cutscene}
Master Chief's POV: An explosion knocks him off his feet. He gets up and forces the door to Hangar One open, crawls through, and slams the door back down. The Pelican is waiting at the other end of the hangar bay.
Hangar One's energy shield goes offline, exposing everything inside to the vacuum. The Master Chief and the still-powerless Pelican start getting pulled outside.
- Pilot (COM): "No! No! No! No! (frustrated groan) Oh, come on!"
The Pelican is sucked out of the ship. The Master Chief grabs onto the floor but a piece of debris slams into him, knocking him out of the ship. He drifts through the debris field, before finally coming to a rest in front of the damaged Zeta Halo.
A series of messages appear on his VISR.
VISR . OS. \> MASTERCHIEF 117
[INITIALIZE] CONSTRUCTING MESSAGE
\> PARSING_ENCODED_DATA
...
INCOMING TRANSMISSION
[INITIALIZE] LOCATION DETECTED
...
VISR . OS. \> AI REQUIRE RETRIEVAL
\> CONSTRUCTING MESSAGE
...
VISR . OS. \> MASTERCHIEF 117
[MISSION SUCCESSFUL]
...
[INFILTRATION COMPLETE]
...
VISR . OS. \> AI REQUIRE RETRIEVAL
[SUBSYSTEM FAILURE]
...
VISR . OS. \> COORDINATES APPROXIMATED
LOCATION SENT
...
VISR . OS. \> AI REQUIRE RETRIEVAL
RETRIEVE WEAPON
\> CLEANING TRACE DATABASE
...
END OF MESSAGE
- Pilot (COM): "Chief! You still with me?"
- John-117: "I'm here."
- Pilot (COM): "Okay... give me a second... I'm coming to get you."
The now recharged Pelican flies overhead and stops in front of him with its troop bay door open.
- Pilot (COM): "Welcome back, Chief. Okay, let's get out of here."
The Master Chief uses his Grappleshot to enter the Pelican.
Fade to black.
Level ends.
Achievements
The following achievements can be unlocked on Warship Gbraakon across all editions of Halo Infinite.
| Xbox | Steam | Title | Unlock requirement |
|---|---|---|---|

|

|
First Contact | Lost, and found. |

|

|
Mix Things Up | Get at least one kill with every available weapon and grenade on the Banished ship. |
Collectibles
- Audio Logs (3): Escharum's Testimony 01 - Loss, Evacuation 01 - Infinity Down, Recovered File 01 - The Plan
- Skulls (1): Boom Skull
Production notes
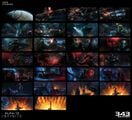
- The campaign's intro cinematic was created by Axis Studios.[3][4] The studio used a mix of keyframe animation and motion capture reference to create eight shots of continuous camera action.[5]
- The Discover Hope trailer uses an in-development version of the opening cutscene where Fernando Esparza finds John-117. In the trailer, Esparza's daughter sings "Twinkle, Twinkle, Little Star" rather than "Mary Had a Little Lamb".
Trivia
- During the cutscene that plays when entering the Ghost of Gbraakon's bridge, the two Jiralhanae closest to Escharum's hologram can be seen holding white Mosa-pattern carbines. The carbines disappear after the cutscene ends. This is the only time the weapon appears in the entire game. This is similar to the BR55HB SR’s brief appearance in Halo 3: ODST.
- During the escape sequence, the body of a red Unggoy Assault can be found in a corridor a short distance away from the bridge. This is the only red Unggoy Assault found in the level, and there will be a needler instead of a Disruptor next to its body.
- During the escape sequence, the player can be instantly killed if they are struck by a loose container, even at full shields.
- On cooperative play, the calibration can be skipped like a cinematic. The looking is done automatically for the players, and there is no prompt upon inserting the AI data crystal chip into the helmet.
Gallery
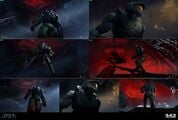
Concept art
Color scripting for the opening cinematic.
Concept art of the Banished dreadnought ramming the UNSC Infinity.
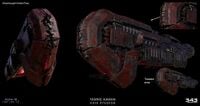
Concept art of a detail paintover of the Banished dreadnought that rams the UNSC Infinity.
Concept art of Banished Phantoms as they attack the UNSC Infinity.

Concept art of the Banished Phantom's engines.
Concept art of the exterior of the UNSC Infinity's hangar bays.
Concept art of John-117 in the UNSC Infinity's hangar bay.
Concept art of John-117 fighting on the UNSC Infinity.
Concept art of John-117's shields taking damage.
Concept art of the hangar in which John fights the Banished.
Concept art of debris in the hangar.
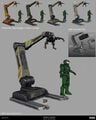
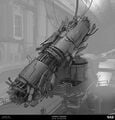
Concept art of the lift arm that Atriox knocks John into.
Concept art of John's shields failing after being thrown against the lift arm.
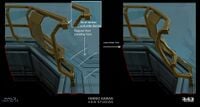
Concept art of the handrail that John is slammed into by Atriox.
Concept art of the hangar crane from which John is thrown into space.

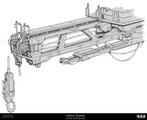
Finalized concept art of the crane.
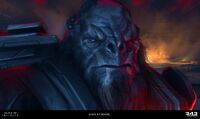
Concept art of Atriox's face before he throws John into space.
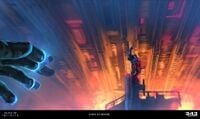
Concept art of John's perspective as he is thrown into space.
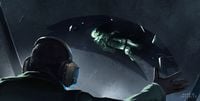
Concept art of Esparza finding John-117 floating in space.
Color scripting of the cinematic where John approaches the Ghost of Gbraakon.
Concept art of scraps onboard the Ghost of Gbraakon.
Concept art of some scraps found at the start of the mission.
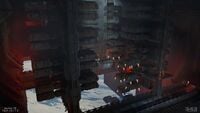
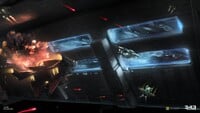
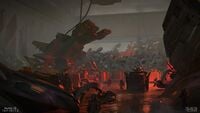
Concept art of the Gbraakon's deployment bay.
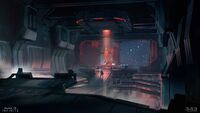
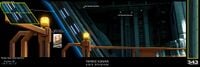
Concept art of the Gbraakon's bridge.
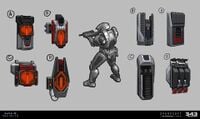
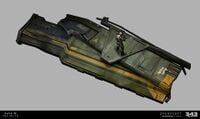
Concept art of various props used in the mission.

Scripting sketch for the mission's ending sequence.


Pre-release
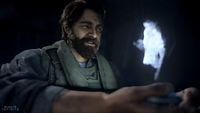
Esparza watching a holographic recording of the transmission from his daughter.
Esparza reacting with joy to Chief's return, as seen from the Spartan's HUD.
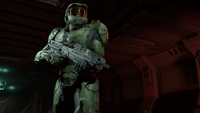
John-117 wields an MA40 assault rifle in the vacuum of space.


Screenshots
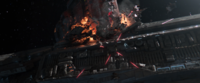
A Banished dreadnought rams into the dorsal hull of Infinity.
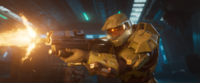
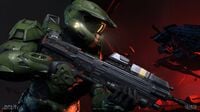
John-117 fires his MA40 while he fights onboard Infinity.
![The PANSPEC energy shielding on John-117's MJOLRNIR [GEN3] flares.](https://halo.wiki.gallery/images/thumb/a/a5/HINF_MjolnirShieldFlare.png/200px-HINF_MjolnirShieldFlare.png)
The PANSPEC energy shielding on John-117's MJOLRNIR [GEN3] flares.

John-117 fires a Grappleshot to pickup an Mk50 Sidekick.
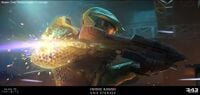
Atriox before he throws John-117 into space.
Atriox throws the Chief off the ship and the Chief passes through the energy barrier while his Grappleshot is fallen short.
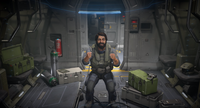
The Pilot asleep onboard Echo 216.
The pilot reacts in joy seeing Chief's armor reactivated.
The Pilot runs a diagnostic test on the Chief's suit.
The Chief looks at the damaged Zeta Halo from inside Echo 216’s cockpit.
John-117 prepares to jump.
John-117 wields an MA40 assault rifle in the vacuum of space.
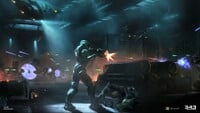
John-117 prepares to fight with the Berserker that teared the doors open.
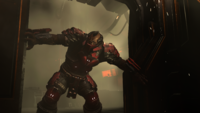
A Jiralhanae berserker tears the door open.
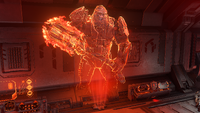
A hologram of Atriox in a hallway.
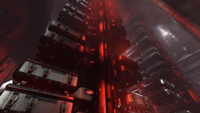
Rows of Banished drop-bases prepare for deployment.
The elevator at the dreadnought's deployment bay.
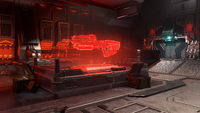
A hologram of an MA40 assault rifle.
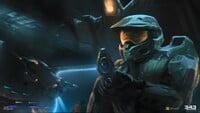
The Chief approaches the entrance to the bridge.
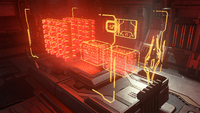
A hologram displays the dreadnought's deployment bay.
Jiralhanae warriors attempt to defend Gbraakon's bridge.
The Chief destroys the ship's cooling manifolds.
Gbraakon's engines overload.
Escharum gives a taunting speech to John-117.
John-117 uses his Grappleshot to avoid a hazardous spill.
The deployment bay in chaos.
An explosion in the deployment bay explodes and the elevator slams down into the floor.
John-117 escapes the exploding Gbraakon.
John-117 and Echo 216 are sucked out of Gbraakon's hangar.
Echo 216 picks up the Chief after they escape Gbraakon.


![The PANSPEC energy shielding on John-117's MJOLRNIR [GEN3] flares.](/File:HINF_MjolnirShieldFlare.png)


Sources
- ^ Halo Infinite, UNSC Audio log: Evacuation #01 - Infinity Down
- ^ Halo Waypoint, Canon Fodder - Parasite's Cake (Retrieved on Jan 31, 2026) [archive]
- ^ YouTube - HALO, Halo Infinite | Campaign Opening Cutscene (Retrieved on Apr 6, 2022)
- ^ Halo Waypoint, Canon Fodder - Encyclopedic Enlightenment (Retrieved on Apr 6, 2022) [archive]
- ^ Axis Studios, Halo Infinite: Story (Retrieved on Jan 27, 2022) [archive]


