H3:Sierra 117
From Halopedia, the Halo wiki
|
Prev: |
|
|
Next: |
|
| Sierra 117 | |
|---|---|

| |
|
Game: |
|
|
File name (?): |
|
|
Player: |
|
|
Date: |
|
|
Location: |
Near Mount Kilimanjaro, Tanzania, Africa |
|
Objective(s): |
|
|
Par Time: |
00:15:00 (Master Chief Collection) |
|
Par Score: |
13,000 (Master Chief Collection) |
 |
Halopedia has a walkthrough guide for this level; see H3:Sierra 117/Walkthrough. |
| “ | Rise up. Start the fight. | ” |
Sierra 117 is the second campaign level of Halo 3. It is the first level in Halo 3 to feature real gameplay, as opposed to the first level, Arrival, which is purely a cutscene and tutorial. This is also the first level to feature Cortana Moments.
Upon completing the level on the Normal, Heroic, or Legendary difficulties, the player will earn the "Landfall" achievement and 20 Gamerscore. Upon earning 15,000 points in Campaign Scoring, the player will be awarded with the Guerilla achievement and 10 Gamerscore.
Setting[edit]
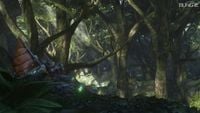
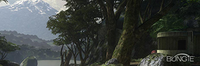
This level takes place in a lush African jungle that lies on the southern slopes of Shira peak of Mount Kilimanjaro, as confirmed from the hexadecimal code of the Halo 3 Beta and physically confirmed in the Halo 3 E3 2007 Trailer and the short video subsequent Bungie Podcasts (Mawenzi peak can be seen slightly obscured to the right of Uhuru peak, both of which are part of the Kilimanjaro mountain.) The jungle is home to a Covenant encampment, and hosts lush verdant forestry, rivers, rocky landscapes, waterfalls, and tunnels. The environment bears some resemblance to the "Off the Rock, Through the Bush, Nothing but Jackal" section of Halo 2's Delta Halo, although the location is different; Sierra 117 takes place on Earth, while Delta Halo is set on Installation 05.
Plot[edit]
Having been found by Sergeant Avery Johnson, Marcus Stacker, some Marines, and the Arbiter Thel 'Vadam, the Master Chief is escorted through the jungle, not knowing there is trouble ahead. Johnson has with him two squads of Marines, but, after spotting a Covenant Phantom overhead, he decides to split them in order to attempt to reach an evacuation point at a nearby river. The Master Chief, Thel 'Vadam and one squad head one way, following a stream leading to the river, while Johnson and the other UNSC forces scale a waterfall, and head another way. Bravo squad, apparently left behind by Johnson's team to guard the Landing Zone, where Pelicans were to extract the troops, breaks radio silence, and is attacked by a pack of Jiralhanae, led by a Jiralhanae Chieftain.
The Chief encounters the previously patrolling Phantoms, which drop off Jiralhanae and Unggoy. After the battle, they receive notice from Johnson that they cannot get into contact with another Marine team, Bravo. Almost immediately after, the group comes across a stricken marine held captive by a Jiralhanae on a log above them. The Jiralhanae beats the Marine, inquiring about a secret "location." After killing the inquisitive Jiralhanae, they are told that the rest of Bravo is dead, apparently pinned down by a Phantom and slaughtered by a Jiralhanae Chieftain. The Bravo team survivor, Gunnery Sergeant Reynolds, then joins the squad escorting the Master Chief.
By the time the Master Chief and Thel 'Vadam make it to the river for evacuation, the Pelicans at the evacuation point are already under attack by Covenant infantry. Johnson is seen using the machine gun turret at the back of one of the Pelicans, and with combined fire the Covenant are momentarily pushed back. Several Banshees swoop in on and attack the Pelicans. Both Pelicans suffer catastrophic wing damage from the Banshees' fuel rod cannons and make a fiery exit further down river as more Jiralhanae and Unggoy reinforcements show up to kill Master Chief's squad. After pushing through the Covenant forces, the Chief and Thel 'Vadam are told over the COM that Johnson's Pelican has crash landed and shortly afterward come across him and his squad fleeing from the crash site, pursued by Jiralhanae and Unggoy forces. The Chieftain pulls his own Phantom out of the fight to regroup.
They desperately try to catch up with Johnson, killing many Unggoy, Jiralhanae and Kig-Yar. After coming across the crashed Pelican, they find Sniper Rifles and Battle Rifles. Master Chief, Thel 'Vadam and the surviving marines then find themselves in a thick jungle and have to fight past Kig-Yar hiding in the trees and on the ground, with no sign of Johnson or his squad of marines.
They then reach a large dam where they see Johnson being taunted and kicked into a small building and held captive by a Jiralhanae Chieftain. It is implied that this is the same Chieftain that killed Bravo's men and pursued Johnson from his crash site. The area is also littered with Unggoy and Kig-Yar as well as half a dozen Jiralhanae. With slow progress, the two heroes manage to fight their way through and around the dam and eventually take down the Jiralhanae Chieftain. They then rescue Johnson and the three surviving marines from his squad. (Note: the marines will be dead if you still have marines from before)
Johnson calls in Pelican Kilo 023 piloted by Hocus to come and pick them up, but they are first engaged by two Phantoms which drop off hordes of Unggoy and a few Jiralhanae Captains wielding brute shots and spikers. Whilst the group engages the ground forces, the Pelican arrives and takes down the two Phantoms with missiles. Hocus then lands and evacuates the survivors and Johnson is seen patting the Chief on the shoulder in thanks before the Pelican flies off.
Transcript[edit]
Walk It Off[edit]
Brutes on the prowl.

{Gameplay}
- Sergeant Major Avery J. Johnson: "First Squad, you're my scouts. Move out! Quiet as you can."
- (2-Player Co-op Change) Sergeant Johnson: "First Squad, you're my scouts. Arbiter, watch the Chief's back. Move out! Quiet as you can."
- (3-4 Players Co-op Change): "First Squad, you're my scouts. As for you, just try not to wreck my planet. Move out! Quiet as you can."
If the player stalls:
- Sergeant Johnson: "Let's get moving, Chief. Come on, I'll lead you out."
They come across a log. The Marines climb over, and Johnson stands on the log, waiting for Chief.
If the player stalls:
- Sergeant Johnson: "Up and over, Chief."
If the player further stalls:
- Sergeant Johnson: "Jump! Stretch those legs, Spartan."
The squad moves out.
- Sergeant Johnson: "Bravo Team, this is Johnson. We got him. Fall back to the extraction point. Over."
A Jiralhanae howls off in the distance.
- Marine #1: "That sounded close."
- Marine #2: "Yeah, too close."
- Sergeant Reynolds (COM): "Johnson, you be advised. Hostiles are -{static}- on the move -{static}-. I've got eyes on a -{static}- Brute Pack -{static}-. Over."
- Sergeant Johnson: "Say again, Gunny? You're breaking up."
There is the ominous whisper of gravitational drives as a Phantom flies overhead above the trees.
- Marine #3: (whispers) "Sergeant Major, Phantom inbound."
- Sergeant Johnson: "We stick together and we're gonna get spotted. Let's split up, meet back at the LZ. Chief, go with the Arbiter, head toward the river. Second Squad, you're with me."
- (Co-op Change) Sergeant Johnson: "Chief, you and the Arbiter head toward the river."
Johnson and Second Squad climb up the cliff by the waterfall.
If the Chief attempts to follow Johnson and stares at him after the climb:
- Sergeant Johnson: "Keep an eye out for Bravo Team, Chief! If the Brutes do have our scent, those boys are in a lot of trouble!"

Johnson and Second Squad cross the river above the waterfall and run out of sight. The Master Chief and Thel 'Vadam take charge of First Squad. Thel 'Vadam leads the Chief up onto some rocks around a pile of fallen logs, while First Squad waits to go straight over. They spot a Jiralhanae Captain Major accompanied by a squad of Unggoy.
- Jiralhanae Captain Major: "Spread out, you whelps! Find them!"
- Marine #3: (whispers) "Up ahead! Single Brute, plus backup!"
- Marine #3: "He's got power armor, Chief! Take down its shields before you close!"
Master Chief and 'Vadam engage the Jiralhanae and his Unggoy subordinates. First Squad provides assistance for the Chief. After killing the Covenant patrol, they regroup.
- Arbiter Thel 'Vadam (Single Player Only): (to the Jiralhanae corpse) "The Prophets are liars, but you are fools to do their bidding!"
A couple more Phantoms arrive and deploy additional lances of Unggoy and Jiralhanae. After clearing these enemies out, the Chief and his allies form up at a winking flare at an underground cave.
- Marine #3: "These Brutes are tough."
- Female Marine #4: "Grunts ain't no slouches either."
- Thel 'Vadam: "The Grunts' new-found courage is but fear. When we are victorious, all who serve the Prophets will be punished."
- (Co-op Change) Marine #3: "Maybe the Brutes put something in their tanks."
After advancing through the caves, the team enters a massive forested expanse and finds the "Grunt Camp".[2] Sleeping Unggoy litter the first half while a few Jiralhanae, Kig-Yar and other Unggoy patrol the far hills.
- Marine #3: "Sleepers! Take 'em out, nice and quiet! (On Heroic or Legendary) Jackals, on the ridge! Stay low; looks like they've got carbines."
When the team is spotted by the Covenant:
- Marine #3: (on Heroic or Legendary) "I hate it when I'm right!"
A large battle erupts in the camp. Additional Covenant reinforcements enter from the next area, but all fall to the team. They regroup near the exit:
- Sergeant Johnson (COM): "Pelicans are en route, Chief, but I can't reach Bravo. If you find 'em, get 'em to the extraction point."
If the player stalls:
- Thel 'Vadam: "Come. The landing zone is this way."
Beyond the encampment, a Jiralhanae Captain is torturing Sergeant Reynolds on a log. Several other Covenant troops are nearby. It is possible and optional to save the Marine by killing or distracting the Jiralhanae before he kills him.
- Jiralhanae Captain: "Tell me its location!"
- Sergeant Reynolds: "Kiss... my... ass."
If the Sergeant is not saved, the Jiralhanae Captain breaks his spine and throws him down, before noticing the Master Chief and 'Vadam. If he is saved, Reynolds jumps down from the log, grabs a nearby Assault Rifle and joins the Master Chief and 'Vadam in their fight.
After the area is clear, Reynolds (if he survived) speaks with the Chief.
- Sergeant Reynolds: "Brute Chieftain. A Phantom. Pinned us down... killed my men."
First Squad cross the log bridge, clear out additional Covenant troops, including another Jiralhanae Captain and continue on until they reach another cave.
- Thel 'Vadam: "The river, hurry!"

The UNSC squad continues forward and heads into the cave. They move down a steep slope and enter an underground cave leading to the river where Johnson has established an extraction point. The Chief's vision suddenly distorts. Purple lines flare across his view and the face of Cortana appears.
- Cortana (Cortana Moment): "Could you sacrifice me to complete your mission? Could you watch me die?"
- Marine #3: (looks back) "Sir, you okay?"
- Marine #4: (concerned) "Your vitals just pinged KIA."
Charlie Foxtrot[edit]
Hostile air inbound.
First Squad leaves the caves; the river is around the next bend. Three Marine corpses are scattered on the ground, with BR55HB SR Battle Rifle ammunition and Fragmentation Grenades.
- Sergeant Johnson (COM): "Chief, Pelicans are at the river. We've got company, so hustle up!"
- Thel 'Vadam: "Grenades! Blow them to bits!"
Beyond the steep slope is a river substation[2] next to a raging river. A pair of Pelican dropships hover above the river as gunners in their troop bays fire upon a cluster of Covenant troops that have tunneled themselves in the substation.
- Pilot (COM): "Hold on. Got a contact."
As the Master Chief and his allies take out the Covenant forces that are closest to the Pelicans, two Banshees streak in along the river.
- Pilot (COM): "Banshees! Fast and low!"
- Echo 51 Pilot (COM): "Break off — now!"

The Banshees fire their fuel rod cannons at the Pelicans, and score direct hits on both. Explosions cascade over the Pelicans. Echo 51's wingman collides with Echo 51.
- Echo 51 Pilot (COM): "Watch yourself!"
- Pilot (COM): "I'm hit! ARRGH!"
- Echo 51 Pilot (COM): "Lost a thruster. Hang on!"
- Sergeant Johnson (COM): "Get a hold of her!"
- Echo 51 Pilot (COM): "Negative! We're going down!"
Both damaged Pelicans streak away around the river bend in a futile attempt to escape. Echo 51's wingman loses altitude and immediately plunges into the river beyond the dam, most likely drowning all of its occupants. Echo 51 manages to clear the river, but skims the top of a cliff, flips over in the air, and crashes out of sight.
With their evac gone, the Master Chief, Thel 'Vadam, and the Marines fight to secure the substation, defeating two waves of Jiralhanae-led Covenant reinforcements.[2]
- Thel 'Vadam (Single Player): "The Banshees will return. Hurry, back into the jungle!"
- (Co-op Change) Marine #3: "Banshees are gonna circle back. Let's head into the jungle, sir."
The Chief and his allies re-enter the jungle.
- Sergeant Johnson (COM): "Chief, can you hear me?...(static) My bird's down. Half a klick -(static)- downriver from your position."
- Marine #3: "Jackals. On the ridge. Stay low. Looks like they got Carbines."
On higher difficulties, some of the Kig-Yar in this area are armed with Particle Beam Rifles.
After the Chief and 'Vadam pass through the short Kig-Yar-laden "Sniper Alley",[2] they see a bridge. Three Marines are crossing it, under heavy fire, retreating from the wreckage of Echo 51. They hear Johnson's voice over the COM unit as a Jiralhanae leads a charge against the fleeing Marines.
- Sergeant Johnson (COM): "Come on, you dumb apes! You want breakfast? You gotta catch it!"
Johnson and some of the Marines frag the Jiralhanae and the other Covenant troops on the bridge, and run off into a cave.
The Chief and 'Vadam encounter many hostiles, including a Jiralhanae Chieftain on the side of a Phantom, who flies off when either his gunner or many of his troops are eliminated. The Chief and 'Vadam secure the area, and discover Echo 51's crash site by the riverside. The crashed dropship, lying on an outcropping along the valley wall, is surrounded by assault rifles, battle rifles, a sniper rifle, ammunition, and Fragmentation Grenades. The Pelican's radio is still operational.
If the Chief or 'Vadam waits by Echo 51's radio:
- Crow's Nest Controller (Echo 51's Radio): "Echo Five-One, this is Crow's Nest. Echo Five-One, please respond! (pause) Hocus, Five-One is down. Divert for emergency evac, over."
The Chief and his allies head up a slope, clear out more Covenant, and arrive at another cave.
- Marine: "Sergeant Major went this way, Chief. Through the cave."
The Master Chief leads 'Vadam (and any accompanying Marines) through the cave and into a narrow section of jungle. They soon arrive at a clearing.
Quid Pro Quo[edit]
Rescue at the dam.
At the end the Master Chief and 'Vadam reach a low cliff, viewing a Covenant-held dam. 'Vadam spots the Jiralhanae Chieftain beating Johnson on the far left in front of a small building.
- Thel 'Vadam: "See how they bait their trap?"
The Chieftain roars at Johnson. Johnson punches the Chieftain in the stomach with no effect.
- Thel 'Vadam: "I will help you spring it."
The Chieftain growls loudly and kicks Johnson back inside the "prison".
{Gameplay}
The Chief and 'Vadam battle their way across the dam, engaging a plethora of Unggoy, Kig-Yar (including several Kig-Yar Snipers) and Jiralhanae. Once enough of his subordinates have been killed, the Chieftain charges, oftentimes activating his invincibility device. Ultimately the Chief, with the help of 'Vadam and any other Marines that are still alive manage to kill all of the Covenant troops in the area. They finally reach Johnson, who's been tied up and imprisoned behind a plasma shield.
- Sergeant Johnson: "This isn't as fun as it looks. Cut the power!"
If no Marines came with the Chief, the other three Marines in the prison will still be alive and awaiting rescue.
- Marine Escapee: "Brutes were gonna gut us, sir."
The Master Chief deactivates the plasma shield. Johnson (and any other Marine prisoners) break free of their bindings and stand up.
- Sergeant Johnson: "We're even, as long as we're only counting today. Kilo 023, what's your ETA?"
- Hocus (COM): "Imminent, Sergeant. Find some cover. Gotta clear a path."
Sergeant Johnson and the Marine survivors grab Covenant weaponry from nearby crates.
- Sergeant Johnson: "Roger that, Hocus. Friendly gunship, coming in hot!"
Two Phantoms arrive, carrying reinforcements. The Chief, 'Vadam, Johnson and any accompanying Marines engage the newly-arrived Covenant troops. The Phantoms hover over the river, their Unggoy gunners opening fire with their plasma turrets.
- Sergeant Johnson: "Hocus! Phantom!"
- Hocus (COM): "I see 'em! Standby. Going loud. Everyone down!"
Pelican Kilo 23 rounds the river bend, directly in front of the two hovering Phantoms. Hocus, Kilo 23's pilot, lets loose a missile barrage, etching the air with vapor contrails as the first Phantom explodes in a brilliant coruscation of light.
- Hocus (COM): "Scratch one Phantom!"
If any ground forces remain, Kilo 23 will take them out. Kilo 23 fires two missile barrages at the second Phantom, and sends it plunging into the river.
- Hocus (COM): "Scratch two!"

Hocus lowers the Pelican to the dam for pickup. Johnson, the Master Chief, 'Vadam and any remaining Marines board Kilo 23.
If the Chief doesn't board the Pelican:
If the Chief still stalls:
- Sergeant Johnson: "Come on, Chief! The world won't save itself!"
If the Chief still doesn't board:
- Sergeant Johnson: "Do you or do you not want to finish the fight?"
Kilo 23 takes off. Johnson gives the Chief a pat on the shoulder appreciatively and goes into the cockpit. The back hatch closes and Kilo 23 flies over the first dam, en route to Crow's Nest. The view cuts to an area in the jungle. Sentries on watch in the jungle spot Kilo 23 on approach.
- Marine Sentry: "IFF confirmed. Contact is Pelican Dropship Kilo 23. Over."
- Crow's Nest Controller (COM): "Roger that. What's the word, Kilo 23?"
- Hocus (COM): "Sierra 117 on board. Request priority clearance. Over."
The two Marine Sentries bump their fists and smile.
- Crow's Nest Controller (COM): "Deck's yours. Come on down."
Kilo 23 descends into a hole in the ground. Fade to black.
Level ends
Achievements[edit]
The following achievements can be unlocked on this mission on the Xbox 360 edition of Halo 3.
| Icon | Name | Description | Gamerscore |
|---|---|---|---|

|
Landfall | Finish the first mission of the Campaign on Normal, Heroic, or Legendary. | 20 |

|
Iron | Find and claim this skull. | 10 |
Production Notes[edit]

Early paper sketch design documents suggest the first section of the mission would function as a separate, small tutorial mission with the working title of "Kilimanjaro Jungle". After a short engagement with some Grunts, the player would then enter a Warthog that would transition to the full gameplay mission with the working title of "River". While this "training course" mission was dropped, the idea evidently evolved into what is in the final game, with the intro cutscene and look inversion tutorial in the separate mission Arrival.
In the early paper sketch for "River", the player was meant to stay in the Warthog and engage various enemies in a "Warthog Run" for some time, seemingly until about halfway through the mission, when for an at the time undecided reason ("Ambush?" being a suggested method) the player would then lose the Warthog and continue on foot to the dam. The dam section is almost entirely different in this version, with it being being a non-linear engagement around two dam bridges and a courtyard on the other side of the river. It is suggested the player could obtain a Ghost in the courtyard, and was meant to finish the mission by actually arriving at an entrance to Crow's Nest. This is unlike in the final game where the player enters a Pelican at the dam and flies to Crow's Nest in a cutscene.[3]
The final section of the level was reused by Bungie as the basis for a cut multiplayer map developed for Halo 3, by the working name "Damn". The map would have restored the damaged facility seen in Sierra 117 to full repair and set the map at night, rather than the midday setting of the original. However, it was cancelled for unknown reasons, with the map files later included in the Halo 3: ODST Editing Kit for modders to use. The hydro dam was also during the production of Halo 3: ODST while prototyping the Firefight mode.[4]
Trivia[edit]
Miscellaneous[edit]

- During the cutscene in which 'Vadam points out Johnson being forced into the holding area, the weapon that John is holding will vary depending on what primary weapon the player is holding prior to the cutscene much like during the cutscenes in Halo 2. This is the only occurrence in which the player can choose what weapon John has in a cutscene in the entire game. Every cutscene after this one has John scripted to hold specific weapons; regardless of what weapon the player actually is holding.
- The cutscene in which the Chieftain kicks Johnson into the building differs from the scene depicted in the Halo 3 E3 2007 Trailer. In the trailer, the Chieftain catches Johnson's punch, leading to Johnson helplessly struggling before the Chieftain throwing him upwards then kicking him mid-air into the building. In the final release of the game, the Chieftain does not react to Johnson's punch, and instead kicks Johnson into the building with a knee strike.
- It is possible to kill the Brute Chieftain on the Phantom by Echo 051's wreckage. However, a Chieftain is still present to push Johnson into the prison, so they may be two different chieftains, or the one on the Phantom was not scripted to die.
- This is the only Halo 3 mission where Thel 'Vadam will accompany the player through the entire level. (This does not include Halo, because on single player he will be absent during the fight against 343 Guilty Spark.)
- If N'tho 'Sraom reaches the middle point cutscene/checkpoint of the level, he will appear in the cutscene instead of 'Vadam (Arbiter) and say his dialogue.[verification needed]
- All of the kills Hocus gains through her missiles are headshots. This can be seen by turning on the Grunt Birthday Party skull and leaving some grunts alive at the bridge, then quickly rushing to the bridge (note that the player is not supposed to actually try to kill them, due to her missiles being able to kill the player.) When her missiles kill the Grunts, one can easily see the confetti and hear the children laughter.
- After all the enemies are killed, players can head back to place where the 'Quid Pro Quo' cutscene plays. However, the tunnel entrance will have mysteriously disappeared.
- If the player deactivates the containment shield holding Johnson without entering the room (by jumping to the ceiling and pressing the switch through the glass), Johnson will still sit there until the player enters the room.
- When the Chieftain pushes Johnson in the room, if one looks at it with a Sniper Rifle, Johnson actually trips into the room and the shield doors just close on their own.
- It is possible to man the Pelican's turret by killing the marine manning it, but this will activate the cut scene.
Detours[edit]
- During the chapter entitled Quid Pro Quo, if one wants to bypass the Brute chieftain, it is possible to take a shortcut. After the cutscene, pick off all the Grunts and Jackals. Then, head towards the dam. There are stairs leading down and up. Go down. One will find oneself in a room. Wipe out any Covenant in the room. On the left side of the room, there is a small doorway. If you go in, you will find yourself underneath the main walkway with the chieftain and other Covenant loyalists. Walk forward, and you will find yourself past the chieftain. If the Brute chieftain goes berserk, however, he may pursue you relentlessly, so be careful. If you also spent some time on the ridge sniping enemies from a safe distance, he will run over the bridge and wait for you, or run under it via the tunnel.
- When you reach the dam where you must free Johnson, go into the first complex. If you head up the ladder, there is a good sniping spot that gives you a good aim at the enemies, but poor defense. It is also possible to jump from one crate onto a roof, where a Jackal with a Carbine can be found; by jumping through and breaking windows, you can enter that same room.
Glitches[edit]
- Main article: Glitches

- The Arbiter eye glitch can been seen on this level, if paused in Theater mode right at the start of the level before the game goes to full screen.
- In Theater, it is possible to see a six-winged bird. At the start, when the player sees the first Brute, three birds will sometimes fly low through the area and get stuck on the rock that the Brute is standing on, overlapping and forming a six-winged bird. It will disappear in a few seconds, so one may have to view the level in the Theater and pause when one sees it to get a good look at it.
- There are two vacations that can be performed in this level. (See: Sierra 117 vacation.)
- It is possible to "break" the level by tossing a Plasma Grenade at Kilo 23's cockpit at the end of the level. The grenade will pass through the door to the cockpit and kill Hocus, causing the D77 Pelican to fall through the level's geometry and disappear. Caution: Kilo 23 is rather large. if it falls on you, you may be splattered.
- If, during the Charlie Foxtrot chapter, you shoot Johnson off of the bridge as he crosses it, he will begin to fight the Grunts, and if you are playing on a sufficient difficulty (Legendary with a few gold skulls on), he can be knocked back by grenades and Brute Shot blasts. On rare occasions, he will be held back and rejoin your group, and on other occasions, he may get "stuck" against an environmental obstacle, able to move but refusing to do so. When you go to the bottleneck of the forest before the Brute Chieftain locks Johnson in the room, he will vanish. If done correctly, when you look at Johnson being held by the chieftain, he will be running and wielding his rifle.
- You can also grenade him off the bridge. He will generally try to run back up the ridge, and back across the bridge. When this happens, he is unaffected by grenades (they launch him into the air, but while in mid-air, he is posed as if he jumped or fell). He will also rarely respond to shots, though he may occasionally grunt in pain or curse if hit by shots from weapons like the Needler.
- It is possible to board the Phantom carrying the Brute Chieftain before he flies off to regroup. While inside the Phantom, the Brute cannot be killed. So long as you are on board, and mounted on one of the turrets, the Phantom will always get stuck on the cliff face. Should you dismount, you will fall to your death and the Phantom will resume its journey.
- When playing on Heroic or Legendary, you can use a glitch to get the Energy Sword that Thel 'Vadam wields. Deliberately weaken the Arbiter by destroying his shield. Either make sure you see his Energy Sword on his hips, or when near enemies, he'll take it out. Kill him by either sticking him with a Plasma Grenade or letting the Covenant kill him (though the latter method will make it harder to find 'Vadam's corpse and his Energy Sword). When the deed is done, pick up the sword and it'll have around one to five energy left. If you want a fully-charged Energy Sword, repeat the steps again, but wait several seconds after 'Vadam respawns, or he will see you as a traitor, and kill you with one shot or melee attack.
- On Legendary, with all the skulls on, it is possible to climb to the top of the hill where Sergeant Johnson and the Marines climb, but it is a small gap and very difficult to get there. It is on the left of the water. Up there, the marines will run into a small alcove and disappear.
- In the area where the two Pelicans are shot down by Banshees, as you head back into the jungle, you may be able to grenade the Arbiter off the cliff and onto the waterfall. He will slide down into the water, some distance beneath the surface, and run around for a little while. If you fire at him, you may be able to hear him faintly utter the usual phrases (e.x. "Save your fire for the Brutes!"). He will typically head off to the right (your right, when facing the entrance to the jungle) and travel some distance before reappearing back on the cliff, blindly running into a wall until you approach him.
- At the end of the level, it is possible to jump inside the Pelican without pressing RB. If you manage to do this, and melee the marine manning the machine gun turret to death, you can man the turret, but doing so will cause the level to end. You can also melee attack some of the marines in the seats; they will fall through the floor of the Pelican.
- It is possible to walk on the riverbed where the Pelicans are shot down. You can use this to take your enemies by surprise, but note that the enemies' bullets will still go through the water.
- After the Pelicans crash into the river, you can jump down and find their machine gun turrets.
- At the end of the level, when Hocus's Pelican arrives and the Phantom's wreckage is still in the water, use a Plasma Grenade to blow one of the weapon crates into the water. If you jump onto the crate, it is possible to jump onto the biggest piece of the phantom. You can ride this until it sinks, where you can stay underwater on top of it indefinitely. You can also grenade jump off of the wreckage to get on top of the Pelican.
- At the end of the level, you can shake Hocus's Pelican. To do this, you'll need the Gravity Hammer and possibly some Plasma Grenades. Jump on top of the Pelican once it comes to pick you up, by using the ledge to the left of it. Whack the tail end with the Gravity Hammer, or throw Plasma Grenades at it, making sure it moves away from the bridge. If done properly, the Pelican should move around.
- With a carefully placed Plasma Grenade into the cockpit, a player can take down the Pelican that comes to pick up Master Chief at the end of the level.
- The Brute Chieftain at the end of the level will occasionally be invincible. He will possess no shields, and will bleed when shot, but can not be killed by any weapon, and can be deterred only by tricking him into jumping into the river, where he will not be able to get out. However, examination on Theater mode will show him still forever roaming the bottom.
Mistakes[edit]
- The compass on the Assault Rifle is inaccurate - it is out by roughly 90 degrees. Using the compass alone, one would estimate their position as being on top of Shira peak which is to the West of Kibo peak. If you scan the horizon, then you would see Shira peak to the left of Kibo peak.
- Even though the time line takes place in the morning, the actual in-game background scenery tells a different story. If you use the position of the sun, the orientation of Mount Kilimanjaro and the Chief's position at Blind Skull, the time would be late in the afternoon, meaning the sun would be in the wrong place.
- At the end there is a Marine manning a machine gun turret in the Pelican, but in the cutscene, he is gone.
Easter eggs[edit]
- Main article: Easter egg
- When you are approaching the part when you see Johnson and his men running over the bridge, try climbing the rocks in the area behind. You can pick up a Beam Rifle, and if you look closely enough, you might just see a family of Cavemen.
- Two examples of the trees that have carvings in them are a carved heart that has the initials MF inside the heart and another carved heart that has M + L 7-16-95 inside.
- The Iron Skull is found on this level.
- The Blind Skull is found on this level.
- There are two secret towers outside the map: one behind some two dimensional trees, and one in the same area out by a lighting storm out in the open. They also are behind the invisible wall so you cannot reach them. You can find them if you get outside of the map in the dam area.
- At the beginning of the level after the Arrival, it is rumored that B-113-421's roars can be heard before entering the pool area. However, this is questionable since B-113-421 is only present and mentioned in Believe which was non-canon.
- Near the end of the level, you can use the elevator glitch where the skull is located to get on top of the glass structure. If you walk across the structure and proceed onto the side of the cliff you will be able to find a lone caveman, which is similar to the cavemen you can find at the beginning of the level.
- You can also use the Elevator glitch to get onto the platform above the Skull. You will need the chieftain's Gravity Hammer to get up. Once you are up, get your co-op pal to commit suicide. They should respawn above the player on the ledge above the skull. Once you have beaten the map, you can wander around above the dam and up into the hills on foot. There are numerous features like small hills and large holes in the ground. It has yet to be fully explored.
- At the end of the level, on the far side of the dam, if you walk down the pipe running parallel to the water and into a small alcove and look up, it appears that there is an image on the ceiling, but it's yet to be identified.
- If player one takes too long to board Hocus's Pelican at the end of the level, Johnson might say, "Come on, Chief! The fight isn't gonna' finish itself!" This is an obvious reference to the Halo 3 tagline, "Finish the fight!".
- There is a partially rendered entrance to the level "Crow's Nest" if you get out of this level using the method mentioned above. It looks somewhat like a cave, but there is no way out. It is recommended that one player stays out of the area while another goes in.
- There are invisible floors on this level that make it seem like you are walking the stairway to Heaven. To do this, just use the Elevator glitch to get out of the map near the dam area by the Iron Skull.
Achievement Tips[edit]
- This level is good for getting the "Used Car Salesman" achievement. After rescuing Johnson at the dam, there should be a Phantom outside. Just stick the Phantom's front-mounted turret to get the achievement.
References[edit]
- The multiplayer map Ghost Town is based on, inspired by, and located in the same area as Sierra 117.
- Note that the level is called Sierra 117; Sierra is the word used in the NATO phonetic alphabet to represent the letter S, which, when used in a military sense, generally stands for "sniper." However, in Halo 3, it is S-117, which corresponds to John-117. This has been confirmed in the second Bungie Podcast.
- Quid pro quo is Latin for "something for something". It may be a reference to Silence of the Lambs.
- The Achievement "Landfall" is the same name as the Halo Shorts Series, Halo: Landfall.
- The river in the area is the Nkuu river or one of its tributaries.
Gallery[edit]
Concept art[edit]
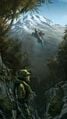
Concept art of John-117 with a Pelican and Mount Kilimanjaro in the background.
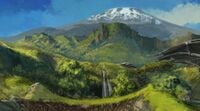
More concept art of Mount Kilimanjaro.
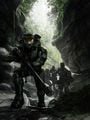
Concept art of John-117 leading Johnson and Marines in the jungle.
An early sketch of the dam.
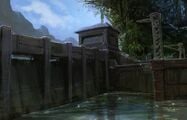
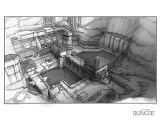
Early concept art of the A2 Hydroelectric Facility.
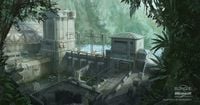
Concept art of the hydroelectric facility.
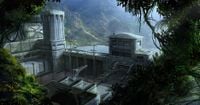
Another concept of the facility.


Design Documentation[edit]
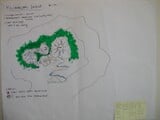
Early paper sketch titled "Kilimanjaro Jungle".
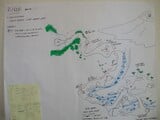
Early paper sketch titled "River".
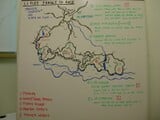
Mission Whiteboard titled "1.1 Flee Jungle To Base".
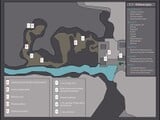
Digital design document titled "1.1 Kilimanjaro".


Storyboards[edit]
- First revision intro


- Second revision intro


- Outro


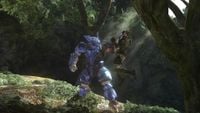
Promotional images[edit]
John-117 standing in the jungle.
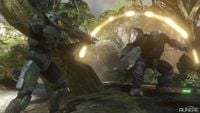
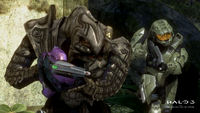
A Jiralhanae goes berserk and prepares to attack John-117.
A pair of Unggoy in the jungle.
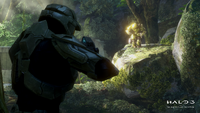
John-117 watches a Jiralhanae Captain Major from the shadows.

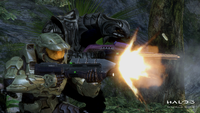
John-117 wielding an assault rifle.

John-117 wielding an assault rifle.

John-117 wielding an assault rifle.
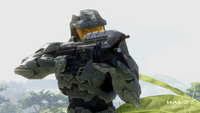
John-117 wielding an assault rifle.
John-117 and Thel 'Vadam with their weapons raised.
John-117 and Thel 'Vadam fighting alongside each other.
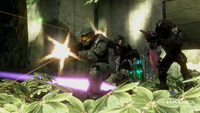
John-117, Thel 'Vadam, and a marine firing their weapons.
A Kig-Yar sniper on patrol.
John-117 fires his sniper rifle at the Jiralhanae Chieftain.
John-117 using the gravity hammer against Unggoy.
Phantoms at the hydroelectric facility.


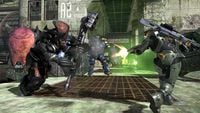
Screenshots[edit]
Preview of the level in Halo 3 menu.
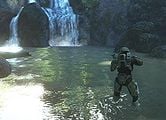
John-117 at the waterfall where Johnson takes Second squad and splits up.
A Jiralhanae Captain interrogates Gunnery Sergeant Reynolds.

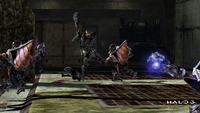
John-117 throws a plasma grenade at a pair of Unggoy.

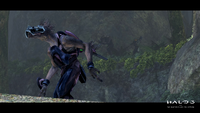
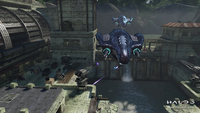
A Brute Chieftain riding on a Phantom.
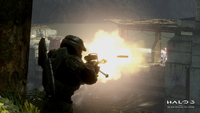
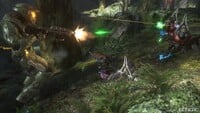
John-117 fires his weapon at the Jiralhanae Chieftain at A2 Hydroelectric Facility.
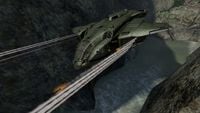
Kilo 023 firing Anvil-II air-to-surface missiles at Phantoms.
Promotional image of the level, with John-117 firing at several Unggoy.


Sources[edit]
- ^ Halo 3 Editing Kit, game file
H3EK\tags\levels\solo\010_jungle\010_jungle.scenario - ^ a b c d Halo 3: The Official Guide
- ^ Work of Rob Stokes, Halo 3 (Retrieved on May 25, 2023) [archive]
- ^ Bungie Podcast, Prepared to drop just in time for E3 week, Joe Staten, Paul Bertone, Lars Bakken, and Dan Miller stop by to provide intel on Halo 3: ODST.: 33:50 (Retrieved on Feb 20, 2025) [archive]
| Preceded by Arrival |
Halo 3 Campaign Missions Sierra 117 |
Succeeded by Crow's Nest |
| ||||||||||||||||||||||||||||||||||||||||


