The Halo
From Halopedia, the Halo wiki
|
Prev: |
|
|
Next: |
|
| The Halo | |
|---|---|

| |
|
Game: |
|
|
Player: |
|
|
Date: |
|
|
Location: |
|
|
Objective(s): |
|
 |
Halopedia doesn't currently have a walkthrough for this level; could you write one? |
| “ | A reunited Red Team must push back the Banished invasion of the Halo so Anders can reach the Control Room. | ” |
The Halo is the eleventh and penultimate campaign level in Halo Wars 2.
Transcript[edit]
ANDERS' HALO / CONTROL ROOM
THE HALO
Mission Briefing
- Captain Cutter: "We've stopped the tide of Banished reinforcements arriving on the ring, but Atriox has already managed to gain a foothold near Alpha Base."
- Isabel: "Our troops have been trying to reach the ring's Control Room, but the routes are cut off by a Banished shield."
- Anders: "We've got to get that Control Room so I can deactivate the Halo's firing systems and plant our signal beacon. If I can't do that, we won't be sending an SOS back home - we'll be sending a very large - and very live - bomb."
- Captain Cutter: "If Atriox gets control of this Halo, he'll be holding a gun to the head of all life across hundreds of light years. We have to clear the Banished off this ring. It's up to you, Red Team."
Mission Summary
Get Professor Anders to the Control Room and clear the Halo of all Banished forces.
Scouting Report
The Halo will have deployed Forerunner defenses to protect itself.
{In-game Cutscene}
The camera flies over several locations where the UNSC and the Banished are clashing with each other. UNSC forces on the ring are winning the engagements.
- Atriox: "Captain. Your troops fight with a tenacity that almost matches my Jiralhanae brothers. I'm impressed. [growls] You and I are survivors, and I respect that, so I offer you a boon. Take your troops, take your ship, leave now, and I will not hunt you down."
- Captain Cutter: "Did you make the same offer to the people you slaughtered at that outpost? We're not going anywhere. We're only talking right now because you know I'm going to take this Ark from you."
- Atriox: Hahahaha! Luck! Treachery! These are the only reasons you still live, Cutter! Very well. I admire your spirit, but you've just sentenced your little ship to oblivion!
Cuts to Alpha Base, where UNSC forces, along with Douglas-042 and Alice-130, are defending it and rallying their forces. Douglas assassinates a Jiralhanae Warlord, while Alice kills a Sangheili with her machine gun.
- Douglas-042: "Stay down!"
A Suicide Unggoy comes close to Douglas, but Alice kills it before it can reach Douglas, saving him.
- Alice-130: "It's a wonder you stayed alive without me."
Douglas kills more enemies with his magnums.
- Douglas-042: "Always got to show off, eh, Alice?"
A Mgalekgolo and an Unggoy Minor appear in front of them. Douglas kills the Minor.
- Alice-130: "Who gets to take this one?"
Jerome-092 jumps over the Mgalekgolo and kills it with his M6 Spartan Laser.
- Jerome-092: "I figured you two have had enough fun."
Red Team finally reunites.
{Gameplay}
- Jerome-092: "Spirit of Fire Actual, we've secured the base, but our forces are scattered."
- Captain Cutter: "Regroup everyone you can, but the priority is getting to that Control Room and disarming the Halo before it heads towards human space."
- Jerome-092: "We'll get it done, sir."
A Pelican drops off two squads of Marines while UNSC defense forces around Alpha Base hold the perimeter.
- Captain Cutter: "We're halfway there, troops. Stay the course."
- Squad Leader: "Red Team, we have hostiles at the barrier! Won't be able to hold it for long!"
- Jerome-092: "Hold the line, Red Team!"
Banished start to attack from all directions. Four Pelicans arrive, dropping reinforcements to strengthen the UNSC defense perimeter.
While holding the Banished off, the UNSC hears something.
- Douglas-042: "Uh, what's that sound?"
The Energy Shield storing a Retriever Sentinel goes offline, releasing it to the battlefield.
- Anders: "The installation has released a Retriever! They're the Ark's most powerful Sentinels!"
- Douglas-042: "Because we didn't have enough going on."
- Anders: "Heightened security protocols kicked in as soon as Halo left the Ark, but that may work in our favor."
UNSC forces quickly assemble their defenses, and are nearly overwhelmed by the Retriever Sentinel before the UNSC forces retreat for the UNSC base. Red Team quickly assembles all units to prevent it from reaching the base.
Once Retriever Sentinel's HP reaches 25%, it will retreat immediately for repairs.
- Alice-130: "That wasn't easy."
- Anders: "It's only retreated for repairs. It'll be back soon."
Anders marks three Control Towers.
- Anders: "I've marked three Control Towers. If you can secure those, I should be able to take control of the Retriever. Until then, keep out of its way!"
- Alice-130: "You know, just for once I'd like a straight up fight. There's the enemy, shoot the enemy, go home."
The UNSC defense forces survive with minimal casualties and are now under the player's command as they reassemble.
While assembling forces, the Retriever Sentinel is fully repaired.
- Anders: "Be on the lookout for that Retriever, it'll consider everyone here a threat!"
The UNSC approaches the first tower.
- Jerome-092: "Let's focus on securing those towers, Red Team. Everyone's counting on us."
After assembling its forces, the UNSC goes to one of the Control Towers, eliminates any Banished resistance, and captures it.
- Jerome-092: "That's the first tower, Professor."
- Anders: "Okay, that's opened up the system to me. But I'm still locked out from the full solution. If you take the other towers, I will be able to get control faster!"
The UNSC heads to the next Control Tower, proceeding with caution to avoid being spotted by the Retriever Sentinel.
Fighting breaks out around all Control Towers as the UNSC and Banished contest control of the Retriever Sentinel.
When Bravo base requests assistance, the UNSC diverts its forces to secure the base.
- Captain Cutter: "Spartans. Bravo base is under attack! If we lose it, we'll have very little time to rebuild!"
Once the base is secured, it will be immediately under player's control.
- Squad Leader: "Thanks for the assist, Red Team! Lead the way!"
- Captain Cutter: "Good work, Red Team. We're going to need all the support we can get."
If the player destroys the Banished base to the west.
- Captain Cutter: "Good work. That will reduce the amount of Banished reinforcements on the battlefield."
When the enemy captures a Control Tower.
- Captain Cutter: "The enemy has captured Control Tower A!"
- Captain Cutter: "The enemy has captured Control Tower B!"
- Captain Cutter: "The enemy has captured Control Tower C!"
If player captures a Control Tower.
- Captain Cutter: "We have captured Control Tower A!"
- Captain Cutter: "We have captured Control Tower B!"
- Captain Cutter: "We have captured Control Tower C!"
If the player controls two of the three Control Towers.
- Anders: "That's helped speed things up, Jerome. I'm getting closer to taking control."
If player successfully takes control of all Control Towers.
- Jerome-092: "That's all the towers, Professor."
- Anders: "I'm in, but I'm going to need some time to calibrate everything."
If the Retriever was fully repaired after being repelled.
- Anders: "Careful, that Retriever won't discriminate between us and the Banished!"
- Anders: "Watch out, the Retriever is nearby, stay out of it's way!"
The UNSC finds units that are scattered west of Control Tower C.
- Squad Leader: "Mind if we tag along, sir?"
When discovering the scattered UNSC units between Alpha Base and Bravo Base.
- Squad Leader: "Heads up, troops! Friendlies!"
- Jerome-092: "Soldiers, captain says to join up with us."
- Squad Leader: "It'll be a pleasure, sir."
When finding a Scorpion Units North of Bravo Base.
- Squad Leader: "Scorpion here and ready for action."
All of scattered UNSC units are immediately under player's control.
When the UNSC is reaching 1500.
- Captain Cutter: "We're halfway there, troops. Stay the course."
The UNSC holds the line around the Control Towers until the meter reaches 3000.
- Anders: "I have full control of the Retriever! Get to the shield generator, Red Team, and I'll clear the way."
- Jerome-092: "On our way, Professor."
The Retriever Sentinel immediately retreats once Anders takes control of it.
{In-game Cutscene}
A Kodiak, Wolverines and Marines are setting up a position while Red Team arrives on a Warthog. The Retriever Sentinel approaches.
- Jerome-092: "Professor, the Retriever's back!"
- Anders: "But this time it's under our control - for now anyway."
A Pelican flies close to the Retriever.
- Jerome-092: "Keep the area clear for the Professor!"
Anders maneuvers the Retriever Sentinel to the shield generator.
- Anders: "Stand back, let's see what our new friend can do!"
The Retriever Sentinel charges its cannon and fires it. The shield goes down and the Retriever Sentinel retreats.
- Anders: "We're in!"
- Captain Cutter: "This is it, team. Get ready to defend the Control Room. The Professor has go down into the ring to deactivate its weapons systems and set up the comms beacon."
A Pelican drops Anders onto the ground, and she runs into Control Room. Meanwhile, Nightingales, Marines and Hellbringers quickly set up a defensive perimeter around Control Room.
Level ends.
Mission Complete
Leader Power Avaiable[edit]
- Restoration Drones I, II and III (I picked by default)
- Archer Missiles I, II and III (I picked by default)
- Battle Hardened I and II
- Lotus Mine I and II (I picked by default)
- ODST Drop (Picked by default)
- Turret Drop I and II (I picked by default)
- R&D I, II and III
- Holographic Decoy I and II (I picked by default)
Unit Deployment[edit]
- Red Team
- Command Center
- 1 Generator
- 1 Supply Pad
- 1 Field Armory
- 1 Barracks
- Jerome-092
- Douglas-042
- Alice-130
- 3 Marines
- 1 Scorpion Tank
- 1 Warthog
- 600 Supply
- 400 Power
- UNSC Defense Force
- 8 Marines (4 Survives, Full Upgrade)
- 4 Hellbringers (2 Survives, Full Upgrade)
- 5 Cyclops (2 Survives)
- 4 Scorpion Tank
- 4 Warthog (Full upgrade)
- 2 Kodiak
- 1 Wolverines
Strategies[edit]
General[edit]
- The Retriever Sentinel will never venture towards Control Tower A, but Banished forces, sometimes including a Jiralhanae Warlord, will constantly be dropped off near that point.
- Note that Marine upgrades only apply to units trained from the base, not ones gained during the mission.
- Destroying the Banished's base to the west will slow down their reinforcements.
- Occupy it immediately so the Banished will spread their focus on two fronts, their former base and the Control Towers.
- Set up Siege Turrets at your base to reinforce Control Tower A.
- The Banished will send forces to attack your bases and the Control Towers. If you plan to also destroy the Banished base, consider constructing two Nightingales: one to heal your defensive force at Control Tower A, and one to accompany your attacking force at the Banished base.
Optional and Bonus Objectives[edit]
- There are three groups of scattered UNSC forces. The first is located in the paths north of Alpha base. The second group is located on the Forerunner platform north of Bravo base. The third group is located south of Control Tower C, near the waterfalls.
- Bravo base is located to the Northeast of Alpha Base. It's better to rescue the base first (or, at least after capturing Control Tower A) to immediately gain access to more resources and reinforcements.
- The Banished base is located west of Control Tower A.
- When the Retriever Sentinel is patrolling around the field, avoid it at all costs. It usually patrols around the Control Towers B and C, so time the movement of your troops according to the Retriever’s patrol path.
- Set up Kodiaks near Control Towers B and C, but away from the patrol route of the Retriever Sentinel. The Kodiaks can damage Banished units being deployed at the Control Towers while out of range, even when the Banished is capturing Towers under your control. Set up a small defense force to move between the two towers. The Kodiaks would do enough damage to the Banished units and your defense force can finish them off before they capture the Control Tower. Be mindful to move the units away from the Control Towers afterwards, as the Retriever Sentinel patrols between the two towers.
- The Vulture's Phoenix missile is effective against vehicles and aircrafts. The missile moves much slower than other weapons, so use the ability on enemies with 50% or lower health.
Trivia[edit]
Miscellaneous[edit]
- The After Party skull is awarded for rescuing Bravo Base.
- After fighting off the Retriever for the first time, only the non-player allied Kodiaks become controllable by the player. If the player managed to fight off the Retriever before it destroys most of the allied units, they will not become player-controllable and will remain in their position for the rest of the mission.
- The Phoenix Log for this level is extremely easy to find: it is located south of Alpha Base, very close to the starting position and can be grabbed quickly once the level begins.
Mistakes[edit]
- Douglas-042 is holding magnums in the opening cutscene, but when the gameplay starts, he is holding a Rocket Launcher as normal. This is possibly due to the fact that all Spartans are fully upgraded when the gameplay starts.
Gallery[edit]
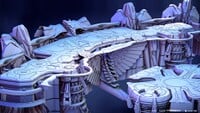
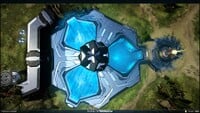
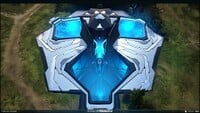
A render of the Forerunner geometry made for this level and the next level.

A render of the Forerunner geometry made for this level and the next level.
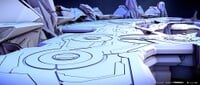
A render of the Forerunner geometry made for this level and the next level.
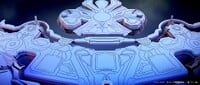
A render of the Forerunner geometry made for this level and the next level.
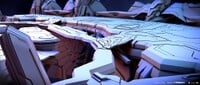
A render of the Forerunner geometry made for this level and the next level.
A screenshot of the Retriever Sentinel array.

A screenshot of the Retriever Sentinel array.
A screenshot of the Retriever Sentinel array.
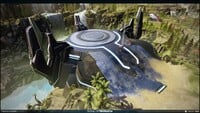
A screenshot of one of the Control Tower platforms.
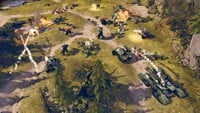
A UNSC army on the level.


Sources[edit]
| Preceded by The Foundry |
Halo Wars 2 campaign levels The Halo |
Succeeded by Last Stand |
| ||||||||


