Rat Race
From Halopedia, the Halo wiki
Template:Multiplayer Map Infobox
Summary
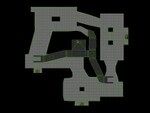
Rat Race is a multiplayer map in Halo: Combat Evolved. It is a circular map, with a multitude of Teleporters, tunnels, and passages.
The most notable feature of the map is the central section of elevated tunnels. There are two entrances to this complex, one by way of teleporter and one by way of an inclined ramp. The strategic value lies in the two exit points, which allow a player to drop unexpectedly from the ceiling through a wide hole into the enemy section of the base. Since this is strictly a one-way vector of attack, and jumping down this hole usually entails grabbing an active camouflage or Overshield power-up, defenders are forced to keep an eye to the ceiling.
Although the Bungie.net description claims that it is a UNSC attempt to mine into the surface of a section of Halo Installation 04,[1] the fact that they had only 2 or 3 days to set it up makes it difficult to confirm with known facts. Likewise, it is not known where they would have found the equipment necessary, or the time to do this.
Strategy
Capture the Flag
- First, if located on the "base" (there are no buildings in Rat Race-only the flags) that has the Flamethrower, get it! It is the best weapon in the entire map. To see how to get it, see "Weapon Location".
- If you're at the enemy base, do not act miserly and only chuck one nade-they will spawn there, and you grenades will either weaken them to the extent that you can finish 'em off with any weapon, or, if playing on 50% or no shields, kill them.
- If you have frags, drain those up before employing the plasma counterparts-they are much more destructive unless you manage to "stick" an opponent.
- Before charging to the enemy flag, scan the ceiling. There should be either an overshield or an active camouflage, both of which are priceless assets.
- Go through the tunnel towards the enemy base, and you should be provided with either a wonderful sniper position for backup fire, or an ideal spot to jump down to retrieve the flag, as your opponents will not see you unless you jump down..
King of the Hill (Team)
- You can spam nades to either hold off your enemies, or confuse them.
- If you can, you should employ an ideal sniper location(outside the hill, mind you!) and provide ambushes/repressive fire. (See the CTF section for an example.)
- If it is in an open area, the hill will become extended. Therefore, you should be wary of hiding locations that a crouching and silent oppenent might be able to use and evade detection (giving the other team time).
- The time that counts is not the combined times of all the members, but the time in which at least one member is on the hill. Therefore, though you get recognized more on the scores, you can aid your team by offering suppresive fire outside.
- At close range, an expert SPARTAN wielding a shotgun is arguably the most perilous one. If given the chance, always take it. If possible, get a plasma rifle to take down his shields and a single headshot from the boomstick to send him to Hades .
- To counter a shotgunner, you can either spam grenades, snipe him (you might require a reasonably distant range and skill), or use the fire-melee tactic from the Assault Rifle.
Weapon Placement
- Flamethrower - As a red, simply turn left once you spawn and then continue (‘’not’’ through the tunnel, but next to it) and walk until you are at the wall. To you immediate left lies the flamthrower.
If you’re a blue, simply go to the left, next to your flag, and then walk forwards and remain on the right side. At the end, you should see the flamethrower. Note that after you’re at the flamethrower’s location, all you have to do is turn left, and you’ll be at enemy base.
- Plasma Rifle - : If you have spawned as a “Reddy”, then turn to your left and go through the tunnel. After you walk a bit, turn right when the tunnel splits into two directions. Continue, and the plasma rifle, as well as an upgrade, should be at the far end.
If you’ve joined the blue team, go through the teleporter that is in the south-west direction. Then, simply take a right, and you’re there.
- Assault Rifle - default
- Pistol - default
- Shotgun - For the red team, follow the same steps to receive the plasma rifle until the tunnel breaks up into two components. Then, simply go forward rather than right, and it should also be there with an uprade.
For the blue team, enter the teleporter described in the directions to the plasma rifle. Then, take a left and then an immediate forward
- Fragmentation Grenades - As the red team, the quickest route is to simply go down the "ramp" towards the visible teleporter. On the right, there should be four [[Fragmentation Grenade}Fragmentation Grenades]]
Trivia
- The structure of the level resembles a parking lot's up and down ramps, careening off expressways.
- Rat Race is not similar to the Halo 3 map Rat's Nest in any way shape or form, other than the word Rat.
Images
