Second Ark Conflict: Difference between revisions
From Halopedia, the Halo wiki
(That's the name of the base) Tag: Undo |
BaconShelf (talk | contribs) No edit summary |
||
| (184 intermediate revisions by 17 users not shown) | |||
| Line 1: | Line 1: | ||
{{ | {{Status|Canon}} | ||
{{disambig header|the battle in the [[Post-Covenant War conflicts|post-war]] era|other battles on Installation 00|Battle of Installation 00 (disambiguation)}} | {{disambig header|the battle in the [[Post-Covenant War conflicts|post-war]] era|other battles on Installation 00|Battle of Installation 00 (disambiguation)}} | ||
{{ | {{Battle infobox | ||
|name=Second Ark Conflict | |name=Second Ark Conflict | ||
|image=[[File:HW2-Trailer-Banished vs UNSC.png| | |image=[[File:HW2-Trailer-Banished vs UNSC.png|475px]] | ||
|prev=*[[Attack on Installation 00]] <small>([[Banished]])</small> | |prev=*[[Attack on Installation 00]] <small>([[Banished]])</small> | ||
*[[Outbreak on the UNSC Spirit of Fire]] <small>({{UNSCShip|Spirit of Fire}})</small> | *[[Outbreak on the UNSC Spirit of Fire]] <small>({{UNSCShip|Spirit of Fire}})</small> | ||
|conc=[[Sangheili-Jiralhanae war]] | |conc=*[[Sangheili-Jiralhanae war]] | ||
*[[Created conflict]] | |||
|conflict=[[Post-Covenant War conflicts]] | |next= [[Battle for Zeta Halo]] | ||
|date=[[2559#March|March 28, 2559]]– | |conflict=[[Post-Covenant War conflicts]]{{Ref/Level|Id=The Signal|HW2|The Signal}} | ||
|place=*[[Installation 00]] | |date=[[2559#March|March 28, 2559]]–{{Ref/Game|Id=Alice Report|HW2|Phoenix Logs|Detail=Alice-130 Report #1}} | ||
*[[Installation 09]] | |place=*[[Installation 00]]{{Ref/Reuse|The Signal}} | ||
|result='''Ongoing''' | *[[Installation 09]]{{Ref/Level|Id=The Halo|HW2|The Halo}} | ||
*[[UNSC]] gains a significant foothold on the Ark. | |result='''Ongoing as of October 2559'''{{Ref/Reuse|DW}}{{Ref/Game|Id=Beyond|HW2|Phoenix Logs|Detail=Beyond the Edge}} | ||
**[[Atriox]]'s right hand, [[Decimus]], is killed. | *[[UNSC]] gains a significant foothold on the Ark.{{Ref/Reuse|Beyond}} | ||
**[[Banished]] [[flagship]], ''[[Enduring Conviction]]'', is destroyed. | **[[Atriox]]'s right hand, [[Decimus]], is killed.{{Ref/Level|Id=Lights Out|HW2|Lights Out}} | ||
**[[Banished]] [[flagship]], ''[[Enduring Conviction]]'', is destroyed.{{Ref/Level|Id=Under the Dark|HW2|Under the Dark}} | |||
**[[UNSC]] successfully plants a [[distress beacon]] on [[Installation 09]] but the ring is intercepted by a [[Guardian]] on its way to [[Installation 04]]'s site. | **[[UNSC]] successfully plants a [[distress beacon]] on [[Installation 09]] but the ring is intercepted by a [[Guardian]] on its way to [[Installation 04]]'s site. | ||
*The Flood are released onto the Ark but contained quickly by the [[Banished]]. | *The [[Flood]] are released onto the Ark but contained quickly by the [[Banished]] and then scoured from the rubble of High Charity.{{Ref/Level|Id=Fighting|HW2|Fighting Retreat}}{{Ref/Reuse|Manifestation}}{{Ref/Novel|Id=Sacrifice|SoR|Detail= Adjunct - [[Sacrifice]]}} | ||
|side1=[[United Nations Space Command]] | **Discovery in the rubble of High Charity allows [[Atriox]] to flee from the Ark by portal and return to the Milky Way galaxy.{{Ref/Novel|Id=SoR|SoR}} | ||
|side2=[[Banished]] | *Revelation of [[Dhas Bhasvod]]'s [[Dhas Bhasvod's Covenant]] who begin fighting both sides for their own gains.{{Ref/Reuse|Sacrifice}}{{Ref/Reuse|DW}} | ||
|side3=[[Sentinel|Forerunner constructs]] | *Destruction of [[Intrepid Eye]], [[Epsilon Clarion]] and the Ark's ability to fire the Halo Array, and destruction of [[Castor]]'s detachment of the [[Keepers of the One Freedom]].{{Ref/Novel|Id=DW|DW}} | ||
|side4=[[Flood]] | |side1=*{{Icon|UNSC HCW}} [[United Nations Space Command|UNSC]]{{Ref/Reuse|The Signal}} | ||
|commanders1=*Captain [[James Cutter]] | |side2=*{{Icon|Banished}} [[Banished]]{{Ref/Level|Id=A New Enemy|HW2|A New Enemy}} | ||
*Lieutenant Colonel [[Morgan Kinsano]] | |side3=*{{Icon|Forerunner}} [[Sentinel|Forerunner constructs]]{{Ref/Level|Id=Ascension|HW2|Ascension (Halo Wars 2 level)|Ascension}} | ||
* | ---- | ||
*{{Icon|Covenant FB}} [[Dhas Bhasvod's Covenant]]{{Ref/Reuse|Sacrifice}} | |||
|commanders2=*Atriox | *[[Keepers of the One Freedom]]{{Ref/Reuse|SoR}} | ||
* | |side4=*[[Flood]]{{Ref/Reuse|Fighting}} | ||
*[[Shipmaster]] [[Let 'Volir]] | |commanders1=*[[Captain|CAPT]] [[James Cutter]]{{Ref/Reuse|The Signal}} | ||
*"[[Colony]]" | *[[Commander|CDR]] [[Barre]]{{Ref/Novel|Id=HDW11|DW|Chapter=11}} | ||
*[[Jiralhanae Warlord|Warlord]] [[Pavium]] | *[[Lieutenant Colonel|LTCOL]] [[Morgan Kinsano]]{{Ref/Game|Id=PLK|HW2|Phoenix Logs|Detail=Kinsano}} | ||
*[[Voridus]] | *[[Major|MAJ]] [[Elijah Vaughan]]{{Ref/Game|Id=PLMV|HW2|Phoenix Logs|Detail=Major Vaughan}} | ||
|commanders3= | *[[Commander|CDR]] [[Jerome-092]]{{Ref/Reuse|The Signal}} | ||
|commanders4=[[Proto-Gravemind]]† | *[[Artificial intelligence|Logistics AI]] [[Isabel]] | ||
|forces1=*{{UNSCShip|Spirit of Fire}} | *[[Lieutenant]] [[Veta Lopis]] {{Ref/Reuse|DW}} | ||
** | |commanders2=*[[Warmaster]] [[Atriox]] {{C|Pre-[[Operation: WOLFE|October 12]]}}{{Ref/Reuse|The Signal}} | ||
**[[D81-LRT Condor]]s | *[[War Chief]] [[Decimus]]†{{Ref/Reuse|A New Enemy}} | ||
*** | *[[Shipmaster]] [[Let 'Volir]]{{Ref/Game|Id=PLL|HW2|Phoenix Logs|Detail=Shipmaster Let 'Volir}} | ||
**[[AC-220 Vulture]]s | *"[[Colony]]"{{Ref/Reuse|Gatecrashers}} | ||
**[[D77-TC Pelican]]s | *[[Jiralhanae Warlord|Warlord]] [[Pavium]]{{Ref/Reuse|WCGW}} | ||
*** | *[[Voridus]]{{Ref/Reuse|WCGW}} | ||
**[[EV-44 Nightingale]]s | |commanders3=*[[Sentinel#Sentinel Defense Network|Sentinel Defense Network]] | ||
**[[AV-14B Hornet]]s | *[[Facilitator-class ancilla]] [[Epsilon Resource Facility submonitor]] | ||
**[[M850 Grizzly| | *[[Facilitator-class ancilla]] [[Epsilon Clarion ancilla]] | ||
**[[HRUNTING/YGGDRASIL Mark II (J) Colossus]]es | ---- | ||
**[[M808S Scorpion]]s | *[[Prelate]] [[Dhas Bhasvod]] | ||
**[[HRUNTING/YGGDRASIL Mark IX Mantis]]es | *[[Archeon-class ancilla]] [[Intrepid Eye]]†{{Ref/Reuse|DW}} | ||
**[[M400 Kodiak]]s | *[[Dokab]] [[Castor]] | ||
**[[M650 Mastodon]]s | |commanders4=*[[Proto-Gravemind]]†{{Ref/Reuse|Manifestation}} | ||
**[[M9 Wolverine]]s | |forces1=*1 {{Class|Phoenix|colony ship|support ship}} | ||
**[[M12 Warthog]]s | **{{UNSCShip|Spirit of Fire}}{{Ref/Reuse|The Signal}} | ||
**[[M121 Jackrabbit]]s | ***5,500+ personnel{{Ref/Reuse|A New Enemy}} | ||
**[[HRUNTING Mark III Cyclops]] | ***[[D81-LRT Condor]]s{{Ref/Reuse|A New Enemy}} | ||
**[[Spartan-II]] [[Red Team]] | ****1+ [[G81 Condor]]{{Ref/Reuse|Last Stand}} | ||
**[[UNSC Marine Corps]] | ***[[B-65 Shortsword]]s{{Ref/Novel|Id=HDW1|DW|Chapter=1}} | ||
***[[Hellbringers]] | ***[[AC-220 Vulture|Vulture]]s{{Ref/Reuse|The Foundry}} | ||
***[[Orbital Drop Shock Trooper]]s | ***[[S-14 Baselard|Baselard]]s{{Ref/Reuse|HDW2}} | ||
****[[9th Shock Troops Battalion]] | ***[[F-29 Nandao]]s{{Ref/Reuse|HDW2}} | ||
*****[[Boomerang Company]] | ***[[D77-TC Pelican|Pelican]]s{{Ref/Reuse|The Signal}} | ||
****4+ G77S-S Pelican gunships{{Ref/Reuse|Last Stand}} | |||
***[[EV-44 Nightingale|Nightingale]]s{{Ref/Reuse|The Signal}} | |||
***[[AV-22 Sparrowhawk|Sparrowhawk]]s{{Ref/Reuse|HDW2}} | |||
***[[AV-14B Hornet|Hornet]]s{{Ref/Reuse|The Signal}} | |||
***[[M850 Grizzly|Grizzlies]]{{Ref/Reuse|Last Stand}} | |||
***[[HRUNTING/YGGDRASIL Mark II (J) Colossus|Colossus]]es{{Ref/Reuse|Watch}} | |||
***[[M312 Elephant|Elephant]]s{{Ref/Novel|Id=HDW2|DW|Chapter=2}} | |||
***[[M808S Scorpion|Scorpion]]s{{Ref/Level|Id=From the Deep|HW2|From the Deep}} | |||
***[[HRUNTING/YGGDRASIL Mark IX Mantis|Mantis]]es{{Ref/Reuse|Gatecrashers}} | |||
***[[M400 Kodiak|Kodiak]]s{{Ref/Reuse|A New Enemy}} | |||
***[[M650 Mastodon|Mastodon]]s{{Ref/Game|Id=PLM|HW2|Phoenix Logs|Detail=Mastodon}} | |||
***[[M9 Wolverine|Wolverine]]s{{Ref/Reuse|The Cartographer}} | |||
***[[XRP12 Gremlin|Gremlin]]s{{Ref/Reuse|HDW2}} | |||
***[[M12 Warthog|Warthog]]s{{Ref/Reuse|The Signal}} | |||
***[[M121 Jackrabbit|Jackrabbit]]s{{Ref/Reuse|The Foundry}} | |||
***[[HRUNTING Mark III (B) Cyclops|Cyclops]]{{Ref/Reuse|Ascension}} | |||
***[[Spartan-II]] [[Red Team]]{{Ref/Reuse|The Signal}} | |||
***[[UNSC Marine Corps]]{{Ref/Reuse|The Signal}} | |||
****[[Hellbringers]]{{Ref/Reuse|A New Enemy}} | |||
****[[Orbital Drop Shock Trooper]]s{{Ref/Reuse|Gatecrashers}} | |||
*****[[9th Shock Troops Battalion]]{{Ref/Reuse|PLMV}} | |||
******[[Boomerang Company]]{{Ref/Reuse|PLMV}} | |||
|forces2= | |forces2= | ||
*''Enduring Conviction'' | *Banished fleet{{Ref/YouTube|Id=stream|fYaxRoAf96s|Channel=Halo|VidName=Halo Lore Stream: The Halo Array|Time=4251|Quote=There's some stuff in the secondary materials for Halo Wars 2, regarding the fleet that actually went to the Ark with the Enduring Conviction. [...] some of those ships are out at other installations that are near the Ark. So there's the Ark, and there's facilities that are out near the Ark that we don't see - some of those ships are out there doing that. You could say it's a cost function of how many ships we could show in the cutscenes and stuff. Yeah, it [Enduring Conviction] wasn't the only ship that was there. | ||
* | |Quotee=Kenneth Peters|Detail=1:10:51}} | ||
*[[ | *1 {{Pattern|Syfon|assault carrier}} | ||
*[[ | **''[[Enduring Conviction]]''{{Ref/Reuse|PLL}} | ||
*[[ | *1+ other starship capable of [[glassing]]{{Ref/Reuse|Watch}} | ||
*[[Shroud]]s | *[[Eklon'Dal Workshop Lich]]es{{Ref/Game|Id=Awakening the Nightmare|Halo Wars 2: Awakening the Nightmare}}{{Ref/Reuse|SoR}} | ||
*[[Blisterback]]s | *[[Seraph]]s | ||
*[[ | *[[Eklon'Dal Workshop Spirit|Spirit]]s{{Ref/Reuse|The Halo}} | ||
*[[ | *[[Eklon'Dal Workshop Phantom|Phantom]]s{{Ref/Game|Id=PLP|HW2|Phoenix Logs|Detail=Phantom}} | ||
*[[ | *[[Klavbrig Workshop Shroud]]s{{Ref/Reuse|Under the Dark}} | ||
*[[ | *[[Gydrozka Workshop Blisterback]]s{{Ref/Reuse|One Three Zero}} | ||
**[[Wraith Invader]]s | *[['Ahtulai Workshop Banshee|Banshee]]s{{Ref/Reuse|The Signal}} | ||
*[[Methane Wagon]]s | *[[Barukaza Workshop Scarab|Scarab]]s{{Ref/Reuse|From the Deep}} | ||
*[[Marauder]]s | *[[Barukaza Workshop Locust|Locust]]s{{Ref/Reuse|From the Deep}} | ||
*[[Reaver]]s | *[[Eklon'Dal Workshop Wraith|Wraith]]s{{Ref/Reuse|The Signal}} | ||
*[[ | **[[Eklon'Dal Workshop Wraith Invader|Wraith Invader]]s{{Ref/Game|Id=PLWI|HW2|Phoenix Logs|Detail=Wraith Invader}} | ||
*[[ | *[[Methane Wagon]]s{{Ref/Game|Id=PLMW|HW2|Phoenix Logs|Detail=Methane Wagon}} | ||
*[[ | *[[Eklon'Dal Workshop Marauder]]s{{Ref/Reuse|One Three Zero}} | ||
*[[Skitterer]]s | *[[Reaver]]s{{Ref/Reuse|Lights Out}} | ||
*[[Barug'qel Workshop Chopper|Chopper]]s{{Ref/Reuse|A New Enemy}} | |||
*[[Zaagokelu Workshop Ghost|Ghost]]s{{Ref/Reuse|The Signal}} | |||
*[[Eklon'Dal Workshop Goblin|Goblin]]s{{Ref/Game|Id=PLGG|HW2|Phoenix Logs|Detail=Grunt Goblin}} | |||
*[[Klavrig Workshop Skitterer]]s{{Ref/Reuse|Gatecrashers}} | |||
*Ground forces | *Ground forces | ||
**[[Jiralhanae]] | **[[Jiralhanae]]{{Ref/Reuse|The Signal}} | ||
**[[Mgalekgolo]] | **[[Mgalekgolo]]{{Ref/Reuse|The Signal}} | ||
**[[Sangheili]] | **[[Sangheili]]{{Ref/Reuse|The Signal}} | ||
**[[Huragok]] | **[[Human]]s{{Ref/Novel|Id=DW5|HDW|Chapter=5|Page=87|Quote='Some of the Banished humans defected to the UNSC,' Arcas said.}} | ||
**[[Unggoy]] | **[[Huragok]]{{Ref/Reuse|One Three Zero}} | ||
|forces3=* | **[[Unggoy]]{{Ref/Reuse|The Signal}} | ||
*Several [[Controller Sentinel]]s | |forces3=*4+ [[Retriever]] Sentinels{{Ref/Reuse|The Halo}}{{Ref/Level|Id=Manifestation|HW2|Manifestation}}{{Ref/Level|Id=Gatecrashers|HW2|Gatecrashers}}{{Ref/Level|Id=WCGW|HW2|What Could Go Wrong?}} | ||
*Several [[Protector Sentinel (Installation 00)|Protector Sentinels]] | *Several [[Controller Sentinel]]s{{Ref/Reuse|Gatecrashers}} | ||
* | *Several [[Protector Sentinel (Installation 00)|Protector Sentinels]]{{Ref/Reuse|Ascension}} | ||
| | *Extremely large numbers of [[Aggressor Sentinel]]s{{Ref/Reuse|Under the Dark}} | ||
* | *[[Armiger]] contingents{{Ref/Site|Id=CF100|URL=https://www.halowaypoint.com/en-us/news/sweet-centennial|Site=Halo Waypoint|Page=Canon Fodder - Sweet Centennial|D=24|M=09|Y=2021}} | ||
*AV-14B Hornets | ---- | ||
* | *1 captured [[Eklon'Dal Workshop Lich]]{{Ref/Reuse|SoR}} | ||
*M808S Scorpions | *[[Morsam-pattern Seraph]]s{{Ref/Novel|Id=HDW4|DW|Chapter=4}} | ||
* | *[[Spirit]]s{{Ref/Reuse|HDW2}} | ||
*M12 Warthog LRVs | *[[Kez'katu-pattern Phantom|T-52 Phantom]]s{{Ref/Novel|Id=HDW7|DW|Chapter=7}} | ||
*Marauders | *[[Type-26 Banshee|T-26 Banshee]]s{{Ref/Reuse|HDW2}} | ||
* | *[[Zurdo-pattern Wraith|T-26 Wraith]]s{{Ref/Reuse|HDW2}} | ||
*[[Flood spawner form]]s | *[[Karo'etba-pattern Ghost|T-32 Ghost]]s{{Ref/Reuse|HDW2}} | ||
*[[Seeder infector]]s | *Ground forces | ||
*[[Flood infester form]]s | **[[Jiralhanae]]{{Ref/Reuse|SoR}} | ||
*[[Flood burster]]s | **[[Kig-Yar]]{{Ref/Reuse|SoR}} | ||
*[[Flood combat form]]s | **[[Unggoy]]{{Ref/Reuse|SoR}} | ||
*[[Pod infector]]s | **[[Sangheili]]{{Ref/Reuse|SoR}} | ||
|casual1=* | **[[Human]]s{{Ref/Reuse|SoR}} | ||
*Several ground and air forces | ***[[Ferret]]s {{c|Undercover}} | ||
|casual2=*''Enduring Conviction'' | |forces4=*[[Abomination]]s{{Ref/Level|Id=Light|HW2|Light the Fuse}} | ||
*Overall | *Blisterbacks{{Ref/Reuse|Light}} | ||
* | *AV-14B Hornets{{Ref/Reuse|Manifestation}} | ||
*Banished Banshees{{Ref/Reuse|Light}} | |||
*Moderate losses of Voridus and Pavium's salvage teams | *M808S Scorpions{{Ref/Reuse|Light}} | ||
|casual3=* | *Banished Wraiths{{Ref/Reuse|Light}} | ||
*Several Controller Sentinels | *M12 Warthog LRVs{{Ref/Reuse|Light}} | ||
*Several Protector Sentinels | *Marauders{{Ref/Reuse|Light}} | ||
*Millions of Aggressor Sentinels | *Barug'qel Workshop Choppers{{Ref/Reuse|Fighting}} | ||
|casual4=*Proto-Gravemind | *[[Flood spawner form]]s{{Ref/Reuse|Light}} | ||
*[[Seeder infector]]s{{Ref/Reuse|Light}} | |||
*[[Flood infester form]]s{{Ref/Reuse|Fighting}} | |||
*[[Flood burster]]s{{Ref/Reuse|Fighting}} | |||
*[[Flood combat form]]s{{Ref/Reuse|Fighting}} | |||
*[[Pod infector]]s{{Ref/Reuse|Fighting}} | |||
|casual1=*1+ G81 Condor{{Ref/Level|Id=Watch|HW2|Not on My Watch}} | |||
*Several ground and air forces {{Ref/Reuse|The Signal}}{{Ref/Reuse|Lights Out}}{{Ref/Reuse|A New Enemy}}{{Ref/Reuse|WCGW}}{{Ref/Reuse|Under the Dark}} | |||
|casual2=*''Enduring Conviction''{{Ref/Reuse|Under the Dark}} | |||
*Overall heavy losses | |||
*6+ Banished Scarabs{{Ref/Reuse|Last Stand}}{{Ref/Reuse|The Foundry}}{{Ref/Reuse|From the Deep}} | |||
*Moderate losses of Voridus and Pavium's salvage teams{{Ref/Reuse|Light}} | |||
*[[Clan of the Long Shields]]{{Ref/Reuse|DW}} | |||
|casual3=*3+ Retriever Sentinels{{Ref/Reuse|Gatecrashers}}{{Ref/Reuse|WCGW}} | |||
*Several Controller Sentinels{{Ref/Reuse|Gatecrashers}} | |||
*Several Protector Sentinels{{Ref/Reuse|Gatecrashers}} | |||
*Millions of Aggressor Sentinels{{Ref/Reuse|Under the Dark}} | |||
---- | |||
*Heavy [[Dhas Bhasvod's Covenant]] losses | |||
**2 Phantoms | |||
**3 Seraphs | |||
**Heavy ground forces | |||
*[[Intrepid Eye]] | |||
*Destruction of Castor's small Keepers detachment | |||
|casual4=*Total{{Ref/Reuse|Sacrifice}} | |||
**[[Proto-Gravemind]]{{Ref/Reuse|Manifestation}} | |||
}} | }} | ||
{{Quote|[[Captain Cutter|Captain]], your [[UNSC Spirit of Fire|troops]] fight with a tenacity that almost matches my [[Jiralhanae]] [[Atriox's Chosen|brothers]]. I'm impressed. You and I are survivors, and I respect that, so I offer you a boon. Take your troops, take your ship, leave now, and I will not hunt you down.|Atriox offering Captain Cutter and his crew a chance to leave peacefully in the ongoing battle. | {{Quote|[[Captain Cutter|Captain]], your [[UNSC Spirit of Fire|troops]] fight with a tenacity that almost matches my [[Jiralhanae]] [[Atriox's Chosen|brothers]]. I'm impressed. You and I are survivors, and I respect that, so I offer you a boon. Take your troops, take your ship, leave now, and I will not hunt you down.|Atriox offering Captain Cutter and his crew a chance to leave peacefully in the ongoing battle.{{Ref/Reuse|The Halo}}}} | ||
The '''Second Ark Conflict''' | The '''Second Ark Conflict'''{{Ref/Book|HWF|Page=48}} was a large [[battle]] fought between the isolated [[United Nations Space Command]] [[UNSC Armed Forces|forces]] of the {{UNSCShip|Spirit of Fire}} and the hostile mercenary organization known as the [[Banished]] in [[2559]], about six years after the [[Human-Covenant War]] [[Battle of Installation 00|ended]] on the same ancient [[Forerunner]] [[Astroengineering|installation]] known as [[Installation 00|the Ark]]. After mysteriously arriving at the Ark on [[2559#March|March 28, 2559]], the long-lost crew of the ''Spirit of Fire'' were awoken from [[Cryonics|cryosleep]] and soon came into hostile contact with the powerful mercenary organization. During the battle, the UNSC destroyed the Banished's flagship, the {{Class|CAS|assault carrier}} ''[[Enduring Conviction]]'', and initiated the deployment sequence of [[Installation 09|one]] of the Ark's [[Halo Array|Halo rings]], one of an array of massive ring-shaped superweapons capable of destroying all sentient life in [[Milky Way|the galaxy]], intending to use it to send a [[distress beacon]] to [[Human colonies|human space]]. | ||
== | A new threat emerged on the Ark when Banished salvage teams breached the ruins of ''[[High Charity]]'' and inadvertently [[Outbreak on Installation 00|unleashed]] the [[Flood]] on the Ark once more. The Banished and the Ark's defenses managed to stop the outbreak and contain the Flood once again before it could spread too far. | ||
In [[2559#October|October]], the Banished managed to open a portal between their forces on the Ark and their forces in the Milky Way on [[Reach]]. Atriox and some of his warriors took the portal to the Milky Way, while the [[Keepers of the One Freedom]] took portal to the Ark in a plot to begin the [[Great Journey]].{{Ref/Reuse|SoR}} This was complicated by the return of the Forerunner {{Class|Archeon|ancilla}} [[Intrepid Eye]]{{Ref/Reuse|DW}} who had previously caused a great deal of chaos in the Milky Way.{{Ref/Novel|LL}}{{Ref/Novel|Ret}} Intrepid Eye and the citadel from which the Halo Array could be fired were both destroyed, along with the Keepers faction, its two survivors set themselves against all of the other factions on the Ark seeking vengeance.{{Ref/Reuse|DW}} | |||
==Background== | |||
{{Main|Outbreak on the UNSC Spirit of Fire}} | {{Main|Outbreak on the UNSC Spirit of Fire}} | ||
{{Quote|Captain, wake up... Something has happened.|Serina's message for Captain Cutter. | {{Quote|Captain, wake up... Something has happened.|Serina's message for Captain Cutter.{{Ref/Reuse|The Signal}}}} | ||
On [[2558#October|October 28, 2558]], | On [[2558#October|October 28, 2558]],{{Ref/Level|H5G|Guardians}} during the [[Created]]'s [[Subjugation of Earth|subjugation]] of [[Earth]], the [[Portal at Voi|portal to the]] immense, extra-[[Milky Way|galactic]] [[Forerunner]] [[Astroengineering|installation]] known as [[Installation 00]], or "the Ark," shut down.{{Ref/Book|Id=Mythos202|HM|Page=202}} One month later on November 25,{{Ref/Reuse|The Signal}}{{Ref/Game|HW2|Phoenix Logs|Detail=The Graveyard}} a powerful [[Covenant remnants|ex-Covenant]] mercenary group known as the [[Banished]] arrived at the Ark with a force comprised of [[Jiralhanae]], [[humans]], [[Sangheili]], [[Unggoy]], [[Mgalekgolo]], and [[Huragok]]. The Banished [[Attack on Installation 00|raided]] the [[United Nations Space Command]] research outposts on the surface.{{Ref/Reuse|The Signal}} While there, the Banished set up bases and salvage operations across the Ark establishing significant control.{{Ref/Reuse|A New Enemy}} | ||
[[File:Flood infector Spirit of Fire.jpg| | [[File:Flood infector Spirit of Fire.jpg|250px|thumb|left|A surviving Pod infector starts an outbreak on the ''Spirit of Fire''.]] | ||
Meanwhile, the {{UNSCShip|Spirit of Fire}} spent almost twenty-eight years drifting through space | Meanwhile, the {{UNSCShip|Spirit of Fire}} spent almost twenty-eight years drifting through space{{Ref/Reuse|The Signal}} after their [[Shaw-Fujikawa Translight Engine|slipsace drive]] was destroyed in the [[Battle of Trove]].{{Ref/Level|Id=Escape|HW|Escape (Halo Wars level)|Escape}} A surviving [[Pod infector]] on board the ship started an [[Outbreak on the UNSC Spirit of Fire|outbreak]], and a few crew members were infected. As the outbreak began to escalate, [[Smart AI]] [[Serina]] awoke [[Spartan-II]] [[Senior Chief Petty Officer]] [[Jerome-092]] and the two of them quickly quelled the outbreak and sterilized the local Flood infestation. In the aftermath of the outbreak, 7-year-old Serina prepared herself for final dispensation, as per protocol. Many years later, the {{UNSCShip|Spirit of Fire}} arrived mysteriously via [[slipspace]] [[Slipspace portal|portal]] at Installation 00 on [[2559#March|March 28, 2559]].{{Ref/Reuse|The Signal}} | ||
[[File:HW2-Anders&CutteraboveArk.png|thumb|left|250px|Captain James Cutter and Professor Ellen Anders examine the Ark.]] | [[File:HW2-Anders&CutteraboveArk.png|thumb|left|250px|Captain James Cutter and Professor Ellen Anders examine the Ark.]] | ||
Less than an hour after the ship's arrival, the crew was automatically awoken from [[Cryonics|cryosleep]] by the vessel's deceased AI Serina, who had left a message for the ship's [[UNSC rank structure|Captain]], [[James Cutter]], informing him of the status of the ship, the crew, and herself. After arriving at the ''Spirit of Fire's'' observation deck, Cutter was briefed on the situation by Professor [[Ellen Anders]], who told him that the [[astronavigation]] system placed them outside the Milky Way. When Cutter discovered they had arrived via slipspace portal, Anders revealed to him that something on the surface of the Ark had opened the portal and pulled them in. Not a second later, Cutter was informed over [[COM|comms]] that a message was being transmitted from the surface through a [[UNSC]] frequency, however, its encryption was too advanced for the crew's outdated decryption techniques. Instead of spending time decoding it, Cutter asked Anders for the source of the transmission and ordered [[SPARTAN-II program|Spartan]] [[Red Team]] to prepare a recon squad and find the source of the signal. | Less than an hour after the ship's arrival, the crew was automatically awoken from [[Cryonics|cryosleep]] by the vessel's deceased AI Serina, who had left a message for the ship's [[UNSC rank structure|Captain]], [[James Cutter]], informing him of the status of the ship, the crew, and herself. After arriving at the ''Spirit of Fire's'' observation deck, Cutter was briefed on the situation by Professor [[Ellen Anders]], who told him that the [[astronavigation]] system placed them outside the Milky Way. When Cutter discovered they had arrived via slipspace portal, Anders revealed to him that something on the surface of the Ark had opened the portal and pulled them in. Not a second later, Cutter was informed over [[COM|comms]] that a message was being transmitted from the surface through a [[UNSC]] frequency, however, its encryption was too advanced for the crew's outdated decryption techniques. Instead of spending time decoding it, Cutter asked Anders for the source of the transmission and ordered [[SPARTAN-II program|Spartan]] [[Red Team]] to prepare a recon squad and find the source of the signal.{{Ref/Reuse|The Signal}} | ||
With recon [[UNSC Armed Forces|forces]] having been sent in ahead, Red Team was dropped off in a [[Warthog]] on the Ark's south spire. | With recon [[UNSC Armed Forces|forces]] having been sent in ahead, Red Team was dropped off in a [[Warthog]] on the Ark's south spire.{{Ref/Reuse|A New Enemy}} Arriving at a hastily-created barrier, one of the soldiers of [[Recon One]] informed them that they had set charges and so [[Alice-130]] fired on it with the Warthog's [[M46 Vulcan|machine gun]], detonating the charges and destroying the barrier. After destroying another barrier, Red Team eventually encountered a recon team who had been attacked. Pressing on, the [[Spartan]]s arrived at a [[portal]] that had been discovered by the recon soldiers. While the [[UNSC Marine Corps|Marines]] stayed behind to guard the portal, Red Team ventured through and were teleported nearby. After passing a couple more portals, the Spartans found themselves at the [[Henry Lamb research outpost]].{{Ref/Reuse|The Signal}} {{clear|left}} | ||
== | ==Battle== | ||
===Encounter with Atriox=== | ===Encounter with Atriox=== | ||
{{Quote|no=three|Isabel|Douglas-042|Isabel|q1=Oh no.|q2=What was that?|q3=It's him.|Isabel after realizing Atriox had found them | {{Quote|no=three|Isabel|Douglas-042|Isabel|q1=Oh no.|q2=What was that?|q3=It's him.|Isabel after realizing Atriox had found them{{Ref/Reuse|The Signal}}}} | ||
Entering the desolate facility, the Spartans discovered a [[holotable]] which [[Jerome-092]] proceeded to activate. Appearing in front of them was the orange [[hologram]] of a smart [[AI]], who expressed her relief that Spartans had arrived. Ordered to identify herself, the AI told Jerome she was [[Isabel]], and that she was in UNSC logistics for the Ark research outpost. After being asked where the survivors are and what the strength of the [[Covenant]] force there was, Isabel displayed confusion and told the Spartans they needed to escape. Unbeknownst to them, their [[Human-Covenant War|war]] with the Covenant Empire had ended [[2553|six years ago]]. Suddenly, they heard a loud thumping sound coming from further within the facility. After [[Data crystal chip|retrieving]] Isabel, Jerome signaled for them to move up into another section of the outpost. | Entering the desolate facility, the Spartans discovered a [[holotable]] which [[Jerome-092]] proceeded to activate. Appearing in front of them was the orange [[hologram]] of a smart [[AI]], who expressed her relief that Spartans had arrived. Ordered to identify herself, the AI told Jerome she was [[Isabel]], and that she was in UNSC logistics for the Ark research outpost. After being asked where the survivors are and what the strength of the [[Covenant]] force there was, Isabel displayed confusion and told the Spartans they needed to escape. Unbeknownst to them, their [[Human-Covenant War|war]] with the Covenant Empire had ended [[2553|six years ago]]. Suddenly, they heard a loud thumping sound coming from further within the facility. After [[Data crystal chip|retrieving]] Isabel, Jerome signaled for them to move up into another section of the outpost. | ||
[[File:HW2-Chainbreakerslam.png|thumb|left|250px|Douglas and Jerome are forced into the air by Atriox's gravity mace.]] | [[File:HW2-Chainbreakerslam.png|thumb|left|250px|Douglas and Jerome are forced into the air by Atriox's gravity mace.]] | ||
Out of the darkness, [[Atriox|a]] heavily armored [[Jiralhanae]] grabbed Alice by the neck and lifted her up before throwing her to the side. As the other two Spartans began firing on the massive Brute, he slammed [[Chainbreaker|his]] | Out of the darkness, [[Atriox|a]] heavily armored [[Jiralhanae]] grabbed Alice by the neck and lifted her up before throwing her to the side. As the other two Spartans began firing on the massive Brute, he slammed [[Chainbreaker|his]] [[gravity mace]] into the ground, sending them into the air and allowing the Brute to strike Jerome, launching him to the side as well. Using his mace, the Jiralhanae pulled [[Douglas-042]] in and slammed the supersoldier into the ground behind him. Alice ran back up from behind the Brute, firing her [[M6C magnum|pistol]] at the same time, before being knocked to the side. Recovering, Douglas gripped his [[M90 shotgun|shotgun]] but was kicked away before he could use it. Armed with a [[combat knife]], Jerome approached the Brute, dodged one of his strikes, and stabbed him before once again being struck away. Again, Alice fired her pistol at the alien but was deflected by the Brute's arm. Douglas picked up his shotgun again, but before he could fire it, the Jiralhanae knocked it out of his hand. Opting for his knife, Douglas managed to stab the Brute twice before having his shoulder crushed by the ursine's grip. As the Spartan screamed an agonizing cry and held his shoulder in pain, the Brute reactivated his gravity mace and, as Douglas started getting back up, struck him in the chest, launching him through the air and causing his helmet to come off. Removing the knife from his abdomen, the Jiralhanae picked up the helmet and crushed it, musing over the fact that his suspicion that Spartans were merely [[human]] was correct. As Alice and Jerome approached the severely wounded Douglas, Recon One reported that there were multiple hostiles approaching Red Team's location. With the pair deciding to leave, Alice began dragging Douglas, who soon fell unconscious. Exiting the research outpost, the pair were greeted by the sight of hundreds of warriors of various species surrounding them on the cliffs above. As Alice put Douglas in the Warthog and manned the gun, Jerome requested [[Archer missile]]s be launched on their position. As Jerome drove away from the facility, Alice fired at the pursuing Ghosts and the other ground forces teleporting around them. The Spartans soon reached a [[light bridge]], which Alice proceeded to activate. With enemy ground forces approaching, Alice volunteered to hold off them off while Jerome and Douglas crossed the bridge and were picked up by a [[D77-TC Pelican|Pelican]].{{Ref/Reuse|The Signal}} {{clear|left}} | ||
===Getting up to speed=== | ===Getting up to speed=== | ||
{{Quote|If we don't stop Atriox now, we leave the galaxy at the mercy of a monster. So no, Isabel, we won't be running anywhere today.|Captain James Cutter to Isabel | {{Quote|If we don't stop Atriox now, we leave the galaxy at the mercy of a monster. So no, Isabel, we won't be running anywhere today.|Captain James Cutter to Isabel{{Ref/Reuse|The Signal}}}} | ||
After returning to the ''Spirit of Fire'', Jerome inserted Isabel's data chip into the [[bridge]] holotable and introduced her to Captain Cutter. The captain asked Isabel to report on what happened and what they're up against. Despite her apprehensiveness to talk, she told Cutter that the Brute the Spartans fought was called Atriox, the leader of the [[Banished]], a Covenant [[Covenant remnants|splinter group]] who fought the empire simultaneously with humanity. Isabel exclaimed that if the entire Covenant couldn't contain him, then the ''Spirit of Fire'' didn't stand a chance and that they needed to escape far away as quickly as possible. However, Cutter told her that while they did only have one ship, it was all they may have left and that he refused to leave the galaxy at the mercy of Atriox. As he put the vessel in combat-ready mode, the bridge crew ran back to their stations ready to fight and Jerome left to get prepared. | [[File:PL history lesson.png|250px|thumb|The crew learns how the [[Human-Covenant War]] ended and the [[Treaty of 2552|Sangheili alliance]] from Isabel.]] | ||
After returning to the ''Spirit of Fire'', Jerome inserted Isabel's data chip into the [[bridge]] holotable and introduced her to Captain Cutter. The captain asked Isabel to report on what happened and what they're up against. Despite her apprehensiveness to talk, she told Cutter that the Brute the Spartans fought was called Atriox, the leader of the [[Banished]], a Covenant [[Covenant remnants|splinter group]] who fought the empire simultaneously with humanity. Isabel exclaimed that if the entire Covenant couldn't contain him, then the ''Spirit of Fire'' didn't stand a chance and that they needed to escape far away as quickly as possible. However, Cutter told her that while they did only have one ship, it was all they may have left and that he refused to leave the galaxy at the mercy of Atriox. As he put the vessel in combat-ready mode, the bridge crew ran back to their stations ready to fight and Jerome left to get prepared.{{Ref/Reuse|The Signal}} {{clear|left}} | |||
===Assault on the salvage operation=== | ===Assault on the salvage operation=== | ||
[[File:HW2 A New Enemy.jpg|thumb|250px|Jerome-092 leading the attack on Decimus' salvage operation.]] | [[File:HW2 A New Enemy.jpg|thumb|left|250px|Jerome-092 leading the attack on Decimus' salvage operation.]] | ||
{{Quote|no=two|Jerome-092|Isabel|q1=I'm guessing that's Decimus.|q2=He looks bigger than the last time I saw him.|Jerome-092 and Isabel during the former's encounter with Decimus | {{Quote|no=two|Jerome-092|Isabel|q1=I'm guessing that's Decimus.|q2=He looks bigger than the last time I saw him.|Jerome-092 and Isabel during the former's encounter with Decimus{{Ref/Reuse|A New Enemy}}}} | ||
After conferring with Isabel on the best option for attacking the Banished chain of command, the AI told Cutter of Lieutenant [[Decimus]], the overseer of a ship graveyard salvage operation near the Henry Lamb research outpost. | After conferring with Isabel on the best option for attacking the Banished chain of command, the AI told Cutter of Lieutenant [[Decimus]], the overseer of a ship graveyard salvage operation near the Henry Lamb research outpost.{{Ref/Reuse|A New Enemy}} | ||
Deciding that they should hit the Banished with a surprise attack and then establish a base of operations, Cutter deployed [[Strike One]], a unit of eight Marines led by Jerome, to the installation's surface. After fighting through Banished forces, the strike team arrived at a Forerunner tower giving off a massive power signature, which they proceeded to secure on Anders' recommendation. Pressing on, the Marines and Jerome made their way through the ship graveyard left behind from the [[Battle of Installation 00|final battle of the war]] before reaching a Banished base. Managing to overrun the base, UNSC forces eliminated the Banished forces and destroyed the base before preparing to set up their own in its place. | Deciding that they should hit the Banished with [[Attack on Decimus' Salvage Operation|a surprise attack]] and then establish a base of operations, Cutter deployed [[Strike One]], a unit of eight Marines led by Jerome, to the installation's surface. After fighting through Banished forces, the strike team arrived at a Forerunner tower giving off a massive power signature, which they proceeded to secure on Anders' recommendation. Pressing on, the Marines and Jerome made their way through the ship graveyard left behind from the [[Battle of Installation 00|final battle of the war]] before reaching a Banished base. Managing to overrun the base, UNSC forces eliminated the Banished forces and destroyed the base before preparing to set up their own in its place.{{Ref/Reuse|A New Enemy}} | ||
After the Marines established the base, Isabel alerted them and Captain Cutter of a large energy build-up directly above. Despite being hit by the [[energy projector]] of the ''[[Enduring Conviction]]'', the Banished's {{Class|CAS|assault carrier}}, the base sustained only non-critical damage, allowing Strike One to continue north in the direction of the rest of Decimus' salvage operation. | After the Marines established the base, Isabel alerted them and Captain Cutter of a large energy build-up directly above. Despite being hit by the [[energy projector]] of the ''[[Enduring Conviction]]'', the Banished's {{Class|CAS|assault carrier}}, the base sustained only non-critical damage, allowing Strike One to continue north in the direction of the rest of Decimus' salvage operation.{{Ref/Reuse|A New Enemy}} | ||
While fighting their way through several canyons of Banished forces, Strike One suffered a few more [[plasma]] bombardments before reaching a portal from which Decimus himself appeared. Managing to hold off the attacking Marines, Decimus proceeded to order a plasma bombardment on his own position while he was protected by an [[energy shield]]. As his reinforcements arrived, Decimus retreated back through the teleporter and ordered another strike, killing his own men as well as most of the UNSC forces. Realizing the Jiralhanae lieutenant must be trying to hide something, Cutter ordered the surviving members of Strike One to retrieve anything of value. Shortly after, Jerome found an encrypted piece of data which he promptly sent to Isabel. Expressing concern, Isabel stated the information points to [[Cartographer#Installation 00|the Ark's Cartographer]] and that she would explain what it is back on the ''Spirit of Fire''. | While fighting their way through several canyons of Banished forces, Strike One suffered a few more [[plasma]] bombardments before reaching a portal from which Decimus himself appeared. Managing to hold off the attacking Marines, Decimus proceeded to order a plasma bombardment on his own position while he was protected by an [[energy shield]]. As his reinforcements arrived, Decimus retreated back through the teleporter and ordered another strike, killing his own men as well as most of the UNSC forces. Realizing the Jiralhanae lieutenant must be trying to hide something, Cutter ordered the surviving members of Strike One to retrieve anything of value. Shortly after, Jerome found an encrypted piece of data which he promptly sent to Isabel. Expressing concern, Isabel stated the information points to [[Cartographer#Installation 00|the Ark's Cartographer]] and that she would explain what it is back on the ''Spirit of Fire''.{{Ref/Reuse|A New Enemy}} {{clear|left}} | ||
===Activating the elevator=== | ===Activating the elevator=== | ||
[[File:HW2-Jerome vs Wraith.jpg|thumb | [[File:HW2-Jerome vs Wraith.jpg|thumb|250px|Jerome-092 engaging a Banished Wraith.]] | ||
{{Quote|The Cartographer's defenses make it almost impenetrable; the only way up to it is by a Forerunner elevator. If you can get access to the local Forerunner Control Towers, I can take control of the elevator and take us up. It's our only chance of getting inside.|Ellen Anders to James Cutter | {{Quote|The Cartographer's defenses make it almost impenetrable; the only way up to it is by a Forerunner elevator. If you can get access to the local Forerunner Control Towers, I can take control of the elevator and take us up. It's our only chance of getting inside.|Ellen Anders to James Cutter{{Ref/Reuse|Ascension}}}} | ||
On the ship, Isabel and Anders went over the data from Decimus' base and found a way into the Cartographer, a repository of information on the Ark's schematics and systems. Reporting to Cutter, Isabel explained the purpose of the Cartographer while Anders explained how to activate the [[elevator]] in order to gain access to it. | On the ship, Isabel and Anders went over the data from Decimus' base and found a way into the Cartographer, a repository of information on the Ark's schematics and systems. Reporting to Cutter, Isabel explained the purpose of the Cartographer while Anders explained how to activate the [[elevator]] in order to gain access to it.{{Ref/Reuse|Ascension}} | ||
Sending a small, experienced unit of Marines led by Jerome, Cutter gave them orders to capture and access Forerunner [[Control Tower]]s so that Anders could activate the Cartographer's elevator. Moving up from the beach, the unit found destroyed Banished mining equipment, suggesting [[Sentinel|a third party]] was involved in the battle. Moving further up, the Marines soon discovered what had done the destruction: the Ark's [[Aggressor Sentinel|sentinels]]. Moving on, the Marines encountered the first Control Tower and eliminated the Banished forces protecting it. After doing the same with the rest of the Control Towers, Anders was able to gain access to the elevator and transport the Marines up to the Cartographer. | Sending a small, experienced unit of Marines led by Jerome, Cutter gave them orders to capture and access Forerunner [[Control Tower]]s so that Anders could activate the Cartographer's elevator. Moving up from the beach, the unit found destroyed Banished mining equipment, suggesting [[Sentinel|a third party]] was involved in the battle. Moving further up, the Marines soon discovered what had done the destruction: the Ark's [[Aggressor Sentinel|sentinels]]. Moving on, the Marines encountered the first Control Tower and eliminated the Banished forces protecting it. After doing the same with the rest of the Control Towers, Anders was able to gain access to the elevator and transport the Marines up to the Cartographer.{{Ref/Reuse|Ascension}} {{clear|left}} | ||
===Marine rescue=== | ===Marine rescue=== | ||
[[File:HW2-Alice leading Marines.jpg|thumb|250px|Alice-130 escorting a group of rescued Marines.]] | [[File:HW2-Alice leading Marines.jpg|thumb|left|250px|Alice-130 escorting a group of rescued Marines.]] | ||
{{Quote|no=three|Alice-130|James Cutter|Alice-130|q1=Spirit of Fire Actual, this is Alice One-Three-Zero reporting in.|q2=Good to hear from you Alice. How did you make it out?|q3=Commandeered an enemy vehicle, sir. I've rescued some of our troops and we're ready to get back in the fight.|Alice-130 coming back into contact with the ''Spirit of Fire'' | {{Quote|no=three|Alice-130|James Cutter|Alice-130|q1=Spirit of Fire Actual, this is Alice One-Three-Zero reporting in.|q2=Good to hear from you Alice. How did you make it out?|q3=Commandeered an enemy vehicle, sir. I've rescued some of our troops and we're ready to get back in the fight.|Alice-130 coming back into contact with the ''Spirit of Fire''{{Ref/Level|Id=One Three Zero|HW2|One Three Zero}}}} | ||
After escaping the research outpost, Alice began tracking an enemy convoy to one of their compounds. Discovering they had imprisoned some of the ''Spirit of Fire'' | After escaping the research outpost, Alice began tracking an enemy convoy to one of their compounds. Discovering they had imprisoned some of the ''Spirit of Fire's'' Marines, the Spartan infiltrated the base and freed the prisoners. After moving to a few more prison compounds, Alice was able to free the remaining captive UNSC personnel and kill a few Banished patrols, alerting the enemy to their presence. After arriving at another research outpost, Alice sent an encrypted message to Captain Cutter, who informed her that Pelicans were on the way but so were Banished forces. Managing to hold off the advancing units long enough for the Pelicans to arrive, Alice and the rescued personnel managed to get aboard and escape with their vehicles and cyclops armor. Shortly afterward, Cutter gave Alice command of the rescued Marines, their equipment and vehicles so they could perform hit-and-run operations against the Banished, while Isabel prepared a briefing package to get her back up to speed with the situation.{{Ref/Reuse|One Three Zero}} {{clear|left}} | ||
===Infiltrating the Map Room=== | ===Infiltrating the Map Room=== | ||
{{Quote|Isabel gave me everything the UNSC already knows about the area and it looks like we'll need to reach the Map Room.|Ellen Anders to James Cutter | {{Quote|Isabel gave me everything the UNSC already knows about the area and it looks like we'll need to reach the Map Room.|Ellen Anders to James Cutter{{Ref/Level|Id=The Cartographer|HW2|The Cartographer}}}} | ||
After reaching the Cartographer via the elevator, the UNSC forces discovered an energy shield was preventing them from accessing the central chamber and the Map Room. Moving up, Jerome and the Marines encountered a conduit and proceeded to fire on it in an attempt to take down the shield. Before they could, however, the Ark's self-preservation protocol sent sentinels to the location, forcing the Marines to retreat. Fortunately for the UNSC soldiers, Isabel and Anders' project, an [[EMP]] weapon, was ready to deploy. The EMP devices were launched down from the ''Spirit of Fire'' onto the sentinels, successfully neutralizing them and allowing Jerome and the Marines to disable the conduit. With the conduit disabled, the energy shield protecting the central chamber was deactivated and Anders proceeded in. Activating a Forerunner interface, Anders learned that the Marines would have to disable three more conduits in order for the Map Room's shield to go down. After repeating the process for the next three conduits, the energy shield finally dissipated, and after one more strike with the EMP missiles on the sentinels, Anders was able to access the Map Room. Accessing the Cartographer's data, Anders discovered that the Banished were using the Ark's network of thousands of portals to move around and reported her findings to Captain Cutter. | |||
After reaching the Cartographer via the elevator, the UNSC forces discovered an energy shield was preventing them from accessing the central chamber and the Map Room. Moving up, Jerome and the Marines encountered a conduit and proceeded to fire on it in an attempt to take down the shield. Before they could, however, the Ark's self-preservation protocol sent sentinels to the location, forcing the Marines to retreat. Fortunately for the UNSC soldiers, Isabel and Anders' project, an [[EMP]] weapon, was ready to deploy. The EMP devices were launched down from the ''Spirit of Fire'' onto the sentinels, successfully neutralizing them and allowing Jerome and the Marines to disable the conduit. With the conduit disabled, the energy shield protecting the central chamber was deactivated and Anders proceeded in. Activating a Forerunner interface, Anders learned that the Marines would have to disable three more conduits in order for the Map Room's shield to go down. After repeating the process for the next three conduits, the energy shield finally dissipated, and after one more strike with the EMP missiles on the sentinels, Anders was able to access the Map Room. Accessing the Cartographer's data, Anders discovered that the Banished were using the Ark's network of thousands of portals to move around and reported her findings to Captain Cutter.{{Ref/Reuse|The Cartographer}} {{clear|left}} | |||
===Crippling the portal network=== | ===Crippling the portal network=== | ||
[[File:HW2-Portal attack.jpg|thumb | [[File:HW2-Portal attack.jpg|thumb|250px|[[D77-TC Pelican|Pelicans]] moving in to attack the Banished portals.]] | ||
{{Quote|He's spread his troops far and wide by abusing the Ark's network of portals. That's his biggest mistake... Some of Atriox's troops will be stranded and the rest won't be able to redeploy as easily. It'll give us a fighting chance.|James Cutter on destroying the portal network's hub | {{Quote|He's spread his troops far and wide by abusing the Ark's network of portals. That's his biggest mistake... Some of Atriox's troops will be stranded and the rest won't be able to redeploy as easily. It'll give us a fighting chance.|James Cutter on destroying the portal network's hub{{Ref/Reuse|Lights Out}}}} | ||
Intending to cripple the Banished's portal network and strand most of their forces, Cutter deployed Jerome, a recovered Douglas, and the Marines near the network's control hub with orders to destroy it. As they advanced on the hub, the Marines destroyed portals along the way to prevent being overrun. After fighting through more Banished reinforcements, the Marines encountered a chasm which they crossed using a portal. Nearing the control hub, the UNSC forces neutralized the last of the Banished forces and destroyed the device, shutting down the portal network. Enraged, a heavily armored Decimus descended on them but was unable to prevail against the human forces. After reporting on the Brute's defeat, the unit was informed that the ''Spirit of Fire'' was under attack and that they had to return to the ship immediately. | Intending to cripple the Banished's portal network and strand most of their forces, Cutter deployed Jerome, a recovered Douglas, and the Marines near the network's control hub with orders to destroy it. As they advanced on the hub, the Marines destroyed portals along the way to prevent being overrun. After fighting through more Banished reinforcements, the Marines encountered a chasm which they crossed using a portal. Nearing the control hub, the UNSC forces neutralized the last of the Banished forces and destroyed the device, shutting down the portal network. Enraged, a heavily armored Decimus descended on them but was unable to prevail against the human forces. After reporting on the Brute's defeat, the unit was informed that the ''Spirit of Fire'' was under attack and that they had to return to the ship immediately.{{Ref/Reuse|Lights Out}} | ||
===Dealing with the carrier=== | ===Dealing with the carrier=== | ||
{{Quote|That ship brought these monsters. Killed everyone I was supposed to protect. Now it wants to do the same to you. I won't let that happen. It's time to show them what power really means around here.|Isabel on dealing with the ''Enduring Conviction'' | {{Quote|That ship brought these monsters. Killed everyone I was supposed to protect. Now it wants to do the same to you. I won't let that happen. It's time to show them what power really means around here.|Isabel on dealing with the ''Enduring Conviction''{{Ref/Reuse|Hold the Line}}}} | ||
[[File:HW2-Defending the particle cannon.jpg|thumb|250px|Alice directing UNSC forces as they defend the particle cannon.]] | [[File:HW2-Defending the particle cannon.jpg|thumb|left|250px|Alice directing UNSC forces as they defend the particle cannon.]] | ||
While Alice fended off Banished troops on the surface, more and more of the ''Spirit of Fire's'' turrets were being destroyed by the Banished's relentless [[Banshee]] runs. Having found a way to create a portal away from the Ark, Anders proceeded to the bridge and informed Cutter and Isabel of her plan to deploy [[Installation 09|a preconstructed Halo ring]] maintained in the Ark's [[Foundry]] through slipspace. Cutter suggested that if it was deployed to replace the one the [[John-117|Master Chief]] [[Battle of Installation 04|destroyed]], it would be near enough to [[Reach]] for the UNSC to pick up a [[distress beacon]]. However, their impending destruction by the ''Enduring Conviction'' meant that it would have to be dealt with first. Forming a plan, Isabel requested ground forces be split up in order to buy time. | While Alice fended off Banished troops on the surface, more and more of the ''Spirit of Fire's'' turrets were being destroyed by the Banished's relentless [[Banshee]] runs. Having found a way to create a portal away from the Ark, Anders proceeded to the bridge and informed Cutter and Isabel of her plan to deploy [[Installation 09|a preconstructed Halo ring]] maintained in the Ark's [[Foundry (location)|Foundry]] through slipspace. Cutter suggested that if it was deployed to replace the one the [[John-117|Master Chief]] [[Battle of Installation 04|destroyed]], it would be near enough to [[Reach]] for the UNSC to pick up a [[distress beacon]]. However, their impending destruction by the ''Enduring Conviction'' meant that it would have to be dealt with first. Forming a plan, Isabel requested ground forces be split up in order to buy time.{{Ref/Reuse|Hold the Line}} | ||
Accessing a Forerunner [[particle cannon]] on the Ark's surface, the UNSC targeted the ''Enduring Conviction'', immobilizing it and causing its shields to drain. The importance of the assault carrier prompted the Banished to assault the cannon with all available local forces, drawing troops away from the Banished base underneath the carrier where Jerome and Isabel were approaching the vessel's [[gravity lift]]. | Accessing a Forerunner [[particle cannon]] on the Ark's surface, the UNSC targeted the ''Enduring Conviction'', immobilizing it and causing its shields to drain. The importance of the assault carrier prompted the Banished to assault the cannon with all available local forces, drawing troops away from the Banished base underneath the carrier where Jerome and Isabel were approaching the vessel's [[gravity lift]].{{Ref/Level|Id=Hold the Line|HW2|Hold the Line}} | ||
As Jerome and Isabel, with support from a unit led by Alice, neared the platform, their Pelicans were shot down by Banished turrets guarding the lift. The Spartans managed to survive the crash and reunite with a unit of UNSC [[sniper]]s. Needing a clear path to the grav lift, Jerome requested Alice take care of the anti-air turrets surrounding the grav-lift. Deciding to utilize the [[Kodiak]]s, Alice positioned the vehicles on the edge of the cliff near the platform and ordered them to fire on the Banished ordnance. | As Jerome and Isabel, with support from a unit led by Alice, neared the platform, their Pelicans were shot down by Banished turrets guarding the lift. The Spartans managed to survive the crash and reunite with a unit of UNSC [[sniper]]s. Needing a clear path to the grav lift, Jerome requested Alice take care of the anti-air turrets surrounding the grav-lift. Deciding to utilize the [[Kodiak]]s, Alice positioned the vehicles on the edge of the cliff near the platform and ordered them to fire on the Banished ordnance.{{Ref/Reuse|Under the Dark}} | ||
[[File:HW2-Sentinel bombardment.png|thumb | [[File:HW2-Sentinel bombardment.png|thumb|250px|The Ark's Sentinels bombarding the ''Enduring Conviction''.]] | ||
With the particle cannon finally having managed to break through the ''Enduring Conviction'' | With the particle cannon finally having managed to break through the ''Enduring Conviction's'' shields, Jerome was notified that he was clear to board and all remaining UNSC personnel underneath the carrier were extracted immediately.{{Ref/Reuse|Hold the Line}} | ||
Arriving inside the carrier, Jerome made quick work of the [[Sangheili]] in the area before inserting Isabel into a nearby [[holotank]]. Accessing the vessel's firing systems, Isabel managed to fire its underside energy projector. As the plasma beam penetrated the surface of the Ark | Arriving inside the carrier, Jerome made quick work of the [[Sangheili]] in the area before inserting Isabel into a nearby [[holotank]]. Accessing the vessel's firing systems, Isabel managed to fire its underside energy projector. As the plasma beam penetrated the surface of the Ark, the installation's sentinels, in a desperate attempt to stop the destruction, launched themselves at the weakest part of the carrier. As the sentinels cut away at the vessel, Jerome held off Jiralhanae reinforcements. With the sentinels having done enough destruction to the carrier, the energy projector shut down and the front section of the vessel began to separate. Retrieving Isabel from the holotank, Jerome, in a move seemingly inspired by [[John-117]]’s jump from orbit to atmosphere in [[2552]], proceeded to jump out of the newly-formed opening, dodging debris as he descended to the Ark's surface.{{Ref/Reuse|Under the Dark}} {{clear|left}} | ||
===Stopping Banished reinforcements=== | ===Stopping Banished reinforcements=== | ||
[[File:HW2-Access point assault.jpg|thumb|250px|Marines and [[Cyclops]]es battling Banished forces on their way to the access point.]] | [[File:HW2-Access point assault.jpg|thumb|250px|Douglas’s Scarab, Marines, and [[Cyclops]]es battling Banished forces on their way to the access point.]] | ||
{{Quote|When a new ring is launched, the Ark activates access points so sentinels can finalize preparations. Atriox must be using these points to send his troops up.|Ellen Anders to James Cutter | {{Quote|When a new ring is launched, the Ark activates access points so sentinels can finalize preparations. Atriox must be using these points to send his troops up.|Ellen Anders to James Cutter{{Ref/Level|Id=The Foundry|HW2|The Foundry}}}} | ||
With Anders having initiated the Halo ring's deployment sequence, the ''Spirit of Fire'' sent forces to the superweapon's surface in order to find the [[Control Room]]. However, using one of the Ark's [[access point]]s, the Banished were able to instantaneously send troops to the ring, slowly overwhelming the UNSC forces there. | With Anders having initiated the Halo ring's deployment sequence, the ''Spirit of Fire'' sent forces to the superweapon's surface in order to find the [[Control Room]]. However, using one of the Ark's [[access point]]s, the Banished were able to instantaneously send troops to the ring, slowly overwhelming the UNSC forces there.{{Ref/Reuse|The Foundry}} | ||
When a unit of Marines arrived at the access point's location, they found that the Banished vehicle barricade was too strong to push through. However, the UNSC forces soon managed to locate a [[ | When a unit of Marines arrived at the access point's location, they found that the Banished vehicle barricade was too strong to push through. However, the UNSC forces soon managed to locate a [[Barukaza Workshop Scarab|Scarab]] under repair, whose [[focus cannon]] was strong enough to destroy the enemy blockade. With the ''Spirit of Fire'' having launched Archer missiles at the Banished troops surrounding the surviving Marines, Douglas and Alice were dropped off to reinforce their assault on the Scarab. After fighting through Banished forces preparing to transit to the ring, the unit approached the damaged Scarab and encountered its commander, [[Orda Val 'Saham]], who they soon neutralized. With Douglas in control of the Scarab, he and the Marines were soon able to rid the area of Banished forces. Reaching the access point, Alice and Douglas received orders from Captain Cutter to proceed through the portal and destroy it behind them, then move on to assist with fighting the Banished forces on the ring in order to reach the Control Room.{{Ref/Reuse|The Foundry}} | ||
=== | ===Battle of Installation 09=== | ||
{{Quote|We've got to get to that Control Room so I can deactivate the Halo's firing systems and plant our signal beacon. If I can't do that, we won't be sending an SOS back home, we'll be sending a very large and very live bomb.|Ellen Anders to James Cutter | [[File:HW2-Banished ejected.png|thumb|left|250px|The Banished forces on the Halo ring are ejected into space.]] | ||
After reuniting with Jerome on the Halo, Red Team led Marine forces to [[Alpha Base (Installation 09)|Alpha Base]] and defeated the Banished forces there. However, the Banished had already set up a shield sealing off the ring's Control Room, where Anders was to disable the firing systems and plant the comms beacon. Suddenly, a [[Retriever]] sentinel appeared, wreaking havoc on the UNSC forces before the Marines could send it into retreat. Realizing the sentinel could be used to their advantage, Anders told Red Team that if they could secure three Control Towers, she would be able to take control of the Retriever. Making their way to the towers, the Marines defeated the surrounding Banished forces and secured them, allowing Anders to take control of the massive sentinel. Using the machine's main weapon, Anders destroyed the [[shield generator]] in one blast, allowing her to access the Control Room. As the professor descended, the Spartans and Marines stayed behind to defend the structure. | {{Quote|We've got to get to that [[Control Room (Installation 09)|Control Room]] so I can deactivate the Halo's firing systems and plant our signal beacon. If I can't do that, we won't be sending an SOS back home, we'll be sending a very large and very live bomb.|Ellen Anders to James Cutter{{Ref/Reuse|The Halo}}}} | ||
After reuniting with Jerome on the Halo, Red Team led Marine forces to [[Alpha Base (Installation 09)|Alpha Base]] and defeated the Banished forces there. However, the Banished had already set up a shield sealing off the ring's Control Room, where Anders was to disable the firing systems and plant the comms beacon. Suddenly, a [[Retriever]] sentinel appeared, wreaking havoc on the UNSC forces before the Marines could send it into retreat. Realizing the sentinel could be used to their advantage, Anders told Red Team that if they could secure three Control Towers, she would be able to take control of the Retriever. Making their way to the towers, the Marines defeated the surrounding Banished forces and secured them, allowing Anders to take control of the massive sentinel. Using the machine's main weapon, Anders destroyed the [[shield generator]] in one blast, allowing her to access the Control Room. As the professor descended, the Spartans and Marines stayed behind to defend the structure.{{Ref/Reuse|The Halo}} | |||
While Anders worked on accessing the ring's firing systems, the Marines set up turret emplacements and defended against incoming Banished forces. With support from the ''Spirit of Fire'' and Marine reinforcements, the UNSC held back heavy Banished reinforcements long enough for Anders to access the weapons systems and plant the distress beacon. However, Anders reminded Cutter that the Banished still needed to be removed from the ring but that she found a way to speed that up. Telling Cutter to clear UNSC forces from the immediate area, Anders proceeded to manipulate the Halo's [[gravity anchor]]s, creating an energy shield around the remaining Banished forces before ejecting the land they were standing on into space.{{Ref/Level|Id=Last Stand|HW2|Last Stand (Halo Wars 2 level)|Last Stand}} | |||
While Anders worked on accessing the ring's firing systems, the Marines set up turret emplacements and defended against incoming Banished forces. With support from the ''Spirit of Fire'' and Marine reinforcements, the UNSC held back heavy Banished reinforcements long enough for Anders to access the weapons systems and plant the distress beacon. However, Anders reminded Cutter that the Banished still needed to be removed from the ring but that she found a way to speed that up. Telling Cutter to clear UNSC forces from the immediate area, Anders proceeded to manipulate the Halo's [[gravity anchor]]s, creating an energy shield around the remaining Banished forces before ejecting the land they were standing on into space. | |||
[[File:HW2-Anders meets a Guardian.png|thumb|250px|Anders looking up at the newly-arrived Guardian.]] | [[File:HW2-Anders meets a Guardian.png|thumb|250px|Anders looking up at the newly-arrived Guardian.]] | ||
With the Banished forces on the ring dealt with, Red Team and the Marines evacuated to the ''Spirit of Fire'' immediately. However, Anders realized she didn't have enough time to reach them before the ring transitioned into slipspace. With Anders out of reach, Cutter got to work planning their next offensive against the remaining Banished forces, | With the Banished forces on the ring dealt with, Red Team and the Marines evacuated to the ''Spirit of Fire'' immediately. However, Anders realized she didn't have enough time to reach them before the ring transitioned into slipspace. With Anders out of reach, Cutter got to work planning their next offensive against the remaining Banished forces,{{Ref/Reuse|Beyond}} while Atriox prepared his army for their inevitable next battle. | ||
The ''Spirit of Fire'' crew's attempt to deploy the new Halo to the Soell system was unsuccessful. The ring was forcibly pulled out of slipspace on its way by a [[Guardian]], which Anders encountered upon returning to the surface. | The ''Spirit of Fire'' crew's attempt to deploy the new Halo to the Soell system was unsuccessful. The ring was forcibly pulled out of slipspace on its way by a [[Guardian]], which Anders encountered upon returning to the surface.{{Ref/Reuse|Last Stand}} {{clear|left}} | ||
[[File:HW2 Not on My Watch.jpg|thumb|left|250px|Sunray 1-1 during OPERATION: SPEARBREAKER.]] | |||
===Operation: SPEARBREAKER=== | ===Operation: SPEARBREAKER=== | ||
{{Main|Operation: SPEARBREAKER}} | {{Main|Operation: SPEARBREAKER}} | ||
A month after the departure of the Halo, the ''Spirit of Fire'' picked up a cloaked area. [[O'Sullivan]], the | A month after the departure of the Halo, the ''Spirit of Fire'' picked up a cloaked area. [[O'Sullivan]], the supervisor of the scout drones, informed the captain and [[Sunray 1-1]] along with [[India Company]] was deployed to the battlefield to discover what the Banished were up to. Reaching their destination, they found a Forerunner {{Class|Despair|fighter}} docked inside one of the installation's hangars, and the Banished attempting to launch it to destroy ''Spirit of Fire''. Colony made an attempt to stop them by deploying multiple Goliaths and a Hunter Captain, but their efforts were thwarted by Sunray 1-1 who destroyed the fighter before it could be launched, thwarting the plan.{{Ref/Reuse|Gatecrashers}}{{Ref/Reuse|Watch}} | ||
===Yapyap's rebellion=== | ===Yapyap's rebellion=== | ||
Sometime during the battle [[Yapyap]] the Destroyer abandoned the Banished with forces under his command in favor of locating the fabled Golden Methane Hydrate Mines of Sabator. | Sometime during the battle [[Yapyap]] the Destroyer abandoned the Banished with forces under his command in favor of locating the fabled Golden Methane Hydrate Mines of Sabator, several [[Sangheili]] and [[Mgalekgolo]] also defected to join his rebellion.{{Ref/Game|Id=PLY|HW2|Phoenix Logs|Detail=Yapyap The Destroyer}} His Throne of Woe somehow enabled him to receive Unggoy reinforcements.{{Ref/Game|Id=PLCF|HW2|Phoenix Logs|Detail=Cannon Fodder}} | ||
[[File:HLC Flood Warning.png|thumb|right|250px|Pavium fighting Flood.]] | |||
===Awakening a nightmare=== | ===Awakening a nightmare=== | ||
{{Quote|I told you not to go inside. For good reason!|Atriox to Voridus | {{Quote|I told you not to go inside. For good reason!|Atriox to Voridus{{Ref/Reuse|Manifestation}}}} | ||
{{Main|Outbreak on Installation 00}} | {{Main|Outbreak on Installation 00}} | ||
Two months after the departure of Installation 09, Atriox sent two Warlords, [[Voridus]] and [[Pavium]] to salvage starships near the ruins of [[High Charity]] and scout the dome surrounding it. During the salvaging operation, Voridus disabled the Sentinel defense network around High Charity having his forces fight against many sentinels and a few scattered UNSC forces. | Two months after the departure of Installation 09, Atriox sent two Warlords, [[Voridus]] and [[Pavium]] to salvage starships near the ruins of [[High Charity]] and scout the dome surrounding it. During the salvaging operation, Voridus disabled the Sentinel defense network around High Charity having his forces fight against many sentinels and a few scattered UNSC forces.{{Ref/Reuse|WCGW}} Some UNSC Marines and vehicles from the ''Spirit of Fire's'' crew fell to Flood infection and were assimilated.{{Ref/Reuse|Fighting}} Piercing a hole through the shield surrounding High Charity with a Scarab, Voridus hoped to salvage equipment from the destroyed Covenant holy city. However, he and his forces inadvertently released the [[Flood]] that had managed to survive [[Installation 08]]'s firing.{{Ref/Reuse|Fighting}} Following several retreats, Pavium and his forces were able to hold off the Flood long enough for Voridus and his strike team to reactivate the Sentinel defense network.{{Ref/Level|Id=Archive|HW2|The Archive}} Using [[Eklon'Dal Workshop Antlion]]s and eventually a [[Retriever Sentinel]], Pavium and Voridus were able to destroy a [[Proto-Gravemind]] near High Charity moments before it could turn into a [[Gravemind]]. | ||
With the Sentinels reactivated and the Proto-Gravemind destroyed, the Flood were once again contained by the Sentinels and the Banished.{{Ref/Reuse|Manifestation}} The Banished and the Sentinels ultimately succeeded in "scouring" the parasite from High Charity.{{Ref/Reuse|Sacrifice}} | |||
Following the destruction of the Flood, the Banished raided High Charity's ruins and pillaged its data stores, retrieving, amongst other things, the access code to ''[[Anodyne Spirit]]''.{{Ref/Reuse|Sacrifice}} Following the outbreak, some Banished humans had defected to the forces of the {{UNSCShip|Spirit of Fire}}.{{Ref/Novel|Id=DW5|HDW|Chapter=5|Page=87|Quote='Some of the Banished humans defected to the UNSC,' Arcas said.}} | |||
===Raiding the Keyship=== | |||
{{Main|Raid on Anodyne Spirit}} | |||
In order to leave the Ark and return with Banished reinforcements, Atriox sent his forces to raid ''[[Anodyne Spirit]]'', the [[Prophet of Truth]]'s [[keyship]] that was landed on the Ark during the [[Battle of Installation 00]] in [[2552]]. The Banished came into conflict with remnants of the [[Dhas Bhasvod's Covenant]] who had survived inside the keyship, but nevertheless managed to retrieve the shards of the [[Menachite Forerunner crystal]] that was collected by [[Tartarus]]' forces and presented to the Prophet of Truth following the [[Massacre at Eridanus Secundus]].{{Ref/Reuse|Sacrifice}} | |||
===Reconnecting with Reach=== | |||
{{Main|Operation: WOLFE|Battle for Translocation portal Epsilon}} | |||
After getting the crystal, Atriox managed to send a message to Banished [[War Chief]] [[Escharum]] in the Milky Way galaxy, instructing him to locate the [[Menachite portal complex]] on [[Reach]], aware of its existence and general location due to records of [[Tartarus]], calling it the Portal Under the Mountain. Atriox's stated plan was to return to the Ark with reinforcements from the Banished forces that he had left behind in the Milky Way. Once the portal was ready, Atriox would use the shards of the crystal to open it on the Ark's end.{{Ref/Novel|Id=Chapter 3|SoR|Chapter=3}} | |||
As the Banished and their allies the [[Keepers of the One Freedom]], the [[Legion of the Corpse-Moon]] and the [[Clan of the Ravaged Tusks|Ravaged Tusks]] searched for the portal, and found it by tailing [[Blue Team]] on their [[Operation: WOLFE|search]] in the ruins of [[CASTLE Base]]. The Banished to the portal complex where one of the [[Ferret]]s, working undercover in the Keepers, activated the portal mechanism. A [[slipspace portal]] connecting the Ark and Reach opened, allowing Atriox to fly through it in a [[Eklon'Dal Workshop Lich]] and return to the Milky Way galaxy along with several of his top soldiers, leaving behind thousands of Banished forces to continue the fight on the Ark in his absence.{{Ref/Reuse|SoR}} With the portal open between [[Reach]] and the Ark, the fanatical [[Keepers of the One Freedom]] seized the opportunity to hijack [[Atriox]]'s [[Eklon'Dal Workshop Lich]] and use it to reach the Ark and begin the [[Great Journey]] by firing the [[Halo Array]]. Despite Atriox's warnings that the Ark still had thousands of Banished forces defending it, the Keepers were undeterred and departed through the portal for the Ark, unaware that their human companions are actually the [[Ferret]]s, an undercover team of [[ONI]] operatives made up mainly of [[Spartan-III]]'s. | |||
Despite his stated intention to return to the Ark with more Banished reinforcements, Atriox instead departed from Reach in [[Escharum]]'s [[intrusion corvette]], stating that the Banished had a greater purpose to attend to and he was sure that the Banished forces that he had left behind could hold the Ark in his absence. The portal collapsed shortly thereafter, preventing anyone else from traveling to or from the Ark through it.{{Ref/Reuse|SoR}} | |||
===Attempting to Start the Great Journey=== | |||
[[File:HDW FullCoverArt.jpg|thumb|left|250px|Veta Lopis, the Keepers, and Dhas Bhasvod on the Ark.]] | |||
{{Main|Battle for Translocation portal Epsilon|Battle of Epsilon Clarion}} | |||
In October 2559, the detachment of the [[Keepers of the One Freedom]] led by [[Castor]] arrived on the Ark in the midst of a [[Battle for Translocation portal Epsilon|three-way battle]] for control of the slipspace portal between the UNSC, Banished and [[Dhas Bhasvod's Covenant]]. After crashing, Castor formed an alliance with [[Prelate]] [[Dhas Bhasvod]], the leader of the Covenant loyalists. The Forerunner {{Class|Archeon|ancilla}} [[Intrepid Eye]], who was believed to have been destroyed during [[Operation: BIRD IN HAND]], revealed herself and resumed her guise as "the Oracle" in order to manipulate Castor for her own ends. Really, the ancilla intended to fire the [[Halo Array]] - in turn destroying the [[Domain]] and rendering [[Cortana]] vulnerable to Intrepid Eye. The ancilla then intended to use the Ark's resources to reseed the galaxy and tailor humanity over the course of hundreds of millennia to be ready to take up the [[Mantle of Responsibility]].{{Citation needed}} | |||
The combined Keepers/Covenant alliance set out to one of the installation's [[Cartographer#Installation 00|Cartographers]] in order to find a new facility to fire the Halo Array from, the [[Installation 00 Citadel|original Citadel]] having been destroyed in the midst of the upheaval caused by the Ark's repairs. [[Veta Lopis]] left behind a message capsule in an attempt to alert ''[[Romeo-008]]'', a reconnaissance Pelican that was observing the battle from nearby, to the threat. However, the message was instead found by [[Pavium]] and [[Voridus]] who rallied the [[Clan of the Long Shields]] to stop Castor. At the Cartographer, Lopis' Reclaimer status was used to get the location of the [[Epsilon Clarion]] facility, the only one of the Ark's [[Clarion]] facilities that was either accessible or operable, from the facility's monitor. During this time, Intrepid Eye was able to confirm Lopis' identity as an ONI spy. This reveal lead to Castor, [[blademaster]] [[Inslaan 'Gadogai]] and Bhasvod using the [[Ferret]]s and a captured Banished data pad to draw their two enemies into a trap where they would fight each other, thus buying time for the allied forces to complete their mission. | |||
Before the Keepers and Covenant could leave the Cartographer, the Banished launched a brief attack on their landed ships, causing the [[Aggressor Sentinel]]s to join the battle as well. Ultimately, Bhasvod's command Phantom was crippled and had to be abandoned along with the Covenant's Ghosts and half of their air support - while the Banished suffered no losses. Recognizing that their cover had been blown, the Ferrets got ''Romeo-008'' to extract them. U, the trap worked and [[Vulture]]s from the ''Spirit of Fire'' destroyed nine of the ten Seraphs belonging to the Clan of the Long Shields. A short time later, the Banished forces suffered [[Ambush in the Maze Rift|an ambush]] by the Covenant's three Seraphs in the [[Maze Rift]], but the remaining Banished Seraph was able to take them out and stop the ambush.{{Citation needed}} | |||
Knowing that they would never reach Epsilon Clarion in time, Lopis had the Pelican broadcast the coordinates in the clear, alerting the Banished to where they needed to go, allowing the Long Shields to set up fortifications around Epsilon Clarion. However, Intrepid Eye was able to direct them to a defensive tower nearby where the facility could be accessed via a light bridge and tunnel. Somehow anticipating this, the Banished attacked the Phantoms as they landed the ground forces, destroying one and chasing the other as it flew off. ''Romeo-008'' then attacked with salvos of [[Anvil-II air-to-surface missile|missiles]] that killed most of the Covenant and Keepers forces, leaving only a few including Castor, Bhasvod, 'Gadogai, [[Arcas]] and [[Krelis]]. It also destroyed most of the devices that Intrepid Eye was residing inside of, causing her to lose most of the data that she had gathered since her reactivation six years earlier. Nevertheless, Intrepid Eye managed to make contact with the facility's [[Facilitator-class ancilla]] and convinced it to activate the light bridge and allow them across while defending against the Banished. Using Sentinels and a series of avalanches, the Epsilon Clarion ancilla succeeded in obliterating the Long Shields, leaving only Pavium, Vordius and a few other survivors. At least most of the [['Ahtulai Workshop Banshee]]s were destroyed by the Sentinels and the rest eventually retreated. During this time, the Ferrets assaulted the few enemy survivors and managed to eliminate their human followers in order to prevent them from being used as Reclaimers.{{Citation needed}} | |||
With the | Recognizing the continuing threat if Intrepid Eye was not destroyed and allowed to attempt to fire the Array with or without a Reclaimer, the Ferrets came up with a plan to allow the ancilla to download herself into Epsilon Clarion's systems which would leave her in one place and thus vulnerable to destruction. To facilitate this plan, Lopis allowed herself to be captured while the other Ferrets set up a signal repeater and followed her in an effort to rescue their leader, although [[Mark-G313]], severely wounded and unable to keep up, remained behind to hold off an attacking Sentinel. Spotting their passage across the light bridge, Pavium, Voridus and their few remaining forces attempted to ambush the surviving Keepers and the Covenant, but the Ferrets alerted them with gunfire as the ambush would ruin their own plan. The fight left Pavium and Voridus as the only survivors on the Banished side, Krelis mortally wounded and only Castor, Bhasvod, 'Gadogai and Arcas left of the Keepers and Covenant forces.{{Citation needed}} | ||
After entering Epsilon Clarion, Intrepid Eye prepared to transfer herself into the facility's systems, but Lopis declared a [[logic plague]] emergency in order to buy more time. This caused [[Epsilon Clarion ancilla|the facility's ancilla]] to immediately cut off contact with the rest of the Ark's systems and block Intrepid Eye's entry. As a result, Intrepid Eye was forced to manifest an [[avatar]] of herself and argue with the ancilla about allowing them to activate the Array. In the process, Castor learned the truth about Halos purpose as a last resort weapon against the [[Flood]] rather than a means of Transcendence by triggering the Great Journey. Intrepid Eye eventually managed to trick the ancilla into granting her access and once she was in, Lopis signalled the ''Spirit of Fire'' to begin an [[orbital bombardment]] with [[EMP]] [[MAC]] rounds. Although Intrepid Eye raised the facility's shields, the EMPs were enough to damage the power systems and they would inevitably bring down the shield, allowing the MAC rounds to destroy Epsilon Clarion. In addition, any EMP powerful enough to take down the shield would also be powerful enough to wipe out Intrepid Eye's code and destroy the ancilla. Effectively trapped, Intrepid Eye managed to force Epsilon Clarion's ancilla to open the control room and attempted to have Castor use Lopis to trigger Halo's activation, intending to escape by piggybacking on the activation signal. However, Castor's faith had been shattered by what he had witnessed, and he turned against both the ancilla and Bhasvod as [[Ash-G099]] and [[Olivia-G291]] stormed Epsilon Clarion in order to rescue Lopis. A skirmish ensued that left Ash and Olivia severely wounded, Arcas dead and Bhasvod thrown into a pit. With Epsilon Clarion on the verge of destruction and no longer intending to go through with their plan to fire the Halo Array, 'Gadogai convinced Castor to flee with the Ferrets doing the same. The ''Spirit of Fire's'' bombardment destroyed both Epsilon Clarion and Intrepid Eye, taking with it the Ark's ability to fire the Array until a new Clarion facility could be constructed.{{Citation needed}} | |||
In the aftermath of the bombardment, the ''Spirit of Fire'' dispatched [[Red Team]] in a Pelican to perform a search-and-rescue mission for the Ferrets. Having survived his fall, Bhasvod attempted to attack Lopis, Ash and Olivia, but he was attacked and wounded by Mark before Bhasvod killed Mark. Bhasvod was left with his plan foiled and unable to, for the time being, recover the shards of the [[Menachite Forerunner crystal]] with which he intended to open a slipspace portal to [[Cloister]] and inform [[Jom G'e'qth]] that their plan had failed. Mark's sacrifice allowed Red Team to rescue the other Ferrets and recover Mark's body. The only survivors of the Long Shields, aside from possibly [[Thalazan]], Pavium and Voridus decided to report to [[Let 'Volir]] that their actions had bought the ''Spirit of Fire'' enough time to launch its bombardment. Now the only survivors of their sect of the Keepers of One Freedom, Castor and 'Gadogai, symbolically destroyed Bhasvod's glaive despite it being fried by the EMP as it was the last surviving piece of equipment that had held Intrepid Eye before the ancilla's transfer into Epsilon Clarion.{{Citation needed}} Because of the revelation of Halo's bitter truth, Castor decided to abandon the Keepers' faith.{{Ref/Book|Id=Enc22P247|Enc22|Page=247}} Teams from the ''Spirit of Fire'' subsequently conducted a thorough search of the area and confirmed that Intrepid Eye had in fact been destroyed with no transmissions having been detected from Epsilon Clarion before, during or after the bombardment which had reduced whatever the ancilla might've been hiding into slag.{{Citation needed}} | |||
Ten days later, the ''Spirit of Fire'' held a funeral for Mark and [[John Cassidy]], the co-pilot of ''Romeo-008'' who had also lost his life in the fighting. Unable to return home, Lopis and the surviving Ferrets decided to accept Cutter's offer to join the crew of the ''Spirit of Fire'' and help them in their continuing fight against the Banished.{{Ref/Reuse|DW}} | |||
==Engagements== | |||
{{Engagements in the Second Ark Conflict}} | |||
==Timeline== | |||
[[File:PL dawn.png|thumb|250px|UNSC forces deployed on the Ark.]] | |||
===March 28, 2559=== | |||
*{{UNSCShip|Spirit of Fire}} arrives at Installation 00. All surviving crew is awakened and begin investigating Installation 00 following a distress signal from [[Isabel]]. | |||
*Red Team are forced to retreat after Atriox and the [[Banished]] ambush them at [[Henry Lamb Research Outpost]], with Alice-130 left behind to cover the evacuation.{{Ref/Reuse|Alice Report}}}} The UNSC begin a series of offensive operations to cripple the Banished and their salvage operations.{{Ref/Level|HW2|A New Enemy|Detail=Context in this level's cutscene indicate it takes place more-or-less immediately following the previous level.}} | |||
===Unknown date (March 28-March 30)=== | |||
*Alice-130 tracks a Banished convoy to a research camp and begins a campaign to rescue Marine prisoners, leading a small resistance movement - ultimately managing to link back up with ''Spirit of Fire''.{{Ref/Level|HW2|One Three Zero}} | |||
*''Spirit of Fire'' forces, using intelligence gathered from the salvage base taken from the Banished, make an assault on the installation's Cartographer and successfully take it. This success allows the UNSC forces to discover how the Banished have spread their reach as effectively as they have, using the facility's slipspace translocation portals.{{Ref/Level|HW2|Ascension (Halo Wars 2 level)|Ascension}}{{Ref/Level|HW2|The Cartographer}} | |||
===March 30, 2559=== | |||
*Ordo Val'Saham records his thoughts on the UNSC capture of the cartographer facility.{{Ref/Game|HW2|Phoenix Logs|Detail=A Split Heart is Easily Conquered}} | |||
===Unknown date (March 30-April 2)=== | |||
*UNSC forces make a series of assaults on the Banished portal controller sites, crippling their ability to move effectively across the installation. During the fighting, Decimus is killed and ''Enduring Conviction'' begins an attack on ''Spirit of Fire''.{{Ref/Level|HW2|Lights Out}} | |||
*Banished forces make an assault on the portal site occupied by Alice-130's resistance forces, though are successfully repelled.{{Ref/Level|HW2|From The Deep}} | |||
*[[Assault on Enduring Conviction|Assault on ''Enduring Conviction'']] - a joint ground operation led by ''Spirit of Fire'' forces successfully co-opts a Forerunner particle cannon, and forces ''Enduring Conviction'' to retreat from its attack.{{Ref/Level|HW2|Hold the Line}} Simultaneously, a force led by Jerome-092 is able to reach the carrier's gravity lift and board the ship, using Isabel to take control of the energy projector and trigger the Ark into a self-defense measure - destroying ''Enduring Conviction''.{{Ref/Level|HW2|Under the Dark}} | |||
*[[Battle of Installation 09]] - Following the destruction of ''Enduring Conviction'' a new Halo ring - Installation 09 - is released from the Ark's foundry. All available UNSC and Banished assets are scrambled to take control of the installation, ultimately culminating in a UNSC victory and the launch of the ring to the Soell system. Ultimately, the ring is intercepted by a Guardian.{{Ref/Level|HW2|The Foundry}}{{Ref/Level|HW2|The Halo}}{{Ref/Level|HW2|Last Stand (Halo Wars 2 level)|Last Stand}} | |||
===May 2559=== | |||
*[[Operation: SPEARBREAKER]], Major Vaughan leads India Company to destroy a Forerunner {{Class|Despair|fighter}} that Banished forces led by [[Colony]] had intended to use in order to destroy the ''Spirit of Fire''. | |||
===June 4, 2559=== | |||
*The Banished inadvertently releases the Flood from High Charity, [[Outbreak on Installation 00]] begins. | |||
===June 5, 2559=== | |||
*Warlord [[Pavium]] and [[Voridus]] successfully defeat the Proto-Gravemind, containing the threat of the Flood. The Flood is subsequently "scoured" from the wreckage of High Charity by the Banished and the Sentinels. | |||
===Unknown date (Between June 6 to July)=== | |||
*The Banished successfully acquire an access code to the ''[[Anodyne Spirit]]'' during the scouring of High Charity. | |||
*The Banished conducts a raid at the [[Raid on Anodyne Spirit|Covenant Loyalist's bastion]], and successfully takes the Forerunner Crystal. | |||
===October 12, 2559=== | |||
{{Expand-section}} | |||
===October 14, 2559=== | |||
*The [[Battle of Epsilon Clarion]] results in the destruction of [[Intrepid Eye]], Castor's detachment of the [[Keepers of the One Freedom]], the [[Clan of the Long Shields]] and [[Epsilon Clarion]], as well as the death of [[Mark-G313]]. | |||
===October 24, 2559=== | |||
*Burial of [[Mark-G313]]. The surviving [[Ferret]]s officially join the ''Spirit of Fire'' crew and the continuing fight against the Banished. | |||
==Participants== | |||
{{col-begin}} | |||
{{col-3}} | |||
===UNSC=== | |||
===Naval assets=== | |||
====Starships==== | |||
{| class="wikitable sortable " style="width: 75%;" cellspacing="1" cellpadding="1" border="0" | |||
|- | |||
! Tactical grouping | |||
! Class | |||
! Name | |||
! Status<!--This refers to their status after the battle, not their overall status--> | |||
|- | |||
| rowspan="1" |Unknown | |||
|{{Class|Phoenix|colony ship}} | |||
|{{UNSCShip|Spirit of Fire}} | |||
|Unknown | |||
|} | |||
====Military personnel==== | |||
{| class="wikitable sortable " style="width: 75%;" cellspacing="1" cellpadding="1" border="0" | |||
|- | |||
! Branch | |||
! Rank | |||
! Name | |||
! Status<!--This refers to their status after the battle, not their overall status--> | |||
|- | |||
| rowspan="8" |[[UNSC Navy]] | |||
|[[Captain]] | |||
|[[James Cutter]] | |||
|Unknown | |||
|- | |||
|[[Commander]] | |||
|[[Jerome-092]] | |||
|Unknown | |||
|- | |||
|[[Lieutenant]] | |||
|[[Veta Lopis]] | |||
|Unknown | |||
|- | |||
| rowspan="2" |Senior Chief Petty Officer | |||
|[[Alice-130]] | |||
|Unknown | |||
|- | |||
|[[Douglas-042]] | |||
|Unknown | |||
|- | |||
| rowspan="3" |Petty Officer | |||
|[[Ash-G099]] | |||
|Unknown | |||
|- | |||
|[[Olivia-G291]] | |||
|Unknown | |||
|- | |||
|[[Mark-G313]] | |||
|KIA | |||
|- | |||
| rowspan="4" |[[UNSC Marine Corps]] | |||
|[[Lieutenant Colonel]] | |||
|[[Morgan Kinsano]] | |||
|Unknown | |||
|- | |||
|[[Major]] | |||
|[[Elijah Vaughan]] | |||
|Unknown | |||
|- | |||
|[[Sergeant]] | |||
|[[Allieri]] | |||
|Unknown | |||
|- | |||
|Unknown | |||
|[[G. Peterson]] | |||
|Unknown | |||
|} | |||
====Artificial Intelligence==== | |||
{{Main|Artificial intelligence}} | |||
{| class="wikitable sortable " style="width: 75%;" cellspacing="1" cellpadding="1" border="0" | |||
|- | |||
! Name | |||
! Status<!--This refers to their status after the battle, not their overall status--> | |||
|- | |||
|[[Isabel]] | |||
|Unknown | |||
|} | |||
===Units=== | |||
====Ground forces==== | |||
*[[UNSC Navy]] | |||
**[[Red Team]] | |||
*[[UNSC Marine Corps]] | |||
**[[Hellbringers]] | |||
**[[India Company]] | |||
**[[9th Shock Troops Battalion]] | |||
***[[Boomerang Company]] | |||
{{col-3}} | |||
===Banished=== | |||
===Naval assets=== | |||
====Starships==== | |||
{| class="wikitable sortable " style="width: 75%;" cellspacing="1" cellpadding="1" border="0" | |||
|- | |||
! Tactical grouping | |||
! Class | |||
! Name | |||
! Status<!--This refers to their status after the battle, not their overall status--> | |||
|- | |||
|Unknown | |||
|{{Class|CAS|assault carrier}} | |||
|''[[Enduring Conviction]]'' | |||
|Destroyed | |||
|} | |||
====Military personnel==== | |||
{| class="wikitable sortable " style="width: 75%;" cellspacing="1" cellpadding="1" border="0" | |||
|- | |||
! Branch | |||
! Rank | |||
! Name | |||
! Status<!--This refers to their status after the battle, not their overall status--> | |||
|- | |||
| rowspan="9" |Unknown | |||
|[[War Chief]] | |||
|[[Decimus]] | |||
|KIA | |||
|- | |||
|[[Shipmaster]] | |||
|[[Let 'Volir]] | |||
|Unknown | |||
|- | |||
|[[Honor Guard]] | |||
|[[Orda Val 'Saham]] | |||
|KIA | |||
|- | |||
| rowspan="2" |[[Warlord]] | |||
|[[Pavium]] | |||
|Unknown | |||
|- | |||
|[[Ristyx]] | |||
|Unknown | |||
|- | |||
| rowspan="4" |Unknown | |||
|[[Voridus]] | |||
|Unknown | |||
|- | |||
|[[Forticus]] | |||
|Unknown | |||
|- | |||
|[[Jato 'Ratum]] | |||
|Unknown | |||
|- | |||
|[[Plutus]] | |||
|KIA | |||
|} | |||
{{col-3}} | |||
===Keepers of the One Freedom=== | |||
====Military personnel==== | |||
{| class="wikitable sortable " style="width: 75%;" cellspacing="1" cellpadding="1" border="0" | |||
|- | |||
! Branch | |||
! Rank | |||
! Name | |||
! Status<!--This refers to their status after the battle, not their overall status--> | |||
|- | |||
| rowspan="3" |Unknown | |||
|[[Dokab]] | |||
|[[Castor]] | |||
|Unknown | |||
|- | |||
| rowspan="2" |Unknown | |||
|[[Krelis]] | |||
|KIA | |||
|- | |||
|[[Arcas]] | |||
|KIA | |||
|} | |||
{{Col-end}} | |||
==Gallery== | ==Gallery== | ||
| Line 243: | Line 556: | ||
File:HW2-Banished-02.jpg|Atriox stands before his army in the aftermath of the battle on the Halo. | File:HW2-Banished-02.jpg|Atriox stands before his army in the aftermath of the battle on the Halo. | ||
File:HW2-Odsts-1.jpg|Sunray 1-1 in combat. | File:HW2-Odsts-1.jpg|Sunray 1-1 in combat. | ||
File:HW2_Spearbreaker_Loadscreen.jpg|UNSC forces fighting Sentinels. | File:HW2_Spearbreaker_Loadscreen.jpg|UNSC forces fighting Sentinels. | ||
File:HW2-What Could Go Wrong.jpg|Voridus' Volatile Scarab heads for High Charity. | File:HW2-What Could Go Wrong.jpg|Voridus' Volatile Scarab heads for High Charity. | ||
| Line 259: | Line 571: | ||
File:HW2-Squish.gif|Atriox crushes an infection form. | File:HW2-Squish.gif|Atriox crushes an infection form. | ||
File:HW2-Cleanup.png|Aggressor Sentinels begin to contain the Flood once again. | File:HW2-Cleanup.png|Aggressor Sentinels begin to contain the Flood once again. | ||
</gallery> | </gallery> | ||
| Line 266: | Line 577: | ||
*''[[Halo Mythos]]'' {{Im}} | *''[[Halo Mythos]]'' {{Im}} | ||
*''[[Halo Wars 2]]'' | *''[[Halo Wars 2]]'' | ||
*''[[Halo: Shadows of Reach]]'' {{Im}} | |||
**''[[Sacrifice]]'' | |||
*''[[Halo: Divine Wind]]'' | |||
*''[[Halo Infinite]]'' {{Mo}} | |||
*''[[Halo: Outcasts]]'' {{Mo}} | |||
==Sources== | ==Sources== | ||
{{ | {{Ref/Sources}} | ||
{{Post-Covenant War conflicts}} | {{Post-Covenant War conflicts}} | ||
[[Category:Second Ark Conflict| ]] | [[Category:Second Ark Conflict| ]] | ||
[[Category:Engagements in the Second Ark Conflict| ]] | [[Category:Engagements in the Second Ark Conflict| ]] | ||
Latest revision as of 06:26, April 25, 2024

- "Captain, your troops fight with a tenacity that almost matches my Jiralhanae brothers. I'm impressed. You and I are survivors, and I respect that, so I offer you a boon. Take your troops, take your ship, leave now, and I will not hunt you down."
- — Atriox offering Captain Cutter and his crew a chance to leave peacefully in the ongoing battle.[4]
The Second Ark Conflict[40] was a large battle fought between the isolated United Nations Space Command forces of the UNSC Spirit of Fire and the hostile mercenary organization known as the Banished in 2559, about six years after the Human-Covenant War ended on the same ancient Forerunner installation known as the Ark. After mysteriously arriving at the Ark on March 28, 2559, the long-lost crew of the Spirit of Fire were awoken from cryosleep and soon came into hostile contact with the powerful mercenary organization. During the battle, the UNSC destroyed the Banished's flagship, the CAS-class assault carrier Enduring Conviction, and initiated the deployment sequence of one of the Ark's Halo rings, one of an array of massive ring-shaped superweapons capable of destroying all sentient life in the galaxy, intending to use it to send a distress beacon to human space.
A new threat emerged on the Ark when Banished salvage teams breached the ruins of High Charity and inadvertently unleashed the Flood on the Ark once more. The Banished and the Ark's defenses managed to stop the outbreak and contain the Flood once again before it could spread too far.
In October, the Banished managed to open a portal between their forces on the Ark and their forces in the Milky Way on Reach. Atriox and some of his warriors took the portal to the Milky Way, while the Keepers of the One Freedom took portal to the Ark in a plot to begin the Great Journey.[11] This was complicated by the return of the Forerunner Archeon-class ancilla Intrepid Eye[5] who had previously caused a great deal of chaos in the Milky Way.[41][42] Intrepid Eye and the citadel from which the Halo Array could be fired were both destroyed, along with the Keepers faction, its two survivors set themselves against all of the other factions on the Ark seeking vengeance.[5]
Background[edit]
- Main article: Outbreak on the UNSC Spirit of Fire
- "Captain, wake up... Something has happened."
- — Serina's message for Captain Cutter.[2]
On October 28, 2558,[43] during the Created's subjugation of Earth, the portal to the immense, extra-galactic Forerunner installation known as Installation 00, or "the Ark," shut down.[44] One month later on November 25,[2][45] a powerful ex-Covenant mercenary group known as the Banished arrived at the Ark with a force comprised of Jiralhanae, humans, Sangheili, Unggoy, Mgalekgolo, and Huragok. The Banished raided the United Nations Space Command research outposts on the surface.[2] While there, the Banished set up bases and salvage operations across the Ark establishing significant control.[12]

Meanwhile, the UNSC Spirit of Fire spent almost twenty-eight years drifting through space[2] after their slipsace drive was destroyed in the Battle of Trove.[46] A surviving Pod infector on board the ship started an outbreak, and a few crew members were infected. As the outbreak began to escalate, Smart AI Serina awoke Spartan-II Senior Chief Petty Officer Jerome-092 and the two of them quickly quelled the outbreak and sterilized the local Flood infestation. In the aftermath of the outbreak, 7-year-old Serina prepared herself for final dispensation, as per protocol. Many years later, the UNSC Spirit of Fire arrived mysteriously via slipspace portal at Installation 00 on March 28, 2559.[2]

Less than an hour after the ship's arrival, the crew was automatically awoken from cryosleep by the vessel's deceased AI Serina, who had left a message for the ship's Captain, James Cutter, informing him of the status of the ship, the crew, and herself. After arriving at the Spirit of Fire's observation deck, Cutter was briefed on the situation by Professor Ellen Anders, who told him that the astronavigation system placed them outside the Milky Way. When Cutter discovered they had arrived via slipspace portal, Anders revealed to him that something on the surface of the Ark had opened the portal and pulled them in. Not a second later, Cutter was informed over comms that a message was being transmitted from the surface through a UNSC frequency, however, its encryption was too advanced for the crew's outdated decryption techniques. Instead of spending time decoding it, Cutter asked Anders for the source of the transmission and ordered Spartan Red Team to prepare a recon squad and find the source of the signal.[2]
With recon forces having been sent in ahead, Red Team was dropped off in a Warthog on the Ark's south spire.[12] Arriving at a hastily-created barrier, one of the soldiers of Recon One informed them that they had set charges and so Alice-130 fired on it with the Warthog's machine gun, detonating the charges and destroying the barrier. After destroying another barrier, Red Team eventually encountered a recon team who had been attacked. Pressing on, the Spartans arrived at a portal that had been discovered by the recon soldiers. While the Marines stayed behind to guard the portal, Red Team ventured through and were teleported nearby. After passing a couple more portals, the Spartans found themselves at the Henry Lamb research outpost.[2]
Battle[edit]
Encounter with Atriox[edit]
- Isabel: "Oh no."
- Douglas-042: "What was that?"
- Isabel: "It's him."
- — Isabel after realizing Atriox had found them[2]
Entering the desolate facility, the Spartans discovered a holotable which Jerome-092 proceeded to activate. Appearing in front of them was the orange hologram of a smart AI, who expressed her relief that Spartans had arrived. Ordered to identify herself, the AI told Jerome she was Isabel, and that she was in UNSC logistics for the Ark research outpost. After being asked where the survivors are and what the strength of the Covenant force there was, Isabel displayed confusion and told the Spartans they needed to escape. Unbeknownst to them, their war with the Covenant Empire had ended six years ago. Suddenly, they heard a loud thumping sound coming from further within the facility. After retrieving Isabel, Jerome signaled for them to move up into another section of the outpost.

Out of the darkness, a heavily armored Jiralhanae grabbed Alice by the neck and lifted her up before throwing her to the side. As the other two Spartans began firing on the massive Brute, he slammed his gravity mace into the ground, sending them into the air and allowing the Brute to strike Jerome, launching him to the side as well. Using his mace, the Jiralhanae pulled Douglas-042 in and slammed the supersoldier into the ground behind him. Alice ran back up from behind the Brute, firing her pistol at the same time, before being knocked to the side. Recovering, Douglas gripped his shotgun but was kicked away before he could use it. Armed with a combat knife, Jerome approached the Brute, dodged one of his strikes, and stabbed him before once again being struck away. Again, Alice fired her pistol at the alien but was deflected by the Brute's arm. Douglas picked up his shotgun again, but before he could fire it, the Jiralhanae knocked it out of his hand. Opting for his knife, Douglas managed to stab the Brute twice before having his shoulder crushed by the ursine's grip. As the Spartan screamed an agonizing cry and held his shoulder in pain, the Brute reactivated his gravity mace and, as Douglas started getting back up, struck him in the chest, launching him through the air and causing his helmet to come off. Removing the knife from his abdomen, the Jiralhanae picked up the helmet and crushed it, musing over the fact that his suspicion that Spartans were merely human was correct. As Alice and Jerome approached the severely wounded Douglas, Recon One reported that there were multiple hostiles approaching Red Team's location. With the pair deciding to leave, Alice began dragging Douglas, who soon fell unconscious. Exiting the research outpost, the pair were greeted by the sight of hundreds of warriors of various species surrounding them on the cliffs above. As Alice put Douglas in the Warthog and manned the gun, Jerome requested Archer missiles be launched on their position. As Jerome drove away from the facility, Alice fired at the pursuing Ghosts and the other ground forces teleporting around them. The Spartans soon reached a light bridge, which Alice proceeded to activate. With enemy ground forces approaching, Alice volunteered to hold off them off while Jerome and Douglas crossed the bridge and were picked up by a Pelican.[2]
Getting up to speed[edit]
- "If we don't stop Atriox now, we leave the galaxy at the mercy of a monster. So no, Isabel, we won't be running anywhere today."
- — Captain James Cutter to Isabel[2]

After returning to the Spirit of Fire, Jerome inserted Isabel's data chip into the bridge holotable and introduced her to Captain Cutter. The captain asked Isabel to report on what happened and what they're up against. Despite her apprehensiveness to talk, she told Cutter that the Brute the Spartans fought was called Atriox, the leader of the Banished, a Covenant splinter group who fought the empire simultaneously with humanity. Isabel exclaimed that if the entire Covenant couldn't contain him, then the Spirit of Fire didn't stand a chance and that they needed to escape far away as quickly as possible. However, Cutter told her that while they did only have one ship, it was all they may have left and that he refused to leave the galaxy at the mercy of Atriox. As he put the vessel in combat-ready mode, the bridge crew ran back to their stations ready to fight and Jerome left to get prepared.[2]
Assault on the salvage operation[edit]

- Jerome-092: "I'm guessing that's Decimus."
- Isabel: "He looks bigger than the last time I saw him."
- — Jerome-092 and Isabel during the former's encounter with Decimus[12]
After conferring with Isabel on the best option for attacking the Banished chain of command, the AI told Cutter of Lieutenant Decimus, the overseer of a ship graveyard salvage operation near the Henry Lamb research outpost.[12] Deciding that they should hit the Banished with a surprise attack and then establish a base of operations, Cutter deployed Strike One, a unit of eight Marines led by Jerome, to the installation's surface. After fighting through Banished forces, the strike team arrived at a Forerunner tower giving off a massive power signature, which they proceeded to secure on Anders' recommendation. Pressing on, the Marines and Jerome made their way through the ship graveyard left behind from the final battle of the war before reaching a Banished base. Managing to overrun the base, UNSC forces eliminated the Banished forces and destroyed the base before preparing to set up their own in its place.[12]
After the Marines established the base, Isabel alerted them and Captain Cutter of a large energy build-up directly above. Despite being hit by the energy projector of the Enduring Conviction, the Banished's CAS-class assault carrier, the base sustained only non-critical damage, allowing Strike One to continue north in the direction of the rest of Decimus' salvage operation.[12]
While fighting their way through several canyons of Banished forces, Strike One suffered a few more plasma bombardments before reaching a portal from which Decimus himself appeared. Managing to hold off the attacking Marines, Decimus proceeded to order a plasma bombardment on his own position while he was protected by an energy shield. As his reinforcements arrived, Decimus retreated back through the teleporter and ordered another strike, killing his own men as well as most of the UNSC forces. Realizing the Jiralhanae lieutenant must be trying to hide something, Cutter ordered the surviving members of Strike One to retrieve anything of value. Shortly after, Jerome found an encrypted piece of data which he promptly sent to Isabel. Expressing concern, Isabel stated the information points to the Ark's Cartographer and that she would explain what it is back on the Spirit of Fire.[12]
Activating the elevator[edit]

- "The Cartographer's defenses make it almost impenetrable; the only way up to it is by a Forerunner elevator. If you can get access to the local Forerunner Control Towers, I can take control of the elevator and take us up. It's our only chance of getting inside."
- — Ellen Anders to James Cutter[13]
On the ship, Isabel and Anders went over the data from Decimus' base and found a way into the Cartographer, a repository of information on the Ark's schematics and systems. Reporting to Cutter, Isabel explained the purpose of the Cartographer while Anders explained how to activate the elevator in order to gain access to it.[13]
Sending a small, experienced unit of Marines led by Jerome, Cutter gave them orders to capture and access Forerunner Control Towers so that Anders could activate the Cartographer's elevator. Moving up from the beach, the unit found destroyed Banished mining equipment, suggesting a third party was involved in the battle. Moving further up, the Marines soon discovered what had done the destruction: the Ark's sentinels. Moving on, the Marines encountered the first Control Tower and eliminated the Banished forces protecting it. After doing the same with the rest of the Control Towers, Anders was able to gain access to the elevator and transport the Marines up to the Cartographer.[13]
Marine rescue[edit]

- Alice-130: "Spirit of Fire Actual, this is Alice One-Three-Zero reporting in."
- James Cutter: "Good to hear from you Alice. How did you make it out?"
- Alice-130: "Commandeered an enemy vehicle, sir. I've rescued some of our troops and we're ready to get back in the fight."
- — Alice-130 coming back into contact with the Spirit of Fire[31]
After escaping the research outpost, Alice began tracking an enemy convoy to one of their compounds. Discovering they had imprisoned some of the Spirit of Fire's Marines, the Spartan infiltrated the base and freed the prisoners. After moving to a few more prison compounds, Alice was able to free the remaining captive UNSC personnel and kill a few Banished patrols, alerting the enemy to their presence. After arriving at another research outpost, Alice sent an encrypted message to Captain Cutter, who informed her that Pelicans were on the way but so were Banished forces. Managing to hold off the advancing units long enough for the Pelicans to arrive, Alice and the rescued personnel managed to get aboard and escape with their vehicles and cyclops armor. Shortly afterward, Cutter gave Alice command of the rescued Marines, their equipment and vehicles so they could perform hit-and-run operations against the Banished, while Isabel prepared a briefing package to get her back up to speed with the situation.[31]
Infiltrating the Map Room[edit]
- "Isabel gave me everything the UNSC already knows about the area and it looks like we'll need to reach the Map Room."
- — Ellen Anders to James Cutter[27]
After reaching the Cartographer via the elevator, the UNSC forces discovered an energy shield was preventing them from accessing the central chamber and the Map Room. Moving up, Jerome and the Marines encountered a conduit and proceeded to fire on it in an attempt to take down the shield. Before they could, however, the Ark's self-preservation protocol sent sentinels to the location, forcing the Marines to retreat. Fortunately for the UNSC soldiers, Isabel and Anders' project, an EMP weapon, was ready to deploy. The EMP devices were launched down from the Spirit of Fire onto the sentinels, successfully neutralizing them and allowing Jerome and the Marines to disable the conduit. With the conduit disabled, the energy shield protecting the central chamber was deactivated and Anders proceeded in. Activating a Forerunner interface, Anders learned that the Marines would have to disable three more conduits in order for the Map Room's shield to go down. After repeating the process for the next three conduits, the energy shield finally dissipated, and after one more strike with the EMP missiles on the sentinels, Anders was able to access the Map Room. Accessing the Cartographer's data, Anders discovered that the Banished were using the Ark's network of thousands of portals to move around and reported her findings to Captain Cutter.[27]
Crippling the portal network[edit]

- "He's spread his troops far and wide by abusing the Ark's network of portals. That's his biggest mistake... Some of Atriox's troops will be stranded and the rest won't be able to redeploy as easily. It'll give us a fighting chance."
- — James Cutter on destroying the portal network's hub[7]
Intending to cripple the Banished's portal network and strand most of their forces, Cutter deployed Jerome, a recovered Douglas, and the Marines near the network's control hub with orders to destroy it. As they advanced on the hub, the Marines destroyed portals along the way to prevent being overrun. After fighting through more Banished reinforcements, the Marines encountered a chasm which they crossed using a portal. Nearing the control hub, the UNSC forces neutralized the last of the Banished forces and destroyed the device, shutting down the portal network. Enraged, a heavily armored Decimus descended on them but was unable to prevail against the human forces. After reporting on the Brute's defeat, the unit was informed that the Spirit of Fire was under attack and that they had to return to the ship immediately.[7]
Dealing with the carrier[edit]
- "That ship brought these monsters. Killed everyone I was supposed to protect. Now it wants to do the same to you. I won't let that happen. It's time to show them what power really means around here."
- — Isabel on dealing with the Enduring Conviction[47]

While Alice fended off Banished troops on the surface, more and more of the Spirit of Fire's turrets were being destroyed by the Banished's relentless Banshee runs. Having found a way to create a portal away from the Ark, Anders proceeded to the bridge and informed Cutter and Isabel of her plan to deploy a preconstructed Halo ring maintained in the Ark's Foundry through slipspace. Cutter suggested that if it was deployed to replace the one the Master Chief destroyed, it would be near enough to Reach for the UNSC to pick up a distress beacon. However, their impending destruction by the Enduring Conviction meant that it would have to be dealt with first. Forming a plan, Isabel requested ground forces be split up in order to buy time.[47]
Accessing a Forerunner particle cannon on the Ark's surface, the UNSC targeted the Enduring Conviction, immobilizing it and causing its shields to drain. The importance of the assault carrier prompted the Banished to assault the cannon with all available local forces, drawing troops away from the Banished base underneath the carrier where Jerome and Isabel were approaching the vessel's gravity lift.[47]
As Jerome and Isabel, with support from a unit led by Alice, neared the platform, their Pelicans were shot down by Banished turrets guarding the lift. The Spartans managed to survive the crash and reunite with a unit of UNSC snipers. Needing a clear path to the grav lift, Jerome requested Alice take care of the anti-air turrets surrounding the grav-lift. Deciding to utilize the Kodiaks, Alice positioned the vehicles on the edge of the cliff near the platform and ordered them to fire on the Banished ordnance.[8]

With the particle cannon finally having managed to break through the Enduring Conviction's shields, Jerome was notified that he was clear to board and all remaining UNSC personnel underneath the carrier were extracted immediately.[47]
Arriving inside the carrier, Jerome made quick work of the Sangheili in the area before inserting Isabel into a nearby holotank. Accessing the vessel's firing systems, Isabel managed to fire its underside energy projector. As the plasma beam penetrated the surface of the Ark, the installation's sentinels, in a desperate attempt to stop the destruction, launched themselves at the weakest part of the carrier. As the sentinels cut away at the vessel, Jerome held off Jiralhanae reinforcements. With the sentinels having done enough destruction to the carrier, the energy projector shut down and the front section of the vessel began to separate. Retrieving Isabel from the holotank, Jerome, in a move seemingly inspired by John-117’s jump from orbit to atmosphere in 2552, proceeded to jump out of the newly-formed opening, dodging debris as he descended to the Ark's surface.[8]
Stopping Banished reinforcements[edit]

- "When a new ring is launched, the Ark activates access points so sentinels can finalize preparations. Atriox must be using these points to send his troops up."
- — Ellen Anders to James Cutter[22]
With Anders having initiated the Halo ring's deployment sequence, the Spirit of Fire sent forces to the superweapon's surface in order to find the Control Room. However, using one of the Ark's access points, the Banished were able to instantaneously send troops to the ring, slowly overwhelming the UNSC forces there.[22]
When a unit of Marines arrived at the access point's location, they found that the Banished vehicle barricade was too strong to push through. However, the UNSC forces soon managed to locate a Scarab under repair, whose focus cannon was strong enough to destroy the enemy blockade. With the Spirit of Fire having launched Archer missiles at the Banished troops surrounding the surviving Marines, Douglas and Alice were dropped off to reinforce their assault on the Scarab. After fighting through Banished forces preparing to transit to the ring, the unit approached the damaged Scarab and encountered its commander, Orda Val 'Saham, who they soon neutralized. With Douglas in control of the Scarab, he and the Marines were soon able to rid the area of Banished forces. Reaching the access point, Alice and Douglas received orders from Captain Cutter to proceed through the portal and destroy it behind them, then move on to assist with fighting the Banished forces on the ring in order to reach the Control Room.[22]
Battle of Installation 09[edit]

- "We've got to get to that Control Room so I can deactivate the Halo's firing systems and plant our signal beacon. If I can't do that, we won't be sending an SOS back home, we'll be sending a very large and very live bomb."
- — Ellen Anders to James Cutter[4]
After reuniting with Jerome on the Halo, Red Team led Marine forces to Alpha Base and defeated the Banished forces there. However, the Banished had already set up a shield sealing off the ring's Control Room, where Anders was to disable the firing systems and plant the comms beacon. Suddenly, a Retriever sentinel appeared, wreaking havoc on the UNSC forces before the Marines could send it into retreat. Realizing the sentinel could be used to their advantage, Anders told Red Team that if they could secure three Control Towers, she would be able to take control of the Retriever. Making their way to the towers, the Marines defeated the surrounding Banished forces and secured them, allowing Anders to take control of the massive sentinel. Using the machine's main weapon, Anders destroyed the shield generator in one blast, allowing her to access the Control Room. As the professor descended, the Spartans and Marines stayed behind to defend the structure.[4]
While Anders worked on accessing the ring's firing systems, the Marines set up turret emplacements and defended against incoming Banished forces. With support from the Spirit of Fire and Marine reinforcements, the UNSC held back heavy Banished reinforcements long enough for Anders to access the weapons systems and plant the distress beacon. However, Anders reminded Cutter that the Banished still needed to be removed from the ring but that she found a way to speed that up. Telling Cutter to clear UNSC forces from the immediate area, Anders proceeded to manipulate the Halo's gravity anchors, creating an energy shield around the remaining Banished forces before ejecting the land they were standing on into space.[20]

With the Banished forces on the ring dealt with, Red Team and the Marines evacuated to the Spirit of Fire immediately. However, Anders realized she didn't have enough time to reach them before the ring transitioned into slipspace. With Anders out of reach, Cutter got to work planning their next offensive against the remaining Banished forces,[6] while Atriox prepared his army for their inevitable next battle.
The Spirit of Fire crew's attempt to deploy the new Halo to the Soell system was unsuccessful. The ring was forcibly pulled out of slipspace on its way by a Guardian, which Anders encountered upon returning to the surface.[20]

Operation: SPEARBREAKER[edit]
- Main article: Operation: SPEARBREAKER
A month after the departure of the Halo, the Spirit of Fire picked up a cloaked area. O'Sullivan, the supervisor of the scout drones, informed the captain and Sunray 1-1 along with India Company was deployed to the battlefield to discover what the Banished were up to. Reaching their destination, they found a Forerunner Despair-class fighter docked inside one of the installation's hangars, and the Banished attempting to launch it to destroy Spirit of Fire. Colony made an attempt to stop them by deploying multiple Goliaths and a Hunter Captain, but their efforts were thwarted by Sunray 1-1 who destroyed the fighter before it could be launched, thwarting the plan.[18][24]
Yapyap's rebellion[edit]
Sometime during the battle Yapyap the Destroyer abandoned the Banished with forces under his command in favor of locating the fabled Golden Methane Hydrate Mines of Sabator, several Sangheili and Mgalekgolo also defected to join his rebellion.[48] His Throne of Woe somehow enabled him to receive Unggoy reinforcements.[49]

Awakening a nightmare[edit]
- "I told you not to go inside. For good reason!"
- — Atriox to Voridus[9]
- Main article: Outbreak on Installation 00
Two months after the departure of Installation 09, Atriox sent two Warlords, Voridus and Pavium to salvage starships near the ruins of High Charity and scout the dome surrounding it. During the salvaging operation, Voridus disabled the Sentinel defense network around High Charity having his forces fight against many sentinels and a few scattered UNSC forces.[19] Some UNSC Marines and vehicles from the Spirit of Fire's crew fell to Flood infection and were assimilated.[1] Piercing a hole through the shield surrounding High Charity with a Scarab, Voridus hoped to salvage equipment from the destroyed Covenant holy city. However, he and his forces inadvertently released the Flood that had managed to survive Installation 08's firing.[1] Following several retreats, Pavium and his forces were able to hold off the Flood long enough for Voridus and his strike team to reactivate the Sentinel defense network.[50] Using Eklon'Dal Workshop Antlions and eventually a Retriever Sentinel, Pavium and Voridus were able to destroy a Proto-Gravemind near High Charity moments before it could turn into a Gravemind.
With the Sentinels reactivated and the Proto-Gravemind destroyed, the Flood were once again contained by the Sentinels and the Banished.[9] The Banished and the Sentinels ultimately succeeded in "scouring" the parasite from High Charity.[10]
Following the destruction of the Flood, the Banished raided High Charity's ruins and pillaged its data stores, retrieving, amongst other things, the access code to Anodyne Spirit.[10] Following the outbreak, some Banished humans had defected to the forces of the UNSC Spirit of Fire.[35]
Raiding the Keyship[edit]
- Main article: Raid on Anodyne Spirit
In order to leave the Ark and return with Banished reinforcements, Atriox sent his forces to raid Anodyne Spirit, the Prophet of Truth's keyship that was landed on the Ark during the Battle of Installation 00 in 2552. The Banished came into conflict with remnants of the Dhas Bhasvod's Covenant who had survived inside the keyship, but nevertheless managed to retrieve the shards of the Menachite Forerunner crystal that was collected by Tartarus' forces and presented to the Prophet of Truth following the Massacre at Eridanus Secundus.[10]
Reconnecting with Reach[edit]
- Main articles: Operation: WOLFE, Battle for Translocation portal Epsilon
After getting the crystal, Atriox managed to send a message to Banished War Chief Escharum in the Milky Way galaxy, instructing him to locate the Menachite portal complex on Reach, aware of its existence and general location due to records of Tartarus, calling it the Portal Under the Mountain. Atriox's stated plan was to return to the Ark with reinforcements from the Banished forces that he had left behind in the Milky Way. Once the portal was ready, Atriox would use the shards of the crystal to open it on the Ark's end.[51]
As the Banished and their allies the Keepers of the One Freedom, the Legion of the Corpse-Moon and the Ravaged Tusks searched for the portal, and found it by tailing Blue Team on their search in the ruins of CASTLE Base. The Banished to the portal complex where one of the Ferrets, working undercover in the Keepers, activated the portal mechanism. A slipspace portal connecting the Ark and Reach opened, allowing Atriox to fly through it in a Eklon'Dal Workshop Lich and return to the Milky Way galaxy along with several of his top soldiers, leaving behind thousands of Banished forces to continue the fight on the Ark in his absence.[11] With the portal open between Reach and the Ark, the fanatical Keepers of the One Freedom seized the opportunity to hijack Atriox's Eklon'Dal Workshop Lich and use it to reach the Ark and begin the Great Journey by firing the Halo Array. Despite Atriox's warnings that the Ark still had thousands of Banished forces defending it, the Keepers were undeterred and departed through the portal for the Ark, unaware that their human companions are actually the Ferrets, an undercover team of ONI operatives made up mainly of Spartan-III's.
Despite his stated intention to return to the Ark with more Banished reinforcements, Atriox instead departed from Reach in Escharum's intrusion corvette, stating that the Banished had a greater purpose to attend to and he was sure that the Banished forces that he had left behind could hold the Ark in his absence. The portal collapsed shortly thereafter, preventing anyone else from traveling to or from the Ark through it.[11]
Attempting to Start the Great Journey[edit]

- Main articles: Battle for Translocation portal Epsilon, Battle of Epsilon Clarion
In October 2559, the detachment of the Keepers of the One Freedom led by Castor arrived on the Ark in the midst of a three-way battle for control of the slipspace portal between the UNSC, Banished and Dhas Bhasvod's Covenant. After crashing, Castor formed an alliance with Prelate Dhas Bhasvod, the leader of the Covenant loyalists. The Forerunner Archeon-class ancilla Intrepid Eye, who was believed to have been destroyed during Operation: BIRD IN HAND, revealed herself and resumed her guise as "the Oracle" in order to manipulate Castor for her own ends. Really, the ancilla intended to fire the Halo Array - in turn destroying the Domain and rendering Cortana vulnerable to Intrepid Eye. The ancilla then intended to use the Ark's resources to reseed the galaxy and tailor humanity over the course of hundreds of millennia to be ready to take up the Mantle of Responsibility.[citation needed]
The combined Keepers/Covenant alliance set out to one of the installation's Cartographers in order to find a new facility to fire the Halo Array from, the original Citadel having been destroyed in the midst of the upheaval caused by the Ark's repairs. Veta Lopis left behind a message capsule in an attempt to alert Romeo-008, a reconnaissance Pelican that was observing the battle from nearby, to the threat. However, the message was instead found by Pavium and Voridus who rallied the Clan of the Long Shields to stop Castor. At the Cartographer, Lopis' Reclaimer status was used to get the location of the Epsilon Clarion facility, the only one of the Ark's Clarion facilities that was either accessible or operable, from the facility's monitor. During this time, Intrepid Eye was able to confirm Lopis' identity as an ONI spy. This reveal lead to Castor, blademaster Inslaan 'Gadogai and Bhasvod using the Ferrets and a captured Banished data pad to draw their two enemies into a trap where they would fight each other, thus buying time for the allied forces to complete their mission.
Before the Keepers and Covenant could leave the Cartographer, the Banished launched a brief attack on their landed ships, causing the Aggressor Sentinels to join the battle as well. Ultimately, Bhasvod's command Phantom was crippled and had to be abandoned along with the Covenant's Ghosts and half of their air support - while the Banished suffered no losses. Recognizing that their cover had been blown, the Ferrets got Romeo-008 to extract them. U, the trap worked and Vultures from the Spirit of Fire destroyed nine of the ten Seraphs belonging to the Clan of the Long Shields. A short time later, the Banished forces suffered an ambush by the Covenant's three Seraphs in the Maze Rift, but the remaining Banished Seraph was able to take them out and stop the ambush.[citation needed]
Knowing that they would never reach Epsilon Clarion in time, Lopis had the Pelican broadcast the coordinates in the clear, alerting the Banished to where they needed to go, allowing the Long Shields to set up fortifications around Epsilon Clarion. However, Intrepid Eye was able to direct them to a defensive tower nearby where the facility could be accessed via a light bridge and tunnel. Somehow anticipating this, the Banished attacked the Phantoms as they landed the ground forces, destroying one and chasing the other as it flew off. Romeo-008 then attacked with salvos of missiles that killed most of the Covenant and Keepers forces, leaving only a few including Castor, Bhasvod, 'Gadogai, Arcas and Krelis. It also destroyed most of the devices that Intrepid Eye was residing inside of, causing her to lose most of the data that she had gathered since her reactivation six years earlier. Nevertheless, Intrepid Eye managed to make contact with the facility's Facilitator-class ancilla and convinced it to activate the light bridge and allow them across while defending against the Banished. Using Sentinels and a series of avalanches, the Epsilon Clarion ancilla succeeded in obliterating the Long Shields, leaving only Pavium, Vordius and a few other survivors. At least most of the 'Ahtulai Workshop Banshees were destroyed by the Sentinels and the rest eventually retreated. During this time, the Ferrets assaulted the few enemy survivors and managed to eliminate their human followers in order to prevent them from being used as Reclaimers.[citation needed]
Recognizing the continuing threat if Intrepid Eye was not destroyed and allowed to attempt to fire the Array with or without a Reclaimer, the Ferrets came up with a plan to allow the ancilla to download herself into Epsilon Clarion's systems which would leave her in one place and thus vulnerable to destruction. To facilitate this plan, Lopis allowed herself to be captured while the other Ferrets set up a signal repeater and followed her in an effort to rescue their leader, although Mark-G313, severely wounded and unable to keep up, remained behind to hold off an attacking Sentinel. Spotting their passage across the light bridge, Pavium, Voridus and their few remaining forces attempted to ambush the surviving Keepers and the Covenant, but the Ferrets alerted them with gunfire as the ambush would ruin their own plan. The fight left Pavium and Voridus as the only survivors on the Banished side, Krelis mortally wounded and only Castor, Bhasvod, 'Gadogai and Arcas left of the Keepers and Covenant forces.[citation needed]
After entering Epsilon Clarion, Intrepid Eye prepared to transfer herself into the facility's systems, but Lopis declared a logic plague emergency in order to buy more time. This caused the facility's ancilla to immediately cut off contact with the rest of the Ark's systems and block Intrepid Eye's entry. As a result, Intrepid Eye was forced to manifest an avatar of herself and argue with the ancilla about allowing them to activate the Array. In the process, Castor learned the truth about Halos purpose as a last resort weapon against the Flood rather than a means of Transcendence by triggering the Great Journey. Intrepid Eye eventually managed to trick the ancilla into granting her access and once she was in, Lopis signalled the Spirit of Fire to begin an orbital bombardment with EMP MAC rounds. Although Intrepid Eye raised the facility's shields, the EMPs were enough to damage the power systems and they would inevitably bring down the shield, allowing the MAC rounds to destroy Epsilon Clarion. In addition, any EMP powerful enough to take down the shield would also be powerful enough to wipe out Intrepid Eye's code and destroy the ancilla. Effectively trapped, Intrepid Eye managed to force Epsilon Clarion's ancilla to open the control room and attempted to have Castor use Lopis to trigger Halo's activation, intending to escape by piggybacking on the activation signal. However, Castor's faith had been shattered by what he had witnessed, and he turned against both the ancilla and Bhasvod as Ash-G099 and Olivia-G291 stormed Epsilon Clarion in order to rescue Lopis. A skirmish ensued that left Ash and Olivia severely wounded, Arcas dead and Bhasvod thrown into a pit. With Epsilon Clarion on the verge of destruction and no longer intending to go through with their plan to fire the Halo Array, 'Gadogai convinced Castor to flee with the Ferrets doing the same. The Spirit of Fire's bombardment destroyed both Epsilon Clarion and Intrepid Eye, taking with it the Ark's ability to fire the Array until a new Clarion facility could be constructed.[citation needed]
In the aftermath of the bombardment, the Spirit of Fire dispatched Red Team in a Pelican to perform a search-and-rescue mission for the Ferrets. Having survived his fall, Bhasvod attempted to attack Lopis, Ash and Olivia, but he was attacked and wounded by Mark before Bhasvod killed Mark. Bhasvod was left with his plan foiled and unable to, for the time being, recover the shards of the Menachite Forerunner crystal with which he intended to open a slipspace portal to Cloister and inform Jom G'e'qth that their plan had failed. Mark's sacrifice allowed Red Team to rescue the other Ferrets and recover Mark's body. The only survivors of the Long Shields, aside from possibly Thalazan, Pavium and Voridus decided to report to Let 'Volir that their actions had bought the Spirit of Fire enough time to launch its bombardment. Now the only survivors of their sect of the Keepers of One Freedom, Castor and 'Gadogai, symbolically destroyed Bhasvod's glaive despite it being fried by the EMP as it was the last surviving piece of equipment that had held Intrepid Eye before the ancilla's transfer into Epsilon Clarion.[citation needed] Because of the revelation of Halo's bitter truth, Castor decided to abandon the Keepers' faith.[52] Teams from the Spirit of Fire subsequently conducted a thorough search of the area and confirmed that Intrepid Eye had in fact been destroyed with no transmissions having been detected from Epsilon Clarion before, during or after the bombardment which had reduced whatever the ancilla might've been hiding into slag.[citation needed]
Ten days later, the Spirit of Fire held a funeral for Mark and John Cassidy, the co-pilot of Romeo-008 who had also lost his life in the fighting. Unable to return home, Lopis and the surviving Ferrets decided to accept Cutter's offer to join the crew of the Spirit of Fire and help them in their continuing fight against the Banished.[5]
Engagements[edit]
| ||||||||||||||||||||
Timeline[edit]

March 28, 2559[edit]
- UNSC Spirit of Fire arrives at Installation 00. All surviving crew is awakened and begin investigating Installation 00 following a distress signal from Isabel.
- Red Team are forced to retreat after Atriox and the Banished ambush them at Henry Lamb Research Outpost, with Alice-130 left behind to cover the evacuation.[3]}} The UNSC begin a series of offensive operations to cripple the Banished and their salvage operations.[53]
Unknown date (March 28-March 30)[edit]
- Alice-130 tracks a Banished convoy to a research camp and begins a campaign to rescue Marine prisoners, leading a small resistance movement - ultimately managing to link back up with Spirit of Fire.[54]
- Spirit of Fire forces, using intelligence gathered from the salvage base taken from the Banished, make an assault on the installation's Cartographer and successfully take it. This success allows the UNSC forces to discover how the Banished have spread their reach as effectively as they have, using the facility's slipspace translocation portals.[55][56]
March 30, 2559[edit]
- Ordo Val'Saham records his thoughts on the UNSC capture of the cartographer facility.[57]
Unknown date (March 30-April 2)[edit]
- UNSC forces make a series of assaults on the Banished portal controller sites, crippling their ability to move effectively across the installation. During the fighting, Decimus is killed and Enduring Conviction begins an attack on Spirit of Fire.[58]
- Banished forces make an assault on the portal site occupied by Alice-130's resistance forces, though are successfully repelled.[59]
- Assault on Enduring Conviction - a joint ground operation led by Spirit of Fire forces successfully co-opts a Forerunner particle cannon, and forces Enduring Conviction to retreat from its attack.[60] Simultaneously, a force led by Jerome-092 is able to reach the carrier's gravity lift and board the ship, using Isabel to take control of the energy projector and trigger the Ark into a self-defense measure - destroying Enduring Conviction.[61]
- Battle of Installation 09 - Following the destruction of Enduring Conviction a new Halo ring - Installation 09 - is released from the Ark's foundry. All available UNSC and Banished assets are scrambled to take control of the installation, ultimately culminating in a UNSC victory and the launch of the ring to the Soell system. Ultimately, the ring is intercepted by a Guardian.[62][63][64]
May 2559[edit]
- Operation: SPEARBREAKER, Major Vaughan leads India Company to destroy a Forerunner Despair-class fighter that Banished forces led by Colony had intended to use in order to destroy the Spirit of Fire.
June 4, 2559[edit]
- The Banished inadvertently releases the Flood from High Charity, Outbreak on Installation 00 begins.
June 5, 2559[edit]
- Warlord Pavium and Voridus successfully defeat the Proto-Gravemind, containing the threat of the Flood. The Flood is subsequently "scoured" from the wreckage of High Charity by the Banished and the Sentinels.
Unknown date (Between June 6 to July)[edit]
- The Banished successfully acquire an access code to the Anodyne Spirit during the scouring of High Charity.
- The Banished conducts a raid at the Covenant Loyalist's bastion, and successfully takes the Forerunner Crystal.
October 12, 2559[edit]
 This section needs expansion. You can help Halopedia by expanding it.
October 14, 2559[edit]
- The Battle of Epsilon Clarion results in the destruction of Intrepid Eye, Castor's detachment of the Keepers of the One Freedom, the Clan of the Long Shields and Epsilon Clarion, as well as the death of Mark-G313.
October 24, 2559[edit]
- Burial of Mark-G313. The surviving Ferrets officially join the Spirit of Fire crew and the continuing fight against the Banished.
Participants[edit]
UNSC[edit][edit]Starships[edit]
Military personnel[edit]
Artificial Intelligence[edit]
Units[edit]Ground forces[edit] |
Banished[edit][edit]Starships[edit]
Military personnel[edit]
|
Keepers of the One Freedom[edit]Military personnel[edit]
|
Gallery[edit]
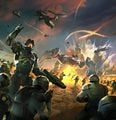
UNSC forces fight a Scarab.
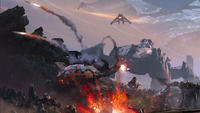
Concept art of the battle for Halo Wars 2
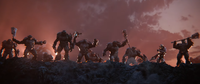
The Banished make their presence known.
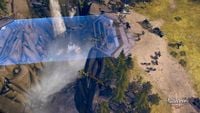
UNSC forces cross a light bridge.
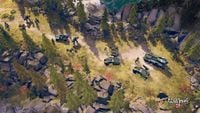
UNSC forces move across the Ark.
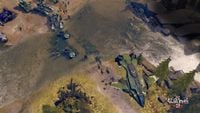
UNSC forces head towards Decimus' salvage operation.
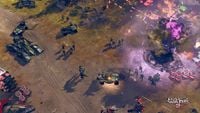
UNSC forces attack Decimus' salvage operation.
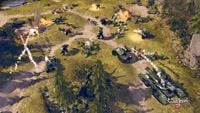
UNSC and Banished forces clash.
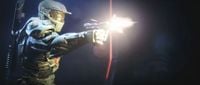
Jerome-092 infiltrates the Enduring Conviction.
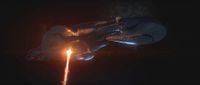
Enduring Conviction is bisected.

Atriox and Let 'Volir at the crash site of the Enduring Conviction
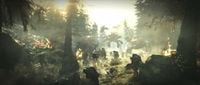
Banished forces fight for control of the Halo.

UNSC forces evacuate to Spirit of Fire.
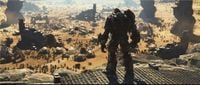
Atriox stands before his army in the aftermath of the battle on the Halo.

Sunray 1-1 in combat.
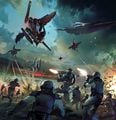
UNSC forces fighting Sentinels.
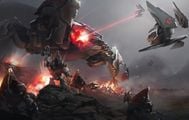
Voridus' Volatile Scarab heads for High Charity.
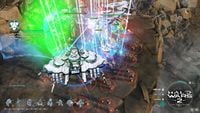
Forces under the command of Voridus engage Retriever Sentinels.
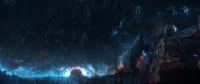
Voridus' Volatile Scarab pierces through High Charity's containment shield.
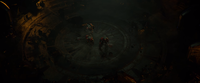
A trio of Banished Jiralhanae prepare to engage the Flood.
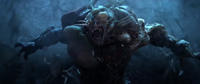
The Flood escape from High Charity.
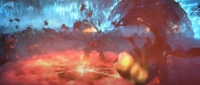
The Banished fight the Flood.
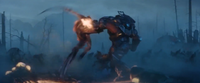
Voridus kills a Flood form with his gauntlet.
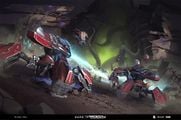
Pavium's forces hold the line before retreating.
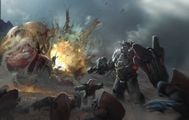
Pavium and Unggoy attack the Flood.
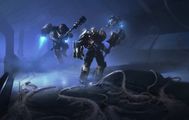
Voridus and two Jiralhanae Jumpers go to reactivate the Sentinels.
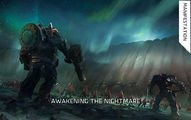
Pavium, Voridus, and some Unggoy stand before one of the Proto-Gravemind's tentacles.
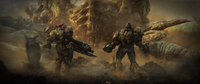
Pavium and Voridus roar in victory after killing the Proto-Gravemind.
Atriox crushes an infection form.
Aggressor Sentinels begin to contain the Flood once again.


List of appearances[edit]
- Know Your Enemy (First appearance)
- Halo Mythos (Indirect mention)
- Halo Wars 2
- Halo: Shadows of Reach (Indirect mention)
- Halo: Divine Wind
- Halo Infinite (Mentioned only)
- Halo: Outcasts (Mentioned only)
Sources[edit]
- ^ a b c d e f g h i Halo Wars 2, campaign level Fighting Retreat
- ^ a b c d e f g h i j k l m n o p q r s t u v w x y z aa ab ac ad ae af Halo Wars 2, campaign level The Signal
- ^ a b Halo Wars 2, Phoenix Logs: Alice-130 Report #1
- ^ a b c d e f Halo Wars 2, campaign level The Halo
- ^ a b c d e f g h i Halo: Divine Wind
- ^ a b c Halo Wars 2, Phoenix Logs: Beyond the Edge
- ^ a b c d e Halo Wars 2, campaign level Lights Out
- ^ a b c d e f g h Halo Wars 2, campaign level Under the Dark
- ^ a b c d e f g Halo Wars 2, campaign level Manifestation
- ^ a b c d e f g Halo: Shadows of Reach: Adjunct - Sacrifice
- ^ a b c d e f g h i j k l Halo: Shadows of Reach
- ^ a b c d e f g h i j k l m n o Halo Wars 2, campaign level A New Enemy
- ^ a b c d e f Halo Wars 2, campaign level Ascension
- ^ Halo: Divine Wind, chapter 11
- ^ Halo Wars 2, Phoenix Logs: Kinsano
- ^ a b c Halo Wars 2, Phoenix Logs: Major Vaughan
- ^ a b Halo Wars 2, Phoenix Logs: Shipmaster Let 'Volir
- ^ a b c d e f g h i j Halo Wars 2, campaign level Gatecrashers
- ^ a b c d e f Halo Wars 2, campaign level What Could Go Wrong?
- ^ a b c d e f Halo Wars 2, campaign level Last Stand
- ^ Halo: Divine Wind, chapter 1
- ^ a b c d e f Halo Wars 2, campaign level The Foundry
- ^ a b c d e f g h i Halo: Divine Wind, chapter 2
- ^ a b c d Halo Wars 2, campaign level Not on My Watch
- ^ a b c d Halo Wars 2, campaign level From the Deep
- ^ Halo Wars 2, Phoenix Logs: Mastodon
- ^ a b c Halo Wars 2, campaign level The Cartographer
- ^ YouTube - Halo, Halo Lore Stream: The Halo Array: 1:10:51 "There's some stuff in the secondary materials for Halo Wars 2, regarding the fleet that actually went to the Ark with the Enduring Conviction. [...] some of those ships are out at other installations that are near the Ark. So there's the Ark, and there's facilities that are out near the Ark that we don't see - some of those ships are out there doing that. You could say it's a cost function of how many ships we could show in the cutscenes and stuff. Yeah, it [Enduring Conviction] wasn't the only ship that was there." - Kenneth Peters
- ^ Halo Wars 2: Awakening the Nightmare
- ^ Halo Wars 2, Phoenix Logs: Phantom
- ^ a b c d e Halo Wars 2, campaign level One Three Zero
- ^ Halo Wars 2, Phoenix Logs: Wraith Invader
- ^ Halo Wars 2, Phoenix Logs: Methane Wagon
- ^ Halo Wars 2, Phoenix Logs: Grunt Goblin
- ^ a b Halo: Divine Wind, chapter 5, page 87: "'Some of the Banished humans defected to the UNSC,' Arcas said."
- ^ Halo Waypoint, Canon Fodder - Sweet Centennial (Retrieved on Sep 24, 2021) [archive]
- ^ Halo: Divine Wind, chapter 4
- ^ Halo: Divine Wind, chapter 7
- ^ a b c d e f g h i j Halo Wars 2, campaign level Light the Fuse
- ^ Halo: Warfleet, page 48
- ^ Halo: Last Light
- ^ Halo: Retribution
- ^ Halo 5: Guardians, campaign level Guardians
- ^ Halo Mythos, page 202
- ^ Halo Wars 2, Phoenix Logs: The Graveyard
- ^ Halo Wars, campaign level Escape
- ^ a b c d Halo Wars 2, campaign level Hold the Line
- ^ Halo Wars 2, Phoenix Logs: Yapyap The Destroyer
- ^ Halo Wars 2, Phoenix Logs: Cannon Fodder
- ^ Halo Wars 2, campaign level The Archive
- ^ Halo: Shadows of Reach, chapter 3
- ^ Halo Encyclopedia (2022 edition), page 247
- ^ Halo Wars 2, campaign level A New Enemy: Context in this level's cutscene indicate it takes place more-or-less immediately following the previous level.
- ^ Halo Wars 2, campaign level One Three Zero
- ^ Halo Wars 2, campaign level Ascension
- ^ Halo Wars 2, campaign level The Cartographer
- ^ Halo Wars 2, Phoenix Logs: A Split Heart is Easily Conquered
- ^ Halo Wars 2, campaign level Lights Out
- ^ Halo Wars 2, campaign level From The Deep
- ^ Halo Wars 2, campaign level Hold the Line
- ^ Halo Wars 2, campaign level Under the Dark
- ^ Halo Wars 2, campaign level The Foundry
- ^ Halo Wars 2, campaign level The Halo
- ^ Halo Wars 2, campaign level Last Stand
| ||||||||||||||||||||||||||||||||


