Battle of Mombasa: Difference between revisions
From Halopedia, the Halo wiki
m (→Participants) |
|||
| (140 intermediate revisions by 26 users not shown) | |||
| Line 1: | Line 1: | ||
{{ | {{Status|Canon}} | ||
{{Battle infobox | {{Battle infobox | ||
|prev=[[Operation: FIRST STRIKE]] | |prev=*[[Operation: FIRST STRIKE]] | ||
|conc=[[ | *[[Battle of October 10]] | ||
|next=[[Battle of Ross Island]] | |conc=[[Raid on the Threshold gas mine]] | ||
|next=*[[Second Battle of New Mombasa]] | |||
*[[Battle of Ross Island]] | |||
|name=Battle of Mombasa | |name=Battle of Mombasa | ||
|image=[[File: | |image=[[File:Battle of Mombasa compilation.jpg|301px]]<br>Clockwise from top left: [[M12B Warthog]]s drive along a ruined highway in [[Old Mombasa]]; [[civilian]]s fleeing by [[Human marine craft|watercraft]] during the battle; an image of [[John-117]] taken by [[Benjamin Giraud]] during the battle; a {{Pattern|Protos|Scarab}} destroyed in Old Mombasa; the ''[[Solemn Penance]]'' jumping to [[slipspace]] over the city; elements of [[Alpha-Nine]] observing a {{Pattern|Ket|battlecruiser}} at the conclusion of the battle. | ||
|conflict=[[Human-Covenant War]] | |conflict=[[Human-Covenant War]] | ||
|date=[[2552#October|October | *[[Battle for Earth]] | ||
|place=[[Mombasa]], [[Kenya | |date=[[2552#October|October 20–21, 2552]]{{Ref/Reuse|bnet}}{{Ref/Reuse|waypoint}}{{Ref/Reuse|waypointvergil}}{{Ref/Note|Id=dateend|Text=While no date of the end of the Battle of Mombasa was specified, the sunrise seemingly appears in the ''[[Coastal Highway]]'' level in ''[[Halo 3: ODST]]'' even after the nightfall in the previous levels. Also given that Truth's excavation fleet arrived on October 21 as stated by ''[[Halo Waypoint]]'' presumably referring to the same newly-arrived fleet in the level, It is likely that the ''Coastal Highway'' level, hence the end of Battle of Mombasa, took place on morning of October 21.}} | ||
|result=Strategic [[Covenant]] victory | |place=[[Mombasa]], [[Kenya]], [[East African Protectorate]] | ||
*Covenant occupation of Mombasa. | |result='''Strategic [[Covenant]] victory''' | ||
* | *Covenant occupation and destruction of Mombasa via [[glassing]].{{Ref/Reuse|coastal}} | ||
*Rediscovery of [[Portal at Voi|the Portal]]. | **Rediscovery of [[Portal at Voi|the Portal]].{{Ref/Reuse|coastal}} | ||
*[[Huragok]] [[Quick to Adjust]] defects and gives knowledge to the UNSC.{{Ref/Site|Id=Catalog|URL=https://www.halowaypoint.com/en-us/forums/db05ce78845f4120b062c50816008e5d/topics/is-there-an-actual-name-for-vergil/65913c8a-e2e7-42c0-8fed-c11c3da84d4e/posts?page=1#post11|Site=Halo Waypoint|Page=Is there an actual name for Vergil?|D=6|M=5|Y=2021}} | |||
*[[Huragok]] [[Quick to Adjust]] | *Prophet of Regret retreats to [[Installation 05|Delta Halo]], where he is later [[Assassination of the Prophet of Regret|killed]] by [[John-117]].{{Ref/Reuse|metropolis}} | ||
*Prophet of Regret | |side1=*{{Icon|UNSC HCW}} [[United Nations Space Command|UNSC]] | ||
|side1=*[[United Nations Space Command]] | **{{Icon|Navy}} [[UNSC Navy]] | ||
*[[New Mombasa Police Department]] | **{{Icon|Army}} [[UNSC Army]] | ||
|side2=[[Covenant | **[[UNSC Air Force]] | ||
**[[UNSC Marine Corps]] | |||
*{{Icon|NMPD}} [[New Mombasa Police Department|NMPD]] | |||
*[[Civilian]] militias | |||
**[[Colonial Militia]]{{Ref/Reuse|mombasastreets}} | |||
|side2={{Icon|Covenant FB}} [[Covenant]] | |||
|commanders1= | |commanders1= | ||
*[[Unidentified colonel]]† | *[[Unidentified colonel]]†{{Ref/Reuse|upliftreserve}} | ||
*[[Commander|CDR]] [[Miranda Keyes]] | *[[Commander|CDR]] [[Miranda Keyes]]{{Ref/Reuse|outskirts}} {{C|Pre-Slipspace}} | ||
*[[Captain (ground forces)| | *[[Captain (ground forces)|CAPT]] [[Veronica Dare]]{{Ref/Reuse|tayariplaza}} {{C|Post-Slipspace}} | ||
*[[Lieutenant]] [[Parisa]] | *[[Lieutenant|LT]] [[Parisa]]{{Ref/Reuse|palace}} | ||
*[[Master Chief Petty Officer|MCPO]] [[John-117]] | *[[Master Chief Petty Officer|MCPO]] [[John-117]]{{Ref/Reuse|outskirts}} {{C|Pre-Slipspace}} | ||
*[[Sergeant Major| | *[[Sergeant Major|SGTMAJ]] [[Avery Junior Johnson|Avery Johnson]]{{Ref/Reuse|outskirts}} {{C|Pre-Slipspace}} | ||
*[[Staff Sergeant|SSGT]] [[Banks|Marcus Banks]]{{Ref/Reuse|outskirts}} {{C|Pre-Slipspace}} | |||
*[[Staff Sergeant| | |commanders2=*[[Hierarchs|High]] [[Prophet of Regret]]{{Ref/Reuse|outskirts}} {{C|Pre-Slipspace}} | ||
|commanders2=*[[Prophet of Regret]] | *[[Hierarchs|High]] [[Prophet of Truth]]{{Ref/Reuse|waypoint}} {{C|Post-Slipspace}} | ||
*[[Prophet of Truth]] | |||
|forces1= | |forces1= | ||
* | *[[UNSC Home Fleet|Home Fleet]] | ||
**{{ | **3+ [[UNSC frigate|frigates]]{{Ref/Novel|Id=goo186|Novel=Halo: Ghosts of Onyx|Page=186}} {{C|Pre-Slipspace}} | ||
* | ***1+ {{Class|Stalwart|light frigate}}{{Ref/Reuse|outskirts}} | ||
**{{ | ***1+ {{Class|Paris|heavy frigate}}{{Ref/Reuse|Id=goo186}} | ||
*[[ | **1+ [[UNSC destroyer|destroyer]]{{Ref/Site|Id=newmombasa|URL=https://www.halowaypoint.com/en-us/universe/locations/new-mombasa|Site=Halo Waypoint|Page=New Mombasa|D=20|M=07|Y=2021}} | ||
*[[ | **2+ [[prowler]]s{{Ref/Reuse|Id=goo186}} {{C|Pre-Slipspace}} | ||
*[[ | ***1+ [[UNSC corvette|stealth corvette]]{{Ref/Reuse|Id=goo186}} | ||
*[[ | ***1+ {{Class|Sahara|heavy prowler}}{{Ref/Reuse|Id=goo186}} | ||
**[[ | **[[Fifth Fleet]] | ||
**[[ | ***1+ {{Class|Marathon|heavy cruiser}}{{Ref/Reuse|preparetodrop}} {{C|in low orbit}} | ||
**[[ | *2+ {{Class|Crassus|supercarrier}}s{{Ref/Map|Id=longshore|Game=Halo 3|Map=Longshore}} | ||
***[[ | *Multiple [[F-99 Wombat]]s{{Ref/Reuse|Id=upliftreserve}} | ||
**[[ | *1 stolen [[Kez'katu-pattern Phantom|T-52 Phantom]]{{Ref/Reuse|kikowani}} {{c|Post-Slispace}} | ||
*1 [[SPARTAN-II Program| | *Multiple [[D77-TC Pelican]]s{{Ref/Reuse|outskirts}} | ||
**[[ | **Multiple [[D77C-NMPD Pelican]]s{{Ref/Reuse|ONIalphasite}} | ||
|forces2=* | *Multiple [[AV-22 Sparrowhawk]]s{{Ref/Reuse|Id=ss1}} | ||
* | *1+ [[UH-144 Falcon]]{{Ref/Map|Id=breakneck|Game=Halo: Reach|Map=Breakneck}} | ||
** | *Multiple [[AV-14 Hornet]]s{{Ref/Reuse|Id=ss1}} | ||
**Numerous [[ | *Multiple [[M312 Elephant]]s{{Ref/Reuse|Id=ss3}} | ||
**Numerous [[ | *Several [[Olifant]]s{{Ref/Reuse|coastal}} | ||
**Numerous [[ | *[[M808 Scorpion]] | ||
**Numerous [[ | **Multiple [[M808B Scorpion]]s{{Ref/Reuse|metropolis}} | ||
**Numerous [[ | **Multiple [[M808C Scorpion]]s{{Ref/Reuse|kizingoboulevard}} | ||
**[[ | *Multiple [[M850 Grizzly|M850 Grizzlies]]{{Ref/Reuse|ope}} | ||
**[[ | *[[M12 Warthog]] | ||
**[[ | **Multiple [[M12 Chaingun Warthog]]s{{Ref/Reuse|outskirts}} | ||
**[[ | **Multiple [[M12G1 Gauss Warthog]]s{{Ref/Reuse|metropolis}} | ||
**[[ | **Multiple [[M831 Troop Transport Warthog]]s{{Ref/Reuse|coastal}} | ||
**[[ | *Multiple [[M274 Mongoose]]s{{Ref/Reuse|mombasastreets}} | ||
**[[ | *Numerous ground forces | ||
|casual1=* | **1 [[SPARTAN-II Program|Spartan-II]]{{Ref/Reuse|outskirts}} {{C|Pre-Slipspace}} | ||
*Majority of NMPD forces | **Numerous [[UNSC Marine Corps|marines]]{{Ref/Reuse|outskirts}} | ||
* | **Numerous [[Orbital Drop Shock Troopers|ODSTs]]{{Ref/Reuse|outskirts}} | ||
* | **Numerous [[New Mombasa Police Department|NMPD]] personnels{{Ref/Reuse|nmpdhq}} | ||
|casual2=*Heavy infantry casualties | **Numerous armed [[civilian]]s{{Ref/Reuse|HGN}} | ||
* | |forces2= | ||
*All remaining Sangheili | *[[Fleet of Sacred Consecration]] | ||
**1 {{Class|CAS|assault carrier}}{{Ref/Reuse|outskirts}} {{C|Pre-Slipspace}} | |||
**3+ {{Pattern|Ket|battlecruiser}}s{{Ref/Reuse|kikowani}}{{Ref/Reuse|firsttwelvehours}} | |||
*[[Truth's fleet]]{{Ref/Reuse|waypoint}} {{C|October 21}} | |||
**Massive number of ships{{Ref/Reuse|waypoint}} | |||
***3+ {{Class|CAS|assault carrier}}s{{Ref/Reuse|coastal}} | |||
***Multiple {{Pattern|Ket|battlecruiser}}s{{Ref/Reuse|coastal}} | |||
*Numerous air vehicles | |||
**Numerous {{Pattern|R'shwupa|Phantom}}s{{Ref/Reuse|Id=ss3}} | |||
**Numerous [[Kez'katu-pattern Phantom|T-52 Phantoms]]{{Ref/Reuse|outskirts}} | |||
**Numerous [[Taaku Xur-pattern Spirit|T-28 Spirits]]{{Ref/Reuse|Id=ss1}} | |||
**[[Type-26 Banshee|T-26 Banshee]] | |||
***Numerous [[Oghal-pattern Banshee|T-26A Banshees]]{{Ref/Reuse|metropolis}} | |||
***Numerous [[Is'belox-pattern Banshee|T-26B Banshees]]{{Ref/Reuse|opa}} | |||
***Numerous [[Irdnekt-pattern Banshee|T-26C Banshees]]{{Ref/Reuse|kizingoboulevard}} | |||
*Numerous ground vehicles | |||
**2+ [[Protos-pattern Scarab|T-47A Scarabs]]{{Ref/Reuse|outskirts}} | |||
**Multiple [[Deutoros-pattern Scarab|T-47B Scarabs]]{{Ref/Reuse|kikowani}}{{Ref/Reuse|coastal}} | |||
**Numerous [[Zo'op-pattern Weevil|T-48 Weevils]]{{Ref/Reuse|outskirts}} | |||
**Numerous [[Zurdo-pattern Wraith|T-26 Wraiths]]{{Ref/Reuse|metropolis}} | |||
***Several [[Ogab'd-pattern anti-aircraft Wraith|T-52 AA Wraiths]]{{Ref/Reuse|Id=kikowani}} | |||
**Numerous [[Karo'etba-pattern Ghost|T-32 Ghosts]]{{Ref/Reuse|outskirts}} | |||
**Numerous [[Ruwaa-pattern Shadow|T-29 Shadows]]{{Ref/Reuse|outskirts}} | |||
*Numerous ground forces | |||
**[[Jiralhanae]]{{Ref/Reuse|Id=tayariplaza}} | |||
**[[Sangheili]]{{Ref/Reuse|outskirts}} {{c|Pre-slipspace}} | |||
**[[Huragok]]{{Ref/Reuse|Id=kikowani}} | |||
**[[Unggoy]]{{Ref/Reuse|outskirts}} | |||
**[[Kig-Yar]]{{Ref/Reuse|outskirts}} | |||
**[[Mgalekgolo]]{{Ref/Reuse|outskirts}} | |||
**[[Yanme'e]]{{Ref/Reuse|outskirts}} | |||
|casual1= | |||
*Heavy infantry and civilian casualties{{Ref/Game|ODST|Detail=Opening scroll}} | |||
**Majority of NMPD forces | |||
**Many ODSTs | |||
**Most of Scorpions{{Ref/Reuse|kizingoboulevard}} | |||
|casual2=*Heavy infantry casualties | |||
**Many Scarabs{{Ref/Reuse|turf}} | |||
***2+ {{Pattern|Protos|Scarab}}s{{Ref/Reuse|metropolis}} | |||
***1+ {{Pattern|Deutoros|Scarab}}{{Ref/Reuse|kikowani}} | |||
**All remaining Sangheili forces{{Ref/Reuse|upliftreserve}}{{Ref/Reuse|waypoint}} {{c|killed by Jiralhanae under Truth's orders}} | |||
}} | }} | ||
{{Quote|This is the only place on [[Earth]] the [[Covenant]] decided to land. That [[Prophet of Regret|Prophet]] is going to tell us why.|[[Fleet Admiral]] [[Terrence Hood]]{{Ref/Reuse|outskirts}}}} | |||
The '''Battle of Mombasa''', also known as the '''Battle of New Mombasa''',{{Ref/Reuse|opa}} was a large-scale [[battle|engagement]] of the [[Battle for Earth]], taking place in late [[2552#October|October 2552]]. Over the course of the battle, [[Covenant Empire|Covenant]] forces attempted to capture the [[city]] of [[Mombasa]], [[Kenya]] before it was quickly retaken in a matter of around one hour by the [[United Nations Space Command|UNSC]].{{Ref/Level|Id=outskirts|H2|Outskirts}}{{Ref/Level|Id=metropolis|H2|Metropolis}} However, after the [[High Prophet of Regret]]'s retreat, the city remained occupied but now by the [[Prophet of Truth]] and his Jiralhanae loyalists.<ref name="bnet">[http://halo.bungie.net/News/content.aspx?type=topnews&cid=16989 ''Bungie.net'': Bungie Weekly Update: 01/23/09]</ref> In the aftermath of the battle, [[Portal at Voi|the Portal]] to [[Installation 00|the Ark]] was eventually found by the Covenant, which would prove to be a major determining factor in the final outcome of the [[Human-Covenant War]].{{Ref/Level|Id=coastal|ODST|Coastal Highway}}{{Ref|Id=waypoint|''Halo Waypoint'', [[Ten Twenty]]}} Years after the war's end, a movement known as "[[Project Rebirth]]" emerged to endorse the eventual rebuilding of Mombasa in the aftermath of the War.{{Ref/Reuse|pointprizes}} | |||
== | ==Background== | ||
After discovering and decrypting a [[Forerunner]] [[Luminary]] found on [[Meridian]], the [[Prophet of Regret]] of the [[Covenant]] was given [[Slipstream space|Slipspace]] coordinates to a planet called "Erde-Tyrene", which was home to a Forerunner [[Portal at Voi|slipspace portal]] leading to the [[Installation 00|Ark]] | ===Covenant Discovery=== | ||
After discovering and decrypting a [[Forerunner]] [[Luminary]] found on [[Meridian]], the [[High Prophet of Regret]] of the [[Covenant]] was given [[Slipstream space|Slipspace]] coordinates to a [[planet]] called "Erde-Tyrene", which was home to a Forerunner [[Portal at Voi|slipspace portal]] leading to the [[Installation 00|Ark]] — a facility highly important to the initiation of their [[Covenant religion|"Great Journey"]]. Unknown to Regret, Erde-Tyrene was [[human]]ity's homeworld, [[Earth]]. In his characteristic brash and ambitious manner, the Prophet of Regret, wishing to proceed with securing the Portal, took [[Fleet of Sacred Consecration|a hastily-assembled force]] of 15 warships to Earth.{{Ref/Game|Id=beholden|H2A|Detail=[[Terminal (Halo 2: Anniversary)|Terminal 14 - Beholden]]}} Though surprised to find not only a human presence on the planet, but a planet more fortified than any previously encountered human-held world, the [[Hierarchs|High Prophet]] deemed his mission important enough to proceed and utilized many tactics to ensure his safe arrival on the surface. The coordinates provided by the Forerunner information indicated that his quarry was around the area of [[Mombasa]], [[Kenya]]. Immediately after the [[Prophet of Truth]] learned of Regret's move, he sent [[Truth's fleet|a massive support and excavation fleet]] he had collected in secrecy to pick up where Regret had left off.{{Ref/Reuse|bnet}}{{Ref/Reuse|waypoint}} | |||
== | ===Mombasa=== | ||
The city was relatively lightly defended, with only [[New Mombasa Police Department|NMPD forces]] as well as some Marine units present, including the [[17th Marine Regiment]].{{Ref/Comic|Id=HGN|HGN|Detail=[[Second Sunrise Over New Mombasa]]}} Some additional military units had been transferred to the city, along with Earth's other tether cities, following the [[Fall of Reach]] to bolster their defenses in case of a Covenant invasion. These included [[E2-BAG/1/7]] as well as some [[UNSC Army]] forces, though Lieutenant [[Parisa]] of E2-BAG/1/7 was put out of action upon deployment.{{Ref/Anthology|Id=palace|Evo|[[Palace Hotel]]|Page=367}} | |||
Just prior to the Covenant's attack, [[Sadie Endesha]] was on her way to [[Magongo]] to enlist in the UNSC,{{Ref/Game|ODST|Detail=[[Sadie's Story]], Circle 1, Arc 1}} while photographer and journalist [[Benjamin Giraud]] was on a train heading to [[Old Mombasa]].{{Ref/Reuse|Id=HGN}} | |||
In the opening stages of the | ==Battle== | ||
===Surprise Covenant invasion=== | |||
{{Quote|No parking, violators will be ticketed and towed!|The Superintendent discussing the assault carrier hovering over New Mombasa with Sadie Endesha.{{Ref/Reuse|sscirc1arc3}}}} | |||
[[File:H2A - Pelicans.jpg|thumb|left|250px|UNSC reinforcements from the {{UNSCShip|In Amber Clad}} arrive in New Mombasa.]] | |||
On October 20, during the opening stages of the [[Battle for Earth]], a single {{Class|CAS|assault carrier}}, the ''[[Solemn Penance]]'', broke through the [[UNSC Home Fleet]]'s defensive lines and headed towards Earth's atmosphere.{{Ref/Level|H2|Cairo Station}}{{Ref/Reuse|HGN}} The ship slipspace jumped down to the city of [[New Mombasa]] in the [[East African Protectorate]].{{Ref/Reuse|sscirc1arc2}} There, the ship came to rest over the [[Uplift Nature Reserve]] deploying infantry and mechanized support.{{Ref/Reuse|upliftreserve}} One of the Covenant's first targets was the Mombasa [[Maglev train]] network.{{Ref/Map|H2|Terminal (map)|Terminal|Detail=Map description}} Despite the widespread Covenant deployment throughout Mombasa, the highest concentration of Covenant ground troops was directly below the carrier in its landing zone.{{Ref/Level|H2|Outskirts|Quote=The highest concentration of Covenant ground troops is directly below the carrier.|Quotee=Cortana}} Over the course of the battle, the Covenant deployed several [[Deutoros-pattern Scarab|Scarab]] assault platforms in both the old and new sections of Mombasa, with many of them targeting the city's space elevator.{{Ref/Anthology|Evo|[[Palace Hotel]]|Page=363}} The UNSC managed to trap and destroy many of them in the narrow streets of the city.{{Ref/Map|Id=turf|Game=H2|Map=Turf|Detail=Map description}} | |||
The Covenant also sent seven Huragok, including [[Quick to Adjust]], into [[Kikowani Station (location)|Kikowani subway station]], likely in search of the Forerunner structure underneath Mombasa. However, the six other Huragok instead freed Quick to Adjust from its explosive harness.{{Ref/Game|ODST|Detail=[[Sadie's Story]], Circle 6, Arc 2}} While the six others were killed, Quick survived and made its way into the data center. Doctor [[Daniel Endesha]] witnessed the event, and instructed [[Vergil]], a subroutine of the city Superintendent, to track Quick.{{Ref/Game|ODST|Detail=[[Sadie's Story]], Circle 6, Arc 3}} The Covenant would find out Quick's betrayal, and send forces into the Data Center to kill Quick or prevent its defection to the UNSC.{{Ref/Reuse|data}} | |||
At the time of the ship jumping down to the city, Sadie Endesha and numerous civilians had been kicked off a train in [[Old Mombasa]].{{Ref/Reuse|sscirc1arc2}} Covenant tanks that were very quickly deployed into the city,{{Ref/Game|Id=sscirc1arc3|ODST|Detail=Sadie's Story, Circle 1, Arc 3}} bombarded and destroyed the train in the vicinity of [[Makupa Station]].{{Ref/Game|Id=sscirc2arc1|ODST|Detail=Sadie's Story, Circle 2, Arc 1}} NMPD Commissioner [[Kinsler]] and officer [[Mike Branley]] soon arrived on the scene, taking Sadie away from the crowd and headed for a police bunker outside the city.{{Ref/Reuse|sscirc2arc1}} Over the course of the battle, some civilians took up arms in an attempt to defend their city, joining the Marines under command of [[unidentified Marine officer (Mombasa)|a Marine officer]].{{Ref/Reuse|HGN}} These "militias" were used as a [[propaganda]] tool by the NMPD, broadcasting their exploits over PA systems.{{Ref/Reuse|sscirc5arc2}} Though a number of the stories of the militias appear to have been fabricated by [[Stephen (Mombasa)|Stephen]] at NMPDHQ, including that of "Harris 'Two-Shot' Kibaki.{{Ref/Game|ODST|Detail=Sadie's Story, Circle 8, Arc 3}} With the Mombasa Tether being shut down, citizens were forced to escape the city on foot or by car.{{Ref/Game|Id=sscirc5arc2|ODST|Detail=Sadie's Story, Circle 5, Arc 2}} The militias and armed citizens allowed for most of the people of New Mombasa to evacuate from the city to Old Mombasa using boats destined for other surrounding cities.{{Ref/Reuse|HGN}} | |||
More [[UNSC Marine Corps]] and [[UNSC Army]] units later poured into the region after the initial attack, some of which arriving from [[Diego Garcia]] near India.{{Ref/Book|[[Halo Encyclopedia (2009 edition)]] (2011 edition)|Page=296}} | |||
=== | ====UNSC insertion==== | ||
[[File: | {{Quote|no=three|Sergeant [[Avery Johnson]]|Pelican Pilots|[[Cortana]]|q1=Dear Humanity...we regret being alien bastards. We regret coming to Earth. And we most definitely regret that the Corps just blew up our raggedy-ass fleet!|q2=Oo-rah!|q3=Regret is a name, Sergeant. The name of one of the Covenant's religious leaders. A Prophet. He's on that carrier, and he's calling for help.|Sergeant Major Avery Johnson and Cortana discussing a Covenant distress signal, while flying in on a [[Pelican]].{{Ref/Reuse|outskirts}}}} | ||
[[File:HtT John in New Mombasa original.jpg|thumb|250px|A picture of John-117 during the battle taken by [[Benjamin Giraud]].]] | |||
Some time after the Covenant insertion to the city and during the civilian evacuation, the {{Class|Stalwart|light frigate}} {{UNSCShip|In Amber Clad}} of the [[Medii Battle Group]]{{Ref/Reuse|evg}} descended near Mombasa to reinforce the ground troops already present. Intercepted transmission from the Covenant forces had led the UNSC to correctly believe that it was the High Prophet of Regret in command of the opposing force, making his capture their utmost priority in the right line of the originally [[Fall of Reach|cancelled]] [[Operation: RED FLAG]]. Three [[D77-TC Pelican|Pelicans]], one of them with the [[Master Chief Petty Officer]] [[John-117]] onboard, were deployed by the ''In Amber Clad'' to board the ''Solemn Penance'' hovering near the [[Mombasa Tether]]. However, before they could get near the carrier, the formation ran across a {{Pattern|Protos|Scarab}} which shot down all of the Pelicans in Old Mombasa. The first was destroyed by the Scarab's main cannon, while the second, carrying an [[Orbital Drop Shock Trooper|ODST]] [[Second Squad#Battle of Mombasa|squad]] led by [[Gunnery Sergeant]] [[Marcus Stacker]], was shot down and crash-landed on the beach. The third Pelican, carrying [[Sergeant Major]] [[Avery Johnson]] and [[John-117]] crashed upside-down into a building in the heart of Old Mombasa.{{Ref/Reuse|outskirts}} | |||
====Outskirts==== | |||
[[File:H2A-daniil-kuksov-metropolis-scarab.png|250px|thumb|left|A Scarab attacks the city of Mombasa.]] | |||
{{Quote|Here, let me give him my "Welcome to Earth" gift basket.|[[Walpole]], an ODST about to fire on a group of Covenant at Hotel Zanzibar.{{Ref/Game|H2|Detail=''[[Another Day at the Beach]]''}}}} | |||
Both teams suffered few casualties from their respective crashes. The Spartan's team moved into a nearby building while Stacker's team moved up the beach to the [[Hotel Zanzibar]] and set up a command post, eliminating several Covenant units in the process. Both teams then waited in their respective locations for extraction.{{Ref/Reuse|outskirts}} | |||
After John-117 and his allies repelled several waves of Covenant including a pair of [[Mgalekgolo]], a Pelican found the group and gave them coordinates of a landing zone. [[Commander]] [[Miranda Keyes]] ordered Johnson to regroup with the ''In Amber Clad'' so that he could coordinate further deployment of infantry and armor units while the Spartan continued on foot through the city to regroup with the second squad.{{Ref/Reuse|outskirts}} | |||
After fighting his way through multiple alleyways filled with [[Kig-Yar Sniper]]s, John-117 found and assisted the [[Orbital Drop Shock Trooper|ODSTs]] pinned down at Hotel Zanzibar. Commander Keyes sent a Warthog to the Spartan, who spearheaded a counterattack, destroying Covenant infantry, armor, and [[Zo'op-pattern Weevil|Covenant artillery emplacements]] on the beaches facing [[New Mombasa]].{{Ref/Reuse|outskirts}} | |||
John-117 and his makeshift Marine unit entered a blown-out hole in a tunnel where they intercepted and destroyed a Covenant convoy, made up primarily of {{Pattern|Ruwaa|Shadow}}s that had been attempting to rendezvous with the regrouping Covenant ground forces still stationed in that sector of the city. Along the way they engaged and neutralized several barricades the Covenant had assembled to fortify the tunnel network. After the engagement in the tunnels, they advanced towards the bridge connecting Old and New Mombasa. Before the Spartan got there, the Marine unit at the bridge had already exhausted itself fighting the Scarab.{{Ref/Reuse|outskirts}}{{Ref/Reuse|metropolis}} | |||
====The Conduit==== | |||
[[File:Orphic Spear 1.png|thumb|250px|Alpha-Five being deployed into New Mombasa.]] | |||
{{Main|Operation: WINDOW PANE}} | |||
As the ''In Amber Clad''{{'}}s force pressed towards New Mombasa, the Covenant brought the [[Conduit]]—a Forerunner device capable of opening [[slipspace portal]]s—to New Mombasa.{{Ref/Level|Id=opa|SS|Operation A: Orphic Spear}} A [[Taaku Xur-pattern Spirit|Spirit]] [[dropship]] carrying a [[data pad]] with information pertaining to the Conduit was shot down by [[UNSC]] forces.{{Ref/Level|Id=ss1|SS|Mission 1: New Mombasa Nightmare}} When the data pad's relevance to the Conduit was realized by the UNSC, a [[Alpha-Five|squad]] of Orbital Drop Shock Troopers was [[Operation: WINDOW PANE|sent to recover it.]]{{Ref/Reuse|opa}} Covenant forces awaiting extraction at the crashed Spirit were attacked by the ODST squad and the [[Sangheili]] [[Field Master]] carrying the data pad was killed. With the data pad, the UNSC used the information gained to pinpoint the location of the Conduit in the city.{{Ref/Level|Id=ss2|SS|Mission 2: On Top of the World}} The ODST squad was directed to a Sangheili task force carrying the Conduit. After a brief engagement, the ODSTs managed to procure the Conduit from the Covenant and the device was delivered to a nearby UNSC convoy.{{Ref/Level|Id=ss3|SS|Mission 3: Conduit}} | |||
The Covenant responded by assaulting the convoy with waves of infantry. Though the ODST squad and several Marines attempted to defend the convoy from attacking Covenant forces, a Sangheili Field Master dropped down from his Spirit into the [[M313 Elephant|Elephant]] carrying the Conduit, retrieved the device, and escaped the engagement aboard the dropship. The ODSTs gave chase and,{{Ref/Level|Id=ss4|SS|Mission 4: Reversal of Fortune}} eventually, the Spirit was shot down. The squad located the dropship's crash site and attacked its surviving occupants. When the Field Master and his [[Kig-Yar]] bodyguards were eventually eliminated, the Conduit was reclaimed by the UNSC.{{Ref/Level|Id=ss5|SS|Mission 5: Wounded Quarry}} The ODSTs took the Conduit aboard a [[M12 Warthog|Warthog]] and were ordered to leave the city.{{Ref/Reuse|ss6}} | |||
The | |||
====Forerunner glyphs==== | |||
Concurrent with the search for the Conduit, an [[unidentified ODST squad]] participated in the battle with orders to retrieve information the Covenant were interested in. Commandeering a [[Grizzly]] tank, the squad rescued marines who had recovered an emergency broadcast from a downed [[AV-14 Hornet]], stating that its crew had captured a series of [[Forerunner symbols|Forerunner glyphs]] from the Covenant. The squad then trekked their way to the site, recovered the glyphs, and escaped the city before the ''[[Solemn Penance]]'' jumped into slipspace.{{Ref/Level|Id=ope|SS|Operation E: Brother’s Keeper}} | |||
=== | ====Battle for New Mombasa==== | ||
[[File: | [[File:H2A Scorpion957-A3Destroyed.png|thumb|left|250px|The [[Protos-pattern Scarab|Scarab]] fires upon [[957-A3|a]] [[M808B Main Battle Tank|Scorpion]] tank, destroying it instantly.]] | ||
[[ | {{Quote|no=two|Sergeant [[Banks]]|Corporal [[Perez]]|q1=That thing is really starting to '''piss me off'''! Marines, time to kill us a Scarab!|q2=It's over here, sir!|Sergeant Banks and Corporal Perez talking about a Scarab heading towards the canals in New Mombasa.{{Ref/Reuse|metropolis}}}} | ||
The Master Chief arrived at the bridge to assess the situation while Sergeant Johnson reinforced the Marines with weaponry, including a [[M808B Scorpion|Scorpion tank]]. The Chief traveled across the bridge with the armored unit, clearing it of both Covenant armored and mechanized forces. These forces included [[Karo'etba-pattern Ghost|Ghosts]], [[Zurdo-pattern Wraith|Wraith]]s, [[Kez'katu-pattern Phantom|Phantoms]], and [[Is'belox-pattern Banshee|Banshees]].{{Ref/Reuse|metropolis}} | |||
After the engagement on the bridge, UNSC forces entered New Mombasa in large numbers. They linked up with various squads of Marines as they moved through the city, eliminating Covenant forces that were setting up positions. The Master Chief's team worked their way into the [[Kilindini Park Cultural Center]] through the sewer system, and then towards the city center via [[Shimanzi Road]] and [[Beria Plaza]], finding that the Scarab had, likewise, taken a similar path.{{Ref/Reuse|metropolis}}{{Ref/Reuse|palace}} | |||
Once in the heart of the [[New Mombasa industrial zone|industrial zone]] near the city center, John-117's team found a Marine outpost holed in a corporate building,{{Ref/Note|In the original version of ''Halo 2'', the building was owned by the [[Mtangulizi Kampuni]]. However, in ''Halo 2: Anniversary'', this building is now depicted under the ownership of [[Lethbridge Industrial]].}} commanded by [[Staff Sergeant]] [[Banks]] of [[A Company]] under siege by a unit of Wraiths. The UNSC forces, with the help of John-117, destroyed the Wraiths, and secured a landing zone for reinforcements. The Pelicans then dropped a platoon of Marine infantry and a Scorpion tank.{{Ref/Reuse|metropolis}} | |||
[[ | |||
The lumbering Scarab appeared from the other end of the plaza the Marine outpost was facing and the Scorpion tank opened fire on it, with no effect. After the Scarab destroyed the tank with its main gun, Marines opened fire on the walker, but it was unaffected and impervious to the weak rounds and climbed over their position and moved into the canals of the city. However, it soon found itself trapped inside of the walls of the canal, giving Pelicans a chance to attack it openly.{{Ref/Reuse|metropolis}} | |||
The Master Chief and A Company followed the Scarab through the canals and the Spartan boarded the walker. While the Marines provided some cover fire, John defeated the forces manning the Scarab walker. After defeating its command crew, he managed to destroy the Scarab from the inside. All Covenant forces soon began retreating to Regret's carrier. The Master Chief was extracted by Sergeant Johnson's Pelican and taken back to ''In Amber Clad'' along with the remaining members of A Company.{{Ref/Reuse|metropolis}} | |||
The | ====Regret's withdrawal==== | ||
[[File:H2A In Amber Clad intercept.png|thumb|left|250px|The {{UNSCShip|In Amber Clad}} gives chase as Regret's flagship prepares to flee New Mombasa.]] | |||
{{Quote|no=two|[[Remi]]|[[Miranda Keyes]]|q1=Ma'am, without a destination solution—|q2=We are ''not'' losing that ship!|Miranda Keyes ordering the pursuit of the ''Solemn Penance''.{{Ref/Reuse|metropolis}}}} | |||
The Pelicans carrying Spartan-117 and the Marines entered the ''In Amber Clad'', just as the carrier was preparing to flee. [[Fleet Admiral]] [[Terrence Hood]] was hesitant to let ''In Amber Clad'' engage Regret's assault carrier, still above Mombasa and beside the Mombasa space elevator. He instead opted to call in two heavier vessels to intercept the carrier if it returned to space. However, when the carrier initiated its slipspace drive, preparing to jump while still in the atmosphere, Hood gave the ship the green light to give chase.{{Ref/Reuse|metropolis}} The {{UNSCShip|Paris}}, {{UNSCShip|Redoutable}}, and {{UNSCShip|Coral Sea}}, and the {{UNSCShip|Dusk}} followed in the wake of the slipspace jump, with the latter ship losing contact with its companions in the slipstream.{{Ref/Novel|Id=goo22|GoO|Chapter=22}} | |||
Just before the carrier jumped, remaining ships of the UNSC Home Fleet deployed dozens of [[Single Occupant Exoatmospheric Insertion Vehicle|SOEIVs]] down to the city in [[Operation: BUMRUSH|an effort to infiltrate the carrier]], only to be caught by the [[Electromagnetic pulse|EMP]] blast in mid-flight, destroying their navigational and safety systems, plunging them and their [[Orbital Drop Shock Trooper]] occupants to almost certain death. It is likely that only [[Alpha-Nine|one squad]] survived, having changed their course away from the carrier at the last moment. Many of the city's buildings were heavily damaged but remained standing, including the Mombasa Tether. The rupture also created a large crater in the mainland, north of New Mombasa, revealing a section of the Forerunner portal.{{Ref/Level|Id=preparetodrop|ODST|Prepare To Drop}} This event would later become referred to as the '''New Mombasa Slipspace Event''', and would lead to the reactivation of the old [[NATO]] [[Outpost C9]].{{Ref/Map|H3|High Ground|Detail=Map description}} | |||
[[ | |||
The ODSTs in possession of the Conduit were escaping the city as the nearby ''Solemn Penance'' entered slipstream space over Mombasa.{{Ref/Level|Id=ss6|SS|Mission 6: Last Exit}} When the resulting slipspace rupture engulfed the city, the ODSTs were killed and the Conduit was believed to have been destroyed as well.{{Ref/Level|Id=opb|SS|Operation B: Steadfast Pursuit}} However, the Conduit entered slipspace to save itself from destruction and arrived at [[Installation 03]].{{Ref/Level|Id=opc|SS|Operation C: Valiant Hammer}} | |||
===After the Slipspace Event=== | |||
[[File:Main phantom.jpg|thumb|250px|A [[Kez'katu-pattern Phantom|Phantom]] deploying troops in New Mombasa just after the Slipspace Event.]] | |||
{{Quote|We need to get above this crap, link up with the [[UNSC battle network|bee-net]]. One of our drones must have seen where they hit.|[[Edward Buck]] to [[Kojo Agu]] after meeting in Tayari Plaza.}} | |||
Large numbers of Covenant troops remained in the city even after Regret's withdrawal. While most of Regret's troops evacuated into the carrier, there was still a significant Covenant presence both on the ground and in orbit. Moments after Regret jumped, the [[Prophet of Truth]] seized the control of the battle and assumed the command of what remained within Regret's [[Fleet of Sacred Consecration|initial fleet]] while a large [[Truth's fleet|support and excavation fleet]] of [[Jiralhanae]]-led Covenant reinforcements was en route to Earth. The remaining Jiralhanae from Regret's forces were simultaneously given orders to execute the [[Sangheili]] forces on the ground and in orbit. This was a part of the Prophet of Truth's personal scheme for the Covenant, which would come to its conclusion two weeks later when the Sangheili were officially removed from their positions as the main warrior caste of the Covenant.{{Ref/Reuse|bnet}}{{Ref/Reuse|waypoint}} | |||
The Covenant forces were met by a sizeable number of UNSC Marines and [[New Mombasa Police Department|NMPD]] forces that remained in the city. The human forces organized an effective resistance, and fought for control of the city throughout the remainder of the day. The city's [[Artificial intelligence|Urban Infrastructure AI]] [[Superintendent]] also had a vital role in the defense of the city.{{Ref/Reuse|ONIalphasite}} | |||
Knocked off their course by the slipspace rupture, two SOEIVs made rough landings: Gunnery Sergeant [[Edward Buck]]'s pod in [[Lumumba]], and Captain [[Veronica Dare]]'s in nearby [[Tayari Plaza (location)|Tayari Plaza]]. At this point in the battle, large groups of Jiralhanae led forces were being deployed into the city. Buck fought his way to Tayari Plaza to help Dare, but upon making it to her pod, he discovered that the Captain had disappeared. Meeting with [[Kojo Agu|another of his squad mates]] and with no idea what his objective was now, Buck took the decision to reunite with his squad and then extract them from the city as fast as possible.{{Ref/Level|Id=tayariplaza|ODST|Tayari Plaza}} | |||
====Assault on the Covenant landing zone==== | |||
[[File:Uplift battle.jpg|thumb|250px|The battle for the Covenant LZ in the Uplift Reserve.]] | |||
{{Quote|no=three|Colonel|Taylor Miles|Colonel|q1=Trooper, you're almost at second platoon's location. Give 'em a hand and push to the primary objective!|q2=What is the objective, Colonel?|q3=You know the Covenant carrier that slipped away from the city? We need to secure its old LZ. Snatch a Tier One asset.|ODST [[Taylor Miles]] and the UNSC colonel at Uplift Reserve.{{Ref/Reuse|upliftreserve}}}} | |||
Around thirty minutes after the slipspace event, unmanned [[F-99 Unmanned Combat Aerial Vehicle|F-99 UCAVs]] were sent to the city to maintain air supremacy over the Phantoms and Banshees. UNSC forces began to regroup, following the orders of [[unidentified colonel|a Marine colonel]]. The Marines were ordered to regroup at the colonel's position near the landing zone, and take control of Regret's carrier's former landing zone in the [[Uplift Nature Reserve]] in an effort to seize an unidentified enemy asset, later revealed to be groups of Huragok. Marines at the Uplift Reserve, led by [[Taylor Miles|a surviving ODST]], managed to break through Covenant defenses along the way to the landing zone. At this point, the Mombasa Tether, already damaged by the jump, collapsed, with miles of debris from the tether scattered across East Africa.{{Ref/Level|Id=tsavo|H3|Tsavo Highway}} The collapse also killed the colonel, who, in his final moments, ordered Marines to evacuate from the park. With the colonel dead and the Covenant transporting all Huragok away from the park, the UNSC forces gained little advantages from their efforts in the park.{{Ref/Level|Id=upliftreserve|ODST|Uplift Reserve}} | |||
=== Fallback to ONI Alpha Site === | ====Fallback to ONI Alpha Site==== | ||
[[File:Alphas destro.png|thumb|left|250px|The Alpha Site is destroyed.]] | [[File:Alphas destro.png|thumb|left|250px|The Alpha Site is destroyed.]] | ||
After the UNSC reclaimed the Covenant landing zone in Uplift Reserve, defending the [[Office of Naval Intelligence]]'s [[ONI Alpha Site|local headquarters]] became the top priority. Ninety minutes after the slipspace event, Marines began falling back to the building as advancing Covenant Wraith convoys prepared to lay siege to Alpha Site. | {{Quote|no=two|Marine|Jiralhanae|q1=All teams, hold the ridge, don't let them near the ONI building!|q2=We do the Prophet's bidding, show no fear!|A UNSC Marine and Jiralhanae Captain rallying their respective forces at ONI Alpha Site.}} | ||
After the UNSC reclaimed the Covenant landing zone in Uplift Reserve, defending the [[Office of Naval Intelligence]]'s [[ONI Alpha Site (location)|local headquarters]] became the top priority. Ninety minutes after the slipspace event, Marines began falling back to the building as advancing Covenant Wraith convoys prepared to lay siege to Alpha Site. Kizingo Boulevard in Sector 4 became an important location where UNSC forces have set up stationary [[M68 Gauss cannon]]s to defend the entrance to the rally point at Sector 10, which leads into Alpha Site. Marines managed to regroup at Sector 10 before falling back further into the ONI complex.{{Ref/Level|Id=kizingoboulevard|ODST|Kizingo Boulevard}} | |||
Within the ONI compound, the Marines and the NMPD forces destroyed the bridge leading to the base, in hopes of slowing down the advancing Covenant forces. This did not, however, stop the incoming dropships, but slowed the advance. The human forces fell back to the base's courtyard, which they defended against waves of Covenant attackers, before falling back into the interior of the main building. Again, they fended off multiple waves of Covenant. | Within the ONI compound, the Marines and the NMPD forces destroyed the bridge leading to the base, in hopes of slowing down the advancing Covenant forces. This did not, however, stop the incoming dropships, but slowed the advance. The human forces fell back to the base's courtyard, which they defended against waves of Covenant attackers, before falling back into the interior of the main building. Again, they fended off multiple waves of Covenant. NMPD forces then planted [[M168 Demolition Charge|explosives]] inside the complex, to destroy it in order to prevent the Covenant from accessing the Superintendent's data facility deep under the building. The only survivors of the siege were two ODSTs from Alpha-Nine, Michael Crespo and Taylor Miles, who evacuated from the roof, where they were picked up by an [[D77C-NMPD Pelican|NMPD Pelican dropship]]. Once on board, they detonated the explosives and watched as the ONI building was completely destroyed. Six hours later, the building was still burning from the explosions.{{Ref/Level|Id=ONIalphasite|ODST|ONI Alpha Site}} At the time, Crespo and Miles were unaware that destroying the building had alerted a newly-constructed [[Yanme'e]] hive beneath the building in the Superintendent's data facility, making it much more difficult for UNSC forces to reach the data core later on.{{Ref/Level|Id=data|ODST|Data Hive}} | ||
=== Skirmish at NMPD Headquarters === | ====Skirmish at NMPD Headquarters==== | ||
While the Alpha Site was destroyed, Edward Buck and his squad's sniper, [[Kojo Agu]], made their way to the top floors of the [[NMPD headquarters]] building, where they were to be picked up by Pelican with two other ODSTs already onboard. However, the dropship was shot down before landing, and it crashed on another rooftop, killing the pilot on impact. Buck and Agu fought their way across the rooftops, and eventually reached the crash site, where they fought off waves of attacking Covenant using heavy weapons from the Pelican. Finally, [[Jiralhanae Chieftain]] [[Bracktanus]] dropped off from a Phantom, killed an NMPD officer and severely wounded Agu. The squad managed to kill the Chieftain, after which they decided to evacuate through the train tunnels which led into Old Mombasa.{{Ref/Level|Id=nmpdhq|ODST|NMPD HQ}} | |||
While the Alpha Site was destroyed, Edward Buck and his squad's sniper, [[Kojo Agu]], made their way to the top floors of the [[NMPD | |||
=== Nightfall === | ====Nightfall==== | ||
By nightfall | [[File:H3ODST NewMombasa.jpg|thumb|250px|The rainy streets of New Mombasa, reduced to a ghost town.]] | ||
{{Quote|no=two|Michael Crespo|Edward Buck|q1=What do you see, Gunny?|q2=A whole lot of Covenant, gathering around that Slipspace crater. I wonder what they're looking for.|Buck and Crespo from Alpha-Nine observing the skyline from Kikowani.}} | |||
By nightfall, nearly all human forces in the city had either been evacuated or destroyed. With Covenant forces controlling the city, remaining Covenant cruisers left by the Prophet of Regret began excavating the area around the crater created by the slipspace rupture.{{Ref/Reuse|firsttwelvehours}} Among the few human survivors were the members of Alpha-Nine, who arrived at [[Kikowani Station (location)|Kikowani Station]] near the city's northeastern seawall, only to realize that the station, as well as [[Kikowani|its surroundings]] had been flooded by [[water]], making escape through train tunnels impossible. The squad decided to hijack a Phantom dropship, in which they succeeded. Buck escorted the rest of the squad through the flooded sections of the city in a [[Irdnekt-pattern Banshee|Banshee]]. The area was filled with Covenant forces, including a [[Deutoros-pattern Scarab|Scarab]]. After destroying the Scarab, they managed to fly out of the city, when Buck suddenly realized he knew where Captain Dare was and decided to go back to find her, inside the Superintendent's [[New Mombasa Data Center|data center]].{{Ref/Level|Id=kikowani|ODST|Kikowani Station}} | |||
Around the same time, a lone ODST | Around the same time, a lone ODST from Alpha-Nine, Lance Corporal [[Rookie|J.D. "Rookie"]], thought dead by the rest of the squad, woke up in his pod, on the edge of a rooftop in [[Mbaraki]]. The city was already occupied by the Covenant, with no UNSC resistance left. The Superintendent aided the Rookie to survive in the city and look for clues for what happened to his squad. After wandering around the city for a while, the Rookie received a distress message from Dare, who was inside the Superintendent's data facility deep under the city. He made his way to a subway entrance, and descended down an elevator shaft, to Sublevel 7 of the data center.{{Ref/Level|Id=mombasastreets|ODST|Mombasa Streets}} At this point, the underground tunnels had become infested with [[Yanme'e]], who had built massive hives in the area.{{Ref/Reuse|data}} | ||
[[File: | ====Extracting the asset==== | ||
=== | [[File:Hurag encounter.png|thumb|300px|Dare and the Rookie meet [[Quick to Adjust]], who "saved" Vergil inside the Superintendent's Data Center.]] | ||
Eventually, the Rookie managed to meet up with Dare inside the [[New Mombasa Data Center|Superintendent's Data Center]]. Inside, | {{Quote|no=two|Veronica Dare|Edward Buck|q1=When did ''this'' happen?|q2=They started showing up right before I went underground.|ONI agent Veronica Dare and ODST Edward Buck viewing a fleet of Covenant ships circling Mombasa.{{Ref/Reuse|coastal}}}} | ||
Eventually, the Rookie managed to meet up with Dare inside the [[New Mombasa Data Center|Superintendent's Data Center]]. The two fought through the Yanme'e hive in sublevel 10, causing the Yanme'e to alert the Jiralhanae, who sent more reinforcements to the Data Center. Inside, Dare and Rookie discovered the Huragok [[Quick to Adjust]],{{Ref/Reuse|Catalog}} who had combined the Superintendent, namely its [[Vergil]] subroutine, with itself. As Quick disconnected from the core, the AI shut itself down, as all of its data had been transferred into the creature. At this point, Buck arrived into the complex and the ODSTs escaped back to the surface through the Covenant-occupied tunnels, while protecting the critically important Huragok.{{Ref/Reuse|data}} | |||
The next day on the morning of October 21, planned reinforcements of the enormous Jiralhanae-led Covenant support and excavation fleet from the Prophet of Truth began to exit slipspace above Mombasa and across its [[East African Protectorate|surrounding areas]], ensuring the full secure of large portions of the [[Africa]] from the UNSC and reinforcing excavation measures by the remaining forces of the Fleet of Sacred Consecration despite Covenant's lack of intel on the nature of the [[Portal at Voi|gateway Portal complex]] to the [[Installation 00|Ark]].{{Ref/Site|Id=waypointvergil|URL=https://www.halowaypoint.com/en-us/news/canon-fodder-vergil-reality|Site=Halo Waypoint|Page=Canon Fodder - Vergil Reality|D=15|M=06|Y=2021}}{{Ref/Note|Id=Truthfleet|Text=Though it was not specified in ''[[Halo Waypoint]]'' that the newly arrived Covenant fleet at the end in the ''[[Coastal Highway]]'' level was the planned same support and excavation fleet sent by Truth as mentioned in ''[[Ten Twenty]]'' and ''Vergil Reality'' docs, it is very likely that the latter was referring to the former, since the Covenant fleet in the ''Coastal Highway'' level was used to support the remnants of the [[Fleet of Sacred Consecration]] for the excavation effort of the Portal at Voi.}} | |||
During the final hours of the day, the area was now full of arriving Covenant [[capital ships]]. More Scarabs have been deployed to the city, and a massive air force of Banshees were deployed to the crater. Buck, Dare and the Rookie made their way to the surface, through a Covenant outpost in [[New Mombasa Sector 1|Sector 1]], and eventually took an elevator to the city's [[New Mombasa Waterfront Highway|Waterfront Highway]]. They then pushed through the highway and made a stand at the entrance to Uplift Reserve. The Phantom captured by the rest of the squad arrived and picked them up, and they made it out just as an assault carrier appeared from slipspace and glassed the area.{{Ref/Reuse|coastal}} | |||
Immediately after the Covenant occupation of Mombasa was achieved, the combined [[Covenant fleet]] gathered over [[Kenya]] and continued to uncover [[Portal at Voi|the Forerunner structure which activates a portal]] to [[Installation 00|the Ark]].{{Ref/Reuse|coastal}} While the Covenant fleet was prolongedly glassing the majority of East Africa, millions would have persished over the course of the excavation effort, before it ended at the final stages of the [[Battle of Kenya]].{{Ref/Reuse|hunt}} | |||
==Aftermath== | ==Aftermath== | ||
[[File:Portal odst.png|thumb|250px| | [[File:Portal odst.png|thumb|250px|A large Covenant fleet sent by the Prophet of Truth continues to arrive over Mombasa and uncovers the Portal, signifying the end of the Battle of Mombasa.]] | ||
===New Mombasa and Earth=== | |||
{{Quote|Before 2552, there was no way anything like that could happen on Earth. On one of those distant planets in the outer colonies, maybe. But an attack on Earth? Couldn't happen. Until it did. It's called [[glassing]]. Covenant warships rain plasma down on a planet until everything and everyone on the surface melts. Usually, it's complete world destruction. Earth only got a taste. The prolonged orbital bombardment destroyed East Africa, killing millions before it ended. None of us were safe anymore.|[[Benjamin Giraud]]{{Ref/Game|Id=hunt|Game=Hunt the Truth|Detail=Episode 01: A Hairline Fracture}}}} | |||
The UNSC would not discover the actual purpose of the Covenant's arrival on Earth until two weeks after the [[Battle of Installation 05]]; most of the information was presumably received from the Huragok that had absorbed [[Vergil]]'s data.{{Ref/Reuse|coastal}} By this point, the [[Prophet of Truth]] had already arrived in Sol System on the [[Anodyne Spirit|Forerunner Dreadnought]], along with many remnants of the [[Fall of High Charity|diminishing]] Covenant such as the remainder of [[High Charity defense fleet|Covenant survivors]] of the [[Battle of Installation 05]] with him.{{Ref/Level|Game=Halo 2|Level=The Great Journey}} The UNSC would assume the Forerunner structure to be the "Ark" until its activation during the [[Battle of Voi]] on [[2552#November|November 17, 2552]].{{Ref/Reuse|tsavo}}{{Ref/Level|H3|Crow's Nest}} | |||
The | The remnants of New Mombasa were liberated after Truth's fleet retreated to [[Installation 00|the Ark]] and were subsequently defeated, with [[Operation: MARSH FLASH]] beginning as part of the [[URNA Southwest Campaign]]. | ||
Parts of Mombasa, like [[Haller Street]], survived the battle. Haller Street and other areas had received some revitalization after [[Project Rebirth]] investment and UNSC interest in the Portal at Voi.{{Ref/Site|Id=CFShowcase|URL=https://www.halowaypoint.com/en-us/news/showcase-sensitive|Site=Halo Waypoint|Page=Canon Fodder - Showcase Sensitive|D=16|M=6|Y=2021}} At some point through Project Rebirth, plans had been created to build the [[United Nations Space Command Memorial Park]] in the city.<ref name="pointprizes">''[[McFarlane Toys/Halo Point Prizes]]'', Campaign Master Chief</ref> | |||
Some of the refugees of the battle ended up on the planet [[Oban]].{{Ref/Novel|Env|Chapter=16}} | |||
In | ===''Solemn Penance'' and UNSC ''In Amber Clad''=== | ||
The ''Solemn Penance'' would arrive at [[Installation 05]] on [[2552#November|November 3]], the Prophet of Regret having learned of the ring's location from the [[Luminary]] on [[Meridian]].{{Ref/Reuse|Id=beholden}} The assault carrier was followed by ''In Amber Clad'', who deployed a [[First Platoon (ODST)|contingent]] of ODSTs led by John-117 on a [[Assassination of the Prophet of Regret|mission to capture or kill the Prophet]], an objective they would accomplish.{{Ref/Level|H2|Delta Halo}}{{Ref/Level|H2|Regret (Halo 2 level)|Regret}} The ''Coral Sea'', ''Dusk'' and ''Redoubtable'' all arrived as well, but at different times. The last ship to arrive, the ''Dusk'', appeared in time to witness the outbreak of the [[Great Schism]].{{Ref/Reuse|goo22}} | |||
===Alpha-Nine, Vergil, and Sadie Endesha=== | |||
{{ | Alpha-Nine was assigned to guard Quick to Adjust.{{Ref/Novel|HNB|Chapter=9}} Eventually, the Huragok was interrogated by Avery Johnson on [[Quito Terminus]], where Quick to Adjust and Vergil confirmed that the Covenant at New Mombasa were searching for the "Ark", or as revealed upon its activation, the Portal to the Ark.{{Ref/Reuse|coastal}} A transcript of the interrogation of Vergil was given to [[Terrence Hood]] in a document titled "Vergil".<ref>''Halo Legendary Crate'', Vergil</ref> | ||
== Participants == | A timeline of events in the Battle of Mombasa and the CSV of Edward Buck were compiled for [[Margaret Parangosky]] by [[Black Box]] titled "First Twelve Hours".{{Ref/Reuse|firsttwelvehours}} | ||
=== UNSC === | |||
{| class="wikitable" | ===Forerunner glyphs and the Conduit=== | ||
In the summer of [[2557]], nearly five years after the battle, the Forerunner glyphs recovered by several ODSTs in the city were finally decoded, pointing to a region on [[Gamma Halo]] containing an [[unidentified Forerunner machine]].{{Ref/Reuse|ope}} | |||
==Timeline== | |||
===October 20, 2552=== | |||
*'''1459 hours''': The {{Class|CAS|assault carrier}} ''[[Solemn Penance]]'' targets New Mombasa.<ref name="firsttwelvehours">''[[Halo Legendary Crate]]'', [[:File:LC 002 Doc 1.jpg|First Twelve Hours]]</ref> The carrier slipspace ruptured down to the city,{{Ref/Game|Id=sscirc1arc2|ODST|Detail=Sadie's Story, Circle 1, Arc 2}} and came to rest over the [[Uplift Nature Reserve]].{{Ref/Reuse|upliftreserve}} | |||
*'''Between 1459 and 1603 hours''': ''Solemn Penance'' drifts towards the [[New Mombasa Orbital Elevator]]. John-117 deployed to Old Mombasa{{Ref/Reuse|outskirts}} and fights into the heart of New Mombasa.{{Ref/Reuse|metropolis}} [[Sadie Endesha]] teams up with [[Mike Branley]] and struggles to reach the Mombasa city center and to find her dad [[Daniel Endesha]].{{Ref/Game|Id=sadie|ODST|Detail=Sadie's Story}} | |||
*'''1512 hours''': A [[Quick to Adjust|T1 asset]] is exposed to capture or kill.{{Ref/Reuse|firsttwelvehours}} | |||
*'''1557 hours''': Alpha-Five confirms procurement of the Conduit.{{Ref/Reuse|firsttwelvehours}} | |||
*'''1602 hours''': ODST units are dropped from {{UNSCShip|Say My Name}} as part of [[Operation: BUMRUSH]].{{Ref/Reuse|firsttwelvehours}} | |||
*'''1603 hours''': ''Solemn Penance'' departs from the city via slipspace.{{Ref/Reuse|firsttwelvehours}} {{UNSCShip|In Amber Clad}} follows.{{Ref/Reuse|metropolis}} [[Alpha-Nine]] squad members are scattered by the shockwave.{{Ref/Reuse|preparetodrop}} [[Alpha-Five]] in possession of the Conduit attempt to flee the blast.{{Ref/Reuse|ss6}} The blast destroys much of the Superintendent's electronics.{{Ref/Reuse|data}} [[Edward Buck]] crash lands in [[Lumumba]] and attempts to meet [[Veronica Dare]] at [[Tayari Plaza (location)|Tayari Plaza]]. However, he ends up with [[Kojo Agu]].{{Ref/Reuse|tayariplaza}} | |||
*'''1624 hours''': Alpha-Five is designated KIA and the Conduit is lost.{{Ref/Reuse|firsttwelvehours}} | |||
*'''1632 hours''': [[Taylor Miles]] exits pod in the Uplift Reserve and links up with UNSC forces to secure landing zone. UNSC conducts [[F-99 Unmanned Combat Aerial Vehicle|F-99 Wombat]] flyovers of the Reserve.{{Ref/Reuse|upliftreserve}} | |||
*'''1649 hours''': The Orbital Elevator collapses. Covenant occupy roughly 38% of the city.{{Ref/Reuse|firsttwelvehours}} | |||
*'''1732 hours''': Marines begin retreating and grouping up at a rally point at [[ONI Alpha Site (location)|ONI Alpha Site]]. [[Michael Crespo]] links up with retreating UNSC forces on [[Kizingo Boulevard (location)|Kizingo Boulevard]].{{Ref/Reuse|kizingoboulevard}} | |||
*'''1810 hours''': Marines and remaining NMPD officers retreat into the inner walls of the ONI Alpha Site. Road bridge leading to it destroyed. Covenant begin dropping forces off by [[Kez'katu-pattern Phantom|Phantom]].{{Ref/Reuse|ONIalphasite}} | |||
*'''1852 hours''': Alpha Site is destroyed. Covenant occupy 51% of the city.{{Ref/Reuse|firsttwelvehours}} Michael Crespo and Taylor Miles were extracted to [[NMPD headquarters]].{{Ref/Reuse|ONIalphasite}} | |||
*'''1914 hours:''' Michael Crespo and Taylor Miles are shot down over a Covenant occupied NMPD HQ. Kojo Agu and Edward Buck rescue and link up with them.{{Ref/Reuse|nmpdhq}} | |||
*'''2101 hours''': Michael Crespo, Taylor Miles, an injured Kojo Agu, and Edward Buck proceed into [[Kikowani]] and find transport out of the district.{{Ref/Reuse|kikowani}} | |||
*'''2141 hours''': Remaining Covenant cruisers begin to group up at Mombasa.{{Ref/Reuse|firsttwelvehours}} | |||
*'''2206 hours''': The [[Rookie]] wakes up in his pod. He begins to search for his squad mates by looking for clues. The [[Superintendent]] assists.{{Ref/Reuse|mombasastreets}} The Rookie meets Dare at the [[New Mombasa Data Center]].{{Ref/Reuse|data}} | |||
*'''2215 hours''': Covenant begin excavating the hole the ''Solemn Penance'' tore into Old Mombasa.{{Ref/Reuse|firsttwelvehours}} | |||
*'''2227 hours''': Covenant occupation is 78%.{{Ref/Reuse|firsttwelvehours}} | |||
*'''2319 hours''': Veronica Dare reports that she has spotted [[Vergil]].{{Ref/Reuse|firsttwelvehours}} | |||
*'''After 2319 hours''': The Rookie, Dare and Buck escort Vergil along the [[New Mombasa Waterfront Highway]].{{Ref/Reuse|coastal}} | |||
*'''2324 hours''': Covenant occupation is 94%.{{Ref/Reuse|firsttwelvehours}} | |||
*'''2359 hours''': Vergil is secured.{{Ref/Reuse|firsttwelvehours}} | |||
===October 21, 2552{{Ref/NoteReuse|dateend}}=== | |||
*A much larger [[Truth's fleet|Covenant fleet]] from the Prophet of Truth began to arrive in-system above Mombasa in order to reinforces the excavation efforts.{{Ref/Reuse|waypointvergil}}{{Ref/Reuse|coastal}} Buck, Dare, and the Rookie defend Vergil as they fight their way to the surface.{{Ref/Reuse|coastal}} At dawn, the team witnesses continual Covenant reinforcements arriving at Earth to aid in excavation efforts.{{Ref/Reuse|coastal}} They flee down the city's Waterfront Highway and reconnect with the rest of Alpha-Nine at the entrance to the Uplift Nature Reserve. {{Ref/Reuse|coastal}} | |||
*The squad manages to hold out and eventually escapes New Mombasa as the city, along with its surroundings, are glassed by the combined excavation fleet.{{Ref/Reuse|coastal}} | |||
==Participants== | |||
{{Col-begin}} | |||
{{Col-2}} | |||
===UNSC=== | |||
===Naval assets=== | |||
====Starships==== | |||
{| class="wikitable sortable " style="width: 75%;" cellspacing="1" cellpadding="1" border="0" | |||
|- | |- | ||
! Fleet / Tactical grouping | |||
! Class | |||
! Name | ! Name | ||
! Status<!--This refers to their status after the battle, not their overall status--> | |||
|- | |||
|[[Fifth Fleet]] | |||
|{{Class|Marathon|heavy cruiser}} | |||
|{{UNSCShip|Say My Name}}{{Ref/Reuse|preparetodrop}} | |||
|Unknown | |||
|- | |||
|[[Medii Battle Group]]{{Ref/Book|Id=evg|Book=Halo: The Essential Visual Guide|Page=107}} | |||
|{{Class|Stalwart|light frigate}} | |||
|{{UNSCShip|In Amber Clad}}{{Ref/Reuse|Id=outskirts}} | |||
|Survived | |||
|- | |||
| rowspan="5" | Unknown | |||
|[[UNSC destroyer]] | |||
|{{UNSCShip|Brasidas}}{{Ref/Reuse|Id=newmombasa}} | |||
|Survived | |||
|- | |||
|{{Class|Paris|heavy frigate}} | |||
|{{UNSCShip|Paris}}{{Ref/Reuse|Id=goo186}} | |||
|Survived | |||
|- | |||
|[[UNSC frigate]] | |||
|{{UNSCShip|Redoubtable}}{{Ref/Reuse|Id=goo186}} | |||
|Survived | |||
|- | |||
|[[UNSC corvette|UNSC stealth corvette]] | |||
|{{UNSCShip|Coral Sea}}{{Ref/Reuse|Id=goo186}} | |||
|Survived | |||
|- | |||
|{{Class|Sahara|heavy prowler}} | |||
|{{UNSCShip|Dusk}}{{Ref/Reuse|Id=goo186}} | |||
|Survived | |||
|} | |||
====Military personnel==== | |||
{| class="wikitable sortable " style="width: 75%;" cellspacing="1" cellpadding="1" border="0" | |||
|- | |||
! Branch | |||
! Rank | ! Rank | ||
! Name | |||
! Status<!--This refers to their status after the battle, not their overall status--> | ! Status<!--This refers to their status after the battle, not their overall status--> | ||
|- | |- | ||
| [[ | | rowspan="3" |[[UNSC Navy]] | ||
| Lance Corporal | |[[Captain]] | ||
| Survived | |[[Veronica Dare]] | ||
|Survived | |||
|- | |||
|[[Commander]] | |||
|[[Miranda Keyes]] | |||
|Survived | |||
|- | |||
|[[Master Chief Petty Officer]] | |||
|[[John-117]] | |||
|Survived | |||
|- | |||
| rowspan="25" |[[UNSC Marine Corps]] | |||
|[[Colonel]] | |||
|[[Unidentified colonel|Unknown]] | |||
|KIA | |||
|- | |||
| rowspan="1" |[[Lieutenant (UNSC)|Lieutenant]] | |||
|[[Parisa]] | |||
|Unknown | |||
|- | |||
|[[Sergeant Major]] | |||
|[[Avery Johnson|Avery J. Johnson]] | |||
|Survived | |||
|- | |||
| rowspan="2" |[[Gunnery Sergeant]] | |||
|[[Edward Buck]] | |||
|Survived | |||
|- | |||
|[[Marcus P. Stacker]] | |||
|Survived | |||
|- | |||
|[[Staff Sergeant]] | |||
|[[Banks]] | |||
|Survived | |||
|- | |||
| rowspan="3" |[[Corporal]] | |||
|[[Taylor H. Miles]] | |||
|Survived | |||
|- | |||
|[[Palmer (Marine)|Palmer]] | |||
|Unknown | |||
|- | |||
|[[Perez (Marine)|Perez]] | |||
|Survived{{Ref/Note|Perez survival is suggested in ''[[Quarantine Zone]]'', where Johnson questions McKenzie and Perez regarding the status of their exit.}} | |||
|- | |||
| rowspan="5" |[[Lance Corporal]] | |||
|[[Kojo Agu]] | |||
|Survived | |||
|- | |||
|[[Fones]] | |||
|Unknown | |||
|- | |||
|[[Morton]] | |||
|Unknown | |||
|- | |||
|[[Pineada]] | |||
|Unknown | |||
|- | |- | ||
| [[ | |"[[Rookie]]" | ||
|Survived | |||
| Survived | |||
|- | |- | ||
| [[ | | rowspan="4" |[[Private First Class]] | ||
| | |[[Galliard]] | ||
| | |KIA | ||
|- | |- | ||
| [[ | |[[Locke (Mombasa)|Locke]] | ||
| | |KIA | ||
|- | |- | ||
| [[Michael Crespo | |[[Michael Crespo]] | ||
|Survived | |||
| Survived | |||
|- | |- | ||
| [[ | |[[Sullivan]] | ||
| | |Unkown | ||
|- | |- | ||
| [[ | | rowspan="6" |[[Private]] | ||
| | |[[Butkus]] | ||
| Unknown | |Unknown | ||
|- | |- | ||
| [[Emerson]] | |[[Emerson]] | ||
|Unknown | |||
| Unknown | |||
|- | |- | ||
| [[ | |[[Jemison]] | ||
|KIA | |||
| KIA | |||
|- | |- | ||
| [[ | |[[McKenzie (Marine)|McKenzie]] | ||
| | |Survived | ||
|- | |- | ||
| [[ | |[[O'Brien (ODST)|O'Brien]] | ||
| | |KIA | ||
| | |||
|- | |- | ||
| [[ | |[[Walpole]] | ||
| | |Unknown | ||
|- | |- | ||
| [[ | |Unknown | ||
| [[ | |[[Davis (Marine)|Davis]] | ||
| | |Unknown | ||
|} | |||
====Units==== | |||
*[[UNSC Marine Corps]] | |||
**[[Orbital Drop Shock Trooper]] | |||
***[[105th Shock Troops Division]] | |||
****[[7th Shock Troops Battalion]] | |||
***[[65th Shock Troops Division]] | |||
****[[Alpha-Nine]] | |||
***[[Alpha-Five]] | |||
***[[Unidentified ODST squad]] | |||
**[[A Company]] | |||
**[[Second Platoon (Halo 3: ODST)|Second Platoon]] | |||
**[[E2-BAG/1/7]] | |||
*[[UNSC Navy]] | |||
**[[UNSC Home Fleet|Home Fleet]] | |||
***[[Fifth Fleet]] | |||
***[[Medii Battle Group]]{{Ref/Reuse|evg}} | |||
===Artificial intelligence=== | |||
{{Main|Artificial intelligence}} | |||
{| class="wikitable sortable " style="width: 75%;" cellspacing="1" cellpadding="1" border="0" | |||
|- | |- | ||
! Name | |||
! Status<!--This refers to their status after the battle, not their overall status--> | |||
|- | |- | ||
| [[ | |[[Cortana]] | ||
|Survived | |||
| Survived | |||
|- | |- | ||
| [[ | |[[Superintendent]] | ||
| | |Terminated | ||
|- | |- | ||
| [[ | |[[Vergil]] | ||
| | |Survived {{c|Absorbed into [[Quick to Adjust]]}} | ||
| | |} | ||
===Civilians=== | |||
====People==== | |||
{| class="wikitable sortable " style="width: 75%;" cellspacing="1" cellpadding="1" border="0" | |||
|- | |- | ||
! Name | |||
! Status<!--This refers to their status after the battle, not their overall status--> | |||
|- | |- | ||
| [[ | |[[Mike Branley]] | ||
| | |Unknown | ||
|- | |- | ||
| [[ | |[[Roberto Bustamante]] | ||
| | |KIA | ||
|- | |- | ||
| [[ | |[[Daniel Endesha]] | ||
| | |KIA | ||
|- | |- | ||
| [[ | |[[Sadie Endesha]] | ||
|Survived | |||
| Survived | |||
|- | |- | ||
| [[ | |[[Benjamin Giraud]] | ||
| | |Survived | ||
|- | |- | ||
| [[ | |[[Marshall Glick]] | ||
| | |KIA | ||
|- | |- | ||
| [[ | |[[Petra Janecek]] | ||
| | |Survived | ||
|- | |- | ||
| | |[[Jim Odingo]] | ||
| | |KIA | ||
|- | |- | ||
| [[ | |[[Tom Uberti]] | ||
|KIA | |||
| KIA | |||
|- | |- | ||
| [[ | |[[Carlos Wambua]] | ||
| [[ | |KIA | ||
| Unknown | |- | ||
|[[Jonas]] | |||
|Unknown | |||
|- | |||
|[[Kinsler]] | |||
|KIA | |||
|- | |||
|[[Stephen (Mombasa)|Stephen]] | |||
|Unknown | |||
|- | |||
|[[Communications Duty Officer|Unnamed Communications Officer]] | |||
|Unknown | |||
|- | |||
|[[Crone|Unnamed Crone]] | |||
|KIA | |||
|- | |||
|[[Unnamed NMPD Officer]] | |||
|KIA | |||
|- | |||
|[[Unnamed Commuter]] | |||
|Unknown | |||
|} | |} | ||
{{Col-2}} | |||
===Covenant=== | |||
===Naval assets=== | |||
====Starships==== | |||
{| class="wikitable sortable " style="width: 75%;" cellspacing="1" cellpadding="1" border="0" | |||
|- | |||
! Fleet | |||
! Class | |||
! Name | |||
! Status<!--This refers to their status after the battle, not their overall status--> | |||
|- | |||
| rowspan="2" | [[Fleet of Sacred Consecration]] | |||
|{{Class|CAS|assault carrier}} | |||
|''[[Solemn Penance]]''{{Ref/Reuse|outskirts}} | |||
|Survived | |||
|- | |||
|{{Pattern|Ket|battlecruiser}} | |||
|''[[Pious Inquisitor]]'' {{c|possibly}}{{Ref/Reuse|firsttwelvehours}} | |||
|Survived | |||
|} | |||
=== | ====Military personnel==== | ||
{| class="wikitable sortable " style="width: 75%;" cellspacing="1" cellpadding="1" border="0" | |||
|- | |||
! Branch | |||
! Rank | |||
! Name | |||
! Status<!--This refers to their status after the battle, not their overall status--> | |||
|- | |||
|Unknown | |||
|[[Shipmaster]] | |||
|[[Rhul 'Salmutee]] | |||
|Survived | |||
|} | |||
====Non-combatants==== | |||
{| class="wikitable sortable " style="width: 75%;" cellspacing="1" cellpadding="1" border="0" | |||
|- | |||
! Branch | |||
! Rank | |||
! Name | |||
! Status<!--This refers to their status after the battle, not their overall status--> | |||
|- | |||
| rowspan="2" |[[High Council]] | |||
| rowspan="2" |[[Hierarchs|High Prophet]] | |||
|[[Prophet of Regret]]{{Ref/Reuse|outskirts}} | |||
|Survived | |||
|- | |||
|[[Prophet of Truth]]{{Ref/Reuse|waypoint}} | |||
|Survived | |||
|- | |||
|Unknown | |||
|Unknown | |||
|[[Quick to Adjust]]{{Ref/Reuse|data}} | |||
|Survived {{C|defected}} | |||
|} | |||
{{Col-end}} | |||
==Trivia== | ==Trivia== | ||
*The multiplayer levels [[Turf]], [[Terminal ( | *The multiplayer levels [[Turf]], [[Terminal (map)|Terminal]], [[District]] in ''Halo 2'' and [[Longshore]] in ''Halo 3'' take place during the Battle of Mombasa. The ''Halo 2'' level [[Tombstone]] apparently takes place late in the battle, (roughly concurrent with ''Halo 3: ODST'') as the city is largely in ruins. | ||
*[[Sadie's Story]] depicts Regret's assault carrier arriving in the city via slipspace. The carrier's descent to the atmosphere is never shown in any other source, but it may have made a short, pinpoint jump to get away from the UNSC forces. | *[[Sadie's Story]] depicts Regret's assault carrier arriving in the city via slipspace. The carrier's descent to the atmosphere is never shown in any other source, but it may have made a short, pinpoint jump to get away from the UNSC forces. | ||
*Judging by the timeline, New Mombasa was supposed to be over a thousand kilometers further south than Old Mombasa due to geographical latitude placement. This could be an oversight by Bungie due to geographical emplacement; by 1900 hours, near the equator line, the sun has already set, while on the level NMPD HQ, at 1936 hours the sun is still setting.{{Ref/Reuse|nmpdhq}}<ref>''Halo Timeline year 2552'', [[2552]]</ref> | |||
==Gallery== | |||
<gallery> | |||
File:Arney Antics.jpg|Civilians taking up arms during the battle. | |||
File:H2A-OutskirtsCourtyardBattle.png|Marines fighting in Old Mombasa. | |||
File:Halo hogfight.jpg|UNSC forces led by John-117 advancing on the beach. | |||
File:H3ODST PrepareToDrop Loadscreen.png|SOEIV pods dropping into New Mombasa moments before Regret's retreat. | |||
File:H3ODST - Regret Carrier.png|The ''Solemn Penance'' moments before its jump into Slipspace. | |||
File:H3ODST - Slipspace Event.png|The Mombasa Slipspace Event. | |||
File:H3ODST Warthog Convoy.jpg|A Warthog convoy in Uplift Nature Reserve. | |||
File:H3ODST FamilyFeud.jpg|ODST Edward Buck comes across the aftermath of the skirmish between the Sangheili and Jiralhanae in the city. | |||
File:H3ODST TayariMarinesSurrounded.jpg|Covenant infantry surrounding UNSC Marines in Sector 8 after the Slipspace event. | |||
File:ONIsitedefend.jpg|NMPD officers and ODSTs defending the interior of Alpha Site. | |||
File:H3ODST-CrashedD77C.jpg|Dutch, Mickey, and a police officer at the crash site of their D77C-Pelican. | |||
File:HTMCC-H3ODST KikowaniScarab 2.jpg|Alpha-Nine destroys a Scarab. | |||
File:H3ODST ScarabAttacksOlifant.jpg|A Scarab fires at the Olifant operated by Dare and Huragok Quick to Adjust. | |||
File:H3ODST HuragokDefense2.jpg|Edward Buck and the Rookie defending the entrance to Uplift Nature Reserve. | |||
File:H2 Tombstone Skybox.png|The destroyed city as seen from a [[Unnamed UNSC munitions testing complex|UNSC complex]]. | |||
</gallery> | |||
==List of appearances== | ==List of appearances== | ||
*''[[Halo: First Strike]]'' | |||
**''[[Petra]]'' {{Mo}} | |||
*''[[Halo 2]]'' {{1st}} | *''[[Halo 2]]'' {{1st}} | ||
*''[[Halo Graphic Novel]]'' | *''[[Halo Graphic Novel]]'' | ||
**''[[Second Sunrise Over New Mombasa]]'' | **''[[Second Sunrise Over New Mombasa]]'' | ||
*''[[Halo: Ghosts of Onyx]]'' | |||
*''[[Halo 3]]'' {{Mo}} | |||
*''[[Halo 3: ODST]]'' | *''[[Halo 3: ODST]]'' | ||
**''[[Sadie's Story]]'' | **''[[Sadie's Story]]'' | ||
*''[[Halo Legends]]'' | |||
**''[[Origins]]'' {{c|Possible appearance}} | |||
*''[[Halo: Evolutions - Essential Tales of the Halo Universe]]'' | *''[[Halo: Evolutions - Essential Tales of the Halo Universe]]'' | ||
**''[[Palace Hotel | **''[[Palace Hotel]]'' | ||
*''[[Halo: Reach]]'' | |||
*''[[Halo 4]]'' {{c|Possible appearance in [[Prologue]]}} | |||
*''[[Halo 2: Anniversary]]'' | *''[[Halo 2: Anniversary]]'' | ||
*''[[Halo: New Blood]]'' | *''[[Halo: New Blood]]'' | ||
| Line 328: | Line 629: | ||
*''[[Halo Mythos]]'' | *''[[Halo Mythos]]'' | ||
*''[[Halo: Envoy]]'' {{Mo}} | *''[[Halo: Envoy]]'' {{Mo}} | ||
*''[[Halo: Bad Blood]]'' {{Mo}} | |||
*''[[Halo Infinite: Memory Agent]]'' {{Mo}} | |||
==Notes== | ==Notes== | ||
{{Ref/Notes}} | |||
==Sources== | ==Sources== | ||
{{ | {{Ref/Sources|2}} | ||
{{Engagements in the Battle for Earth}} | |||
{{ | |||
Latest revision as of 23:19, June 6, 2023
|
Previous: |
|
|
Concurrent: |
|
|
Next: |
|
| Battle of Mombasa | |
|---|---|
 Clockwise from top left: M12B Warthogs drive along a ruined highway in Old Mombasa; civilians fleeing by watercraft during the battle; an image of John-117 taken by Benjamin Giraud during the battle; a Protos-pattern Scarab destroyed in Old Mombasa; the Solemn Penance jumping to slipspace over the city; elements of Alpha-Nine observing a Ket-pattern battlecruiser at the conclusion of the battle. | |
|
Conflict: |
|
|
Date: |
|
|
Location: |
|
|
Outcome: |
Strategic Covenant victory
|
- "This is the only place on Earth the Covenant decided to land. That Prophet is going to tell us why."
- — Fleet Admiral Terrence Hood[9]
The Battle of Mombasa, also known as the Battle of New Mombasa,[26] was a large-scale engagement of the Battle for Earth, taking place in late October 2552. Over the course of the battle, Covenant forces attempted to capture the city of Mombasa, Kenya before it was quickly retaken in a matter of around one hour by the UNSC.[9][6] However, after the High Prophet of Regret's retreat, the city remained occupied but now by the Prophet of Truth and his Jiralhanae loyalists.[1] In the aftermath of the battle, the Portal to the Ark was eventually found by the Covenant, which would prove to be a major determining factor in the final outcome of the Human-Covenant War.[4][2] Years after the war's end, a movement known as "Project Rebirth" emerged to endorse the eventual rebuilding of Mombasa in the aftermath of the War.[29]
Background[edit]
Covenant Discovery[edit]
After discovering and decrypting a Forerunner Luminary found on Meridian, the High Prophet of Regret of the Covenant was given Slipspace coordinates to a planet called "Erde-Tyrene", which was home to a Forerunner slipspace portal leading to the Ark — a facility highly important to the initiation of their "Great Journey". Unknown to Regret, Erde-Tyrene was humanity's homeworld, Earth. In his characteristic brash and ambitious manner, the Prophet of Regret, wishing to proceed with securing the Portal, took a hastily-assembled force of 15 warships to Earth.[30] Though surprised to find not only a human presence on the planet, but a planet more fortified than any previously encountered human-held world, the High Prophet deemed his mission important enough to proceed and utilized many tactics to ensure his safe arrival on the surface. The coordinates provided by the Forerunner information indicated that his quarry was around the area of Mombasa, Kenya. Immediately after the Prophet of Truth learned of Regret's move, he sent a massive support and excavation fleet he had collected in secrecy to pick up where Regret had left off.[1][2]
Mombasa[edit]
The city was relatively lightly defended, with only NMPD forces as well as some Marine units present, including the 17th Marine Regiment.[24] Some additional military units had been transferred to the city, along with Earth's other tether cities, following the Fall of Reach to bolster their defenses in case of a Covenant invasion. These included E2-BAG/1/7 as well as some UNSC Army forces, though Lieutenant Parisa of E2-BAG/1/7 was put out of action upon deployment.[11]
Just prior to the Covenant's attack, Sadie Endesha was on her way to Magongo to enlist in the UNSC,[31] while photographer and journalist Benjamin Giraud was on a train heading to Old Mombasa.[24]
Battle[edit]
Surprise Covenant invasion[edit]
- "No parking, violators will be ticketed and towed!"
- — The Superintendent discussing the assault carrier hovering over New Mombasa with Sadie Endesha.[32]

On October 20, during the opening stages of the Battle for Earth, a single CAS-class assault carrier, the Solemn Penance, broke through the UNSC Home Fleet's defensive lines and headed towards Earth's atmosphere.[33][24] The ship slipspace jumped down to the city of New Mombasa in the East African Protectorate.[34] There, the ship came to rest over the Uplift Nature Reserve deploying infantry and mechanized support.[8] One of the Covenant's first targets was the Mombasa Maglev train network.[35] Despite the widespread Covenant deployment throughout Mombasa, the highest concentration of Covenant ground troops was directly below the carrier in its landing zone.[36] Over the course of the battle, the Covenant deployed several Scarab assault platforms in both the old and new sections of Mombasa, with many of them targeting the city's space elevator.[37] The UNSC managed to trap and destroy many of them in the narrow streets of the city.[28]
The Covenant also sent seven Huragok, including Quick to Adjust, into Kikowani subway station, likely in search of the Forerunner structure underneath Mombasa. However, the six other Huragok instead freed Quick to Adjust from its explosive harness.[38] While the six others were killed, Quick survived and made its way into the data center. Doctor Daniel Endesha witnessed the event, and instructed Vergil, a subroutine of the city Superintendent, to track Quick.[39] The Covenant would find out Quick's betrayal, and send forces into the Data Center to kill Quick or prevent its defection to the UNSC.[40]
At the time of the ship jumping down to the city, Sadie Endesha and numerous civilians had been kicked off a train in Old Mombasa.[34] Covenant tanks that were very quickly deployed into the city,[32] bombarded and destroyed the train in the vicinity of Makupa Station.[41] NMPD Commissioner Kinsler and officer Mike Branley soon arrived on the scene, taking Sadie away from the crowd and headed for a police bunker outside the city.[41] Over the course of the battle, some civilians took up arms in an attempt to defend their city, joining the Marines under command of a Marine officer.[24] These "militias" were used as a propaganda tool by the NMPD, broadcasting their exploits over PA systems.[42] Though a number of the stories of the militias appear to have been fabricated by Stephen at NMPDHQ, including that of "Harris 'Two-Shot' Kibaki.[43] With the Mombasa Tether being shut down, citizens were forced to escape the city on foot or by car.[42] The militias and armed citizens allowed for most of the people of New Mombasa to evacuate from the city to Old Mombasa using boats destined for other surrounding cities.[24]
More UNSC Marine Corps and UNSC Army units later poured into the region after the initial attack, some of which arriving from Diego Garcia near India.[44]
UNSC insertion[edit]
- Sergeant Avery Johnson: "Dear Humanity...we regret being alien bastards. We regret coming to Earth. And we most definitely regret that the Corps just blew up our raggedy-ass fleet!"
- Pelican Pilots: "Oo-rah!"
- Cortana: "Regret is a name, Sergeant. The name of one of the Covenant's religious leaders. A Prophet. He's on that carrier, and he's calling for help."
- — Sergeant Major Avery Johnson and Cortana discussing a Covenant distress signal, while flying in on a Pelican.[9]

Some time after the Covenant insertion to the city and during the civilian evacuation, the Stalwart-class light frigate UNSC In Amber Clad of the Medii Battle Group[45] descended near Mombasa to reinforce the ground troops already present. Intercepted transmission from the Covenant forces had led the UNSC to correctly believe that it was the High Prophet of Regret in command of the opposing force, making his capture their utmost priority in the right line of the originally cancelled Operation: RED FLAG. Three Pelicans, one of them with the Master Chief Petty Officer John-117 onboard, were deployed by the In Amber Clad to board the Solemn Penance hovering near the Mombasa Tether. However, before they could get near the carrier, the formation ran across a Protos-pattern Scarab which shot down all of the Pelicans in Old Mombasa. The first was destroyed by the Scarab's main cannon, while the second, carrying an ODST squad led by Gunnery Sergeant Marcus Stacker, was shot down and crash-landed on the beach. The third Pelican, carrying Sergeant Major Avery Johnson and John-117 crashed upside-down into a building in the heart of Old Mombasa.[9]
Outskirts[edit]

- "Here, let me give him my "Welcome to Earth" gift basket."
- — Walpole, an ODST about to fire on a group of Covenant at Hotel Zanzibar.[46]
Both teams suffered few casualties from their respective crashes. The Spartan's team moved into a nearby building while Stacker's team moved up the beach to the Hotel Zanzibar and set up a command post, eliminating several Covenant units in the process. Both teams then waited in their respective locations for extraction.[9]
After John-117 and his allies repelled several waves of Covenant including a pair of Mgalekgolo, a Pelican found the group and gave them coordinates of a landing zone. Commander Miranda Keyes ordered Johnson to regroup with the In Amber Clad so that he could coordinate further deployment of infantry and armor units while the Spartan continued on foot through the city to regroup with the second squad.[9]
After fighting his way through multiple alleyways filled with Kig-Yar Snipers, John-117 found and assisted the ODSTs pinned down at Hotel Zanzibar. Commander Keyes sent a Warthog to the Spartan, who spearheaded a counterattack, destroying Covenant infantry, armor, and Covenant artillery emplacements on the beaches facing New Mombasa.[9]
John-117 and his makeshift Marine unit entered a blown-out hole in a tunnel where they intercepted and destroyed a Covenant convoy, made up primarily of Ruwaa-pattern Shadows that had been attempting to rendezvous with the regrouping Covenant ground forces still stationed in that sector of the city. Along the way they engaged and neutralized several barricades the Covenant had assembled to fortify the tunnel network. After the engagement in the tunnels, they advanced towards the bridge connecting Old and New Mombasa. Before the Spartan got there, the Marine unit at the bridge had already exhausted itself fighting the Scarab.[9][6]
The Conduit[edit]

- Main article: Operation: WINDOW PANE
As the In Amber Clad's force pressed towards New Mombasa, the Covenant brought the Conduit—a Forerunner device capable of opening slipspace portals—to New Mombasa.[26] A Spirit dropship carrying a data pad with information pertaining to the Conduit was shot down by UNSC forces.[18] When the data pad's relevance to the Conduit was realized by the UNSC, a squad of Orbital Drop Shock Troopers was sent to recover it.[26] Covenant forces awaiting extraction at the crashed Spirit were attacked by the ODST squad and the Sangheili Field Master carrying the data pad was killed. With the data pad, the UNSC used the information gained to pinpoint the location of the Conduit in the city.[47] The ODST squad was directed to a Sangheili task force carrying the Conduit. After a brief engagement, the ODSTs managed to procure the Conduit from the Covenant and the device was delivered to a nearby UNSC convoy.[20]
The Covenant responded by assaulting the convoy with waves of infantry. Though the ODST squad and several Marines attempted to defend the convoy from attacking Covenant forces, a Sangheili Field Master dropped down from his Spirit into the Elephant carrying the Conduit, retrieved the device, and escaped the engagement aboard the dropship. The ODSTs gave chase and,[48] eventually, the Spirit was shot down. The squad located the dropship's crash site and attacked its surviving occupants. When the Field Master and his Kig-Yar bodyguards were eventually eliminated, the Conduit was reclaimed by the UNSC.[49] The ODSTs took the Conduit aboard a Warthog and were ordered to leave the city.[50]
Forerunner glyphs[edit]
Concurrent with the search for the Conduit, an unidentified ODST squad participated in the battle with orders to retrieve information the Covenant were interested in. Commandeering a Grizzly tank, the squad rescued marines who had recovered an emergency broadcast from a downed AV-14 Hornet, stating that its crew had captured a series of Forerunner glyphs from the Covenant. The squad then trekked their way to the site, recovered the glyphs, and escaped the city before the Solemn Penance jumped into slipspace.[22]
Battle for New Mombasa[edit]

- Sergeant Banks: "That thing is really starting to piss me off! Marines, time to kill us a Scarab!"
- Corporal Perez: "It's over here, sir!"
- — Sergeant Banks and Corporal Perez talking about a Scarab heading towards the canals in New Mombasa.[6]
The Master Chief arrived at the bridge to assess the situation while Sergeant Johnson reinforced the Marines with weaponry, including a Scorpion tank. The Chief traveled across the bridge with the armored unit, clearing it of both Covenant armored and mechanized forces. These forces included Ghosts, Wraiths, Phantoms, and Banshees.[6]
After the engagement on the bridge, UNSC forces entered New Mombasa in large numbers. They linked up with various squads of Marines as they moved through the city, eliminating Covenant forces that were setting up positions. The Master Chief's team worked their way into the Kilindini Park Cultural Center through the sewer system, and then towards the city center via Shimanzi Road and Beria Plaza, finding that the Scarab had, likewise, taken a similar path.[6][11]
Once in the heart of the industrial zone near the city center, John-117's team found a Marine outpost holed in a corporate building,[Note 2] commanded by Staff Sergeant Banks of A Company under siege by a unit of Wraiths. The UNSC forces, with the help of John-117, destroyed the Wraiths, and secured a landing zone for reinforcements. The Pelicans then dropped a platoon of Marine infantry and a Scorpion tank.[6]
The lumbering Scarab appeared from the other end of the plaza the Marine outpost was facing and the Scorpion tank opened fire on it, with no effect. After the Scarab destroyed the tank with its main gun, Marines opened fire on the walker, but it was unaffected and impervious to the weak rounds and climbed over their position and moved into the canals of the city. However, it soon found itself trapped inside of the walls of the canal, giving Pelicans a chance to attack it openly.[6]
The Master Chief and A Company followed the Scarab through the canals and the Spartan boarded the walker. While the Marines provided some cover fire, John defeated the forces manning the Scarab walker. After defeating its command crew, he managed to destroy the Scarab from the inside. All Covenant forces soon began retreating to Regret's carrier. The Master Chief was extracted by Sergeant Johnson's Pelican and taken back to In Amber Clad along with the remaining members of A Company.[6]
Regret's withdrawal[edit]

- Remi: "Ma'am, without a destination solution—"
- Miranda Keyes: "We are not losing that ship!"
- — Miranda Keyes ordering the pursuit of the Solemn Penance.[6]
The Pelicans carrying Spartan-117 and the Marines entered the In Amber Clad, just as the carrier was preparing to flee. Fleet Admiral Terrence Hood was hesitant to let In Amber Clad engage Regret's assault carrier, still above Mombasa and beside the Mombasa space elevator. He instead opted to call in two heavier vessels to intercept the carrier if it returned to space. However, when the carrier initiated its slipspace drive, preparing to jump while still in the atmosphere, Hood gave the ship the green light to give chase.[6] The UNSC Paris, UNSC Redoutable, and UNSC Coral Sea, and the UNSC Dusk followed in the wake of the slipspace jump, with the latter ship losing contact with its companions in the slipstream.[51]
Just before the carrier jumped, remaining ships of the UNSC Home Fleet deployed dozens of SOEIVs down to the city in an effort to infiltrate the carrier, only to be caught by the EMP blast in mid-flight, destroying their navigational and safety systems, plunging them and their Orbital Drop Shock Trooper occupants to almost certain death. It is likely that only one squad survived, having changed their course away from the carrier at the last moment. Many of the city's buildings were heavily damaged but remained standing, including the Mombasa Tether. The rupture also created a large crater in the mainland, north of New Mombasa, revealing a section of the Forerunner portal.[14] This event would later become referred to as the New Mombasa Slipspace Event, and would lead to the reactivation of the old NATO Outpost C9.[52]
The ODSTs in possession of the Conduit were escaping the city as the nearby Solemn Penance entered slipstream space over Mombasa.[50] When the resulting slipspace rupture engulfed the city, the ODSTs were killed and the Conduit was believed to have been destroyed as well.[53] However, the Conduit entered slipspace to save itself from destruction and arrived at Installation 03.[54]
After the Slipspace Event[edit]

- "We need to get above this crap, link up with the bee-net. One of our drones must have seen where they hit."
- — Edward Buck to Kojo Agu after meeting in Tayari Plaza.
Large numbers of Covenant troops remained in the city even after Regret's withdrawal. While most of Regret's troops evacuated into the carrier, there was still a significant Covenant presence both on the ground and in orbit. Moments after Regret jumped, the Prophet of Truth seized the control of the battle and assumed the command of what remained within Regret's initial fleet while a large support and excavation fleet of Jiralhanae-led Covenant reinforcements was en route to Earth. The remaining Jiralhanae from Regret's forces were simultaneously given orders to execute the Sangheili forces on the ground and in orbit. This was a part of the Prophet of Truth's personal scheme for the Covenant, which would come to its conclusion two weeks later when the Sangheili were officially removed from their positions as the main warrior caste of the Covenant.[1][2]
The Covenant forces were met by a sizeable number of UNSC Marines and NMPD forces that remained in the city. The human forces organized an effective resistance, and fought for control of the city throughout the remainder of the day. The city's Urban Infrastructure AI Superintendent also had a vital role in the defense of the city.[17]
Knocked off their course by the slipspace rupture, two SOEIVs made rough landings: Gunnery Sergeant Edward Buck's pod in Lumumba, and Captain Veronica Dare's in nearby Tayari Plaza. At this point in the battle, large groups of Jiralhanae led forces were being deployed into the city. Buck fought his way to Tayari Plaza to help Dare, but upon making it to her pod, he discovered that the Captain had disappeared. Meeting with another of his squad mates and with no idea what his objective was now, Buck took the decision to reunite with his squad and then extract them from the city as fast as possible.[10]
Assault on the Covenant landing zone[edit]

- Colonel: "Trooper, you're almost at second platoon's location. Give 'em a hand and push to the primary objective!"
- Taylor Miles: "What is the objective, Colonel?"
- Colonel: "You know the Covenant carrier that slipped away from the city? We need to secure its old LZ. Snatch a Tier One asset."
- — ODST Taylor Miles and the UNSC colonel at Uplift Reserve.[8]
Around thirty minutes after the slipspace event, unmanned F-99 UCAVs were sent to the city to maintain air supremacy over the Phantoms and Banshees. UNSC forces began to regroup, following the orders of a Marine colonel. The Marines were ordered to regroup at the colonel's position near the landing zone, and take control of Regret's carrier's former landing zone in the Uplift Nature Reserve in an effort to seize an unidentified enemy asset, later revealed to be groups of Huragok. Marines at the Uplift Reserve, led by a surviving ODST, managed to break through Covenant defenses along the way to the landing zone. At this point, the Mombasa Tether, already damaged by the jump, collapsed, with miles of debris from the tether scattered across East Africa.[55] The collapse also killed the colonel, who, in his final moments, ordered Marines to evacuate from the park. With the colonel dead and the Covenant transporting all Huragok away from the park, the UNSC forces gained little advantages from their efforts in the park.[8]
Fallback to ONI Alpha Site[edit]

- Marine: "All teams, hold the ridge, don't let them near the ONI building!"
- Jiralhanae: "We do the Prophet's bidding, show no fear!"
- — A UNSC Marine and Jiralhanae Captain rallying their respective forces at ONI Alpha Site.
After the UNSC reclaimed the Covenant landing zone in Uplift Reserve, defending the Office of Naval Intelligence's local headquarters became the top priority. Ninety minutes after the slipspace event, Marines began falling back to the building as advancing Covenant Wraith convoys prepared to lay siege to Alpha Site. Kizingo Boulevard in Sector 4 became an important location where UNSC forces have set up stationary M68 Gauss cannons to defend the entrance to the rally point at Sector 10, which leads into Alpha Site. Marines managed to regroup at Sector 10 before falling back further into the ONI complex.[21]
Within the ONI compound, the Marines and the NMPD forces destroyed the bridge leading to the base, in hopes of slowing down the advancing Covenant forces. This did not, however, stop the incoming dropships, but slowed the advance. The human forces fell back to the base's courtyard, which they defended against waves of Covenant attackers, before falling back into the interior of the main building. Again, they fended off multiple waves of Covenant. NMPD forces then planted explosives inside the complex, to destroy it in order to prevent the Covenant from accessing the Superintendent's data facility deep under the building. The only survivors of the siege were two ODSTs from Alpha-Nine, Michael Crespo and Taylor Miles, who evacuated from the roof, where they were picked up by an NMPD Pelican dropship. Once on board, they detonated the explosives and watched as the ONI building was completely destroyed. Six hours later, the building was still burning from the explosions.[17] At the time, Crespo and Miles were unaware that destroying the building had alerted a newly-constructed Yanme'e hive beneath the building in the Superintendent's data facility, making it much more difficult for UNSC forces to reach the data core later on.[40]
Skirmish at NMPD Headquarters[edit]
While the Alpha Site was destroyed, Edward Buck and his squad's sniper, Kojo Agu, made their way to the top floors of the NMPD headquarters building, where they were to be picked up by Pelican with two other ODSTs already onboard. However, the dropship was shot down before landing, and it crashed on another rooftop, killing the pilot on impact. Buck and Agu fought their way across the rooftops, and eventually reached the crash site, where they fought off waves of attacking Covenant using heavy weapons from the Pelican. Finally, Jiralhanae Chieftain Bracktanus dropped off from a Phantom, killed an NMPD officer and severely wounded Agu. The squad managed to kill the Chieftain, after which they decided to evacuate through the train tunnels which led into Old Mombasa.[23]
Nightfall[edit]

- Michael Crespo: "What do you see, Gunny?"
- Edward Buck: "A whole lot of Covenant, gathering around that Slipspace crater. I wonder what they're looking for."
- — Buck and Crespo from Alpha-Nine observing the skyline from Kikowani.
By nightfall, nearly all human forces in the city had either been evacuated or destroyed. With Covenant forces controlling the city, remaining Covenant cruisers left by the Prophet of Regret began excavating the area around the crater created by the slipspace rupture.[25] Among the few human survivors were the members of Alpha-Nine, who arrived at Kikowani Station near the city's northeastern seawall, only to realize that the station, as well as its surroundings had been flooded by water, making escape through train tunnels impossible. The squad decided to hijack a Phantom dropship, in which they succeeded. Buck escorted the rest of the squad through the flooded sections of the city in a Banshee. The area was filled with Covenant forces, including a Scarab. After destroying the Scarab, they managed to fly out of the city, when Buck suddenly realized he knew where Captain Dare was and decided to go back to find her, inside the Superintendent's data center.[16]
Around the same time, a lone ODST from Alpha-Nine, Lance Corporal J.D. "Rookie", thought dead by the rest of the squad, woke up in his pod, on the edge of a rooftop in Mbaraki. The city was already occupied by the Covenant, with no UNSC resistance left. The Superintendent aided the Rookie to survive in the city and look for clues for what happened to his squad. After wandering around the city for a while, the Rookie received a distress message from Dare, who was inside the Superintendent's data facility deep under the city. He made his way to a subway entrance, and descended down an elevator shaft, to Sublevel 7 of the data center.[7] At this point, the underground tunnels had become infested with Yanme'e, who had built massive hives in the area.[40]
Extracting the asset[edit]

- Veronica Dare: "When did this happen?"
- Edward Buck: "They started showing up right before I went underground."
- — ONI agent Veronica Dare and ODST Edward Buck viewing a fleet of Covenant ships circling Mombasa.[4]
Eventually, the Rookie managed to meet up with Dare inside the Superintendent's Data Center. The two fought through the Yanme'e hive in sublevel 10, causing the Yanme'e to alert the Jiralhanae, who sent more reinforcements to the Data Center. Inside, Dare and Rookie discovered the Huragok Quick to Adjust,[5] who had combined the Superintendent, namely its Vergil subroutine, with itself. As Quick disconnected from the core, the AI shut itself down, as all of its data had been transferred into the creature. At this point, Buck arrived into the complex and the ODSTs escaped back to the surface through the Covenant-occupied tunnels, while protecting the critically important Huragok.[40]
The next day on the morning of October 21, planned reinforcements of the enormous Jiralhanae-led Covenant support and excavation fleet from the Prophet of Truth began to exit slipspace above Mombasa and across its surrounding areas, ensuring the full secure of large portions of the Africa from the UNSC and reinforcing excavation measures by the remaining forces of the Fleet of Sacred Consecration despite Covenant's lack of intel on the nature of the gateway Portal complex to the Ark.[3][Note 3]
During the final hours of the day, the area was now full of arriving Covenant capital ships. More Scarabs have been deployed to the city, and a massive air force of Banshees were deployed to the crater. Buck, Dare and the Rookie made their way to the surface, through a Covenant outpost in Sector 1, and eventually took an elevator to the city's Waterfront Highway. They then pushed through the highway and made a stand at the entrance to Uplift Reserve. The Phantom captured by the rest of the squad arrived and picked them up, and they made it out just as an assault carrier appeared from slipspace and glassed the area.[4]
Immediately after the Covenant occupation of Mombasa was achieved, the combined Covenant fleet gathered over Kenya and continued to uncover the Forerunner structure which activates a portal to the Ark.[4] While the Covenant fleet was prolongedly glassing the majority of East Africa, millions would have persished over the course of the excavation effort, before it ended at the final stages of the Battle of Kenya.[56]
Aftermath[edit]

New Mombasa and Earth[edit]
- "Before 2552, there was no way anything like that could happen on Earth. On one of those distant planets in the outer colonies, maybe. But an attack on Earth? Couldn't happen. Until it did. It's called glassing. Covenant warships rain plasma down on a planet until everything and everyone on the surface melts. Usually, it's complete world destruction. Earth only got a taste. The prolonged orbital bombardment destroyed East Africa, killing millions before it ended. None of us were safe anymore."
- — Benjamin Giraud[56]
The UNSC would not discover the actual purpose of the Covenant's arrival on Earth until two weeks after the Battle of Installation 05; most of the information was presumably received from the Huragok that had absorbed Vergil's data.[4] By this point, the Prophet of Truth had already arrived in Sol System on the Forerunner Dreadnought, along with many remnants of the diminishing Covenant such as the remainder of Covenant survivors of the Battle of Installation 05 with him.[57] The UNSC would assume the Forerunner structure to be the "Ark" until its activation during the Battle of Voi on November 17, 2552.[55][58]
The remnants of New Mombasa were liberated after Truth's fleet retreated to the Ark and were subsequently defeated, with Operation: MARSH FLASH beginning as part of the URNA Southwest Campaign.
Parts of Mombasa, like Haller Street, survived the battle. Haller Street and other areas had received some revitalization after Project Rebirth investment and UNSC interest in the Portal at Voi.[59] At some point through Project Rebirth, plans had been created to build the United Nations Space Command Memorial Park in the city.[29]
Some of the refugees of the battle ended up on the planet Oban.[60]
Solemn Penance and UNSC In Amber Clad[edit]
The Solemn Penance would arrive at Installation 05 on November 3, the Prophet of Regret having learned of the ring's location from the Luminary on Meridian.[30] The assault carrier was followed by In Amber Clad, who deployed a contingent of ODSTs led by John-117 on a mission to capture or kill the Prophet, an objective they would accomplish.[61][62] The Coral Sea, Dusk and Redoubtable all arrived as well, but at different times. The last ship to arrive, the Dusk, appeared in time to witness the outbreak of the Great Schism.[51]
Alpha-Nine, Vergil, and Sadie Endesha[edit]
Alpha-Nine was assigned to guard Quick to Adjust.[63] Eventually, the Huragok was interrogated by Avery Johnson on Quito Terminus, where Quick to Adjust and Vergil confirmed that the Covenant at New Mombasa were searching for the "Ark", or as revealed upon its activation, the Portal to the Ark.[4] A transcript of the interrogation of Vergil was given to Terrence Hood in a document titled "Vergil".[64]
A timeline of events in the Battle of Mombasa and the CSV of Edward Buck were compiled for Margaret Parangosky by Black Box titled "First Twelve Hours".[25]
Forerunner glyphs and the Conduit[edit]
In the summer of 2557, nearly five years after the battle, the Forerunner glyphs recovered by several ODSTs in the city were finally decoded, pointing to a region on Gamma Halo containing an unidentified Forerunner machine.[22]
Timeline[edit]
October 20, 2552[edit]
- 1459 hours: The CAS-class assault carrier Solemn Penance targets New Mombasa.[25] The carrier slipspace ruptured down to the city,[34] and came to rest over the Uplift Nature Reserve.[8]
- Between 1459 and 1603 hours: Solemn Penance drifts towards the New Mombasa Orbital Elevator. John-117 deployed to Old Mombasa[9] and fights into the heart of New Mombasa.[6] Sadie Endesha teams up with Mike Branley and struggles to reach the Mombasa city center and to find her dad Daniel Endesha.[65]
- 1512 hours: A T1 asset is exposed to capture or kill.[25]
- 1557 hours: Alpha-Five confirms procurement of the Conduit.[25]
- 1602 hours: ODST units are dropped from UNSC Say My Name as part of Operation: BUMRUSH.[25]
- 1603 hours: Solemn Penance departs from the city via slipspace.[25] UNSC In Amber Clad follows.[6] Alpha-Nine squad members are scattered by the shockwave.[14] Alpha-Five in possession of the Conduit attempt to flee the blast.[50] The blast destroys much of the Superintendent's electronics.[40] Edward Buck crash lands in Lumumba and attempts to meet Veronica Dare at Tayari Plaza. However, he ends up with Kojo Agu.[10]
- 1624 hours: Alpha-Five is designated KIA and the Conduit is lost.[25]
- 1632 hours: Taylor Miles exits pod in the Uplift Reserve and links up with UNSC forces to secure landing zone. UNSC conducts F-99 Wombat flyovers of the Reserve.[8]
- 1649 hours: The Orbital Elevator collapses. Covenant occupy roughly 38% of the city.[25]
- 1732 hours: Marines begin retreating and grouping up at a rally point at ONI Alpha Site. Michael Crespo links up with retreating UNSC forces on Kizingo Boulevard.[21]
- 1810 hours: Marines and remaining NMPD officers retreat into the inner walls of the ONI Alpha Site. Road bridge leading to it destroyed. Covenant begin dropping forces off by Phantom.[17]
- 1852 hours: Alpha Site is destroyed. Covenant occupy 51% of the city.[25] Michael Crespo and Taylor Miles were extracted to NMPD headquarters.[17]
- 1914 hours: Michael Crespo and Taylor Miles are shot down over a Covenant occupied NMPD HQ. Kojo Agu and Edward Buck rescue and link up with them.[23]
- 2101 hours: Michael Crespo, Taylor Miles, an injured Kojo Agu, and Edward Buck proceed into Kikowani and find transport out of the district.[16]
- 2141 hours: Remaining Covenant cruisers begin to group up at Mombasa.[25]
- 2206 hours: The Rookie wakes up in his pod. He begins to search for his squad mates by looking for clues. The Superintendent assists.[7] The Rookie meets Dare at the New Mombasa Data Center.[40]
- 2215 hours: Covenant begin excavating the hole the Solemn Penance tore into Old Mombasa.[25]
- 2227 hours: Covenant occupation is 78%.[25]
- 2319 hours: Veronica Dare reports that she has spotted Vergil.[25]
- After 2319 hours: The Rookie, Dare and Buck escort Vergil along the New Mombasa Waterfront Highway.[4]
- 2324 hours: Covenant occupation is 94%.[25]
- 2359 hours: Vergil is secured.[25]
October 21, 2552[Note 1][edit]
- A much larger Covenant fleet from the Prophet of Truth began to arrive in-system above Mombasa in order to reinforces the excavation efforts.[3][4] Buck, Dare, and the Rookie defend Vergil as they fight their way to the surface.[4] At dawn, the team witnesses continual Covenant reinforcements arriving at Earth to aid in excavation efforts.[4] They flee down the city's Waterfront Highway and reconnect with the rest of Alpha-Nine at the entrance to the Uplift Nature Reserve. [4]
- The squad manages to hold out and eventually escapes New Mombasa as the city, along with its surroundings, are glassed by the combined excavation fleet.[4]
Participants[edit]
Trivia[edit]
- The multiplayer levels Turf, Terminal, District in Halo 2 and Longshore in Halo 3 take place during the Battle of Mombasa. The Halo 2 level Tombstone apparently takes place late in the battle, (roughly concurrent with Halo 3: ODST) as the city is largely in ruins.
- Sadie's Story depicts Regret's assault carrier arriving in the city via slipspace. The carrier's descent to the atmosphere is never shown in any other source, but it may have made a short, pinpoint jump to get away from the UNSC forces.
- Judging by the timeline, New Mombasa was supposed to be over a thousand kilometers further south than Old Mombasa due to geographical latitude placement. This could be an oversight by Bungie due to geographical emplacement; by 1900 hours, near the equator line, the sun has already set, while on the level NMPD HQ, at 1936 hours the sun is still setting.[23][66]
Gallery[edit]

Civilians taking up arms during the battle.
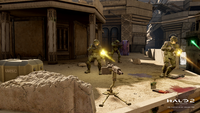
Marines fighting in Old Mombasa.
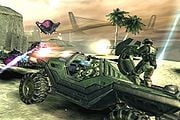
UNSC forces led by John-117 advancing on the beach.
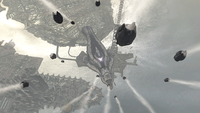
SOEIV pods dropping into New Mombasa moments before Regret's retreat.
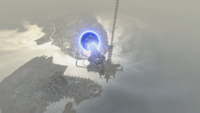
The Solemn Penance moments before its jump into Slipspace.
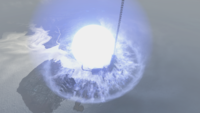
The Mombasa Slipspace Event.
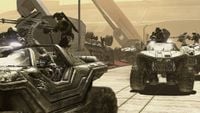
A Warthog convoy in Uplift Nature Reserve.
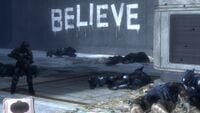
ODST Edward Buck comes across the aftermath of the skirmish between the Sangheili and Jiralhanae in the city.
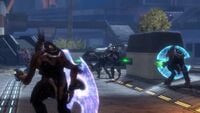
Covenant infantry surrounding UNSC Marines in Sector 8 after the Slipspace event.
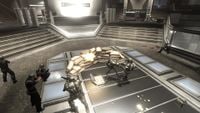
NMPD officers and ODSTs defending the interior of Alpha Site.

Dutch, Mickey, and a police officer at the crash site of their D77C-Pelican.
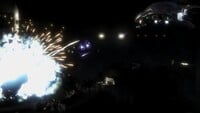
Alpha-Nine destroys a Scarab.
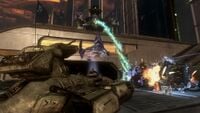
A Scarab fires at the Olifant operated by Dare and Huragok Quick to Adjust.

Edward Buck and the Rookie defending the entrance to Uplift Nature Reserve.
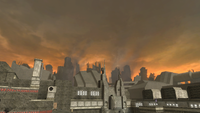
The destroyed city as seen from a UNSC complex.


List of appearances[edit]
- Halo: First Strike
- Petra (Mentioned only)
- Halo 2 (First appearance)
- Halo Graphic Novel
- Halo: Ghosts of Onyx
- Halo 3 (Mentioned only)
- Halo 3: ODST
- Halo Legends
- Origins (Possible appearance)
- Halo: Evolutions - Essential Tales of the Halo Universe
- Halo: Reach
- Halo 4 (Possible appearance in Prologue)
- Halo 2: Anniversary
- Halo: New Blood
- Hunt the Truth (Mentioned only)
- Halo: Spartan Strike
- Halo Mythos
- Halo: Envoy (Mentioned only)
- Halo: Bad Blood (Mentioned only)
- Halo Infinite: Memory Agent (Mentioned only)
Notes[edit]
- ^ a b While no date of the end of the Battle of Mombasa was specified, the sunrise seemingly appears in the Coastal Highway level in Halo 3: ODST even after the nightfall in the previous levels. Also given that Truth's excavation fleet arrived on October 21 as stated by Halo Waypoint presumably referring to the same newly-arrived fleet in the level, It is likely that the Coastal Highway level, hence the end of Battle of Mombasa, took place on morning of October 21.
- ^ In the original version of Halo 2, the building was owned by the Mtangulizi Kampuni. However, in Halo 2: Anniversary, this building is now depicted under the ownership of Lethbridge Industrial.
- ^ Though it was not specified in Halo Waypoint that the newly arrived Covenant fleet at the end in the Coastal Highway level was the planned same support and excavation fleet sent by Truth as mentioned in Ten Twenty and Vergil Reality docs, it is very likely that the latter was referring to the former, since the Covenant fleet in the Coastal Highway level was used to support the remnants of the Fleet of Sacred Consecration for the excavation effort of the Portal at Voi.
- ^ Perez survival is suggested in Quarantine Zone, where Johnson questions McKenzie and Perez regarding the status of their exit.
Sources[edit]
- ^ a b c d Bungie.net: Bungie Weekly Update: 01/23/09
- ^ a b c d e f g h i Halo Waypoint, Ten Twenty
- ^ a b c Halo Waypoint, Canon Fodder - Vergil Reality (Retrieved on Jun 15, 2021) [archive]
- ^ a b c d e f g h i j k l m n o p q r s Halo 3: ODST, campaign level Coastal Highway
- ^ a b Halo Waypoint, Is there an actual name for Vergil? (Retrieved on May 6, 2021) [archive]
- ^ a b c d e f g h i j k l m n o p q r Halo 2, campaign level Metropolis
- ^ a b c d Halo 3: ODST, campaign level Mombasa Streets
- ^ a b c d e f g h Halo 3: ODST, campaign level Uplift Reserve
- ^ a b c d e f g h i j k l m n o p q r s t u v w x y z aa ab ac ad ae af ag ah Halo 2, campaign level Outskirts
- ^ a b c d Halo 3: ODST, campaign level Tayari Plaza
- ^ a b c Halo: Evolutions - Palace Hotel, page 367
- ^ a b c d e f g h i Halo: Ghosts of Onyx, page 186
- ^ a b Halo Waypoint, New Mombasa (Retrieved on Jul 20, 2021) [archive]
- ^ a b c d Halo 3: ODST, campaign level Prepare To Drop
- ^ Halo 3, multiplayer map Longshore
- ^ a b c d e f g h Halo 3: ODST, campaign level Kikowani Station
- ^ a b c d e Halo 3: ODST, campaign level ONI Alpha Site
- ^ a b c d Halo: Spartan Strike, campaign level Mission 1: New Mombasa Nightmare
- ^ Halo: Reach, multiplayer map Breakneck
- ^ a b c Halo: Spartan Strike, campaign level Mission 3: Conduit
- ^ a b c d e Halo 3: ODST, campaign level Kizingo Boulevard
- ^ a b c Halo: Spartan Strike, campaign level Operation E: Brother’s Keeper
- ^ a b c d Halo 3: ODST, campaign level NMPD HQ
- ^ a b c d e f Halo Graphic Novel: Second Sunrise Over New Mombasa
- ^ a b c d e f g h i j k l m n o p q r Halo Legendary Crate, First Twelve Hours
- ^ a b c d Halo: Spartan Strike, campaign level Operation A: Orphic Spear
- ^ Halo 3: ODST: Opening scroll
- ^ a b Halo 2, multiplayer map Turf: Map description
- ^ a b McFarlane Toys/Halo Point Prizes, Campaign Master Chief
- ^ a b Halo 2: Anniversary: Terminal 14 - Beholden
- ^ Halo 3: ODST: Sadie's Story, Circle 1, Arc 1
- ^ a b Halo 3: ODST: Sadie's Story, Circle 1, Arc 3
- ^ Halo 2, campaign level Cairo Station
- ^ a b c Halo 3: ODST: Sadie's Story, Circle 1, Arc 2
- ^ Halo 2, multiplayer map Terminal: Map description
- ^ Halo 2, campaign level Outskirts: "The highest concentration of Covenant ground troops is directly below the carrier." - Cortana
- ^ Halo: Evolutions - Palace Hotel, page 363
- ^ Halo 3: ODST: Sadie's Story, Circle 6, Arc 2
- ^ Halo 3: ODST: Sadie's Story, Circle 6, Arc 3
- ^ a b c d e f g Halo 3: ODST, campaign level Data Hive
- ^ a b Halo 3: ODST: Sadie's Story, Circle 2, Arc 1
- ^ a b Halo 3: ODST: Sadie's Story, Circle 5, Arc 2
- ^ Halo 3: ODST: Sadie's Story, Circle 8, Arc 3
- ^ Halo Encyclopedia (2009 edition) (2011 edition), page 296
- ^ a b c Halo: The Essential Visual Guide, page 107
- ^ Halo 2: Another Day at the Beach
- ^ Halo: Spartan Strike, campaign level Mission 2: On Top of the World
- ^ Halo: Spartan Strike, campaign level Mission 4: Reversal of Fortune
- ^ Halo: Spartan Strike, campaign level Mission 5: Wounded Quarry
- ^ a b c Halo: Spartan Strike, campaign level Mission 6: Last Exit
- ^ a b Halo: Ghosts of Onyx, chapter 22
- ^ Halo 3, multiplayer map High Ground: Map description
- ^ Halo: Spartan Strike, campaign level Operation B: Steadfast Pursuit
- ^ Halo: Spartan Strike, campaign level Operation C: Valiant Hammer
- ^ a b Halo 3, campaign level Tsavo Highway
- ^ a b Hunt the Truth: Episode 01: A Hairline Fracture
- ^ Halo 2, campaign level The Great Journey
- ^ Halo 3, campaign level Crow's Nest
- ^ Halo Waypoint, Canon Fodder - Showcase Sensitive (Retrieved on Jun 16, 2021) [archive]
- ^ Halo: Envoy, chapter 16
- ^ Halo 2, campaign level Delta Halo
- ^ Halo 2, campaign level Regret
- ^ Halo: New Blood, chapter 9
- ^ Halo Legendary Crate, Vergil
- ^ Halo 3: ODST: Sadie's Story
- ^ Halo Timeline year 2552, 2552
| |||||||||||


