Halo: Hunters in the Dark: Difference between revisions
From Halopedia, the Halo wiki
Lejellysoup (talk | contribs) mNo edit summary |
SpartanLeet (talk | contribs) No edit summary |
||
| (30 intermediate revisions by 13 users not shown) | |||
| Line 1: | Line 1: | ||
{{Title|''Halo: Hunters in the Dark''}} | {{Title|''Halo: Hunters in the Dark''}} | ||
{{ | {{Status|RealWorld}} | ||
{{Novel infobox | {{Novel infobox | ||
|name=''Halo: Hunters in the Dark'' | |name=''Halo: Hunters in the Dark'' | ||
|image=[[File:Halo-HuntersInTheDark-CoverArt.jpg|300px]] | |image=[[File:Halo-HuntersInTheDark-CoverArt.jpg|300px]] | ||
|author=[[Peter David]]<ref name="Canon Fodder 20150312">[https://www.halowaypoint.com/en-us/ | |author=[[Peter David]]<ref name="Canon Fodder 20150312">[https://www.halowaypoint.com/en-us/news/canon-fodder-novel-ideas '''Halo Waypoint''': ''Canon Fodder - Novel Ideas'']</ref> | ||
|publisher=Simon & Schuster | |cover artist=[[:Category:Images by Kory Lynn Hubbell|Kory Lynn Hubbell]] | ||
|publication=[[2015|June 16, 2015]] | |publisher=Simon & Schuster{{Ref/Reuse|Canon Fodder 20150312}} | ||
|media=Print | |publication=[[2015|June 16, 2015]]{{Ref/Reuse|Canon Fodder 20150312}} | ||
|length= | |media=Print{{Ref/Reuse|Canon Fodder 20150312}} | ||
|ISBN=[[Special:BookSources/9781476795874|9781476795874]] | |length=368 pages<ref name="s&s">[http://books.simonandschuster.com/HALO-Hunters-in-the-Dark/Peter-David/9781476795874 '''Simons and Schuster''': ''Halo: Hunters in the Dark'']</ref> | ||
|ISBN=[[Special:BookSources/9781476795874|9781476795874]]{{Ref/Reuse|s&s}} | |||
}} | }} | ||
'''''Halo: Hunters in the Dark''''' is a [[Halo novels|full-length print novel]] from Simon & Schuster written by ''New York Times'' bestselling author [[Wikipedia:Peter David|Peter David]]. It was released on June 16, 2015. | '''''Halo: Hunters in the Dark''''' is a [[Halo novels|full-length print novel]] from Simon & Schuster written by ''New York Times'' bestselling author [[Wikipedia:Peter David|Peter David]]. It was released on June 16, 2015.{{Ref/Reuse|Canon Fodder 20150312}} | ||
==Official summary== | ==Official summary== | ||
{{Article | {{Article quote|It is [[2555]], more than two years after the [[John-117|Master Chief]] went missing-in-action following a [[Battle of Installation 00|decisive conflict]] on [[Installation 00]] — the massive, extragalactic [[Forerunner]] construct known as the Ark — as part of the final chapter in humanity’s bloody [[Human-Covenant War|thirty-year struggle]] against the overwhelming forces of the [[Covenant]]. Now, as a tenuous peace exists between the humans and the [[Sangheili|Elites]], a startling scientific discovery is made…and the riddle behind its Forerunner origins could very well seal the fate of the entire galaxy within a matter of weeks. In order to unravel these dangerous secrets, a heroic, hastily formed coalition of humans and Elites must attempt to overcome their differences as they embark on a [[Operation: FAR STORM|covert mission]] back to the Ark — an astonishing, enigmatic place beyond comprehension from which few have returned and where mortal danger awaits them all…{{Ref/Reuse|s&s}}}} | ||
==Plot summary== | ==Plot summary== | ||
{{Spoiler}} | {{Spoiler/begin}} | ||
[[Bobby Kodiak|Broadside One]], the [[squad]] leader of [[Broadside]], is lying heavily wounded in a small cave after an encounter with unknown creatures on [[Installation 00]]. One of the several [[remote contact team]]s deployed to the remains of the Ark by {{UNSCShip|Rubicon}}, Broadside was attacked by the creatures and most of the team was killed. While Broadside One contemplates his fate and observes that the creatures seemed to suddenly unite together to destroy the team, an unidentified voice confirms his theory. Claiming that it requires [[human]] assistance and that it will save him, the voice orders Broadside One to surrender himself and he accepts. | [[Bobby Kodiak|Broadside One]], the [[squad]] leader of [[Broadside]], is lying heavily wounded in a small cave after an encounter with unknown creatures on [[Installation 00]]. One of the several [[remote contact team]]s deployed to the remains of the Ark by {{UNSCShip|Rubicon}}, Broadside was attacked by the creatures and most of the team was killed. While Broadside One contemplates his fate and observes that the creatures seemed to suddenly unite together to destroy the team, an unidentified voice confirms his theory. Claiming that it requires [[human]] assistance and that it will save him, the voice orders Broadside One to surrender himself and he accepts. | ||
| Line 29: | Line 30: | ||
Meanwhile, Vale regains full control of her body and she recalls previous events. However, the ground opens up beneath her and she falls into a series of [[elevator]]s and tubes that bring her to a room. There, Vale encounters a construct that transforms into a golden replication of herself and introduces itself as [[000 Tragic Solitude]], Installation 00's [[monitor]] and the voice that had spoken to her earlier. The monitor reveals how he lured Vale to his position and how he was responsible for activating the Halos' firing sequence to rid the [[Milky Way]] of "destructive species", such as the humans and Sangheili that had [[Battle of Installation 04|destroyed]] [[Installation 04]], [[Glassing|glassed]] Installation 05, and destroyed [[Installation 08|04's replacement]] which heavily damaged the Ark in the process. With the firing sequence set, Tragic Solitude correctly suspected that the humans would reopen the portal, allowing him to send an army of heavily armed Retrievers to Earth to mine the planet for the resources needed to repair the Ark. Having become [[Rampancy|rampant]] from the damage the Ark had sustained in [[2552]], Tragic Solitude refuses to reason with Vale. Meanwhile, Usze, Lamb, and Holt are attacked by a mobile, [[carnivorous plant]] and the group is forced to take shelter in a cave up on a cliffside. Feeling some sympathy for Vale, the monitor allows the two teams to communicate. Holt contacts Kodiak and reveals their current situation; Kodiak departs for the other team's location. Upon arriving, Kodiak and Usze manage to kill the plant. As both teams soon meet at the Citadel, they realize that they are likely being lead into a trap and presume the installation's ancilla intends to use Drifts Randomly to help repair the Ark. Regardless, the team continues into the Citadel, following behind the Huragok. Once inside the Citadel, Mann shuts down the firing sequence. However, the team is promptly attacked by hordes of armigers. Mann, Lamb, Drifts, Usze, and Kola retreat down an elevator shaft, while Holt, Kodiak, N'tho, and Zon escape through a portal created by an armiger. Meanwhile, Tragic Solitude reveals to Vale that he intends to spare only Drifts and herself, for reasons he currently refuses to discuss. Vale attempts to argue further with the monitor, but Tragic Solitude induces her to sleep. | Meanwhile, Vale regains full control of her body and she recalls previous events. However, the ground opens up beneath her and she falls into a series of [[elevator]]s and tubes that bring her to a room. There, Vale encounters a construct that transforms into a golden replication of herself and introduces itself as [[000 Tragic Solitude]], Installation 00's [[monitor]] and the voice that had spoken to her earlier. The monitor reveals how he lured Vale to his position and how he was responsible for activating the Halos' firing sequence to rid the [[Milky Way]] of "destructive species", such as the humans and Sangheili that had [[Battle of Installation 04|destroyed]] [[Installation 04]], [[Glassing|glassed]] Installation 05, and destroyed [[Installation 08|04's replacement]] which heavily damaged the Ark in the process. With the firing sequence set, Tragic Solitude correctly suspected that the humans would reopen the portal, allowing him to send an army of heavily armed Retrievers to Earth to mine the planet for the resources needed to repair the Ark. Having become [[Rampancy|rampant]] from the damage the Ark had sustained in [[2552]], Tragic Solitude refuses to reason with Vale. Meanwhile, Usze, Lamb, and Holt are attacked by a mobile, [[carnivorous plant]] and the group is forced to take shelter in a cave up on a cliffside. Feeling some sympathy for Vale, the monitor allows the two teams to communicate. Holt contacts Kodiak and reveals their current situation; Kodiak departs for the other team's location. Upon arriving, Kodiak and Usze manage to kill the plant. As both teams soon meet at the Citadel, they realize that they are likely being lead into a trap and presume the installation's ancilla intends to use Drifts Randomly to help repair the Ark. Regardless, the team continues into the Citadel, following behind the Huragok. Once inside the Citadel, Mann shuts down the firing sequence. However, the team is promptly attacked by hordes of armigers. Mann, Lamb, Drifts, Usze, and Kola retreat down an elevator shaft, while Holt, Kodiak, N'tho, and Zon escape through a portal created by an armiger. Meanwhile, Tragic Solitude reveals to Vale that he intends to spare only Drifts and herself, for reasons he currently refuses to discuss. Vale attempts to argue further with the monitor, but Tragic Solitude induces her to sleep. | ||
Mann, Lamb, Usze, Kola, and Drifts find themselves within the Citadel's inner tunnels and discover the Citadel's damaged, central power station. While Drifts works on repairing the station, Lamb and Mann discover a damaged [[Sentinel]], which suddenly attacks Lamb. Usze quickly destroys the construct, but Lamb soon dies from blood loss. While Mann mourns the loss of his friend upon Usze's suggestion, Drifts manages to activate a map of the Ark's inner tunnels, including one that leads to the exit of the Citadel. The four come across a heavy, locked door blocking their path, with the [[Foundry]]'s control suite on the other side, followed by the Citadel's exit. Usze and Kola manage to lift the door, barely allowing Mann and Drifts to slide through. While the two Sangheili are ambushed by dozens of armigers, Drifts begins toying with the Foundry's controls and confirms Tragic Solitude's presence to Mann. At Mann's request, Drifts works to take control of the Ark's systems. Meanwhile, Holt, Kodiak, N'tho, and Zon find themselves within a dark chamber, with a large gap in the flooring blocking their path. While the Spartans use their thrusters within [[MJOLNIR Powered Assault Armor (GEN2)|their armor]] to aid them as they leap across the gap, [[Aggressor Sentinel]]s suddenly rise out of the gap just as N'tho attempts to jump the hole. Zon and the Spartans quickly destroy the Sentinels, while N'tho manages to grab onto the ledge on the other side of the gap. Once the Spartans pull N'tho up from the ledge, Zon leaps across as well and the group continues forward. N'tho detects the recently awakened Vale's voice and the group walks towards her direction. Tragic Solitude reveals to Vale that her friends have managed to deactivate the Halos' firing sequence, but informs her that he intends to force her to activate the firing sequence once again after he kills the remaining members of the team. He reveals that he had increased the portal's power, allowing the Retrievers to reach Earth in a matter of hours—which also allowed ''Mayhem'' to reach the Ark at a similar speed. The monitor decides to move his plans into motion and sends his army of Retrievers through the portal. As Drifts gains control of the Ark's systems and suppresses the monitor, he opens the door between them and the two Sangheili; Usze and Kola—having managed to defeat the armigers—hazily enter the Ark's control room, moderately wounded. Meanwhile, the Retrievers arrive at Earth and begin mining the planet, while others engage the [[UNSC Home Fleet]]. Establishing a communication link, Tragic Solitude orders Vale to tell Drifts to return full control of the Ark to him. However, Vale defies the monitor and encourages Drifts and Mann to purge the ancilla from the Ark's systems. Vale tells the monitor to kill her, as she does not wish to live as his captive. Instead, Tragic Solitude brings forth a human cyborg, whom the monitor reveals to be the human he had previously used to initiate the firing sequence as well as the lone survivor of the previous expedition to the Ark—Broadside One. | Mann, Lamb, Usze, Kola, and Drifts find themselves within the Citadel's inner tunnels and discover the Citadel's damaged, central power station. While Drifts works on repairing the station, Lamb and Mann discover a damaged [[Sentinel]], which suddenly attacks Lamb. Usze quickly destroys the construct, but Lamb soon dies from blood loss. While Mann mourns the loss of his friend upon Usze's suggestion, Drifts manages to activate a map of the Ark's inner tunnels, including one that leads to the exit of the Citadel. The four come across a heavy, locked door blocking their path, with the [[Foundry (location)|Foundry]]'s control suite on the other side, followed by the Citadel's exit. Usze and Kola manage to lift the door, barely allowing Mann and Drifts to slide through. While the two Sangheili are ambushed by dozens of armigers, Drifts begins toying with the Foundry's controls and confirms Tragic Solitude's presence to Mann. At Mann's request, Drifts works to take control of the Ark's systems. Meanwhile, Holt, Kodiak, N'tho, and Zon find themselves within a dark chamber, with a large gap in the flooring blocking their path. While the Spartans use their thrusters within [[MJOLNIR Powered Assault Armor (GEN2)|their armor]] to aid them as they leap across the gap, [[Aggressor Sentinel]]s suddenly rise out of the gap just as N'tho attempts to jump the hole. Zon and the Spartans quickly destroy the Sentinels, while N'tho manages to grab onto the ledge on the other side of the gap. Once the Spartans pull N'tho up from the ledge, Zon leaps across as well and the group continues forward. N'tho detects the recently awakened Vale's voice and the group walks towards her direction. Tragic Solitude reveals to Vale that her friends have managed to deactivate the Halos' firing sequence, but informs her that he intends to force her to activate the firing sequence once again after he kills the remaining members of the team. He reveals that he had increased the portal's power, allowing the Retrievers to reach Earth in a matter of hours—which also allowed ''Mayhem'' to reach the Ark at a similar speed. The monitor decides to move his plans into motion and sends his army of Retrievers through the portal. As Drifts gains control of the Ark's systems and suppresses the monitor, he opens the door between them and the two Sangheili; Usze and Kola—having managed to defeat the armigers—hazily enter the Ark's control room, moderately wounded. Meanwhile, the Retrievers arrive at Earth and begin mining the planet, while others engage the [[UNSC Home Fleet]]. Establishing a communication link, Tragic Solitude orders Vale to tell Drifts to return full control of the Ark to him. However, Vale defies the monitor and encourages Drifts and Mann to purge the ancilla from the Ark's systems. Vale tells the monitor to kill her, as she does not wish to live as his captive. Instead, Tragic Solitude brings forth a human cyborg, whom the monitor reveals to be the human he had previously used to initiate the firing sequence as well as the lone survivor of the previous expedition to the Ark—Broadside One. | ||
Tragic Solitude commands both humans to fight to the death; despite Vale's reluctance, the cyborg eagerly charges at her. Meanwhile, the Spartans, N'tho, and Zon locate Vale, but are obstructed by an [[energy barrier]]. Kodiak recognizes the cyborg as his brother, Bobby Kodiak; Spartan Kodiak had thought Bobby had gone [[MIA]] on an ONI operation, which was in fact the original expedition to the Ark. Kodiak manages to communicate to Vale that the cyborg is his brother, and Vale is able to calm Bobby down by using his name and reminding him of his own brother. However, as the cyborg begins attacking her again, the Spartans, N'tho, and Zon discover the monitor's data stores and begin firing into them. To get them to stop, Tragic Solitude recalls the Retrievers and the cyborg collapses to the ground. With the energy barrier down, Kodiak tends to his brother, but the monitor suddenly attacks the group. Bobby charges at the monitor and plunges one of his bladed forearms into the Tragic Solitude's interior housing, destroying both of them. Both groups meet up and exit the Citadel. As the team walks back towards ''Mayhem'', Vale comforts Kodiak on the loss of his brother, who in turn suggests for Vale to consider joining the [[Spartan | Tragic Solitude commands both humans to fight to the death; despite Vale's reluctance, the cyborg eagerly charges at her. Meanwhile, the Spartans, N'tho, and Zon locate Vale, but are obstructed by an [[energy barrier]]. Kodiak recognizes the cyborg as his brother, Bobby Kodiak; Spartan Kodiak had thought Bobby had gone [[MIA]] on an ONI operation, which was in fact the original expedition to the Ark. Kodiak manages to communicate to Vale that the cyborg is his brother, and Vale is able to calm Bobby down by using his name and reminding him of his own brother. However, as the cyborg begins attacking her again, the Spartans, N'tho, and Zon discover the monitor's data stores and begin firing into them. To get them to stop, Tragic Solitude recalls the Retrievers and the cyborg collapses to the ground. With the energy barrier down, Kodiak tends to his brother, but the monitor suddenly attacks the group. Bobby charges at the monitor and plunges one of his bladed forearms into the Tragic Solitude's interior housing, destroying both of them. Both groups meet up and exit the Citadel. As the team walks back towards ''Mayhem'', Vale comforts Kodiak on the loss of his brother, who in turn suggests for Vale to consider joining the [[Spartan Operations|Spartan branch]]. As the team takes notice of the now-temperate weather and encounters the previously hostile chaefka now eating vegetation, they determine that Tragic Solitude had controlled both the weather and the animals in an attempt to kill all members of the team, except for Vale. The trip back to ''Mayhem'' proves to be relatively peaceful, except for a single encounter with a pack of hostile blind wolves which are easily killed. Upon arriving at the damaged ship, the team's injuries are treated. | ||
Later, Usze comforts Vale, who feels guilty that the monitor had to be destroyed and her diplomatic skills could not pacify him. As the Sangheili, humans, and Drifts set to work to repair the damaged ''Mayhem'', {{UNSCShip|Witness}} and a fleet of other UNSC ships arrives on the other side of the portal to investigate the source of the Retrievers' attack and retreat. ''Witness'' lifts ''Mayhem'' inside of it and all ships and personnel return to Earth. On the trip back, N'tho attempts to comfort Kodiak on the loss of his brother and offers him a trip to [[Sanghelios]]; Kodiak declines, but sincerely expresses his gratitude for the gesture. Upon their return, Richards visits Osman at her office. Osman offers her a [[Medal of Honor]] and a promotion, though she declines the latter as she believes she failed to properly lead those under her command due to her injury. The novel ends with Mann commenting that research teams have since been deployed to the Ark, and he hopes to one day return there and even possibly work with Drifts Randomly again. He hopes the UNSC will use the now-deactivated Retrievers to finish the monitor's work and repair the Ark. However, Mann currently intends to search for [[Theresa|his daughter]], whom he has never met. | Later, Usze comforts Vale, who feels guilty that the monitor had to be destroyed and her diplomatic skills could not pacify him. As the Sangheili, humans, and Drifts set to work to repair the damaged ''Mayhem'', {{UNSCShip|Witness}} and a fleet of other UNSC ships arrives on the other side of the portal to investigate the source of the Retrievers' attack and retreat. ''Witness'' lifts ''Mayhem'' inside of it and all ships and personnel return to Earth. On the trip back, N'tho attempts to comfort Kodiak on the loss of his brother and offers him a trip to [[Sanghelios]]; Kodiak declines, but sincerely expresses his gratitude for the gesture. Upon their return, Richards visits Osman at her office. Osman offers her a [[Medal of Honor]] and a promotion, though she declines the latter as she believes she failed to properly lead those under her command due to her injury. The novel ends with Mann commenting that research teams have since been deployed to the Ark, and he hopes to one day return there and even possibly work with Drifts Randomly again. He hopes the UNSC will use the now-deactivated Retrievers to finish the monitor's work and repair the Ark. However, Mann currently intends to search for [[Theresa|his daughter]], whom he has never met. | ||
| Line 38: | Line 39: | ||
==Appearances== | ==Appearances== | ||
{{Featurelist|secondcolumn=title-5|title-1=Characters| | {{Featurelist|secondcolumn=title-5|title-1=Characters| | ||
====Artificial Intellegence==== | |||
*[[000 Tragic Solitude]] | *[[000 Tragic Solitude]] | ||
*[[117649]] {{Mo}} | *[[117649 Despondent Pyre]] {{Mo}} | ||
*[[343 Guilty Spark]] {{Mo}} | *[[343 Guilty Spark]] {{Mo}} | ||
*[[Cortana]] {{Mo}} | |||
====Deer-Like Creature==== | |||
*[[Vanessa]] {{1st}} | |||
====Human==== | |||
*[[Annabelle Richards]] {{1st}} | *[[Annabelle Richards]] {{1st}} | ||
*[[Bob Casper]] {{Fm}} | *[[Bob Casper]] {{Fm}} | ||
| Line 46: | Line 52: | ||
*[[Calder]] {{1st}} | *[[Calder]] {{1st}} | ||
*[[Carl Radeen]] {{1st}} | *[[Carl Radeen]] {{1st}} | ||
*[[Crystal Speakman]] {{1st}} | *[[Crystal Speakman]] {{1st}} | ||
*[[Cynthia Diggs]] {{Fm}} | *[[Cynthia Diggs]] {{Fm}} | ||
*[[Elias Holt]] {{1st}} | *[[Elias Holt]] {{1st}} | ||
*[[Frank Kodiak]] {{1st}} | *[[Frank Kodiak]] {{1st}} | ||
*[[Gonzalez]] {{1st}} | *[[Gonzalez]] {{1st}} | ||
*[[Henry Lamb]] {{1st}} | *[[Henry Lamb]] {{1st}} | ||
*[[John-117]] {{Mo}} | *[[John-117]] {{Mo}} | ||
*[[Kapalos]] {{1st}} | *[[Kapalos]] {{1st}} | ||
*[[Luther Mann]] {{1st}} | *[[Luther Mann]] {{1st}} | ||
*[[Margaret Parangosky]] {{Mo}} | *[[Margaret Parangosky]] {{Mo}} | ||
*[[O'Shea]] {{1st}} | *[[O'Shea]] {{1st}} | ||
*[[Olympia Vale]] | *[[Olympia Vale]] | ||
*[[Ramona]] {{Fm}} | *[[Ramona]] {{Fm}} | ||
*[[Serin Osman]] | *[[Serin Osman]] | ||
*[[Stein]] {{1st}} | *[[Stein]] {{1st}} | ||
*[[Tangredi]] {{1st}} | *[[Tangredi]] {{1st}} | ||
*[[Terrence Hood]] | *[[Terrence Hood]] | ||
*[[Theresa]] {{Fm}} | *[[Theresa]] {{Fm}} | ||
*[[Turot]] {{1st}} | *[[Turot]] {{1st}} | ||
*[[Van Zandt]] {{1st}} | *[[Van Zandt]] {{1st}} | ||
*[[William Iqbal]] | *[[William Iqbal]] | ||
====Hurakgok==== | |||
*[[Drifts Randomly]] {{1st}} | |||
====Sangheili==== | |||
*[[Ilta 'Bemet]] {{Fm}} | |||
*[[Kola 'Baoth]] {{1st}} | |||
*[[N'tho 'Sraom]] | |||
*[[Otar 'Bemet]] {{1st}} | |||
*[[Rtas 'Vadum]] {{Im}} | |||
*[[Sehar]] {{1st}} | |||
*[[Thel 'Vadam]] | |||
*[[Toha 'Sumai]] {{Mo}} | |||
*[[Usze 'Taham]] | |||
*[[Xaebho 'Anyame]] {{Fm}} | *[[Xaebho 'Anyame]] {{Fm}} | ||
*[[Zon 'Vadum]] {{1st}} | *[[Zon 'Vadum]] {{1st}} | ||
====San'Shyuum==== | |||
*[[Prophet of Truth]] {{Mo}} | |||
|title-2=Species| | |title-2=Species| | ||
*[[Chaefka]] {{1st}} | *[[Chaefka]] {{1st}} | ||
| Line 100: | Line 106: | ||
*[[Sangheili]] | *[[Sangheili]] | ||
*[[San'Shyuum]] {{Mo}} | *[[San'Shyuum]] {{Mo}} | ||
*[[ | *[[Olfmeri]] {{1st}} | ||
*[[Unggoy]] {{Mo}} | *[[Unggoy]] {{Mo}} | ||
*[[Velithra]] {{Fm}} | *[[Velithra]] {{Fm}} | ||
| Line 118: | Line 124: | ||
*[[Unified Earth Government]] | *[[Unified Earth Government]] | ||
**[[United Nations Space Command]] | **[[United Nations Space Command]] | ||
***[[Spartan | ***[[Spartan Operations|Spartan]] | ||
****[[SPARTAN-IV program]] | ****[[SPARTAN-IV program]] | ||
***[[UNSC Army]] | ***[[UNSC Army]] | ||
| Line 149: | Line 155: | ||
*****[[HIGHCOM Facility Bravo-6]] | *****[[HIGHCOM Facility Bravo-6]] | ||
***British Isles | ***British Isles | ||
****London {{Mo}} | ****[[London]] {{Mo}} | ||
****[[University of Oxford]] {{Mo}} | ****[[University of Oxford]] {{Mo}} | ||
****[[University of Edinburgh]] {{Mo}} | ****[[University of Edinburgh]] {{Mo}} | ||
| Line 158: | Line 164: | ||
*[[Installation 00]] | *[[Installation 00]] | ||
**[[Installation 00 Citadel|Citadel]] | **[[Installation 00 Citadel|Citadel]] | ||
**[[Foundry]] | **[[Foundry (location)|Foundry]] | ||
*[[Installation 03]] {{Mo}} | *[[Installation 03]] {{Mo}} | ||
*[[Installation 04]] {{Mo}} | *[[Installation 04]] {{Mo}} | ||
| Line 202: | Line 208: | ||
|title-6=Weapons| | |title-6=Weapons| | ||
;Covenant | |||
*[[Antimatter mine]] {{1st}} | *[[Antimatter mine]] {{1st}} | ||
*[[Type-1 energy sword]] | |||
*{{Pattern|Mosa|carbine}} | |||
;Human | |||
*[[BR85HB battle rifle]] | *[[BR85HB battle rifle]] | ||
*[[M6 series]] | *[[M6 series]] | ||
*[[ | ;Forerunner | ||
*[[Hard light stave]] {{1st}} | |||
*[[Z-250 lightrifle]] | *[[Z-250 lightrifle]] | ||
| Line 213: | Line 225: | ||
*{{Class|Charon|light frigate}} {{Mo}} | *{{Class|Charon|light frigate}} {{Mo}} | ||
**{{UNSCShip|Forward Unto Dawn}} {{Mo}} | **{{UNSCShip|Forward Unto Dawn}} {{Mo}} | ||
*[[D81-LRT | *[[D81-LRT Condor]] | ||
*[[Diplomatic shuttle]] {{Mo}} | *[[Diplomatic shuttle]] {{Mo}} | ||
*[[F-99 Wombat]] | *[[F-99 Wombat]] | ||
*[[Keyship]] {{Mo}} | *[[Keyship]] {{Mo}} | ||
**[[ | **''[[Anodyne Spirit]]'' {{Mo}} | ||
*[[Pelican]] | *[[Pelican]] | ||
*{{ | *{{Pattern|Ceudar|heavy corvette}} | ||
**''[[Mayhem]]'' {{1st}} | **''[[Mayhem]]'' {{1st}} | ||
*''[[Shadow of Intent]]'' {{Im}} | *''[[Shadow of Intent]]'' {{Im}} | ||
* | *{{Pattern|Deutoros|Scarab}} | ||
* | *{{Pattern|Ru'swum|Phantom}} | ||
*{{UNSCShip|Spirit of Fire}} {{Mo}} | *{{UNSCShip|Spirit of Fire}} {{Mo}} | ||
*[[UNSC carrier]] | *[[UNSC carrier]] | ||
| Line 229: | Line 241: | ||
*[[UNSC cruiser]] | *[[UNSC cruiser]] | ||
**{{UNSCShip|Endeavor}} {{1st}} | **{{UNSCShip|Endeavor}} {{1st}} | ||
*{{UNSCShip| | *{{UNSCShip|Redoubtable}} {{Mo}} | ||
*{{UNSCShip|Rubicon}} {{Mo}} | *{{UNSCShip|Rubicon}} {{Mo}} | ||
| Line 239: | Line 251: | ||
**[[Monitor]] | **[[Monitor]] | ||
**[[Retriever Sentinel]] | **[[Retriever Sentinel]] | ||
*[[Automated surgery suite]] | |||
*[[Baffler]] {{mo}} | *[[Baffler]] {{mo}} | ||
*[[Data pad]] | *[[Data pad]] | ||
| Line 247: | Line 260: | ||
*[[MJOLNIR Powered Assault Armor (GEN2)|MJOLNIR Powered Assault Armor [GEN2]]] | *[[MJOLNIR Powered Assault Armor (GEN2)|MJOLNIR Powered Assault Armor [GEN2]]] | ||
**[[MJOLNIR Powered Assault Armor/AA variant|Air Assault]] variant | **[[MJOLNIR Powered Assault Armor/AA variant|Air Assault]] variant | ||
*[[Sangheili combat harness]] | *[[Combat harness|Sangheili combat harness]] | ||
*[[Translation software]] | *[[Translation software]] | ||
*[[War Games]] | *[[War Games]] | ||
| Line 253: | Line 266: | ||
==Trivia== | ==Trivia== | ||
*The book's cover is illustrated by [[:Category:Images by Kory Lynn Hubbell|Kory Lynn Hubbell]], a concept artist who worked for [[343 Industries]] on ''[[Halo 4]]'' and ''[[Halo 5: Guardians]]''. ''Hunters in the Dark'' was Hubbell's first book cover illustration, though he would later go on to illustrate the cover of ''[[Halo: Last Light]]''.{{Ref/Site|URL=https://koryface.tumblr.com/post/115745859150/halo-hunters-in-the-dark-i-was-lucky-enough-to-do|Site=Tumblr|Page=koryface|Quote='''Halo: Hunters in the Dark''' I was lucky enough to do a book cover for the next Halo Novel, Hunters in the Dark. This was a first for me, so I’ll mark that off the old’ bucket list.|D=27|M=12|Y=2022}} | |||
*The title of the novel is an allusion to several lines (691-694) from the 1781 Poem ''Retirement'' by [[Wikipedia:William Cowper|William Cowper]], which are featured as an epigraph:<br>{{Quote|Philologists, who chase<br>A panting syllable through time and space,<br>Start it at home, and hunt it in the dark<br>To Gaul, to Greece, and into Noah's Ark.|William Cowper}} | *The title of the novel is an allusion to several lines (691-694) from the 1781 Poem ''Retirement'' by [[Wikipedia:William Cowper|William Cowper]], which are featured as an epigraph:<br>{{Quote|Philologists, who chase<br>A panting syllable through time and space,<br>Start it at home, and hunt it in the dark<br>To Gaul, to Greece, and into Noah's Ark.|William Cowper}} | ||
**A [[Wikipedia:Philology|Philologist]] is one who studies ancient texts and languages. This epigraph is therefore appropriate as Luther Mann's study of the ancient Forerunner language brought him on a chase from Trevelyan to Zeta Halo and finally to the Ark. | **A [[Wikipedia:Philology|Philologist]] is one who studies ancient texts and languages. This epigraph is therefore appropriate as Luther Mann's study of the ancient Forerunner language brought him on a chase from Trevelyan to Zeta Halo and finally to the Ark. | ||
**Peter David has stated, perhaps jokingly, that because of the prominence of the Ark in the story he desperately wished to title it ''Raiders of the Lost Ark'', but was prevented by his publisher for [[Wikipedia:Raiders of the Lost Ark|obvious reasons]].<ref>[https://www.halowaypoint.com/en-us/ | **Peter David has stated, perhaps jokingly, that because of the prominence of the Ark in the story he desperately wished to title it ''Raiders of the Lost Ark'', but was prevented by his publisher for [[Wikipedia:Raiders of the Lost Ark|obvious reasons]].<ref>[https://www.halowaypoint.com/en-us/news/canon-fodder-jurassic-ark '''Halo Waypoint''' ''Canon Fodder - Jurassic Ark'']</ref> | ||
*The novel's cover depicts [[Blind wolf|blind wolves]], creatures that were originally planned to be featured in ''[[Halo: Combat Evolved]]'' as ambient wildlife. The cover was designed by Kory Hubbell.<ref>[https://www.halowaypoint.com/en-us/ | *The novel's cover depicts [[Blind wolf|blind wolves]], creatures that were originally planned to be featured in ''[[Halo: Combat Evolved]]'' as ambient wildlife. The cover was designed by Kory Hubbell.<ref>[https://www.halowaypoint.com/en-us/news/canon-fodder-nine-lives '''Halo Waypoint''': ''Canon Fodder - Nine Lives'']</ref> | ||
*When the UNSC-Swords of Sanghelios taskforce arrives at the Citadel, the elevator descends into the main room.<ref>'''Halo: Hunters in the Dark''', ''page 255''</ref> However, in the ''[[Halo 3]]'' level [[The Covenant (level)|The Covenant]], the elevator goes ''up'' to the main room. | *When the UNSC-Swords of Sanghelios taskforce arrives at the Citadel, the elevator descends into the main room.<ref>'''Halo: Hunters in the Dark''', ''page 255''</ref> However, in the ''[[Halo 3]]'' level [[The Covenant (level)|The Covenant]], the elevator goes ''up'' to the main room. | ||
==Gallery== | ==Gallery== | ||
===Cover art artwork=== | |||
<gallery> | |||
File:Hunters in the Dark full cover.jpg|2015 cover art of the novel. | |||
</gallery> | |||
===Edition covers=== | |||
<gallery> | |||
File:Halo-HuntersInTheDark-CoverArt.jpg|2015 edition. | |||
</gallery> | |||
===Other=== | |||
<gallery> | <gallery> | ||
File:Hunters in the | File:Hunters in the dark Cover Back.jpg|Back cover of the 2015 edition. | ||
</gallery> | </gallery> | ||
==Sources== | ==Sources== | ||
{{Ref/Sources}} | |||
{{ | {{Navbox/Media/Novels}} | ||
[[Category:Novels|Hunters in the Dark]] | [[Category:Novels|Hunters in the Dark]] | ||
[[Category:Canon|Hunters in the Dark]] | [[Category:Canon|Hunters in the Dark]] | ||
Latest revision as of 10:58, March 9, 2024
| Halo: Hunters in the Dark | |
|---|---|

| |
| Attribution information | |
|
Author(s): |
|
|
Cover artist(s): |
|
| Publication information | |
|
Publisher: |
Simon & Schuster[1] |
|
Publication date: |
|
|
Media type: |
Print[1] |
|
Pages: |
368 pages[2] |
|
ISBN: |
|
Halo: Hunters in the Dark is a full-length print novel from Simon & Schuster written by New York Times bestselling author Peter David. It was released on June 16, 2015.[1]
Official summary[edit]
| “ | It is 2555, more than two years after the Master Chief went missing-in-action following a decisive conflict on Installation 00 — the massive, extragalactic Forerunner construct known as the Ark — as part of the final chapter in humanity’s bloody thirty-year struggle against the overwhelming forces of the Covenant. Now, as a tenuous peace exists between the humans and the Elites, a startling scientific discovery is made…and the riddle behind its Forerunner origins could very well seal the fate of the entire galaxy within a matter of weeks. In order to unravel these dangerous secrets, a heroic, hastily formed coalition of humans and Elites must attempt to overcome their differences as they embark on a covert mission back to the Ark — an astonishing, enigmatic place beyond comprehension from which few have returned and where mortal danger awaits them all…[2] | ” |
Plot summary[edit]
Broadside One, the squad leader of Broadside, is lying heavily wounded in a small cave after an encounter with unknown creatures on Installation 00. One of the several remote contact teams deployed to the remains of the Ark by UNSC Rubicon, Broadside was attacked by the creatures and most of the team was killed. While Broadside One contemplates his fate and observes that the creatures seemed to suddenly unite together to destroy the team, an unidentified voice confirms his theory. Claiming that it requires human assistance and that it will save him, the voice orders Broadside One to surrender himself and he accepts.
Archaeologist Luther Mann recalls fleeing his homeworld of Verent at six years of age as the Covenant glassed the planet. Although his parents became distant and cold, Mann becomes fascinated with the Covenant. Mann is home-schooled by his mother until she committed suicide when he was fifteen. Following the Human-Covenant War, Mann takes advantage of the new-found peace with several of the former Covenant species to learn more about the cultures of them and the Forerunners. On March 8, 2555, Mann has been contracted by the UNSC's Office of Naval Intelligence to work on Installation 07, having discovered the Halo himself. While searching for the installation's Control Room, Mann, and his colleague Henry Lamb, discover a countdown emanating from a certain sector of the ring. Going by worse-case scenario, the two predict that it is counting down to installation activation in approximately five weeks and inform their superior, Director Bob Casper. Casper contacts the research teams on Installations 03 and 05, who also confirm the presence of the same countdown. Casper reports the findings to ONI leadership and a meeting is immediately scheduled between assorted UNSC leaders and scientists, including Fleet Admiral Terrence Hood, Admiral Serin Osman, General Van Zandt, General Crystal Speakman, Captain Annabelle Richards, Doctor William Iqbal, and Casper. Despite Osman's concerns, the rest of the group decide that the Sangheili's help is needed in reaching Installation 00 to stop the ring's activation.
The Swords of Sanghelios are informed of the activation of the Halo's firing sequence and Arbiter Thel 'Vadam sends N'tho 'Sraom, Usze 'Taham, and the Huragok Drifts Randomly to Earth aboard Mayhem, where they meet with the UNSC at the deactivated slipspace portal that leads to the Ark at Voi, Kenya. Osman places Richards in charge of representing the UNSC during the mission, with Spartan-IVs Frank Kodiak and Elias Holt serving as a security detail. Mann and Lamb are relocated to the portal's site, while Drifts works on activating the portal. Olympia Vale, an expert in Sangheili culture and language, serves as a liaison between the two groups. Richards and Kodiak experience difficulty at suppressing their disdain for the Sangheili and the Spartan challenges N'tho to an alleged "friendly" duel—N'tho had cut off Kodiak's arm during the Covenant War. The fight is interrupted when Drifts activates the portal and a Retriever promptly exits. The construct begins mining Earth for resources, but it is quickly defeated by UNSC Endeavor. The team meets aboard Mayhem to discuss the next course of action; while Richards insists on waiting for ONI's permission before entering the portal, N'tho decides that they cannot waste time waiting for administrative consent and prepares to enter the portal. However, another Retriever exits the portal and attacks Mayhem. After a brief engagement, the vessel defeats the construct and continues through the portal, much to Richards' and Kodiak's chagrin. Mayhem's crew is soon shocked to discover that the trip through the portal will only take a couple hours, rather than several weeks as they expected. As Mayhem exits slipspace over the Ark, the ship is attacked by a group of heavily armed Retrievers. Mayhem crash-lands on the Ark's surface, with the crew only suffering minor injuries. Soon, the mission's team—Mann, Lamb, Vale, Richards, Holt, Kodiak, ten UNSC Marines, N'tho, Usze, Kola 'Baoth, Zon 'Vadum, and Drifts—leave Mayhem and begin venturing towards the Ark's Citadel to stop the Halo Array's activation sequence.
After passing by a pod of peaceful leviathans, the team encounters a pack of predatory blind wolves. Although the group manages to evade the animals upon Vale's advice, they are promptly discovered and attacked by chaefka. The blind wolves are drawn back to the group as a fight breaks out between the animals and the team. While three Marines are killed, Vale is injured and hears the aforementioned unidentified voice. Vale loses all memory of current events and is lured away from the battle by the voice. She encounters a friendly chaefka, who further leads her away from her team and towards the Citadel. Meanwhile, the rest of the team manages to kill most of the attacking animals, with the remainders fleeing from the area. When Vale's disappearance is realized, Richards sends Usze, Holt, and Lamb to track her down, while the rest of the team continues on towards the Citadel. Those responsible for tracking Vale discover her footprints and those of a chaefka leading towards the center of the Ark. While Richards sends three Marines to return to Mayhem with the dead, she injures her leg shortly after and returns to the ship for treatment with the rest of the Marines. As they continue on, the cold weather becomes dramatically worse and the team encounters a mammoth. To their surprise, the mammoth allows them to ride on its back; N'tho and Mann predict that the mammoth is under the influence of an ancilla of the installation. Meanwhile, increasing snowfall prevents Usze, Holt, and Lamb from following Vale's footprints and communication attempts with the rest of the team prove unsuccessful. The group resolves to continue to the Citadel, hoping to either encounter Vale or the rest of the team. Along their journey, they discover a sharp increase of temperature as they reach the faltering center of the Ark. After passing the ruins of High Charity, the group is attacked by four armiger constructs. The armigers knock trees and rocks down the mountain, which barely miss the group. The three make a stand and begin eliminating the constructs, as more arrive at the area via self-made slipspace portals. Usze and Holt, with some help from Lamb, manage to destroy most of the armigers, while the few remaining constructs flee. However, the armiger's attack further displaced the group from tracking down Vale's location.
Meanwhile, Vale regains full control of her body and she recalls previous events. However, the ground opens up beneath her and she falls into a series of elevators and tubes that bring her to a room. There, Vale encounters a construct that transforms into a golden replication of herself and introduces itself as 000 Tragic Solitude, Installation 00's monitor and the voice that had spoken to her earlier. The monitor reveals how he lured Vale to his position and how he was responsible for activating the Halos' firing sequence to rid the Milky Way of "destructive species", such as the humans and Sangheili that had destroyed Installation 04, glassed Installation 05, and destroyed 04's replacement which heavily damaged the Ark in the process. With the firing sequence set, Tragic Solitude correctly suspected that the humans would reopen the portal, allowing him to send an army of heavily armed Retrievers to Earth to mine the planet for the resources needed to repair the Ark. Having become rampant from the damage the Ark had sustained in 2552, Tragic Solitude refuses to reason with Vale. Meanwhile, Usze, Lamb, and Holt are attacked by a mobile, carnivorous plant and the group is forced to take shelter in a cave up on a cliffside. Feeling some sympathy for Vale, the monitor allows the two teams to communicate. Holt contacts Kodiak and reveals their current situation; Kodiak departs for the other team's location. Upon arriving, Kodiak and Usze manage to kill the plant. As both teams soon meet at the Citadel, they realize that they are likely being lead into a trap and presume the installation's ancilla intends to use Drifts Randomly to help repair the Ark. Regardless, the team continues into the Citadel, following behind the Huragok. Once inside the Citadel, Mann shuts down the firing sequence. However, the team is promptly attacked by hordes of armigers. Mann, Lamb, Drifts, Usze, and Kola retreat down an elevator shaft, while Holt, Kodiak, N'tho, and Zon escape through a portal created by an armiger. Meanwhile, Tragic Solitude reveals to Vale that he intends to spare only Drifts and herself, for reasons he currently refuses to discuss. Vale attempts to argue further with the monitor, but Tragic Solitude induces her to sleep.
Mann, Lamb, Usze, Kola, and Drifts find themselves within the Citadel's inner tunnels and discover the Citadel's damaged, central power station. While Drifts works on repairing the station, Lamb and Mann discover a damaged Sentinel, which suddenly attacks Lamb. Usze quickly destroys the construct, but Lamb soon dies from blood loss. While Mann mourns the loss of his friend upon Usze's suggestion, Drifts manages to activate a map of the Ark's inner tunnels, including one that leads to the exit of the Citadel. The four come across a heavy, locked door blocking their path, with the Foundry's control suite on the other side, followed by the Citadel's exit. Usze and Kola manage to lift the door, barely allowing Mann and Drifts to slide through. While the two Sangheili are ambushed by dozens of armigers, Drifts begins toying with the Foundry's controls and confirms Tragic Solitude's presence to Mann. At Mann's request, Drifts works to take control of the Ark's systems. Meanwhile, Holt, Kodiak, N'tho, and Zon find themselves within a dark chamber, with a large gap in the flooring blocking their path. While the Spartans use their thrusters within their armor to aid them as they leap across the gap, Aggressor Sentinels suddenly rise out of the gap just as N'tho attempts to jump the hole. Zon and the Spartans quickly destroy the Sentinels, while N'tho manages to grab onto the ledge on the other side of the gap. Once the Spartans pull N'tho up from the ledge, Zon leaps across as well and the group continues forward. N'tho detects the recently awakened Vale's voice and the group walks towards her direction. Tragic Solitude reveals to Vale that her friends have managed to deactivate the Halos' firing sequence, but informs her that he intends to force her to activate the firing sequence once again after he kills the remaining members of the team. He reveals that he had increased the portal's power, allowing the Retrievers to reach Earth in a matter of hours—which also allowed Mayhem to reach the Ark at a similar speed. The monitor decides to move his plans into motion and sends his army of Retrievers through the portal. As Drifts gains control of the Ark's systems and suppresses the monitor, he opens the door between them and the two Sangheili; Usze and Kola—having managed to defeat the armigers—hazily enter the Ark's control room, moderately wounded. Meanwhile, the Retrievers arrive at Earth and begin mining the planet, while others engage the UNSC Home Fleet. Establishing a communication link, Tragic Solitude orders Vale to tell Drifts to return full control of the Ark to him. However, Vale defies the monitor and encourages Drifts and Mann to purge the ancilla from the Ark's systems. Vale tells the monitor to kill her, as she does not wish to live as his captive. Instead, Tragic Solitude brings forth a human cyborg, whom the monitor reveals to be the human he had previously used to initiate the firing sequence as well as the lone survivor of the previous expedition to the Ark—Broadside One.
Tragic Solitude commands both humans to fight to the death; despite Vale's reluctance, the cyborg eagerly charges at her. Meanwhile, the Spartans, N'tho, and Zon locate Vale, but are obstructed by an energy barrier. Kodiak recognizes the cyborg as his brother, Bobby Kodiak; Spartan Kodiak had thought Bobby had gone MIA on an ONI operation, which was in fact the original expedition to the Ark. Kodiak manages to communicate to Vale that the cyborg is his brother, and Vale is able to calm Bobby down by using his name and reminding him of his own brother. However, as the cyborg begins attacking her again, the Spartans, N'tho, and Zon discover the monitor's data stores and begin firing into them. To get them to stop, Tragic Solitude recalls the Retrievers and the cyborg collapses to the ground. With the energy barrier down, Kodiak tends to his brother, but the monitor suddenly attacks the group. Bobby charges at the monitor and plunges one of his bladed forearms into the Tragic Solitude's interior housing, destroying both of them. Both groups meet up and exit the Citadel. As the team walks back towards Mayhem, Vale comforts Kodiak on the loss of his brother, who in turn suggests for Vale to consider joining the Spartan branch. As the team takes notice of the now-temperate weather and encounters the previously hostile chaefka now eating vegetation, they determine that Tragic Solitude had controlled both the weather and the animals in an attempt to kill all members of the team, except for Vale. The trip back to Mayhem proves to be relatively peaceful, except for a single encounter with a pack of hostile blind wolves which are easily killed. Upon arriving at the damaged ship, the team's injuries are treated.
Later, Usze comforts Vale, who feels guilty that the monitor had to be destroyed and her diplomatic skills could not pacify him. As the Sangheili, humans, and Drifts set to work to repair the damaged Mayhem, UNSC Witness and a fleet of other UNSC ships arrives on the other side of the portal to investigate the source of the Retrievers' attack and retreat. Witness lifts Mayhem inside of it and all ships and personnel return to Earth. On the trip back, N'tho attempts to comfort Kodiak on the loss of his brother and offers him a trip to Sanghelios; Kodiak declines, but sincerely expresses his gratitude for the gesture. Upon their return, Richards visits Osman at her office. Osman offers her a Medal of Honor and a promotion, though she declines the latter as she believes she failed to properly lead those under her command due to her injury. The novel ends with Mann commenting that research teams have since been deployed to the Ark, and he hopes to one day return there and even possibly work with Drifts Randomly again. He hopes the UNSC will use the now-deactivated Retrievers to finish the monitor's work and repair the Ark. However, Mann currently intends to search for his daughter, whom he has never met.
Appearances[edit]
CharactersArtificial Intellegence
Deer-Like Creature
Human
Hurakgok
Sangheili
San'Shyuum
Species
Organizations
Locations
|
Events
Weapons
Vehicles
Equipment and technology
|
Trivia[edit]
- The book's cover is illustrated by Kory Lynn Hubbell, a concept artist who worked for 343 Industries on Halo 4 and Halo 5: Guardians. Hunters in the Dark was Hubbell's first book cover illustration, though he would later go on to illustrate the cover of Halo: Last Light.[3]
- The title of the novel is an allusion to several lines (691-694) from the 1781 Poem Retirement by William Cowper, which are featured as an epigraph:
- "Philologists, who chase
A panting syllable through time and space,
Start it at home, and hunt it in the dark
To Gaul, to Greece, and into Noah's Ark." - — William Cowper
- A Philologist is one who studies ancient texts and languages. This epigraph is therefore appropriate as Luther Mann's study of the ancient Forerunner language brought him on a chase from Trevelyan to Zeta Halo and finally to the Ark.
- Peter David has stated, perhaps jokingly, that because of the prominence of the Ark in the story he desperately wished to title it Raiders of the Lost Ark, but was prevented by his publisher for obvious reasons.[4]
- The novel's cover depicts blind wolves, creatures that were originally planned to be featured in Halo: Combat Evolved as ambient wildlife. The cover was designed by Kory Hubbell.[5]
- When the UNSC-Swords of Sanghelios taskforce arrives at the Citadel, the elevator descends into the main room.[6] However, in the Halo 3 level The Covenant, the elevator goes up to the main room.
Gallery[edit]
Cover art artwork[edit]
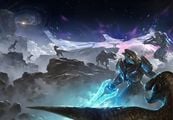
2015 cover art of the novel.

Edition covers[edit]
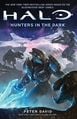
2015 edition.
Other[edit]
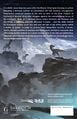
Back cover of the 2015 edition.

Sources[edit]
- ^ a b c d e Halo Waypoint: Canon Fodder - Novel Ideas
- ^ a b c Simons and Schuster: Halo: Hunters in the Dark
- ^ Tumblr, koryface: "Halo: Hunters in the Dark I was lucky enough to do a book cover for the next Halo Novel, Hunters in the Dark. This was a first for me, so I’ll mark that off the old’ bucket list." (Retrieved on Dec 27, 2022) [archive]
- ^ Halo Waypoint Canon Fodder - Jurassic Ark
- ^ Halo Waypoint: Canon Fodder - Nine Lives
- ^ Halo: Hunters in the Dark, page 255
| |||||||||||||||||||||||||||||||||||||||||


