Halo 2 E3 demo: Difference between revisions
From Halopedia, the Halo wiki
Forerunner (talk | contribs) No edit summary |
m (Text replacement - "\|(right|thumb)(\|[^\]\n]+)?\|(right|thumb)" to "|thumb$2") |
||
| (71 intermediate revisions by 32 users not shown) | |||
| Line 1: | Line 1: | ||
{{ | {{Title|''Halo 2'' E3 demo}} | ||
{{Status|RealWorld}} | |||
{{Level infobox | {{Level infobox | ||
|prev= | |prev= | ||
| Line 10: | Line 11: | ||
|place=[[New Mombasa]], [[Kenya]] | |place=[[New Mombasa]], [[Kenya]] | ||
|Objective=Rendevous with Sergeant Banks. | |Objective=Rendevous with Sergeant Banks. | ||
|enemies=*[[ | |enemies=*[[Jiralhanae|Brutes]] | ||
*[[ | *[[Unggoy|Grunts]] | ||
**[[Minor | **[[Unggoy Minor|Minors]] | ||
*[[Jackals]] | *[[Kig-yar|Jackals]] | ||
**[[Minor | **[[Kig-yar Minor|Minors]] | ||
|nowalk=true | |nowalk=true | ||
}} | }} | ||
The '''Halo 2 E3 Demo''' was a real-time demonstration of early plans for [[Halo 2|''Halo 2'']]'s [[Outskirts]] and [[Metropolis]] levels. It was shown at [[E3 2003]], and | {{Quote|In the world of video game sort of mythic legends, I think the Halo 2 E3 demo is right up there. It's like the unicorn of the gaming industry.|[[Brian Jarrard]]<ref name="mixer">[https://www.youtube.com/watch?v=Qp86KNbeCA8 ''YouTube'': Halo 2 E3 2003 Demo Stream from 343 + Never Before Seen Alphas/Betas (1080p 60 FPS)]</ref>}} | ||
The '''''Halo 2'' E3 Demo''' was a real-time demonstration of early plans for [[Halo 2|''Halo 2'']]'s [[Outskirts]] and [[Metropolis]] levels. It was shown at [[Electronic Entertainment Expo|E3 2003]], and revealed new designs for ''Halo 2'', including [[Orbital Drop Shock Troopers|ODSTs]], [[BR55 battle rifle|Battle Rifles]] (which were originally going to be single-shot), [[Dual wielding|dual-wielding]], [[M7 SMG|SMG]]s, [[Jiralhanae|Brutes]], the [[M12G1 Gauss Warthog|Gauss Warthog]], among others. | |||
The demo bears little resemblance to the final game as it was created by Bungie out of demand for material to show at E3 amidst the exceedingly hectic development process of ''Halo 2''.<ref name="yt cairo">[https://www.youtube.com/watch?v=xcSk8Rx_JTo&t=13m30s '''YouTube''': ''Halo 2 Anniversary - Cairo Station Campaign Gameplay and...'']</ref> | |||
==Gameplay== | |||
The demo runs on an early development version of the game engine and is built with the premise that the player—originally [[Joseph Staten]]—follows a heavily scripted path.{{Ref/Reuse|yt cairo}} For example, although the player is able to go "off script" and explore the level, there are certain cues to prompt them along; for example, the player will be teleported to the Gauss Warthog during the relevant portion of the demo regardless of their location on the map. Also, the player seemingly has unlimited health, ammunition and grenades. The dual [[M7 SMG|SMGs]] showcased in the demo are also not an example of true [[dual wielding]] as implemented in the final game, as the two weapons behave like a single one in terms of gameplay. Several other oddities indicate the game's unfinished nature, such as the Marines in the [[medical tent]]s in the opening area, who cannot die and will continue to play their scripted animations even if the player attacks them.{{Ref/Reuse|mixer}} | |||
On November 14, 2018, 343 Industries employees, [[Brian Jarrard]], Sean Cooper and [[Frank O'Connor]] revisited the E3 demo, along with several other early development ''Halo 2'' levels, in an online stream.{{Ref/Reuse|mixer}} Bungie and 343 Industries employees had previously commented that the demo would crash instantly if the player deviated from the scripted path, supposedly making it unworkable as an actual level.{{Ref/Reuse|yt cairo}}<ref>[http://halo.bungie.net/News/content.aspx?cid=4221 '''Bungie.net''': ''Weekly What's What Update: Massive Attack!''] - ''Nope, the E3 demo you're talking about still works and is playable even, but is waaaaaaaay too buggy as it stands to ever be released. ''</ref> However, it was found during the stream that the demo is actually quite robust, as O'Connor did not manage to "break" it despite having deliberately set out to do so.{{Ref/Reuse|mixer}} | |||
==Plot== | ==Plot== | ||
The [[Master Chief]] is en route to a UNSC field command post turned field hospital to assist the marines in destroying an [[ | Following a humorous, fourth-wall-breaking introduction by [[Avery Johnson|Sergeant Avery Johnson]] designed to accompany the original E3 presentation by Bungie, the demo opens to a scene of the [[Earth]] city of [[New Mombasa]] under siege by the [[Covenant]]. The [[John-117|Master Chief]] is en route to a UNSC field command post turned field hospital to assist the marines in destroying an [[Zo'op-pattern Weevil|artillery cannon]] and securing the area. The [[D77-TC Pelican|Pelican]] lands and Master Chief exits with a few ODSTs to be introduced to Cpl. [[Perez]] who takes him through the field hospital to where [[Banks|Sergeant Banks]] is. | ||
The Master Chief proceeds through the camp witnessing the new animations of allied AIs. He then passes through a destroyed building housing a Marine heavy Machine gun team and | The Master Chief proceeds through the camp witnessing the new animations of allied AIs. He then passes through a destroyed building housing a Marine heavy Machine gun team and Sergeant Banks. Both are pinned down by Covenant forces. The Sergeant then calls in an airstrike on the [[Zo'op-pattern Weevil|artillery cannon]]. A flight of Longsword fighters promptly complies, launching a successful bombing run on the cannon. After the airstrike has occurred Banks gives the player his SMG, an introduction to the new feature of [[dual wielding]]. Using his new weapons, the Chief clears the area of Covenant troops before moving over a pile a debris and into an open street. | ||
In the street there is a packed group of about seven Jackals with shields. Upon spotting the Chief they form a phalanx and begin to open fire with their plasma pistols. After a few moments of shooting the group of Jackals are splattered by a pair of [[Warthog]] | In the street there is a packed group of about seven Jackals with shields. Upon spotting the Chief they form a phalanx and begin to open fire with their plasma pistols. After a few moments of shooting, the group of Jackals are splattered by a pair of [[M12 Warthog|Warthogs]]. One of the Warthogs is the new Gauss Warthog, the driver instructs the Master Chief to man the Gauss Cannon on the back. Upon the Chief entering the turret, Warthogs drive around the street areas which are incidentally quite similar to the streets before the [[Protos-pattern Scarab|Scarab]] attack in the ''Halo 2'' level, [[Metropolis]]. After the Chief destroys a few {{Pattern|Ruwaa|Shadow}}s and [[Karo'etba-pattern Ghost|Ghosts]], the Warthog is boarded by a [[Jiralhanae|Brute]] who kills the Marines in the passenger and driver seat, prompting the Chief to exit the vehicle to take action against the boarder. | ||
The Master Chief quickly kills the Brute and a few of his comrades with his battle rifle before being alerted by [[Cortana]] of a fast approaching | The Master Chief quickly kills the Brute and a few of his comrades with his battle rifle before being alerted by [[Cortana]] of a fast approaching Ghost. Chief proceeds to board this vehicle by hijacking the Ghost, introducing yet another new ''Halo 2'' feature. | ||
The Chief proceeds to wreak havoc on the Covenant troops in the area before he is instructed by Cortana to escape the area via a tunnel which leads to a bridge. The demo then cuts then changes to a cutscene of two Brutes on Ghosts chasing the Chief through the tunnel. As a sign declaring "Highway access denied" flashes, the automatic doors at the end of the tunnel begin to close. In response to this small crisis Master Chief speeds up, barely making it through the remaining space between the closing doors, although in the process his Ghost crashes, disgorging him upon the ground. However the two pursuing Brutes are not so lucky. The door closes completely before they get to it and a shot from the outside of the tunnel shows the two explosions caused by the crash of the Brutes' Ghosts. | The Chief proceeds to wreak havoc on the Covenant troops in the area before he is instructed by Cortana to escape the area via a tunnel which leads to a bridge. The demo then cuts then changes to a cutscene of two Brutes on Ghosts chasing the Chief through the tunnel. As a sign declaring "Highway access denied" flashes, the automatic doors at the end of the tunnel begin to close. In response to this small crisis Master Chief speeds up, barely making it through the remaining space between the closing doors, although in the process his Ghost crashes, disgorging him upon the ground. However the two pursuing Brutes are not so lucky. The door closes completely before they get to it and a shot from the outside of the tunnel shows the two explosions caused by the crash of the Brutes' Ghosts. | ||
Just after Cortana points out a Covenant ship in the sky, a barrage of glowing drop pods begin to land around the Chief. Elites step out of these Drop Pods and draw their [[ | Just after Cortana points out a Covenant ship in the sky, a barrage of glowing drop pods begin to land around the Chief. Elites step out of these Drop Pods and draw their [[Type-1 energy sword|energy swords]]. Chief responds holstering one of his SMGs and charging up a [[Anskum-pattern plasma grenade|plasma grenade]]. Cortana, noting Chief's action, teasingly says "bet you can't stick it" to which the Master Chief responds "You're on." As he lunges forward to toss the grenade, the demo ends. | ||
== Transcript== | == Transcript== | ||
{{#widget:YouTube|id=K05JAlIkNyc|width=400|right}} | |||
''Open to [[Avery Johnson|Sergeant Johnson]] walking toward the camera in a dimly-lit room.'' | |||
*'''Sergeant Johnson:''' "Stow it, son! These folks didn't wait in line to hear your lips flippety-flop! Knuckle up, and get ready to ''dance'', you pasty bastard. | |||
''Johnson snaps his fingers. A map of of East Africa, centered on the New Mombasa metropolis, descends into view. As he speaks, he gesticulates at the map energetically with a pointer stick.'' | |||
*'''Sergeant Johnson:''' "What you good people are about to see, is an operation in progress. This is a real-time feed; no smoke-and-mirrors pre-recorded bullshit! Elements of the Covenant fleet have made landfall and occupied one of our cities. We will link up with our forces in-theater, and engage the enemy, and boot their sorry behinds back into the stratosphere!" | |||
''A looping sprite animation of Johnson kicking a [[Unggoy|Grunt]] from behind appears over the map.'' | |||
*'''Sergeant Johnson:''' "Yo! Demo biatch! Ya want anything? [pauses] Didn't think so. ''Kill the lights''!" | |||
''The screen goes black.'' | |||
''Fade in on a massive building complex that dominates the sky'' | |||
'''NEW MOMBASA. EAST AFRICAN PROTECTORATE''' | '''NEW MOMBASA. EAST AFRICAN PROTECTORATE''' | ||
''A Pelican zooms into view. We see the Master Chief'' | |||
'''[[Cortana]]:''' It took two in the nose then dropped into the atmosphere. | *'''[[Cortana]]:''' "It took two in the nose then dropped into the atmosphere." | ||
'''Master Chief:''' Who was first contact? | *'''Master Chief:''' "Who was first contact?" | ||
'''Sergeant Johnson:''' [[405th]] out of [[Diego Garcia]]. | *'''Sergeant Johnson:''' "[[A Company|405th]] out of [[Diego Garcia]]." | ||
''Zoom out. We see the Pelican flying over the cloud layer.'' | |||
'''Sergeant Johnson:''' But, don't expect a big welcome; the Covenant wiped most of them out ''before'' they hit the ground. | *'''Sergeant Johnson:''' "But, don't expect a big welcome; the Covenant wiped most of them out ''before'' they hit the ground." | ||
''The Pelican drops right into the city.'' | |||
''Fade to white'' | |||
''Fade in. We see two marines looking on the LZ. Plasma mortars fly over the air above'' | |||
'''Spotter:'''<ref name=" | *'''Spotter:'''<ref name="storyboards">''[[The Art of Halo|Art of Halo]]'', pages 150-155</ref> "Immediate. Grid Kilo 23 is hot. Recommend mission abort." | ||
'''Pilot(O.S.):''' Roger, recon. | *'''Pilot(O.S.):''' "Roger, recon." | ||
''The Pelican flies overhead'' | |||
'''Pilot:''' It's your call, Sarge. | *'''Pilot:''' "It's your call, Sarge." | ||
'''Sergeant Johnson:''' We're going in. Get tactical, Marines! | *'''Sergeant Johnson:''' "We're going in. Get tactical, Marines!" | ||
''In the back of the Pelican, We see ODSTs getting their weapons ready'' | |||
'''Cortana:''' Covenant ground forces own this city. We'll need to deal with them before we can kill that cruiser. | *'''Cortana:''' "Covenant ground forces own this city. We'll need to deal with them before we can kill that cruiser." | ||
''The Pelican lands smoothly on top of the government building''{{Ref/Reuse|storyboards}} | |||
'''Sergeant Johnson:''' Pile out! Go! Go! Go! | *'''Sergeant Johnson:''' "Pile out! Go! Go! Go!" | ||
''The Master Chief hops out'' | |||
''' | '''{Gameplay}''' | ||
''' | *'''Sergeant Johnson (O.S.):''' "I'll evac the wounded. Keep me posted, Cortana." | ||
''' | *'''Cortana:''' "Of course, Sergeant." | ||
''A Marine greets the Chief.'' | |||
''' | *'''Perez (To the Master Chief):''' "Sir, Corporal Perez, A- Company. CP is this way." | ||
'' | ''Master Chief follows the marine through a field hospital'' | ||
'''Marine Medic | *'''Marine Medic:''' "Must be seeing things, guess the brass do give a shit." (''Referring to the Master Chief arriving'') | ||
*'''Marine Medic #2:''' "Come on, come on! Stay with me, marine!" | |||
'''Marine Medic # | *'''Marine Medic #3:''' "No tags. Hang two units, O-neg, and he needs an airway." | ||
'' | ''Perez stops near a wounded Marine'' | ||
''' | *'''Marine Medic #4:''' "I'm calling it, 1900." | ||
''' | *'''Perez:''' "The Lieutenant got hit as soon as we dropped in." | ||
*'''Cortana:''' "Who's in charge now, Corporal?" | |||
''' | *'''Perez:''' "Sergeant Banks, Ma'am. He's pinned down out front. C'mon. I'll show you." | ||
''' | ''Master Chief follows Perez yet again. He walks into a building, up the stairs. They pass by a pair of Marines shooting through holes in the wall.'' | ||
*'''Marine #3:''' "No, no! Behind that ST." | |||
'''Marine # | *'''Marine #4:''' "Yeah, yeah, yeah!" | ||
''' | *'''Marine #3:''' "Three more! Coming left." | ||
'''Marine # | *'''Marine #4:''' "I'm running low, man!" | ||
''Master Chief follows Perez to another part of the building. They come to an opening leading to a balcony. Another Marine has taken cover behind a wall along the balcony.'' | |||
''' | *'''Perez:''' "Parsons!" | ||
''' | *'''Parsons:''' "Yeah?" | ||
*'''Perez:''' "Is it clear?" | |||
'' | ''Giant explosion rocks the building.'' | ||
''' | *'''Parsons:''' "You tell me!" | ||
*'''Marine #5:''' " Coño... Friendlies, moving out! Covering fire!" | |||
'' | ''The Chief moves out onto the balcony. In the background, an artillery cannon fires a plasma mortar, which flies out overhead. The Master Chief uses his battle rifle to take out a couple Grunts he sees below, then moves on.'' | ||
*'''Marine #6 (O.S.):''' "[[Unggoy|Grunts]], down low." | |||
'' | ''The Chief throws a grenade into a group of Grunts below, killing them. He picks off a few more Grunts in the distance with his battle rifle, before moving down a flight of stairs.'' | ||
'' | ''The Chief meets up with Sergeant Banks.'' | ||
*'''Sergeant Banks:''' "When I asked for reinforcements, I didn't think they'd send a [[SPARTAN-II program|Spartan]]." | |||
'' | ''The artillery fires another mortar. This time, it hits a nearby building, destroying part of it and causing debris to fall.'' | ||
''' | *'''Sergeant Banks:''' "We gotta take that thing out. Cover me!" | ||
''The Chief uses his battle rifle and a grenade to kill more Grunts and a Jackal.'' | |||
''' | ''Sergeant Banks walks over to a dead Marine, and takes out his radio'' | ||
'''Sergeant Banks | *'''Sergeant Banks:''' "Tech Aids H.Q. This is Sergeant Banks. I got a hostile Artillery 200 meters east over my position. Bring smoke, over." | ||
'' | ''The Chief mans a portable machine gun and starts shoot at any enemy in sight.'' | ||
*'''ODST (COM):''' "Hostiles right." | |||
''The Master Chief continues to fight, with the Artillery Cannon still intact'' | |||
''' | *'''Sergeant Banks:''' "Dammit, H.Q. is anybody on this freq!?" | ||
*'''Major Easley (COM):''' "Sergeant, this is Major Easley. Hang tight. We're inbound." | |||
''' | ''Overhead, two Longswords approach the Artillery Cannon, and destroy it, then continue on.'' | ||
('' | *'''Major Easley (COM):''' "Verify delivery of ordnance on target." | ||
''' | *'''Sergeant Banks:''' "Dead on, Major! Target neutralized!" | ||
*'''Sergeant Banks''': ''(to Master Chief)'' "Take my weapon, you'll need it." | |||
''' | ''He gives the Master Chief two SMGs'' | ||
''' | ''Master Chief jumps off the balcony and into further battle. After clearing out the street, he goes into the damaged building, where more ''[[Kig-Yar|''Jackals'']]'' and Grunts appear.'' | ||
'''Marine # | *'''Marine #7 (O.S.):''' "Frag and clear!" | ||
''' | ''A grenade is tossed into the enemy hiding place. It explodes.'' | ||
('' | *'''Marine #7 (O.S.):''' "Clear it out." | ||
''' | ''The Chief moves in. The explosion hasn't killed the Covenant inside, but it has stunned them long enough for the Chief to kill them all.'' | ||
''' | ''The Chief exits the building and sees a group of Jackals, which get run over by a Gauss Warthog.'' | ||
*'''Marine Driver:''' "Could use a gunner, sir." | |||
''' | *'''Sergeant Banks:''' "We got your back." | ||
'' | ''The Chief gets on board and mans the gun. A Shadow passes by, and he destroys it.'' | ||
*'''Marine Passenger:''' "That's the way. Yeah!" | |||
''' | ''They drive around, encountering two more Shadows. One escapes through a tunnel, but the Chief destroys the second.'' | ||
''' | *'''Marine Passenger:''' "Sit down, ya chumps!" | ||
''The Warthog drives around the tunnel. They intercept the escaping Shadow at it emerges from the tunnel. The Chief destroys it with the cannon.'' | |||
''' | ''The Chief's Warthog meets up with another Warthog, and they move down the street, killing any Covenant infantry they come across.'' | ||
*'''Marine Driver:''' "That better buff out." | |||
''' | ''Two Ghosts appear''. | ||
*'''Marine Passenger:''' "Ghosts! Making a break for it. Quick!" | |||
''' | *'''Marine Driver:''' "Don't worry. I got 'em." | ||
''The Chief destroys one of the Ghosts. Another pair of Ghosts appear. The Chief destroys them both.'' | |||
*'''Marine Passenger:''' "Do you wanna let me drive?" | |||
''The Chief destroys another Shadow. More Ghosts appear.'' | |||
''The Chief destroys one Ghost'' | |||
*'''Marine Passenger:''' "That's one!" | |||
'' | ''The Chief destroys a second Ghost'' | ||
''' | *'''Marine Passenger:''' "That's two! C'mon! Who's got more?" | ||
''The Chief destroys a third Ghost'' | |||
''A [[Phantom]] flies overhead'' | |||
'''Cortana:''' | *'''Cortana:''' "A Phantom!" | ||
*'''Marine Driver:''' "Hang on!" | |||
''' | ''A second Phantom flies overhead. The Chief fires at it, but the Phantom is unaffected. It begins deploying [[Brute]]s.'' | ||
*'''Cortana:''' "Brutes!" | |||
''' | *'''Cortana:''' "Look out!" | ||
''A Brute drops in from the Phantom and lands on the hood of the Chief's Warthog. It kills both the Marine driver and passenger. The Chief jumps out and the Warthog crashes into the wall. The Chief kills the Brute by meleeing it with his weapon. He then shoots an abandoned car in the distance, blowing it up. The explosion kills a couple of nearby Brutes. The Chief then picks off a third Brute with his battle rifle.'' | |||
*'''Cortana:''' "Ghosts! To your right!" | |||
*The | |||
''A Ghost approaches'' | |||
*The | *'''Cortana:''' "Wait for it…" | ||
* | |||
*[[ | ''Master Chief hijacks the enemy Ghost.'' | ||
* | |||
*'''Cortana:''' "Nice!" | |||
*The Brutes voices are deeper, much like an ape, than in the final game | |||
''The Chief kicks the Brute driver off and commandeers the Ghost'' | |||
*The Battle Rifle | |||
*The Master Chief fires the | *'''Cortana:''' "The Marines won't stand a chance if those Phantoms double back. See if you can draw them off." | ||
* | |||
*The Battle Rifle is semi-automatic, has no ammo counter, | ''The Chief shoots at the Phantoms, getting their attention, then makes a break for it.'' | ||
*The Shadow's turret shoots green plasma blasts that look like charged plasma pistol shots, not purple shots. Also, it | |||
''Fade to white'' | |||
'''{Cutscene}''' | |||
*The Elites | |||
*The [[Brute Shot]] shoots like a large plasma projectile which flies straight instead of the frag grenade that falls and bounces after a few feet. | ''The Chief's Ghost zooms off, and the camera follows it. Behind it, a Phantom approaches, followed by a ghost, and another Phantom. The camera zooms in on the Master Chief. He looks back. The first Phantom starts shooting at the Chief with the frontal turret, with another ghost leading the Chief. He narrowly misses the shots of [[plasma]]. The Phantom shoots at the "''Welcome to [[New Mombasa]]''" sign to stop the Chief. It ends up falling on the Phantom instead, and the Phantom flips on its side and explodes, while the Chief escapes.'' | ||
*The [[Plasma Pistol]] | |||
*'''Cortana:''' "Chief…" | |||
*The | |||
*Brutes bleed purple, but in the final game, they bleed | *'''Master Chief:''' "Hang on!" | ||
*The Fragmentation Grenades made the same type of explosion like they did in ''Halo: Combat Evolved'' , but are much weaker | |||
''The Chief approaches a closing wall in the highway tunnel. He narrowly escapes, and scrapes the road behind him as he slides down the bridge.'' | |||
*When Master Chief hijacked the Ghost, he stood on the | |||
*The [[Brutes]] are weaker than they are in the final game and were easily killed. | ''Inside the tunnel, an enemy Ghost piloted by a Brute crashes into the fully closed wall, and explodes. There are two explosions on the other side of the wall.'' | ||
*The Battle Rifle's melee attack shows three different animations at the same time instead of only one at a | |||
''The Chief gets back up and looks at the Covenant Cruiser hovering above.'' | |||
*When the Chief shoots a Phantom with a [[Gauss Cannon]] a green and blue plasma spark appears. | |||
*The Gauss Cannon has a faster rate of fire | *'''Cortana:''' "Bingo! There's the cruiser! Now all we need to do… is…" | ||
*The back of the [[Phantom]] is open and the troops disperse like | ''Covenant drop pods descend from the sky.'' | ||
*If | |||
*Jackal | ''Several drop pods land around the Chief. He turns around, and another drop pod lands in front of him. It opens up to reveal a black armored [[Sangheili|Elite]]. The Elite jumps out and growls at the Chief.'' | ||
*The Jackal | |||
*Jackals are also seen moving | *'''Sangheili:''' "Wort! Wort! Wort!" | ||
*The | |||
*There is a huge increase in the number of Grunt death animations where they stop in their tracks when killed | ''More Elites surround the Chief. They draw their energy swords and snarl menacingly.'' | ||
[[File:H2-E3-MasterChief-PlasmaGrenade.jpg|thumb|200px|Cortana: "Betcha can't stick it." Master Chief: "You're on."]] | |||
*'''Cortana:''' "Bet'cha can't stick it…" | |||
''The Chief pulls out a [[Anskum-pattern plasma grenade|plasma grenade]] and activates it.'' | |||
*'''Master Chief:''' "You're on." | |||
''The Chief throws it.'' | |||
''Fade to white.'' | |||
''Title is shown:'' | |||
'''''HALO 2''''' | |||
''The demo ends.'' | |||
==Differences with the final game<!--Please avoid comparing the demo with the actual campaign level. This section should be focused on the gameplay mechanics and appearances.-->== | |||
* The Brutes voices are deeper, much like an ape, than in the final game. | |||
* The Battle Rifle Has a slower version of the CE Assault Rifle Reload Animation. | |||
* The Master Chief fires the SMGs at the same time, and he never reloads them. | |||
* In addition, when the Master Chief changes to the Battle Rifle from the SMGs, he doesn't drop the other SMG. This led many viewers to assume that the "dual SMGs" were a single weapon. | |||
* The Battle Rifle is semi-automatic, and has no ammo counter, making it more like the later [[Designated Marksman Rifle]] featured in Halo: Reach. | |||
* The Shadow's turret shoots green plasma blasts that look like charged plasma pistol shots, not purple shots. Also, it fires at a more regular pace, not getting faster as it shoots, as it does in the final release when manned by Elites. | |||
* The SpecOps Elites featured are black colored rather than dark blue in the final game. | |||
* The [[Type-25 Brute Shot|Brute Shot]] shoots like a large plasma projectile which flies straight instead of the frag grenade that falls and bounces after a few feet. | |||
* The [[Type-25 Directed Energy Pistol|Plasma Pistol]] fires a larger bolt. | |||
* The Phantoms have a different appearance and are destructible. | |||
* Brutes bleed purple, but in the final game, they bleed dark blue. | |||
* The Fragmentation Grenades made the same type of explosion like they did in ''Halo: Combat Evolved'' , but are much weaker. | |||
* When Master Chief hijacked the Ghost, he stood on the Ghost for a considerable amount of time before he kicked the driver out. | |||
* The [[Jiralhanae|Brutes]] are weaker than they are in the final game and were easily killed. | |||
* The Battle Rifle's melee attack shows three different animations at the same time instead of only one at a time—this was the first animation shown by Bungie of their proposed "melee combo" system, which was cut out of the final game due to time constraints. | |||
* When the Chief shoots a Phantom with a [[M68 Gauss cannon|Gauss Cannon]] a green and blue plasma spark appears. | |||
* The Gauss Cannon has a faster rate of fire. | |||
* The back of the [[Kez'katu-pattern Phantom|Phantom]] is open and the troops disperse like on a [[D77-TC Pelican|Pelican]]. | |||
* If one looks closely at the Elites' energy swords, they can tell that they have the same appearance as the ''Halo 3'' ones, with the pointed edges around the hilt when turned on. | |||
* Jackal shields are a bright fluorescent blue, instead of bluish-green in the final version. | |||
* The Jackal shields appear to be a figure-8 shape, instead of the circular shape seen in the final game. | |||
* Jackals are also seen moving forward together in a phalanx formation (as opposed to just running around normally) shortly before being run over by Warthogs at 4:46. | |||
* The Ghost's fire mode is different to that of the final version. In the final version, the mode was alternating blasts from each Plasma Cannon. Here, it was more like Halo 1's fire which fired both Cannons at the same time. The rate of fire was also increased and the plasma bolts travel faster. | |||
* There is a huge increase in the number of Grunt death animations where they stop in their tracks when killed attempting to shoot the player one last time before slowly falling forward. Few of the killed Grunts in the trailer perform the classic "Grunty Death Backflip" when killed with Battle Rifle fire. | |||
* Civilian cars make much bigger and deadlier explosions. | |||
* Plasma bolts and projectiles are more fluorescent than their retail counterpart. | |||
* Many textures for building walls and floors are re-used from Combat Evolved including brushed metal tiling, seen at 1:53 and 2:43. | |||
* The Havok physics engine was not yet implemented in the game, so physics are closer to Combat Evolved. | |||
* Grunt and human blood decals are Brighter, and more fluorescent than their retail counterparts. | |||
* Human blood textures are re-used from Combat Evolved. | |||
* Grunt, human and Jackal blood splat decals are bigger than retail, resulting in more blood seen in the demo compared to the full release. | |||
* Grunts and Jackals are more aggressive and will fire faster than retail, as seen at 4:25. | |||
* Chief features a new model not seen in the full release of the game, featuring real-time reflections on his visor, seen at 0:19. | |||
* Gunshots and shots from the Mounted Turret illuminate the ground and surrounding area when fired. | |||
* The SMGs' muzzle flash is a darker red, rather than a bright yellow/orange seen in the final release. | |||
* SMGs (including dual wielded SMGs) have an increased rate of fire, and no recoil. | |||
* Dual SMG's have a unique "Double Up" overlapping Reticle, rather than a normal SMG reticle seen in retail. | |||
* Warthog Headlights illuminate and cast visible light and shadows on the road | |||
* Physics for Warthog splatters seem to be closer to Combat Evolved, Even small bumps or hits will result in a splatter with a lot of blood particles. | |||
* Street Lamps and Lights illuminate dynamic lights and shadows, Most dynamic lights were disabled shortly before release but still exist in the final game and can be enabled on the Halo 2 Editing Kit. this was also explained by Joe staten in the H2 developer commentary on 4:48. | |||
* Mounted turrets visibly expel rounds after every shot fired | |||
==Gallery== | |||
===Storyboards=== | |||
<gallery> | |||
File:H2E3_Storyboard_1.jpg | |||
File:H2E3_Storyboard_2.jpg | |||
File:H2E3_Storyboard_3.jpg | |||
File:H2E3_Storyboard_4.jpg | |||
File:H2E3_Storyboard_5.jpg | |||
File:H2E3_Storyboard_6.jpg | |||
File:H2E3_Storyboard_7.jpg | |||
File:H2E3_Storyboard_8.jpg | |||
File:H2E3_Storyboard_9.jpg | |||
File:H2E3_Storyboard_10.jpg | |||
File:H2E3_Storyboard_11.jpg | |||
File:H2E3_Storyboard_12.jpg | |||
File:H2E3_Storyboard_13.jpg | |||
File:H2E3_Storyboard_14.jpg | |||
File:H2E3_Storyboard_15.jpg | |||
File:H2E3_Storyboard_16.jpg | |||
File:H2E3_Storyboard_17.jpg | |||
</gallery> | |||
===Images=== | |||
<gallery> | |||
File:H2-Concept-E3-Chief.jpg|Concept art of John-117 priming a plasma grenade. | |||
File:H2E3_VisualGlitch.jpg|A visual glitch that occurred during the demo's development. | |||
File:H2 E3 Demo Shadows.jpg|A close-up of the Shadows in the demo. | |||
File:H2E3 Demo Master Chief.jpg|Master Chief in the Battle of New Mombasa. | |||
File:H2E3_BetchaCan'tStickEm.jpg|"Betcha can't stick 'em!" | |||
File:H2E3_GaussHog.jpg|John-117 manning a Gauss cannon in the demo. | |||
File:H2E3_John117_Ghost.jpg|John-117 driving a Ghost in the demo. | |||
File:H2E3_John117_Warthog.jpg|John-117 driving a Warthog. | |||
File:H2E3_John117_Turret.jpg|John-117 manning an [[M247 machine gun]]. | |||
File:H2E3_Standoff.jpg|John-117 facing down two SpecOps Elites. | |||
File:H2E3_John117_Hijack.jpg|John-117 hijacking a Ghost. | |||
File:H2E3_Ghost_Chase.jpg|Two Ghosts chasing one another. | |||
File:H2E3_Wallpaper_StandTall.jpg|"Stand Tall" wallpaper. | |||
File:H2E3_Wallpaper_GhostChase.jpg|"Ghost Chase" wallpaper. | |||
</gallery> | |||
==External links== | |||
*[https://www.youtube.com/watch?v=Qp86KNbeCA8 343 Industries stream playing the demo] | |||
==Sources== | ==Sources== | ||
{{Ref/Sources}} | |||
{{Halo Demo}} | |||
{{Trailer}} | {{Trailer}} | ||
[[Category:Halo 2 | |||
[[Category:Halo 2 trailers]] | |||
Latest revision as of 12:18, April 12, 2023
| Halo 2 E3 Demo | |
|---|---|

| |
|
Game: |
|
|
Player: |
|
|
Date: |
|
|
Location: |
|
 |
Halopedia doesn't currently have a walkthrough for this level; could you write one? |
- "In the world of video game sort of mythic legends, I think the Halo 2 E3 demo is right up there. It's like the unicorn of the gaming industry."
- — Brian Jarrard[1]
The Halo 2 E3 Demo was a real-time demonstration of early plans for Halo 2's Outskirts and Metropolis levels. It was shown at E3 2003, and revealed new designs for Halo 2, including ODSTs, Battle Rifles (which were originally going to be single-shot), dual-wielding, SMGs, Brutes, the Gauss Warthog, among others.
The demo bears little resemblance to the final game as it was created by Bungie out of demand for material to show at E3 amidst the exceedingly hectic development process of Halo 2.[2]
Gameplay[edit]
The demo runs on an early development version of the game engine and is built with the premise that the player—originally Joseph Staten—follows a heavily scripted path.[2] For example, although the player is able to go "off script" and explore the level, there are certain cues to prompt them along; for example, the player will be teleported to the Gauss Warthog during the relevant portion of the demo regardless of their location on the map. Also, the player seemingly has unlimited health, ammunition and grenades. The dual SMGs showcased in the demo are also not an example of true dual wielding as implemented in the final game, as the two weapons behave like a single one in terms of gameplay. Several other oddities indicate the game's unfinished nature, such as the Marines in the medical tents in the opening area, who cannot die and will continue to play their scripted animations even if the player attacks them.[1]
On November 14, 2018, 343 Industries employees, Brian Jarrard, Sean Cooper and Frank O'Connor revisited the E3 demo, along with several other early development Halo 2 levels, in an online stream.[1] Bungie and 343 Industries employees had previously commented that the demo would crash instantly if the player deviated from the scripted path, supposedly making it unworkable as an actual level.[2][3] However, it was found during the stream that the demo is actually quite robust, as O'Connor did not manage to "break" it despite having deliberately set out to do so.[1]
Plot[edit]
Following a humorous, fourth-wall-breaking introduction by Sergeant Avery Johnson designed to accompany the original E3 presentation by Bungie, the demo opens to a scene of the Earth city of New Mombasa under siege by the Covenant. The Master Chief is en route to a UNSC field command post turned field hospital to assist the marines in destroying an artillery cannon and securing the area. The Pelican lands and Master Chief exits with a few ODSTs to be introduced to Cpl. Perez who takes him through the field hospital to where Sergeant Banks is.
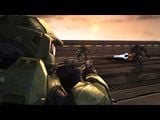
The Master Chief proceeds through the camp witnessing the new animations of allied AIs. He then passes through a destroyed building housing a Marine heavy Machine gun team and Sergeant Banks. Both are pinned down by Covenant forces. The Sergeant then calls in an airstrike on the artillery cannon. A flight of Longsword fighters promptly complies, launching a successful bombing run on the cannon. After the airstrike has occurred Banks gives the player his SMG, an introduction to the new feature of dual wielding. Using his new weapons, the Chief clears the area of Covenant troops before moving over a pile a debris and into an open street.
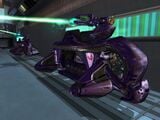
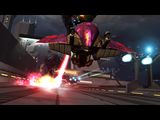
In the street there is a packed group of about seven Jackals with shields. Upon spotting the Chief they form a phalanx and begin to open fire with their plasma pistols. After a few moments of shooting, the group of Jackals are splattered by a pair of Warthogs. One of the Warthogs is the new Gauss Warthog, the driver instructs the Master Chief to man the Gauss Cannon on the back. Upon the Chief entering the turret, Warthogs drive around the street areas which are incidentally quite similar to the streets before the Scarab attack in the Halo 2 level, Metropolis. After the Chief destroys a few Ruwaa-pattern Shadows and Ghosts, the Warthog is boarded by a Brute who kills the Marines in the passenger and driver seat, prompting the Chief to exit the vehicle to take action against the boarder.
The Master Chief quickly kills the Brute and a few of his comrades with his battle rifle before being alerted by Cortana of a fast approaching Ghost. Chief proceeds to board this vehicle by hijacking the Ghost, introducing yet another new Halo 2 feature.
The Chief proceeds to wreak havoc on the Covenant troops in the area before he is instructed by Cortana to escape the area via a tunnel which leads to a bridge. The demo then cuts then changes to a cutscene of two Brutes on Ghosts chasing the Chief through the tunnel. As a sign declaring "Highway access denied" flashes, the automatic doors at the end of the tunnel begin to close. In response to this small crisis Master Chief speeds up, barely making it through the remaining space between the closing doors, although in the process his Ghost crashes, disgorging him upon the ground. However the two pursuing Brutes are not so lucky. The door closes completely before they get to it and a shot from the outside of the tunnel shows the two explosions caused by the crash of the Brutes' Ghosts.
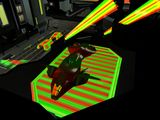
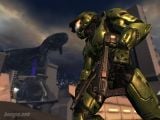
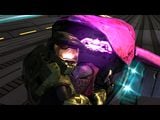
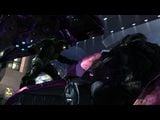
Just after Cortana points out a Covenant ship in the sky, a barrage of glowing drop pods begin to land around the Chief. Elites step out of these Drop Pods and draw their energy swords. Chief responds holstering one of his SMGs and charging up a plasma grenade. Cortana, noting Chief's action, teasingly says "bet you can't stick it" to which the Master Chief responds "You're on." As he lunges forward to toss the grenade, the demo ends.
Transcript[edit]
Open to Sergeant Johnson walking toward the camera in a dimly-lit room.
- Sergeant Johnson: "Stow it, son! These folks didn't wait in line to hear your lips flippety-flop! Knuckle up, and get ready to dance, you pasty bastard.
Johnson snaps his fingers. A map of of East Africa, centered on the New Mombasa metropolis, descends into view. As he speaks, he gesticulates at the map energetically with a pointer stick.
- Sergeant Johnson: "What you good people are about to see, is an operation in progress. This is a real-time feed; no smoke-and-mirrors pre-recorded bullshit! Elements of the Covenant fleet have made landfall and occupied one of our cities. We will link up with our forces in-theater, and engage the enemy, and boot their sorry behinds back into the stratosphere!"
A looping sprite animation of Johnson kicking a Grunt from behind appears over the map.
- Sergeant Johnson: "Yo! Demo biatch! Ya want anything? [pauses] Didn't think so. Kill the lights!"
The screen goes black.
Fade in on a massive building complex that dominates the sky
NEW MOMBASA. EAST AFRICAN PROTECTORATE
A Pelican zooms into view. We see the Master Chief
- Cortana: "It took two in the nose then dropped into the atmosphere."
- Master Chief: "Who was first contact?"
- Sergeant Johnson: "405th out of Diego Garcia."
Zoom out. We see the Pelican flying over the cloud layer.
- Sergeant Johnson: "But, don't expect a big welcome; the Covenant wiped most of them out before they hit the ground."
The Pelican drops right into the city.
Fade to white
Fade in. We see two marines looking on the LZ. Plasma mortars fly over the air above
- Spotter:[4] "Immediate. Grid Kilo 23 is hot. Recommend mission abort."
- Pilot(O.S.): "Roger, recon."
The Pelican flies overhead
- Pilot: "It's your call, Sarge."
- Sergeant Johnson: "We're going in. Get tactical, Marines!"
In the back of the Pelican, We see ODSTs getting their weapons ready
- Cortana: "Covenant ground forces own this city. We'll need to deal with them before we can kill that cruiser."
The Pelican lands smoothly on top of the government building[4]
- Sergeant Johnson: "Pile out! Go! Go! Go!"
The Master Chief hops out
{Gameplay}
- Sergeant Johnson (O.S.): "I'll evac the wounded. Keep me posted, Cortana."
- Cortana: "Of course, Sergeant."
A Marine greets the Chief.
- Perez (To the Master Chief): "Sir, Corporal Perez, A- Company. CP is this way."
Master Chief follows the marine through a field hospital
- Marine Medic: "Must be seeing things, guess the brass do give a shit." (Referring to the Master Chief arriving)
- Marine Medic #2: "Come on, come on! Stay with me, marine!"
- Marine Medic #3: "No tags. Hang two units, O-neg, and he needs an airway."
Perez stops near a wounded Marine
- Marine Medic #4: "I'm calling it, 1900."
- Perez: "The Lieutenant got hit as soon as we dropped in."
- Cortana: "Who's in charge now, Corporal?"
- Perez: "Sergeant Banks, Ma'am. He's pinned down out front. C'mon. I'll show you."
Master Chief follows Perez yet again. He walks into a building, up the stairs. They pass by a pair of Marines shooting through holes in the wall.
- Marine #3: "No, no! Behind that ST."
- Marine #4: "Yeah, yeah, yeah!"
- Marine #3: "Three more! Coming left."
- Marine #4: "I'm running low, man!"
Master Chief follows Perez to another part of the building. They come to an opening leading to a balcony. Another Marine has taken cover behind a wall along the balcony.
- Perez: "Parsons!"
- Parsons: "Yeah?"
- Perez: "Is it clear?"
Giant explosion rocks the building.
- Parsons: "You tell me!"
- Marine #5: " Coño... Friendlies, moving out! Covering fire!"
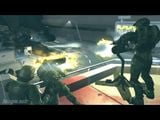
The Chief moves out onto the balcony. In the background, an artillery cannon fires a plasma mortar, which flies out overhead. The Master Chief uses his battle rifle to take out a couple Grunts he sees below, then moves on.
- Marine #6 (O.S.): "Grunts, down low."
The Chief throws a grenade into a group of Grunts below, killing them. He picks off a few more Grunts in the distance with his battle rifle, before moving down a flight of stairs.
The Chief meets up with Sergeant Banks.
- Sergeant Banks: "When I asked for reinforcements, I didn't think they'd send a Spartan."
The artillery fires another mortar. This time, it hits a nearby building, destroying part of it and causing debris to fall.
- Sergeant Banks: "We gotta take that thing out. Cover me!"
The Chief uses his battle rifle and a grenade to kill more Grunts and a Jackal.
Sergeant Banks walks over to a dead Marine, and takes out his radio
- Sergeant Banks: "Tech Aids H.Q. This is Sergeant Banks. I got a hostile Artillery 200 meters east over my position. Bring smoke, over."
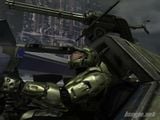
The Chief mans a portable machine gun and starts shoot at any enemy in sight.
- ODST (COM): "Hostiles right."
The Master Chief continues to fight, with the Artillery Cannon still intact
- Sergeant Banks: "Dammit, H.Q. is anybody on this freq!?"
- Major Easley (COM): "Sergeant, this is Major Easley. Hang tight. We're inbound."
Overhead, two Longswords approach the Artillery Cannon, and destroy it, then continue on.
- Major Easley (COM): "Verify delivery of ordnance on target."
- Sergeant Banks: "Dead on, Major! Target neutralized!"
- Sergeant Banks: (to Master Chief) "Take my weapon, you'll need it."
He gives the Master Chief two SMGs
Master Chief jumps off the balcony and into further battle. After clearing out the street, he goes into the damaged building, where more Jackals and Grunts appear.
- Marine #7 (O.S.): "Frag and clear!"
A grenade is tossed into the enemy hiding place. It explodes.
- Marine #7 (O.S.): "Clear it out."
The Chief moves in. The explosion hasn't killed the Covenant inside, but it has stunned them long enough for the Chief to kill them all.
The Chief exits the building and sees a group of Jackals, which get run over by a Gauss Warthog.
- Marine Driver: "Could use a gunner, sir."
- Sergeant Banks: "We got your back."
The Chief gets on board and mans the gun. A Shadow passes by, and he destroys it.
- Marine Passenger: "That's the way. Yeah!"
They drive around, encountering two more Shadows. One escapes through a tunnel, but the Chief destroys the second.
- Marine Passenger: "Sit down, ya chumps!"
The Warthog drives around the tunnel. They intercept the escaping Shadow at it emerges from the tunnel. The Chief destroys it with the cannon.
The Chief's Warthog meets up with another Warthog, and they move down the street, killing any Covenant infantry they come across.
- Marine Driver: "That better buff out."
Two Ghosts appear.
- Marine Passenger: "Ghosts! Making a break for it. Quick!"
- Marine Driver: "Don't worry. I got 'em."
The Chief destroys one of the Ghosts. Another pair of Ghosts appear. The Chief destroys them both.
- Marine Passenger: "Do you wanna let me drive?"
The Chief destroys another Shadow. More Ghosts appear.
The Chief destroys one Ghost
- Marine Passenger: "That's one!"
The Chief destroys a second Ghost
- Marine Passenger: "That's two! C'mon! Who's got more?"
The Chief destroys a third Ghost
A Phantom flies overhead
- Cortana: "A Phantom!"
- Marine Driver: "Hang on!"
A second Phantom flies overhead. The Chief fires at it, but the Phantom is unaffected. It begins deploying Brutes.
- Cortana: "Brutes!"
- Cortana: "Look out!"
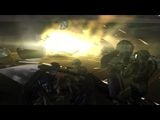
A Brute drops in from the Phantom and lands on the hood of the Chief's Warthog. It kills both the Marine driver and passenger. The Chief jumps out and the Warthog crashes into the wall. The Chief kills the Brute by meleeing it with his weapon. He then shoots an abandoned car in the distance, blowing it up. The explosion kills a couple of nearby Brutes. The Chief then picks off a third Brute with his battle rifle.
- Cortana: "Ghosts! To your right!"
A Ghost approaches
- Cortana: "Wait for it…"
Master Chief hijacks the enemy Ghost.
- Cortana: "Nice!"
The Chief kicks the Brute driver off and commandeers the Ghost
- Cortana: "The Marines won't stand a chance if those Phantoms double back. See if you can draw them off."
The Chief shoots at the Phantoms, getting their attention, then makes a break for it.
Fade to white
{Cutscene}
The Chief's Ghost zooms off, and the camera follows it. Behind it, a Phantom approaches, followed by a ghost, and another Phantom. The camera zooms in on the Master Chief. He looks back. The first Phantom starts shooting at the Chief with the frontal turret, with another ghost leading the Chief. He narrowly misses the shots of plasma. The Phantom shoots at the "Welcome to New Mombasa" sign to stop the Chief. It ends up falling on the Phantom instead, and the Phantom flips on its side and explodes, while the Chief escapes.
- Cortana: "Chief…"
- Master Chief: "Hang on!"
The Chief approaches a closing wall in the highway tunnel. He narrowly escapes, and scrapes the road behind him as he slides down the bridge.
Inside the tunnel, an enemy Ghost piloted by a Brute crashes into the fully closed wall, and explodes. There are two explosions on the other side of the wall.
The Chief gets back up and looks at the Covenant Cruiser hovering above.
- Cortana: "Bingo! There's the cruiser! Now all we need to do… is…"
Covenant drop pods descend from the sky.
Several drop pods land around the Chief. He turns around, and another drop pod lands in front of him. It opens up to reveal a black armored Elite. The Elite jumps out and growls at the Chief.
- Sangheili: "Wort! Wort! Wort!"
More Elites surround the Chief. They draw their energy swords and snarl menacingly.

- Cortana: "Bet'cha can't stick it…"
The Chief pulls out a plasma grenade and activates it.
- Master Chief: "You're on."
The Chief throws it.
Fade to white.
Title is shown:
HALO 2
The demo ends.
Differences with the final game[edit]
- The Brutes voices are deeper, much like an ape, than in the final game.
- The Battle Rifle Has a slower version of the CE Assault Rifle Reload Animation.
- The Master Chief fires the SMGs at the same time, and he never reloads them.
- In addition, when the Master Chief changes to the Battle Rifle from the SMGs, he doesn't drop the other SMG. This led many viewers to assume that the "dual SMGs" were a single weapon.
- The Battle Rifle is semi-automatic, and has no ammo counter, making it more like the later Designated Marksman Rifle featured in Halo: Reach.
- The Shadow's turret shoots green plasma blasts that look like charged plasma pistol shots, not purple shots. Also, it fires at a more regular pace, not getting faster as it shoots, as it does in the final release when manned by Elites.
- The SpecOps Elites featured are black colored rather than dark blue in the final game.
- The Brute Shot shoots like a large plasma projectile which flies straight instead of the frag grenade that falls and bounces after a few feet.
- The Plasma Pistol fires a larger bolt.
- The Phantoms have a different appearance and are destructible.
- Brutes bleed purple, but in the final game, they bleed dark blue.
- The Fragmentation Grenades made the same type of explosion like they did in Halo: Combat Evolved , but are much weaker.
- When Master Chief hijacked the Ghost, he stood on the Ghost for a considerable amount of time before he kicked the driver out.
- The Brutes are weaker than they are in the final game and were easily killed.
- The Battle Rifle's melee attack shows three different animations at the same time instead of only one at a time—this was the first animation shown by Bungie of their proposed "melee combo" system, which was cut out of the final game due to time constraints.
- When the Chief shoots a Phantom with a Gauss Cannon a green and blue plasma spark appears.
- The Gauss Cannon has a faster rate of fire.
- The back of the Phantom is open and the troops disperse like on a Pelican.
- If one looks closely at the Elites' energy swords, they can tell that they have the same appearance as the Halo 3 ones, with the pointed edges around the hilt when turned on.
- Jackal shields are a bright fluorescent blue, instead of bluish-green in the final version.
- The Jackal shields appear to be a figure-8 shape, instead of the circular shape seen in the final game.
- Jackals are also seen moving forward together in a phalanx formation (as opposed to just running around normally) shortly before being run over by Warthogs at 4:46.
- The Ghost's fire mode is different to that of the final version. In the final version, the mode was alternating blasts from each Plasma Cannon. Here, it was more like Halo 1's fire which fired both Cannons at the same time. The rate of fire was also increased and the plasma bolts travel faster.
- There is a huge increase in the number of Grunt death animations where they stop in their tracks when killed attempting to shoot the player one last time before slowly falling forward. Few of the killed Grunts in the trailer perform the classic "Grunty Death Backflip" when killed with Battle Rifle fire.
- Civilian cars make much bigger and deadlier explosions.
- Plasma bolts and projectiles are more fluorescent than their retail counterpart.
- Many textures for building walls and floors are re-used from Combat Evolved including brushed metal tiling, seen at 1:53 and 2:43.
- The Havok physics engine was not yet implemented in the game, so physics are closer to Combat Evolved.
- Grunt and human blood decals are Brighter, and more fluorescent than their retail counterparts.
- Human blood textures are re-used from Combat Evolved.
- Grunt, human and Jackal blood splat decals are bigger than retail, resulting in more blood seen in the demo compared to the full release.
- Grunts and Jackals are more aggressive and will fire faster than retail, as seen at 4:25.
- Chief features a new model not seen in the full release of the game, featuring real-time reflections on his visor, seen at 0:19.
- Gunshots and shots from the Mounted Turret illuminate the ground and surrounding area when fired.
- The SMGs' muzzle flash is a darker red, rather than a bright yellow/orange seen in the final release.
- SMGs (including dual wielded SMGs) have an increased rate of fire, and no recoil.
- Dual SMG's have a unique "Double Up" overlapping Reticle, rather than a normal SMG reticle seen in retail.
- Warthog Headlights illuminate and cast visible light and shadows on the road
- Physics for Warthog splatters seem to be closer to Combat Evolved, Even small bumps or hits will result in a splatter with a lot of blood particles.
- Street Lamps and Lights illuminate dynamic lights and shadows, Most dynamic lights were disabled shortly before release but still exist in the final game and can be enabled on the Halo 2 Editing Kit. this was also explained by Joe staten in the H2 developer commentary on 4:48.
- Mounted turrets visibly expel rounds after every shot fired
Gallery[edit]
Storyboards[edit]


Images[edit]

Concept art of John-117 priming a plasma grenade.
A visual glitch that occurred during the demo's development.
A close-up of the Shadows in the demo.
Master Chief in the Battle of New Mombasa.
"Betcha can't stick 'em!"
John-117 manning a Gauss cannon in the demo.
John-117 driving a Ghost in the demo.
John-117 driving a Warthog.
John-117 manning an M247 machine gun.
John-117 facing down two SpecOps Elites.
John-117 hijacking a Ghost.
Two Ghosts chasing one another.
"Stand Tall" wallpaper.

"Ghost Chase" wallpaper.


External links[edit]
Sources[edit]
- ^ a b c d YouTube: Halo 2 E3 2003 Demo Stream from 343 + Never Before Seen Alphas/Betas (1080p 60 FPS)
- ^ a b c YouTube: Halo 2 Anniversary - Cairo Station Campaign Gameplay and...
- ^ Bungie.net: Weekly What's What Update: Massive Attack! - Nope, the E3 demo you're talking about still works and is playable even, but is waaaaaaaay too buggy as it stands to ever be released.
- ^ a b Art of Halo, pages 150-155
| ||||||||


