UNSC Marine Corps: Difference between revisions
From Halopedia, the Halo wiki
m (→Trivia) |
|||
| Line 247: | Line 247: | ||
[[Image:1208308468 Charge by zaku0909.jpg|thumb|The ODSTs are a special branch of the UNSC Marine Corps.]] | [[Image:1208308468 Charge by zaku0909.jpg|thumb|The ODSTs are a special branch of the UNSC Marine Corps.]] | ||
[[Image:Corporal Wu.jpg|thumb|A Marine sharpshooter on the Ark.]] | [[Image:Corporal Wu.jpg|thumb|A Marine sharpshooter on the Ark.]] | ||
Following negotiations between Admiral Hood and Rtas 'Vadum onboard the Sangheili flagship [[Shadow of Intent]], it was agreed that the Sangheili Fleet, as well as the Forward Unto Dawn and her Marine complement, would follow [[Truth]] through the Portal to the [[Ark]], after realizing the magnitude of the [[Flood]] threat to all of the galaxy's sentient life and the importance of retrieving the [[UNSC]] A.I. [[Cortana]]. | Following negotiations between Admiral Hood and [[Rtas 'Vadum]] onboard the [[Sangheili]] flagship [[Shadow of Intent]], it was agreed that the Sangheili Fleet, as well as the Forward Unto Dawn and her Marine complement, would follow [[Truth]] through the Portal to the [[Ark]], after realizing the magnitude of the [[Flood]] threat to all of the galaxy's sentient life and the importance of retrieving the [[UNSC]] A.I. [[Cortana]]. | ||
Upon emerging from the Portal, the Sangheili fleet encountered a [[Jiralhanae]] fleet three times their size. With 'Vadum's ships holding the line against Truth's fleet, Spartan-117, the Arbiter, and a Marine-ODST task force under Sergeants [[Avery Johnson]], [[Reynolds]], and [[Pete Stacker]] landed on the Ark. | Upon emerging from the Portal, the Sangheili fleet encountered a [[Jiralhanae]] fleet three times their size. With 'Vadum's ships holding the line against Truth's fleet, Spartan-117, the Arbiter, and a Marine-ODST task force under Sergeants [[Avery Johnson]], [[Reynolds]], and [[Pete Stacker]] landed on the Ark. | ||
Revision as of 10:55, November 29, 2008
Template:Ratings Template:Infobox Military Unit Template:Article Quote The UNSC Marine Corps is a branch of the United Nations Space Command that is responsible primarily for land-based military operations. The Marines also protect Navy vessels from boarders and bases from attack.
Background
A rugged and diverse assortment of well equipped and highly trained men and women, the Marine Corps of the United Nations Space Command, go on to fight a losing war against the Covenant's highly superior technology and numbers. Under the leadership of many notable commanders, they continue to wage a furious struggle against the Covenant, even as their numbers diminish.
Operational History
Before The Human-Covenant War
The UN Marine Corps (The predecessors of the UNSC Marine Corps) were one of the primary combat groups fielded by the UN in the Interplanetary War, and were the first military organization deployed offworld in 2163. After the United Nations claimed victory in 2164, it reorganized into the UNSC, thereby changing the UN Marine Corps to the UNSC Marine Corps. Later, the UNSC Marine Corps would be responsible for dealing with Insurrectionist uprisings among UNSC colonies star systems.
First Encounters


The first documented Marine Corps encounter with the Covenant was at the Battle of Harvest, but there was only a light Marine presence, made up of Colonial Militia and civilians.
Another early encounter[1] occurred on an Arctic world, possibly in the Epsilon Indi System. The marines quickly established a base of operations, while a reconnaissance team was sent to scout the surrounding area, though they were killed by Energy Sword-wielding, Special Operations Elites. In response, a detachment of Scorpion tanks, and Warthog light-medium reconnaissance vehicles were sent to investigate, and were met by a Covenant heavy battle-group, with large numbers of Banshee attack fighters and Elite warriors. The UNSC force suffered heavy casualties. Soon after this battle had begun, the Marine presence was reinforced by Spartan Group Omega, but the outcome of this battle is, as of yet, unknown[2].
Battle of Sigma Octanus IV
There was a Marine presence on the colony world of Sigma Octanus IV. In the first stage of the battle, during a naval engagement, a Covenant Carrier was able to land a large contingent of troops on the northern pole of the planet.
The Covenant were able to take Côte d'Azur, a major population center. Fortunately, almost all of the civilian population was able to be evacuated beforehand, and UNSC Marine Corps General Kits launched an assault by 0700 hours to retake the city. It was unsuccessful.
Meanwhile, three Marine squads, near Côte d'Azur and under the command of Lieutenant McCasky were dispatched for a light reconnaissance of Grid 13 x 24. They were engaged by Covenant forces, including Hunters, and suffering heavy losses, only one UNSC M12 Warthog LRV of the reconnaissance force survived with four Marines by the names of Harland, Walker, Fincher, and Cochran. Shortly afterwords, Firebase Bravo was destroyed by the Covenant, and the Warthog was forced to divert to Alpha Headquarters.
It, too, had been attacked, and while the Covenant attack had been repulsed, heavy casualties were suffered which left Harland the temporary commander of the base. Harland promptly requested reinforcements from the cruiser in orbit, the Leviathan. The Leviathan sent a team of twelve SPARTAN-IIs commanded by SPARTAN-117 as reinforcements.[3].
The surviving Marines of Marine HQ protected a Pelican Dropship while the SPARTANs detonated a HAVOK Nuclear Warhead in Côte d'Azur, cleaning the Covenant ground presence on Sigma Octanus IV. They then retreated back to a Pelican dropship, which promptly took off with other Pelicans holding other Marine survivors for the UNSC Leviathan[4].
Battle of Reach
The UNSC Marine Corps maintained a sizable presence of Reach when the Covenant stormed the planet, bypassing the defense fleet in orbit and the MAC Gun platforms thus make a landing of large numbers of soldiers on the South and North poles.
By 0555 hours, the Covenant had overrun FLEETCOM HQ on Reach, destroying the perimeter and swarming the Marine defenders with Banshees, Wraiths, and battalions of infantry. The objective of the Covenant ground armies was to destroy a series of fusion reactors on Reach's surface that powered the orbiting Super Magnetic Accelerator Cannon-equipped Orbital Defense Platforms, and thus, disabling the UNSC's major defensive asset and allowing the Covenant fleet to occupy Reach's airspace.
By 0622 hours, the situation was critical enough that the UNSC Pillar of Autumn sent a full detachment of SPARTAN-II super soldiers to Reach in a Pelican drop ship to defend the fusion generators. The Orbital Defense Platforms were already being vaporized in space, and if they were compromised from the ground, the meager remaining UNSC defense fleet would swiftly fall.
Meanwhile, Charlie Company, a Marine detachment, was in charge of defending Orbital Defense Generator Facility A-331. They were forced to defend against a massive Covenant attack, using chain guns on Warthogs, Tanks,and positions from the bunkers, as well as any arsenal available. Lieutenant Buckman, the CO of Charlie Company, was ordered to flank the Covenant to retrieve the NOVA bombs, but FLEETCOM, alarmed that the Covenant might overrun ODG A-331, overreacted and carpet-bombed the area, eliminating the Covenant advance as well as most of Charlie Company.
There were four survivors of Charlie Company that held their position until they met with the SPARTANs. The survivors were sent with several heavily wounded SPARTANs to a fall back position at Mechanite Mountain, but all four Marines died from the Covenant, ending the UNSC Marine Corps's known involvement in the Battle of Reach.
Battle of Installation 04
Landfall
A sizable Orbital Drop Shock Trooper special forces detachment and a standard Marine detachment was assigned to the UNSC Pillar of Autumn for its intended operation to infiltrate Covenant High Command and kidnap a Prophet. This prophet was to be used as leverage for negotiating a peace treaty between the UNSC and the Covenant. However, the ambush over Threshold forced the Pillar of Autumn to crash land on the Forerunner installation also known as Installation 04 (Alpha Halo).

The Pillar of Autumn's ODST detachment consisted of four 130-man companies: Companies A, B, C, and D, for a total of approximately 520 operators. During the Covenant boarding of the Pillar of Autumn, they were assigned to defend the engine room of the warship against the boarding parties. They were extremely efficient in their defense, suffering only several dozen casualties while successfully holding off the Covenant at the two entrances to the massive engine chamber[5]. However, the standard Marines did not fare as well in their defense, setting up multiple lines of defense around the periphery of the Pillar of Autumn and utilizing Combat Barriers and urban combat techniques in the restrictive environment to hold off the enemy, which were Elites and Grunts. Ultimately, they were unsuccessful, and the Covenant managed to infiltrate many compartments of the warship before Captain Jacob Keyes, commander of the Pillar of Autumn, decided it was a lost cause to hold off superior numbers of attacking Covenant warships as well as internal boarders and ordered all hands to evacuate.[6].
Naval crewmen, standard Marines, and SPARTAN-117 evacuated in the ship's Bumblebee life pods while the ODST companies utilized Human Entry Vehicles. The landings, however, had numerous problems and killed dozens of UNSC soldiers and crewmen alike. Major Antonio Silva, the ODST Commander, ordered all surviving ODST units to secure a lightly-defended Covenant-held butte, which he turned into a coordinating home base for the UNSC resistance to come against the Covenant. After securing it, the ODSTs worked to make it a strategically defensible point for the UNSC survivors. It was christened Alpha Base by Major Silva, who also ordered that all remaining UNSC forces to rendezvous there to make a stand. The Covenant launched a large vehicular raid on Alpha Base of nearly a hundred Ghosts, but the 200 or so available ODSTs were able to repulse the poorly led assault.
The Covenant placed as high a priority on recovering UNSC life pods as the UNSC forces did. Many of the successful landings were soon attacked by Covenant forces in an effort to minimize the number of Marines on the ring world. Individuals and teams such as SPARTAN-117 and the Pelican Echo 419 spent a considerable amount of time securing life pods throughout the installation, and regrouping the Marines to later lead the human resistance. Cortana was monitoring the Covenant Battlenet and discovered that Captain Jacob Keyes had made a safe landing of the Pillar of Autumn and had been captured by the Covenant ground forces. She also found that he was being held on the Covenant ship Truth and Reconciliation.
Truth and Reconciliation


SPARTAN-117 led Fire Team Charlie to rescue Keyes from the grounded Covenant CCS-class Truth and Reconciliation. They would set down a short distance from the Covenant battle cruiser, and then infiltrate through its Gravity Lift. From there, they would find Keyes, rescue him, and then evacuate.
Surprisingly, the plan went quite well. Despite a rather large Covenant force guarding the way into the Truth and Reconciliation and a pair of Hunters being deployed at the Gravity Lift (among other things), the approach was simple. From there, they were able to go up the Gravity Lift into the belly of the Truth and Reconciliation. It was at this point that the Marines were ambushed by an Energy Sword wielding Elite. The Chief killed it, but unsure of what the device was at that time was unable to implement it against the Covenant. This was the UNSC's first encounter with new Covenant technology. It is worth noting that there were a few Type-25 Assault Gun Carriage or Wraiths in the hangers at that point also. The UNSC forces fiercely battled their way through alien corridors for fifteen minutes before reaching a spacious hangar bay. However, before they could continue, the Covenant were able to lock the doors on the Marines and John-117, continually sending in waves of reinforcements to kill the trapped UNSC soldiers in the locked hangar bay. After losing a significant amount of soldiers, Cortana was able to use her computer countermeasures to force open a door that lead from the hangar to the bridge of the warship. Master Chief ordered his Marine comrades to wait in the bridge while he assaulted a Covenant brig, freeing Keyes and also three other captured Marines. However, by the time they returned to the bridge, Energy Sword-wielding Elites had slain the rest of the rescue team. They headed to the Hanger Bay for evacuation, but Covenant air patrols prevented their rescue. Instead, the team chose to hijack an enemy Spirit dropship that was laying dormant in the hangar bay, with Captain Keyes freed and secured[7].
Shortly afterwords, the UNSC Marine forces stationed at Alpha Base, under the command of Major Silva, decide to embark on a risky raid on the crashed hulk of the Pillar of Autumn to get much-needed supplies and ammunition, vehicular support, and fuel for the ferrying Pelican Drop ships. A small 62-man ODST force under the leadership of Lieutenant McKay raided the Covenant-patrolled crash site of the Pillar of Autumn, using sniper fire to eliminate most of the defending Ghost attack vehicles and infantry, and then securing the ship with 10 casualties, securing much-needed supplies for the UNSC forces.[8] However, the Covenant learned about this, and before McKay's force can return to Alpha Base and drop off the newly-seized supplies and vehicles that they had secured from the wreck of the Pillar of Autumn, they were intercepted by a superior Covenant force in the rocky terrain. The tide of battle is turned to the UNSC's favor, however, by discipline, organization, and luck. The UNSC's four Scorpion Tanks used shell bombardment to destroy the attacking Covenant Wraiths, while the UNSC Warthogs fought off waves of assailing Banshee attack craft and Ghosts. The Covenant's aggressive tactics yielded no advantage, and the well-coordinated UNSC rocket units and a particularly bold feint by Second Lieutenant Oros destroyed the dozens of Covenant Banshees, and Marine sharpshooter Lance Corporal Jones took a serendipitous sniper rifle shot, killing a Covenant Elite officer, disorienting and fragmenting the Covenant resistance as UNSC forces plowed through the Covenant remnants.[9].
The Flood
Meanwhile, a Covenant Elite, 'Qualomee, surrendered to the UNSC and yielded intelligence about a Covenant arms cache in a faraway swamp. After Captain Keyes meets Major Silva and congratulates him and his ODSTs for establishing Alpha Base for the UNSC, Keyes decides to lead a platoon of Marines under the leadership of Staff Sergeant Avery J. Johnson to secure this Covenant arms cache while Master Chief is ordered to a remote island where a Forerunner construct named the "Silent Cartographer" is stationed - a construct that is believed to hold an entire and fully-detailed map of Installation 04. Securing the intelligence would give the UNSC an inestimable edge in their resistance efforts.

Two Pelican Drop ships inserted two squads of Marines (lead by Gunnery Sergeant Waller and Sergeant Stacker) and Master Chief to an edge of the island. They were deployed under fire, but managed to secure a beachhead and a landing zone for the UNSC to land further reinforcements (including an M12 Warthog LRV). SPARTAN-117 and two Marines, PFC Hosky and an unnamed Female Marine corporal, took the Warthog, driving it to a cliff that was the entrance to the facility that housed the Silent Cartographer. However, the Covenant knew that the UNSC was attempting to secure the intelligence, and locked the entrance way, forcing the trio to make a detour to a security substation, deactivating the locked door before finally being able to tunnel their way through the Covenant defenses stationed inside the subterranean facility and retrieving the intelligence.
The surviving Marines still waiting on the landing zone were scheduled to be reinforced by Pelican Bravo 22 when it was shot down by ground arsenal. Shortly afterwords, a pair of Spirit drop ships converged on the Marines by the landing zone, overwhelming them on the exposed terrain of the beachhead while SPARTAN-117 was still within the bowels of the underground facility. The forces on the beachhead are presumed dead. The lack of a UNSC-held landing zone on the surface of the island meant that Echo 419 could not extract Master Chief and his vital intelligence. However, Cortana found that there was a massively honeycombed system of massive open corridors that permeate the ground of Installation 04, allowing a vehicle that entered the system to travel essentially anywhere undetected. Echo 419 wass able to slip into the system and rescue Master Chief. Using this system, Master Chief was able to be transported to the installation's Control Room[10].
Captain Keyes's team, meanwhile, landed near the site of the supposed "weapons cache". The two Marine teams cleared the Covenant defenses and began to search the underground facility where the arms were supposedly stored. One team stayed back while the other team, led by Staff Sergeant Johnson, searched the facility. Eventually, they ran across a door that had been electronically locked by the Covenant. Despite the protest of the technician, Captain Keyes ordered the door to be unlocked to gain access to the door. Shortly after entering the room, however, the advance team, including Captain Keyes, was attacked by parasitic organisms called Flood. Staff Sergeant Johnson managed to escape after the Flood Infection Forms took over his fellow Marines. Supposedly his body was unsuited for infection due to the affects of Boren's Syndrome. Private Bisenti would also survive the attack but is speculated to have died when Spartan 117 blew up Installation 04. Due to a failed infection attempt, Private First Class Jenkins was infected but had control over his consciousness and some body functions. Jenkins was later captured and interrogated by UNSC forces.
Cortana had already learned of the threat the Flood was and sent SPARTAN-117 to save Keyes. However, the Spartan would only find Jenkins' helmet and it's mission log. When he was on the way to the evacuation site, he fought against Flood Infection and Combat Forms of both Covenant Elite and human Marine form, then ran into a surviving squad of Marines and began retreating with them to a nearby structure, whilst being assaulted by Flood Combat forms. After securing an LZ for dropship Echo 419, he would then disappear after encountering 343 Guilty Spark.[11].
Meanwhile, Alpha Base came under heavy attack from a Covenant force. The Covenant had identified that SPARTAN-117 was responsible for the majority of the hundreds of casualties during the raid on the Truth and Reconciliation, and an ambitious Special Operations Elite named Zuka 'Zamamee was tasked with leading a platoon of Special Operations Elites into the bowel of Alpha Base to assassinate the Demon while a much larger Covenant force distracted the UNSC defenders. Using a captured Pelican drop ship, Charlie 217, 'Zamamee infiltrated the UNSC HQ, but SPARTAN-117 was nowhere to be found. Meanwhile, Spirit drop ships hit the UNSC defenses, but are thrown back by massive amounts of sniper rifle fire and several Scorpion Tanks. Furthermore, the ODSTs organize several hunter-killer teams to re-secure the HQ, murdering all the Special Operations Elites save 'Zamamee, who was able to rescue a captive Grunt named Yayap and escape with Yayap in a Banshee fighter[12].
Containment
While SPARTAN-117 journeyed through various areas in Installation 04, Cortana was able to briefly contact Alpha Base, informing them that SPARTAN-117 will use the Pillar of Autumn's reactors to trigger a thermonuclear explosion that would destroy Installation 04. However, the explosion would kill all life on the ring world if the UNSC forces failed to escape before the detonation. Major Silva came up with a daring plan: to recapture the damaged Truth and Reconciliation, already taken to launch readiness by a Covenant repair team, and to use it to escape the ring while SPARTAN-117 sets off the delayed thermonuclear reaction and escapes as well. Afterwards, SPARTAN-117 will rendezvous with the UNSC-controlled Truth and Reconciliation and then they will return to Earth, heralding a glorious victory for the UNSC: a superweapon destroyed, a Covenant armada annihilated, and the first Covenant warship ever captured.
However, this plan was not perfect. Alpha Base's contingent learned of the Flood as a brief skirmish with nearby Covenant patrols leads to an exaggerated battle as the Flood attack, and the UNSC personnel are mostly horrified by the Flood's combat potential and viciousness.[13] After it was learned that Flood are aboard the Truth and Reconciliation, ODST Lieutenant McKay and UNSC AI Wellsley were convinced that the UNSC survivors should not risk severe casualties boarding a Flood-infested starship...and even if they prevail and bring the warship to Earth, if any Flood managed to invade Earth, it would "fall"[14][15]. However, Silva, the commanding officer of all of Alpha Base's forces after Keyes's tragic death, demurs, and instead assaults the Truth and Reconciliation, with his ODST special forces operators securing the ship with minimal casualties and the non-combat personnel in tow. Surviving senior naval officers from the Pillar of Autumn are sent in after the ODSTs deem the warship as "secure", and they move swiftly to under see last-minute repairs to the Truth and Reconciliation before it takes off.
However, McKay still holds doubt - even if the Truth and Reconciliation took off successfully and reached Earth without incidence, the epidemiological threat of the Flood meant that if even one parasite managed to infect a human on Earth, it would be a disaster of a galactic scale. McKay, in conscience, makes the decision to damage the Truth and Reconciliation's reactors and destroy the warship, killing herself and all 312 UNSC personnel and surviving Flood beings on board[16], thereby destroying nearly all of the UNSC presence on the ring.
Escape
While almost all of Alpha Base's personnel are eliminated in the tragic self-detonation, Avery J. Johnson did not make it onto the Truth and Reconciliation after surviving the Flood attack. He was able to join three other UNSC personnel that were, likewise, not aboard the Truth and Reconciliation as well: Office of Naval Intelligence Lieutenant Elias Haverson, ODST Corporal Locklear, and Warrant Officer Sheila Polaski. Together, the four escaped Installation 04 in a Pelican Dropship[17] before SPARTAN-117 set off the thermonuclear detonation, himself escaping in a C709 Longsword-class Starfighter[18].
After Installation 04's destruction, Cortana conducted a scan of the interstellar debris of Installation 04, and found an echo of Polaski's dropship. SPARTAN-117 was able to link up with the four other UNSC survivors of the cataclysm, but seven Covenant warships: six Covenant Cruisers and one 3-kilometer Covenant Flagship, entered the system and opened fire at the fighter and the Pelican. SPARTAN-117 ordered everyone into the Longsword while the Pelican was sent ahead as bait, drawing plasma fire from the Covenant starships while Cortana remotely hacked into the Covenant task force's Battlenet, causing electronic mayhem that temporarily stunned the weapons aboard the warships while the Longsword, with SPARTAN-117, Johnson, Locklear, Polaski, and Haverson on board, slipped into the hangar of the Covenant Flagship[19].
The small group of unprepared UNSC warriors fought through Elite defenders while Cortana slips into the Covenant Flagship's computer systems from a fiber optic port, and then proceeds to drain atmosphere from most segments of the ship, asphyxiating most of the Covenant guards. However, the bridge's crew still remained alive, and sealed the doors to the bridge, barricading themselves from the UNSC attackers. This measure is futile: SPARTAN-117 uses a plasma grenade to electromagnetically scramble the locks to the doors, and the UNSC forces seize the understaffed bridge with minor difficulties...SPARTAN-117's personal energy shields fail just as an Energy Sword-wielding Zealot appears. SPARTAN-117 has his arm nearly amputated in the resulting wrestle, but Marines Johnson and Locklear are able to severely wound the Zealot, before throwing him into an escape pod and launching it[20].
Cortana interfaces with the bridge's navigational controls to let the now UNSC-controlled flagship, Ascendant Justice, flee from the system, but a Covenant AI counters her, physically disabling the Slipspace drive of the Ascendant Justice and preventing Cortana from executing a jump out of the system before the six other Covenant Cruisers vaporize the flagship. SPARTAN-117, however, makes a journey through the damaged warship to kill the Grunts guarding the disabled Slipspace drive, and then forces a Covenant Engineer to repair the drive, allowing Cortana to program the Ascendant Justice to jump from the system, just barely surviving the bombardment of the six Covenant Cruisers, thus ending the UNSC retreat from the war torn system[21].
First Battle of Earth


- Main article: First Battle of Earth
- "We're taking this fight to the surface."
- — Commander Miranda Keyes
The UNSC Marine Corps remained in large force on Earth and its geosynchronous Orbital Defense Platforms, and were thus mostly prepared to repulse a relatively small Covenant invasion when fifteen Covenant capital warships, two Assault Carriers and thirteen Covenant Cruisers, entered the Sol System.
Because the large number of orbital Magnetic Accelerator Cannons made it almost impossible for any of the Covenant warships to reach Earth unscathed, the Covenant sent boarding craft to board numerous Orbital Defense Platforms. The boarders swiftly penetrated the platform's infantry defenders and set bombs in the core of the stations and then detonated them, destroying the defense station inside-out with minimal losses. Malta Station and Athens Station fell almost immediately to the internal sabotaging.
Covenant forces invaded Cairo Station as well, the command center for UNSC fleet operations during the battle. The crew of the Cairo held out longer, albeit with heavy casualties, and Marines and crewmen fought a coordinated holding action, trying to force the boarders out of the peripheral hangars and the intermediate common rooms, but their defenses were penetrated by a small force of Elites and Grunts that planted a bomb in the Fire Control Center of Cairo Station. Only SPARTAN-117's timely reinforcement of the Marine garrison and his assault on the Fire Control Center managed to disarm the bomb in time, thus saving Cairo Station from destruction.[22]. John then proceeded to send the bomb to another Covenant ship, utterly destroying it.
However, despite the fact that Cairo Station and hundreds of others of Orbital Defense Platforms still stood, the loss of the Malta and Athens allowed a Covenant Assault Carrier to penetrate the UNSC Navy's defensive web around Earth, and this Assault Carrier attacked New Mombasa, Africa.
However, the 405th Marine Infantry Division, some of whose elements were stationed in Mombasa, Kenya at the time, were able to battle against the Covenant as the Assault Carrier landed Phantoms, Orbital Insertion Pods, and used its Gravity Lift to directly deploy reinforcements. Furthermore, the In Amber Clad was also able to use its Pelicans to deploy Marines, vehicles, and equipment to assist the 405th Marine Division.
The In Amber Clad sent three Pelican Dropships to reinforce and to drop off Marine and ODST fire teams at Grid Kilo 23, where SPARTAN-117 and Johnson would lead a coordinated Marine assault to liberate the Covenant-contested city center, when the Pelicans were unexpectedly attacked by a Scarab en route to their landing zone. Two of the Pelicans were forced to break off when one of the In Amber Clad's Pelicans, which contained SPARTAN-117 and Sergeant Johnson, crashed into a building.
Miraculously, everyone aboard the Pelican except the pilot survived, and SPARTAN-117 was able to rally the Marine passengers, holding a nearby battle-damaged building against multiple Covenant attacks until the Marines could be evacuated at a nearby clearing.
Meanwhile, SPARTAN-117 proceeded to relieve a small ODST force, under the command of Gunnery Sergeant Pete Stacker, at Hotel Zanzibar, and then fought through a Covenant-controlled tunneled highway where the Covenant were using the tunnel as a supply route.[23].
However, the Scarab brushed aside Marine defenses, walking over the highway, and then past a large bridge and into the midsection's of the city completely unopposed by Marine small arms fire[24].
SPARTAN-117 and a small team of Marines pursued the lumbering walker, fighting through long segments of Covenant-controlled city locations until reaching the city center, where "A" Company of the 77th Marine Regiment defended against waves of Covenant Ghosts, Wraiths, and Phantoms in a fortified industrial building.
Completely undeterred by UNSC Marine Corps Scorpion Tanks or machine guns, the Scarab too brushed aside "A" Company in its fortified building, until it was caught in a nearby canal system and physically trapped. Pelicans commenced air strikes on the trapped walker, but the armor was barely scarred, and there was no other choice but to board the Scarab itself and destroy internally. While "A" Company's remnants provided suppressive fire, SPARTAN-117 boarded the enemy walker when the Scarab was stuck by a bridge, killing its crew (numerous Grunts and Elites) and destroying it[25].
Battle of Installation 05
- Main article: Battle of Installation 05
- "Cortana? What exactly am I looking at?"
- — Commander Miranda Keyes
- "Say what?!"
- — Sergeant Major Avery J. Johnson

After the Slipspace cataclysm over Mombasa involving the Prophet of Regret's Assault Carrier, In Amber Clad pursued the Prophet of Regret's carrier through Slipspace to Installation 05 (Delta Halo), where Regret was determined to sermonize and then activate the ring world and bring about The Great Journey to all of the Covenant and lead them to a believed transcendence.
While the carrier sent Phantom drop ships to the surface to land the Covenant Army in the immediate area and to allow Regret to begin his religious ceremony in a Forerunner temple before activating the ring, the In Amber Clad passed over the approximate position where Regret's temple was, deploying ten Human Entry Vehicles, and shortly afterwards, a flight of Pelican Dropships.
While only a handful of HEV pods survived the insertion, the surviving ones contained SPARTAN-117 and several heavily armed Orbital Drop Shock Troopers. Together, they cleared a small area of Shielded Plasma Cannons and a small group of Covenant soldiers, establishing an LZ for a Pelican Drop ship to deploy an M12 Warthog LRV and another pair of ODST operators.
SPARTAN-117 took the Warthog, and with the help of the ODSTs, fought through a Covenant-controlled bridge before another Pelican deployed a M808B Scorpion MBT that provided extra firepower for a UNSC offensive to push through two large Forerunner temple ruins, and to neutralize the Wraith where yet a third Pelican from the In Amber Clad dropped off resupply drop pods and Marine reinforcements.
After battling through a ravine entrenched by aerial Drones and Jackal Snipers, the UNSC force reached a small Forerunner temple, where SPARTAN-117 and two remaining Marines fought off a pair of Honor Guard Elites[26] before continuing onwards through a series of closed temples before reaching an open circular platform where a fourth Pelican was scheduled to air-drop additional armaments.
However, before that could happen, SPARTAN-117 and whatever surviving Marines were attacked by an airborne Phantom dropship that deployed two heavy Hunter warriors that savagely assailed the UNSC personnel before they were fought off and the fourth Pelican arrived to bring BR55 Battle Rifles, Sniper Rifles, and M19 SSM Rocket Launchers. SPARTAN-117 continued to take a gondola from the open platform, fighting off enemy Banshee fighters and Ranger Elites to reach a series of submerged temple structures and finally another gondola to the temple where Regret was sermonizing.
SPARTAN-117 and his Marines began fighting off Energy Sword-armed Honor Guard Elites, managed to assassinate the Prophet of Regret before the Prophet of Truth and Prophet of Mercy ordered an Assault Carrier to use an Energy Projector to vaporize the temple in a vain attempt to kill the "Demon", afterwards which contact was lost with SPARTAN-117 and whatever remaining Marines that were accompanying him at the time.
Meanwhile, at High Charity, the Changing of the Guard occurred, and the Arbiter was deployed to the Sentinel Wall[27] to deactivate the containment shield that prevented any being from journeying to the Library and retrieving the Index. After the Containment Shield was deactivated, apparently a company-sized Marine unit was sent to the Flood-Infested Wall[28][29] to try to make their way to the Library, but were overwhelmed by the Flood and assimilated.
However, while the Arbiter punched through heavy Flood defenses surrounding the Library, the UNSC tried again to attack the Library and secure the Index to ensure that the Covenant would not use it to activate Installation 05 and cleanse the galaxy of sentient life in their misguided religious quest. While the Arbiter cleaned out the Flood infestation barring way to the Library, the UNSC were able to slip a small force of Marines directly next to the Forerunner structure, who managed to infiltrate it, but took casualties from Flood infection forms.
At the end, only Miranda Keyes and Avery Johnson survived, but while Commander Keyes secured the Index, the Arbiter managed to race into the Library, incapacitating Perez and MacKenzie before launching a sneak attack on Johnson and Keyes, knocking them both unconscious before securing the Index for the Covenant[30].
Battle of High Charity
- Main article: Battle of High Charity
However, Spartan-117 had survived the Covenant vaporization of Regret's Temple, but had a more insidious fate: deceived by the Flood overlord creature known as the Gravemind, he became the Flood's pawn, being teleported to High Charity in an attempt to battle through legions of Covenant troops to capture or kill the Prophet of Truth and secure the Index to ensure that Truth would not activate Halo.
Early on during the Battle of High Charity, however, Cortana detected the CNI wave signatures of several UNSC Marines inside the bowels of High Charity. SPARTAN-117 took a short detour, launching an attack on a four-story Covenant detention facility and rescuing five Marine prisoners from a pair of heavily guarded Covenant detention blocks, who aided him in his battles through High Charity.
In the end, however, none of the Marines survived (even if you some how complete the level with some of them still alive, they won't be there in the next Master Chief level), and the Prophet of Truth escaped from SPARTAN-117's grasp, fleeing in a Phantom drop ship while Tartarus, Chieftain of the Brutes, took the imprisoned Keyes and Johnson, along with a cohort of Honor Guard Brutes, in two separate Phantoms to Installation 05, where Tartarus planned to use the Index to activate Halo at the Control Room of Installation 05[31].
Meanwhile, the In Amber Clad had not fared well after Keyes's team's departure from the frigate. Flood forces managed to storm aboard by use of crashed Pelicans, killing the human crew and using their unprecedented sentience to crew the ship. They managed to crash it onto a high tower on High Charity, spreading Flood into the Covenant planetoids. Pelican dropships provided the Flood with extensive routes to invade High Charity.
A number of its crew were assimilated into the insular of the parasite, fighting against SPARTAN-117 as the Master Chief battled through a Flood-infested High Charity to secure access to the Forerunner Ship[32].
While Tartarus took the Index and Miranda Keyes in one Phantom to the Control Room, the other Phantom, carrying Johnson, diverted its route. When arrived with two other captured Marines, the Arbiter arrived and with the distraction, the Marines and himself managed to slip through to an inactive Scarab walker while two nearby Marines, most likely Sergeant Stacker and Sergeant Banks, fought off a large pack of Brute Captains with Plasma Pistols. These two Marines were saved when the Arbiter arrived, slaying the Brutes.
However, Johnson pointed the Scarab's main cannon at the Arbiter...but not in bad will. The Arbiter and Johnson made a truce. Johnson would use the main cannon of the Scarab to punch a hole in the surface of the Control Room while the Arbiter would charge in with a Banshee and defeat Brute Captains and Brute Honor Guards before confronting Tartarus while Johnson would dismount from the Scarab, joining a large number of Covenant Separatist Councilors, Zealots, and Special Operation Elites in aiding the Arbiter to kill Tartarus and prevent him from using the Index to activate Halo.
However, Tartarus put up a significant resistance, and despite being heavily outnumbered by the Arbiter's Elite comrades, used his personal energy shield and the gargantuan Fist of Rukt to defend himself. In the end, however, Tartarus was unsuccessful.
Johnson used his exceptional marksmanship to take down Tartarus's powerful shields from afar with a Particle Beam Rifle while the Arbiter and his allies attacked the unshielded Tartarus, finally killing him and bringing an end to the Chieftain of the Brutes and preventing the firing of the Halos, terminating the UNSC Marine Corps's involvement at Installation 05.
Second Battle of Earth
- Main article: Second Battle of Earth
When the Arbiter arrives on Earth with Commander Miranda Keyes and Sergeant Major Avery J. Johnson, the Arbiter requests a truce between the Sangheili and Human races. Knowing the desperate situation for the human race being close to extinction from the remainder of a Covenant of lies and the savage Brutes, the Arbiter mercifully unites the Separatists and the Human Race.
The UNSC Marine Corps had a substantial involvement in the defense of Earth during the Second Battle of Earth, being the majority of the UNSC's ground defenses when the Covenant landed on Earth in multiple locations, which included the continent of Africa.
A scattered Marine presence appeared to remain in force in the immediate vicinity of New Mombasa, where a Slipspace disaster wiped off a significant number of Marine assets, including a portion of the 405th Marine Infantry Division.
Marine forces managed to hold out in an underground base, waging a guerrilla war against the Covenant occupiers of East Africa for some time before the Master Chief's arrival from on board the Forerunner Dreadnought [33]. After his recovery, Marine forces prepared to launch an offensive against the Covenant and reach what they thought to be the Ark. Unfortunately, the Covenant found them first, and assaulted the base with heavy numbers of infantry. The Marines, Master Chief, and the Arbiter managed to fend them off long enough to evacuate the remainder of the survivors, and destroyed the base rather than let the Covenant learn of their plan[34] - the Master Chief personally led a small number of Marines along the Tsavo Highway, penetrating through numerous blockades and passing patrols of Choppers and Wraiths, eventually reaching the town of Voi[35]. Once at Voi, the Master Chief and the Marines began their operation - destroying all anti-air emplacements, in order to allow Pelican drop ships to insert more UNSC forces, including the Arbiter. One emplacement from a perimeter of heavy Anti-Air Artillery was disabled, allowing UNSC Longsword Fighters and Frigates to attack the Forerunner Dreadnought. The Prophet of Truth, however, activated a portal over the "Ark," leading to the true facility - and a Covenant Cruiser made a pinpoint slipspace jump in-atmosphere above Voi, infected by the Flood
The Marine Lieutenant commanding forces in Voi soon was forced into a brutal firefight against the Flood, in which he and all of the Marines in his command post were infected, except for a single survivor.
Spartan-117, having destroyed the AA Gun battery, reentered Voi with the Arbiter, and began attacking the Flood and rescuing Marine survivors. Despite his best efforts, only six Marines (plus the Sergeant from the loading ramp and the additional marines from his squad), not counting the traumatized survivor of the raid on the CP or, were rescued. About midway to the crash site of the Flood-controlled ship, the unlikely rescuers of the humans, the First Sangheilian Fleet under Rtas 'Vadum, arrived, and deployed Special Operations Sangheili to assist in the evacuation of John-117 and his Marine squad, and glassing of all infected areas. The Marines that the Chief had been evacuated, and were transported to the Forward Unto Dawn, thus ending major UNSC Marine corp operations in this area.
Battle of Installation 00
- Main article: Battle of Installation 00
Exploration and Touchdown
- "All armor form up, hit 'em where it hurts!"
- — Gunnery Sergeant Pete Stacker, leading a Scorpion platoon on the Ark
Following negotiations between Admiral Hood and Rtas 'Vadum onboard the Sangheili flagship Shadow of Intent, it was agreed that the Sangheili Fleet, as well as the Forward Unto Dawn and her Marine complement, would follow Truth through the Portal to the Ark, after realizing the magnitude of the Flood threat to all of the galaxy's sentient life and the importance of retrieving the UNSC A.I. Cortana.
Upon emerging from the Portal, the Sangheili fleet encountered a Jiralhanae fleet three times their size. With 'Vadum's ships holding the line against Truth's fleet, Spartan-117, the Arbiter, and a Marine-ODST task force under Sergeants Avery Johnson, Reynolds, and Pete Stacker landed on the Ark.
Spartan-117's first objective was to clear AA defenses so Commander Keyes could set down the Dawn; he was dropped off with four ODSTs near the first Covenant battery. They proceeded to knock it out, and linked up with two Marines whose Pelican had been shot down. The impromptu assault team hijacked a Jiralhanae Prowler, commandeered a Mongoose from the wreck of the Pelican, and headed out to the last AA battery. Once it was destroyed, Commander Keyes set down the Dawn, and deployed Bravo Team, an armored unit of three Scorpions and a chain-gun warthog under Gunnery Sergeant Stacker, as well as 343 Guilty Spark.
The armored platoon forged ahead, and managed to penetrate a wall separating Spartan-117 from his objective: a Cartographer similar to the one found on Installation 04. However, a Scarab, a Phantom, and several Wraith tanks were in the way. Bravo Team managed to skillfully bludgeon their way through the Covenant defenses, and Spartan-117 managed to arrive at the Cartographer building, discovering that Truth was holed up in a Forerunner Citadel in the center of the Ark.
Pathfinding and Confrontation
Upon the discovery of Truth's location, a flight of five Pelicans and two Separatist Phantoms made way to the Citadel. They split up into three groups; the Arbiter led his two Phantoms' worth of Elites, Avery Johnson led a duo of Pelicans filled with Marines, and the Master Chief took another two Pelicans holding ODSTs. Their goal was to split up and quickly deactivate the three shield generators surrounding the Citadel. Miranda Keyes held back and waited to give the Master Chief's team support, fearful of the Anti-Air Wraith guarding their insertion point. Her fears were justified when one of the two Pelicans of the Master Chief's team was shot down. The remaining bird landed the Chief and just three ODSTs to take out the Brute position and disable the Wraith. Through much hardship and desperation they did just that, and awaited Miranda Keyes' reinforcements of three more Marines, a Warthog and a Mongoose. The mounted strike force then fought their way to the interior of the island, towards one of the three generators the battle group was tasked with taking out.
The Master Chief and his team proceeded inside the generator complex, fighting a myriad of loyalist Covenant along the way. The Chief made his way up to the control center, slew a pack of Brutes including a Brute Chieftain, and deactivated the generator. Approximately that same moment, the Arbiter and his Elites deactivated their generator as well. Expecting the third station to fall along with them, Miranda and the Chief were shocked to hear that Johnson's team of Marines was being overwhelmed by Brute reinforcements and were forced to fall back. Keyes rallied the other two strike teams and ordered them to finish the job that Johnson's team had started.
The team being led by the Master Chief sped back down to their original landing zone, and were picked up by a flight of Hornets. Assisted by the remaining two Pelicans, they all battled their way through stiff Covenant air resistance and saw the massive enemy force that had understandingly subdued the now apparently vanished Johnson's team. A vicious landing operation commenced, and the whole cliff side station was violently cleared for the Master Chief and remaining Elites (including the Arbiter) to storm the generator complex and deactivate the final power source.
As the shield went down, a fully Flood-consumed High Charity burst out of slip-space (presumably from the portal on Earth) onto the Ark. A number of pieces of debris smashed through the Elites cruiser, severely damaging it. A chunk of infested debris also smashed through the complex, and the Chief fought the Flood as he got back outside to the deployment zone.
Upon her arrival, Keyes had delivered a Scorpion, a Gauss Warthog, and a few Mongooses for him to use as he led the remaining Marine ground force and a handful of Elites to the interior of the island and begin the siege of the Citadel. The mounted and heavily armed task force battled their way down the Covenant fortified cliff side and was then met by a terrifying welcome party of two Scarab tanks. The remaining airborne force of Pelicans and Hornets assisted the Chief's team as they fiercely fought and destroyed this last line of defense.
The Master Chief and the Arbiter then proceeded into the Citadel to rescue Johnson and kill the Prophet of Truth, but only made it after Miranda Keyes' desperate rescue attempt. Johnson escaped using Miranda's Pelican and returned to Forward Unto Dawn, and the Master Chief and the Arbiter had to fight their way out, escaping the Flood and the Covenant. The remaining Marines and Elites were withdrawn to the Shadow of Intent as the Master Chief ventured into the remains of High Charity in search of Cortana.
Later, Avery Johnson's exploits aided in the final destruction of the reborn Installation 04 and the Flood, giving his life for Humanity and the Arbiter along the way.
As Forward Unto Dawn crash-landed into water mass on Earth, Marines (likely those that did not travel to the Ark, or had remained behind with Lord Hood) helped the Arbiter out of the wreck, and also participated in the memorial ceremony near the Ark Portal. It is likely that Marines were involved in peacekeeping and aid missions on Earth, or sent into space to battle against any remaining Covenant Loyalist forces.
Equipment
Armor


Marines have few bio-augmentations and usually wear passively camouflaged armored uniforms. They wear dark-colored metal-alloy armor to shield them from gunfire. Marine helmets are mounted with holographic text-displaying eyepieces and helmet recorders. As well as helmets, Marines on field operations in more humid locales sometimes choose to wear boonie covers, or those in colder environments don visored and thicker helmets.
Marine NCOs are easily recognized by the hat that they wear complete with the Eagle, Globe and Anchor insignia of the Marine Corps, although they often times substitute this soft hat for a more practical protective helmet. While they occasionally wear helmets in Halo 2, in Halo: Combat Evolved, Marine Sergeant like Johnson always are seen wearing the hat. Sergeants are (usually) more tactically adept, are better shots, and are tougher to kill than normal Marines, though these differences in gameplay are fairly minimal.
In Halo: Combat Evolved, Marines sported gray fatigues, and over that, pieces of brown armor plating covering the head, shoulder, and shins. At times, they only wore their fatigues, even forgoing helmets or even body armor plating in hazardous combat operations. At times, their helmets were also substituted for boonie covers and sometimes bandannas. However, since they had to get off the Pillar of Autumn,they probably didn't have time to grab their gear. Some Marines had small backpacks built into their back chest armor plating, although these backpacks appeared to be part of a medical uniform, as the text "EMP" (Emergency Medical Pack) was written on the back.
The UNSC Marine armor was much different in Halo 2. Marines appear to wear an armored suit underneath jungle camouflage-patterned padding, and a conspicuous green load-bearing armored vest over their chest padding for additional protection. The standard-issue armor is more efficient than the body armor issued to the Marines of Halo: Combat Evolved. In Halo 2, the Marines no longer appear as a rag-tag group of survivors, but as a unified force. They no longer wear boonie covers and are never seen in combat without their armor. In fact, in Halo 2, the only times Marines are seen without any armor is during the awards ceremony aboard Cairo Station. In that paticular case, they were wearing their dress white uniform.
In Halo 3, the Marines sport armor that is an evolution from that of Halo 2, with heavier and well-articulated woodland-colored full body armor (chest plate, back plate, shoulder plates, elbow pads, and knee pads) over camouflaged fatigues, allowing them to passively camouflage well in jungle terrain. Marines sometimes don small helmet communications microphones or black-phased sunglasses on their helmets, and others carry backpacks.
Marines in both Halo 2 and 3 have been seen to wear black gloves, probably to protect their hands and improve their grip on their weapons.
Orbital Drop Shock Troopers, otherwise known as "Helljumpers", are a special operations unit within the UNSC Marine Corps. They wear full body armor with a dark black camouflage scheme. They sport heavy and articulated black body suits, which are also believed to double as an armored g-suit that allows for safe transport in small ships during turbulent atmospheric entry. They also wear fully-visored black helmets that cover the entirety of the head.
Marines operating in cold environments wear environmentally-tailored armor, with snow camouflage scheme heavily thickened and full body armor and well as insulated and visored helmets with something analogous to a balaclava as shown in Halo Wars.
It should be noted that all Marines have a HUD not just from their helmets, but from their standard neural interface which projects HUD data directly to the Marine's retina.
Armament
Infantry Weapons
The standard issue weapon for UNSC Marines Corps is the MA5 series of assault rifles. Most Marines were issued the MA5B variant until its replacement in late 2552 by the BR-55HB SR and MA5C.(Note: Before the BR55HB SR an older varient called the BR55 was used). Suppressive fire was provided by the M247 GPMG during the First Battle of Earth, presumably replaced by the AIE-486H Heavy Machine Gun by the time of the Second Battle of Earth. Special Forces and vehicle crews are issued M7 and M7S Submachine Gun variants, with personal sidearms such as the M6 Series.
Snipers operate the SRS 99C-S2 AM and SRS 99D-S2 AM sniper rifle variants for anti-materiel and anti-personnel operations, with the M99 Special Application Scoped Rifle used as a dedicated anti-materiel weapon. Standard UNSC snipers as recalled by SPARTAN-117 usually traveled in a team consisting of operators.
Anti-armor fire is provided by the M19 and M41 rocket or missile launchers and the W/AV M6 G/GNR Spartan Laser directed-energy-weapon. Anti-air fire is provided by the M19-B SAM Missile Launcher, capable of destroying Banshee's and damaging Seraph fighters.
Ground Vehicles
The UNSC Marines standard vehicle is the M12 Warthog LRV, used for armored patrols and personnel mobility. The M12G1 Warthog LAAV is used as an anti-armor vehicle, mounted with an M68 Gauss Cannon, as well as the M12A1 Warthog LAAV mounted with a 102mm SC-HE Rocket Turret, firing 102mm shaped-charge high-explosive rockets. For heavy combat, the Marine Corps operates the M808B Scorpion Main battle Tank, and uses the Wolverine in an anti-air role.
Aircraft
The UNSC Marine Corps' most common aircraft is the Pelican dropship, either the D77-TC or, in late 2552, the D77H-TCI variants, used as multirole aerodynes, able to carry a mixture of Scorpion anti-tank rockets and Anvil II air-to-surface missiles, and equipped with chin mounted 7.62mm Machine-Guns or 70mm Auto-Cannons. The Corps also operates the Longsword as it's primary fighter, using it to its full effectiveness in Air-To-Air, Air-To-Ground, and Space Combat, the Sparrowhawk as an powerful air-to-ground attack gunship, the Shortsword as a short-range bomber, the Sparrowhawk and Hornet aerial support vehicles, and the SkyHawk VTOL strike fighter.
Marine air forces are intended usually to support ground forces or do drop off vital equipment for the soldier, either in close-air-support or air interdiction roles, with the UNSC Navy taking on the dedicated air force role[36].
Equipment
Halo: Combat Evolved
- MA5B ICWS Assault Rifle
- SRS99C-S2 AM Sniper Rifle
- M90 Assault Shotgun
- M6D Pistol
- M9 HE-DP Grenade
- M19 SSM Rocket Launcher
Halo 2
- M6C Magnum Sidearm
- BR55 Battle Rifle
- M7/Caseless Sub Machine Gun
- SRS99C-S2 AMB Sniper Rifle
- M41 SSR MAV/AW Rocket Launcher
- M90 Assault Shotgun
- M9 HE-DP Grenade
- M247 GP Machine Gun
Halo 3
- M6G Personal Defense Weapon System
- M7/Caseless Sub Machine Gun
- MA5C ICWS Assault Rifle
- BR55HB SR Battle Rifle(standard issue)
- M90A Close Assault Weapon System
- SRS99D-S2 AM Sniper Rifle
- M41 SSR MAV/AW Rocket Launcher
- W/AV M6 Grindell/Galileian Nonlinear Rifle "Spartan Laser"
- M9 HE-DP Grenade
- M7057 Defoliant Projector
Halo Wars
- MA5B Assault Rifle
- SRS99C-S2 AM Sniper Rifle
- M9 HE-DP Grenade
- M7057 Defoliant Projector
- M19 SSM Rocket Launcher
- NA4 Flamethrower
Vehicles
Halo: Combat Evolved
Halo 2
Halo 3
- M274 ULATV Mongoose
- M12 LRV Warthog
- M12G1 LAAV Warthog[37]
- M831 Troop Transport
- M808 Scorpion MBT
- Elephant
- Hornet
- D77H-TCI Pelican
- Albatross Heavy Dropship[38]
Halo Wars
- M12 LRV Warthog
- Wolverine Missile Vehicle
- M808 Scorpion MBT
- Rhino (Unknown Tank Class)
- SP42 Cobra
- Hornet
- Vulture Gunship
- D77H-TCI Pelican Dropship
- Albatross Heavy Dropship
Miscellaneous
- CH252 Helmet
- M52B Body Armor
- VZG7 Armored Boots
- S90 Gas Mask
- Spoofer
- VX7 Nerve gas
- PG000E Portable Electricity Generator
Combat
Halo: Combat Evolved

In Halo: Combat Evolved, almost all Marines carry MA5B Assault Rifles, though occasionally they can be seen with a Sniper Rifle (as seen in the level 'Assault on the control room and 'Halo'). Or the Shotgun (as seen in the level '343 Guilty Spark'), and very rarely the Covenant Needler or Plasma Rifle (as seen in the levels 'Assault on the control room' and Truth and reconciliation') when no UNSC armaments are available.
They are relatively accurate with these weapons, with a hit percentage of 50% or upwards, often firing in short bursts with the Assault Rifle, killing a Grunt in one or two bursts, knocking a Jackal's shield off position with repeated bursts, or cooperatively working with other Marines to take down an Elite. Marines also often utilize Fragmentation Grenades (mainly when Ghosts get near or a group of elites) in combat. They don't seem to be able to use rocket launchers even though there are often rocket launchers around the bodies of their dead.
Marines will strafe and avoid fire, but will not usually seek cover. They will roll out of the way of a vehicle but they will not pick up different weapons, Health Packs, or additional ammunition. Marines are also good pathfinders, often able to maneuver around obstacles such as boulders or fallen crates in their paths.
Marines are conscious of fratricide. After you have killed two humans of any type, the rest of the Marines in the campaign level will attack the player. If one kills Captain Keyes, or any other members of the bridge crew, in the campaign level The Pillar of Autumn, Cortana will lock the doors and summon a squad of invincible Marines to kill you.
Marines hitch rides on player-driven Warthogs and Scorpion Tanks but are only capable of piloting Ghosts by themselves, but they are not very skilled doing so, and will often run over you if you are not careful. They will remain on the Warthog if the player leaves the driver seat (although will exit both Scorpion and Warthog on the level Assault on the Control Room if left alone). This is most likely due to the fact that the marines in the Assault on the Control Room level are scripted to exit their vehicle once the player exits it. They are only seen driving by themselves in the cut scene of the Pillar of Autumn and can not do so in game play.
Interestingly, the enemy the Marines are most vulnerable to in Halo: Combat Evolved are the Infection Forms of the Flood. Once one is attached to a Marine, it cannot be shaken off and will kill the soldier, probably infecting them later on. Marines are poor fighters against the Flood and will often take heavy if not total casualties fighting them.
They also go "berserk" when they have taken too much damage. When down to one last bit of health, they will scream something (such as: "I'll take you all on!" or "Eat this!") then rush in a straight line toward the nearest enemy and fire in extended bursts (5-7 round burst as compared to 2-3 round bursts). This is usually the last thing they ever do, as they are badly wounded by this time and the lack of any melee attack (or the use of full auto with an assault rifle) makes them very vulnerable in the close-range combat they so clearly want to engage the enemy in. If a "berserk" Marine survives a fight, they will calm down and simply return to normal.
Halo 2

In Halo 2, the Marines are much more intelligent than in Halo: Combat Evolved.
They are more adept with vehicles, and are able to drive the Warthog, the Ghost, the Wraith, and the Scorpion, albeit a bit clumsily. They can now melee sleeping Grunts and will even attempt assassination kills if they catch the enemy unaware, although they lack the brute strength to kill Elites in this manner. Also, they now are able to take cover behind walls, corners, and obstacles with their backs up against them when under fire.
However, their firearm prowess has decreased, and most Marines are unable to achieve greater than a 25%-50% hit percentage with semiautomatic weapons such as the Covenant Carbine, and are instead more effective with close-range weaponry such as the M7/Caseless Submachine Gun or with heavy weaponry such as the M19 Rocket Launcher or the Fuel Rod Cannon.
Unlike Spartans and Elites they don't have the new ability to dual wield. However dual magnums are sometimes found next to certain marines or additional weapons ex. ODST on Delta Halo with dual pistols.
Although their friendly fire incidents are decreased, contrary to popular belief, Marines do use fragmentation grenades in combat(more likely when betrayed), albeit quite rarely, and are unaware of splash damage from heavy weapons, sometimes firing a rocket into a nearby wall and killing themselves.
The Marines are far more interactive, sometimes speaking to each other while in combat, and wield a greater variety of weapons. The player can also easily switch weapons with the Marines to make sure that they are well armed or that the player is. As in Halo: Combat Evolved, the Marines are aware of backstabbing, and will attempt to kill you after you kill a few of their comrades. The number of Marines that can be killed before the others turn against you oddly seems to vary depending on the weapon used and the way they are shot.
Generally, taking out two marines separately in succession will instantly make them betray the player, unless they are taken out at the same time using an explosive weapon. However, if the player progresses through the level and meets another group of marines a distance away from where the betrayal was performed, they will sometimes be marked as allies once again. Also, if the player does not harm any marines who are shooting at him/her for a certain amount of time the Marine(s) will reluctantly return to an allied condition, or sometiems verbally forgive the player.
Halo 3
Once again they can utilize the Grunts' weakness for naps by using stealth and meleeing them, the marine's melee attack is mostly a kick, but they can hit something with the butt of their rifle. However due to the brute strength of the many races of the Covenant, UNSC Marines will usually lose in melee combat with vicious ballistic creatures such as the Brute. They seek cover much more often and even put their back up to the wall. They will throw grenades much more often, and with great accuracy, especially in higher difficulty levels. They will sometimes also display group tactics never seen in previous games, like huddling into a tight group and combining assault rifle fire while combating Drones. Even though the Marines are smarter in Halo 3 they occasionally will make mistakes, such as running off a cliff while driving a vehicle, more or less like any new player would. Marines/ODSTs seem to be able to react with the environment around them. For example, if a Ghost is about to explode, they will stand back or walk around it and continue after it explodes, or run you over when you turn a corner (only seen on the level "The Storm"). Despite this, their AI was considered poor compared to the enemy AI (such as the Covenant and Flood). There are a lot more face and skin models for the Marines in Halo 3.
The player can still exchange weapons and ammo with them, though they won't accept Brute Shots, Gravity Hammers, Sentinel beams or Energy Swords.
After killing two of them, any that are in the area will come to kill you. After a while (even if you are constantly killing them) they will see you as a friend again. Interestingly, their accuracy becomes 100% if betrayed, and if there are two or more remaining Marines they can end the Chief's life in a matter of seconds.
Their audio clips have also been vastly expanded, and profanity is used to indicate wounded status if the IWHBYD skull is activated.
Marines are vulnerable to the Flood Infection Forms as they were in Halo:CE. If an Infection Form attaches itself on a Marine, they will grapple for a second or so, to give the player a chance to shoot it off, but if the player does not, the Infection Form will mutate the Marine into a Combat Form. However, it is possible to "short circuit" the mutation by firing on the new Flood host, and cause the human to not fully mutate into a combat form. It is also possible to shoot off the Infection Form, but the Marine will likely take some fire in the process.
Marines are extremely ineffective against the Flood if not given shotguns (or assault rifles in a pinch), and will take extremely heavy casualties fighting them.
Marines are seen in larger groups in Halo 3. In previous games they were usually seen in groups of 4-6, or one squad. Now several squads can be seen at a time, and all are able to assist you.
Marines have also gained the ability to flip vehicles, which compensates well for their somewhat poor driving. They can flip the Mongoose or Ghost by themselves, can flip the Warthog in groups of at least three, and strangely, they can flip the 66-ton Scorpion in groups of only five.
Halo Wars
In Halo Wars, Marines are built in squads. Upgrades allow the squad to be fitted with the M19 SSM Rocket Launcher and/or a squad medic. In addition, a 'grenade attack' may be activated by tapping the "secondary attack" button on the controller.[39] A single squad costs 100 supply points and requires 1 Pop. Cap.
Marines armed with the NA4 Flamethrower are built as separate units. Upgrades such as Flash bang which stuns enemies temporarily, allow their defense and/or attack power to be improved.[40] A single unit costs 100 supply points and requires 1 Pop. Cap.
They can be created at the UNSC Barracks or in the UNSC Elephant
Rank structure
Template:UNSC Officer Ranks Template:UNSC Enlisted Ranks
Headline text
Known Marines
- Main article: [[:
- Category: UNSC Marine Corps Personnel|
- Category: UNSC Marine Corps Personnel]]
Marine Units
- Main article: List of UNSC Military Units
List of Marine Quotes
- Main article: UNSC Marine Corps/Quotes
Trivia
- In Tsavo Highway, If you give a couple of marines fuel rod cannons they have the ability to shoot down a Phantom.
- Marines cannot use any equipment what so ever. The reason for this is unknown.
- In almost every video trailer, a Marine is usually killed immediately with one plasma bolt.
- 3 Marines have appeared in all of the games in Halo trilogy:Private first class Chips Dubbo, Sergeant Pete Stacker, and Sergeant major Avery Johnson.
- In Halo: Combat Evolved PC, you can play as a Marine through the use of bump possesion.
- The equipment and armor used by UNSC Marines resembles the modern-day US Army's Future Force Warrior Program, and conceptually may have been inspired by it.
- Gruntipedia has a humorous article about the marines, calling them horrible drivers and useless for anything.
- The Marines' uniforms appear to change in every game. This could be because the Marines in Halo: Combat Evolved are from Reach while the ones in Halo 2 and 3 are from Earth (Which is why the Halo 2 and 3 Marines are similar in looks.)
- The Marine uniform in Halo: Combat Evolved are very different compared to the other games so it is unknown how fast the uniform change happened. This could be because they are from Reach.
- Bungie went to great lengths to ensure that the Marines reflected the diversity of Earth; some Marines look and sound American, while others appear Asian, African, Australian, Hispanic and Italian. Many were also modeled on members of Bungie's own staff members to provide further diversity in the universe.
- In the Halo: Combat Evolved level Truth and Reconciliation, Captain Keyes tells a Marine to "Stow your belly aching soldier, remember you're a leatherneck!" Leatherneck was a nickname earned by U.S. Marines in the era of the Continental Marines. The Marines would wear leather collars to provide protection from slashing attacks as they boarded enemy ships.
- In 2007, Bungie hired an actual Marine, Christian Allen, who served with the US Marines from 1995 to 1999, as a Design Lead. Rather than a frontline combat unit, though, he served as a member of the US Marine Corps Military Police. This could be one of the reasons of the marine uniform change.
- In Halo: Combat Evolved, shooting a dead Marine's armor with a ballistic firearm would eventually send a ricochet at your shields. Meleeing them would result in a loud "clack" However, in Halo 2 and 3, the bullets do not ricochet, but penetrate the dead bodies and result in a large amount of blood.
- In Halo: Combat Evolved, Marines cannot see invisible Elites, even if they have bright, glowing Energy Swords.
- In Halo 3, Marines generally tend to care greatly about the welfare of the Master Chief, and become scared and upset if you die. However, when playing Co-op with the Arbiter, if the Arbiter dies, the Marines don't seem to care at all and act as if it's unfortunate, but still unimportant.
- UNSC Marines tend to perform as well when seriously injured as they do in full-health condition; an unrealistic feature of combat, but this is to be expected, as very few games properly display combat weariness for obvious gameplay-related reasons.
- In Halo 3, you can unload a full magazine onto the chest of a marine and they won't even flinch. Their armor really does protect them this time, but this is only in the center of the chest. You'll know it when you see it and the same goes for pilot helmets. Unload your entire gun on it and they won't feel a thing. Shooting the visor is a different story, shooting the marines in the helmet for Halo 2 and 3 yield the same results: it will come off. If done with a BR though with its 3 shot burst, the first shot will take it off and the other 2 shots will kill him. However, its possible to take it off with the BR without killing them.
- In Halo 3, if you throw a Plasma Grenade at a Marine, it will stick to them. They will usually shout "Get it off me!" and dive away.
- In Halo: Combat Evolved, the faces of Marines are generated by building various portrait images into a form that can be "wrapped" around a 3D model.
- The only equipment the Marines use are grenades. They have never been seen to use Bubble Shields, Power Drainer and so on and so forth.
- Marines are arguably the most balanced infantry in the game, although their AIs can occasionally make them a nuisance during combat.
- Sometimes in Halo 3, dead Marines and Marines with bandage will have Reynolds face.
- On some missions Marines will yell random taunts such as "You will cease to live very soon!" and "suck it!"
- The UNSC Marines appear to have preserved the old USMC tradition of shouting "Oo-rah!" as a cheer.
- Sometimes, if a Marine is shot in the neck on Halo 2 or 3, they will fall to the ground, hold their neck, and start squirming in pain until they truly die.
- In Halo 2 sometimes if you kill ally Marines until they betray you they will say "I have been waiting for this, for a long time!"(shoots you with their weapon) or "you won't get away with that!"(shoots you with their weapon) or "KILL THE TRAITOR!!!". In Halo: Combat Evolved they will yell out things like "Let's end this!" or "I've had enough of this crap!"
- On the Crow's Nest level of Halo 3 Marines have been observed to be aimlessly wander past Brutes, weaponless. The Brutes however, appear not to notice these Marines.
- On Crows Nest, when Master Chief arrives, one of the Marines in the cutscene is also in the command bunker.
- On The Ark sometimes when the frigate lands, the Warthog that is dropped by the Pelican will splatter the Marines who disembarked from it.
- On the level Floodgate, Marines usually die because they try to punch/kick Flood Combat Forms when they get close, usually with little to no effect.
- In Halo 3, when Marines approach fallen Marines, they will crouch beside them, have hand animation where they place their hand on the body, and usually mention some glitched phrase like, "I'll make sure your letter gets to your parents," or "Better you than me," and if there are groups of Marines dead, it will change to, "What happened here?" or "Poor buggers, never stood a chance," During Crows Nest, in the Barracks portion of the level, it is most common to witness this. Marines will also be quite callous when around dead Marines, saying, "He had a watch on him," or "I never liked him anyway".or"where is that watch"
- In Halo: Combat Evolved, the Marines never wield the M19 Rocket Launcher or the Plasma Pistol at any time during the single-player campaign.
- There are only two crazy marines in the Halo trilogy. The first one you meet is on the level 343 Guilty Spark and the second one you meet is on the level Floodgate.
- In any of the Halo trilogy games, Marines will kill an enemy, keep on shooting their dead body and run up to them, yelling things like, "I saw it move!" or "Get up so I can kill you again!".
- In Halo 2 and Halo 3, Marines can drive the Master Chief and the Arbiter around in vehicles while they sit in the gunner or passenger seat. Unlike in Halo: Combat Evolved, Master Chief must always be the driver of the vehicle (excluding Pelicans).
- The most uncommonly seen marines are the Female and African Marines.
- It appears as though the only Female Marines are English/American, Caucasian, or, in extremely rare but still present cases, African.
Gallery
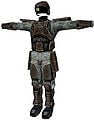
Halo: Combat Evolved Marine Battle Armor
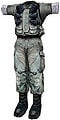
Halo: Combat Evolved Marine fatigue uniform.
- 56926110-Full.jpg
Halo 3 Marine Bloody.


Sources
- ^ Halo Wars
- ^ Halo Wars Announcement Trailer
- ^ Halo: The Fall of Reach, page 174
- ^ Halo: The Fall of Reach, page 212
- ^ Halo: The Flood, page 33
- ^ Halo: Combat Evolved, Pillar of Autumn (Level)
- ^ Halo: Combat Evolved, The Truth and Reconciliation (Level)
- ^ Halo: The Flood, page 136
- ^ Halo: The Flood, page 160
- ^ Halo: Combat Evolved, The Silent Cartographer (Level)
- ^ Halo: Combat Evolved, 343 Guilty Spark (Level)
- ^ Halo: The Flood, page 220
- ^ Halo: The Flood, page 251
- ^ Halo: The Flood, page 317
- ^ Halo: The Flood, page 331
- ^ Halo: The Flood, page 332
- ^ Halo: First Strike, page 48
- ^ Halo: Combat Evolved, The Maw (Level)
- ^ Halo: First Strike, page 58
- ^ Halo: First Strike, page 74
- ^ Halo: First Strike, page 87
- ^ Halo 2, Cairo Station (Level)
- ^ Outskirts(level)
- ^ Halo 2, Outskirts (Level)
- ^ Halo 2, Metropolis (Level)
- ^ Halo 2, Delta Halo (Level)
- ^ The Official Halo 2 Strategy Guide, page 118
- ^ The Official Halo 2 Strategy Guide, page 115
- ^ Halo 2, Sacred Icon (Level)
- ^ Halo 2, Quarantine Zone
- ^ Halo 2, Gravemind (Level)
- ^ Halo 2, High Charity (Level)
- ^ Sierra 117 (level)
- ^ Crows Nest (level)
- ^ Tsavo Highway (level)
- ^ Letter - Re:Antilon Mine
- ^ EGM Halo 3 Single Player clip-Fall 2006
- ^ Sandtrap From the Brute Chopper Quicktime video
- ^ Gamepro #238, pp50
- ^ Gamepro #238, pp50


