Outskirts: Difference between revisions
From Halopedia, the Halo wiki
Dragonclaws (talk | contribs) (add links) |
mNo edit summary |
||
| (173 intermediate revisions by 62 users not shown) | |||
| Line 1: | Line 1: | ||
== | {{Status|Gameplay}} | ||
Outskirts | {{disambig header|the level|the achievement|Outskirts (achievement)}} | ||
{{Level infobox | |||
|pagegamelabel=H2 | |||
|prev=''[[Cairo Station]]'' | |||
|concurrent=''[[Another Day at the Beach]]'' <br>{{C|''[[Halo 2 Multiplayer Map Pack]]''}} {{C|''[[Halo 2: Anniversary|Anniversary]]''}} | |||
|next=''[[Metropolis]]'' | |||
|name='''''Outskirts''''' | |||
|image=[[File:H2A Outskirts Loadscreen.png|300px]] | |||
|game=''[[Halo 2]]'' {{C|''[[Halo 2: Anniversary|Anniversary]]''}} | |||
|devname=<code>03a_oldmombasa</code>{{Ref/File|Id=H2EK|H2EK|H2EK\tags\scenarios\solo\03a_oldmombasa\03a_oldmombasa.scenario}} | |||
|player=[[Master_Chief_(gameplay)#Halo_2|Master Chief]] | |||
|date= [[2552#October 20, 2552|October 20, 2552]] | |||
|place=[[Old Mombasa|Old]] [[Mombasa]], [[Kenya]], [[Earth]] | |||
|objective=Regroup with Marines in Old Mombasa and head to the [[bridge (structure)|bridge]] leading to [[New Mombasa]] | |||
|partime=00:15:00 {{C|''Master Chief Collection''}} | |||
|parscore=8,000 {{C|''Master Chief Collection''}} | |||
}} | |||
{{Article quote|Rally scattered marines, clear hostile contacts from the old-city.'''}} | |||
'''Outskirts''' is the fourth [[campaign]] level of ''[[Halo 2]]''. As the [[John-117|Master Chief]], you must battle your way through the streets of [[Old Mombasa]], [[Earth]], with [[UNSC Marine Corps|Marines]] to reach the beach. From there you head to a [[New Mombasa 105 East|highway]] tunnel, which leads to the next level, [[Metropolis]]. This is also the first level in which you will encounter [[Kig-yar|Jackals]], [[Jackal Snipers]], [[Hunters]], and [[Phantom]] Dropships, as well as the first ''Halo 2'' level in which you can drive vehicles, as well as the first mission to take place on the Earth. This is also the only level in the ''Halo'' Trilogy to feature the {{Pattern|Ruwaa|Shadow}}. Outskirts is also the level in ''Halo 2'' with the most Sniper Jackals; a total of 22 in all, most of which are located in the infamous "Sniper Alley". | |||
''{ | ==Transcript== | ||
[https://youtu.be/4---ROt91TA '''{''Cutscene''}'''] | |||
[http://www.youtube.com/watch?v=y8Cr0xxVctU '''{''Anniversary Cutscene''}'''] | |||
'''[[ | ''Three [[D77-TC Pelican|Pelicans]] rocket away from the ''[[UNSC In Amber Clad|In Amber Clad]]'', jet engines thundering, and spear out towards [[New Mombasa]]. The ''[[Solemn Penance]]'' hovers high over the city, its [[gravity lift]] engaged.'' | ||
'''[[ | *'''[[Cortana]] (COM)''': "The message just repeats. ''Regret, Regret, Regret''." | ||
'' | ''The [[John-117|Master Chief]] watches from the stern of a Pelican as the clouds roll by below.'' | ||
''' | *'''[[Commander (UNSC)|Commander]] [[Miranda Keyes|Keyes]] (COM)''': "Catchy. Any idea what it means?" | ||
'' | ''A convoy of [[M12 Force Application Vehicle|Warthog]]s are seen as the Pelicans pass over them.'' | ||
''' | *'''[[Sergeant Major|Sergeant]] [[Avery Johnson|Johnson]] (COM)''': "Dear [[UNSC|Humanity]]...we regret being alien bastards. We regret coming to [[Earth]]." | ||
'' | ''Inside the cockpit of the [[D77-TC Pelican|Pelican]], Johnson leans against the bulkhead behind the two pilots.'' | ||
''' | *'''Sergeant Johnson''': "And we most ''definitely'' regret that the [[UNSC|Corps]] just blew up our raggedy-ass [[Regret's Fleet|fleet]]!" | ||
'' | *'''Pilots''': ''(in unison)'' "Oo-rah!" | ||
''' | *'''Cortana (COM)''': "[[Prophet of Regret|Regret]] is a ''name'', Sergeant. The name of one of the Covenant's [[High Prophets|religious leaders]]. A Prophet. He's on that carrier, and he's calling for help." | ||
'' | ''A [[UNSC Marine Corps|Marine]] sniper-spotter team lies prone on a rooftop, and the Pelicans fly over their position.'' | ||
'' | *'''[[UNSC Marine Corps|Marine]] (COM)''': "Immediate: Grid kilo two-three is hot. Recommend mission abort." | ||
''' | *'''Pilot (COM)''': "Roger, recon. ''(to Johnson)'' It's your call, Sarge." | ||
''' | *'''Sergeant Johnson''': "We're going in. Get tactical, [[UNSC Marine Corps|Marines]]!" | ||
'' | '' Cut to the Pelican's troop bay. A Marine loads rounds into his Battle Rifle and cocks the gun, and a sharpshooter examines a magazine before slotting it into his Sniper Rifle. A third Marine puts on a helmet, tapping it to make sure it's tight. Master Chief stands silently, gazing at the streets below. | ||
*'''[[Lord Hood]] (COM)''': "Master Chief, get aboard that carrier, and secure the Prophet of Regret. This is the only place on Earth the Covenant decided to land. That Prophet is going to tell us [[Quick to Adjust|why]]." | |||
'' | *'''Pilot''': "Thirty seconds out. Stand by to...whoa." | ||
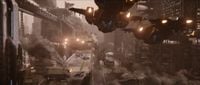
''' | ''The pilot goes silent as a huge {{Pattern|Protos|Scarab}} lumbers into view. Its leg spears a truck, destroying it instantly. Its main gun then focuses and fires, destroying the lead Pelican. The two other Pelicans veer off, as a plasma turret on the Scarab's back track them. The leftward dropship, with Johnson and the Chief on board, catches a burst of plasma on its right flank, flips inverted, hits a building, and slides through a low brick wall, before blacking out the frame.'' | ||
'' | ''NOTE: In the Anniversary version, the rightward dropship is also cut down by the Scarab's plasma turret, leading to the events of Another Day At the Beach.'' | ||
''' | '''{''Gameplay''}''' | ||
''The Master Chief regains consciousness.'' | |||
'''[[Cortana]]:''' | |||
*([[Easy]]): "You all right, Chief?" | |||
*([[Normal]]): "Hey, ''(fakes tapping helmet)'' Wake up." | |||
*([[Heroic]]): "Talk to me, should I start CPR? What's going on?" | |||
*([[Legendary]]): "Blink if you can hear me, Chief." | |||
=== | ===They'll Regret That Too=== | ||
*'''Sergeant Johnson''': "Shake it off, Marines. Clear the crash site! Go, go, go!" | |||
'' | ''A single [[Unggoy Minor]] walks up the alley towards the crashed Pelican. Upon seeing the UNSC force it tries to flee but is quickly killed. The Chief and the rest of the team arrive at a bombed-out building occupied by the Covenant. An enemy [[Kez'katu-pattern Phantom|Phantom]] flies overhead.'' | ||
*'''Marine''': "Secure this area! Dig in fella's! For now, this is home." | |||
*'''Marine''': "Hoo-rah!" | |||
[[ | ''Covenant [[Sangheili]], [[Kig-Yar]] and [[Unggoy]] appear in the area, and upon sighting the team they open fire.'' | ||
*'''Sergeant Johnson''': "If they didn't know we're here before, they do now." | |||
''A few Covenant troops including [[Kig-Yar Sniper]]s (on higher difficulties) appear on the rooftops.'' | |||
*'''Sergeant Johnson''': "Yep, here they come! Up high!" | |||
*'''Sergeant Johnson''': "I don't wanna kill ya, you're just too ugly to let live!" | |||
''After the first wave of Covenant forces are killed:'' | |||
*'''Sergeant Johnson''': "More on the street, left side!" | |||
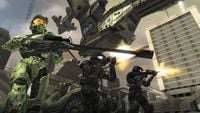
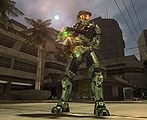
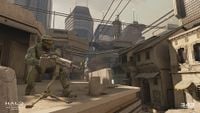
[[File:H2A-OutskirtsCourtyardBattle.png|thumb|300px|Two Marines and John-117 in combat after the Pelican crash.]] | |||
''After the second wave of Covenant are killed, another [[lance]] of [[Kig-yar]] led by a [[Sangheili Minor]] appear through the path the Chief came in.'' | |||
*'''Sergeant Johnson''': "We got Jackals in the courtyard!" | |||
''Later, a group of [[Yanme'e]] flies into the courtyard.'' | |||
*'''Sergeant Johnson''': "Buggers, headin' over the rooftops!" | |||
''Another wave of Covenant attacks.'' | |||
*'''Sergeant Johnson''': "Across the street! Down low!" | |||
''Later, the sound of a [[Kez'katu-pattern Phantom|Phantom]]'s engines drifts over the rooftop.'' | |||
*'''Sergeant Johnson (COM)''': "Eyes up! Phantom's back!" | |||
''The Phantom drops off another wave of Covenant (which includes a [[Sangheili Zealot]] on [[legendary]] difficulty). After the UNSC forces deal with them, a Pelican arrives, hovering over the courtyard.'' | |||
*'''Pilot (COM)''': "My girl's a little big for that courtyard, Sergeant. I see a good LZ on the other side of these buildings. Meet you there, over." | |||
*'''Sergeant Johnson''': "Copy that. Someone get a [[satchel charge|satchel]] on the gate!" | |||
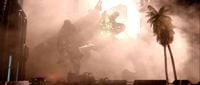
''Before anyone can reach for a satchel, the gates begin to shake, raising dust. A few seconds later, they break, and a pair of [[Mgalekgolo]] arrive.'' | |||
*'''Cortana''': "Hunters!" | |||
*'''Sergeant Johnson (COM)''': "Stand back, Marines. Let the Chief show you how it's done!" | |||
''Once the Mgalekgolo are eliminated:'' | |||
*'''Cortana (COM)''': "Second squad, this is Cortana. What's your status, over?" | |||
*'''[[Gunnery Sergeant (UNSC)|Gunnery Sergeant]] [[Stacker]] (COM)''': "We're operational, ma'am... barely. Our pilots didn't make it." | |||
*'''Cortana (COM)''': "Find a hole, stay put. We'll come to you." | |||
''When the team reaches the second courtyard, they encounter a Kig-Yar sniper with other Kig-Yar ranks supporting it.'' | |||
*'''Marine''': "The only thing worse than Jackals are Jackals with [[Type-50 particle beam rifle|sniper rifles]]!" | |||
''When the team reaches the far courtyard, the Pelican drops off Marines (if you've lost any from the original group).'' | |||
*'''Commander Keyes (COM)''': "Sergeant, I need you on that bird." | |||
*'''Sergeant Johnson (COM)''': "Ma'am?" | |||
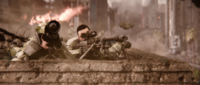
[[File:H2ACampaign SniperAlleyMarines.jpg|thumb|300px|The Marines stare down sniper fire as they advance into the alley.]] | |||
*'''Commander Keyes (COM)''': "My Pelicans are going to start airlifting armor and reinforcements into the city. They'll need an escort that isn't afraid of a little hostile ground fire." | |||
*'''Sergeant Johnson (COM)''': "Understood. I'll keep an eye on 'em. [[John-117|Chief]] ... good luck." | |||
''Sergeant Johnson climbs aboard the Pelican and dusts off.'' | |||
''The Chief and the Marines fight their way through an alley full of Kig-Yar snipers and Yanme'e (and on higher difficulties, a pair of [[Stealth Sangheili]] armed with [[Type-1 Energy Weapon/Sword|energy swords]]), followed by multiple lances of Unggoy and Sangheili. They eventually reach Second squad's position.'' | |||
''A Covenant lance led by a high ranking Sangheili have Second squad pinned down with a plasma turret. The Chief moves in to assist.'' | |||
''After clearing the immediate area of enemies:'' | |||
*'''[[Stacker]]''': "Chief! Glad you could make it. Crash site's on the other side of this [[Hotel Zanzibar|hotel]], Chief. Covenant are crawling all over it. Follow me." | |||
''As the Sergeant and the Chief moves into the darkened hotel...'' | |||
*'''Stacker''' or '''Private Dubbo''': "Stay outta sight." | |||
''Unggoy and Sangheili come through the dark corridors. The UNSC forces hide in the shadows and ambush the Covenant troops. Emerging from the Hotel, they spot a Phantom dropping off more Unggoy and a Sangheili.'' | |||
*'''Stacker''': "[[Unggoy|You]] make my mother-in-law look pretty!" | |||
''A couple Marines pull up in a [[M12 Force Application Vehicle|Warthog]], honking the horn for the Chief.'' | |||
*'''Marine''': "Special delivery from Commander Keyes, Chief." | |||
''The Chief boards the Warthog.'' | |||
*'''Cortana''': "The highest concentration of Covenant ground troops is directly below the carrier. I don't think they want you to get on board." | |||
*'''Cortana''': "That bridge is the most direct route to the city center." | |||
===A Day at the Beach=== | |||
''The Chief drives down the beach, passing a crashed Pelican.'' | |||
*'''Marine''': "Oh man, I love the beach..." | |||
*'''[[Chips Dubbo]]''': "I hope you packed a suit, mate!" | |||
---- | |||
''With IWHYBD skull activated:'' | |||
*'''Marine''': "Hells no! Commando all the way, ''(Spanish)'' vato ''(dude)''!" | |||
---- | |||
*'''Cortana (COM)''': "Cut the chatter...we got trouble." | |||
''The Chief navigates the beaches which are full of Covenant troops supported by [[Covenant watchtower]]s, [[Type-32 Rapid Attack Vehicle|Ghosts]], and a [[Kez'katu-pattern Phantom|Phantom]] dropship. Several large [[Zo'op-pattern Weevil|artillery pieces]] are also present, but none are in operation.'' | |||
*'''Commander Keyes (COM)''': "Chief, the carrier just launched a wave of [[Covenant drop pod|pod]]s. They're inbound on your position!" | |||
''Covenant drop pods slam down on the beach all around the Chief, and Sangheili warriors spring out of them.'' | |||
''The Chief nears a tunnel leading to the bridge.'' | |||
*'''Cortana''': "This tunnel links up to the bridge. It's full of rats, if you know what I mean... But it beats swimming." | |||
''The Chief moves into the highway tunnel.'' | |||
===Speed Zone Ahead=== | |||
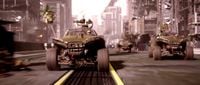
[[File:H2ACampaign ShadowConvoy.png|thumb|300px|The Covenant moves to regroup in New Mombasa.]] | |||
*'''Cortana''': "I've been analyzing the Covenant [[proselytization network|tactical chatter]]. They're surprised, confused... I don't think they expected us to be here. Not you and me...all of us...humanity, on Earth. Odd, I know, but it does help explain why they came here with such a small fleet." | |||
''Throughout the tunnel the team of Warthog(s) encounter many Covenant positions consisting of Ghosts, [[Eeo'Pimu-pattern Shade|Shade]] turrets, [[Shepsu-pattern plasma cannon|Plasma Turret]]s and a few [[Battlefield Methane Tanks]], along with numerous Unggoy, Kig-Yar, Sangheili and Yanme'e infantry. Just as they clear the last of these positions, a massive cyan/green [[focus cannon|plasma beam]] tears into the tunnel through a massive hole above, incinerating a fleeing Warthog. The Scarab can be seen through the hole above.'' | |||
''The Chief comes across a group of {{Pattern|Ruwaa|Shadow}}s in the inner tunnels.'' | |||
*'''Cortana''': "The Covenant must be trying to regroup. Don't let them." | |||
''The Chief pursues and destroys the Shadows, then passes through a final Covenant defensive position consisting of multiple Ghosts, Plasma Cannons and another Shadow with supporting ground troops before approaching the tunnel's exit.'' | |||
''Fades to black.'' | |||
''Level ends.'' | |||
==Achievements== | |||
The following [[achievement]]s can be unlocked on ''Outskirts'' across the [[Halo 2 (Windows Vista)|Windows Vista]] and ''[[Halo: The Master Chief Collection]]'' editions of ''Halo 2: Anniversary''. The original [[Xbox]] release of ''Halo 2'' did not contain achievement unlocks. | |||
{| class="wikitable" | |||
|- | |||
! scope="col" style="width:135px;text-align:center;" |'''''Halo 2'' (Windows Vista)''' | |||
! scope="col" style="width:135px;text-align:center;" |'''''Halo: MCC'' (Xbox One, Xbox Series X|S)''' | |||
! scope="col" style="width:135px;text-align:center;" |'''''Halo: MCC'' (Steam)''' | |||
! scope="col" style="width:175px;height:20px;text-align:center;" |'''Title''' | |||
! scope="col" style="width:350px;height:20px;text-align:center;" |'''Unlock requirement''' | |||
! scope="col" style="width:200px;height:20px;text-align:center;" |'''Games''' | |||
|- | |||
|[[File:H2V Achievement Outskirts.png|center|64px]] | |||
|[[File:HTMCC H2A Achievement Outskirts.png|center|114px]] | |||
|[[File:HTMCC H2A Achievement Steam Outskirts.jpg|center|64px]] | |||
|<center>'''[[Outskirts (achievement)|Outskirts]]'''</center> | |||
|Beat Outskirts on any difficulty. | |||
|<center>[[Halo 2 (Windows Vista)|''Halo 2'' (Windows Vista)]]<br/>''[[Halo: The Master Chief Collection]]''</center> | |||
|- | |||
|<center>N/A</center> | |||
|[[File:HTMCC H2A Achievement RooftopRunner.png|center|114px]] | |||
|[[File:HTMCC H2A Achievement Steam RooftopRunner.jpg|center|64px]] | |||
|<center>'''[[Rooftop Runner]]'''</center> | |||
|Beat the par time on Outskirts. | |||
|<center>''[[Halo: The Master Chief Collection]]''</center> | |||
|- | |||
|<center>N/A</center> | |||
|[[File:HTMCC H2A Achievement ObjectiveSecured.png|center|114px]] | |||
|[[File:HTMCC H2A Achievement Steam ObjectiveSecured.jpg|center|64px]] | |||
|<center>'''[[Objective Secured]]'''</center> | |||
|Beat the par score on Outskirts. | |||
|<center>''[[Halo: The Master Chief Collection]]''</center> | |||
|- | |||
|<center>N/A</center> | |||
|[[File:HTMCC H2A Achievement Inquisitive.png|center|114px]] | |||
|[[File:HTMCC H2A Achievement Steam Inquisitive.jpg|center|64px]] | |||
|<center>'''[[Inquisitive]]'''</center> | |||
|Activate [[Terminal (Halo 2: Anniversary)|Terminal 2]] on Outskirts. | |||
|<center>''[[Halo: The Master Chief Collection]]''</center> | |||
|- | |||
|<center>N/A</center> | |||
|[[File:HTMCC H2A Achievement SkulltakerBlind.png|center|114px]] | |||
|[[File:HTMCC H2A Achievement Steam SkulltakerBlind.jpg|center|64px]] | |||
|<center>'''[[Skulltaker Halo 2: Blind]]'''</center> | |||
|Find and claim the [[Halo 2 skulls#Blind|Blind Skull]]. | |||
|<center>''[[Halo: The Master Chief Collection]]''</center> | |||
|- | |||
|<center>N/A</center> | |||
|[[File:HTMCC H2A Achievement SkulltakerIWHBYD.png|center|114px]] | |||
|[[File:HTMCC H2A Achievement Steam SkulltakerIWHBYD.jpg|center|64px]] | |||
|<center>'''[[Skulltaker Halo 2: IWHBYD]]'''</center> | |||
|Find and claim the [[Halo 2 skulls#IWHBYD|IWHBYD Skull]]. | |||
|<center>''[[Halo: The Master Chief Collection]]''</center> | |||
|- | |||
|<center>N/A</center> | |||
|[[File:HTMCC H2A Achievement RexSword.png|center|114px]] | |||
|[[File:HTMCC Achievement Rex Sword Steam.jpg|center|64px]] | |||
|<center>'''[[Rex Sword]]'''</center> | |||
|Grab the [[Rex#Halo 2|energy sword]] on the level Outskirts. | |||
|<center>''[[Halo: The Master Chief Collection]]''</center> | |||
|- | |||
|<center>N/A</center> | |||
|[[File:HTMCC H2A Achievement Betchacan'tstickit.png|center|114px]] | |||
|[[File:HTMCC Achievement Betcha Can't Stick It Steam.jpg|center|64px]] | |||
|<center>'''[[Betcha can't stick it...]]'''</center> | |||
|Stick a Plasma Grenade to a Stealth Elite on Outskirts. | |||
|<center>''[[Halo: The Master Chief Collection]]''</center> | |||
|- | |||
|} | |||
==Trivia== | |||
===Glitches=== | |||
{{Main|Glitches}} | |||
*There is a glitch where a [[Kig-yar|Jackal]] Sniper can kill himself. | |||
*There is a way to get over the gate from where the Drones come in. First you go where the first Grunt is, jump on one of the lights on top, then jump on the roof, after that you go to the building behind where the Pelican crashed, then look to your left where there is an alley behind the gate. | |||
**There is also a way to get on the other gate at the end of the alley on the other side. First, you jump on the light and then the roof but this time you have to go to the building in front of where the [[Phantom]] comes, grenade jump, and then just head straight. You should see some other buildings with those bridge-like things. Then you get on top of the building with the bridge and just go further straight until you see the inside part, head down and down to the alley and on this place you could see the gate that you went over. | |||
*If you are on the broken bridge when the Pelican takes Johnson, you can jump on the Pelican and go with it but the Pelican will eventually disappear. | |||
*A Tri-gate can be found on this level, though it may be a graphical error. | |||
*It is possible to "kill" Sergeant Johnson by boosting into him and pushing him into a wall. He will disappear into the wall.{{citation needed}} | |||
*If you go out of the map into the water at the end of the level and continue back you pass several structures going into the water, one of these has a black rectangle that produces water effects when shot. | |||
*There is a glitch in this level where you can kill both the [[Hunter]]s with one shot from a [[BR55 Battle Rifle|Battle Rifle]]. When they break through the gates, stand on top of the building across from it, on the glass roof. When they come through the gate, aim for the [[Fuel Rod Gun]] on the second [[Hunter]]'s arm. When it goes to shoot, hit it once, and if you're in the right position, the explosion will kill them both. | |||
*There is a glitch that makes Hotel Zanzibar different. You need the [[Sputnik Skull]] and an [[Energy Sword]]. Grenade jump up to the complete top of the building where the ground is invisible and you can see the invisible roof. Walk all over it and start Sword charging and you'll eventually go through the roof and land inside Hotel Zanzibar. The difference is that when you do the glitch, the Hotel is empty, the lights are on, no allies or enemies are present and the Hotel is completely deserted. If you go to the start of the level or just before the end and go back to the Hotel it will not be empty, it will have the lights flickering and possibly the allies and enemies. | |||
*At the first part of the level (just before the Hunters come) try to keep as many Marines alive as you can. When the Hunters arrive, kill at least one using the turret then jump past the other one, then run straight to where the Pelican arrives and you will receive an additional three Marines, making it possible to have six Marines for the second part, but you must not kill both Hunters before attempting or the Marines will follow and this will not work. | |||
*When you encounter the convoy of Shadows, if you drive through the gap in the Shadow, it will not affect the Ghost and you will go straight through it. | |||
*Before entering the first part of the tunnel, it is possible to knock the top part of the Deployable Lookout Tower off its place and will just stay on the ground. After doing this, you can get Marines out of the Warthog into the Grav-Lift and they will continuously go up and down in it. | |||
[[File:H2 LookoutTower Destroyed.jpg|thumb|200px|The gravity tower top that is separated from the base.]] | |||
*If you get the "REX" Sword on this level, it is possible to have it on unlimited for the next level. First, completely deplete the battery, then keep it for the next level. On the level, it will look like and say it is depleted, but when you take it out, it will appear like a Sword then disappear, and when you attack an enemy it does the same damage a normal Sword would. Note: do not pick up another weapon or it will disappear. | |||
*It is possible to give a Marine no weapon. First, give any Marine an SMG (preferably a regular Marine, it tends not to work with Sergeants), then you must have two Magnums (have at least over 60 spare rounds, 96 would be good). Note that this only works at certain parts of the level, and that the Marines must first be in combat for it to work, the best time and best possible chance of this working is either just after the Pelican leaves with Johnson, after the fight with the Sniper Jackals around the corner, or just as you pass that. Then run up to him and while moving, take his weapon, and if done well enough, the pistol you give him will go right through him and onto the ground. When he walks, he will look kind of strange, but the funniest bit is when you get him in the side of the Warthog, he will stand up in the side with his arms spread apart in a "T" shape, and when he walks, he will look as if he is holding a Pistol ''and'' sometimes will move as if being fired at. | |||
*It is possible to do the [[Hole in the Highway]] glitch on this level. | |||
===Easter eggs=== | |||
[[File:H2A FiveLongYears Sign.png|thumb|The UNSC sign using a screenshot from the Five Long Years cinematic.]] | |||
{{Main|Easter eggs}} | |||
*The [[Blind]] and [[I Would Have Been Your Daddy]] Skulls are found on this level. | |||
**Some of the Ultra Elites you have to fight to obtain the IWHBYD Skull are armed with human Battle Rifles and SMGs. | |||
*On the roof, there is a small room with an [[Energy Sword]] also known as the "REX" sword because of the rocks next to it. It is also called "Excalibur" because it is sticking out of a rock. | |||
*The building with the Blind Skull has four grenades that are stacked by the skull and a spotter's scope. | |||
*In the level, a man can be heard broadcasting [[Outskirts announcements|announcements in Swahili]] through a megaphone. Some megaphones can be found on the walls of buildings and on the highway tunnel. | |||
*There is an [[Invincible Warthog]] on this level. | |||
*You can get a [[Scarab Gun]] on this level. | |||
*If you melee Johnson past Hotel Zanzibar and then hit him with a vehicle, he will yell strange dialogue that does not come up during regular game play. These lines are very morbid. | |||
*Several mostly-indecipherable posters can be found plastered on walls throughout the level. One of the posters shows the Master Chief firing a turret. | |||
*In ''Halo 2: Anniversary'' the posters are replaced by: | |||
**A poster for ''[[Fluke of the Narwal]]'', a ''[[Fist of the Unicorn]]'' cover band, featuring vocalist Dima, guitarist Audrey, bassist Jay, and drummer Nadine. The show is sold out. | |||
**A copy of the ''[[Daily Bulletin]]'', a newspaper offering "Exclusive Coverage" of the "Planet Reach Catastrophe". The photos in the paper are of the Planet Reach, taken from the opening menu cinematic in ''[[Halo: Reach]]'', and the split mountain, taken from the final scene of its final level, ''[[Lone Wolf]]''. | |||
**Another copy of the ''Daily Bulletin'' reporting "New Construction: Expect Delays", and offering "Exclusive Coverage" accompanied by a pair of images of Cairo Station. | |||
**A poster advertising the [[Mombasa Circus]]. | |||
**A copy of ''[[The Mombasa Times]]'' with the headline "[[Corbulo Academy of Military Science|Corbulo]] Gone... '''Not Forgotten'''", and featuring three low-resolution screen shots from ''[[Halo 4: Forward Unto Dawn]]''. | |||
*In ''Anniversary'' a Marine Corps recruitment billboard can be found in the courtyard, featuring an image of cheering Marines taken from the ''[[Halo Wars]]'' [[Five Long Years]] cinematic. The billboard is emblazoned with the slogan "Fight for Humanity: Join the Corps", as well as the original UNSC emblem. The billboard has been vandalized with the message "The End is Near". | |||
* The second terminal is a computer screen located on ground floor of the small building in the beach area before entering the highway tunnels. The console's screen flashes "INCOMING MESSAGE" in red. | |||
===Mistakes=== | |||
[[File:Pelican Exhaust Comparisons.jpg|thumb|Comparison of Pelican exhaust effects in cut scenes.]] | |||
*The exhaust effects on the Pelican dropships are different from the ones in [[Another Day at the Beach]]. | |||
*The Warthogs in the first cutscene have no drivers. (This has been amended in ''Halo 2: Anniversary'') | |||
*In the beginning of the level you can get an [[SMG]] with more ammo than usual, 240 to be exact. | |||
*It's possible, on your way to the IWHBYD skull, to see the edge of the world. | |||
*The Pelican that picks up Johnson has no pilot. | |||
*All the fires on this level won't harm you even if you are unshielded. | |||
===References=== | |||
*The hotel you go into is called Hotel Zanzibar, which is not as previously thought an obvious reference to the multiplayer level, [[Zanzibar]], as that is slightly illogical and is more likely to be the part of Africa called Zanzibar seeing as New Mombasa is in Africa. | |||
*In both the second levels of ''[[Halo: Combat Evolved]]'' and ''[[Halo 2]]'', a [[UNSC]] craft ferrying Master Chief crashes. The Pelican that Master Chief rides on crashes, just like the lifeboat that he rode on in ''Halo: CE''. However, unlike the former, [[Seven|7]] marines survive. | |||
*There are 7 waves of Elites if you get the IWHBYD skull, a reference to [[Bungie]]'s obsession for 7. | |||
*The beginning of the first cutscene was used in a spoof Geico commercial. | |||
*The helmets that the pilots are wearing at the beginning of the level are a lot like the helmets from Marathon. | |||
===Miscellaneous=== | |||
*It is possible to get an Energy Sword on Easy by boarding an Ultra Elite driving a Ghost, and then get out of the Ghost and attack it until it takes out the Sword. | |||
*Because Outskirts is the first part of a two-part level, your weapons will carry over to [[Metropolis]], unless one of your weapons is a Rocket Launcher, or a Magnum. If you finish Outskirts with either weapon, you will start Metropolis with a Battle Rifle and an SMG. | |||
*At the start of the level if you get the Sniper Rifle from Johnson and jump up to the building you would normally ride the Phantom you will have a great sniping position. | |||
*On all but three of the glass panels (at the start of the level on building in the courtyard) you will fall through unless you are running. | |||
*It is possible to complete this level on all difficulties without having to shoot your hand held weapon once. Immediately, go out into the courtyard, go to the left down the street, into an alley, and hop on the roofs. Jump from roof to roof until you reach the Zanzibar hotel. Then, go in and let your marines take out the Grunts and Elites. Whoever they don't kill you can beat down. Then, get in a Ghost or Warthog and drive through the rest of the level without getting out. | |||
*The music just before the Hunters break through the gate, after Johnson leaves, and halfway through the tunnel (just before encountering the Shadow convoy), all share [[Blow Me Away]]'s bass, drums, and choir voices. | |||
*There is a hidden Sniper Rifle on the building where two [[Kig-yar|Jackals]] appear after Johnson leaves. | |||
*It is possible to save up to six Warthogs on this level if they come out. | |||
*You can get on top of most buildings with the Sputnik Skull turned on. | |||
*You can get on top of the second [[Phantom]] with a grenade jump with the Sputnik Skull turned on. | |||
*The pictures where they show Master Chief on a turret killing Grunts and the picture of a jester-like-person are found in human-like maps for multiplayer. | |||
*In the beginning of the level, you can trap the [[Hunters]] that break through the gate. To do this, you must completely block the gate off with the white overturned truck and every other container you find. If the [[Sputnik Skull]] is turned on, it will make the process a lot easier and faster. Also, it is a good idea to have the [[Thunderstorm Skull]] on as well. | |||
*The crashed Pelican first seen when arriving at the beach is the same one that crashed in, [[Another Day at the Beach]]. | |||
*The very first Grunt you encounter in this level will always turn his back to you if you advance towards him, giving you a free assassination. | |||
*If Stacker is killed at Hotel Zanzibar, then the music in the hallway will not play. | |||
*Using the turret on the main building in the courtyard at the beginning of the level, you can kill the two Hunters quite easily as they enter through the gate. This can be a very useful tactic on higher difficulty settings. | |||
*At the beginning of the level, the last Marine to clear the Pelican crash site will often get injured by a piece of falling debris. | |||
*The [[Blue Team]] eagle symbol is featured on the ''Halo 2 Anniversary'' version of the level near the Pelican crash site in the beginning, at the far left of the site with the mounted turret.{{Citation needed}} | |||
*The multiplayer level [[District]] takes place in the beginning area featured in this mission. | |||
==Gallery== | |||
===Halo 2=== | |||
<gallery> | |||
File:Outskirts Official.png|Preview of the level in ''Halo 2'' menu. | |||
File:Mombasa.jpg|Pelican dropships approaching Mombasa. The ''[[Solemn Penance]]'' is hovering over the city, its [[gravity lift]] active. | |||
File:Unsc convoy.jpg|A Warthog convoy in Old Mombasa. | |||
File:H2 Outskirts Scarab.jpg|The Scarab prepares to fire its main cannon. | |||
File:Masterchief with sniper.jpg|A promotional image of ''Outskirts'' with the Master Chief and several ODSTs battling in the streets of Old Mombasa. | |||
File:Really Cool.jpg|John-117 in the courtyard. | |||
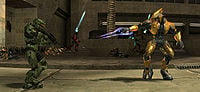
File:FearlessLeader26001200.jpg|John-117 encounters a Sangheili Zealot in the courtyard. | |||
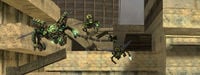
File:Incoming32001200.jpg|A group of Yanme'e flying amdist the buildings of Old Mombasa. | |||
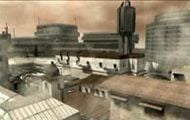
File:Outskirts.jpg|The rooftops of Old Mombasa. | |||
File:Hotelz2rw.jpg|Second squad besieged at Hotel Zanzibar. | |||
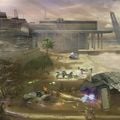
File:Halo hogfight.jpg|John-117 and his Marines on a Warthog battling Covenant forces at the beach. | |||
File:OutskirtsOuter_Wall16001200.jpg|Old Mombasa Seawalls. | |||
</gallery> | |||
===Halo 2: Anniversary=== | |||
<gallery> | |||
File:H2A MombasaBeach Concept.jpg|Concept keyart of the beach sections of the mission. | |||
File:H2A_Dumpster_Concept.jpg|Concept art of a dumpster in Mombasa. | |||
File:H2A-Outskirts-Johnson and pilots.jpg|Avery Johnson and Marine pilots. | |||
File:H2A Cutscene Sniper&Spotter.png|The Marine sniper team. | |||
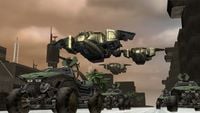
File:H2A - Warthogs.jpg|The Warthog convoy arrives. | |||
File:H2A-ScarabIncoming.jpg|The Pelicans facing the Scarab. | |||
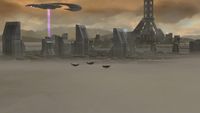
File:L4ifvDY.jpg|The Scarab emerges before the incoming UNSC forces. | |||
File:H2A Campaign OldMombasaCity.png|The cityscape of Old Mombasa. | |||
File:HTMCC-H2A Johnson Takes Aim.jpg|Johnson takes aim as a pair of Hunters break open the gate. | |||
File:H2A Outskirts John117MG.jpg|John-117 wielding a M247 machine gun. | |||
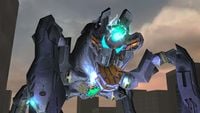
File:HTMCC-H2A Phantom over Courtyard.jpg|A Phantom deploying Covenant troops. | |||
</gallery> | |||
==See also== | |||
===Internal links=== | |||
*[[Suicidal Jackal]] | |||
*[[Invincible Warthog]] | |||
==Sources== | |||
{{Ref/Sources}} | |||
{{succession box | before = ''[[Cairo Station]]'' | title = [[Halo 2 Campaign|''Halo 2'' Campaign Missions]] | years = '''''Outskirts''''' |after = ''[[Metropolis (Level)|Metropolis]]''}} | |||
{{Levels|H2}} | |||
Latest revision as of 15:48, March 12, 2024
|
Prev: |
|
|
Concurrent: |
Another Day at the Beach |
|
Next: |
|
| Outskirts | |
|---|---|

| |
|
Game: |
|
|
Map file name (?): |
|
|
Player: |
|
|
Date: |
|
|
Location: |
|
|
Objective(s): |
Regroup with Marines in Old Mombasa and head to the bridge leading to New Mombasa |
|
Par Time: |
00:15:00 (Master Chief Collection) |
|
Par Score: |
8,000 (Master Chief Collection) |
 |
Halopedia has a walkthrough guide for this level; see Outskirts/Walkthrough. |
| “ | Rally scattered marines, clear hostile contacts from the old-city. | ” |
Outskirts is the fourth campaign level of Halo 2. As the Master Chief, you must battle your way through the streets of Old Mombasa, Earth, with Marines to reach the beach. From there you head to a highway tunnel, which leads to the next level, Metropolis. This is also the first level in which you will encounter Jackals, Jackal Snipers, Hunters, and Phantom Dropships, as well as the first Halo 2 level in which you can drive vehicles, as well as the first mission to take place on the Earth. This is also the only level in the Halo Trilogy to feature the Ruwaa-pattern Shadow. Outskirts is also the level in Halo 2 with the most Sniper Jackals; a total of 22 in all, most of which are located in the infamous "Sniper Alley".
Transcript[edit]
{Cutscene} {Anniversary Cutscene}
Three Pelicans rocket away from the In Amber Clad, jet engines thundering, and spear out towards New Mombasa. The Solemn Penance hovers high over the city, its gravity lift engaged.
- Cortana (COM): "The message just repeats. Regret, Regret, Regret."
The Master Chief watches from the stern of a Pelican as the clouds roll by below.
A convoy of Warthogs are seen as the Pelicans pass over them.
- Sergeant Johnson (COM): "Dear Humanity...we regret being alien bastards. We regret coming to Earth."
Inside the cockpit of the Pelican, Johnson leans against the bulkhead behind the two pilots.
- Sergeant Johnson: "And we most definitely regret that the Corps just blew up our raggedy-ass fleet!"
- Pilots: (in unison) "Oo-rah!"
- Cortana (COM): "Regret is a name, Sergeant. The name of one of the Covenant's religious leaders. A Prophet. He's on that carrier, and he's calling for help."
A Marine sniper-spotter team lies prone on a rooftop, and the Pelicans fly over their position.
- Marine (COM): "Immediate: Grid kilo two-three is hot. Recommend mission abort."
- Pilot (COM): "Roger, recon. (to Johnson) It's your call, Sarge."
- Sergeant Johnson: "We're going in. Get tactical, Marines!"
Cut to the Pelican's troop bay. A Marine loads rounds into his Battle Rifle and cocks the gun, and a sharpshooter examines a magazine before slotting it into his Sniper Rifle. A third Marine puts on a helmet, tapping it to make sure it's tight. Master Chief stands silently, gazing at the streets below.
- Lord Hood (COM): "Master Chief, get aboard that carrier, and secure the Prophet of Regret. This is the only place on Earth the Covenant decided to land. That Prophet is going to tell us why."
- Pilot: "Thirty seconds out. Stand by to...whoa."
The pilot goes silent as a huge Protos-pattern Scarab lumbers into view. Its leg spears a truck, destroying it instantly. Its main gun then focuses and fires, destroying the lead Pelican. The two other Pelicans veer off, as a plasma turret on the Scarab's back track them. The leftward dropship, with Johnson and the Chief on board, catches a burst of plasma on its right flank, flips inverted, hits a building, and slides through a low brick wall, before blacking out the frame.
NOTE: In the Anniversary version, the rightward dropship is also cut down by the Scarab's plasma turret, leading to the events of Another Day At the Beach.
{Gameplay}
The Master Chief regains consciousness.
- (Easy): "You all right, Chief?"
- (Normal): "Hey, (fakes tapping helmet) Wake up."
- (Heroic): "Talk to me, should I start CPR? What's going on?"
- (Legendary): "Blink if you can hear me, Chief."
They'll Regret That Too[edit]
- Sergeant Johnson: "Shake it off, Marines. Clear the crash site! Go, go, go!"
A single Unggoy Minor walks up the alley towards the crashed Pelican. Upon seeing the UNSC force it tries to flee but is quickly killed. The Chief and the rest of the team arrive at a bombed-out building occupied by the Covenant. An enemy Phantom flies overhead.
- Marine: "Secure this area! Dig in fella's! For now, this is home."
- Marine: "Hoo-rah!"
Covenant Sangheili, Kig-Yar and Unggoy appear in the area, and upon sighting the team they open fire.
- Sergeant Johnson: "If they didn't know we're here before, they do now."
A few Covenant troops including Kig-Yar Snipers (on higher difficulties) appear on the rooftops.
- Sergeant Johnson: "Yep, here they come! Up high!"
- Sergeant Johnson: "I don't wanna kill ya, you're just too ugly to let live!"
After the first wave of Covenant forces are killed:
- Sergeant Johnson: "More on the street, left side!"

After the second wave of Covenant are killed, another lance of Kig-yar led by a Sangheili Minor appear through the path the Chief came in.
- Sergeant Johnson: "We got Jackals in the courtyard!"
Later, a group of Yanme'e flies into the courtyard.
- Sergeant Johnson: "Buggers, headin' over the rooftops!"
Another wave of Covenant attacks.
- Sergeant Johnson: "Across the street! Down low!"
Later, the sound of a Phantom's engines drifts over the rooftop.
- Sergeant Johnson (COM): "Eyes up! Phantom's back!"
The Phantom drops off another wave of Covenant (which includes a Sangheili Zealot on legendary difficulty). After the UNSC forces deal with them, a Pelican arrives, hovering over the courtyard.
- Pilot (COM): "My girl's a little big for that courtyard, Sergeant. I see a good LZ on the other side of these buildings. Meet you there, over."
- Sergeant Johnson: "Copy that. Someone get a satchel on the gate!"
Before anyone can reach for a satchel, the gates begin to shake, raising dust. A few seconds later, they break, and a pair of Mgalekgolo arrive.
- Cortana: "Hunters!"
- Sergeant Johnson (COM): "Stand back, Marines. Let the Chief show you how it's done!"
Once the Mgalekgolo are eliminated:
- Cortana (COM): "Second squad, this is Cortana. What's your status, over?"
- Gunnery Sergeant Stacker (COM): "We're operational, ma'am... barely. Our pilots didn't make it."
- Cortana (COM): "Find a hole, stay put. We'll come to you."
When the team reaches the second courtyard, they encounter a Kig-Yar sniper with other Kig-Yar ranks supporting it.
- Marine: "The only thing worse than Jackals are Jackals with sniper rifles!"
When the team reaches the far courtyard, the Pelican drops off Marines (if you've lost any from the original group).
- Commander Keyes (COM): "Sergeant, I need you on that bird."
- Sergeant Johnson (COM): "Ma'am?"

- Commander Keyes (COM): "My Pelicans are going to start airlifting armor and reinforcements into the city. They'll need an escort that isn't afraid of a little hostile ground fire."
- Sergeant Johnson (COM): "Understood. I'll keep an eye on 'em. Chief ... good luck."
Sergeant Johnson climbs aboard the Pelican and dusts off.
The Chief and the Marines fight their way through an alley full of Kig-Yar snipers and Yanme'e (and on higher difficulties, a pair of Stealth Sangheili armed with energy swords), followed by multiple lances of Unggoy and Sangheili. They eventually reach Second squad's position.
A Covenant lance led by a high ranking Sangheili have Second squad pinned down with a plasma turret. The Chief moves in to assist.
After clearing the immediate area of enemies:
- Stacker: "Chief! Glad you could make it. Crash site's on the other side of this hotel, Chief. Covenant are crawling all over it. Follow me."
As the Sergeant and the Chief moves into the darkened hotel...
- Stacker or Private Dubbo: "Stay outta sight."
Unggoy and Sangheili come through the dark corridors. The UNSC forces hide in the shadows and ambush the Covenant troops. Emerging from the Hotel, they spot a Phantom dropping off more Unggoy and a Sangheili.
- Stacker: "You make my mother-in-law look pretty!"
A couple Marines pull up in a Warthog, honking the horn for the Chief.
- Marine: "Special delivery from Commander Keyes, Chief."
The Chief boards the Warthog.
- Cortana: "The highest concentration of Covenant ground troops is directly below the carrier. I don't think they want you to get on board."
- Cortana: "That bridge is the most direct route to the city center."
A Day at the Beach[edit]
The Chief drives down the beach, passing a crashed Pelican.
- Marine: "Oh man, I love the beach..."
- Chips Dubbo: "I hope you packed a suit, mate!"
With IWHYBD skull activated:
- Marine: "Hells no! Commando all the way, (Spanish) vato (dude)!"
- Cortana (COM): "Cut the chatter...we got trouble."
The Chief navigates the beaches which are full of Covenant troops supported by Covenant watchtowers, Ghosts, and a Phantom dropship. Several large artillery pieces are also present, but none are in operation.
- Commander Keyes (COM): "Chief, the carrier just launched a wave of pods. They're inbound on your position!"
Covenant drop pods slam down on the beach all around the Chief, and Sangheili warriors spring out of them.
The Chief nears a tunnel leading to the bridge.
- Cortana: "This tunnel links up to the bridge. It's full of rats, if you know what I mean... But it beats swimming."
The Chief moves into the highway tunnel.
Speed Zone Ahead[edit]

- Cortana: "I've been analyzing the Covenant tactical chatter. They're surprised, confused... I don't think they expected us to be here. Not you and me...all of us...humanity, on Earth. Odd, I know, but it does help explain why they came here with such a small fleet."
Throughout the tunnel the team of Warthog(s) encounter many Covenant positions consisting of Ghosts, Shade turrets, Plasma Turrets and a few Battlefield Methane Tanks, along with numerous Unggoy, Kig-Yar, Sangheili and Yanme'e infantry. Just as they clear the last of these positions, a massive cyan/green plasma beam tears into the tunnel through a massive hole above, incinerating a fleeing Warthog. The Scarab can be seen through the hole above.
The Chief comes across a group of Ruwaa-pattern Shadows in the inner tunnels.
- Cortana: "The Covenant must be trying to regroup. Don't let them."
The Chief pursues and destroys the Shadows, then passes through a final Covenant defensive position consisting of multiple Ghosts, Plasma Cannons and another Shadow with supporting ground troops before approaching the tunnel's exit.
Fades to black.
Level ends.
Achievements[edit]
The following achievements can be unlocked on Outskirts across the Windows Vista and Halo: The Master Chief Collection editions of Halo 2: Anniversary. The original Xbox release of Halo 2 did not contain achievement unlocks.
| Halo 2 (Windows Vista) | Halo: MCC (Xbox One, Xbox Series X|S) | Halo: MCC (Steam) | Title | Unlock requirement | Games |
|---|---|---|---|---|---|
 |
 |
 |
Beat Outskirts on any difficulty. | Halo: The Master Chief Collection | |
 |
 |
Beat the par time on Outskirts. | |||
 |
 |
Beat the par score on Outskirts. | |||
 |
 |
Activate Terminal 2 on Outskirts. | |||
 |
 |
Find and claim the Blind Skull. | |||
 |
 |
Find and claim the IWHBYD Skull. | |||
 |
 |
Grab the energy sword on the level Outskirts. | |||
 |
 |
Stick a Plasma Grenade to a Stealth Elite on Outskirts. |
Trivia[edit]
Glitches[edit]
- Main article: Glitches
- There is a glitch where a Jackal Sniper can kill himself.
- There is a way to get over the gate from where the Drones come in. First you go where the first Grunt is, jump on one of the lights on top, then jump on the roof, after that you go to the building behind where the Pelican crashed, then look to your left where there is an alley behind the gate.
- There is also a way to get on the other gate at the end of the alley on the other side. First, you jump on the light and then the roof but this time you have to go to the building in front of where the Phantom comes, grenade jump, and then just head straight. You should see some other buildings with those bridge-like things. Then you get on top of the building with the bridge and just go further straight until you see the inside part, head down and down to the alley and on this place you could see the gate that you went over.
- If you are on the broken bridge when the Pelican takes Johnson, you can jump on the Pelican and go with it but the Pelican will eventually disappear.
- A Tri-gate can be found on this level, though it may be a graphical error.
- It is possible to "kill" Sergeant Johnson by boosting into him and pushing him into a wall. He will disappear into the wall.[citation needed]
- If you go out of the map into the water at the end of the level and continue back you pass several structures going into the water, one of these has a black rectangle that produces water effects when shot.
- There is a glitch in this level where you can kill both the Hunters with one shot from a Battle Rifle. When they break through the gates, stand on top of the building across from it, on the glass roof. When they come through the gate, aim for the Fuel Rod Gun on the second Hunter's arm. When it goes to shoot, hit it once, and if you're in the right position, the explosion will kill them both.
- There is a glitch that makes Hotel Zanzibar different. You need the Sputnik Skull and an Energy Sword. Grenade jump up to the complete top of the building where the ground is invisible and you can see the invisible roof. Walk all over it and start Sword charging and you'll eventually go through the roof and land inside Hotel Zanzibar. The difference is that when you do the glitch, the Hotel is empty, the lights are on, no allies or enemies are present and the Hotel is completely deserted. If you go to the start of the level or just before the end and go back to the Hotel it will not be empty, it will have the lights flickering and possibly the allies and enemies.
- At the first part of the level (just before the Hunters come) try to keep as many Marines alive as you can. When the Hunters arrive, kill at least one using the turret then jump past the other one, then run straight to where the Pelican arrives and you will receive an additional three Marines, making it possible to have six Marines for the second part, but you must not kill both Hunters before attempting or the Marines will follow and this will not work.
- When you encounter the convoy of Shadows, if you drive through the gap in the Shadow, it will not affect the Ghost and you will go straight through it.
- Before entering the first part of the tunnel, it is possible to knock the top part of the Deployable Lookout Tower off its place and will just stay on the ground. After doing this, you can get Marines out of the Warthog into the Grav-Lift and they will continuously go up and down in it.

- If you get the "REX" Sword on this level, it is possible to have it on unlimited for the next level. First, completely deplete the battery, then keep it for the next level. On the level, it will look like and say it is depleted, but when you take it out, it will appear like a Sword then disappear, and when you attack an enemy it does the same damage a normal Sword would. Note: do not pick up another weapon or it will disappear.
- It is possible to give a Marine no weapon. First, give any Marine an SMG (preferably a regular Marine, it tends not to work with Sergeants), then you must have two Magnums (have at least over 60 spare rounds, 96 would be good). Note that this only works at certain parts of the level, and that the Marines must first be in combat for it to work, the best time and best possible chance of this working is either just after the Pelican leaves with Johnson, after the fight with the Sniper Jackals around the corner, or just as you pass that. Then run up to him and while moving, take his weapon, and if done well enough, the pistol you give him will go right through him and onto the ground. When he walks, he will look kind of strange, but the funniest bit is when you get him in the side of the Warthog, he will stand up in the side with his arms spread apart in a "T" shape, and when he walks, he will look as if he is holding a Pistol and sometimes will move as if being fired at.
- It is possible to do the Hole in the Highway glitch on this level.
Easter eggs[edit]

- Main article: Easter eggs
- The Blind and I Would Have Been Your Daddy Skulls are found on this level.
- Some of the Ultra Elites you have to fight to obtain the IWHBYD Skull are armed with human Battle Rifles and SMGs.
- On the roof, there is a small room with an Energy Sword also known as the "REX" sword because of the rocks next to it. It is also called "Excalibur" because it is sticking out of a rock.
- The building with the Blind Skull has four grenades that are stacked by the skull and a spotter's scope.
- In the level, a man can be heard broadcasting announcements in Swahili through a megaphone. Some megaphones can be found on the walls of buildings and on the highway tunnel.
- There is an Invincible Warthog on this level.
- You can get a Scarab Gun on this level.
- If you melee Johnson past Hotel Zanzibar and then hit him with a vehicle, he will yell strange dialogue that does not come up during regular game play. These lines are very morbid.
- Several mostly-indecipherable posters can be found plastered on walls throughout the level. One of the posters shows the Master Chief firing a turret.
- In Halo 2: Anniversary the posters are replaced by:
- A poster for Fluke of the Narwal, a Fist of the Unicorn cover band, featuring vocalist Dima, guitarist Audrey, bassist Jay, and drummer Nadine. The show is sold out.
- A copy of the Daily Bulletin, a newspaper offering "Exclusive Coverage" of the "Planet Reach Catastrophe". The photos in the paper are of the Planet Reach, taken from the opening menu cinematic in Halo: Reach, and the split mountain, taken from the final scene of its final level, Lone Wolf.
- Another copy of the Daily Bulletin reporting "New Construction: Expect Delays", and offering "Exclusive Coverage" accompanied by a pair of images of Cairo Station.
- A poster advertising the Mombasa Circus.
- A copy of The Mombasa Times with the headline "Corbulo Gone... Not Forgotten", and featuring three low-resolution screen shots from Halo 4: Forward Unto Dawn.
- In Anniversary a Marine Corps recruitment billboard can be found in the courtyard, featuring an image of cheering Marines taken from the Halo Wars Five Long Years cinematic. The billboard is emblazoned with the slogan "Fight for Humanity: Join the Corps", as well as the original UNSC emblem. The billboard has been vandalized with the message "The End is Near".
- The second terminal is a computer screen located on ground floor of the small building in the beach area before entering the highway tunnels. The console's screen flashes "INCOMING MESSAGE" in red.
Mistakes[edit]

- The exhaust effects on the Pelican dropships are different from the ones in Another Day at the Beach.
- The Warthogs in the first cutscene have no drivers. (This has been amended in Halo 2: Anniversary)
- In the beginning of the level you can get an SMG with more ammo than usual, 240 to be exact.
- It's possible, on your way to the IWHBYD skull, to see the edge of the world.
- The Pelican that picks up Johnson has no pilot.
- All the fires on this level won't harm you even if you are unshielded.
References[edit]
- The hotel you go into is called Hotel Zanzibar, which is not as previously thought an obvious reference to the multiplayer level, Zanzibar, as that is slightly illogical and is more likely to be the part of Africa called Zanzibar seeing as New Mombasa is in Africa.
- In both the second levels of Halo: Combat Evolved and Halo 2, a UNSC craft ferrying Master Chief crashes. The Pelican that Master Chief rides on crashes, just like the lifeboat that he rode on in Halo: CE. However, unlike the former, 7 marines survive.
- There are 7 waves of Elites if you get the IWHBYD skull, a reference to Bungie's obsession for 7.
- The beginning of the first cutscene was used in a spoof Geico commercial.
- The helmets that the pilots are wearing at the beginning of the level are a lot like the helmets from Marathon.
Miscellaneous[edit]
- It is possible to get an Energy Sword on Easy by boarding an Ultra Elite driving a Ghost, and then get out of the Ghost and attack it until it takes out the Sword.
- Because Outskirts is the first part of a two-part level, your weapons will carry over to Metropolis, unless one of your weapons is a Rocket Launcher, or a Magnum. If you finish Outskirts with either weapon, you will start Metropolis with a Battle Rifle and an SMG.
- At the start of the level if you get the Sniper Rifle from Johnson and jump up to the building you would normally ride the Phantom you will have a great sniping position.
- On all but three of the glass panels (at the start of the level on building in the courtyard) you will fall through unless you are running.
- It is possible to complete this level on all difficulties without having to shoot your hand held weapon once. Immediately, go out into the courtyard, go to the left down the street, into an alley, and hop on the roofs. Jump from roof to roof until you reach the Zanzibar hotel. Then, go in and let your marines take out the Grunts and Elites. Whoever they don't kill you can beat down. Then, get in a Ghost or Warthog and drive through the rest of the level without getting out.
- The music just before the Hunters break through the gate, after Johnson leaves, and halfway through the tunnel (just before encountering the Shadow convoy), all share Blow Me Away's bass, drums, and choir voices.
- There is a hidden Sniper Rifle on the building where two Jackals appear after Johnson leaves.
- It is possible to save up to six Warthogs on this level if they come out.
- You can get on top of most buildings with the Sputnik Skull turned on.
- You can get on top of the second Phantom with a grenade jump with the Sputnik Skull turned on.
- The pictures where they show Master Chief on a turret killing Grunts and the picture of a jester-like-person are found in human-like maps for multiplayer.
- In the beginning of the level, you can trap the Hunters that break through the gate. To do this, you must completely block the gate off with the white overturned truck and every other container you find. If the Sputnik Skull is turned on, it will make the process a lot easier and faster. Also, it is a good idea to have the Thunderstorm Skull on as well.
- The crashed Pelican first seen when arriving at the beach is the same one that crashed in, Another Day at the Beach.
- The very first Grunt you encounter in this level will always turn his back to you if you advance towards him, giving you a free assassination.
- If Stacker is killed at Hotel Zanzibar, then the music in the hallway will not play.
- Using the turret on the main building in the courtyard at the beginning of the level, you can kill the two Hunters quite easily as they enter through the gate. This can be a very useful tactic on higher difficulty settings.
- At the beginning of the level, the last Marine to clear the Pelican crash site will often get injured by a piece of falling debris.
- The Blue Team eagle symbol is featured on the Halo 2 Anniversary version of the level near the Pelican crash site in the beginning, at the far left of the site with the mounted turret.[citation needed]
- The multiplayer level District takes place in the beginning area featured in this mission.
Gallery[edit]
Halo 2[edit]

Preview of the level in Halo 2 menu.
Pelican dropships approaching Mombasa. The Solemn Penance is hovering over the city, its gravity lift active.
A Warthog convoy in Old Mombasa.
The Scarab prepares to fire its main cannon.
A promotional image of Outskirts with the Master Chief and several ODSTs battling in the streets of Old Mombasa.
John-117 in the courtyard.
John-117 encounters a Sangheili Zealot in the courtyard.
A group of Yanme'e flying amdist the buildings of Old Mombasa.
The rooftops of Old Mombasa.
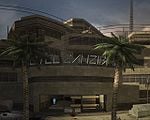
Second squad besieged at Hotel Zanzibar.
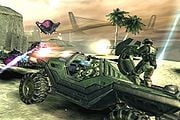
John-117 and his Marines on a Warthog battling Covenant forces at the beach.
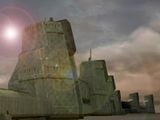
Old Mombasa Seawalls.


Halo 2: Anniversary[edit]
Concept keyart of the beach sections of the mission.
Concept art of a dumpster in Mombasa.
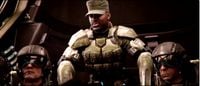
Avery Johnson and Marine pilots.
The Marine sniper team.
The Warthog convoy arrives.
The Pelicans facing the Scarab.
The Scarab emerges before the incoming UNSC forces.
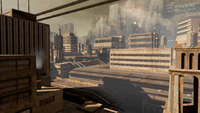
The cityscape of Old Mombasa.

Johnson takes aim as a pair of Hunters break open the gate.
John-117 wielding a M247 machine gun.
A Phantom deploying Covenant troops.


See also[edit]
Internal links[edit]
Sources[edit]
- ^ Halo 2 Editing Kit, game file
H2EK\tags\scenarios\solo\03a_oldmombasa\03a_oldmombasa.scenario
| Preceded by Cairo Station |
Halo 2 Campaign Missions Outskirts |
Succeeded by Metropolis |
| |||||||||||||||||||||||||||||||


