Two Betrayals: Difference between revisions
From Halopedia, the Halo wiki
Dragonclaws (talk | contribs) No edit summary |
TheNeit123 (talk | contribs) mNo edit summary |
||
| (159 intermediate revisions by 71 users not shown) | |||
| Line 1: | Line 1: | ||
== | {{Status|Gameplay}} | ||
Two Betrayals | {{Level infobox | ||
|pagegamelabel=CE | |||
|prev=''[[The Library (level)|The Library]]'' | |||
|concurrent=''[[Ice Canyon]]'' <br>(chronologically {{C|''[[Halo: Fireteam Raven]]''}}) | |||
|next=''[[Keyes]]'' | |||
|name='''''Two Betrayals''''' | |||
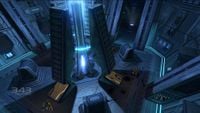
|image=[[File:HCEA TwoBetrayals Loadscreen.png|300px]] | |||
|game=''[[Halo: Combat Evolved]]'' {{C|''[[Halo: Combat Evolved Anniversary|Anniversary]]''}} | |||
|devname=<code>c40</code>{{Ref/File|Id=HCEEK|HCEEK|HCEEK\tags\levels\c40\c40.scenario}} | |||
|player=[[Master_Chief_(gameplay)#Halo:_Combat_Evolved|Master Chief]] | |||
|date= [[2552#September 21, 2552|September 21, 2552]] | |||
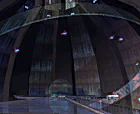
|place= On the surface of [[Installation 04]], in and around the Control Room. | |||
|objective=Destroy 3 [[Phase Pulse Generators]] to disable Halo's primary weapon. | |||
|partime=00:20:00 {{C|''Master Chief Collection''-only}} | |||
|parscore=16,000 {{C|''Master Chief Collection''-only}} | |||
}} | |||
{{Article quote|Re-activate the weapon at the heart of [[Installation 04|Halo]]... and learn the truth.}} | |||
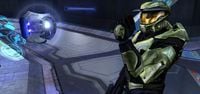
'''Two Betrayals''' is the eighth [[campaign]] level in ''[[Halo: Combat Evolved]]''. This is the last level in which [[Kig-Yar|Jackals]] are fought. It is also the first level where [[Sentinel]]s are hostile enemies instead of your allies. | |||
== | ==Summary== | ||
The Master Chief, after teleporting back to the [[Control Room]], proceeds to activate [[Installation 04]]. However, [[Cortana]], who after spending twelve hours in the control room has discovered Halo's true purpose, stops him just in time. After stealing the [[Activation Index]], she tells the Chief that Halo will wipe out all life in the galaxy, and turns the Chief against the [[343 Guilty Spark|Monitor]] who confirms Cortana's claims, confused that the Master Chief didn't already know this. Spark sends [[Sentinel]]s to take the Spartan's head, and the [[Artificial intelligence|AI]] inside his helmet, but they are quickly destroyed. | |||
Cortana decides that they must destroy Halo to keep it from being fired and decides that the best course of action is to detonate the {{UNSCShip|Pillar of Autumn}}'s fusion engines which will destabilize the ring and cut through a number of primary systems. To buy them some time in case the Monitor finds another way to activate Halo, Cortana orders the Master Chief to disable the three [[phase pulse generator]]s in the area to force the Monitor to make repairs before Halo can be fired. The Master Chief is forced to fight through a combination of Covenant, Flood and Sentinel forces and use [[Type-26 Banshee|Banshees]] to reach each generator which Cortana uses an [[EMP]] to disable. Cortana is able to use the [[proselytization network|Covenant battlenet]] to locate the ''Pillar of Autumn's'' crash site, but requires Captain [[Jacob Keyes]] or his command codes to activate the ship's [[self-destruct]]. After disabling the third pulse generator, Cortana is able to locate Keyes, who is still alive, onboard the Covenant {{Pattern|Ket|battlecruiser}} ''[[Truth and Reconciliation]]''. At Cortana's suggestion, the Master Chief allows the AI to draw power from his suit to use Halo's [[teleportation grid]] to teleport them to the battlecruiser rather than calling for a ride which will take more time that they don't have. | |||
==Transcript== | ==Transcript== | ||
[http://www.youtube.com/watch?v=vGdiqRldWHo '''{''Original Cutscene''}'''] | |||
[http://www.youtube.com/watch?v=uzhJWMv_BNw '''{Anniversary ''Cutscene''}'''] | |||
''{ | |||
'' | |||
' | |||
''{ | |||
''' | |||
' | |||
'' | ''Long shot of the [[Control Room]]. Master Chief and 343 Guilty Spark teleport in, obviously in the middle of a conversation, explaining something about the Flood.'' | ||
''' | *'''[[343 Guilty Spark]]''': "...which means that any organism of sufficient mass and cognitive capability is a potential vector." | ||
'' | ''Master Chief pauses as though sensing something is not quite right.'' | ||
''' | *'''343 Guilty Spark''': "Is something wrong?" | ||
''' | *'''[[Master Chief Petty Officer]] [[John-117]]:''' "No... Nothing." | ||
''' | *'''343 Guilty Spark''': "Splendid. Shall we?" | ||
'' | ''Master Chief and 343 Guilty Spark move up to the main control panel.'' | ||
''' | *'''343 Guilty Spark''': ''(random humming)'' "Unfortunately, my usefulness to this particular endeavor has come to an end. Protocol does not allow units with my classification to... perform a task as important as the reunification of the Index with the Core. That final step is reserved for you, [[Reclaimer]]." | ||
'' | ''Master Chief takes the Index, and puts it into a slot on the console. Lights and holograms appear, but then fade.'' | ||
'''343 Guilty Spark | *'''343 Guilty Spark''': "Odd. That wasn't supposed to happen." | ||
'' | ''Cortana suddenly appears over the console.'' | ||
''' | *'''[[Cortana]]''': "Oh, ''really''!?" | ||
''' | ''There is a flash of light, and 343 Guilty Spark is thrown back, and down to the ground.'' | ||
''' | *'''John-117''': "Cortana!" | ||
''' | *'''Cortana''': "I've spent the last 12 hours cooped up in here, watching you toady about, helping that thing get set to slit our throats!" | ||
''' | *'''John-117''': "Hold on now, he's a friend." | ||
'' | *'''Cortana''': (''Sarcastically)'' "Oh! I didn't realize. He's your ''pal'', is he? Your ''chum''? ''(angrily) ''Do you have any idea what that ''bastard'' almost made you do?!" | ||
''' | *'''John-117''': "Yes... Activate [[Installation 04|Halo]]'s defenses and destroy the [[Flood]], which is why we brought the Index to the Control Center." | ||
'' | *'''Cortana''': "You mean ''this''?" | ||
''The Activation Index hologram appears in Cortana's hand.'' | |||
''' | *'''343 Guilty Spark''': "A construct? In the Core?! That is absolutely unacceptable!" | ||
'' | *'''Cortana''': "Sod off!" | ||
''' | *'''343 Guilty Spark:''' "What impertinence! I shall purge you at once!" | ||
'' | *'''Cortana''': "You sure that's a good idea?" | ||
''Cortana's avatar absorbs the Index.'' | |||
'' | *'''343 Guilty Spark''': "How... how... how ''dare'' you?! I'll-" | ||
'''Cortana:''' | *'''Cortana''': "Do what? ''I'' have the Index! You can just float and ''sputter!''" | ||
'' | *'''John-117''': "Enough!" | ||
'' | ''The Chief brings both hands up in the middle of them as if to stop a fight, then turns back to face Cortana.'' | ||
'' | *'''John-117''': "The Flood is spreading. If we activate Halo's defenses, we can wipe them out." | ||
'''Cortana:''' | *'''Cortana''': "You have ''no idea'' how this ring works, do you? Why the [[Forerunner]]s built it? Halo doesn't ''kill'' Flood, it kills their ''food''. [[Human]]s, [[Covenant Empire|Covenant]], whatever. We're ''all'' equally edible! The only way to stop the Flood is to ''starve'' them to death. And that's exactly what Halo is designed to do: Wipe the galaxy clean of all sentient life. You don't believe me? Ask ''him''!" | ||
'' | ''Cortana points at Spark. Master Chief hesitates, and then turns to 343 Guilty Spark.'' | ||
*'''John-117''': "Is it true?" | |||
''' | *'''343 Guilty Spark''': ''(pauses)'' "More or less. Technically, this installation's pulse has a maximum effective radius of twenty-five thousand light years. But, once the [[Halo Array|others]] follow suit, this galaxy will be quite devoid of life, or at least any life with sufficient biomass to sustain the Flood." ''(Pause)'' "But you already knew that... I mean, how couldn't you?" | ||
'' | *'''Cortana''': "Left out that little detail, did he?" | ||
''' | *'''343 Guilty Spark''': "We have followed outbreak containment procedure to the letter. You were with me each step of the way, as we managed this crisis." | ||
( | *'''Cortana''': ''(alarmed)'' "Chief, I'm picking up movement!" | ||
''' | *'''343 Guilty Spark''': "Why would you hesitate to do what you have already done?" | ||
'' | *'''Cortana''': ''(urgently)'' "We need to go, right now." | ||
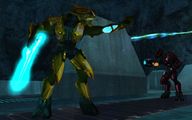
[[File:GuiltySparkAnniversary.png|thumb|300px|343 Guilty Spark threatens the Chief with his Sentinels.]] | |||
'' | ''Four [[Aggressor Sentinel]]s float up behind 343 Guilty Spark, their beams aimed menacingly on the Chief.'' | ||
''' | *'''343 Guilty Spark''': "[[Halo: Silentium|Last time]], [[IsoDidact|you]] asked me, if it were my choice, would I do it? Having had considerable time to ponder your query, my answer has not changed." | ||
'' | ''Master Chief looks around at the Sentinels, and backs towards the panel. He takes Cortana's [[data crystal chip]] out of the console, and inserts it into his head.'' | ||
*'''343 Guilty Spark''': "There is no choice. We must activate the ring." | |||
'''Cortana | *'''Cortana''': "Get - us - ''out - of - here!''" | ||
'' | *'''343 Guilty Spark''': "If you are unwilling to help, I will simply find another. Still, I must have the Index. Give your construct to me, or I will be forced to take her from you." | ||
''' | *'''John-117''': "That's ''not'' going to happen." | ||
'' | *'''343 Guilty Spark''': "So be it." ''(to the Aggressors)'' "Save his head. Dispose of the rest." | ||
''343 Guilty Spark teleports away. The Chief readies his weapon.'' | |||
''{ | '''{''Gameplay''}''' | ||
'''Cortana | *'''Cortana''': "Look out!" | ||
'' | ''The Sentinels open fire at the Chief, but are soon eliminated.'' | ||
'''Cortana:''' | ===The Gun Pointed at the Head of the Universe=== | ||
*'''Cortana''': "We can't let [[343 Guilty Spark|the Monitor]] activate Halo. We have to stop him - we have to ''destroy'' Halo. According to my analysis of the available data, I believe the best course of action is somewhat... risky. An explosion of sufficient size will help destabilize the ring, and will cut through a number of primary systems. We need to trigger a detonation on a large scale, however. A starship's fusion reactors going critical would do the job. I'm going to search what's left of the Covenant [[proselytization network|battlenet]], and see if I can locate the ''[[UNSC Pillar of Autumn|Pillar of Autumn]]''<nowiki>'</nowiki>s crash site. If the ship's [[fusion reactor]]s are still relatively intact, we can use them to destroy Halo." | |||
'' | ''The Chief proceeds through the corridors, eliminating several Covenant patrols as well as the Sentinels that they are in combat with. Soon the Master Chief exits the structure into the snowy night sky.'' | ||
'''Cortana | *'''Cortana''': "I haven't located the crash site yet but we need to buy some time, in case the Monitor or his Sentinels find a way to activate Halo's final weapon, without the Index. The machinery in these canyons are Halo's primary firing mechanisms. They consist of three phase pulse generators that amplify Halo's signal, and allow it to fire deep into space. The power levels are enormous. I can't even begin to calculate the pulse's range. So, if we damage or destroy these generators, the Monitor will need to repair them before Halo can be used. That should buy us some time. I'm marking the location of the nearest pulse generator with a [[navigation point|nav point]]. We need to move in and neutralize the device." | ||
''' | ''The Spartan heads down the pyramid structure, eliminating more Covenant patrols.'' | ||
'''Cortana | *'''Cortana''': "Wait. We should commandeer one of those [[Type-26 Banshee|Banshees]]; we'll need it to reach the pulse generator in time." | ||
'' | ''A [[Sangheili]] enters a [[Zurdo-pattern Wraith|Wraith]] and bombards the Chief's position. The Chief destroys the armor and the troops in the area. He commandeers the Banshee fighter.'' | ||
*'''Cortana''': "Good, let's get moving. The nav point marks our target." | |||
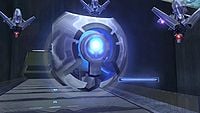
''The Chief flies to a platform protruding from the cliff, clears a lance of Covenant guarding it, and enters the room containing the Phase Pulse Generator.'' | |||
*'''Cortana''': "That's the pulse generator. The center core is the signal amplifier. That's what we need to shut down. We need to interrupt the pulse generator's energy stream. I've adjusted your shield system so that it will deliver an [[electromagnetic pulse|EMP]] burst to disrupt the generator, but you'll need to walk into the beam to trigger it. The EMP blast should neutralize the generator. But it will also drain your shields and leave you vulnerable until they recharge." | |||
''The Chief steps into the generator. The ground shakes rapidly as a small explosion drains the Chief's [[energy shielding|energy shields]].'' | |||
*'''Cortana''': "Objective accomplished! The pulse generator has overloaded. Scanning... the generator's central core is offline. Well done." | |||
''More Sentinels emerge. The Chief takes them out, then exits the room and returns to the canyon.'' | |||
===Breaking Stuff to Look Tough=== | |||
*'''Cortana''': "The second pulse generator is located in the adjacent canyon. Move out, and I'll mark the target with a nav point when we get closer." | |||
''The Chief reaches the bridge in the middle of the canyon, meeting more Covenant troops.'' | |||
*'''Cortana''': "Head through that door. That's the way to the next canyon." | |||
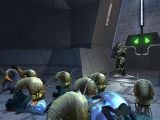
''After fighting through Covenant troops, the Chief sees a few Flood combat forms attacking more Covenant patrols. The Spartan fights his way across several bridges that he [[Assault on the Control Room|previously traversed]] on his way to the Control Room. Various Covenant soldiers, including a [[Sangheili Zealot]], attempt to repulse overwhelming numbers of Flood. The Chief kills them all and eventually makes his way to the bottom of the canyon.'' | |||
*'''Cortana''': "OK. Let's take care of the next pulse generator." | |||
''A large Covenant force defends the area, including a Wraith tank, several [[Mamua'uda-pattern Shade|Shades]] and numerous infantry. The Chief manages to kill them all and leaves the area. Proceeding past the area where a [[M12 Warthog|Warthog]] lies overturned, the Spartan continues to the next area where he fights through another large contingent of Covenant forces, including another Wraith and two [[Mgalekgolo]]. Eventually the Chief is able to defeat all hostiles present, allowing him to commandeer a Banshee. The Chief uses the fighter to wipe out several [[Unggoy]] operated Shade turrets as well as several [[unidentified fuel rod gun|fuel rod gun]] wielders and their Sangheili Zealot commander.'' | |||
''If the player continues on toward the third canyon before disabling the second pulse generator:'' | |||
*'''Cortana''': "Wait! We haven't destroyed the pulse generator yet. Find a Banshee, and fly it up to the location marked by the nav point." | |||
''The Chief enters the second generator room. An intense fight between Flood combat forms and [[Aggressor Sentinel|Sentinels]] rages around the generator. After clearing the room, the Chief steps into the generator and disables the generator. Flood combat forms jumps out from holes in the wall while some enter the room through the door, including several wielding [[M41 rocket launcher|heavy weapons]].'' | |||
*'''Cortana''': "That did it! The pulse generator overloaded. One more to go." | |||
''After clearing the room, the Chief returns outside.'' | |||
===The Tunnels Below=== | |||
*'''Cortana''': "I've located the ''Pillar of Autumn''. She put down twelve-hundred kilometers up spin. Energy readings show her fusion reactors are still powered up. The systems on the ''Pillar of Autumn'' have fail safes that even I can't override, without authorization from the [[Jacob Keyes|Captain]]. We'll need to find him or his neural implants, to start the fusion core detonation. One target remaining. Let's take care of the final pulse generator." | |||
''The Chief draws closer to the tunnel that leads to the third canyon.'' | |||
*'''Cortana''': "That tunnel leads to the next section of the canyon. The final pulse generator we need to destroy is through there." | |||
''A large number of Covenant troops are embroiled in a struggle with yet more Flood forms in the tunnel. Eventually killing all combatants as well as several more rocket launcher wielding combat forms further down the passage, the Chief finds another closed door. The door malfunctions, however, forcing the Chief to leave whatever vehicle he was using. Fighting his way through more Flood forms, the Chief eventually manages to leave the tunnel and exits into the third canyon.'' | |||
===Final Run=== | |||
''The Chief witnesses a group of Covenant led by two Sangheili Zealots making a stand on a hill against hugely overwhelming numbers of Flood. Eliminating the survivors, the Chief exits into another valley where yet another battle is taking place. A nearby cave opening hosts a large supply of abandoned UNSC weapons and ammunition, allowing the Spartan the opportunity to resupply. Eventually the Chief enters a final valley where a group of Flood throw themselves at a mass of Covenant defenses, including two Wraith tanks, several Shade turrets and a large number of assorted infantry being commanded by a Sangheili Zealot. Later in the battle, a squad of [[Stealth Sangheili]] as well as another Zealot, a [[Mgalekgolo]] pair and more infantry emerge. After a protracted battle, the Chief is able to kill all foes in the area and enter a Banshee fighter. He flies to the platform that leads to the third generator. Sentinel Aggressors appear and fire at him. As he arrives at the room containing the third generator, Aggressors with energy shielding appear. He eliminates the Aggressors and disables the final generator.'' | |||
*'''Cortana''': "Final target neutralized. Let's get out of here." | |||
[http://www.youtube.com/watch?v=yO6bqYNhZ7A '''{''Original Cutscene''}'''] | |||
[http://www.youtube.com/watch?v=zZSO0Y6p8ZU '''{Anniversary ''Cutscene''}'''] | |||
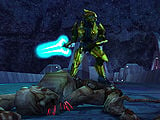
[[File:PhasePulseAnniversary.png|thumb|300px|John-117 after disabling the last phase pulse generator.]] | |||
''The Chief stares at the generator. After a while, he turns away.'' | |||
*'''John-117''': "Let's find a ride and get to the Captain." | |||
*'''Cortana''': "No, that'll take too long." | |||
''The Chief turns back.'' | |||
*'''John-117''': "You have a better idea?" | |||
*'''Cortana''': "There's a [[teleportation grid]] that runs throughout Halo. That's how the Monitor moves about so quickly. I learned how to tap into the grid when I was in the Control Center. Unfortunately, each jump requires a rather...consequential expenditure of energy." | |||
*'''John-117''': "Something tells me I'm not gonna like this." | |||
*'''Cortana''': "But I'm pretty sure I can take the needed energy from your suit without ''permanently'' damaging your shields. Needless to say, I think we should only try this once." | |||
*'''John-117''': "Do it." | |||
''Master Chief is teleported away. Fades to black.'' | |||
''Level ends.'' | |||
==Achievements== | |||
The following [[achievement]]s can be unlocked on Two Betrayals across the [[Xbox 360]] and ''[[Halo: The Master Chief Collection]]'' editions of ''Halo: Combat Evolved Anniversary''. The original [[Xbox]] and [[Halo: Combat Evolved (PC port)|PC]] and [[Halo: Combat Evolved for Macintosh|Macintosh]] releases of ''Halo: Combat Evolved'' did not contain achievement unlocks. | |||
{| class="wikitable" | |||
|- | |||
! scope="col" style="width:135px;text-align:center;" |'''''Halo: Combat Evolved Anniversary'' (Xbox 360)''' | |||
! scope="col" style="width:135px;text-align:center;" |'''''Halo: MCC'' (Xbox One, Xbox Series X|S)''' | |||
! scope="col" style="width:135px;text-align:center;" |'''''Halo: MCC'' (Steam)''' | |||
! scope="col" style="width:175px;height:20px;text-align:center;" |'''Title''' | |||
! scope="col" style="width:350px;height:20px;text-align:center;" |'''Unlock requirement''' | |||
! scope="col" style="width:200px;height:20px;text-align:center;" |'''Games''' | |||
|- | |||
|[[File:HCEA Achievement Two Betrayals.png|center|64px]] | |||
|[[File:HTMCC HCEA Achievement TwoBetrayals.png|center|114px]] | |||
|[[File:HTMCC HCEA Achievement Steam TwoBetrayals.jpg|center|64px]] | |||
|<center>'''[[Two Betrayals (achievement)|Two Betrayals]]'''</center> | |||
|Complete Two Betrayals on any difficulty. | |||
|<center>''[[Halo: Combat Evolved Anniversary]]''<br/>''[[Halo: The Master Chief Collection]]''</center> | |||
|- | |||
|[[File:ACH32.png|center|64px]] | |||
|<center>[[File:HTMCC HCEA Achievement LookOutfortheLittleGuys.png|center|114px]]</center> | |||
|<center>[[File:HTMCC Achievement Look Out For The Little Guys Steam.jpg|center|64px]]</center> | |||
|<center>'''[[Look Out for the Little Guys]]'''</center> | |||
|Complete Two Betrayals on Heroic difficulty or above without killing any Grunts.{{C|''Halo: Combat Evolved Anniversary''}}<br/>Complete Two Betrayals on Legendary difficulty without killing any Grunts.{{C|''Halo: The Master Chief Collection''}} | |||
|<center>''[[Halo: Combat Evolved Anniversary]]''<br/>''[[Halo: The Master Chief Collection]]''</center> | |||
|- | |||
|[[File:ACH33.png|center|64px]] | |||
|<center>[[File:HTMCC HCEA Achievement LeaveItWhereItLay.png|center|114px]]</center> | |||
|<center>[[File:HTMCC Achievement Leave It Where It Lay Steam.jpg|center|64px]]</center> | |||
|<center>'''[[Leave It Where It Lay]]'''</center> | |||
|Complete Two Betrayals on Legendary difficulty without picking up a new weapon. | |||
|<center>''[[Halo: Combat Evolved Anniversary]]''<br/>''[[Halo: The Master Chief Collection]]''</center> | |||
|- | |||
|<center>N/A</center> | |||
|[[File:HTMCC HCEA Achievement WhistleStopTour.png|center|114px]] | |||
|[[File:HTMCC HCEA Achievement Steam WhistleStopTour.jpg|center|64px]] | |||
|<center>'''[[Whistle Stop Tour]]'''</center> | |||
|Beat the par time on Two Betrayals. | |||
|<center>''[[Halo: The Master Chief Collection]]''</center> | |||
|- | |||
|<center>N/A</center> | |||
|[[File:HTMCC HCEA Achievement ItWasInevitable.png|center|114px]] | |||
|[[File:HTMCC HCEA Achievement Steam ItWasInevitable.jpg|center|64px]] | |||
|<center>'''[[It Was Inevitable]]'''</center> | |||
|Beat the par score on Two Betrayals. | |||
|<center>''[[Halo: The Master Chief Collection]]''</center> | |||
|- | |||
|<center>N/A</center> | |||
|[[File:HTMCC HCEA Achievement Memories.png|center|114px]] | |||
|[[File:HTMCC HCEA Achievement Steam Memories.jpg|center|64px]] | |||
|<center>'''[[Memories]]'''</center> | |||
|Find the [[Terminal (Halo: Combat Evolved Anniversary)|Terminal]] on Two Betrayals. | |||
|<center>''[[Halo: The Master Chief Collection]]''</center> | |||
|- | |||
|<center>N/A</center> | |||
|[[File:HTMCC HCEA Achievement SkulltakerPinata.png|center|114px]] | |||
|[[File:HTMCC HCEA Achievement Steam SkulltakerPinata.jpg|center|64px]] | |||
|<center>'''[[Skulltaker Halo: CE: Pinata]]'''</center> | |||
|Find the [[Halo: Combat Evolved Anniversary skulls#Piñata|Piñata Skull]] on Two Betrayals. | |||
|<center>''[[Halo: The Master Chief Collection]]''</center> | |||
|} | |||
=== | ==Production notes== | ||
{{Main|Development of Halo: Combat Evolved}} | |||
''Two Betrayals'' was primarily designed by [[Bungie]] designer [[Dan Orzulak]].{{Ref/YouTube|Id=IGN|9ndZbg8Mr-Q|IGN|Halo: Combat Evolved Devs React to Speedrun (Martin O’Donnell, Marcus Lehto)}} ''Two Betrayals'' shares most of its level geometry with ''[[Assault on the Control Room]]'', albeit adding the phase pulse generator rooms and skipping the opening section of ''Assault on the Control Room'': from where ''[[Echo 419]]'' deploys John-117 to where he first finds members of [[Fireteam Zulu]]. The other main differences from ''Assault on the Control Room'' are that John-117 works "backwards" through the level (aside from his detours in Banshees), and it occurs at night. | |||
In an early story draft, John-117 returned to the Control Room to find Cortana had gone mad with power and now wanted to take over the universe. This plot point was cut for unspecified reasons. Cortana says British phrases like 'sod off' and 'toady about' in the opening cinematic of the level, because [[Jason Jones]] originally wanted Cortana to have a British accent. Cortana's voice actress [[Jen Taylor]] had already recorded the lines in her natural American accent when [[Joseph Staten]] raised the issue to Audio Director [[Martin O'Donnell]]. The dialogue and American accent were kept in the final release due to time constraints.{{Ref/Film|Id=Commentary|[[Halo 3 Legendary Edition|''Halo 3'' Legendary Edition]], Halo: Combat Evolved developer commentary}} In ''[[Halo: The Flood]]'', Cortana says "piss off" rather than "sod off". | |||
343 Guilty Spark's dialogue "''Last time you asked me if it were my choice, would I do it?''" was a mystery for 12 years until the release of the novel ''[[Halo: Silentium]]'', the third and final novel of the [[The Forerunner Saga]], which reveals that 343 Guilty Spark was referring to a question asked by the [[IsoDidact]] before 343 Guilty Spark was assigned to Installation 04, which was: "''Tell me [[Chakas]], if it was your choice, after all we have seen and survived... would you fire the rings?''"{{Ref/Novel|Halo: Silentium|Page=314}} This revelation provides context for many of 343 Guilty Spark's cryptic comments to John-117, in which he addresses the Master Chief as if they had met before and presumes the Spartan to be fully aware of protocol; it can be inferred that Spark somehow believed John to be the IsoDidact. | |||
The events of this level occurs concurrently with the ''[[Halo: Fireteam Raven]]'' level ''[[Ice Canyon]]'', which at one point takes place at the canyon where John-117 finds the Banshee to reach the final phase pulse generator. John-117 makes a brief cameo on ''Ice Canyon'', in which he uses an M90 shotgun to kill a [[Flood tank form]] that was charging at [[Fireteam Raven]]. He then nods at the ODSTs before leaving them. | |||
=== | ==Trivia== | ||
===Glitches=== | |||
*About halfway through the level, one will come across a room where when one first opens the door and a dead Sangheili Ultra and a dead Minor Unggoy with Pod infectors on them can be seen. If the player fires his/her weapon near them, they will jump from the bodies and start attacking the player. | |||
*On rare occasions, the second blast door in the chasm will lock itself leaving players with no other option but to restart the level as a result of the glitch. The blast door also closes once the player has progressed further into the level. | |||
*After the player takes out the third generator, any remaining Sentinels in the room will be destroyed. However, in rare instances that the generator is destroyed and the Aggressors are left alive, they will begin attacking the Master Chief and, despite being in a scripted custom animation, the Chief's shields will fall and he will die. The dialogue continues regardless. | |||
* In the PC version of the game, Cortana does not shift colors during the beginning cinematic, instead she only appears green. Due to ''Halo: Combat Evolved Anniversary'' being built using the PC version, this error is retained in the game's original graphics. | |||
* It's possible to soft lock the mission if the player manages to bring either a Ghost or Banshee with them into the large room just before heading towards the final generator. This can be done if the player, with enough practice, manages to jam either vessel through the semi-operational blastdoor used to enter the room. As a result, the 'Final Run' chapter won't activate, as well as any waves of Covenant or Flood that were meant to spawn. | |||
* If the player don't destroy the first Wraith in the level (before the first pulse generator), the [[Rock Anthem for Saving the World|soundtrack]] will play until the first battle against the Flood. After that, no soundtrack will play in the rest of the level. | |||
===Easter eggs=== | |||
*In ''Halo: Combat Evolved Anniversary'', the eighth [[Terminal (Halo: Combat Evolved Anniversary)|terminal]] can be found in the Control Room, directly across from the central console. | |||
**If you return to the location of the fifth terminal from ''[[Assault on the Control Room]]'', it is no longer there. | |||
*The [[Halo: Combat Evolved Anniversary skulls#Piñata skull|Piñata skull]] in ''Anniversary'' can be found over the tunnel's entrance, which is directly opposite of the platform that leads to the third generator. | |||
===Mistakes=== | |||
*In the beginning cutscene, Master Chief is holding an MA5B Assault Rifle, but when the gameplay begins, the player instead will start with an M90 shotgun and a Plasma Pistol. | |||
*Cortana says she can't "even begin to calculate the pulse's range," however, 343 Guilty Spark already stated that Halo's maximum range is 25,000 light years. It is possible that she just means she can't confirm the Monitor's statement. | |||
*There is an unknown error in the mission that causes Flood Infection Forms to sometimes disappear, even if they aren't shot at. | |||
===Miscellaneous=== | |||
*One can snipe the [[Zurdo-pattern Wraith|Wraith]] driver at the beginning of the level. When the [[Rock Anthem for Saving the World|soundtrack]] starts, aim at the Wraith and one will see a Sangheili. The player still can't drive the Wraith, but this trick can help favourably in Legendary. | |||
*There are a few upturned vehicles scattered around that have dead Flood combat forms beside them, implying that they drove them, even though they cannot drive vehicles in ''[[Halo: Combat Evolved]]''. | |||
*In ''Anniversary'' graphics, all Unggoy Majors in this level who wield fuel rod guns wear red-colored Special Operations Unggoy masks. | |||
*In the ''[[Halo 2]]'' level ''[[The Heretic]]'' [[Unidentified master gunnery sergeant|an unnamed gunnery sergeant]] discusses the damage done to the Master Chief's old armor as he equips the Master Chief with a new one. Included is damage to the power supply. In the ending of this level and the accompanying scene in ''[[Halo: The Flood]]'', [[Cortana]] mentions possible damage to the suit from using it to power a teleport jump. This level is thus likely where that damage occurred. | |||
*Like ''[[Assault on the Control Room]]'', this level has playable Banshees. However, unlike ''Assault on the Control Room'', using the Banshees is not optional as they are required to reach the mission objectives. | |||
* In the final room of the structures connected to the second pair of bridges, there are nothing but Human Combat Forms roaming the room. It is theorized that Fireteam Zulu, who were stationed in the same vicinity for evacuation, were infected by the Flood in between the events of "Assault on the Control Room" and "The Library". | |||
==Gallery== | |||
===Halo: Combat Evolved=== | |||
<gallery> | |||
File:HCE Menu 08 Two Betrayals.png|Preview of the level in ''Halo: Combat Evolved'' menu. | |||
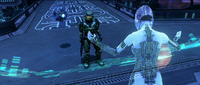
File:Chief Index.jpg|John-117 and 343 Guilty Spark prepare to activate Halo. | |||
File:Sparkandpals.jpg|343 Guilty Spark, backed up by Aggressor Sentinels, threaten John-117. | |||
File:BansheeTwoBetrayals.jpg|John-117 commandeers a Banshee. | |||
File:HCE Infectionforms.jpg|Flood pod infectors prepare to consume a dead Sangheili and Unggoy. | |||
File:Zealot attack.jpg|A Sangheili Zealot commands a Major in battle. | |||
File:Elites.jpg|A Sangheili Zealot and two Sangheili Minors on a bridge. | |||
File:Scrn 067.jpg|A Sangheili Zealot watches over a Flood combat form. | |||
File:Rocket2.jpg|John-117 fires a rocket at a Wraith. | |||
File:TwoBetrayals Scaled-SLoftus.jpg|A scale comparison of ''Two Betrayals''. | |||
</gallery> | |||
===Halo: Combat Evolved Anniversary=== | |||
<gallery> | |||
File:HCEA TwoBetrayals Banshee Concept.jpg|Concept art of a Banshee in flight outside the Control Room. | |||
File:HCEA TwoBetrayals Comparison Concept.jpg|Concept art of the Control Room exterior. | |||
File:Control Room.jpg|John-117 and 343 Guilty Spark prepare to activate Halo. | |||
File:TwoBetrayalsAnniversary.png|Cortana reveals the purpose of Halo. | |||
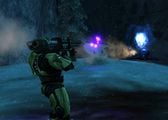
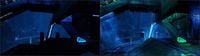
File:HCEA-PhasePulseGenerator-HD.jpg|Several Flood combat forms at the second phase pulse generator. | |||
</gallery> | |||
==Sources== | |||
{{Ref/Sources}} | |||
{{ | {{succession box | before = ''[[The Library]]'' <br />| title = [[Halo: Combat Evolved#Campaign|''Halo CE'' Campaign Missions]] | years = '''''Two Betrayals''''' |after = ''[[Keyes]]''}} | ||
{{Levels|H1}} | |||
Latest revision as of 20:48, April 29, 2024
|
Prev: |
|
|
Concurrent: |
Ice Canyon |
|
Next: |
|
| Two Betrayals | |
|---|---|

| |
|
Game: |
|
|
Map file name (?): |
|
|
Player: |
|
|
Date: |
|
|
Location: |
On the surface of Installation 04, in and around the Control Room. |
|
Objective(s): |
Destroy 3 Phase Pulse Generators to disable Halo's primary weapon. |
|
Par Time: |
00:20:00 (Master Chief Collection-only) |
|
Par Score: |
16,000 (Master Chief Collection-only) |
 |
Halopedia has a walkthrough guide for this level; see Two Betrayals/Walkthrough. |
| “ | Re-activate the weapon at the heart of Halo... and learn the truth. | ” |
Two Betrayals is the eighth campaign level in Halo: Combat Evolved. This is the last level in which Jackals are fought. It is also the first level where Sentinels are hostile enemies instead of your allies.
Summary[edit]
The Master Chief, after teleporting back to the Control Room, proceeds to activate Installation 04. However, Cortana, who after spending twelve hours in the control room has discovered Halo's true purpose, stops him just in time. After stealing the Activation Index, she tells the Chief that Halo will wipe out all life in the galaxy, and turns the Chief against the Monitor who confirms Cortana's claims, confused that the Master Chief didn't already know this. Spark sends Sentinels to take the Spartan's head, and the AI inside his helmet, but they are quickly destroyed.
Cortana decides that they must destroy Halo to keep it from being fired and decides that the best course of action is to detonate the UNSC Pillar of Autumn's fusion engines which will destabilize the ring and cut through a number of primary systems. To buy them some time in case the Monitor finds another way to activate Halo, Cortana orders the Master Chief to disable the three phase pulse generators in the area to force the Monitor to make repairs before Halo can be fired. The Master Chief is forced to fight through a combination of Covenant, Flood and Sentinel forces and use Banshees to reach each generator which Cortana uses an EMP to disable. Cortana is able to use the Covenant battlenet to locate the Pillar of Autumn's crash site, but requires Captain Jacob Keyes or his command codes to activate the ship's self-destruct. After disabling the third pulse generator, Cortana is able to locate Keyes, who is still alive, onboard the Covenant Ket-pattern battlecruiser Truth and Reconciliation. At Cortana's suggestion, the Master Chief allows the AI to draw power from his suit to use Halo's teleportation grid to teleport them to the battlecruiser rather than calling for a ride which will take more time that they don't have.
Transcript[edit]
{Original Cutscene} {Anniversary Cutscene}
Long shot of the Control Room. Master Chief and 343 Guilty Spark teleport in, obviously in the middle of a conversation, explaining something about the Flood.
- 343 Guilty Spark: "...which means that any organism of sufficient mass and cognitive capability is a potential vector."
Master Chief pauses as though sensing something is not quite right.
- 343 Guilty Spark: "Is something wrong?"
- Master Chief Petty Officer John-117: "No... Nothing."
- 343 Guilty Spark: "Splendid. Shall we?"
Master Chief and 343 Guilty Spark move up to the main control panel.
- 343 Guilty Spark: (random humming) "Unfortunately, my usefulness to this particular endeavor has come to an end. Protocol does not allow units with my classification to... perform a task as important as the reunification of the Index with the Core. That final step is reserved for you, Reclaimer."
Master Chief takes the Index, and puts it into a slot on the console. Lights and holograms appear, but then fade.
- 343 Guilty Spark: "Odd. That wasn't supposed to happen."
Cortana suddenly appears over the console.
- Cortana: "Oh, really!?"
There is a flash of light, and 343 Guilty Spark is thrown back, and down to the ground.
- John-117: "Cortana!"
- Cortana: "I've spent the last 12 hours cooped up in here, watching you toady about, helping that thing get set to slit our throats!"
- John-117: "Hold on now, he's a friend."
- Cortana: (Sarcastically) "Oh! I didn't realize. He's your pal, is he? Your chum? (angrily) Do you have any idea what that bastard almost made you do?!"
- John-117: "Yes... Activate Halo's defenses and destroy the Flood, which is why we brought the Index to the Control Center."
- Cortana: "You mean this?"
The Activation Index hologram appears in Cortana's hand.
- 343 Guilty Spark: "A construct? In the Core?! That is absolutely unacceptable!"
- Cortana: "Sod off!"
- 343 Guilty Spark: "What impertinence! I shall purge you at once!"
- Cortana: "You sure that's a good idea?"
Cortana's avatar absorbs the Index.
- 343 Guilty Spark: "How... how... how dare you?! I'll-"
- Cortana: "Do what? I have the Index! You can just float and sputter!"
- John-117: "Enough!"
The Chief brings both hands up in the middle of them as if to stop a fight, then turns back to face Cortana.
- John-117: "The Flood is spreading. If we activate Halo's defenses, we can wipe them out."
- Cortana: "You have no idea how this ring works, do you? Why the Forerunners built it? Halo doesn't kill Flood, it kills their food. Humans, Covenant, whatever. We're all equally edible! The only way to stop the Flood is to starve them to death. And that's exactly what Halo is designed to do: Wipe the galaxy clean of all sentient life. You don't believe me? Ask him!"
Cortana points at Spark. Master Chief hesitates, and then turns to 343 Guilty Spark.
- John-117: "Is it true?"
- 343 Guilty Spark: (pauses) "More or less. Technically, this installation's pulse has a maximum effective radius of twenty-five thousand light years. But, once the others follow suit, this galaxy will be quite devoid of life, or at least any life with sufficient biomass to sustain the Flood." (Pause) "But you already knew that... I mean, how couldn't you?"
- Cortana: "Left out that little detail, did he?"
- 343 Guilty Spark: "We have followed outbreak containment procedure to the letter. You were with me each step of the way, as we managed this crisis."
- Cortana: (alarmed) "Chief, I'm picking up movement!"
- 343 Guilty Spark: "Why would you hesitate to do what you have already done?"
- Cortana: (urgently) "We need to go, right now."

Four Aggressor Sentinels float up behind 343 Guilty Spark, their beams aimed menacingly on the Chief.
- 343 Guilty Spark: "Last time, you asked me, if it were my choice, would I do it? Having had considerable time to ponder your query, my answer has not changed."
Master Chief looks around at the Sentinels, and backs towards the panel. He takes Cortana's data crystal chip out of the console, and inserts it into his head.
- 343 Guilty Spark: "There is no choice. We must activate the ring."
- Cortana: "Get - us - out - of - here!"
- 343 Guilty Spark: "If you are unwilling to help, I will simply find another. Still, I must have the Index. Give your construct to me, or I will be forced to take her from you."
- John-117: "That's not going to happen."
- 343 Guilty Spark: "So be it." (to the Aggressors) "Save his head. Dispose of the rest."
343 Guilty Spark teleports away. The Chief readies his weapon.
{Gameplay}
- Cortana: "Look out!"
The Sentinels open fire at the Chief, but are soon eliminated.
The Gun Pointed at the Head of the Universe[edit]
- Cortana: "We can't let the Monitor activate Halo. We have to stop him - we have to destroy Halo. According to my analysis of the available data, I believe the best course of action is somewhat... risky. An explosion of sufficient size will help destabilize the ring, and will cut through a number of primary systems. We need to trigger a detonation on a large scale, however. A starship's fusion reactors going critical would do the job. I'm going to search what's left of the Covenant battlenet, and see if I can locate the Pillar of Autumn's crash site. If the ship's fusion reactors are still relatively intact, we can use them to destroy Halo."
The Chief proceeds through the corridors, eliminating several Covenant patrols as well as the Sentinels that they are in combat with. Soon the Master Chief exits the structure into the snowy night sky.
- Cortana: "I haven't located the crash site yet but we need to buy some time, in case the Monitor or his Sentinels find a way to activate Halo's final weapon, without the Index. The machinery in these canyons are Halo's primary firing mechanisms. They consist of three phase pulse generators that amplify Halo's signal, and allow it to fire deep into space. The power levels are enormous. I can't even begin to calculate the pulse's range. So, if we damage or destroy these generators, the Monitor will need to repair them before Halo can be used. That should buy us some time. I'm marking the location of the nearest pulse generator with a nav point. We need to move in and neutralize the device."
The Spartan heads down the pyramid structure, eliminating more Covenant patrols.
- Cortana: "Wait. We should commandeer one of those Banshees; we'll need it to reach the pulse generator in time."
A Sangheili enters a Wraith and bombards the Chief's position. The Chief destroys the armor and the troops in the area. He commandeers the Banshee fighter.
- Cortana: "Good, let's get moving. The nav point marks our target."
The Chief flies to a platform protruding from the cliff, clears a lance of Covenant guarding it, and enters the room containing the Phase Pulse Generator.
- Cortana: "That's the pulse generator. The center core is the signal amplifier. That's what we need to shut down. We need to interrupt the pulse generator's energy stream. I've adjusted your shield system so that it will deliver an EMP burst to disrupt the generator, but you'll need to walk into the beam to trigger it. The EMP blast should neutralize the generator. But it will also drain your shields and leave you vulnerable until they recharge."
The Chief steps into the generator. The ground shakes rapidly as a small explosion drains the Chief's energy shields.
- Cortana: "Objective accomplished! The pulse generator has overloaded. Scanning... the generator's central core is offline. Well done."
More Sentinels emerge. The Chief takes them out, then exits the room and returns to the canyon.
Breaking Stuff to Look Tough[edit]
- Cortana: "The second pulse generator is located in the adjacent canyon. Move out, and I'll mark the target with a nav point when we get closer."
The Chief reaches the bridge in the middle of the canyon, meeting more Covenant troops.
- Cortana: "Head through that door. That's the way to the next canyon."
After fighting through Covenant troops, the Chief sees a few Flood combat forms attacking more Covenant patrols. The Spartan fights his way across several bridges that he previously traversed on his way to the Control Room. Various Covenant soldiers, including a Sangheili Zealot, attempt to repulse overwhelming numbers of Flood. The Chief kills them all and eventually makes his way to the bottom of the canyon.
- Cortana: "OK. Let's take care of the next pulse generator."
A large Covenant force defends the area, including a Wraith tank, several Shades and numerous infantry. The Chief manages to kill them all and leaves the area. Proceeding past the area where a Warthog lies overturned, the Spartan continues to the next area where he fights through another large contingent of Covenant forces, including another Wraith and two Mgalekgolo. Eventually the Chief is able to defeat all hostiles present, allowing him to commandeer a Banshee. The Chief uses the fighter to wipe out several Unggoy operated Shade turrets as well as several fuel rod gun wielders and their Sangheili Zealot commander.
If the player continues on toward the third canyon before disabling the second pulse generator:
- Cortana: "Wait! We haven't destroyed the pulse generator yet. Find a Banshee, and fly it up to the location marked by the nav point."
The Chief enters the second generator room. An intense fight between Flood combat forms and Sentinels rages around the generator. After clearing the room, the Chief steps into the generator and disables the generator. Flood combat forms jumps out from holes in the wall while some enter the room through the door, including several wielding heavy weapons.
- Cortana: "That did it! The pulse generator overloaded. One more to go."
After clearing the room, the Chief returns outside.
The Tunnels Below[edit]
- Cortana: "I've located the Pillar of Autumn. She put down twelve-hundred kilometers up spin. Energy readings show her fusion reactors are still powered up. The systems on the Pillar of Autumn have fail safes that even I can't override, without authorization from the Captain. We'll need to find him or his neural implants, to start the fusion core detonation. One target remaining. Let's take care of the final pulse generator."
The Chief draws closer to the tunnel that leads to the third canyon.
- Cortana: "That tunnel leads to the next section of the canyon. The final pulse generator we need to destroy is through there."
A large number of Covenant troops are embroiled in a struggle with yet more Flood forms in the tunnel. Eventually killing all combatants as well as several more rocket launcher wielding combat forms further down the passage, the Chief finds another closed door. The door malfunctions, however, forcing the Chief to leave whatever vehicle he was using. Fighting his way through more Flood forms, the Chief eventually manages to leave the tunnel and exits into the third canyon.
Final Run[edit]
The Chief witnesses a group of Covenant led by two Sangheili Zealots making a stand on a hill against hugely overwhelming numbers of Flood. Eliminating the survivors, the Chief exits into another valley where yet another battle is taking place. A nearby cave opening hosts a large supply of abandoned UNSC weapons and ammunition, allowing the Spartan the opportunity to resupply. Eventually the Chief enters a final valley where a group of Flood throw themselves at a mass of Covenant defenses, including two Wraith tanks, several Shade turrets and a large number of assorted infantry being commanded by a Sangheili Zealot. Later in the battle, a squad of Stealth Sangheili as well as another Zealot, a Mgalekgolo pair and more infantry emerge. After a protracted battle, the Chief is able to kill all foes in the area and enter a Banshee fighter. He flies to the platform that leads to the third generator. Sentinel Aggressors appear and fire at him. As he arrives at the room containing the third generator, Aggressors with energy shielding appear. He eliminates the Aggressors and disables the final generator.
- Cortana: "Final target neutralized. Let's get out of here."
{Original Cutscene} {Anniversary Cutscene}

The Chief stares at the generator. After a while, he turns away.
- John-117: "Let's find a ride and get to the Captain."
- Cortana: "No, that'll take too long."
The Chief turns back.
- John-117: "You have a better idea?"
- Cortana: "There's a teleportation grid that runs throughout Halo. That's how the Monitor moves about so quickly. I learned how to tap into the grid when I was in the Control Center. Unfortunately, each jump requires a rather...consequential expenditure of energy."
- John-117: "Something tells me I'm not gonna like this."
- Cortana: "But I'm pretty sure I can take the needed energy from your suit without permanently damaging your shields. Needless to say, I think we should only try this once."
- John-117: "Do it."
Master Chief is teleported away. Fades to black.
Level ends.
Achievements[edit]
The following achievements can be unlocked on Two Betrayals across the Xbox 360 and Halo: The Master Chief Collection editions of Halo: Combat Evolved Anniversary. The original Xbox and PC and Macintosh releases of Halo: Combat Evolved did not contain achievement unlocks.
| Halo: Combat Evolved Anniversary (Xbox 360) | Halo: MCC (Xbox One, Xbox Series X|S) | Halo: MCC (Steam) | Title | Unlock requirement | Games |
|---|---|---|---|---|---|
 |
 |
 |
Complete Two Betrayals on any difficulty. | Halo: The Master Chief Collection | |
 |
 |
 |
Complete Two Betrayals on Heroic difficulty or above without killing any Grunts.(Halo: Combat Evolved Anniversary) Complete Two Betrayals on Legendary difficulty without killing any Grunts.(Halo: The Master Chief Collection) |
Halo: The Master Chief Collection | |
 |
 |
 |
Complete Two Betrayals on Legendary difficulty without picking up a new weapon. | Halo: The Master Chief Collection | |
 |
 |
Beat the par time on Two Betrayals. | |||
 |
 |
Beat the par score on Two Betrayals. | |||
 |
 |
Find the Terminal on Two Betrayals. | |||
 |
 |
Find the Piñata Skull on Two Betrayals. |
Production notes[edit]
- Main article: Development of Halo: Combat Evolved
Two Betrayals was primarily designed by Bungie designer Dan Orzulak.[2] Two Betrayals shares most of its level geometry with Assault on the Control Room, albeit adding the phase pulse generator rooms and skipping the opening section of Assault on the Control Room: from where Echo 419 deploys John-117 to where he first finds members of Fireteam Zulu. The other main differences from Assault on the Control Room are that John-117 works "backwards" through the level (aside from his detours in Banshees), and it occurs at night.
In an early story draft, John-117 returned to the Control Room to find Cortana had gone mad with power and now wanted to take over the universe. This plot point was cut for unspecified reasons. Cortana says British phrases like 'sod off' and 'toady about' in the opening cinematic of the level, because Jason Jones originally wanted Cortana to have a British accent. Cortana's voice actress Jen Taylor had already recorded the lines in her natural American accent when Joseph Staten raised the issue to Audio Director Martin O'Donnell. The dialogue and American accent were kept in the final release due to time constraints.[3] In Halo: The Flood, Cortana says "piss off" rather than "sod off".
343 Guilty Spark's dialogue "Last time you asked me if it were my choice, would I do it?" was a mystery for 12 years until the release of the novel Halo: Silentium, the third and final novel of the The Forerunner Saga, which reveals that 343 Guilty Spark was referring to a question asked by the IsoDidact before 343 Guilty Spark was assigned to Installation 04, which was: "Tell me Chakas, if it was your choice, after all we have seen and survived... would you fire the rings?"[4] This revelation provides context for many of 343 Guilty Spark's cryptic comments to John-117, in which he addresses the Master Chief as if they had met before and presumes the Spartan to be fully aware of protocol; it can be inferred that Spark somehow believed John to be the IsoDidact.
The events of this level occurs concurrently with the Halo: Fireteam Raven level Ice Canyon, which at one point takes place at the canyon where John-117 finds the Banshee to reach the final phase pulse generator. John-117 makes a brief cameo on Ice Canyon, in which he uses an M90 shotgun to kill a Flood tank form that was charging at Fireteam Raven. He then nods at the ODSTs before leaving them.
Trivia[edit]
Glitches[edit]
- About halfway through the level, one will come across a room where when one first opens the door and a dead Sangheili Ultra and a dead Minor Unggoy with Pod infectors on them can be seen. If the player fires his/her weapon near them, they will jump from the bodies and start attacking the player.
- On rare occasions, the second blast door in the chasm will lock itself leaving players with no other option but to restart the level as a result of the glitch. The blast door also closes once the player has progressed further into the level.
- After the player takes out the third generator, any remaining Sentinels in the room will be destroyed. However, in rare instances that the generator is destroyed and the Aggressors are left alive, they will begin attacking the Master Chief and, despite being in a scripted custom animation, the Chief's shields will fall and he will die. The dialogue continues regardless.
- In the PC version of the game, Cortana does not shift colors during the beginning cinematic, instead she only appears green. Due to Halo: Combat Evolved Anniversary being built using the PC version, this error is retained in the game's original graphics.
- It's possible to soft lock the mission if the player manages to bring either a Ghost or Banshee with them into the large room just before heading towards the final generator. This can be done if the player, with enough practice, manages to jam either vessel through the semi-operational blastdoor used to enter the room. As a result, the 'Final Run' chapter won't activate, as well as any waves of Covenant or Flood that were meant to spawn.
- If the player don't destroy the first Wraith in the level (before the first pulse generator), the soundtrack will play until the first battle against the Flood. After that, no soundtrack will play in the rest of the level.
Easter eggs[edit]
- In Halo: Combat Evolved Anniversary, the eighth terminal can be found in the Control Room, directly across from the central console.
- If you return to the location of the fifth terminal from Assault on the Control Room, it is no longer there.
- The Piñata skull in Anniversary can be found over the tunnel's entrance, which is directly opposite of the platform that leads to the third generator.
Mistakes[edit]
- In the beginning cutscene, Master Chief is holding an MA5B Assault Rifle, but when the gameplay begins, the player instead will start with an M90 shotgun and a Plasma Pistol.
- Cortana says she can't "even begin to calculate the pulse's range," however, 343 Guilty Spark already stated that Halo's maximum range is 25,000 light years. It is possible that she just means she can't confirm the Monitor's statement.
- There is an unknown error in the mission that causes Flood Infection Forms to sometimes disappear, even if they aren't shot at.
Miscellaneous[edit]
- One can snipe the Wraith driver at the beginning of the level. When the soundtrack starts, aim at the Wraith and one will see a Sangheili. The player still can't drive the Wraith, but this trick can help favourably in Legendary.
- There are a few upturned vehicles scattered around that have dead Flood combat forms beside them, implying that they drove them, even though they cannot drive vehicles in Halo: Combat Evolved.
- In Anniversary graphics, all Unggoy Majors in this level who wield fuel rod guns wear red-colored Special Operations Unggoy masks.
- In the Halo 2 level The Heretic an unnamed gunnery sergeant discusses the damage done to the Master Chief's old armor as he equips the Master Chief with a new one. Included is damage to the power supply. In the ending of this level and the accompanying scene in Halo: The Flood, Cortana mentions possible damage to the suit from using it to power a teleport jump. This level is thus likely where that damage occurred.
- Like Assault on the Control Room, this level has playable Banshees. However, unlike Assault on the Control Room, using the Banshees is not optional as they are required to reach the mission objectives.
- In the final room of the structures connected to the second pair of bridges, there are nothing but Human Combat Forms roaming the room. It is theorized that Fireteam Zulu, who were stationed in the same vicinity for evacuation, were infected by the Flood in between the events of "Assault on the Control Room" and "The Library".
Gallery[edit]
Halo: Combat Evolved[edit]
Preview of the level in Halo: Combat Evolved menu.
John-117 and 343 Guilty Spark prepare to activate Halo.
343 Guilty Spark, backed up by Aggressor Sentinels, threaten John-117.

John-117 commandeers a Banshee.
Flood pod infectors prepare to consume a dead Sangheili and Unggoy.
A Sangheili Zealot commands a Major in battle.
A Sangheili Zealot and two Sangheili Minors on a bridge.
A Sangheili Zealot watches over a Flood combat form.
John-117 fires a rocket at a Wraith.
A scale comparison of Two Betrayals.


Halo: Combat Evolved Anniversary[edit]
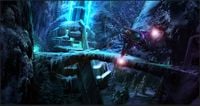
Concept art of a Banshee in flight outside the Control Room.
Concept art of the Control Room exterior.

John-117 and 343 Guilty Spark prepare to activate Halo.
Cortana reveals the purpose of Halo.
Several Flood combat forms at the second phase pulse generator.


Sources[edit]
- ^ Halo: Combat Evolved Editing Kit, game file
HCEEK\tags\levels\c40\c40.scenario - ^ YouTube - IGN, Halo: Combat Evolved Devs React to Speedrun (Martin O’Donnell, Marcus Lehto)
- ^ Halo 3 Legendary Edition, Halo: Combat Evolved developer commentary
- ^ Halo: Silentium, page 314
| Preceded by The Library |
Halo CE Campaign Missions Two Betrayals |
Succeeded by Keyes |
| |||||||||||||||||||||||


