Kikowani Station (location): Difference between revisions
From Halopedia, the Halo wiki
CMDR RileySV (talk | contribs) (Added in citations from HN; added in new other information and citations.) |
No edit summary |
||
| (20 intermediate revisions by 10 users not shown) | |||
| Line 1: | Line 1: | ||
{{ | {{Status|Canon}} | ||
{{ | {{Disambig header|the New Mombasa train station|the Halo 3: ODST campaign level|Kikowani Station}} | ||
{{Quote|Hello traveler. The Mombasa Transit Authority welcomes you to Kikowani station. How may I serve you?|Station kiosk to Sadie Endesha | {{Base infobox | ||
|image=[[File:Sector 0 Kikowani station.jpg|300px]] | |||
'''Kikowani Station''' is an [[New Mombasa Transit Authority|NMTA]] [[Maglev train|Maglev]] train station located in the [[New Mombasa city center|city center]] of [[New Mombasa]], [[Kenya]]. | |location=[[New Mombasa city center]], [[Mombasa]], [[Kenya]]{{Ref/Reuse|circle1arc1}} | ||
|name=Kikowani Station | |||
|purpose= | |||
|length= | |||
|width= | |||
|height= | |||
|surface= | |||
|armament= | |||
|complement= | |||
|built=Pre-[[2552#October|October 20, 2552]]{{Ref/Reuse|circle1arc1}} | |||
|usage= | |||
|destroyed= | |||
|controlledby=[[New Mombasa Transit Authority]]{{Ref/Reuse|circle1arc1}} | |||
|notable= | |||
}} | |||
{{Quote|Hello traveler. The Mombasa Transit Authority welcomes you to Kikowani station. How may I serve you?|Station kiosk to Sadie Endesha{{Ref/Reuse|circle1arc1}}}} | |||
'''Kikowani Station''' is an [[New Mombasa Transit Authority|NMTA]] [[Maglev train|Maglev]] train station part of the [[New Mombasa MagLev train network]]. It was located in the [[New Mombasa city center|city center]] of [[New Mombasa]], [[Kenya]].{{Ref/Game|Id=circle1arc1|H3ODST|[[Audio log (Halo 3: ODST)|Audio Log]] - [[Sadie's Story]], Circle 1, Arc 1}} The station could be accessed from [[New Mombasa Sector 0|Sector 0]] at street level.{{Ref/Level|Id=streetslevel|H3ODST|Mombasa Streets}} | |||
==History== | ==History== | ||
On October | On October 20, 2552, [[Sadie Endesha]] purchased a train ticket at Kikowani Station bound for [[Old Mombasa]]. She boarded train 14 and then departed.{{Ref/Reuse|circle1arc1}} | ||
Early during the [[Covenant]] [[Battle of Mombasa|invasion | Early during the [[Covenant]] [[Battle of Mombasa|invasion of the city]] in the [[Battle for Earth]], seven [[Huragok]] managed to escape their [[Jiralhanae]] handlers in Kikowani. Six of them attempted to remove an explosive device from the seventh Huragok, [[Quick to Adjust]],{{Ref/Game|H3ODST|Audio Log - Sadie's Story, Circle 6, Arc 2}} they accidentally triggered the device. All but the seventh Huragok were killed.{{Ref/Game|H3ODST|Audio Log - Sadie's Story, Circle 6, Arc 3}} | ||
Commissioner [[Kinsler]] had a private train parked at | Commissioner [[Kinsler]] had a private train parked at Platform 9, waiting for Sadie Endesha. A crowd formed on the platforms, trying to board the train, as the Covenant bombarded the station.{{Ref/Game|Id=circle9|H3ODST|Audio Log - Sadie's Story, Circle 9, Arc 2}} With the help of the Quick to Adjust and [[Vergil]], the crowd boarded the train and killed Kinsler{{Ref/Game|H3ODST|Sadie's Story, Circle 9, Arc 5}}. Then, with Sadie and [[Mike Branley]], the civilians departed for Old Mombasa.{{Ref/Game|H3ODST|Sadie's Story, Circle 9, Arc 6}} | ||
By the | By the evening, the station's surroundings, including the train tunnels, were flooded by water. This prevented the [[Orbital Drop Shock Trooper|ODST]] squad [[Alpha-Nine]] from escaping the city through the train tunnels. Instead, the squad stole a Covenant [[Kez'katu-pattern Phantom|Phantom]] that landed in the station and used it to fly to safety.{{Ref/Level|Id=kikowani|H3ODST|Kikowani Station}} An hour later, Alpha-Nine's missing squadmate [[Jonathan Doherty]] arrived at the entrance of Kikowani Station and found the [[biofoam]] canister that had been used to treat [[Kojo Agu|Romeo]]'s injuries before moving on.{{Ref/Reuse|streetslevel}} | ||
== Gallery == | == Gallery == | ||
<gallery> | <gallery> | ||
File:H3ODST_KikowaniStation_Exterior_Concept.jpg|Concept art of the station. Note the labeling as "Kilindini Metro Station". | |||
File:H3ODST_KikowaniStation_Flooded_Concept.png|Concept art of the flooded tracks. | |||
File:H3ODST_KikowaniStation_Breakdown_Concept.jpg|A detailed concept piece of the flooded station. | |||
File:Kikow stat 2.jpg|Kikowani Station at night. | File:Kikow stat 2.jpg|Kikowani Station at night. | ||
File: | File:H3ODST AlphaNine Kikowani.jpg|Alpha-Nine at the station's entrance. | ||
</gallery> | </gallery> | ||
==List of appearances== | ==List of appearances== | ||
*''[[Halo 3: ODST]]'' {{1st}} | *''[[Halo 3: ODST]]'' {{1st}} | ||
**''[[Sadie's Story]]'' | **''[[Sadie's Story]]'' | ||
*''[[Halo: New Blood]]'' | *''[[Halo: New Blood]]'' | ||
==Sources== | ==Sources== | ||
{{Ref/Sources}} | |||
{{MombasaLocales}} | {{MombasaLocales}} | ||
[[Category:Earth]] | [[Category:Earth]] | ||
[[Category:Mombasa Train Stations]] | [[Category:Mombasa Train Stations]] | ||
Latest revision as of 08:56, April 24, 2023
| Kikowani Station | |
|---|---|

| |
| Facility information | |
|
Location: |
|
| Historical information | |
|
Built: |
|
|
Controlled by: |
|
- "Hello traveler. The Mombasa Transit Authority welcomes you to Kikowani station. How may I serve you?"
- — Station kiosk to Sadie Endesha[1]
Kikowani Station is an NMTA Maglev train station part of the New Mombasa MagLev train network. It was located in the city center of New Mombasa, Kenya.[1] The station could be accessed from Sector 0 at street level.[2]
History[edit]
On October 20, 2552, Sadie Endesha purchased a train ticket at Kikowani Station bound for Old Mombasa. She boarded train 14 and then departed.[1]
Early during the Covenant invasion of the city in the Battle for Earth, seven Huragok managed to escape their Jiralhanae handlers in Kikowani. Six of them attempted to remove an explosive device from the seventh Huragok, Quick to Adjust,[3] they accidentally triggered the device. All but the seventh Huragok were killed.[4]
Commissioner Kinsler had a private train parked at Platform 9, waiting for Sadie Endesha. A crowd formed on the platforms, trying to board the train, as the Covenant bombarded the station.[5] With the help of the Quick to Adjust and Vergil, the crowd boarded the train and killed Kinsler[6]. Then, with Sadie and Mike Branley, the civilians departed for Old Mombasa.[7]
By the evening, the station's surroundings, including the train tunnels, were flooded by water. This prevented the ODST squad Alpha-Nine from escaping the city through the train tunnels. Instead, the squad stole a Covenant Phantom that landed in the station and used it to fly to safety.[8] An hour later, Alpha-Nine's missing squadmate Jonathan Doherty arrived at the entrance of Kikowani Station and found the biofoam canister that had been used to treat Romeo's injuries before moving on.[2]
Gallery[edit]
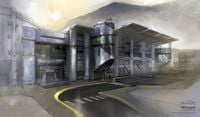
Concept art of the station. Note the labeling as "Kilindini Metro Station".
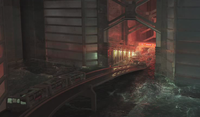
Concept art of the flooded tracks.
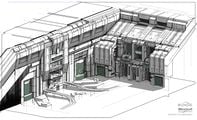
A detailed concept piece of the flooded station.
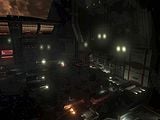
Kikowani Station at night.
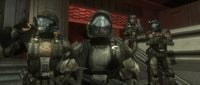
Alpha-Nine at the station's entrance.


List of appearances[edit]
- Halo 3: ODST (First appearance)
- Halo: New Blood
Sources[edit]
- ^ a b c d e f Halo 3: ODST, Audio Log - Sadie's Story, Circle 1, Arc 1
- ^ a b Halo 3: ODST, campaign level Mombasa Streets
- ^ Halo 3: ODST, Audio Log - Sadie's Story, Circle 6, Arc 2
- ^ Halo 3: ODST, Audio Log - Sadie's Story, Circle 6, Arc 3
- ^ Halo 3: ODST, Audio Log - Sadie's Story, Circle 9, Arc 2
- ^ Halo 3: ODST, Sadie's Story, Circle 9, Arc 5
- ^ Halo 3: ODST, Sadie's Story, Circle 9, Arc 6
- ^ Halo 3: ODST, campaign level Kikowani Station
| ||||||||||||||||||||||||||||||||


