Battle of Voi: Difference between revisions
From Halopedia, the Halo wiki
No edit summary |
No edit summary |
||
| Line 58: | Line 58: | ||
|casual2=Unknown, presumably heavy | |casual2=Unknown, presumably heavy | ||
}} | }} | ||
The '''Battle of Voi''' was a ground and aerial engagement between the [[UNSC]], [[UNSCDF]]/[[Covenant Separatist]] alliance and the [[Covenant Loyalists]] at [[Voi]], [[Kenya]], on [[Earth]] in | The '''Battle of Voi''' was a ground and aerial engagement between the [[UNSC]], [[UNSCDF]]/[[Covenant Separatist]] alliance and the [[Covenant Loyalists]] at [[Voi]], [[Kenya]], on [[Earth]] in late [[2552]]. <ref>''[[Halo 3]]'', level ''[[Tsavo Highway (Level)|Tsavo Highway]]''</ref><ref>''[[Halo 3]]'', level ''[[The Storm (Level)|The Storm]]''</ref><ref>''[[Halo 3]]'', level ''[[Floodgate (Level)|Floodgate]]''</ref> | ||
==Introduction== | ==Introduction== | ||
| Line 77: | Line 77: | ||
===Sierra-117 Arrives=== | ===Sierra-117 Arrives=== | ||
After his battle to fight his way up the [[Tsavo Highway (location)|Tsavo Highway]], [[Master Chief]] not only secured the gate to Voi but also a landing zone for [[Commander Keyes|Cmd. Miranda Keyes]] to deploy her Marines. Mounting up with a group of Warthogs, he rode shotgun through the gates to the outside of the Traxus facility where previous Marine counter attacks had failed. Ten marines dismounted from the [[Transport Warthog]]s along with the Chief and then a few remained to operate their [[Warthog| Warthog LRV]] to give them heavy support. The [[Traxus_Factory_Complex_09|Traxus facility]] composed of several areas, each sealed off by a bulk head to allow and deny movement between the areas. After initially infiltrating the facility the first gate was opened, interrupting a [[File]] of [[Jackals]] and [[Grunts]] during one of [[Truth|Truth's]] speeches. They were taken by surprise and quickly gunned down. After quickly hammering through another file of grunts Chief opened the door to a long tunnel heading down the facility. A large group of Grunts, Jackals and a single [[Brute Captain]] guarded the other end of the corridor, along with their reserve [[Type-32 Rapid Assault Vehicle|Ghost RAVs]]. After the combined arms of the Chief, the Warthog and the Marines defeated the defenders, they finally broke through to their first objective. | After his battle to fight his way up the [[Tsavo Highway (location)|Tsavo Highway]], [[Master Chief]] not only secured the gate to Voi but also a landing zone for [[Commander Keyes|Cmd. Miranda Keyes]] to deploy her Marines. Mounting up with a group of Warthogs, he rode shotgun through the gates to the outside of the Traxus facility where previous Marine counter attacks had failed. Ten marines dismounted from the [[Transport Warthog]]s along with the Chief and then a few remained to operate their [[Warthog|Warthog LRV]] to give them heavy support. The [[Traxus_Factory_Complex_09|Traxus facility]] composed of several areas, each sealed off by a bulk head to allow and deny movement between the areas. After initially infiltrating the facility the first gate was opened, interrupting a [[File]] of [[Jackals]] and [[Grunts]] during one of [[Truth|Truth's]] speeches. They were taken by surprise and quickly gunned down. After quickly hammering through another file of grunts Chief opened the door to a long tunnel heading down the facility. A large group of Grunts, Jackals and a single [[Brute Captain]] guarded the other end of the corridor, along with their reserve [[Type-32 Rapid Assault Vehicle|Ghost RAVs]]. After the combined arms of the Chief, the Warthog and the Marines defeated the defenders, they finally broke through to their first objective. | ||
[[Image:Voi 3.jpg|200px|thumb|right|The first objective in sight.]] | [[Image:Voi 3.jpg|200px|thumb|right|The first objective in sight.]] | ||
| Line 97: | Line 97: | ||
===Push to the [[Anti-Aircraft_Battery|AA Gun]]=== | ===Push to the [[Anti-Aircraft_Battery|AA Gun]]=== | ||
[[Master Chief]] soon traveled up to the dock and was joined by another squad of reinforcements led by [[Arbiter (character)|The Arbiter]] and moved through to another section of the Traxus facility, another section held by the Marines. It served as their local command center, their medical station and their ammo dump. It was heavily fortified with numerous defensive points armed with machine guns, but at the other end of the base, where it entered the warehouse, their defensive position was falling. [[Brute]] forces had pushed back through the warehouse, flanking their defensive position. UNSC Forces, now joined by [[Voi_Factory_Workers|Voi dock and factory workers]] and led by the Arbiter and the Chief soon pushed back, retaking the warehouse and defeating large groups of Brutes and even a [[Hunter]] pair before a showdown with a [[Chieftain]] outside. After more tight street to street fighting, they pushed the Covenant forces back to the rocky precipice where the AA gun lay. With no way for the Brutes to retreat and with Lord Hood's attack imminent, it was make or break time. UNSC forces pushed up the hill, fighting off another [[ | [[Master Chief]] soon traveled up to the dock and was joined by another squad of reinforcements led by [[Arbiter (character)|The Arbiter]] and moved through to another section of the Traxus facility, another section held by the Marines. It served as their local command center, their medical station and their ammo dump. It was heavily fortified with numerous defensive points armed with machine guns, but at the other end of the base, where it entered the warehouse, their defensive position was falling. [[Brute]] forces had pushed back through the warehouse, flanking their defensive position. UNSC Forces, now joined by [[Voi_Factory_Workers|Voi dock and factory workers]] and led by the Arbiter and the Chief soon pushed back, retaking the warehouse and defeating large groups of Brutes and even a [[Hunter]] pair before a showdown with a [[Chieftain]] outside. After more tight street to street fighting, they pushed the Covenant forces back to the rocky precipice where the AA gun lay. With no way for the Brutes to retreat and with Lord Hood's attack imminent, it was make or break time. UNSC forces pushed up the hill, fighting off another [[War Chieftain]], numerous Grunts and Jackals, the Chieftain's pack and several hastily planted Plasma Cannons. After defeating the forces guarding it they destroyed its rapidly overheating core and cooling system to cripple it and waited as [[Lord Hood|Lord Hood's]] attack commenced. | ||
===Activation of the Artifact=== | ===Activation of the Artifact=== | ||
| Line 118: | Line 118: | ||
==Sources== | ==Sources== | ||
<references/> | <references/> | ||
{{Human-Covenant War}} | {{Human-Covenant War}} | ||
Revision as of 20:31, October 31, 2009
Template:Battle The Battle of Voi was a ground and aerial engagement between the UNSC, UNSCDF/Covenant Separatist alliance and the Covenant Loyalists at Voi, Kenya, on Earth in late 2552. [1][2][3]
Introduction
The Battle of Voi was the last battle in the Battle of Earth: the Prophet of Truth's fleet of twenty-eight CCS-class Battlecruisers and two Assault Carriers led by Truth in the Forerunner Ship had committed all their forces to Africa, specifically the city of Voi, Africa and the surrounding regions. At Kenya, Brute-led Covenant infantry and vehicular detachments overwhelmed ground-based UNSC defending forces while Truth's cruisers deployed to Voi, glassing a savanna in pursuit of a presumed Forerunner artifact hidden underground there, presumed to be the Ark.
SPARTAN-117 led a UNSC counterattack to regain lost UNSC ground, retaking a jungle near Mount Kilimanjaro and securing the UNSC underground base code-named "Crow's Nest". Commander Miranda Keyes and Sergeant Major Avery J. Johnson then organized a small UNSC strike force led by SPARTAN-117 to attack the Covenant Loyalist-held Tsavo Highway and thus have a platform for a strike at Voi.
The UNSC Marine Corps was able to retake Tsavo Highway, and it served for a staging ground for a small Warthog force that would retake Voi. The UNSC forces stationed at Voi had already suffered severe casualties, with only pockets of Marines drawn in a scattered last defense against numerically superior and vehicular-supported Loyalist forces.
Fleet Admiral Sir Terrence Hood declared that it was imperative that SPARTAN-117's attack force retake Voi: Lord Hood's plan was that he would launch a low-level aerial strike on Truth's fleet above the Forerunner artifact and prevent him from activating the presumed Ark. However, a Loyalist anti-aircraft emplacement stationed at Voi prevented Hood's fleet from advancing; SPARTAN-117 was to retake Voi and destroy the anti-aircraft emplacement to allow Hood to attack Truth's fleet and prevent him from activating the Ark.
Battle
Beginning
When the Prophet of Truth smashed through Earth's space bound defenses and began to land his forces on Earth, eradication of the human race was a secondary objective, as a result, when they occupied Voi, pockets of Marine forces still existed within it. There had been counter attacks before the start of the battle, resulting in heavy casualties and the patches of Marine defenders were hard pressed.
Sierra-117 Arrives
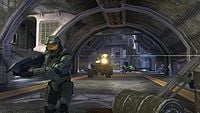
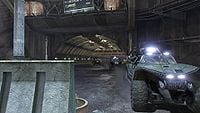
After his battle to fight his way up the Tsavo Highway, Master Chief not only secured the gate to Voi but also a landing zone for Cmd. Miranda Keyes to deploy her Marines. Mounting up with a group of Warthogs, he rode shotgun through the gates to the outside of the Traxus facility where previous Marine counter attacks had failed. Ten marines dismounted from the Transport Warthogs along with the Chief and then a few remained to operate their Warthog LRV to give them heavy support. The Traxus facility composed of several areas, each sealed off by a bulk head to allow and deny movement between the areas. After initially infiltrating the facility the first gate was opened, interrupting a File of Jackals and Grunts during one of Truth's speeches. They were taken by surprise and quickly gunned down. After quickly hammering through another file of grunts Chief opened the door to a long tunnel heading down the facility. A large group of Grunts, Jackals and a single Brute Captain guarded the other end of the corridor, along with their reserve Ghost RAVs. After the combined arms of the Chief, the Warthog and the Marines defeated the defenders, they finally broke through to their first objective.
The First Objective
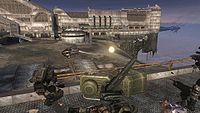
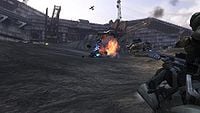
In the dried out dockyard outside, the first Type-52 Anti Aircraft Artillery lay, lending its weight to an aerial dog fight between Hornet Gunships and Banshees. It was guarded by a trio of Ghosts and numerous Type-52 Troop Carriers came in to cover the ground forces. The UNSC Forces punched upwards, securing a UNSC held dock office after initially being pushed back from it and used the LAU-65D/SGM-151 SAM turret at the base to beat back Covenant armed forces. After destroying their objective they pushed onwards, destroying the Wraith that defended the doorway back into the Traxus Facility.
Regroup
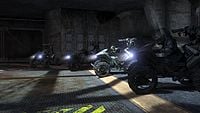
Inside, the UNSC Forces still held parts of the facility but were being pushed back by an assault being headed by a Brute Chieftain. In there a Marine fire team operating a AIE-486H Heavy Machine Gun held the Covenant at bay, at least for a time. A Marine squad headed by Spartan-117 pushed in and killed the Brute Chieftain and his bodyguards attempting to oust the Marine defenders. After opening the next bulkhead for the Warthog supporting them they were ambushed by a swarm of Drones that descended from a Phantom overhead. After forcing them into a retreat the Master Chief and the Warthog linked up with a Marine Anti Tank unit armed with M41 SSR MAV/AW that had requisitioned four M274 Mongoose ULATV to use as improvised fast attack light anti armor vehicles. A Marine offered Spartan-117 the controls of his Mongoose and he led them out into the next Dock.
The Second Objective
In the next dry dock a pair of AA Wraiths battered UNSC air forces, but only because this time they had a significant amount of defensive measures compared to the last area. A number of Ghosts and Chopper RAVs defended them against UNSC counter attack. The Marine mounted Anti Tank unit, the supporting Warthog LRV and a number of troops defending the actual dock with conventional arms and a series of SAM Turrets. Covenant forces were beaten back and their AA batteries destroyed but they refused to admit defeat, bringing in Ghost reinforcements on Phantoms. They were all defeated in turn, leaving the UNSC forces a quick breather and a chance to bring in more mounted Anti Tank units before the Covenant gave one last push to retake the dock. A Type-47 Ultra Heavy Assault Platform, better known as the Scarab, crawled over the roof tops and engaged the mounted forces in the dock. The Marines had a choice whether to disable its legs to cripple it and bring it low then board and destroy its power core or to buy time for the Master Chief so he could use one of the Dock Cranes to board it. In time, it was defeated and destroyed, giving the UNSC forces breathing space to make their push for the final objective.
Push to the AA Gun
Master Chief soon traveled up to the dock and was joined by another squad of reinforcements led by The Arbiter and moved through to another section of the Traxus facility, another section held by the Marines. It served as their local command center, their medical station and their ammo dump. It was heavily fortified with numerous defensive points armed with machine guns, but at the other end of the base, where it entered the warehouse, their defensive position was falling. Brute forces had pushed back through the warehouse, flanking their defensive position. UNSC Forces, now joined by Voi dock and factory workers and led by the Arbiter and the Chief soon pushed back, retaking the warehouse and defeating large groups of Brutes and even a Hunter pair before a showdown with a Chieftain outside. After more tight street to street fighting, they pushed the Covenant forces back to the rocky precipice where the AA gun lay. With no way for the Brutes to retreat and with Lord Hood's attack imminent, it was make or break time. UNSC forces pushed up the hill, fighting off another War Chieftain, numerous Grunts and Jackals, the Chieftain's pack and several hastily planted Plasma Cannons. After defeating the forces guarding it they destroyed its rapidly overheating core and cooling system to cripple it and waited as Lord Hood's attack commenced.
Activation of the Artifact
A task force of three frigates, including the UNSC Forward Unto Dawn, and Longsword fighters assaulted the Forerunner Dreadnought sitting in the center of the artifact. Multiple MAC rounds and fighter-launched ordnance proved ineffective. The Dreadnought suffered no apparent damage and it proceeded to activate the artifact. Covenant forces quickly departed through the newly created Portal. Another unexpected event soon manifested in the slipping in and crash landing of a damaged CCS-class Battlecruiser near Voi. Although it was initially thought to bear Brute reinforcements, it soon became apparent that it brought Flood instead.
The Floodgate opens
The victorious UNSC forces were now encountering unknown hostiles all over the Town and the splintered and weary forces were no match. The Flood had found their way to Earth and begun to infect and spread. Commander Keyes gave a single order, fight to the core of the ship and overload its reactors, destroying the ship and the town and any Flood along with it. Master Chief and the Arbiter headed back into the Town to outside the warehouse facility to see the true face of their enemy. A pair of retreating marine fire teams were ambushed by Combat Forms and Infection Forms, leaving their infection as inevitable. Spartan-117, the Arbiter and the survivors had to inevitably turn their guns on their former comrades. After pressing through the warehouse officers and then the warehouse they linked up with more survivors and pressed on. The route to the command center had been closed off so now they had to find another way around. Using Fusion Cores as improvised explosives and a M7057 Defoliant Projector as an ad hoc anti Flood weapon, they circumnavigated the bulkhead and entered the unusually empty command center. With a single, delirious survivor, the UNSC forces continued to push to the downed ship to meet their new allies.
The Fleet of Retribution
The Sangheili Fleet, the Fleet of Retribution, had followed the Flood infected ship from their blockade at Delta Halo to its arrival at Earth. They began to drop Elite forces to push towards the ship, seeking a prize that lay within it. It wasn't until they came back into the Traxus Facility that the Elites told the UNSC that they believed that Cortana, the AI formerly attached to the Spartan-IIs, the Pillar of Autumn and companion of Master Chief, was within the downed ship. The joint UNSC/Elite forces pressed on, still giving their all to reach the crash site. They eventually broke through, fighting past Flood Pure Forms. With the remaining forces giving cover to the Chief, he entered its Flood-formed carcass and retrieved Cortana. After the ground forces were evacuated safely the Elites began to glass the immediate area, removing any chance of further Flood infection, effectively ending the Battle of Voi.
Related Articles
Sources
