Cortana (level): Difference between revisions
From Halopedia, the Halo wiki
(→Part 2: Nor Hell A Fury: completed walkthrough) |
SpartanLeet (talk | contribs) |
||
| (338 intermediate revisions by more than 100 users not shown) | |||
| Line 1: | Line 1: | ||
{{ | {{Title|Cortana}} | ||
{{Status|Gameplay}} | |||
{{Disambig header|the Halo 3 campaign level|the human AI|Cortana}} | |||
{{Level infobox | {{Level infobox | ||
|prev=''[[The Covenant ( | |pagegamelabel=H3 | ||
|next=''[[Halo | |prev=''[[The Covenant (level)|The Covenant]]'' | ||
|next=''[[Halo (Halo 3 level)|Halo]]'' | |||
|game=''[[Halo 3]]'' | |game=''[[Halo 3]]'' | ||
|devname=<code>110_hc</code> | |||
|name='''''Cortana''''' | |name='''''Cortana''''' | ||
|image=[[File:H3 Cortana Loadscreen.png|300px]] | |||
[[ | |player=[[John-117]] | ||
|player=[[ | |date= [[2552#December|December 11, 2552]]<ref>[http://halo.xbox.com/en-us/intel/featured/video/herofortitude/bfe5038b-314a-4f17-a6be-f7613e0e3788 '''Halo Waypoint''', ''Hero-Fortitude'']</ref> | ||
|date= | |||
|place= [[High Charity]] | |place= [[High Charity]] | ||
| | |objective=Rescue [[Cortana]] and destroy [[High Charity]]. | ||
| | |partime=00:15:00 {{C|''Master Chief Collection''}} | ||
|parscore=17,000 {{C|''Master Chief Collection''}}<br/>15,000 {{C|''Halo 3''}} | |||
}} | }} | ||
{{Article quote|Cleanse [[High Charity]]. Save [[Cortana]].}} | |||
'''Cortana''' is the ninth [[campaign]] level of ''[[Halo 3]]''. It takes place in the [[Flood]] infested [[High Charity]]. The player's mission is to find [[Cortana]] in order to activate [[Installation 08]]. | |||
Upon completing it on the [[Normal]], [[Heroic]], or [[Legendary]] difficulties, the player will earn [[the Key|"The Key" achievement]] and 40 [[Gamerscore]]. Earning over 15,000 points in the campaign meta-game on this level will give the player the [[Orpheus]] achievement, and 10 Gamerscore. | |||
== | ==Summary== | ||
With the [[Prophet of Truth]] dead and the [[Covenant]] defeated at last, the Master Chief must now infiltrate the Flood-infested [[High Charity]] and rescue [[Cortana]], who possesses the [[Activation Index]] needed to activate [[Installation 08|the new Halo]]. The Chief flies into High Charity in a Banshee and journeys into the depths of the city, searching for his lost AI companion. During this mission, not only does the Chief encounter stiff resistance from the Flood, he is constantly plagued by disturbing visions of Cortana being tortured, as well as taunts and threats from the [[Gravemind]]. Despite this, he finally locates and retrieves Cortana, finally fulfilling the promise he made to her before departing for [[Earth]]. The Chief then overloads High Charity's backup reactor to destroy the city. The Arbiter unexpectedly shows up and aids the Chief in his escape. The pair find a crashed Pelican and use it to escape from High Charity just before the city is destroyed. | |||
==Transcript== | ==Transcript== | ||
[http://www.youtube.com/watch?v=oQtAv7HmhK0 '''{''Cutscene''}'''] | [http://www.youtube.com/watch?v=oQtAv7HmhK0 '''{''Cutscene''}'''] | ||
''The [[Master Chief]] flies a [[Banshee]] to High Charity. He finds an opening into the hive. (In co-op, [[Thel 'Vadam]] will follow the Chief and land his Banshee next to the [[Spartan]]'s | ''The [[John-117|Master Chief]] flies a [[Type-26 Banshee|Banshee]] to [[High Charity]]. He finds an opening into the hive. (In co-op, [[Thel 'Vadam]] will follow the Chief and land his Banshee next to the [[Spartan]]'s Banshee)'' | ||
*'''[[Johnson]] (COM)''': "Chief, I'll round up our survivors, fall back to the Dawn." | *'''[[Sergeant Major]] [[Avery Junior Johnson]] (COM)''': "Chief, I'll round up our survivors, fall back to the ''[[UNSC Forward Unto Dawn|Dawn]]''." | ||
'' | ''The Chief drops down onto a wide platform from a hole above ('Vadam follows him in co-op)'' | ||
*'''Johnson (COM)''': "Arbiter will do the same with the Elites." | *'''Johnson (COM)''': "Arbiter will do the same with the [[Sangheili|Elites]]." | ||
''(Co-op Change)'' '''Johnson (COM)''': "[[Rtas 'Vadum|The Shipmaster]] will do the same with the Elites." | |||
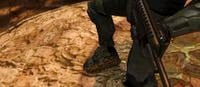
''The Chief shakes off organic material | [[File:H3-MC-Boot-FloodBiomass.jpg|thumb|300px|Flood organic materials stuck on the Chief's boot.]] | ||
''The Chief shakes off some organic material sticking to his boot.'' | |||
*'''Johnson (COM)''': "[[Cortana]]'s in there somewhere..." | *'''Johnson (COM)''': "[[Cortana]]'s in there somewhere..." | ||
'''{''Gameplay''}''' | |||
===Rampant=== | ===Rampant=== | ||
'''''Graverobber.''''' | '''''Graverobber.''''' | ||
'' | ''The Chief begins his journey through the hive, killing any Flood in his path.'' | ||
'' | *'''[[Gravemind]] ([[Character interludes|Gravemind Moment]])''': "Child of [[Forerunner|my enemy]], why have you come? I offer no forgiveness: a [[Forerunner-Precursor war|father's sins]] [[Reclaimer|pass]] to his [[Humanity|son]]." | ||
''The Chief drops down a [[porta]].'' | |||
''A | *'''[[Cortana]] ([[Character interludes|Cortana Moment]])''': ''(A strange mix of cries of agony and psychotic laughter)'' | ||
''The Chief passes through the area where the [[High Council Chamber]] once was. Exploring further, the Chief goes to an outside area where he finds a crashed, but intact [[D77H-TCI Pelican|Pelican]], possibly from the {{UNSCShip|In Amber Clad}}.'' | |||
*'''Cortana''' (coming | *'''Cortana''' ''(coming from a speaker within the crashed Pelican)'': "I ran, tried to stay hidden, but there was no escape! [[Gravemind|He]] cornered me, wrapped me tight... and brought me close." | ||
''As the Chief goes deeper into the hive.'' | ''As the Chief goes deeper into the hive.'' | ||
*'''Gravemind (Gravemind Moment)''': "Of course, you came for ''her''... | *'''Gravemind (Gravemind Moment)''': "Of course, you came for ''[[Cortana|her]]''... [[Prophet of Mercy|We exist together now. Two corpses, in one grave...]]" | ||
*'''Cortana''': ''(distant)'' "A collection of lies; that's all I am! ''Stolen'' [[artificial intelligence|thoughts and memories]]!" | |||
*''' | *'''Gravemind (Gravemind Moment)''': ''(intrigued)'' "And yet, perhaps a part of her...remains?" ''(maniacal laughter, fades into Cortana's voice)'' | ||
*''' | *'''Cortana''': ''(deranged laughter)'' | ||
''In the large room where the [[Halo 3 skulls|Tilt skull]] is located, a [[Terminal (Halo 3)|Terminal]] can be activated, but does not count towards the Marathon Man achievement. If activated, it displays another Cortana Moment.'' | |||
'' | *'''Cortana (Terminal)''': "[[SPARTAN-II program|It]] was the [[Quarter|coin]]'s [[Halo: The Fall of Reach|fault]]! I wanted to make you strong, keep you safe...''(drop in tone)'' I'm sorry, I can't..." | ||
''Cortana begins to show signs of [[rampancy]].'' | |||
''( | *'''Cortana''': ''(casually and kindly, as though nothing is wrong and mimicking Dr. [[Catherine Halsey]])'' "May I speak with you, please?... What's your name? It's very nice to meet you!... You like games? So do I." | ||
'' | ''The Chief fights through more narrow, Flood-contaminated tunnels.'' | ||
*'''Cortana''': ''( | *'''Cortana''': ''(upset and frightened)'' "I'm just my [[Catherine Halsey|mother's]] [[Cognitive Impression Modeling|shadow]]... don't look at me, don't listen! I'm not who I used to be..." | ||
''( | ''As the Chief nears a large room (with the route to the reactor room at the top):'' | ||
*''' | *'''Gravemind (Gravemind Moment)''': ''(angrily)'' "Time has taught me ''patience''! But basking in new freedom, I will know ''all that I possess''!" | ||
'' | ''The Chief continues to the reactor room.'' | ||
*''' | *'''Cortana (Cortana Moment)''': ''(panicking, her voice slightly distorted)'' "I have walked the edge of the abyss. I have seen your future, and I have learned!" | ||
'' | ''The image of Cortana suddenly turns a tinge of green. She clutches her head and writhes in pain.'' | ||
*''' | *'''Gravemind (Gravemind Moment)''': ''(angrily)'' "''Submit''! ''End her torment and my own''!" | ||
''The | ''The Chief heads through a tunnel littered with bones and skulls, and enters the reactor room. He sees one of the four reactor pylons malfunction and overload. The Chief fights his way through the reactor room, and exits through a door on the other side. He enters yet another hallway.'' | ||
*''' | *'''Cortana (Cortana Moment)''': ''(panicking, voice slightly distorted)'' "There will be no more sadness, no more anger, no more envy!" | ||
'' | *'''Gravemind (Gravemind Moment)''': ''(enraged)'' "You ''will'' show me [[Activation Index|what she hides]]...or I shall feast upon your ''bones''!" | ||
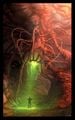
''The Chief | [[File:Cortanam2.jpg|thumb|300px|Cortana turns green.]] | ||
''The Chief begins to reach the end of the hallway.'' | |||
*'''Cortana (Cortana Moment)''': ''( | *'''Cortana (Cortana Moment)''': ''(speaking in a calm, distorted, monotone voice as though brainwashed. Her image is green.)'' "This is [[United Nations Space Command|UNSC]] [[AI serial number|AI Serial Number]] CTN 0452-9. I am a monument to all your sins." | ||
''The Chief rushes to the end of the hallway and enters the former [[Sanctum of the Hierarchs]]. There he finds Cortana lying prone in a stasis field in a center podium. He bashes the shield until it finally fails. Cut to black.'' | |||
'' | [http://www.youtube.com/watch?v=zEnWjrjJpDc&feature=related '''{''Cutscene''}'''] | ||
*'''Cortana | *'''Cortana''': ''(weakly)'' "You ''found'' me." | ||
''The Chief | ''The Master Chief leans closer towards the panel [[Cortana]]'s on. The AI lies pitifully on the podium, pain and shame on her face. The animated code that usually flows across her skin is absent.'' | ||
*'''Cortana''': ''(weakly)'' "But so much of me is wrong… out of place. You might be too late…" | |||
''The Chief kneels right next to Cortana.'' | |||
''Master Chief | *'''[[Master Chief Petty Officer]] [[John-117]]''': "You know me. [[High Charity (level)|When I]] [[Fall of High Charity|make a promise]]…" | ||
''Cortana looks up at the Chief. She starts to glow.'' | |||
*''' | *'''Cortana''': "You… keep it. ''(she raises her head, and sounds amused)'' I ''do'' know how to pick 'em." | ||
'' | *'''John-117''': "Lucky me. Do you still have it?" | ||
[[File:H3-Index and Cortana.jpg|thumb|300px|Cortana shows the index to John-117.]] | |||
''Cortana slowly gets up. As she does, she begins to glow more brightly and the lines of code and equations begin to fall over her surface again. She opens her palm and a hologram of the Index appears above it.'' | |||
*''' | *'''Cortana''': "The [[Activation Index]] from the [[Installation 04|first Halo ring]]. A little souvenir I [[Battle for the Control Room|hung]] [[Two Betrayals|onto]]… just in case. ''(she looks around)'' Got an escape plan?" | ||
'' | ''The Chief gets back on his feet.'' | ||
*''' | *'''John-117''': "Thought I'd try shooting my way out - mix things up a little." | ||
''The Chief takes Cortana's old [[data crystal chip|data chip]] out of his helmet and holds it in front of her. Cortana touches its core and uploads herself into the chip. The Chief inserts Cortana back, at long last, into his armor.'' | |||
'' | *'''Cortana''': ''(jokingly exasperated)'' "Just [[The Pillar of Autumn (Halo: Combat Evolved level)|keep your head down...]] [[Battle over Installation 04|There's two of us in here now, remember]]." | ||
'''{''Gameplay''}''' | |||
===Nor Hell A | ===Nor Hell A Fury…=== | ||
'''''Shoot your way out.''''' | '''''Shoot your way out.''''' | ||
*'''Cortana''': ''(weakly)'' "Chief, get me out of this place. I… I don't want to stay." | |||
*'''Cortana''':''(weakly)'' "Chief, get me out of this place. | |||
''The Chief heads back | ''The Chief heads back out into the hallway.'' | ||
*'''Gravemind (Gravemind Moment)''': ''(roars)'' "Now, at last, I see! Her secret is ''revealed!''" | *'''Gravemind (Gravemind Moment)''': ''(roars)'' "Now, at last, I see! Her secret is ''revealed!''" | ||
''The Master Chief | ''The Master Chief returns to the reactor room. Flood forces, now aware that Cortana is in possession of the Index, start attacking. The Chief stands his ground and defeats them.'' | ||
*'''Cortana''':''(weakly)'' " | *'''Cortana''': ''(weakly)'' "We need to buy some time. This reactor... start a chain reaction. ''Destroy'' [[High Charity]]." | ||
''The Flood | ''The Chief heads to the center of the reactor room and accesses the main controls, exposing the three remaining reactor pylons. A new wave of Flood swarms the reactor room, attempting to stop the Chief. However, he successfully destroys all three reactor pylons.'' | ||
*'''Gravemind''': ''( | *'''Gravemind''': ''(roars in pain)'' | ||
''Alarms blare. Explosions erupt throughout the reactor room.'' | |||
*'''Cortana''': "You hurt it, Chief. But not for long. We need to get to [[Installation 08|Halo]] - destroy the [[Flood]] once and for all." | |||
*'''Cortana''': " | |||
'' | ''The Chief leaves the reactor room and races through High Charity, which is now rapidly falling apart.'' | ||
''If the Chief takes too long:'' | |||
'''Cortana''': " | *'''Cortana''': "An explosion just made us an exit! I'll mark it on your HUD, Chief, go!" | ||
''When the Chief reaches the halfway point to escaping High Charity:'' | |||
'' | *'''Cortana''': "Analyzing the route ahead… I have it mostly figured out. Just keep going. I'll update your [[heads-up display|HUD]] as quickly as I can." | ||
'' | ''The Chief reaches a blocked hallway.'' | ||
'' | *'''Cortana''': "Corridors ahead have all collapsed. I'll find another way, Chief; be careful." | ||
''Or'' | |||
*'''Cortana''': "Corridors beyond this point have collapsed. I'm looking for an alternate. Careful." | |||
'' | ''If the Chief still can't find his way out:'' | ||
*'''Cortana''': "There, Chief, into the maintenance tunnel." | |||
The | ''The Chief finds his way back when…'' | ||
*'''Cortana''': "I've got a friendly contact! Who would be ''crazy'' enough to come in here?" | |||
'' | ''The Chief and Cortana find the Arbiter battling Flood with a [[M7057 flamethrower|flamethrower]] (occasionally, Thel will use his energy sword instead).'' | ||
*'''Cortana''': ''(amused)'' "[[Gravemind (level)|Wait]], you [[Thel 'Vadam|two]] [[Arrival|made]] [[Sierra 117|nice]]? [[Battle of Kenya|What ''else'']] [[Battle of Installation 00|did you do]] [[Human Weakness|while I was gone]]…?" | |||
[[File:H3 High Charity Blowing up.jpg|thumb|300px|''High Charity'' is destroyed.]] | |||
''The Chief and 'Vadam clear the immediate area of remaining Flood, then head outside.'' | |||
[http://www.youtube.com/watch?v=q0i93cjEEyM '''{''Cutscene''}'''] | |||
The | ''The Chief and the Arbiter board the Pelican the Chief discovered earlier. The Chief uploads Cortana into the Pelican's holotank and starts up the engines. One of the [[Gravemind]]'s tentacles reaches for the dropship, but the heat from the thrusters forces it to retreat. The Pelican takes off, smoke pouring lightly from the left engine. The tentacle comes back and tries to ensnare the dropship, but the Pelican pulls free of its grip. The Pelican barely escapes as [[High Charity]]'s reactor goes critical, consuming the planetoid in a massive explosion. The Pelican makes its way to the new Halo ring.'' | ||
==Achievements== | |||
The following [[achievement]]s can be unlocked on this mission on the [[Xbox 360]] edition of ''Halo 3''. | |||
{|class="wikitable" | |||
|-align="center" | |||
!Icon | |||
!Name | |||
!Description | |||
!{{Gamerscore|Gamerscore}} | |||
|-align="center" | |||
|[[File:H3 Achievement The Key.png]] | |||
|[[The Key]] | |||
|Finish the eighth mission of the [[Campaign]] on [[Normal]], [[Heroic]], or [[Legendary]]. | |||
|{{Gamerscore|40}} | |||
|-align="center" | |||
|[[File:H3 Achievement Tilt.png]] | |||
|[[Tilt (Achievement)|Tilt]] | |||
|Find and claim this skull. | |||
|{{Gamerscore|10}} | |||
|} | |||
==Production notes== | |||
{{Main|highcharity}} | |||
{{Quote|I took the Cortana mission, completely gutted it and rebuilt it in about three weeks—that mission where Gravemind is talking to you and Cortana is in distress. We didn’t have a lot of resources for that. It was a lot cooler on paper. And it had the transforming Flood, but I don’t think we did great there. It’s a kind of half-baked mission that needed to be there for the story, so we sort of threw it together, but I would’ve preferred not to do that.|[[Paul Bertone]] discussing his work on Cortana.{{Ref/Site|Id=VICE|URL=https://www.vice.com/en/article/xwqjg3/the-complete-untold-history-of-halo-an-oral-history|Site=VICE|Page=The Complete, Untold History of Halo: An Oral History|D=10|M=10|Y=2021}}}} | |||
== | During the [[Development of Halo 3|development]] of ''Halo 3'', ''Cortana'' was originally intended to be a very different mission, with a prominent role for the [[Mausoleum of the Arbiter]]. This version was scrapped and mission increased in scope by around 75% - due to issues with development, the geometry cut from [[Cut Halo 3 levels#Flood Ship|Flood Ship]] to Cortana.{{Ref/Site|Id=GDC1|URL=https://www.bungie.net/en/aboutus#page=publications&publication=12662|Site=Bungie Publications|Page=Halo 3 Flood Alien Level Autopsy|D=10|M=10|Y=2021}}{{Ref/Site|Id=GDC2|URL=http://halo.bungie.net/images/Inside/publications/presentations/Bungie_EnvDesign_GDC.pptx|Site=Bungie.net|Page=Halo 3 Flood Alien Level Autopsy|Detail=Original presentation download link|D=18|M=1|Y=2021}}{{Ref/Twitter|dmiller360|533780549807398912|Dan Miller|Quote=the level order was the same,just the geometry was different. Originally floodgate consisted of both floodgate AND Cortana|D=10|M=10|Y=2021}}{{Ref/Twitter|dmiller360|1113434705133625344|Dan Miller|Quote=In floodgate you went into the covenant cruiser at the end, correct? Well that was the Cortana geometry. The Floodgate mission was much, much longer. There was original High Charity geometry made for the Cortana mission that was cut due to lack of time.|D=10|M=10|Y=2021}}{{Ref/Twitter|dmiller360|533780831513624576|Dan Miller|Quote=the old original geometry for cortana was cut- that was high charity geometry.|D=10|M=10|Y=2021}} | ||
<gallery> | |||
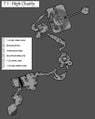
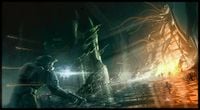
File:H3 Cortana DesignDoc 1.jpg|An early design draft for the initial layout of Cortana. | |||
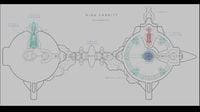
File:H3 Cortana DesignDoc 2.jpg|A later design document for Cortana, more resembling the final game. | |||
</gallery> | |||
==Trivia== | |||
===Glitches=== | |||
{{Main|Glitches}} | |||
*During the level, the player will find dead Elites wearing [[Assault Harness|Assault Armor]]. One of them is glitching by doing their death position in mid-air though; it looks like his foot seems to be stuck in Flood biomass. The corpse will fall if the player melees or uses explosives against it. | |||
== | |||
* | |||
The | ===Easter eggs=== | ||
{{Main|Easter eggs}} | |||
*The [[Halo 3 skulls#Tilt|Tilt]] Skull can be found on this level. | |||
*After obtaining [[Cortana]], there is a skull on a ledge-like structure (it's purple and is kind of bulbous at the end) overhead after the player exits the hallway that leads to Cortana. To get it, one needs to get the Deployable Cover, deploy it on the floor directly in front of the edge of the roof, jump on the deployed cover and crouch jump onto the roof. One may also partner jump or grenade jump with a plasma grenade. Once on top of the roof, locate the skull towards the apex of the angled roof and get the skull. Please note that this skull has no affiliation with the "[[Halo 3 skulls|13 required skulls]]" list and, if carried for the rest of the level, will start Master Chief with a Spartan laser on the next level. This may only work with certain skull combination's and/or other factors in gameplay. However, this skull is unavailable in the ''Halo: The Master Chief Collection'' edition of ''Halo 3''. An unknown glitch causes the skull to spawn in incorrectly, which then rolls off the ledge and into the abyss below the reactor room. Whether this will be fixed in a future patch is as-of-yet unknown. Season 8 update seems to have fixed the skull from dropping down and can now be used again as intended in the original Halo 3. | |||
===References=== | |||
*The section of the level after saving Cortana is called 'Nor Hell A Fury...', referencing the poem by William Congreve 'The Mourning Bride'. The entire line is 'Heaven has no rage like love to hatred turned, Nor hell a fury like a woman scorned', possibly referencing Cortana, who, after months of torment, now has the ability to light the newly constructed Halo ring and destroy the Ark as well as the Flood. | |||
*One of Cortana's lines, "There will be no more sadness. No more anger. No more envy," appears to reference [[Marathon]]'s stages of Rampancy; Melancholia, Anger and Jealousy, respectively. | |||
*The line "It's the coin's fault," is a reference to a factor that brought [[John-117]] into the Spartan program. He identified the side of a 20th-century quarter owned by [[Catherine Halsey|Dr. Halsey]] before it fell to the ground in ''[[Halo: The Fall of Reach]]''. | |||
*The Gravemind uses a line from ''Halo 2'': "We exist together now. Two corpses in one grave." This line is referring to Cortana, and referred to the Prophet of Mercy in ''Halo 2''. This line was said in the level ''[[High Charity (level)|High Charity]]''. | |||
*The achievement for gaining over 15,000 points on this level, entitled Orpheus, is a reference to the ancient Greek mythology story in which the Greek hero Orpheus ventures into the depths of hell to retrieve the one he loves. This is easily compared to the Chief's mission: venture into hell, that is represented as High Charity, to rescue Cortana. | |||
*The line "Just keep your head down... There's two of us in here, remember." is a reference to the ''Halo: Combat Evolved'' level ''[[The Pillar of Autumn (Halo: Combat Evolved level)|The Pillar of Autumn]]''. When the player's shield is completely depleted, Cortana would say the exact line, albeit with a more urgent tone. | |||
===Miscellaneous=== | |||
*Due to Flood form action in the reactor's room, one of the four reactors explodes when the player first enters the room. This led to the player's mission to only destroy three reactors instead of four. | |||
*The [[Mausoleum of the Arbiter]] can be seen in the distance when standing near the crashed Pelican. This and the [[San'Shyuum|Prophets]]' Inner Sanctum are essentially the only recognizable features of High Charity in ''Halo 2'' that can be seen in ''Halo 3''. One can see in the Bungie feature "Flood Autopsy", that they had originally planned to have the Flood reanimate all Arbiter corpses in the room, creating an Arbiter army for the player to fight. | |||
*The room where [[Cortana]] is located is a remake of the room from the level ''[[High Charity (level)|High Charity]]'' from ''Halo 2''. This room is located before the final gravity lift where Cortana says "apparently these are the Prophet Hierarch's private quarters, their inner sanctum". In the "inner sanctum" there are three doors, two located opposite one another, with a third, opposite a large view screen. In the level ''High Charity'', the Chief enters through the third door, and exits through the door on his right; in the level ''Cortana'' from ''Halo 3'', he enters through the door that was locked in ''Halo 2'' (opposite the door that leads to the final gravity lift). The graphic design of the room and the rest of High Charity's interior has been remodeled in ''Halo 3''. It resembles the corridors of the {{Pattern|Ket|battlecruiser}} ''[[Truth and Reconciliation]]'' from ''Halo: Combat Evolved''. | |||
*There is an area with a dead ODST (not the crashed Pelican). It is unknown how he made it so far from the Pelican or if he was from the Frigate {{UNSCShip|In Amber Clad}} before the Flood attacked [[High Charity]]. There is also a Flamethrower in this area which hints to a final stand since he's in a pipe area with one opening. | |||
*Most of the weapons from the [[The Covenant (level)|previous level]] are carried on to this level unless the player makes a fresh start, in which case the loadout will be an [[MA5C assault rifle]] and an [[M90 shotgun]]. | |||
**In the opening cutscene, the Master Chief is shown holding the shotgun no matter what weapons the player starts with. However, if the player starts with the default loadout, they are holding the assault rifle instead of the shotgun with the shotgun as their backup weapon. | |||
**If the previous level the player brought Fuel Rod Gun or Gravity Hammer, the loadout would reset to the Assault Rifle and Shotgun. | |||
*As seen later, primarily in ''[[Halo Wars 2: Awakening the Nightmare]]'', [[High Charity]] was not completely destroyed when the player detonates its reactor. This shell is eventually covered by a [[containment shield]] under the command of [[000 Tragic Solitude]].{{Ref/Game|HW2|Detail=''[[Phoenix Logs]]'' - ''Idle Hands II''}} This is later breached by [[Voridus]] and the [[Banished]] in ''Awakening the Nightmare'', [[Outbreak on Installation 00|releasing the Flood that had survived the destruction of High Charity]] and the firing of [[Installation 08]]. | |||
*After [[Thel 'Vadam]] joins you in battle against the [[Flood]], you can find his [[Type-26 Banshee|Banshee]] outside by the [[D77H-TCI Pelican|Pelican]]. You can jump up to his Banshee and even destroy it, but it is impossible to enter the vehicle. | |||
==Gallery== | |||
===Concept art=== | |||
<gallery> | |||
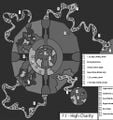
File:H3_HighCharity_Schematic_Concept.jpg|A concept art schematic for the level. | |||
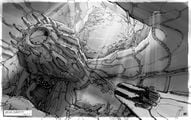
File:MausoleumConcept.jpg|Early concepy art of John-117 looking at Mausoleum of the Arbiter. | |||
File:H3 Cortana Concept 1.jpg|Concept art of the environment in the level. | |||
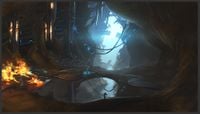
File:H3 Cortana Reactor Concept.jpg|Concept art of the reactor room. | |||
File:H3 Cortana Concept 2.jpg|Concept art of the Master Chief's raid within ''High Charity''. | |||
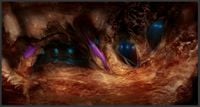
File:H3_Cortana_Concept_3.jpg|Concept art of the Flood-infested ''High Charity''. | |||
File:H3_Cortana_Concept_4.jpg|Concept art of the Flood-infested ''High Charity''. | |||
File:H3_Cortana_Concept_5.jpg|Concept art of the Flood-infested ''High Charity''. | |||
File:H3_Cortana_Concept_6.jpg|Concept art of the Flood-infested ''High Charity''. | |||
File:H3_Cortana_Concept_7.jpg|Concept art of the Flood-infested ''High Charity''. | |||
File:H3_Cortana_Concept_8.jpg|Concept art of the Flood-infested ''High Charity''. | |||
File:H3 Gravemind Concept.jpg|Concept art of an encounter between the Chief and the Gravemind. | |||
</gallery> | |||
===Storyboards=== | |||
<gallery> | |||
File:H3 Cortana Storyboard 1.jpg | |||
File:H3 Cortana Storyboard 2.jpg | |||
File:H3 Cortana Storyboard 3.jpg | |||
File:H3 Cortana Storyboard 4.jpg | |||
File:H3 Cortana Storyboard 5.jpg | |||
File:H3 Cortana Storyboard 6.jpg | |||
File:H3 Cortana Storyboard 7.jpg | |||
File:H3 Cortana Storyboard 8.jpg | |||
File:H3 Cortana Storyboard 9.jpg | |||
File:H3 Cortana Storyboard 10.jpg | |||
</gallery> | |||
=== | ===Screenshots=== | ||
<gallery> | |||
File:H3 Menu 09 Cortana.png|Preview of the level in ''Halo 3'' menu. | |||
File:H3-MC-Boot-FloodBiomass.jpg|John-117 finds Flood biomass stuck on his boot upon arrival. | |||
File:H3-JohnFlamethrower.jpg|John-117 uses a flamethrower against a Flood combat form. | |||
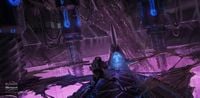
File:H3-Cortana-StasisField.jpg|thumb|300px|The shielded podium in which Cortana is trapped. | |||
File:H3 Arbiter Flamethrower.jpg|Thel 'Vadam, wielding a flamethrower, links up with John-117. | |||
File:H3-117 and Cortana (Cortana level).jpg|The Chief and Cortana ready to escape on a Pelican. | |||
</gallery> | |||
== | ==Sources== | ||
{{Ref/Sources}} | |||
{{succession box | {{succession box | ||
|before = ''[[The Covenant ( | |before = ''[[The Covenant (level)|The Covenant]]'' <br /> | ||
|title = | |title = ''Halo 3'' Campaign Missions | ||
|years = '''''Cortana''''' | |years = '''''Cortana''''' | ||
|after = ''[[Halo | |after = ''[[Halo (Halo 3 level)|Halo]]'' | ||
}} | }} | ||
{{ | {{Levels|H3}} | ||
[[Category:Halo 3 | [[Category:Halo 3 campaign]] | ||
Latest revision as of 06:19, March 10, 2024
|
Prev: |
|
|
Next: |
|
| Cortana | |
|---|---|

| |
|
Game: |
|
|
Map file name (?): |
|
|
Player: |
|
|
Date: |
|
|
Location: |
|
|
Objective(s): |
Rescue Cortana and destroy High Charity. |
|
Par Time: |
00:15:00 (Master Chief Collection) |
|
Par Score: |
17,000 (Master Chief Collection) |
 |
Halopedia has a walkthrough guide for this level; see Cortana (level)/Walkthrough. |
| “ | Cleanse High Charity. Save Cortana. | ” |
Cortana is the ninth campaign level of Halo 3. It takes place in the Flood infested High Charity. The player's mission is to find Cortana in order to activate Installation 08.
Upon completing it on the Normal, Heroic, or Legendary difficulties, the player will earn "The Key" achievement and 40 Gamerscore. Earning over 15,000 points in the campaign meta-game on this level will give the player the Orpheus achievement, and 10 Gamerscore.
Summary[edit]
With the Prophet of Truth dead and the Covenant defeated at last, the Master Chief must now infiltrate the Flood-infested High Charity and rescue Cortana, who possesses the Activation Index needed to activate the new Halo. The Chief flies into High Charity in a Banshee and journeys into the depths of the city, searching for his lost AI companion. During this mission, not only does the Chief encounter stiff resistance from the Flood, he is constantly plagued by disturbing visions of Cortana being tortured, as well as taunts and threats from the Gravemind. Despite this, he finally locates and retrieves Cortana, finally fulfilling the promise he made to her before departing for Earth. The Chief then overloads High Charity's backup reactor to destroy the city. The Arbiter unexpectedly shows up and aids the Chief in his escape. The pair find a crashed Pelican and use it to escape from High Charity just before the city is destroyed.
Transcript[edit]
The Master Chief flies a Banshee to High Charity. He finds an opening into the hive. (In co-op, Thel 'Vadam will follow the Chief and land his Banshee next to the Spartan's Banshee)
- Sergeant Major Avery Junior Johnson (COM): "Chief, I'll round up our survivors, fall back to the Dawn."
The Chief drops down onto a wide platform from a hole above ('Vadam follows him in co-op)
- Johnson (COM): "Arbiter will do the same with the Elites."
(Co-op Change) Johnson (COM): "The Shipmaster will do the same with the Elites."

The Chief shakes off some organic material sticking to his boot.
- Johnson (COM): "Cortana's in there somewhere..."
{Gameplay}
Rampant[edit]
Graverobber.
The Chief begins his journey through the hive, killing any Flood in his path.
- Gravemind (Gravemind Moment): "Child of my enemy, why have you come? I offer no forgiveness: a father's sins pass to his son."
The Chief drops down a porta.
- Cortana (Cortana Moment): (A strange mix of cries of agony and psychotic laughter)
The Chief passes through the area where the High Council Chamber once was. Exploring further, the Chief goes to an outside area where he finds a crashed, but intact Pelican, possibly from the UNSC In Amber Clad.
- Cortana (coming from a speaker within the crashed Pelican): "I ran, tried to stay hidden, but there was no escape! He cornered me, wrapped me tight... and brought me close."
As the Chief goes deeper into the hive.
- Gravemind (Gravemind Moment): "Of course, you came for her... We exist together now. Two corpses, in one grave..."
- Cortana: (distant) "A collection of lies; that's all I am! Stolen thoughts and memories!"
- Gravemind (Gravemind Moment): (intrigued) "And yet, perhaps a part of her...remains?" (maniacal laughter, fades into Cortana's voice)
- Cortana: (deranged laughter)
In the large room where the Tilt skull is located, a Terminal can be activated, but does not count towards the Marathon Man achievement. If activated, it displays another Cortana Moment.
- Cortana (Terminal): "It was the coin's fault! I wanted to make you strong, keep you safe...(drop in tone) I'm sorry, I can't..."
Cortana begins to show signs of rampancy.
- Cortana: (casually and kindly, as though nothing is wrong and mimicking Dr. Catherine Halsey) "May I speak with you, please?... What's your name? It's very nice to meet you!... You like games? So do I."
The Chief fights through more narrow, Flood-contaminated tunnels.
- Cortana: (upset and frightened) "I'm just my mother's shadow... don't look at me, don't listen! I'm not who I used to be..."
As the Chief nears a large room (with the route to the reactor room at the top):
- Gravemind (Gravemind Moment): (angrily) "Time has taught me patience! But basking in new freedom, I will know all that I possess!"
The Chief continues to the reactor room.
- Cortana (Cortana Moment): (panicking, her voice slightly distorted) "I have walked the edge of the abyss. I have seen your future, and I have learned!"
The image of Cortana suddenly turns a tinge of green. She clutches her head and writhes in pain.
- Gravemind (Gravemind Moment): (angrily) "Submit! End her torment and my own!"
The Chief heads through a tunnel littered with bones and skulls, and enters the reactor room. He sees one of the four reactor pylons malfunction and overload. The Chief fights his way through the reactor room, and exits through a door on the other side. He enters yet another hallway.
- Cortana (Cortana Moment): (panicking, voice slightly distorted) "There will be no more sadness, no more anger, no more envy!"
- Gravemind (Gravemind Moment): (enraged) "You will show me what she hides...or I shall feast upon your bones!"

The Chief begins to reach the end of the hallway.
- Cortana (Cortana Moment): (speaking in a calm, distorted, monotone voice as though brainwashed. Her image is green.) "This is UNSC AI Serial Number CTN 0452-9. I am a monument to all your sins."
The Chief rushes to the end of the hallway and enters the former Sanctum of the Hierarchs. There he finds Cortana lying prone in a stasis field in a center podium. He bashes the shield until it finally fails. Cut to black.
- Cortana: (weakly) "You found me."
The Master Chief leans closer towards the panel Cortana's on. The AI lies pitifully on the podium, pain and shame on her face. The animated code that usually flows across her skin is absent.
- Cortana: (weakly) "But so much of me is wrong… out of place. You might be too late…"
The Chief kneels right next to Cortana.
- Master Chief Petty Officer John-117: "You know me. When I make a promise…"
Cortana looks up at the Chief. She starts to glow.
- Cortana: "You… keep it. (she raises her head, and sounds amused) I do know how to pick 'em."
- John-117: "Lucky me. Do you still have it?"

Cortana slowly gets up. As she does, she begins to glow more brightly and the lines of code and equations begin to fall over her surface again. She opens her palm and a hologram of the Index appears above it.
- Cortana: "The Activation Index from the first Halo ring. A little souvenir I hung onto… just in case. (she looks around) Got an escape plan?"
The Chief gets back on his feet.
- John-117: "Thought I'd try shooting my way out - mix things up a little."
The Chief takes Cortana's old data chip out of his helmet and holds it in front of her. Cortana touches its core and uploads herself into the chip. The Chief inserts Cortana back, at long last, into his armor.
- Cortana: (jokingly exasperated) "Just keep your head down... There's two of us in here now, remember."
{Gameplay}
Nor Hell A Fury…[edit]
Shoot your way out.
- Cortana: (weakly) "Chief, get me out of this place. I… I don't want to stay."
The Chief heads back out into the hallway.
- Gravemind (Gravemind Moment): (roars) "Now, at last, I see! Her secret is revealed!"
The Master Chief returns to the reactor room. Flood forces, now aware that Cortana is in possession of the Index, start attacking. The Chief stands his ground and defeats them.
- Cortana: (weakly) "We need to buy some time. This reactor... start a chain reaction. Destroy High Charity."
The Chief heads to the center of the reactor room and accesses the main controls, exposing the three remaining reactor pylons. A new wave of Flood swarms the reactor room, attempting to stop the Chief. However, he successfully destroys all three reactor pylons.
- Gravemind: (roars in pain)
Alarms blare. Explosions erupt throughout the reactor room.
- Cortana: "You hurt it, Chief. But not for long. We need to get to Halo - destroy the Flood once and for all."
The Chief leaves the reactor room and races through High Charity, which is now rapidly falling apart.
If the Chief takes too long:
- Cortana: "An explosion just made us an exit! I'll mark it on your HUD, Chief, go!"
When the Chief reaches the halfway point to escaping High Charity:
- Cortana: "Analyzing the route ahead… I have it mostly figured out. Just keep going. I'll update your HUD as quickly as I can."
The Chief reaches a blocked hallway.
- Cortana: "Corridors ahead have all collapsed. I'll find another way, Chief; be careful."
Or
- Cortana: "Corridors beyond this point have collapsed. I'm looking for an alternate. Careful."
If the Chief still can't find his way out:
- Cortana: "There, Chief, into the maintenance tunnel."
The Chief finds his way back when…
- Cortana: "I've got a friendly contact! Who would be crazy enough to come in here?"
The Chief and Cortana find the Arbiter battling Flood with a flamethrower (occasionally, Thel will use his energy sword instead).
- Cortana: (amused) "Wait, you two made nice? What else did you do while I was gone…?"

The Chief and 'Vadam clear the immediate area of remaining Flood, then head outside.
The Chief and the Arbiter board the Pelican the Chief discovered earlier. The Chief uploads Cortana into the Pelican's holotank and starts up the engines. One of the Gravemind's tentacles reaches for the dropship, but the heat from the thrusters forces it to retreat. The Pelican takes off, smoke pouring lightly from the left engine. The tentacle comes back and tries to ensnare the dropship, but the Pelican pulls free of its grip. The Pelican barely escapes as High Charity's reactor goes critical, consuming the planetoid in a massive explosion. The Pelican makes its way to the new Halo ring.
Achievements[edit]
The following achievements can be unlocked on this mission on the Xbox 360 edition of Halo 3.
| Icon | Name | Description | Gamerscore |
|---|---|---|---|

|
The Key | Finish the eighth mission of the Campaign on Normal, Heroic, or Legendary. | 40 |

|
Tilt | Find and claim this skull. | 10 |
Production notes[edit]
- Main article: highcharity
- "I took the Cortana mission, completely gutted it and rebuilt it in about three weeks—that mission where Gravemind is talking to you and Cortana is in distress. We didn’t have a lot of resources for that. It was a lot cooler on paper. And it had the transforming Flood, but I don’t think we did great there. It’s a kind of half-baked mission that needed to be there for the story, so we sort of threw it together, but I would’ve preferred not to do that."
- — Paul Bertone discussing his work on Cortana.[2]
During the development of Halo 3, Cortana was originally intended to be a very different mission, with a prominent role for the Mausoleum of the Arbiter. This version was scrapped and mission increased in scope by around 75% - due to issues with development, the geometry cut from Flood Ship to Cortana.[3][4][5][6][7]
An early design draft for the initial layout of Cortana.
A later design document for Cortana, more resembling the final game.


Trivia[edit]
Glitches[edit]
- Main article: Glitches
- During the level, the player will find dead Elites wearing Assault Armor. One of them is glitching by doing their death position in mid-air though; it looks like his foot seems to be stuck in Flood biomass. The corpse will fall if the player melees or uses explosives against it.
Easter eggs[edit]
- Main article: Easter eggs
- The Tilt Skull can be found on this level.
- After obtaining Cortana, there is a skull on a ledge-like structure (it's purple and is kind of bulbous at the end) overhead after the player exits the hallway that leads to Cortana. To get it, one needs to get the Deployable Cover, deploy it on the floor directly in front of the edge of the roof, jump on the deployed cover and crouch jump onto the roof. One may also partner jump or grenade jump with a plasma grenade. Once on top of the roof, locate the skull towards the apex of the angled roof and get the skull. Please note that this skull has no affiliation with the "13 required skulls" list and, if carried for the rest of the level, will start Master Chief with a Spartan laser on the next level. This may only work with certain skull combination's and/or other factors in gameplay. However, this skull is unavailable in the Halo: The Master Chief Collection edition of Halo 3. An unknown glitch causes the skull to spawn in incorrectly, which then rolls off the ledge and into the abyss below the reactor room. Whether this will be fixed in a future patch is as-of-yet unknown. Season 8 update seems to have fixed the skull from dropping down and can now be used again as intended in the original Halo 3.
References[edit]
- The section of the level after saving Cortana is called 'Nor Hell A Fury...', referencing the poem by William Congreve 'The Mourning Bride'. The entire line is 'Heaven has no rage like love to hatred turned, Nor hell a fury like a woman scorned', possibly referencing Cortana, who, after months of torment, now has the ability to light the newly constructed Halo ring and destroy the Ark as well as the Flood.
- One of Cortana's lines, "There will be no more sadness. No more anger. No more envy," appears to reference Marathon's stages of Rampancy; Melancholia, Anger and Jealousy, respectively.
- The line "It's the coin's fault," is a reference to a factor that brought John-117 into the Spartan program. He identified the side of a 20th-century quarter owned by Dr. Halsey before it fell to the ground in Halo: The Fall of Reach.
- The Gravemind uses a line from Halo 2: "We exist together now. Two corpses in one grave." This line is referring to Cortana, and referred to the Prophet of Mercy in Halo 2. This line was said in the level High Charity.
- The achievement for gaining over 15,000 points on this level, entitled Orpheus, is a reference to the ancient Greek mythology story in which the Greek hero Orpheus ventures into the depths of hell to retrieve the one he loves. This is easily compared to the Chief's mission: venture into hell, that is represented as High Charity, to rescue Cortana.
- The line "Just keep your head down... There's two of us in here, remember." is a reference to the Halo: Combat Evolved level The Pillar of Autumn. When the player's shield is completely depleted, Cortana would say the exact line, albeit with a more urgent tone.
Miscellaneous[edit]
- Due to Flood form action in the reactor's room, one of the four reactors explodes when the player first enters the room. This led to the player's mission to only destroy three reactors instead of four.
- The Mausoleum of the Arbiter can be seen in the distance when standing near the crashed Pelican. This and the Prophets' Inner Sanctum are essentially the only recognizable features of High Charity in Halo 2 that can be seen in Halo 3. One can see in the Bungie feature "Flood Autopsy", that they had originally planned to have the Flood reanimate all Arbiter corpses in the room, creating an Arbiter army for the player to fight.
- The room where Cortana is located is a remake of the room from the level High Charity from Halo 2. This room is located before the final gravity lift where Cortana says "apparently these are the Prophet Hierarch's private quarters, their inner sanctum". In the "inner sanctum" there are three doors, two located opposite one another, with a third, opposite a large view screen. In the level High Charity, the Chief enters through the third door, and exits through the door on his right; in the level Cortana from Halo 3, he enters through the door that was locked in Halo 2 (opposite the door that leads to the final gravity lift). The graphic design of the room and the rest of High Charity's interior has been remodeled in Halo 3. It resembles the corridors of the Ket-pattern battlecruiser Truth and Reconciliation from Halo: Combat Evolved.
- There is an area with a dead ODST (not the crashed Pelican). It is unknown how he made it so far from the Pelican or if he was from the Frigate UNSC In Amber Clad before the Flood attacked High Charity. There is also a Flamethrower in this area which hints to a final stand since he's in a pipe area with one opening.
- Most of the weapons from the previous level are carried on to this level unless the player makes a fresh start, in which case the loadout will be an MA5C assault rifle and an M90 shotgun.
- In the opening cutscene, the Master Chief is shown holding the shotgun no matter what weapons the player starts with. However, if the player starts with the default loadout, they are holding the assault rifle instead of the shotgun with the shotgun as their backup weapon.
- If the previous level the player brought Fuel Rod Gun or Gravity Hammer, the loadout would reset to the Assault Rifle and Shotgun.
- As seen later, primarily in Halo Wars 2: Awakening the Nightmare, High Charity was not completely destroyed when the player detonates its reactor. This shell is eventually covered by a containment shield under the command of 000 Tragic Solitude.[8] This is later breached by Voridus and the Banished in Awakening the Nightmare, releasing the Flood that had survived the destruction of High Charity and the firing of Installation 08.
- After Thel 'Vadam joins you in battle against the Flood, you can find his Banshee outside by the Pelican. You can jump up to his Banshee and even destroy it, but it is impossible to enter the vehicle.
Gallery[edit]
Concept art[edit]
A concept art schematic for the level.
Early concepy art of John-117 looking at Mausoleum of the Arbiter.

Concept art of the environment in the level.
Concept art of the reactor room.
Concept art of the Master Chief's raid within High Charity.

Concept art of the Flood-infested High Charity.

Concept art of the Flood-infested High Charity.

Concept art of the Flood-infested High Charity.
Concept art of the Flood-infested High Charity.

Concept art of the Flood-infested High Charity.
Concept art of the Flood-infested High Charity.
Concept art of an encounter between the Chief and the Gravemind.


Storyboards[edit]


Screenshots[edit]
Preview of the level in Halo 3 menu.
John-117 finds Flood biomass stuck on his boot upon arrival.
John-117 uses a flamethrower against a Flood combat form.
The shielded podium in which Cortana is trapped.
Thel 'Vadam, wielding a flamethrower, links up with John-117.
The Chief and Cortana ready to escape on a Pelican.


.jpg)
Sources[edit]
- ^ Halo Waypoint, Hero-Fortitude
- ^ VICE, The Complete, Untold History of Halo: An Oral History (Retrieved on Oct 10, 2021) [archive]
- ^ Bungie Publications, Halo 3 Flood Alien Level Autopsy (Retrieved on Oct 10, 2021) [archive]
- ^ Bungie.net, Halo 3 Flood Alien Level Autopsy: Original presentation download link (Retrieved on Jan 18, 2021) [archive]
- ^ Twitter, Dan Miller (@dmiller360): "the level order was the same,just the geometry was different. Originally floodgate consisted of both floodgate AND Cortana" (Retrieved on Oct 10, 2021) [archive]
- ^ Twitter, Dan Miller (@dmiller360): "In floodgate you went into the covenant cruiser at the end, correct? Well that was the Cortana geometry. The Floodgate mission was much, much longer. There was original High Charity geometry made for the Cortana mission that was cut due to lack of time." (Retrieved on Oct 10, 2021) [archive]
- ^ Twitter, Dan Miller (@dmiller360): "the old original geometry for cortana was cut- that was high charity geometry." (Retrieved on Oct 10, 2021) [archive]
- ^ Halo Wars 2: Phoenix Logs - Idle Hands II
| Preceded by The Covenant |
Halo 3 Campaign Missions Cortana |
Succeeded by Halo |
| ||||||||||||||||||||||||||||||||||||||||


