Terminus Firefight: Difference between revisions
From Halopedia, the Halo wiki
(Since there is hardly any articles inform what wave and what faction has what I decided why not just add it here,) |
m (Text replacement - "[Nn]ewcontent" to "New content") |
||
| (21 intermediate revisions by 10 users not shown) | |||
| Line 1: | Line 1: | ||
{{ | {{Status|Gameplay}} | ||
{{ | {{New content}} | ||
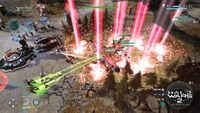
[[File:HW2-Terminus Firefight 03.jpg|thumb | [[File:HW2-Terminus Firefight 03.jpg|thumb|350px|Terminus Firefight in ''Halo Wars 2''.]] | ||
'''Terminus Firefight''' is a cooperative [[gametype]] introduced in ''[[Halo Wars 2]]''. In Terminus Firefight, players build both bases and armies to defend and survive against an onslaught of enemy forces. | '''Terminus Firefight''' is a cooperative [[gametype]] introduced in ''[[Halo Wars 2]]''. In Terminus Firefight, players build both bases and armies to defend and survive against an onslaught of enemy forces. | ||
<ref>[https://www.halowaypoint.com/en-us/news/introducing-halo-wars-2-awakening-the-nightmare'''Halo Waypoint''': Introducing Halo Wars 2: Awakening the Nightmare]</ref> This new mode is included with the digital expansion [[Awakening the Nightmare]], released on September 26, [[2017]]. | <ref>[https://www.halowaypoint.com/en-us/news/introducing-halo-wars-2-awakening-the-nightmare'''Halo Waypoint''': Introducing Halo Wars 2: Awakening the Nightmare]</ref> This new mode is included with the digital expansion [[Awakening the Nightmare]], released on September 26, [[2017]]. | ||
| Line 15: | Line 15: | ||
Always expect of every type of attack. The Huragok in this mode are modified with a glassing beam, and can self-destruct above your structures. Note that the enemy will be constantly focusing on attacking the terminus, except for air units, such as modified Huragok that can use a glassing beam if self-destructed above your base and air units who steer off from their original attack course. In a wave of ODST drops, they will always make a drop around the Terminus and main base. | Always expect of every type of attack. The Huragok in this mode are modified with a glassing beam, and can self-destruct above your structures. Note that the enemy will be constantly focusing on attacking the terminus, except for air units, such as modified Huragok that can use a glassing beam if self-destructed above your base and air units who steer off from their original attack course. In a wave of ODST drops, they will always make a drop around the Terminus and main base. | ||
As a starting base, the player will be provided with a basic squad unit (2 Marines or 3 Grunt Infantry Squad), a Tier 2 base (Combat Station or Stronghold) with five slots available and 600 supplies and 400 power. You will be given 30 seconds to prepare before the first wave starts. Terminus firefight generally provides 3 variable minibase slots to each player scattered around the map, with a total of 9 minibase slots available if played by three players; these can be seen while the game is loading. A 1-slot minibase is available near Terminus, a 2-slot minibase is available in the chokepoint area leading to the terminus, and a 3-slot minibase is available near the enemy's spawn points. | As a starting base, the player will be provided with a basic squad unit (2 Marines or 3 Grunt Infantry Squad, 5 Cannon Fodder (Yapyap)), a Tier 2 base (Combat Station or Stronghold) with five slots available and 600 supplies and 400 power. You will be given 30 seconds to prepare before the first wave starts. Terminus firefight generally provides 3 variable minibase slots to each player scattered around the map, with a total of 9 minibase slots available if played by three players; these can be seen while the game is loading. A 1-slot minibase is available near Terminus, a 2-slot minibase is available in the chokepoint area leading to the terminus, and a 3-slot minibase is available near the enemy's spawn points. Whenever any builds a minibus, that player is also awarded 10 population every minibase. | ||
Some routes can be blocked using Fence, forcing the enemy to re-route, allowing the player to establish a Stronghold undisturbed. Take note, however, that the player can only limit their movements to a blockade that was near their spawn point. If the player blocks both entrances, the enemy will force its way through. This can be utilized if the player wishes to make a chokepoint in order to maximize the kill zones and to hold out much longer. | Some routes can be blocked using Fence, forcing the enemy to re-route, allowing the player to establish a Stronghold undisturbed. Take note, however, that the player can only limit their movements to a blockade that was near their spawn point. If the player blocks both entrances, the enemy will force its way through. This can be utilized if the player wishes to make a chokepoint in order to maximize the kill zones and to hold out much longer. | ||
== Waves == | == Waves == | ||
When the player(s) start the game, they will need to fight their way in order to reach and pass wave 100, Before they can reach wave 100, the game will choose a faction and will | When the player(s) start the game, they will need to fight their way in order to reach and pass wave 100, Before they can reach wave 100, the game will choose a faction and will start waves the certain faction uses. The A.I will commonly start at their weakest state (25% on damage and health) and they will progressively get stronger every 5 waves. | ||
Overall the status | |||
<br>wave 25 (100% on damage and health) | |||
<br>wave 50 (200% on damage and health) | |||
<br>wave 75 (300% on damage and health) | |||
<br>Wave 90 (400% maximum on damage and health) | |||
The A.I. will throw out many units at every wave however, since the UNSC & Banished have more tougher, stronger and population consuming units than the Flood & Forerunners, the maximum population the Banished A.I. can use is 300 while the UNSC A.I. can use the maximum of 400 population. | |||
Note that every 5 waves, a certain upgrade will be applied to the AI such as Smart Missile and Grenade Throw to increase the AI's lethality. | |||
Note, despite the waves & units being listed, it also varies depending how early, mid or late you or your team are in the game mode. | |||
=== UNSC waves === | === UNSC waves === | ||
| Line 27: | Line 38: | ||
***Marines | ***Marines | ||
***ODSTs | ***ODSTs | ||
**Light Vehicles | **Light Vehicles | ||
***Warthogs | ***Warthogs | ||
| Line 34: | Line 44: | ||
**Light Air | **Light Air | ||
***Hornets | ***Hornets | ||
** | **Light Ground | ||
*** | ***(Light Ground will use units from Light Infantry and Light Vehicles) | ||
*** | **Light Army mix | ||
***(Every light unit will attack with Nightingales guarding them) | |||
**Medium Infantry | **Medium Infantry | ||
***Cyclops | ***Cyclops | ||
***ODSTs | ***ODSTs | ||
**Medium Vehicles | |||
***Warthogs | |||
***Wolverines | |||
***Scorpions | |||
**Medium Air | **Medium Air | ||
***Vultures | ***Vultures | ||
***Hornets | ***Hornets | ||
** | **Medium Ground | ||
*** | ***(Medium Ground will use units from Medium Infantry and Medium Vehicles) | ||
*** | **Medium Army mix | ||
***(Every Medium unit will attack with Nightingales guarding them) | |||
**Anti-Tank Infantry | **Anti-Tank Infantry | ||
***Cyclops | ***Cyclops | ||
**Heavy | **Heavy Vehicles | ||
***Scorpions | ***Scorpions | ||
***Warthogs | ***Warthogs | ||
***Wolverines | ***Wolverines | ||
**Heavy Air | **Heavy Air | ||
***Vultures | ***Vultures | ||
**Heavy Ground | |||
***(Heavy Ground will use units from Heavy Infantry and Heavy Vehicles) | |||
** Heavy Army mix | |||
***(Every Heavy unit will attack with Nightingales guarding them) | |||
*Unique waves | |||
**Snipers - (A extremely rare chance to be spawned between Wave 1 - 25) - The UNSC will start deploying Snipers with other UNSC units | |||
**Anti-Turret - (A rare chance to be spawned between Wave 1 - 50) - The UNSC will start deploying Hellbringers with other UNSC units | |||
**Anti-Air - (A slight rare chance to be spawned between Wave 25 - 75) - The UNSC will start deploying Wolverines with other UNSC units | |||
**Scorpions - (A common chance to be spawned between Wave 50 - 100) - The UNSC will deployed only Scorpions and they are loaded with canister shells | |||
*Special Waves | *Special Waves | ||
| Line 66: | Line 90: | ||
** Army - various units are deployed and heroes | ** Army - various units are deployed and heroes | ||
** Heroes - Spartans are deployed that either carry a Spartan Laser, Rocket Launcher, and Miniguns. | ** Heroes - Spartans are deployed that either carry a Spartan Laser, Rocket Launcher, and Miniguns. | ||
** Grizzlies - A number of Grizzlies are deployed | |||
=== Banished waves === | === Banished waves === | ||
| Line 72: | Line 97: | ||
***Grunt Squad | ***Grunt Squad | ||
***Elite Rangers | ***Elite Rangers | ||
**Light Vehicles | **Light Vehicles | ||
***Choppers | ***Choppers | ||
| Line 79: | Line 102: | ||
**Light Air | **Light Air | ||
***Banshees | ***Banshees | ||
** Light Ground | |||
***(Light Ground will use units from Light Infantry and Light Vehicles) | |||
** Light Army mix | |||
***(Every Light unit will attack with Engineers guarding them) | |||
**Medium Infantry | **Medium Infantry | ||
***Hunters | ***Hunters | ||
***Elite Rangers | ***Elite Rangers | ||
***Grunt Squads | ***Grunt Squads | ||
**Medium Vehicles | |||
***Choppers | |||
***Ghosts | |||
***Reavers | |||
***Marauders | |||
**Medium Air | **Medium Air | ||
***Blisterbacks | ***Blisterbacks | ||
***Banshees | ***Banshees | ||
** | **Medium Ground | ||
*** | ***(Medium Ground will use units from Medium Infantry and Medium Vehicles) | ||
*** | **Medium Army mix | ||
***(Every Medium unit will attack with Engineers guarding them) | |||
**Anti-Tank Infantry | **Anti-Tank Infantry | ||
***Hunters | ***Hunters | ||
**Heavy | **Heavy Vehicles | ||
***Wraiths | ***Wraiths | ||
***Marauders | ***Marauders | ||
***Reavers | |||
**Heavy Air | **Heavy Air | ||
***Blisterbacks | ***Blisterbacks | ||
**Heavy Ground | |||
***(Heavy Ground will use units from Heavy Infantry and Heavy Vehicles) | |||
** Heavy Army mix | |||
***(Every Heavy unit will attack with Engineers guarding them) | |||
*Unique waves | |||
**Melee Infantry - (A Extremely rare chance to be spawned between Wave 1 - 25) - The Banished will deployed only Jump Pack Brutes and their priority is buildings | |||
**Anti-Turret - (A slight rare chance to be spawned between Wave 1 - 50) - The Banished will start deploying Locust with other Banished units | |||
**Anti-Air - (A slight rare chance to be spawned between Wave 25 - 75) - The Banished will start deploying Reavers with other Banished units | |||
*Special Waves | *Special Waves | ||
| Line 101: | Line 144: | ||
**Suicide Grunts - Suicide Grunts will deploy in order to destroy any units or buildings the player(s) has | **Suicide Grunts - Suicide Grunts will deploy in order to destroy any units or buildings the player(s) has | ||
**Bandit Air - Banished Spirits will extract the player(s) resources till it depletes to 0 | **Bandit Air - Banished Spirits will extract the player(s) resources till it depletes to 0 | ||
**Cleansing Beacons - Engineers will spread around the map and donate | **Cleansing Beacons - Engineers will spread around the map and donate themselves to any units or buildings the player(s) has in order to be destroyed by a glassing beam | ||
*Boss Waves | *Boss Waves | ||
| Line 108: | Line 151: | ||
** Heroes - Warlords, Chosens and Honor Guards are deployed | ** Heroes - Warlords, Chosens and Honor Guards are deployed | ||
=== | === Flood Waves === | ||
*Waves | *Waves | ||
**Light Infantry | **Light Infantry | ||
***Infected Brutes | ***Infected Brutes with or without weapons | ||
***Infected Elites | ***Infected Elites with or without weapons | ||
***Infected Marines | ***Infected Marines with or without weapons | ||
**Light Vehicles | **Light Vehicles | ||
***Infected Choppers | ***Infected Choppers | ||
***Infected | ***Infected Warthog | ||
**Light Air | **Light Air | ||
***Infected Banshees | ***Infected Banshees | ||
** Light Ground | |||
***(Light Ground will use units from Light Infantry and Light Vehicles) | |||
** Light Army mix | |||
***(Every Light unit will attack) | |||
**Medium Infantry | **Medium Infantry | ||
***Infected Brutes with or without weapons | ***Infected Brutes with or without weapons | ||
***Infected Elites with or without weapons | ***Infected Elites with or without weapons | ||
***Infected Marines with or without weapons | ***Infected Marines with or without weapons | ||
**Medium Vehicles | |||
***Infected Choppers | |||
***Infected Warthog | |||
***Infected Marauders | |||
**Medium Air | **Medium Air | ||
***Infected Blisterbacks | ***Infected Blisterbacks | ||
***Infected Banshees | ***Infected Banshees | ||
**Heavy | ** Medium Ground | ||
***(Medium Ground will use units from Medium Infantry and Medium Vehicles) | |||
** Medium Army mix | |||
***(Every Light unit will attack) | |||
**Heavy Vehicles | |||
***Infected Wraiths | ***Infected Wraiths | ||
***Infected Marauders | ***Infected Marauders | ||
| Line 134: | Line 188: | ||
**Heavy Air | **Heavy Air | ||
***Infected Blisterbacks | ***Infected Blisterbacks | ||
** Heavy Ground | |||
***(Heavy Ground will use units from Heavy Infantry and Heavy Vehicles) | |||
** Heavy Army mix | |||
***(Every Light unit will attack) | |||
*Special Waves | *Special Waves | ||
| Line 144: | Line 202: | ||
** Armies - Flood units are deployed and are accompanied by Spawners | ** Armies - Flood units are deployed and are accompanied by Spawners | ||
=== | === Forerunner Waves === | ||
*Light Air | *Light Air | ||
**Aggressor Sentinels | **Aggressor Sentinels | ||
| Line 154: | Line 211: | ||
**Protector Sentinels | **Protector Sentinels | ||
*Special | *Special Wave | ||
**Bandit Air - Aggressor will extract the player(s) resources till it depletes to 0 | **Bandit Air - Aggressor will extract the player(s) resources till it depletes to 0 | ||
| Line 170: | Line 227: | ||
;UNSC | ;UNSC | ||
UNSC mainly favors Kodiak and Siege Turret for ground defenses and Wolverines for Air Defenses on late wave. Nightingale plays a very pivotal role in order for player to divert the resources to leader power and defenses, using Healing Drones as last healing resort. | UNSC mainly favors Kodiak and Siege Turret for ground defenses and Wolverines for Air Defenses on late wave. Nightingale plays a very pivotal role in order for player to divert the resources to leader power and defenses, using Healing Drones as last healing resort. | ||
===[[James Cutter/Gameplay|Captain Cutter]]=== | ===[[James Cutter/Gameplay|Captain Cutter]]=== | ||
*[[Jerome-092]] is highly recommended to hijack any vehicle so it can be effective at Vet 6. | *[[Jerome-092]] is highly recommended to hijack any vehicle so it can be effective at Vet 6. | ||
| Line 205: | Line 263: | ||
===[[Jerome-092/Gameplay|Jerome-092]]=== | ===[[Jerome-092/Gameplay|Jerome-092]]=== | ||
*"Recon Trains" helps all is units to shoot further and to see further. | *"Recon Trains" helps all is units to shoot further and to see further. | ||
*[[Team Omega|Omega Team]] is highly efficient in late waves and his a huge recommend to let all 3 of them hijack late wave heavy units, such as [[AC-220 Vulture|Vultures]] and [[Blisterback | *[[Team Omega|Omega Team]] is highly efficient in late waves and his a huge recommend to let all 3 of them hijack late wave heavy units, such as [[AC-220 Vulture|Vultures]] and [[Gydrozka Workshop Blisterback]]s since they can get to Vet 6 and receive damaged boost. | ||
*[[M650 Mastodon|Mastodon]] garrisoned with proper infantries should be able to deal with the hordes of enemies with ease. | *[[M650 Mastodon|Mastodon]] garrisoned with proper infantries should be able to deal with the hordes of enemies with ease. | ||
*It is recommended to set up defenses on the last line or close enough to Terminus, especially on late wave due to maximizing the efficiency of Mastodon and defenses. | *It is recommended to set up defenses on the last line or close enough to Terminus, especially on late wave due to maximizing the efficiency of Mastodon and defenses. | ||
===[[Serina/Gameplay|Serina]]=== | ===[[Serina/Gameplay|Serina]]=== | ||
*Chill effect makes the enemy | *Chill effect makes the enemy slower to reach Terminus. Added with Kodiak's firepower, it was a devastating ground defense combination. | ||
;Banished | ;Banished | ||
Banished mainly favors Blisterback for ground | Banished mainly favors Blisterback for ground defences and Reavers for Air Defenses on late wave. Engineers plays a very pivotal role in order for player to divert the resources to leader power and defenses, using Atriox's Bulwark as last healing resort. | ||
===[[Atriox/Gameplay|Atriox]]=== | ===[[Atriox/Gameplay|Atriox]]=== | ||
*The [[Atriox's Chosen|Chosen]] has great range and aoe. | *The [[Atriox's Chosen|Chosen]] has great range and aoe. | ||
| Line 229: | Line 288: | ||
===[[Ripa 'Moramee/Gameplay|Ripa 'Moramee]]=== | ===[[Ripa 'Moramee/Gameplay|Ripa 'Moramee]]=== | ||
*His leader powers can be spammed for his units to deal more damage. | *His leader powers can be spammed for his units to deal more damage. | ||
*His Stasis leader powers allow players to establish kill zones and buying enough time for other players to finish enemies on another side of the map before reinforcing the player's side. | |||
===[[Yapyap/Gameplay|Yapyap The Destroyer]]=== | ===[[Yapyap/Gameplay|Yapyap The Destroyer]]=== | ||
*Due to Yapyap's [[Cannon Fodder]] that does not consume resources, player can divert the resources to research and preparing defenses | *Due to Yapyap's [[Cannon Fodder]] that does not consume resources, player can divert the resources to research and preparing defenses faster. | ||
===[[Pavium/Gameplay|Pavium]]=== | ===[[Pavium/Gameplay|Pavium]]=== | ||
*Mega Turret serves as a best form of defense. Players usually places Mega Turret at minibase at early wave and co-op with other players, it gives a lot of benefits for defenses on the last line. | *Mega Turret serves as a best form of defense. Players usually places Mega Turret at minibase at early wave and co-op with other players, it gives a lot of benefits for defenses on the last line. | ||
**Creating Blisterback is optional since the Mega Turrets are a unique siege building that don't cost any population. | **Creating Blisterback is optional since the Mega Turrets are a unique siege building that don't cost any population. | ||
**Having 9 Mega Turrets at your base can be very effective. (Note: send resources to Pavium as he will hardly have resource | **Having 9 Mega Turrets at your base can be very effective. (Note: send resources to Pavium as he will hardly have resource generators) | ||
*Just like "Close Air Support" the "Lich Vanguard" is helpful on Direct Air waves. | *Just like "Close Air Support" the "Lich Vanguard" is helpful on Direct Air waves. | ||
| Line 244: | Line 304: | ||
== Maps == | == Maps == | ||
This mode is only playable on the map [[The Last Bastion]]. | This mode is only playable on the map [[The Last Bastion]]. | ||
[[File:HW2- | [[File:HW2-The Last Bastion.jpg|450px|thumb|center|The Last Bastion]] | ||
==Gallery== | ==Gallery== | ||
| Line 256: | Line 316: | ||
==Sources== | ==Sources== | ||
{{Ref/Sources}} | |||
{{Gametype}} | {{Gametype}} | ||
Latest revision as of 12:58, December 9, 2023
"WE'VE GOT A NEW CONTACT, UNKNOWN CLASSIFICATION!" This article may contain information based upon upcoming, unreleased, or recently-released content, and may not be fully complete. Additionally, the information may be subject to change if it is based on pre-release material. Please update it as soon as any relevant and accurate material is available.
|

Terminus Firefight is a cooperative gametype introduced in Halo Wars 2. In Terminus Firefight, players build both bases and armies to defend and survive against an onslaught of enemy forces. [1] This new mode is included with the digital expansion Awakening the Nightmare, released on September 26, 2017.
Gameplay[edit]
Up to three players amass armies to defend both their bases, and their Forerunner Terminus node against an ever-increasing and intensifying hoard of attacking enemies.
Players have to battle against UNSC, Banished, and voracious Flood forces while fighting for survival. With the ability to construct new defense measurements such as spike floors and barricades alongside classic Halo Wars gameplay features like base-building, tech trees, and Leader power usage, this modes adds an entirely new tower defense-style twist to the classic wave-based Firefight mode. The enemy firepower and health are adjusted based on how many players are participating. The more players, the more of a challenge it will be. The longer you survive the wave, the tougher the enemies you will face. If the player manages to defeat an enemy wave before next wave starts, they will be awarded bonus points; the more quickly you defeat them, the more bonus points you will earn; however, each wave appears randomly. The wave's compositions are completely random; however, every 5 waves, heavy units (mainly Grizzlies), Leader Army (Such as Flood Spawner) or Super Units will appear. The bonuses will not be rewarded if the player does not clear 5 multiplier waves (5, 10, 15, etc.) in time. The Healing Drones bonus heals all damaged units, Veterancy Bonus will increase all unit's veterancy rank by 1, and Unit Reinforcements will deploy 1 random unit with each dropship without consuming population.
Bonus items will be often dropped after a few waves. The possibilities are Power, Supply or Veterancy bonuses, and they will dropped on a random area of the map. A score multiplier will be added with every minibase you construct; however, your minibases will be extremely vulnerable to the enemy since they will attack them on sight, forcing the player to mostly concentrate their defenses around the Terminus. The more minibases you construct, the more score multipliers you will earn, but it will also put your base on more risk from enemy attacks. The score multiplier does not affect all players in a game if one succeeds in constructing a minibase; rather, it only affects those who constructed it. If you construct a minibase and complete it, you can build more turret defenses surrounding the minibase outside the Terminus to delay the enemy more, allowing you to intercept them with more organized forces, in addition to adding barricade defenses, without risking losing troops. Note that turret defenses surrounding minibases can only be constructed if a minibase's construction is complete.
The player should get close to terminus since it provides a permanent healing effect, suitable for units that defend the last line.
Always expect of every type of attack. The Huragok in this mode are modified with a glassing beam, and can self-destruct above your structures. Note that the enemy will be constantly focusing on attacking the terminus, except for air units, such as modified Huragok that can use a glassing beam if self-destructed above your base and air units who steer off from their original attack course. In a wave of ODST drops, they will always make a drop around the Terminus and main base.
As a starting base, the player will be provided with a basic squad unit (2 Marines or 3 Grunt Infantry Squad, 5 Cannon Fodder (Yapyap)), a Tier 2 base (Combat Station or Stronghold) with five slots available and 600 supplies and 400 power. You will be given 30 seconds to prepare before the first wave starts. Terminus firefight generally provides 3 variable minibase slots to each player scattered around the map, with a total of 9 minibase slots available if played by three players; these can be seen while the game is loading. A 1-slot minibase is available near Terminus, a 2-slot minibase is available in the chokepoint area leading to the terminus, and a 3-slot minibase is available near the enemy's spawn points. Whenever any builds a minibus, that player is also awarded 10 population every minibase.
Some routes can be blocked using Fence, forcing the enemy to re-route, allowing the player to establish a Stronghold undisturbed. Take note, however, that the player can only limit their movements to a blockade that was near their spawn point. If the player blocks both entrances, the enemy will force its way through. This can be utilized if the player wishes to make a chokepoint in order to maximize the kill zones and to hold out much longer.
Waves[edit]
When the player(s) start the game, they will need to fight their way in order to reach and pass wave 100, Before they can reach wave 100, the game will choose a faction and will start waves the certain faction uses. The A.I will commonly start at their weakest state (25% on damage and health) and they will progressively get stronger every 5 waves.
Overall the status
wave 25 (100% on damage and health)
wave 50 (200% on damage and health)
wave 75 (300% on damage and health)
Wave 90 (400% maximum on damage and health)
The A.I. will throw out many units at every wave however, since the UNSC & Banished have more tougher, stronger and population consuming units than the Flood & Forerunners, the maximum population the Banished A.I. can use is 300 while the UNSC A.I. can use the maximum of 400 population.
Note that every 5 waves, a certain upgrade will be applied to the AI such as Smart Missile and Grenade Throw to increase the AI's lethality.
Note, despite the waves & units being listed, it also varies depending how early, mid or late you or your team are in the game mode.
UNSC waves[edit]
- Waves
- Light Infantry
- Marines
- ODSTs
- Light Vehicles
- Warthogs
- Jackrabbits
- Wolverines
- Light Air
- Hornets
- Light Ground
- (Light Ground will use units from Light Infantry and Light Vehicles)
- Light Army mix
- (Every light unit will attack with Nightingales guarding them)
- Medium Infantry
- Cyclops
- ODSTs
- Medium Vehicles
- Warthogs
- Wolverines
- Scorpions
- Medium Air
- Vultures
- Hornets
- Medium Ground
- (Medium Ground will use units from Medium Infantry and Medium Vehicles)
- Medium Army mix
- (Every Medium unit will attack with Nightingales guarding them)
- Anti-Tank Infantry
- Cyclops
- Heavy Vehicles
- Scorpions
- Warthogs
- Wolverines
- Heavy Air
- Vultures
- Heavy Ground
- (Heavy Ground will use units from Heavy Infantry and Heavy Vehicles)
- Heavy Army mix
- (Every Heavy unit will attack with Nightingales guarding them)
- Light Infantry
- Unique waves
- Snipers - (A extremely rare chance to be spawned between Wave 1 - 25) - The UNSC will start deploying Snipers with other UNSC units
- Anti-Turret - (A rare chance to be spawned between Wave 1 - 50) - The UNSC will start deploying Hellbringers with other UNSC units
- Anti-Air - (A slight rare chance to be spawned between Wave 25 - 75) - The UNSC will start deploying Wolverines with other UNSC units
- Scorpions - (A common chance to be spawned between Wave 50 - 100) - The UNSC will deployed only Scorpions and they are loaded with canister shells
- Special Waves
- Direct Air - Hornets will ignore the path and fly straight to the Terminus
- ODSTs - ODST will drop anywhere in order to destroy any units or buildings the player(s) has
- Bandit Air - Pelican Gunships will extract the player(s) resources till it depletes to 0
- Boss Waves
- Condor - A Condor has been deployed
- Army - various units are deployed and heroes
- Heroes - Spartans are deployed that either carry a Spartan Laser, Rocket Launcher, and Miniguns.
- Grizzlies - A number of Grizzlies are deployed
Banished waves[edit]
- Waves
- Light Infantry
- Grunt Squad
- Elite Rangers
- Light Vehicles
- Choppers
- Ghosts
- Light Air
- Banshees
- Light Ground
- (Light Ground will use units from Light Infantry and Light Vehicles)
- Light Army mix
- (Every Light unit will attack with Engineers guarding them)
- Medium Infantry
- Hunters
- Elite Rangers
- Grunt Squads
- Medium Vehicles
- Choppers
- Ghosts
- Reavers
- Marauders
- Medium Air
- Blisterbacks
- Banshees
- Medium Ground
- (Medium Ground will use units from Medium Infantry and Medium Vehicles)
- Medium Army mix
- (Every Medium unit will attack with Engineers guarding them)
- Anti-Tank Infantry
- Hunters
- Heavy Vehicles
- Wraiths
- Marauders
- Reavers
- Heavy Air
- Blisterbacks
- Heavy Ground
- (Heavy Ground will use units from Heavy Infantry and Heavy Vehicles)
- Heavy Army mix
- (Every Heavy unit will attack with Engineers guarding them)
- Light Infantry
- Unique waves
- Melee Infantry - (A Extremely rare chance to be spawned between Wave 1 - 25) - The Banished will deployed only Jump Pack Brutes and their priority is buildings
- Anti-Turret - (A slight rare chance to be spawned between Wave 1 - 50) - The Banished will start deploying Locust with other Banished units
- Anti-Air - (A slight rare chance to be spawned between Wave 25 - 75) - The Banished will start deploying Reavers with other Banished units
- Special Waves
- Direct Air - Banshees will ignore the path and fly straight to the Terminus
- Suicide Grunts - Suicide Grunts will deploy in order to destroy any units or buildings the player(s) has
- Bandit Air - Banished Spirits will extract the player(s) resources till it depletes to 0
- Cleansing Beacons - Engineers will spread around the map and donate themselves to any units or buildings the player(s) has in order to be destroyed by a glassing beam
- Boss Waves
- Scarab - A Scarab has been deployed
- Army - various units are deployed and heroes
- Heroes - Warlords, Chosens and Honor Guards are deployed
Flood Waves[edit]
- Waves
- Light Infantry
- Infected Brutes with or without weapons
- Infected Elites with or without weapons
- Infected Marines with or without weapons
- Light Vehicles
- Infected Choppers
- Infected Warthog
- Light Air
- Infected Banshees
- Light Ground
- (Light Ground will use units from Light Infantry and Light Vehicles)
- Light Army mix
- (Every Light unit will attack)
- Medium Infantry
- Infected Brutes with or without weapons
- Infected Elites with or without weapons
- Infected Marines with or without weapons
- Medium Vehicles
- Infected Choppers
- Infected Warthog
- Infected Marauders
- Medium Air
- Infected Blisterbacks
- Infected Banshees
- Medium Ground
- (Medium Ground will use units from Medium Infantry and Medium Vehicles)
- Medium Army mix
- (Every Light unit will attack)
- Heavy Vehicles
- Infected Wraiths
- Infected Marauders
- Infected Scorpions
- Infected Warthogs
- Heavy Air
- Infected Blisterbacks
- Heavy Ground
- (Heavy Ground will use units from Heavy Infantry and Heavy Vehicles)
- Heavy Army mix
- (Every Light unit will attack)
- Light Infantry
- Special Waves
- Anti-Air - Flying Infectors forms will go after any air units and are accompanied by any infected Air units
- Anti-Vehicles - Ground Infectors forms will go after any vehicle units and are accompanied by any infected ground units
- Anti-Infantry - Flood Spores forms will go after any infantry units and are accompanied by any infected ground units
- Boss Waves
- Hive Commander - A Abomination is deployed
- Armies - Flood units are deployed and are accompanied by Spawners
Forerunner Waves[edit]
- Light Air
- Aggressor Sentinels
- Medium Air
- Aggressor Sentinels
- Protector Sentinels
- Heavy Air
- Protector Sentinels
- Special Wave
- Bandit Air - Aggressor will extract the player(s) resources till it depletes to 0
- Boss Wave
- Retriever Sentinel - A Retriever Sentinel is deployed
Bonus Waves[edit]
- Healing - Every unit and building will be healed and also damaged Terminus & Spires will slowly repair themselves
- Veterancy - Random units will be granted Veterancy
- Reinforcements - Players will be awarded certain units depending on the waves
Strategies[edit]
The player is usually focused on placing units inside healing area around Terminus during early wave to prevent losses. Focusing on upgrading the base to full capabilities (Full Upgrade and Research) is very reccomended to prepare for the later wave and it's better to finish all the upgrades before Wave 20 so player can focus on spending resources on defenses to delay and prevent them from reaching Terminus such as making traps, upgrading it and using leader powers.
- UNSC
UNSC mainly favors Kodiak and Siege Turret for ground defenses and Wolverines for Air Defenses on late wave. Nightingale plays a very pivotal role in order for player to divert the resources to leader power and defenses, using Healing Drones as last healing resort.
Captain Cutter[edit]
- Jerome-092 is highly recommended to hijack any vehicle so it can be effective at Vet 6.
- Jackrabbit is very useful in scout to expand the base quicker and also helping teamates to build bases and plots.
- Also, try to the "UNSC Raid" to help infantry move faster to get resources.
- His 'Close Air Support' is helpful to defend the Terminus in "Direct Air" Waves.
Isabel[edit]
- Alice-130's minigun is very effective at frontlines.
- it's highly recommended to hijack any vehicle so it can be effective at Vet 6.
- Her Ghost in the Machine would help her and the team to turn the enemy against themselves and it's very useful at wave "Heavy Air", " Scorpions", and "Heavy Vehicles".
- This doesn't effect flood vehicles nor aircraft.
Professor Anders[edit]
- Douglas-042's Rocket Launcher has great AOE and effective against a group of small air units.
- it's highly recommended to hijack any vehicle so it can be effective at Vet 6.
- Protector Sentinels plays a critical role on early-mid game, with upgrades the Sentinels is one of the lethalest defenders.
- Build a decent amount of Kodiaks in order to mass spawn Sentinels at the enemy, this would not be effective to air waves.
- R&D also serves as one of the best Leader power, stacking up with Logistics research player can reinforce the defenses quicker than other leaders.
Sergeant Forge[edit]
- His 'Rolling Economy' would help him save resources and upgrade his base to get 2 & 3 tier faster.
- His Warthog's aura helps his units to be more tougher & faster, including his team.
- The Defense aura also effects the Terminus.
- Grizzlies are recommended for head-on defenses, using as a tank for defending Kodiaks. Use Nightingale to assist Grizzly.
Morgan Kinsano[edit]
- Her damage boost can help her units to fight better and stand a chance against heavy units.
- Kinsano is great to take out infantry and is a great unit to put in Garrisons.
Sergeant Johnson[edit]
- Since bunkers can be dropped anywhere on the battlefield through Leader Powers, utilize it to the fullest for defense advantage.
- If the player unlocks 'Remote Sensors' he will provide the team with great Line of Sight.
Jerome-092[edit]
- "Recon Trains" helps all is units to shoot further and to see further.
- Omega Team is highly efficient in late waves and his a huge recommend to let all 3 of them hijack late wave heavy units, such as Vultures and Gydrozka Workshop Blisterbacks since they can get to Vet 6 and receive damaged boost.
- Mastodon garrisoned with proper infantries should be able to deal with the hordes of enemies with ease.
- It is recommended to set up defenses on the last line or close enough to Terminus, especially on late wave due to maximizing the efficiency of Mastodon and defenses.
Serina[edit]
- Chill effect makes the enemy slower to reach Terminus. Added with Kodiak's firepower, it was a devastating ground defense combination.
- Banished
Banished mainly favors Blisterback for ground defences and Reavers for Air Defenses on late wave. Engineers plays a very pivotal role in order for player to divert the resources to leader power and defenses, using Atriox's Bulwark as last healing resort.
Atriox[edit]
- The Chosen has great range and aoe.
- His economy leader powers will help fortify bases, turrets, and plots.
Decimus[edit]
- Boundless Fury & Siphon will help his units to be more effective.
Let 'Volir[edit]
- His advanced cloaking abilities & units' long range can be helpful to deal with mass units with no "detect" units.
Colony[edit]
- Vehicle Symbiote can help his base and turrets to have more line of sign and also a slight armor boost.
Ripa 'Moramee[edit]
- His leader powers can be spammed for his units to deal more damage.
- His Stasis leader powers allow players to establish kill zones and buying enough time for other players to finish enemies on another side of the map before reinforcing the player's side.
Yapyap The Destroyer[edit]
- Due to Yapyap's Cannon Fodder that does not consume resources, player can divert the resources to research and preparing defenses faster.
Pavium[edit]
- Mega Turret serves as a best form of defense. Players usually places Mega Turret at minibase at early wave and co-op with other players, it gives a lot of benefits for defenses on the last line.
- Creating Blisterback is optional since the Mega Turrets are a unique siege building that don't cost any population.
- Having 9 Mega Turrets at your base can be very effective. (Note: send resources to Pavium as he will hardly have resource generators)
- Just like "Close Air Support" the "Lich Vanguard" is helpful on Direct Air waves.
Voridus[edit]
- Always use incendiary gel whenever the cooldown is completed. Although not much handy at later wave, it will at least give the enemy some damage to slow their progress.
Maps[edit]
This mode is only playable on the map The Last Bastion.

Gallery[edit]
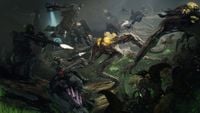
Concept art of Terminus Firefight.
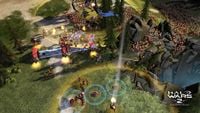
Commander Jerome-092 and his troops engage a Flood wave.
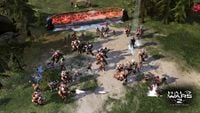
Arbiter Ripa 'Moramee and his troops engage the Flood.
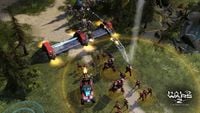
Commander Jerome and his troops fire upon the Flood.
Pavium and his troops face a Banished wave.


Sources[edit]
| |||||||||||


