User:JackVibe/Sandbox: Difference between revisions
From Halopedia, the Halo wiki
No edit summary |
No edit summary |
||
| Line 56: | Line 56: | ||
{{Quote|no=two|[[Avery Johnson]]|[[John-117]]|q1=Radio for VTOL, heavy lift gear. We're not leaving him here.|q2=Yeah, you're not.|John-117 after regaining consciousness.{{Ref/Reuse|arrival}}}} | {{Quote|no=two|[[Avery Johnson]]|[[John-117]]|q1=Radio for VTOL, heavy lift gear. We're not leaving him here.|q2=Yeah, you're not.|John-117 after regaining consciousness.{{Ref/Reuse|arrival}}}} | ||
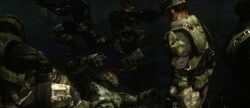
[[File:Arrivalgather.jpg|thumb|left|250px|Sergeant Johnson and his Marines locate the unconscious Master Chief.]] | [[File:Arrivalgather.jpg|thumb|left|250px|Sergeant Johnson and his Marines locate the unconscious Master Chief.]] | ||
In the morning of 17 November, 2552, Sergeant Major Avery Johnson | In the morning of 17 November, 2552, Sergeant Major Avery Johnson led [[Gunnery Sergeant]][[Marcus Stacker]]'s [[First Squad]] and [[Second Squad#Recovering Spartan-117|Second Squad]] into the jungles of Tanzania to recover John-117, using the triangulation data acquired by forces [[Battle of Sector Six|fighting]] near the [[Pakistan]]-Afghanistan border in [[Sector Six]]. [[Bravo Team]], led by [[Gunnery Sergeant]] [[Reynolds]], was also deployed nearby, closer to the extraction point at the river. | ||
Johnson and his team discovered the Spartan lying in a supine position at the end of an impact crater with his [[MJOLNIR Powered Assault Armor/Mark VI|armor]] locked into place by it's [[Hydrostatic gel|gel layer]]. The Spartan remained unconscious until the [[Unidentified Corpsman|Corpsman]] partially unlocked John's armor, and woke up just as Johnson instructed his Marines to call in heavy lifting gear to extract the Spartan. After John-117 reported Cortana had remained on High Charity, the Corpsman fully unlocked Spartan’s armor. | Johnson and his team discovered the Spartan lying in a supine position at the end of an impact crater with his [[MJOLNIR Powered Assault Armor/Mark VI|armor]] locked into place by it's [[Hydrostatic gel|gel layer]]. The Spartan remained unconscious until the [[Unidentified Corpsman|Corpsman]] partially unlocked John's armor, and John-117 woke up just as Johnson instructed his Marines to call in heavy lifting gear to extract the Spartan. After John-117 reported [[Cortana]] had remained on ''[[High Charity]]'', the Corpsman helped the calibrate and fully unlocked Spartan’s armor. | ||
The recovery team was joined by [[Arbiter]] [[Thel 'Vadam]], who, upon disengaging his [[active camouflage]], was briefly accosted by John-117. Johnson quickly defused the situation, and | The recovery team was joined by [[Arbiter]] [[Thel 'Vadam]], who, upon disengaging his [[active camouflage]], was briefly accosted by John-117. Johnson quickly defused the situation, and 'Vadam reported the Jiralhanae had caught their scent.{{Ref/Reuse|arrival}} | ||
===Opening skirmishes=== | |||
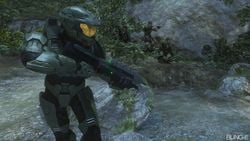
[[File:H3_Sierra117_Marines.jpg|thumb|left|250px|John-117 and a fireteam of Marines in the Tanzanian jungle.]] | [[File:H3_Sierra117_Marines.jpg|thumb|left|250px|John-117 and a fireteam of Marines in the Tanzanian jungle.]] | ||
Johnson ordered First Squad to scout ahead | Johnson ordered First Squad to scout ahead. The squad moved ahead, with Second Squad along with himself, John-117 and 'Vadam following behind. As they made their way through the jungle, Johnson informed Reynolds that they had recovered the Master Chief. Although Reynolds responded, soon afterwards he and the rest of Bravo Team, while en route to the extraction point, came under attack by a Jiralhanae Chieftain and a Phantom, and they lost contact with Johnson's team. | ||
As the team approached a waterfall, they were forced to take cover as a [[Type-52 Phantom]] flew overhead. Fearful that they would be spotted more quickly in a large unit, Johnson split the team. John-117 and 'Vadam went with First Squad while he took command of Second Squad and ascended the nearby cliff-face to take an alternate route to the extraction point at a nearby river. First Squad was discovered by Covenant patrols moments later, and they found their way through the Covenant-occupied jungle. | |||
Near the extraction point, John-117 found a Jiralhanae Captain interrogating Reynolds and demanding the location of the [[Crow's Nest (location)|nearby UNSC base]], to which the Gunnery Sergeant refused to answer. Before the Brute could kill the Marine, John managed to eliminate the Captain and his subordinates. The group, now accompanied by Reynolds, fought their way towards the river.{{Ref/Reuse|s117}} | |||
===Extraction is prevented=== | ===Extraction is prevented=== | ||
Revision as of 06:02, July 6, 2021
|
Previous: |
|||||||||||||||||||
|
Concurrent: |
|||||||||||||||||||
|
Next: |
|||||||||||||||||||
| Recovery of John-117 | |||||||||||||||||||
|---|---|---|---|---|---|---|---|---|---|---|---|---|---|---|---|---|---|---|---|

| |||||||||||||||||||
|
Conflict: |
|||||||||||||||||||
|
Date: |
|||||||||||||||||||
|
Location: |
South of Mount Kilimanjaro, Tanzania, East African Protectorate | ||||||||||||||||||
|
Outcome: |
| ||||||||||||||||||
| |||||||||||||||||||
The Recovery of John-117 was a small engagement between the United Nations Space Command against the Covenant on November 17, 2552 in the Tanzanian jungles near Mount Kilimanjaro in Africa. UNSC forces led by Sergeant Major Avery Johnson succeeded in recovering SPARTAN-II John-117 after his escape from the Anodyne Spirit.[2][1]
Background
During the early morning of November 17, 2552, the Forerunner keyship Anodyne Spirit carrying the High Prophet of Truth arrived at Earth, smashing through the remnants of the UNSC Home Fleet that had been engaging Covenant warships over the planet for the last month. On board the keyship was Spartan John-117 who, after making a failed assassination attempt on the Prophet, was forced to flee from the ship.[3] Using a door as a heat shield, the Spartan bailed out of the Anodyne Spirit as it entered Earth's atmosphere. His trajectory and expected crash site was triangulated by S. Hartley, an Orbital Drop Shock Trooper fighting Covenant forces near Sector Six, Asia.[4] This would allow several squads of Marines led by Avery Johnson to locate the Spartan in the following hours.[2] John made landfall in a Tanzanian jungle south of Mount Kilimanjaro while the Forerunner vessel continued descending until it landed on the portal to the Ark, which had been excavated by Truth's fleet.[5]
Battle
Recovering John-117
- Avery Johnson: "Radio for VTOL, heavy lift gear. We're not leaving him here."
- John-117: "Yeah, you're not."
- — John-117 after regaining consciousness.[2]
In the morning of 17 November, 2552, Sergeant Major Avery Johnson led Gunnery SergeantMarcus Stacker's First Squad and Second Squad into the jungles of Tanzania to recover John-117, using the triangulation data acquired by forces fighting near the Pakistan-Afghanistan border in Sector Six. Bravo Team, led by Gunnery Sergeant Reynolds, was also deployed nearby, closer to the extraction point at the river.
Johnson and his team discovered the Spartan lying in a supine position at the end of an impact crater with his armor locked into place by it's gel layer. The Spartan remained unconscious until the Corpsman partially unlocked John's armor, and John-117 woke up just as Johnson instructed his Marines to call in heavy lifting gear to extract the Spartan. After John-117 reported Cortana had remained on High Charity, the Corpsman helped the calibrate and fully unlocked Spartan’s armor.
The recovery team was joined by Arbiter Thel 'Vadam, who, upon disengaging his active camouflage, was briefly accosted by John-117. Johnson quickly defused the situation, and 'Vadam reported the Jiralhanae had caught their scent.[2]
Opening skirmishes
Johnson ordered First Squad to scout ahead. The squad moved ahead, with Second Squad along with himself, John-117 and 'Vadam following behind. As they made their way through the jungle, Johnson informed Reynolds that they had recovered the Master Chief. Although Reynolds responded, soon afterwards he and the rest of Bravo Team, while en route to the extraction point, came under attack by a Jiralhanae Chieftain and a Phantom, and they lost contact with Johnson's team.
As the team approached a waterfall, they were forced to take cover as a Type-52 Phantom flew overhead. Fearful that they would be spotted more quickly in a large unit, Johnson split the team. John-117 and 'Vadam went with First Squad while he took command of Second Squad and ascended the nearby cliff-face to take an alternate route to the extraction point at a nearby river. First Squad was discovered by Covenant patrols moments later, and they found their way through the Covenant-occupied jungle.
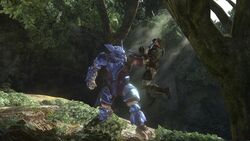
Near the extraction point, John-117 found a Jiralhanae Captain interrogating Reynolds and demanding the location of the nearby UNSC base, to which the Gunnery Sergeant refused to answer. Before the Brute could kill the Marine, John managed to eliminate the Captain and his subordinates. The group, now accompanied by Reynolds, fought their way towards the river.[1]
Extraction is prevented
- "Come on, you dumb apes! You want breakfast? You gotta catch it!"
- — Sergeant Johnson to pursuing Covenant forces.
By the time John and his team reached the river, the Pelicans were under heavy fire from Covenant ground troops that had entrenched themselves around the river substation. Johnson and his team were already on board, the sergeant using the Pelican's bay-mounted heavy machine gun in an attempt to fend off the attackers. As John, Thel and the Marines of First Squad arrived to assist, several Banshees soared in over the river, landing direct hits on the engines of both Pelicans. One dropship plummeted into the water beyond the dam while the Pelican with Johnson and his team, Echo 051 managed to clear the dam but smashed into a nearby cliff and tumbled out of sight. Several Phantoms then arrived, one of them suppressing the UNSC forces while the other deployed large numbers of Covenant reinforcements onto the dam. John and his team had fight their way through these newly-landed troops until they could re-enter the jungle. Once in the jungle, the humans and Sangheili had to pass through a narrow section of jungle laden with Kig-Yar snipers. On the other side of the pass, they reached an overhang where they witnessed Johnson and the other survivors from Echo 051 retreat into a nearby cave while under heavy Covenant fire. With support from Thel and First Squad, John moved through the area, engaging groups of infantry including a mass of Unggoy deploying from a Phantom that had a Jiralhanae Chieftain riding on the side. As the number of Covenant soldiers dwindled, the Phantom left the battlefield, allowing John to approach the overturned wreckage of Echo 051. Here, the Spartan was able to overhear a radio transmission from the Crow's Nest controller coming through the Pelican's still-functional radio in which Kilo 023 was ordered to provide emergency evacuation for the team due to Echo 051's destruction. After re-arming from the weapons littering the crash site, John and Thel proceeded through the cave that Johnson's squad had taken. Upon arriving at the A2 Hydroelectric Facility, Thel informed John that Sergeant Johnson had been captured by the Covenant; the two watched as the sergeant attempted to punch the commanding Jiralhanae Chieftain, only to get kicked into a small building and sealed behind a shield door.[1]
Rescue of Sergeant Johnson
- "See how they bait their trap? I will help you spring it."
- — Thel 'Vadam to John-117 as they prepare to rescue the captured Sergeant Johnson.
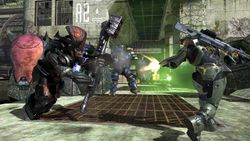
The two began an attack on the large contingent of Covenant forces at the facility, facing off against numerous Jiralhanae Captains and their lances. As they battled their way across the dam, another Phantom arrived to deposit more troops near the building where Johnson was held captive. Eventually engaging with the Chieftain and his bodyguards, John and Thel managed to defeat the ferocious Covenant warriors and make it to the building where Johnson and the survivors of his squad were imprisoned. After deactivating the energy barrier keeping them contained, Johnson and the remnants of Second Squad took weaponry from the nearby Covenant supply cases. As a pair of Phantom dropships entered the area, Kilo 032's pilot warned the team to remain in cover as she was inbound to clear a path. As the Phantoms deployed troops onto the dam, the team were forced to engage while waiting for the Pelican to arrive. Moments later, Kilo 023 flew in along the river, unloading barrages of missiles into both Phantoms, obliterating them. Hocus then brought her dropship in to land on the dam, allowing the team to climb on board. As the Pelican departed for the nearby Crow's Nest, Johnson gratefully patted John on the shoulder. Kilo 023 would land on the landing pad of Crow's Nest, with Commander Miranda Keyes personally arriving to meet the group off the Pelican.[1][6]
Aftermath
Upon arriving at Crow's Nest, Commander Keyes would tell John that she had prevented Installation 05's activation, and of the Prophet of Truth's plans to activate what they believed to be the Ark, but was in reality the gateway portal to the installation. Admiral Hood would explain the plan to neutralize anti-aircraft emplacements in the city of Voi allowing a UNSC battle group to assault the excavation site. The base would soon be attacked by the Covenant, which would conclude with John destroying the entire base with a bomb once all other UNSC personnel had evacuated.[6] The survivors would then mobilize for the assault on Voi.[7][8]
Participants
UNSC
Military personnel
| Branch | Rank | Name | Status |
|---|---|---|---|
| UNSC Navy | Gunnery Sergeant | Marcus Stacker[1] | Survived |
| Reynolds[1] | Survived | ||
| Sergeant Major | Avery Johnson | Survived | |
| Master Chief Petty Officer | John-117 | Survived | |
| Lieutenant | Hocus | Survived |
Units
Ground forces
Covenant separatists
Military personnel
| Branch | Rank | Name | Status |
|---|---|---|---|
| Unknown | Arbiter | Thel 'Vadam | Survived |
| Special Operations | Usze 'Taham[9] | Survived | |
| N'tho 'Sraom[9] | Survived |
Units
Ground forces
List of appearances
- Halo 3 (First appearance)
Sources
- ^ a b c d e f g h i j k l m n o p Halo 3, campaign level Sierra 117
- ^ a b c d Halo 3, campaign level Arrival
- ^ Halo: Uprising
- ^ Halo: Landfall, Last One Standing
- ^ Halo 3, campaign level, The Storm
- ^ a b Halo 3, campaign level, Crow's Nest
- ^ Halo 3, campaign level, Tsavo Highway
- ^ Halo 3, campaign level, The Storm
- ^ a b bungie.net, The Tru7h About Co-Op in Halo 3 (Retrieved on Nov 14, 2014) [archive]
| |||||||||||
Halo 4
Track listing
Volume 1
E5C3 opening cinematic E6C1 after freeing marines E10C3 boarding
E7C2 when Covenant reinforcements arrive, followed by a lighter version E9C5 activating the map
E3C1 defense with UNSC gear E3C2 final wave of Covenant E4C3 initial arrival E4C4 light version in opening, followed by full version E6C1 after deactivating shield door E7C2 when returning to the hangar E8C2 opening cinematic E8C3 opening cinematic E8C5 briefly in opening cinematic E9C4 wave of hunters after ambush E10C1 blowing up the harvester entrance E10C5 briefly in opening cinematic
E4C4 when defending after arrival of mantis E4C2 when defending the rear tower E4C5 when reactivating the reactor E5C1 when defending wave E5C5 briefly in opening cinematic E5C5 when Phantoms arrive E6C3 after extracting Covenant intel E7C4 when clearing aft weapon controls E8C3 when inside the cave E8C5 when clearing the area after activating AA guns E10C3 when opening door E10C3 exiting the lich E3C1 Opening cinematic E3C2 opening cinematic E4C5 closing cinematic E5C4 opening cinematic E5C5 after clearing the area
|
Volume 2E10C5 escaping the cave E9C5 activating grav lift
E4C5 activating base power E9C4 after ambush
E4C4 when knights enter near the end E5C2 when destroying tech E6C5 exiting harvester E9C1 defending the power source
E10C3 returning to caves
E3C2 deactivating generators E3C4 briefly opening between each wave E5C2 between each wave E6C5 seraching IFF tags E7C1 opening skirmish E9C2 between encounters E10C1 inside harvester E10C5 inside cave
E3C4 when defending waves of Banshees and Phantoms E5C5 when drop pods arrive after finding UNSC gear E7C4 when closing doors E7C5 when facing final wave E8C2 when clearing the conduits E8C3 clearing the area after freeing switchback E9C3 nitial scorpion section, again in the final assault E10C5 attacking the harvester
E10C3 when lich arrives
E3C3 briefly in opening cinematic (3:15) E7C2 when entering server room hallway (1:07) E7C5 upon clearing hangar E9C2 into the cave
E6C5 entering harvester E7C4 when moving to guns
E4C1 after cinematic and until pylon is activated E5C2 when returning to the main atrium E5C4 when defending the generators E6C1 opening combat E7C3 in the hallways to data center
E7C1 after Murphy drops off a Mantis E10C4 when defending the caves and clearing the landing zone
|
Music excluded from OST (according to my ears anyway):
- The strings heard during level Requiem when moving to The Gate
- E3C3 when attacking jammer
- E4C1 when leaving sniper valley
- E6C3 when outside fending off reinforcements from the phantom
- E7C2 when clearing the hangar
- E8C5 when investigating the first two map locations
- Ambiance with soft drums and suspenseful strings heard in E3C3 when investigating tower
- Grave melody by strings and bass heard in E3C4 during initial defense
- Strings melody heard in E3C4 when pelicans bring in mantises
- triumphant melody usually played for crimson heroics
- S3C4 when defending
- S4C3 after activating portal
- E8C5 after activating turrets
- E10C1 disabling the aa guns
- E10C3 after activating comm panel
- humming suspenseful ambiance
- E4C1 after tapping into covenant comms
- upbeat woodwinds
- E4C2 opening cinematic
- creepy digital ambiance (sounds like swamp - variation?)
- E4C2 when attacking waterfront tower
- creepy ambiance
- E4C2 when inside waterfront tower
- suspenseful bass and percussion
- E4C5 opening
- short suspenseful strings
- E6C4 investigating base
--!>


