Rank (Halo 4): Difference between revisions
From Halopedia, the Halo wiki
BaconShelf (talk | contribs) No edit summary |
m (→Spartan Rank: Center align) |
||
| Line 13: | Line 13: | ||
! style="width:200px"|Total XP Req'd | ! style="width:200px"|Total XP Req'd | ||
! Rank unlocks | ! Rank unlocks | ||
|- | |- align="center" | ||
|{{H4rank|one}} | |{{H4rank|one}} | ||
|0 | |0 | ||
|0 | |0 | ||
|[[Assault Rifle]], [[Magnum]], [[Frag Grenade]]s {{C|Default unlocks}} | |[[Assault Rifle]], [[Magnum]], [[Frag Grenade]]s {{C|Default unlocks}} | ||
|- | |- align="center" | ||
|{{H4rank|two}} | |{{H4rank|two}} | ||
|750 | |750 | ||
|750 | |750 | ||
|[[DMR]], [[Battle Rifle]] | |[[DMR]], [[Battle Rifle]] | ||
|- | |- align="center" | ||
|{{H4rank|three}} | |{{H4rank|three}} | ||
|830 | |830 | ||
|1,580 | |1,580 | ||
|[[Promethean vision]], [[Thruster pack]] | |[[Promethean vision]], [[Thruster pack]] | ||
|- | |- align="center" | ||
|{{H4rank|four}} | |{{H4rank|four}} | ||
|980 | |980 | ||
|2,560 | |2,560 | ||
|[[Multiplayer emblems#Halo 4|Foreground Emblem Pack 1]] | |[[Multiplayer emblems#Halo 4|Foreground Emblem Pack 1]] | ||
|- | |- align="center" | ||
|{{H4rank|five}} | |{{H4rank|five}} | ||
|1,390 | |1,390 | ||
|3,950 | |3,950 | ||
|[[Carbine]], [[Storm Rifle]] | |[[Carbine]], [[Storm Rifle]] | ||
|- | |- align="center" | ||
|{{H4rank|six}} | |{{H4rank|six}} | ||
|2,030 | |2,030 | ||
|5,980 | |5,980 | ||
|[[Loadout]] Slot 2, [[Series 12 jetpack|Jetpack]], [[Hologram]] | |[[Loadout]] Slot 2, [[Series 12 jetpack|Jetpack]], [[Hologram]] | ||
|- | |- align="center" | ||
|{{H4rank|seven}} | |{{H4rank|seven}} | ||
|2,530 | |2,530 | ||
|8,510 | |8,510 | ||
|Shielding and Mobility [[tactical packages]] | |Shielding and Mobility [[tactical packages]] | ||
|- | |- align="center" | ||
|{{H4rank|eight}} | |{{H4rank|eight}} | ||
|2,950 | |2,950 | ||
|11,460 | |11,460 | ||
|[[WARRIOR-class Mjolnir|Warrior]] armor set, [[Plasma Pistol]], [[Plasma Grenade]]s | |[[WARRIOR-class Mjolnir|Warrior]] armor set, [[Plasma Pistol]], [[Plasma Grenade]]s | ||
|- | |- align="center" | ||
|{{H4rank|nine}} | |{{H4rank|nine}} | ||
|3,480 | |3,480 | ||
|14,940 | |14,940 | ||
|[[Twin-plated]] forearm armor | |[[Twin-plated]] forearm armor | ||
|- | |- align="center" | ||
|{{H4rank|one|zero}} | |{{H4rank|one|zero}} | ||
|4,000 | |4,000 | ||
|18,940 | |18,940 | ||
|[[RG-63 Counter]] leg armor, [[Hardlight shield]], [[Active camouflage]] | |[[RG-63 Counter]] leg armor, [[Hardlight shield]], [[Active camouflage]] | ||
|- | |- align="center" | ||
|{{H4rank|one|one}} | |{{H4rank|one|one}} | ||
|4,530 | |4,530 | ||
|23,470 | |23,470 | ||
|[[AIR ASSAULT-class Mjolnir|Air Assault]] armor set | |[[AIR ASSAULT-class Mjolnir|Air Assault]] armor set | ||
|- | |- align="center" | ||
|{{H4rank|one|two}} | |{{H4rank|one|two}} | ||
|5,060 | |5,060 | ||
|28,530 | |28,530 | ||
|Ammo and Dexterity [[support upgrade]] | |Ammo and Dexterity [[support upgrade]] | ||
|- | |- align="center" | ||
|{{H4rank|one|three}} | |{{H4rank|one|three}} | ||
|5,580 | |5,580 | ||
|34,110 | |34,110 | ||
|Heroic [[stance]] | |Heroic [[stance]] | ||
|- | |- align="center" | ||
|{{H4rank|one|four}} | |{{H4rank|one|four}} | ||
|6,090 | |6,090 | ||
|40,200 | |40,200 | ||
|Loadout slot 3, Resupply and AA Effiency tactical packages | |Loadout slot 3, Resupply and AA Effiency tactical packages | ||
|- | |- align="center" | ||
|{{H4rank|one|five}} | |{{H4rank|one|five}} | ||
|6,590 | |6,590 | ||
|46,790 | |46,790 | ||
|[[SOLDIER-class Mjolnir|Soldier]] armor set | |[[SOLDIER-class Mjolnir|Soldier]] armor set | ||
|- | |- align="center" | ||
|{{H4rank|one|six}} | |{{H4rank|one|six}} | ||
|7,060 | |7,060 | ||
|53,850 | |53,850 | ||
|Autosentry, Regeneration field | |Autosentry, Regeneration field | ||
|- | |- align="center" | ||
|{{H4rank|one|seven}} | |{{H4rank|one|seven}} | ||
|7,520 | |7,520 | ||
|61,370 | |61,370 | ||
|[[AVIATOR-class Mjolnir|Aviator]] armor set | |[[AVIATOR-class Mjolnir|Aviator]] armor set | ||
|- | |- align="center" | ||
|{{H4rank|one|eight}} | |{{H4rank|one|eight}} | ||
|8,790 | |8,790 | ||
|70,160 | |70,160 | ||
|Pulse Grenades, Boltshot | |Pulse Grenades, Boltshot | ||
|- | |- align="center" | ||
|{{H4rank|one|nine}} | |{{H4rank|one|nine}} | ||
|9,670 | |9,670 | ||
|79,830 | |79,830 | ||
|Foreground emblem pack 2 | |Foreground emblem pack 2 | ||
|- | |- align="center" | ||
|{{H4rank|two|zero}} | |{{H4rank|two|zero}} | ||
|10,440 | |10,440 | ||
|90,270 | |90,270 | ||
|Solar visor, Awareness and Sensor support upgrades | |Solar visor, Awareness and Sensor support upgrades | ||
|- | |- align="center" | ||
|{{H4rank|two|one}} | |{{H4rank|two|one}} | ||
|11,530 | |11,530 | ||
|101,800 | |101,800 | ||
|Unlock background ability for emblems and [[DEFENDER-class Mjolnir|Defender]] armor | |Unlock background ability for emblems and [[DEFENDER-class Mjolnir|Defender]] armor | ||
|- | |- align="center" | ||
|{{H4rank|two|two}} | |{{H4rank|two|two}} | ||
|12,310 | |12,310 | ||
|114,110 | |114,110 | ||
|[[GV-09 Locking]] forearm armor, Lightrifle and Suppressor | |[[GV-09 Locking]] forearm armor, Lightrifle and Suppressor | ||
|- | |- align="center" | ||
|{{H4rank|two|three}} | |{{H4rank|two|three}} | ||
|13,340 | |13,340 | ||
|127,450 | |127,450 | ||
|[[LG-50 Bulk]] leg armor | |[[LG-50 Bulk]] leg armor | ||
|- | |- align="center" | ||
|{{H4rank|two|four}} | |{{H4rank|two|four}} | ||
|14,240 | |14,240 | ||
|141,690 | |141,690 | ||
|Grenadier and Firepower tactical packages | |Grenadier and Firepower tactical packages | ||
|- | |- align="center" | ||
|{{H4rank|two|five}} | |{{H4rank|two|five}} | ||
|15,160 | |15,160 | ||
|156,850 | |156,850 | ||
|N/A | |N/A | ||
|- | |- align="center" | ||
|{{H4rank|two|six}} | |{{H4rank|two|six}} | ||
|16,100 | |16,100 | ||
|172,950 | |172,950 | ||
|Loadout slot 4, [[RECON-class Mjolnir|Recon]] armor set, Explosives and Ordnance Priority support upgrades | |Loadout slot 4, [[RECON-class Mjolnir|Recon]] armor set, Explosives and Ordnance Priority support upgrades | ||
|- | |- align="center" | ||
|{{H4rank|two|seven}} | |{{H4rank|two|seven}} | ||
|17,050 | |17,050 | ||
|190,000 | |190,000 | ||
|[[EVA-class Mjolnir|EVA]] armor set | |[[EVA-class Mjolnir|EVA]] armor set | ||
|- | |- align="center" | ||
|{{H4rank|two|eight}} | |{{H4rank|two|eight}} | ||
|18,030 | |18,030 | ||
|208,030 | |208,030 | ||
|Foreground emblem pack 3 | |Foreground emblem pack 3 | ||
|- | |- align="center" | ||
|{{H4rank|two|nine}} | |{{H4rank|two|nine}} | ||
|19,020 | |19,020 | ||
|227,050 | |227,050 | ||
|Frost visor | |Frost visor | ||
|- | |- align="center" | ||
|{{H4rank|three|zero}} | |{{H4rank|three|zero}} | ||
|20,030 | |20,030 | ||
|247,080 | |247,080 | ||
|[[Inner-plated]] forearm armor | |[[Inner-plated]] forearm armor | ||
|- | |- align="center" | ||
|{{H4rank|three|one}} | |{{H4rank|three|one}} | ||
|21,050 | |21,050 | ||
|268,130 | |268,130 | ||
|[[Outer-plated]] leg armor | |[[Outer-plated]] leg armor | ||
|- | |- align="center" | ||
|{{H4rank|three|two}} | |{{H4rank|three|two}} | ||
|22,100 | |22,100 | ||
|290,230 | |290,230 | ||
|Assassin stance | |Assassin stance | ||
|- | |- align="center" | ||
|{{H4rank|three|three}} | |{{H4rank|three|three}} | ||
|23,160 | |23,160 | ||
|313,390 | |313,390 | ||
|Background emblem pack 2 | |Background emblem pack 2 | ||
|- | |- align="center" | ||
|{{H4rank|three|four}} | |{{H4rank|three|four}} | ||
|24,240 | |24,240 | ||
|337,630 | |337,630 | ||
|[[Outer-plated]] forearm armor | |[[Outer-plated]] forearm armor | ||
|- | |- align="center" | ||
|{{H4rank|three|five}} | |{{H4rank|three|five}} | ||
|25,330 | |25,330 | ||
|362,960 | |362,960 | ||
|[[XG-89 Narrow]] leg armor | |[[XG-89 Narrow]] leg armor | ||
|- | |- align="center" | ||
|{{H4rank|three|six}} | |{{H4rank|three|six}} | ||
|26,440 | |26,440 | ||
|389,400 | |389,400 | ||
|Foreground emblem pack 4 | |Foreground emblem pack 4 | ||
|- | |- align="center" | ||
|{{H4rank|three|seven}} | |{{H4rank|three|seven}} | ||
|27,570 | |27,570 | ||
|416,970 | |416,970 | ||
|[[WAR MASTER-class Mjolnir|War Master]] armor set | |[[WAR MASTER-class Mjolnir|War Master]] armor set | ||
|- | |- align="center" | ||
|{{H4rank|three|eight}} | |{{H4rank|three|eight}} | ||
|28,700 | |28,700 | ||
|445,670 | |445,670 | ||
|[[SCOUT-class Mjolnir|Scout]] armor set | |[[SCOUT-class Mjolnir|Scout]] armor set | ||
|- | |- align="center" | ||
|{{H4rank|three|nine}} | |{{H4rank|three|nine}} | ||
|29,860 | |29,860 | ||
|475,530 | |475,530 | ||
|[[Contoured]] forearm armor | |[[Contoured]] forearm armor | ||
|- | |- align="center" | ||
|{{H4rank|four|zero}} | |{{H4rank|four|zero}} | ||
|31,030 | |31,030 | ||
|506,560 | |506,560 | ||
|[[Contoured]] leg armor | |[[Contoured]] leg armor | ||
|- | |- align="center" | ||
|{{H4rank|four|one}} | |{{H4rank|four|one}} | ||
|32,220 | |32,220 | ||
|538,780 | |538,780 | ||
|Loadout slot 5, [[ORBITAL-class Mjolnir|Orbital]] armor set | |Loadout slot 5, [[ORBITAL-class Mjolnir|Orbital]] armor set | ||
|- | |- align="center" | ||
|{{H4rank|four|two}} | |{{H4rank|four|two}} | ||
|33,420 | |33,420 | ||
|572,200 | |572,200 | ||
|[[INFILTRATOR-class Mjolnir|Infiltrator]] armor set | |[[INFILTRATOR-class Mjolnir|Infiltrator]] armor set | ||
|- | |- align="center" | ||
|{{H4rank|four|three}} | |{{H4rank|four|three}} | ||
|34,640 | |34,640 | ||
|606,840 | |606,840 | ||
|[[HAZOP-class Mjolnir|HAZOP]] armor set | |[[HAZOP-class Mjolnir|HAZOP]] armor set | ||
|- | |- align="center" | ||
|{{H4rank|four|four}} | |{{H4rank|four|four}} | ||
|35,860 | |35,860 | ||
|642,700 | |642,700 | ||
|Background emblem pack 3 | |Background emblem pack 3 | ||
|- | |- align="center" | ||
|{{H4rank|four|five}} | |{{H4rank|four|five}} | ||
|37,110 | |37,110 | ||
|679,810 | |679,810 | ||
|[[EOD-class Mjolnir|EOD]] armor set | |[[EOD-class Mjolnir|EOD]] armor set | ||
|- | |- align="center" | ||
|{{H4rank|four|six}} | |{{H4rank|four|six}} | ||
|38,360 | |38,360 | ||
|718,170 | |718,170 | ||
|Midnight visor | |Midnight visor | ||
|- | |- align="center" | ||
|{{H4rank|four|seven}} | |{{H4rank|four|seven}} | ||
|39,640 | |39,640 | ||
|757,810 | |757,810 | ||
|[[OCEANIC-class Mjolnir|Oceanic]] armor set | |[[OCEANIC-class Mjolnir|Oceanic]] armor set | ||
|- | |- align="center" | ||
|{{H4rank|four|eight}} | |{{H4rank|four|eight}} | ||
|40,920 | |40,920 | ||
|798,730 | |798,730 | ||
|[[XV-27 Shifting]] forerarm armor | |[[XV-27 Shifting]] forerarm armor | ||
|- | |- align="center" | ||
|{{H4rank|four|nine}} | |{{H4rank|four|nine}} | ||
|42,220 | |42,220 | ||
|840,950 | |840,950 | ||
|[[Over-locking]] leg armor | |[[Over-locking]] leg armor | ||
|- | |- align="center" | ||
|{{H4rank|five|zero}} | |{{H4rank|five|zero}} | ||
|43,530 | |43,530 | ||
|884,480 | |884,480 | ||
|[[ENFORCER-class Mjolnir|Enforcer]] armor set, Last Stand stance, unlock ability to pick specialisations | |[[ENFORCER-class Mjolnir|Enforcer]] armor set, Last Stand stance, unlock ability to pick specialisations | ||
|- | |- align="center" | ||
|{{H4rank|five|one}} | |{{H4rank|five|one}} | ||
|0 | |0 | ||
|884,480 | |884,480 | ||
|rowspan=10|Specialization-specific unlocks | |rowspan=10|Specialization-specific unlocks | ||
|- | |- align="center" | ||
|{{H4rank|five|two}} | |{{H4rank|five|two}} | ||
|11,730 | |11,730 | ||
|896,210 | |896,210 | ||
|- | |- align="center" | ||
|{{H4rank|five|three}} | |{{H4rank|five|three}} | ||
|12,760 | |12,760 | ||
|908,970 | |908,970 | ||
|- | |- align="center" | ||
|{{H4rank|five|four}} | |{{H4rank|five|four}} | ||
|18,240 | |18,240 | ||
|927,210 | |927,210 | ||
|- | |- align="center" | ||
|{{H4rank|five|five}} | |{{H4rank|five|five}} | ||
|29,320 | |29,320 | ||
|956,530 | |956,530 | ||
|- | |- align="center" | ||
|{{H4rank|five|six}} | |{{H4rank|five|six}} | ||
|39,360 | |39,360 | ||
|995,890 | |995,890 | ||
|- | |- align="center" | ||
|{{H4rank|five|seven}} | |{{H4rank|five|seven}} | ||
|47,740 | |47,740 | ||
|1,043,630 | |1,043,630 | ||
|- | |- align="center" | ||
|{{H4rank|five|eight}} | |{{H4rank|five|eight}} | ||
|54,960 | |54,960 | ||
|1,098,590 | |1,098,590 | ||
|- | |- align="center" | ||
|{{H4rank|five|nine}} | |{{H4rank|five|nine}} | ||
|60,470 | |60,470 | ||
|1,159,060 | |1,159,060 | ||
|- | |- align="center" | ||
|{{H4rank|six|zero}} | |{{H4rank|six|zero}} | ||
|63,820 | |63,820 | ||
|1,222,880 | |1,222,880 | ||
|- | |- align="center" | ||
|{{H4rank|six|one}} | |{{H4rank|six|one}} | ||
|0 | |0 | ||
|1,222,880 | |1,222,880 | ||
|rowspan=10|Specialization-specific unlocks | |rowspan=10|Specialization-specific unlocks | ||
|- | |- align="center" | ||
|{{H4rank|six|two}} | |{{H4rank|six|two}} | ||
|11,730 | |11,730 | ||
|1,234,610 | |1,234,610 | ||
|- | |- align="center" | ||
|{{H4rank|six|three}} | |{{H4rank|six|three}} | ||
|12,760 | |12,760 | ||
|1,247,370 | |1,247,370 | ||
|- | |- align="center" | ||
|{{H4rank|six|four}} | |{{H4rank|six|four}} | ||
|18,240 | |18,240 | ||
|1,265,610 | |1,265,610 | ||
|- | |- align="center" | ||
|{{H4rank|six|five}} | |{{H4rank|six|five}} | ||
|29,320 | |29,320 | ||
|1,294,930 | |1,294,930 | ||
|- | |- align="center" | ||
|{{H4rank|six|six}} | |{{H4rank|six|six}} | ||
|39,360 | |39,360 | ||
|1,334,290 | |1,334,290 | ||
|- | |- align="center" | ||
|{{H4rank|six|seven}} | |{{H4rank|six|seven}} | ||
|47,740 | |47,740 | ||
|1,382,030 | |1,382,030 | ||
|- | |- align="center" | ||
|{{H4rank|six|eight}} | |{{H4rank|six|eight}} | ||
|54,960 | |54,960 | ||
|1,436,990 | |1,436,990 | ||
|- | |- align="center" | ||
|{{H4rank|six|nine}} | |{{H4rank|six|nine}} | ||
|60,470 | |60,470 | ||
|1,497,460 | |1,497,460 | ||
|- | |- align="center" | ||
|{{H4rank|seven|zero}} | |{{H4rank|seven|zero}} | ||
|63,820 | |63,820 | ||
|1,561,280 | |1,561,280 | ||
|- | |- align="center" | ||
|{{H4rank|seven|one}} | |{{H4rank|seven|one}} | ||
|0 | |0 | ||
|1,561,280 | |1,561,280 | ||
|rowspan=10|Specialization-specific unlocks | |rowspan=10|Specialization-specific unlocks | ||
|- | |- align="center" | ||
|{{H4rank|seven|two}} | |{{H4rank|seven|two}} | ||
|11,730 | |11,730 | ||
|1,573,010 | |1,573,010 | ||
|- | |- align="center" | ||
|{{H4rank|seven|three}} | |{{H4rank|seven|three}} | ||
|12,760 | |12,760 | ||
|1,585,770 | |1,585,770 | ||
|- | |- align="center" | ||
|{{H4rank|seven|four}} | |{{H4rank|seven|four}} | ||
|18,240 | |18,240 | ||
|1,604,010 | |1,604,010 | ||
|- | |- align="center" | ||
|{{H4rank|seven|five}} | |{{H4rank|seven|five}} | ||
|29,320 | |29,320 | ||
|1,633,330 | |1,633,330 | ||
|- | |- align="center" | ||
|{{H4rank|seven|six}} | |{{H4rank|seven|six}} | ||
|39,360 | |39,360 | ||
|1,672,690 | |1,672,690 | ||
|- | |- align="center" | ||
|{{H4rank|seven|seven}} | |{{H4rank|seven|seven}} | ||
|47,740 | |47,740 | ||
|1,720,430 | |1,720,430 | ||
|- | |- align="center" | ||
|{{H4rank|seven|eight}} | |{{H4rank|seven|eight}} | ||
|54,960 | |54,960 | ||
|1,775,390 | |1,775,390 | ||
|- | |- align="center" | ||
|{{H4rank|seven|nine}} | |{{H4rank|seven|nine}} | ||
|60,470 | |60,470 | ||
|1,835,860 | |1,835,860 | ||
|- | |- align="center" | ||
|{{H4rank|eight|zero}} | |{{H4rank|eight|zero}} | ||
|63,820 | |63,820 | ||
|1,899,680 | |1,899,680 | ||
|- | |- align="center" | ||
|{{H4rank|eight|one}} | |{{H4rank|eight|one}} | ||
|0 | |0 | ||
|1,899,680 | |1,899,680 | ||
|rowspan=10|Specialization-specific unlocks | |rowspan=10|Specialization-specific unlocks | ||
|- | |- align="center" | ||
|{{H4rank|eight|two}} | |{{H4rank|eight|two}} | ||
|11,730 | |11,730 | ||
|1,911,410 | |1,911,410 | ||
|- | |- align="center" | ||
|{{H4rank|eight|three}} | |{{H4rank|eight|three}} | ||
|12,760 | |12,760 | ||
|1,924,170 | |1,924,170 | ||
|- | |- align="center" | ||
|{{H4rank|eight|four}} | |{{H4rank|eight|four}} | ||
|18,240 | |18,240 | ||
|1,942,410 | |1,942,410 | ||
|- | |- align="center" | ||
|{{H4rank|eight|five}} | |{{H4rank|eight|five}} | ||
|29,320 | |29,320 | ||
|1,971,730 | |1,971,730 | ||
|- | |- align="center" | ||
|{{H4rank|eight|six}} | |{{H4rank|eight|six}} | ||
|39,360 | |39,360 | ||
|2,011,090 | |2,011,090 | ||
|- | |- align="center" | ||
|{{H4rank|eight|seven}} | |{{H4rank|eight|seven}} | ||
|47,740 | |47,740 | ||
|2,058,830 | |2,058,830 | ||
|- | |- align="center" | ||
|{{H4rank|eight|eight}} | |{{H4rank|eight|eight}} | ||
|54,960 | |54,960 | ||
|2,113,790 | |2,113,790 | ||
|- | |- align="center" | ||
|{{H4rank|eight|nine}} | |{{H4rank|eight|nine}} | ||
|60,470 | |60,470 | ||
|2,174,260 | |2,174,260 | ||
|- | |- align="center" | ||
|{{H4rank|nine|zero}} | |{{H4rank|nine|zero}} | ||
|63,820 | |63,820 | ||
|2,238,080 | |2,238,080 | ||
|- | |- align="center" | ||
|{{H4rank|nine|one}} | |{{H4rank|nine|one}} | ||
|0 | |0 | ||
|2,238,080 | |2,238,080 | ||
|rowspan=10|Specialization-specific unlocks | |rowspan=10|Specialization-specific unlocks | ||
|- | |- align="center" | ||
|{{H4rank|nine|two}} | |{{H4rank|nine|two}} | ||
|11,730 | |11,730 | ||
|2,249,810 | |2,249,810 | ||
|- | |- align="center" | ||
|{{H4rank|nine|three}} | |{{H4rank|nine|three}} | ||
|12,760 | |12,760 | ||
|2,262,570 | |2,262,570 | ||
|- | |- align="center" | ||
|{{H4rank|nine|four}} | |{{H4rank|nine|four}} | ||
|18,240 | |18,240 | ||
|2,280,810 | |2,280,810 | ||
|- | |- align="center" | ||
|{{H4rank|nine|five}} | |{{H4rank|nine|five}} | ||
|29,320 | |29,320 | ||
|2,310,130 | |2,310,130 | ||
|- | |- align="center" | ||
|{{H4rank|nine|six}} | |{{H4rank|nine|six}} | ||
|39,360 | |39,360 | ||
|2,349,490 | |2,349,490 | ||
|- | |- align="center" | ||
|{{H4rank|nine|seven}} | |{{H4rank|nine|seven}} | ||
|47,740 | |47,740 | ||
|2,397,230 | |2,397,230 | ||
|- | |- align="center" | ||
|{{H4rank|nine|eight}} | |{{H4rank|nine|eight}} | ||
|54,960 | |54,960 | ||
|2,452,190 | |2,452,190 | ||
|- | |- align="center" | ||
|{{H4rank|nine|nine}} | |{{H4rank|nine|nine}} | ||
|60,470 | |60,470 | ||
|2,512,660 | |2,512,660 | ||
|- | |- align="center" | ||
|{{H4rank|one|zero|zero}} | |{{H4rank|one|zero|zero}} | ||
|63,820 | |63,820 | ||
|2,576,480 | |2,576,480 | ||
|- | |- align="center" | ||
|{{H4rank|one|zero|one}} | |{{H4rank|one|zero|one}} | ||
|0 | |0 | ||
|2,576,480 | |2,576,480 | ||
|rowspan=10|Specialization-specific unlocks | |rowspan=10|Specialization-specific unlocks | ||
|- | |- align="center" | ||
|{{H4rank|one|zero|two}} | |{{H4rank|one|zero|two}} | ||
|11,730 | |11,730 | ||
|2,588,210 | |2,588,210 | ||
|- | |- align="center" | ||
|{{H4rank|one|zero|three}} | |{{H4rank|one|zero|three}} | ||
|12,760 | |12,760 | ||
|2,600,970 | |2,600,970 | ||
|- | |- align="center" | ||
|{{H4rank|one|zero|four}} | |{{H4rank|one|zero|four}} | ||
|18,240 | |18,240 | ||
|2,619,210 | |2,619,210 | ||
|- | |- align="center" | ||
|{{H4rank|one|zero|five}} | |{{H4rank|one|zero|five}} | ||
|29,320 | |29,320 | ||
|2,648,530 | |2,648,530 | ||
|- | |- align="center" | ||
|{{H4rank|one|zero|six}} | |{{H4rank|one|zero|six}} | ||
|39,360 | |39,360 | ||
|2,687,890 | |2,687,890 | ||
|- | |- align="center" | ||
|{{H4rank|one|zero|seven}} | |{{H4rank|one|zero|seven}} | ||
|47,740 | |47,740 | ||
|2,735,630 | |2,735,630 | ||
|- | |- align="center" | ||
|{{H4rank|one|zero|eight}} | |{{H4rank|one|zero|eight}} | ||
|54,960 | |54,960 | ||
|2,790,590 | |2,790,590 | ||
|- | |- align="center" | ||
|{{H4rank|one|zero|nine}} | |{{H4rank|one|zero|nine}} | ||
|60,470 | |60,470 | ||
|2,851,060 | |2,851,060 | ||
|- | |- align="center" | ||
|{{H4rank|one|one|zero}} | |{{H4rank|one|one|zero}} | ||
|63,820 | |63,820 | ||
|2,914,880 | |2,914,880 | ||
|- | |- align="center" | ||
|{{H4rank|one|one|one}} | |{{H4rank|one|one|one}} | ||
|0 | |0 | ||
|2,914,880 | |2,914,880 | ||
|rowspan=10|Specialization-specific unlocks | |rowspan=10|Specialization-specific unlocks | ||
|- | |- align="center" | ||
|{{H4rank|one|one|two}} | |{{H4rank|one|one|two}} | ||
|11,730 | |11,730 | ||
|2,926,610 | |2,926,610 | ||
|- | |- align="center" | ||
|{{H4rank|one|one|three}} | |{{H4rank|one|one|three}} | ||
|12,760 | |12,760 | ||
|2,939,370 | |2,939,370 | ||
|- | |- align="center" | ||
|{{H4rank|one|one|four}} | |{{H4rank|one|one|four}} | ||
|18,240 | |18,240 | ||
|2,957,610 | |2,957,610 | ||
|- | |- align="center" | ||
|{{H4rank|one|one|five}} | |{{H4rank|one|one|five}} | ||
|29,320 | |29,320 | ||
|2,986,930 | |2,986,930 | ||
|- | |- align="center" | ||
|{{H4rank|one|one|six}} | |{{H4rank|one|one|six}} | ||
|39,360 | |39,360 | ||
|3,026,290 | |3,026,290 | ||
|- | |- align="center" | ||
|{{H4rank|one|one|seven}} | |{{H4rank|one|one|seven}} | ||
|47,740 | |47,740 | ||
|3,074,030 | |3,074,030 | ||
|- | |- align="center" | ||
|{{H4rank|one|one|eight}} | |{{H4rank|one|one|eight}} | ||
|54,960 | |54,960 | ||
|3,128,990 | |3,128,990 | ||
|- | |- align="center" | ||
|{{H4rank|one|one|nine}} | |{{H4rank|one|one|nine}} | ||
|60,470 | |60,470 | ||
|3,189,460 | |3,189,460 | ||
|- | |- align="center" | ||
|{{H4rank|one|two|zero}} | |{{H4rank|one|two|zero}} | ||
|63,820 | |63,820 | ||
|3,253,280 | |3,253,280 | ||
|- | |- align="center" | ||
|{{H4rank|one|two|one}} | |{{H4rank|one|two|one}} | ||
|0 | |0 | ||
|3,253,280 | |3,253,280 | ||
|rowspan=10|Specialization-specific unlocks | |rowspan=10|Specialization-specific unlocks | ||
|- | |- align="center" | ||
|{{H4rank|one|two|two}} | |{{H4rank|one|two|two}} | ||
|11,730 | |11,730 | ||
|3,265,010 | |3,265,010 | ||
|- | |- align="center" | ||
|{{H4rank|one|two|three}} | |{{H4rank|one|two|three}} | ||
|12,760 | |12,760 | ||
|3,277,770 | |3,277,770 | ||
|- | |- align="center" | ||
|{{H4rank|one|two|four}} | |{{H4rank|one|two|four}} | ||
|18,240 | |18,240 | ||
|3,296,010 | |3,296,010 | ||
|- | |- align="center" | ||
|{{H4rank|one|two|five}} | |{{H4rank|one|two|five}} | ||
|29,320 | |29,320 | ||
|3,325,330 | |3,325,330 | ||
|- | |- align="center" | ||
|{{H4rank|one|two|six}} | |{{H4rank|one|two|six}} | ||
|39,360 | |39,360 | ||
|3,364,690 | |3,364,690 | ||
|- | |- align="center" | ||
|{{H4rank|one|two|seven}} | |{{H4rank|one|two|seven}} | ||
|47,740 | |47,740 | ||
|3,412,430 | |3,412,430 | ||
|- | |- align="center" | ||
|{{H4rank|one|two|eight}} | |{{H4rank|one|two|eight}} | ||
|54,960 | |54,960 | ||
|3,467,390 | |3,467,390 | ||
|- | |- align="center" | ||
|{{H4rank|one|two|nine}} | |{{H4rank|one|two|nine}} | ||
|60,470 | |60,470 | ||
|3,527,860 | |3,527,860 | ||
|- | |- align="center" | ||
|{{H4rank|one|three|zero}} | |{{H4rank|one|three|zero}} | ||
|63,820 | |63,820 | ||
Revision as of 16:42, December 13, 2020
Spartan Rank is the primary ranking system used in Halo 4. Players are promoted after accumulating an amount of experience points (XP) through multiplayer (i.e. by playing War Games and Spartan Ops, completing Commendations and Challenges) and Forge matches. After reaching level 50, players are allowed to earn specializations.[1]
Competitive Skill Rank, or CSR, is a secondary ranking system based on wins and losses rather then XP. It was designed to pair players with similar skills into the same match. After its launch date on April 10, 2013, players' CSRs can be seen on their Halo Waypoint stats.[2] Each playlist features its own individual CSR running from levels 1 through 50.[3]
Spartan Rank
Players begin their careers in the base SPARTAN-IV ranks. There are 130 ranks in total, from SR-1 to SR-130, unlocking armor permutations, Loadout equipment, tactical packages, support upgrades, visors, stances and emblems and weapon skins.[1] After achieveing SR-50, players are able to select a specialization from the eight available. A specialization consists of a path of ten ranks, with various unlocks exclusive to that specialisation. Once the player has hit the tenth rank of the picked specialization, they can pick another; this process repeats until all specializations are completed at SR-130.
| Rank | Additional XP Req'd | Total XP Req'd | Rank unlocks |
|---|---|---|---|
| Template:H4rank | 0 | 0 | Assault Rifle, Magnum, Frag Grenades (Default unlocks) |
| Template:H4rank | 750 | 750 | DMR, Battle Rifle |
| Template:H4rank | 830 | 1,580 | Promethean vision, Thruster pack |
| Template:H4rank | 980 | 2,560 | Foreground Emblem Pack 1 |
| Template:H4rank | 1,390 | 3,950 | Carbine, Storm Rifle |
| Template:H4rank | 2,030 | 5,980 | Loadout Slot 2, Jetpack, Hologram |
| Template:H4rank | 2,530 | 8,510 | Shielding and Mobility tactical packages |
| Template:H4rank | 2,950 | 11,460 | Warrior armor set, Plasma Pistol, Plasma Grenades |
| Template:H4rank | 3,480 | 14,940 | Twin-plated forearm armor |
| Template:H4rank | 4,000 | 18,940 | RG-63 Counter leg armor, Hardlight shield, Active camouflage |
| Template:H4rank | 4,530 | 23,470 | Air Assault armor set |
| Template:H4rank | 5,060 | 28,530 | Ammo and Dexterity support upgrade |
| Template:H4rank | 5,580 | 34,110 | Heroic stance |
| Template:H4rank | 6,090 | 40,200 | Loadout slot 3, Resupply and AA Effiency tactical packages |
| Template:H4rank | 6,590 | 46,790 | Soldier armor set |
| Template:H4rank | 7,060 | 53,850 | Autosentry, Regeneration field |
| Template:H4rank | 7,520 | 61,370 | Aviator armor set |
| Template:H4rank | 8,790 | 70,160 | Pulse Grenades, Boltshot |
| Template:H4rank | 9,670 | 79,830 | Foreground emblem pack 2 |
| Template:H4rank | 10,440 | 90,270 | Solar visor, Awareness and Sensor support upgrades |
| Template:H4rank | 11,530 | 101,800 | Unlock background ability for emblems and Defender armor |
| Template:H4rank | 12,310 | 114,110 | GV-09 Locking forearm armor, Lightrifle and Suppressor |
| Template:H4rank | 13,340 | 127,450 | LG-50 Bulk leg armor |
| Template:H4rank | 14,240 | 141,690 | Grenadier and Firepower tactical packages |
| Template:H4rank | 15,160 | 156,850 | N/A |
| Template:H4rank | 16,100 | 172,950 | Loadout slot 4, Recon armor set, Explosives and Ordnance Priority support upgrades |
| Template:H4rank | 17,050 | 190,000 | EVA armor set |
| Template:H4rank | 18,030 | 208,030 | Foreground emblem pack 3 |
| Template:H4rank | 19,020 | 227,050 | Frost visor |
| Template:H4rank | 20,030 | 247,080 | Inner-plated forearm armor |
| Template:H4rank | 21,050 | 268,130 | Outer-plated leg armor |
| Template:H4rank | 22,100 | 290,230 | Assassin stance |
| Template:H4rank | 23,160 | 313,390 | Background emblem pack 2 |
| Template:H4rank | 24,240 | 337,630 | Outer-plated forearm armor |
| Template:H4rank | 25,330 | 362,960 | XG-89 Narrow leg armor |
| Template:H4rank | 26,440 | 389,400 | Foreground emblem pack 4 |
| Template:H4rank | 27,570 | 416,970 | War Master armor set |
| Template:H4rank | 28,700 | 445,670 | Scout armor set |
| Template:H4rank | 29,860 | 475,530 | Contoured forearm armor |
| Template:H4rank | 31,030 | 506,560 | Contoured leg armor |
| Template:H4rank | 32,220 | 538,780 | Loadout slot 5, Orbital armor set |
| Template:H4rank | 33,420 | 572,200 | Infiltrator armor set |
| Template:H4rank | 34,640 | 606,840 | HAZOP armor set |
| Template:H4rank | 35,860 | 642,700 | Background emblem pack 3 |
| Template:H4rank | 37,110 | 679,810 | EOD armor set |
| Template:H4rank | 38,360 | 718,170 | Midnight visor |
| Template:H4rank | 39,640 | 757,810 | Oceanic armor set |
| Template:H4rank | 40,920 | 798,730 | XV-27 Shifting forerarm armor |
| Template:H4rank | 42,220 | 840,950 | Over-locking leg armor |
| Template:H4rank | 43,530 | 884,480 | Enforcer armor set, Last Stand stance, unlock ability to pick specialisations |
| Template:H4rank | 0 | 884,480 | Specialization-specific unlocks |
| Template:H4rank | 11,730 | 896,210 | |
| Template:H4rank | 12,760 | 908,970 | |
| Template:H4rank | 18,240 | 927,210 | |
| Template:H4rank | 29,320 | 956,530 | |
| Template:H4rank | 39,360 | 995,890 | |
| Template:H4rank | 47,740 | 1,043,630 | |
| Template:H4rank | 54,960 | 1,098,590 | |
| Template:H4rank | 60,470 | 1,159,060 | |
| Template:H4rank | 63,820 | 1,222,880 | |
| Template:H4rank | 0 | 1,222,880 | Specialization-specific unlocks |
| Template:H4rank | 11,730 | 1,234,610 | |
| Template:H4rank | 12,760 | 1,247,370 | |
| Template:H4rank | 18,240 | 1,265,610 | |
| Template:H4rank | 29,320 | 1,294,930 | |
| Template:H4rank | 39,360 | 1,334,290 | |
| Template:H4rank | 47,740 | 1,382,030 | |
| Template:H4rank | 54,960 | 1,436,990 | |
| Template:H4rank | 60,470 | 1,497,460 | |
| Template:H4rank | 63,820 | 1,561,280 | |
| Template:H4rank | 0 | 1,561,280 | Specialization-specific unlocks |
| Template:H4rank | 11,730 | 1,573,010 | |
| Template:H4rank | 12,760 | 1,585,770 | |
| Template:H4rank | 18,240 | 1,604,010 | |
| Template:H4rank | 29,320 | 1,633,330 | |
| Template:H4rank | 39,360 | 1,672,690 | |
| Template:H4rank | 47,740 | 1,720,430 | |
| Template:H4rank | 54,960 | 1,775,390 | |
| Template:H4rank | 60,470 | 1,835,860 | |
| Template:H4rank | 63,820 | 1,899,680 | |
| Template:H4rank | 0 | 1,899,680 | Specialization-specific unlocks |
| Template:H4rank | 11,730 | 1,911,410 | |
| Template:H4rank | 12,760 | 1,924,170 | |
| Template:H4rank | 18,240 | 1,942,410 | |
| Template:H4rank | 29,320 | 1,971,730 | |
| Template:H4rank | 39,360 | 2,011,090 | |
| Template:H4rank | 47,740 | 2,058,830 | |
| Template:H4rank | 54,960 | 2,113,790 | |
| Template:H4rank | 60,470 | 2,174,260 | |
| Template:H4rank | 63,820 | 2,238,080 | |
| Template:H4rank | 0 | 2,238,080 | Specialization-specific unlocks |
| Template:H4rank | 11,730 | 2,249,810 | |
| Template:H4rank | 12,760 | 2,262,570 | |
| Template:H4rank | 18,240 | 2,280,810 | |
| Template:H4rank | 29,320 | 2,310,130 | |
| Template:H4rank | 39,360 | 2,349,490 | |
| Template:H4rank | 47,740 | 2,397,230 | |
| Template:H4rank | 54,960 | 2,452,190 | |
| Template:H4rank | 60,470 | 2,512,660 | |
| Template:H4rank | 63,820 | 2,576,480 | |
| Template:H4rank | 0 | 2,576,480 | Specialization-specific unlocks |
| Template:H4rank | 11,730 | 2,588,210 | |
| Template:H4rank | 12,760 | 2,600,970 | |
| Template:H4rank | 18,240 | 2,619,210 | |
| Template:H4rank | 29,320 | 2,648,530 | |
| Template:H4rank | 39,360 | 2,687,890 | |
| Template:H4rank | 47,740 | 2,735,630 | |
| Template:H4rank | 54,960 | 2,790,590 | |
| Template:H4rank | 60,470 | 2,851,060 | |
| Template:H4rank | 63,820 | 2,914,880 | |
| Template:H4rank | 0 | 2,914,880 | Specialization-specific unlocks |
| Template:H4rank | 11,730 | 2,926,610 | |
| Template:H4rank | 12,760 | 2,939,370 | |
| Template:H4rank | 18,240 | 2,957,610 | |
| Template:H4rank | 29,320 | 2,986,930 | |
| Template:H4rank | 39,360 | 3,026,290 | |
| Template:H4rank | 47,740 | 3,074,030 | |
| Template:H4rank | 54,960 | 3,128,990 | |
| Template:H4rank | 60,470 | 3,189,460 | |
| Template:H4rank | 63,820 | 3,253,280 | |
| Template:H4rank | 0 | 3,253,280 | Specialization-specific unlocks |
| Template:H4rank | 11,730 | 3,265,010 | |
| Template:H4rank | 12,760 | 3,277,770 | |
| Template:H4rank | 18,240 | 3,296,010 | |
| Template:H4rank | 29,320 | 3,325,330 | |
| Template:H4rank | 39,360 | 3,364,690 | |
| Template:H4rank | 47,740 | 3,412,430 | |
| Template:H4rank | 54,960 | 3,467,390 | |
| Template:H4rank | 60,470 | 3,527,860 | |
| Template:H4rank | 63,820 | 3,591,680 |
CSR
Competitive Skill Rank, or CSR, is a new system introduced to Halo 4 in April 2013 aimed to fill a similar role to the 1-50 skill rank systems seen in Halo 2 and Halo 3. CSR calculations are calculated-per playlist, with the highest CSR value for a player being the one shown on their Halo Waypoint service record.
Competitive Skill Rank is calculated in one of two ways, depending on the playlist. Several playlists use a win/loss system to determine ranking, while others utilize individual scoring, which determines rank based on the player's performance against everyone in the match, teammates included. It is also affected by the CSR's of the other players in the game: outperforming and beating players with higher CSRs will make a player more likely to rank up, and vice versa. Playlists that utilize individual scoring allow players to rank up faster than those that use team scoring.[2]
The playlists that utilize individual scoring are:
- Infinity Slayer
- Big Team Infinity Slayer
- Rumble Pit
- Multi-Team
- Team Action Sack
- Flood, Team Snipers
- Regicide
- SWAT
Team-based scoring playlists are[2]
- Castle Team DLC
- Team Objective
- Capture the Flag
- Dominion
- Team Throwdown
- Team Doubles
- Grifball
Gallery

CSR emblems representing the various levels. The blank emblem means the player has not played the playlist since April 10, 2013.
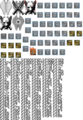
The Halo 4 rank emblems.


