Control schemes
From Halopedia, the Halo wiki
The various Halo games come with a large variety of control schemes for the various input methods available for the games (traditionally some form of Xbox controller).
Control schemes by game[edit]
See the below pages for more specific information on per-game control schemes.
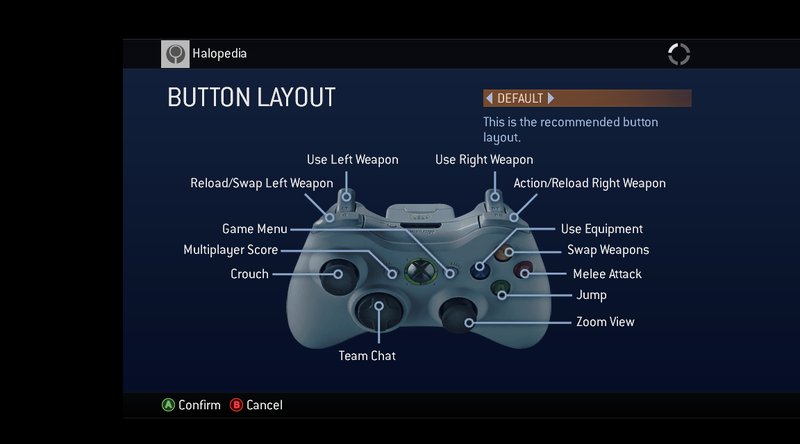
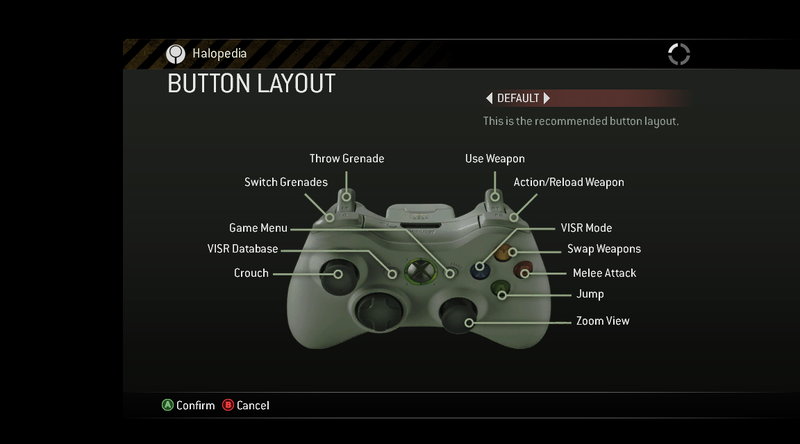
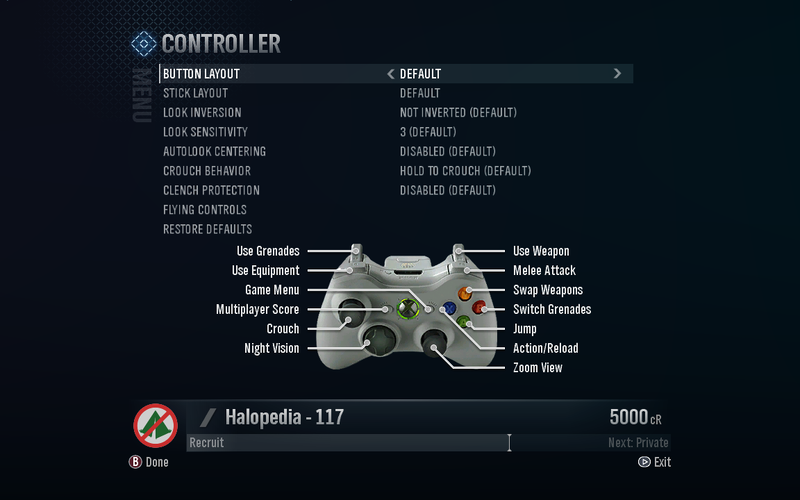
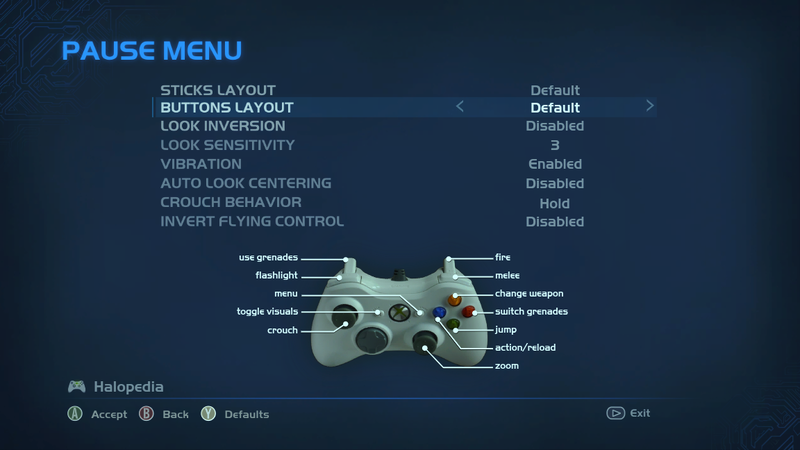
First-person shooter[edit]
Control schemes by game (First-person shooter) |
![A screenshot of "BUTTONS SETTINGS" set to "DEFAULT" in the “EDIT PROFILE SETTINGS” → “CONTROLLER SETUP” settings menu of Halo: Combat Evolved.[1]Note: The screenshot was taken from the emulator Xemu.](https://halo.wiki.gallery/images/d/da/HCE_%E2%80%94_ControllerLayoutDefault_Menu_Screenshot.png)
![A screenshot of the selected "Default" in the "Button Layout" settings menu of Halo 2 (Xbox).[1]Note: The screenshot was taken from the emulator Xemu.](https://halo.wiki.gallery/images/f/f2/H2_%E2%80%94_ControllerLayoutDefault_Menu_Screenshot.png)

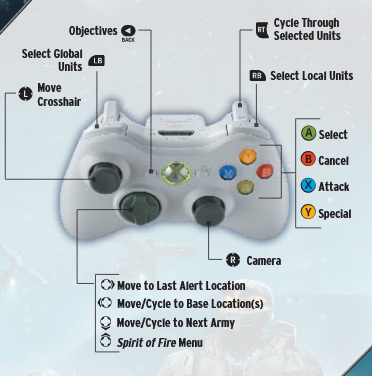
Real-time strategy[edit]
Control schemes by game (real-time strategy) |

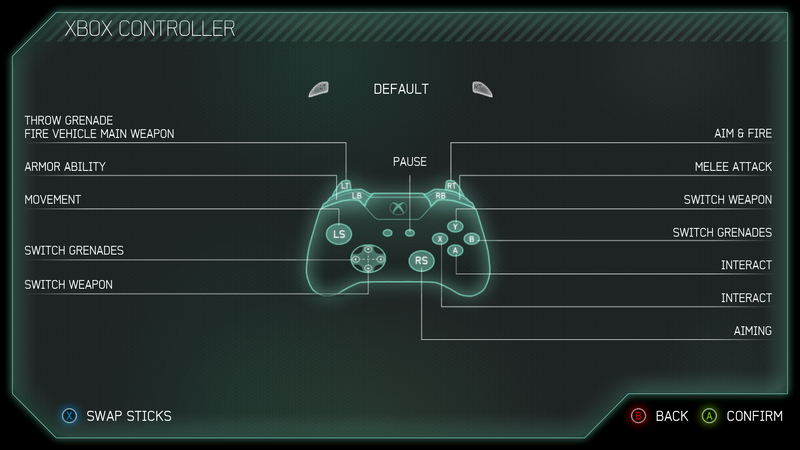
Isometric shooter[edit]
Control schemes by game (Isometric shooter) |
![A screenshot of "VIEW CONTROLS" menu from Halo: Spartan Assault (Xbox 360)[1]Note: The screenshot was taken from the emulator Xenia.](https://halo.wiki.gallery/images/thumb/2/23/HSA_%E2%80%94_ViewControls_Menu_Xbox360_Screenshot.png/800px-HSA_%E2%80%94_ViewControls_Menu_Xbox360_Screenshot.png)
| |||||||||||


