
HINF:Control schemes
From Halopedia, the Halo wiki

The following control schemes are available in Halo Infinite.
Controller[edit]
Default Button Layout & informations[edit]
Halo Infinite has rebindable button maps for the controller. The following represents the default controls in the game.

| Input Action | Button | Description | Bindable | |
|---|---|---|---|---|
| Game Menu (Text Chat) | No | |||
| On-foot | Jump | Set the input to jump.[Note 1] | Yes | |
| Crouch/Slide | Set the input to crouch. While sprinting, press this input to slide. | |||
| Sprint | Set the input to sprint. | |||
| Fire Weapon | Set the input to fire the equipped weapon. | |||
| Use Equipment | Set the input to use the equipped equipment. | |||
| Melee | Set the input to melee. | |||
| Throw Grenade | Set the input to throw the equipped grenade. | |||
| Reload/Vent/Interact | Set the input to reload or vent the equipped weapon or interact with a nearby object. | |||
| Switch Weapon/Drop Weapon | Set the input to switch weapons. Hold to drop the equipped weapon. | |||
| Drop Weapon | Set the input to drop the equipped weapon. | |||
| Zoom | Set the input to zoom in with the equipped weapon. Also cycles through zoom levels if the scope supports multiple zoom levels. | |||
| Zoom Level | Set the input to change the zoom level while zoomed in with a scoped weapon. | |||
| AI Scan | Set the input to highlight objectives and interactive objects. | |||
| Helmet Light/Mark | Set the input to toggle the Helmet Light during Campaign. This input will call out locations and objects during Multiplayer. | |||
| Campaign Menu/Scoreboard | Campaign Menu/Scoreboard | Set the input to access the TacMap, Upgrade, Database, and other menus during Campaign. This input will display the Scoreboard during Multiplayer. | ||
| Scoreboard Interact | Set the input to interact with the multiplayer scoreboard. | |||
| Vehicle | Boost/E-Brake | Set the input to use the vehicle's boost or e-brake while driving. | ||
| Ascend/Brake | Set the input to ascend with the vehicle or use the brake while driving. | |||
| Descend/Tricks | Set the input to descend with the vehicle or activate tricks while piloting. | |||
| Fire Weapon | Set the input to fire a vehicle's weapon. | |||
| Reload/Vent | Set the input to reload or vent an equipped weapon as a passenger. | |||
| Switch Seats | Set the input to switch seats. | |||
| Switch Weapon | Set the input to switch weapons as a passenger. | |||
| Melee | Set the input to melee as a passenger. | |||
| AI Scan | Set the input to highlight objectives and interactive objects. | |||
| Throw Grenade | Set the input to throw a grenade as a passenger. | |||
| Equipment | Switch Equipment | Set the input to open the Equipment Switcher during Campaign. | ||
| Equip Slot 1 | Set the input to switch to the Equipment in the first slot af the Equipment Switcher while it is open. | |||
| Equip Slot 2 | Set the input to switch to the Equipment in the second slot of the Equipment Switcher while it is open. | |||
| Equip Slot 3 | Set the input to switch to the Equipment in the third slot of the Equipment Switcher while it is open. | |||
| Equip Slot 4 | Set the input to switch to the Equipment in the fourth slot of the Equipment Switcher while it is open. | |||
| Grenades | Switch Grenade | Set the input to open the Grenade Switcher during Campaign. This input will switch grenade types during Multiplayer. | ||
| Equip Frag Grenade | Set the input to switch to Frag Grenades while the Grenade Switcher is open. | |||
| Equip Plasma Grenade | Set the input to switch to Plasma Grenades while the Grenade Switcher is open. | |||
| Equip Dynamo Grenade | Set the input to switch to Dynamo Grenades while the Grenade Switcher is open. | |||
| Equip Spike Grenade | Set the input to switch to Spike Grenades while the Grenade Switcher is open. | |||
| Theater/Observer | Cycle Camera | Set the input to change the camera. | ||
| Toggle UI | Set the input to toggle through the Theater UI and HUD visibility options. | |||
| Toggle Outlines | Set the input to show or hide all outlines. | |||
| Toggle Outline Occlusion | Set the input to switch whether outlines show through walls and objects. | |||
| Skip Forward | Set the input to skip forward on the timeline. | |||
| Skip Backward | Set the input to skip backward on the timeline. | |||
| Fast Forward | Set the input to fast forward on the timeline. | |||
| Toggle Legend | Set the input to show or hide the legend. | |||
| Camera Up | Set the input to move the camera up. | |||
| Camera Down | Set the input to move the camera down. | |||
| Camera Zoom | Set the input to zoom the camera. | |||
| Camera Boost | Set the input to toggle camera zoom boost. | |||
| View Previous Player | Set the input to view the previous player. | |||
| View Next Player | Set the input to view the next player. | |||
| Toggle Team Stat Boards | Set the input to show or hide the team stat boards in Observer mode. | |||
| Toggle Player Switcher | Set the input to show or hide the player switcher in Observer mode. | |||
| Toggle Timeline Zoom | Set the input to toggle timeline zoom in Theater. | |||
| Forge Gamplay | Custom Input | Set the input to interact with node graph scripts that have been created in Forge maps and modes. | ||
| Alert carry | Press and hold them until the weapon is lower; it should take 5 seconds.[Note 2] | No | ||
| Hide/show coordinates | [Note 2] | |||
| Toggle freecam | Press and hold them until freecam is enabled; it should take 5 seconds.[Note 2] | |||
| Enable/disable Pan Cam | These are after freecam is enabled. | |||
| Toggle Control | ||||
| Increase camera movement speed | ||||
| Decrease camera movement speed | ||||
Button Layout settings[edit]
Well, Halo Infinite features rebindable button maps; the game comes with the "BUTTON LAYOUT" setting.

| Input Action | Button | |
|---|---|---|
| On-foot | Jump | |
| Crouch/Slide | ||
| Sprint | ||
| Fire Weapon | ||
| Use Equipment | ||
| Melee | ||
| Throw Grenade | ||
| Reload/Vent/Interact | ||
| Switch Weapon/Drop Weapon | ||
| Drop Weapon | ||
| Zoom | ||
| Zoom Level | ||
| AI Scan | ||
| Helmet Light/Mark | ||
| Campaign Menu/Scoreboard | Campaign Menu/Scoreboard | |
| Scoreboard Interact | ||
| Vehicle | Boost/E-Brake | |
| Ascend/Brake | ||
| Descend/Tricks | ||
| Fire Weapon | ||
| Reload/Vent | ||
| Switch Seats | ||
| Switch Weapon | ||
| Melee | ||
| AI Scan | ||
| Throw Grenade | ||
| Equipment | Switch Equipment | |
| Equip Slot 1 | ||
| Equip Slot 2 | ||
| Equip Slot 3 | ||
| Equip Slot 4 | ||
| Grenades | Switch Grenade | |
| Equip Frag Grenade | ||
| Equip Plasma Grenade | ||
| Equip Dynamo Grenade | ||
| Equip Spike Grenade | ||
| Theater/Observer | Cycle Camera | |
| Toggle UI | ||
| Toggle Outlines | ||
| Toggle Outline Occlusion | ||
| Skip Forward | ||
| Skip Backward | ||
| Fast Forward | ||
| Toggle Legend | ||
| Camera Up | ||
| Camera Down | ||
| Camera Zoom | ||
| Camera Boost | ||
| View Previous Player | ||
| View Next Player | ||
| Toggle Team Stat Boards | ||
| Toggle Player Switcher | ||
| Toggle Timeline Zoom | ||
| Forge Gamplay | Custom Input | |

| Input Action | Button | |
|---|---|---|
| On-foot | Jump | |
| Crouch/Slide | ||
| Sprint | ||
| Fire Weapon | ||
| Use Equipment | ||
| Melee | ||
| Throw Grenade | ||
| Reload/Vent/Interact | ||
| Switch Weapon/Drop Weapon | ||
| Drop Weapon | ||
| Zoom | ||
| Zoom Level | ||
| AI Scan | ||
| Helmet Light/Mark | ||
| Campaign Menu/Scoreboard | Campaign Menu/Scoreboard | |
| Scoreboard Interact | ||
| Vehicle | Boost/E-Brake | |
| Ascend/Brake | ||
| Descend/Tricks | ||
| Fire Weapon | ||
| Reload/Vent | ||
| Switch Seats | ||
| Switch Weapon | ||
| Melee | ||
| AI Scan | ||
| Throw Grenade | ||
| Equipment | Switch Equipment | |
| Equip Slot 1 | ||
| Equip Slot 2 | ||
| Equip Slot 3 | ||
| Equip Slot 4 | ||
| Grenades | Switch Grenade | |
| Equip Frag Grenade | ||
| Equip Plasma Grenade | ||
| Equip Dynamo Grenade | ||
| Equip Spike Grenade | ||
| Theater/Observer | Cycle Camera | |
| Toggle UI | ||
| Toggle Outlines | ||
| Toggle Outline Occlusion | ||
| Skip Forward | ||
| Skip Backward | ||
| Fast Forward | ||
| Toggle Legend | ||
| Camera Up | ||
| Camera Down | ||
| Camera Zoom | ||
| Camera Boost | ||
| View Previous Player | ||
| View Next Player | ||
| Toggle Team Stat Boards | ||
| Toggle Player Switcher | ||
| Toggle Timeline Zoom | ||
| Forge Gamplay | Custom Input | |

| Input Action | Button | |
|---|---|---|
| On-foot | Jump | |
| Crouch/Slide | ||
| Sprint | ||
| Fire Weapon | ||
| Use Equipment | ||
| Melee | ||
| Throw Grenade | ||
| Reload/Vent/Interact | ||
| Switch Weapon/Drop Weapon | ||
| Drop Weapon | ||
| Zoom | ||
| Zoom Level | ||
| AI Scan | ||
| Helmet Light/Mark | ||
| Campaign Menu/Scoreboard | Campaign Menu/Scoreboard | |
| Scoreboard Interact | ||
| Vehicle | Boost/E-Brake | |
| Ascend/Brake | ||
| Descend/Tricks | ||
| Fire Weapon | ||
| Reload/Vent | ||
| Switch Seats | ||
| Switch Weapon | ||
| Melee | ||
| AI Scan | ||
| Throw Grenade | ||
| Equipment | Switch Equipment | |
| Equip Slot 1 | ||
| Equip Slot 2 | ||
| Equip Slot 3 | ||
| Equip Slot 4 | ||
| Grenades | Switch Grenade | |
| Equip Frag Grenade | ||
| Equip Plasma Grenade | ||
| Equip Dynamo Grenade | ||
| Equip Spike Grenade | ||
| Theater/Observer | Cycle Camera | |
| Toggle UI | ||
| Toggle Outlines | ||
| Toggle Outline Occlusion | ||
| Skip Forward | ||
| Skip Backward | ||
| Fast Forward | ||
| Toggle Legend | ||
| Camera Up | ||
| Camera Down | ||
| Camera Zoom | ||
| Camera Boost | ||
| View Previous Player | ||
| View Next Player | ||
| Toggle Team Stat Boards | ||
| Toggle Player Switcher | ||
| Toggle Timeline Zoom | ||
| Forge Gamplay | Custom Input | |

| Input Action | Button | |
|---|---|---|
| On-foot | Jump | |
| Crouch/Slide | ||
| Sprint | ||
| Fire Weapon | ||
| Use Equipment | ||
| Melee | ||
| Throw Grenade | ||
| Reload/Vent/Interact | ||
| Switch Weapon/Drop Weapon | ||
| Drop Weapon | ||
| Zoom | ||
| Zoom Level | ||
| AI Scan | ||
| Helmet Light/Mark | ||
| Campaign Menu/Scoreboard | Campaign Menu/Scoreboard | |
| Scoreboard Interact | ||
| Vehicle | Boost/E-Brake | |
| Ascend/Brake | ||
| Descend/Tricks | ||
| Fire Weapon | ||
| Reload/Vent | ||
| Switch Seats | ||
| Switch Weapon | ||
| Melee | ||
| AI Scan | ||
| Throw Grenade | ||
| Equipment | Switch Equipment | |
| Equip Slot 1 | ||
| Equip Slot 2 | ||
| Equip Slot 3 | ||
| Equip Slot 4 | ||
| Grenades | Switch Grenade | |
| Equip Frag Grenade | ||
| Equip Plasma Grenade | ||
| Equip Dynamo Grenade | ||
| Equip Spike Grenade | ||
| Theater/Observer | Cycle Camera | |
| Toggle UI | ||
| Toggle Outlines | ||
| Toggle Outline Occlusion | ||
| Skip Forward | ||
| Skip Backward | ||
| Fast Forward | ||
| Toggle Legend | ||
| Camera Up | ||
| Camera Down | ||
| Camera Zoom | ||
| Camera Boost | ||
| View Previous Player | ||
| View Next Player | ||
| Toggle Team Stat Boards | ||
| Toggle Player Switcher | ||
| Toggle Timeline Zoom | ||
| Forge Gamplay | Custom Input | |

| Input Action | Button | |
|---|---|---|
| On-foot | Jump | |
| Crouch/Slide | ||
| Sprint | ||
| Fire Weapon | ||
| Use Equipment | ||
| Melee | ||
| Throw Grenade | ||
| Reload/Vent/Interact | ||
| Switch Weapon/Drop Weapon | ||
| Drop Weapon | ||
| Zoom | ||
| Zoom Level | ||
| AI Scan | ||
| Helmet Light/Mark | ||
| Campaign Menu/Scoreboard | Campaign Menu/Scoreboard | |
| Scoreboard Interact | ||
| Vehicle | Boost/E-Brake | |
| Ascend/Brake | ||
| Descend/Tricks | ||
| Fire Weapon | ||
| Reload/Vent | ||
| Switch Seats | ||
| Switch Weapon | ||
| Melee | ||
| AI Scan | ||
| Throw Grenade | ||
| Equipment | Switch Equipment | |
| Equip Slot 1 | ||
| Equip Slot 2 | ||
| Equip Slot 3 | ||
| Equip Slot 4 | ||
| Grenades | Switch Grenade | |
| Equip Frag Grenade | ||
| Equip Plasma Grenade | ||
| Equip Dynamo Grenade | ||
| Equip Spike Grenade | ||
| Theater/Observer | Cycle Camera | |
| Toggle UI | ||
| Toggle Outlines | ||
| Toggle Outline Occlusion | ||
| Skip Forward | ||
| Skip Backward | ||
| Fast Forward | ||
| Toggle Legend | ||
| Camera Up | ||
| Camera Down | ||
| Camera Zoom | ||
| Camera Boost | ||
| View Previous Player | ||
| View Next Player | ||
| Toggle Team Stat Boards | ||
| Toggle Player Switcher | ||
| Toggle Timeline Zoom | ||
| Forge Gamplay | Custom Input | |
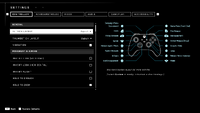 Default
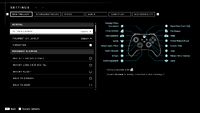 Legacy
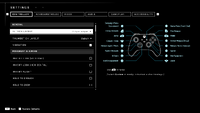 Bumper Jumper
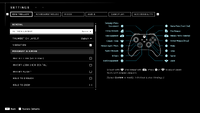 Recon
Recon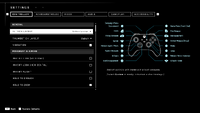 Button Puncher
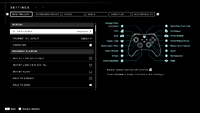 Helljumper
| Input Action | Button Layout | ||||||
|---|---|---|---|---|---|---|---|
Default |
Legacy |
Bumper Jumper |
Recon |
Button Puncher |
Helljumper
| ||
| On-foot | Jump | ||||||
| Crouch/Slide | |||||||
| Sprint | |||||||
| Fire Weapon | |||||||
| Use Equipment | |||||||
| Melee | |||||||
| Throw Grenade | |||||||
| Reload/Vent/Interact | |||||||
| Switch Weapon/Drop Weapon | |||||||
| Drop Weapon | |||||||
| Zoom | |||||||
| Zoom Level | |||||||
| AI Scan | |||||||
| Helmet Light/Mark | |||||||
| Campaign Menu/Scoreboard | Campaign Menu/Scoreboard | ||||||
| Scoreboard Interact | |||||||
| Vehicle | Boost/E-Brake | ||||||
| Ascend/Brake | |||||||
| Descend/Tricks | |||||||
| Fire Weapon | |||||||
| Reload/Vent | |||||||
| Switch Seats | |||||||
| Switch Weapon | |||||||
| Melee | |||||||
| AI Scan | |||||||
| Throw Grenade | |||||||
| Equipment | Switch Equipment | ||||||
| Equip Slot 1 | |||||||
| Equip Slot 2 | |||||||
| Equip Slot 3 | |||||||
| Equip Slot 4 | |||||||
| Grenades | Switch Grenade | ||||||
| Equip Frag Grenade | |||||||
| Equip Plasma Grenade | |||||||
| Equip Dynamo Grenade | |||||||
| Equip Spike Grenade | |||||||
| Theater/Observer | Cycle Camera | ||||||
| Toggle UI | |||||||
| Toggle Outlines | |||||||
| Toggle Outline Occlusion | |||||||
| Skip Forward | |||||||
| Skip Backward | |||||||
| Fast Forward | |||||||
| Toggle Legend | |||||||
| Camera Up | |||||||
| Camera Down | |||||||
| Camera Zoom | |||||||
| Camera Boost | |||||||
| View Previous Player | |||||||
| View Next Player | |||||||
| Toggle Team Stat Boards | |||||||
| Toggle Player Switcher | |||||||
| Toggle Timeline Zoom | |||||||
| Forge Gamplay | Custom Input | ||||||
Other control settings[edit]
With the "BUTTON LAYOUT" setting mentioned above, here are the rest of the settings.
| Setting | Options | Official description | |
|---|---|---|---|
| General | |||
| Thumbstick Layout | Default |
Default | |
| Legacy | |||
| Southpaw | |||
| Legacy Southpaw | |||
| Vibration | ✓ | Default | Set whether the controller vibrates at certain events. |
| ✗ | |||
| Movement & Aiming | |||
| Invert Look (Vertical) | ✗ | Default | Set whether to invert Right Analog (↑ or ↓). When set, the camera will look up when the look thumbstick is moved down. |
| ✓ | |||
| Invert Look (Horizontal) | ✗ | Default | Set whether to invert Right Analog (← or →). When set, the camera will look left when the look thumbstick is moved right. |
| ✓ | |||
| Invert Flight | ✗ | Default | Set whether to invert Right Analog (↑ or ↓) while piloting a flying vehicle. When set, the camera will look up when the look thumbstick is moved down. |
| ✓ | |||
| Hold to Crouch | ✗ | Default | Set whether the crouch button needs to be held down to remain crouching. |
| ✓ | |||
| Hold to Zoom | ✓ | Default | Set whether the zoom button needs to be held down to remain zooming. |
| ✗ | |||
| Hold to Sprint | ✗ | Default | Set whether the sprint button needs to be held down to remain sprinting. |
| ✓ | |||
| Movement Assisted Steering | ✗ | Default | Set whether Left Analog (← or →) will help steer wheeled vehicles in addition to steering with the camera. |
| ✓ | |||
| Maintain Sprint | ✓ | Default | Set whether to automatically resume sprinting after performing certain actions. |
| ✗ | |||
| Auto Clamber | ✓ | Default | Set whether to mantle while airborne when moving near an accessible ledge. |
| ✗ | |||
| Step Jump | ✓ | Default | Set whether to reduce jump height when jumping onto low ledges. |
| ✗ | |||
| Zoom Reset Behavior | Infinite | Default | Sets whether to use Infinite or Legacy zoom reset behavior. Infinite zoom reset means zoom will return to the last used zoom level on the weapon when initiating zoom. Legacy zoom reset always starts at the first zoom level when initiating zoom. |
| Legacy | |||
| Aim Magnetism | ✓ | Default | Magnetism slightly pulls the reticle to the nearest target while firing. |
| ✗ | |||
| Sensitivity & Acceleration | |||
| Look Acceleration | 1 | Minimum | Set the acceleration speed that is applied when Right Analog is fully engaged. It will ramp up from the base speed (defined by your Look Sensitivity) to the maximum speed. A higher value will reach the maximum speed faster. |
| 2 | Default | ||
| 5 | Maximum | ||
| Look Sensitivity (Horizontal) | 1.0 | Minimum | Set the sensitivity for Right Analog (← or →). |
| 5.0 | Default | ||
| 10.0 | Maximum | ||
| Look Sensitivity (Vertical) | 1.0 | Minimum | Set the sensitivity for Right Analog (↑ or ↓). |
| 5.0 | Default | ||
| 10.0 | Maximum | ||
| Zoom Sensitivity | |||
| Zoom Level | 1.4x | Default | Select a zoom level's look sensitivity to modify. Changes apply to all weapons with the selected value. |
| 1.6x | |||
| 2.5x | |||
| 3.0x | |||
| 5.0x | |||
| 6.0x | |||
| 10.0x | |||
| 1.4x to 10.0x Sensitivity | 0.1 | Minimum | Set the look sensitivity while zoomed in at 1.4x (e.g. MA40 AR). |
| 1.0 | Default | ||
| 2.0 | Maximum | ||
| Trigger Deadzone | |||
| Left Inner Deadzone | 0% | Default | Set how far the left trigger must be down before input is registered. |
| 45% | Maximum | ||
| Left Outer Deadzone | 55% | Default | Set how far the left trigger needs to be pulled to be considered fully down. |
| 100% | Maximum | ||
| Right Inner Deadzone | 0% | Default | Set how far the right trigger must be down before input is registered. |
| 45% | Maximum | ||
| Right Outer Deadzone | 55% | Default | Set how far the right trigger needs to be pulled to be considered fully down. |
| 100% | Maximum | ||
| Move Thumbstick | |||
| Center Deadzone | 0.0 | Minimum | Set how far the move thumbstick is from the center before the minimum input registers. Lower value feels more responsive. Higher value reduces drift. |
| 12.0 | Default | ||
| 15.0 | Maximum | ||
| Max Input Threshold | 0.0 | Minimum | Set how far the move thumbstick is from the edge before the maximum input registers. Lower value increases the variance in the acceleration curve. Higher value reduces slow turn. |
| 10.0 | Default | ||
| 15.0 | Maximum | ||
| Axial Deadzone | 0.0 | Minimum | Set how far the move thumbstick is from the X or Y axes before the minimum input registers. Lower value feels more responsive. Higher value reduces drift. |
| 12.0 | Default | ||
| 15.0 | Maximum | ||
| Look Thumbstick | |||
| Center Deadzone | 0.0 | Minimum | Set how far the look thumbstick is from the center before the minimum input registers. Lower value feels more responsive. Higher value reduces drift. |
| 12.0 | Default | ||
| 15.0 | Maximum | ||
| Max Input Threshold | 0.0 | Minimum | Set how far the look thumbstick is from the edge before the maximum input registers. Lower value increases the variance in the acceleration curve. Higher value reduces slow turn. |
| 10.0 | Default | ||
| 15.0 | Maximum | ||
| Axial Deadzone | 0.0 | Minimum | Set how far the look thumbstick is from the X or Y axes before the minimum input registers. Lower value feels more responsive. Higher value reduces drift. |
| 12.0 | Default | ||
| 15.0 | Maximum | ||
Keyboard and mouse[edit]
Configure bindings[edit]
Default keyboard and mouse controls.

| Input Action | Key or mouse button | Description | Bindable | |||
|---|---|---|---|---|---|---|
| Game Menu | Escape | No | ||||
| On-foot | Move Forward | W | Set the input to move forward.[Note 1] | Yes | ||
| Move Backward | S | Set the input to move backward. | ||||
| Move Left | A | Set the input to move left. | ||||
| Move Right | D | Set the input to move right. | ||||
| Jump | Space | Set the input to jump. | ||||
| Crouch/Slide | Left Ctrl | Set the input to crouch. While sprinting, press this input to slide. | ||||
| Sprint | Left Shift | Set the input to sprint. | ||||
| Walk | Caps Lock | Set the input to walk. | ||||
| Fire Weapon | Left Mouse Button | Set the input to fire the equipped weapon. | ||||
| Use Equipment | Q | Set the input to use the equipped equipment. | ||||
| Melee | F | Set the input to melee. | ||||
| Throw Grenade | G | C | Set the input to throw equipped grenade. | |||
| Reload/Vent | R | Set the input to reload or vent the equipped weapon. | ||||
| Switch Weapon | Scroll Up | Scroll Down | V | Set the input to switch weapons. | ||
| Drop Weapon | Unbind | Set the input to drop the equipped weapon. | ||||
| Interact | E | Set the input to interact with a nearby object. | ||||
| Zoom | Right Mouse Button | Set the input to zoom in with the equipped weapon. Will also cycle through zoom levels if the scope supports multiple zoom levels. | ||||
| Zoom Level | Middle Mouse Button | Set the input to change the zoom level while zooming in with a weapon with multiple levels. | ||||
| Switch to Next Grenade | N | Set the input to cycle to the next grenade type. | ||||
| Switch to Previous Grenade | B | Set the input to cycle to the previously equipped grenade type. | ||||
| AI Scan | Z | Set the input to highlight objectives and interactive objects. | ||||
| Mark | X | Set the input to call out locations and objects during Multiplayer. | ||||
| Toggle Helmet Light | T | Set the input to turn the helmet flashlight on and off. | ||||
| Equip Slot 1 | 1 | Set the input to switch to the Equipment in the first slot. | ||||
| Equip Slot 2 | 2 | Set the input to switch to the Equipment in the second slot. | ||||
| Equip Slot 3 | 3 | Set the input to switch to the Equipment in the third slot. | ||||
| Equip Slot 4 | 4 | Set the input to switch to the Equipment in the fourth slot. | ||||
| Switch Equipment | Unbind | Set the input to switch equipment types | ||||
| Switch to Previous Equipment | Unbind | Set the input to switch to the previously equipped equipment | ||||
| Campaign Menu/Scoreboard | Campaign Menu/Scoreboard | Tab | Set the input to access the TacMap, Upgrade, database, and other menus during Campaign. This input will display the Scoreboard during Multiplayer. | |||
| Scoreboard Interact | Space | Set the input to interact with the multiplayer scoreboard. | ||||
| Vehicle | Boost/E-Brake | Left Shift | Set the input to use the vehicle's boost or e-brake while driving. | |||
| Ascend/Brake | Space | Set the input to ascend with the vehicle or use the brake while driving. | ||||
| Descend/Tricks | Left Ctrl | Set the input to descend with the vehicle or activate tricks while piloting. | ||||
| Switch Seats | Q | Set the input to switch seats. | ||||
| Fire Weapon | Left Mouse Button | Set the input to fire a vehicle's weapon. | ||||
| Melee | F | Middle Mouse Button | Set the input to melee as a passenger. | |||
| Throw Grenade | C | G | Set the input to throw a grenade as a passenger. | |||
| Reload/Vent | R | Set the input to reload or vent an equipped weapon as a passenger. | ||||
| Switch Weapon | Scroll Up | Scroll Down | V | Set the input to switch weapons as a passenger. | ||
| Interact | E | Set the input to interact with a nearby object while operating a vehicle. | ||||
| Switch Grenade | N | Set the input to switch grenade types as a passenger. | ||||
| Switch to Previous Grenade | B | Set the input to cycle to the previously equipped grenade type. | ||||
| AI Scan | Z | Set the input to highlight objectives and interactive objects. | ||||
| Mark | X | Set the input to call out locations and objects during Multiplayer. | ||||
| Equip Slot 1 | 1 | Set the input to switch to the Equipment in the first slot as a passenger. | ||||
| Equip Slot 2 | 2 | Set the input to switch to the Equipment in the second slot as a passenger. | ||||
| Equip Slot 3 | 3 | Set the input to switch to the Equipment in the third slot as a passenger. | ||||
| Equip Slot 4 | 4 | Set the input to switch to the Equipment in the fourth slot as a passenger. | ||||
| Communication | Open Text Chat | Y | Set the input to open Text Chat. | |||
| Voice Chat | VK_XBUTTON2 (6) | Set the input to activate voice chat. Used for both push-to-talk and toggle-to-talk. | ||||
| Theater/Observer | Cycle Camera | M | Set the input to change the camera. | |||
| Toggle UI | Backspace | Set the input to toggle through the Theater UI and HUD visibility options. | ||||
| Toggle Outlines | R | Set the input to show or hide all outlines. | ||||
| Toggle Outline Occlusion | F | Set the input to switch whether outlines show through walls and objects. | ||||
| Skip Forward | E | Set the input to skip forward on the timeline. | ||||
| Skip Backward | Q | Set the input to skip backward on the timeline. | ||||
| Fast Forward | G | Set the input to fast forward on the timeline. | ||||
| Toggle Legend | H | Set the input to show or hide the legend. | ||||
| Camera Up | X | Set the input to move the camera up. | ||||
| Camera Down | Z | Set the input to move the camera down. | ||||
| Camera Zoom | Scroll Up | Right Mouse Button | Set the input to zoom the camera. | |||
| Camera Boost | Left Shift | Set the input to toggle camera zoom boost. | ||||
| 1st Person Camera | C | Set the input to switch to the 1st-person camera. | ||||
| 3rd Person Camera | B | Set the input to switch to the 3rd-person camera. | ||||
| Free Camera | N | Set the input to switch to the free camera. | ||||
| Orbit Camera | V | Set the input to switch to the orbit camera. | ||||
| View Previous Player | , | Set the input to view the previous player. | ||||
| View Next Player | . | Set the input to view the next player. | ||||
| View Player 1 | 1 | Set the input to view Player 1. | ||||
| View Player 2 | 2 | Set the input to view Player 2. | ||||
| View Player 3 | 3 | Set the input to view Player 3. | ||||
| View Player 4 | 4 | Set the input to view Player 4. | ||||
| View Player 5 | 5 | Set the input to view Player 5. | ||||
| View Player 6 | 6 | Set the input to view Player 6. | ||||
| View Player 7 | 7 | Set the input to view Player 7. | ||||
| View Player 8 | 8 | Set the input to view Player 8. | ||||
| Toggle Team Stat Boards | T | Set the input to show or hide the team stat boards in Observer mode. | ||||
| Toggle Player Switcher | I | Set the input to show or hide the player switcher in Observer mode. | ||||
| Toggle Timeline Zoom | U | Set the input to toggle timeline zoom in Theater. | ||||
| Forge Gameplay | Custom Input | 1 | Set the input to interact with node graph scripts that have been created in Forge maps and modes. | |||
Control settings[edit]
| Setting | Options | Official description | |
|---|---|---|---|
| Movement & Aiming | |||
| Invert Look (Vertical) | ✗ | Default | Set whether to invert the vertical look for the mouse. When set, the camera will look up when the mouse is moved down. |
| ✓ | |||
| Invert Look (Horizontal) | ✗ | Default | Set whether to invert the horizontal look for the mouse. When set, the camera will look left when the mouse is moved right. |
| ✓ | |||
| Invert Flight | ✗ | Default | Set whether to invert the vertical look for the mouse while piloting a flying vehicle. When set, the camera will look up when the mouse is moved down. |
| ✓ | |||
| Hold to Crouch | ✗ | Default | Set whether the crouch key needs to be held down to remain crouching. |
| ✓ | |||
| Hold to Zoom | ✗ | Default | Set whether the zoom key needs to be held down to remain zooming. |
| ✓ | |||
| Hold to Sprint | ✗ | Default | Set whether the sprint key needs to be held down to remain sprinting. |
| ✓ | |||
| Maintain Sprint | ✓ | Default | Set whether to automatically resume sprinting after performing certain actions. |
| ✗ | |||
| Auto Clamber | ✓ | Default | Set whether to mantle while airborne when moving near an accessible ledge. |
| ✗ | |||
| Step Jump | ✓ | Default | Set whether to reduce jump height when jumping onto low ledges. |
| ✗ | |||
| Movement Assisted Steering | ✓ | Default | Set whether moving A and D will help steer wheeled vehicles in addition to steering with the camera. |
| ✗ | |||
| Hold to Walk | ✓ | Default | Set whether the walk key needs to be held down to remain walking. |
| ✗ | |||
| Player Walk Throttle Scale | 0.0 | Minimum | Set the scale at which to slow player movement when walking. |
| 0.4 | Default | ||
| 1.0 | Maximum | ||
| Zoom Reset Behavior | Infinite | Default | Sets whether to use Infinite or Legacy zoom reset behavior. Infinite zoom reset means zoom will return to the last used zoom level on the weapon when initiating zoom. Legacy zoom reset always starts at the first zoom level when initiating zoom. |
| Legacy | |||
| Aim Magnetism | ✓ | Default | Magnetism slightly pulls the reticle to the nearest target while firing. |
| ✗ | |||
| Sensitivity | |||
| Mouse Sensitivity | 0.001 | Minimum | Set the sensitivity of your aim. |
| 2.200 | Default | ||
| 10.000 | Maximum | ||
| Sensitivity Scale (Vertical) | 0.1 | Minimum | Set the vertical mouse sensitivity of your aim. |
| 1.0 | Default | ||
| 2.0 | Maximum | ||
| Sensitivity Scale (Horizontal) | 0.1 | Minimum | Set the horizontal mouse sensitivity of your aim. |
| 1.0 | Default | ||
| 2.0 | Maximum | ||
| Zoom Sensitivity | |||
| Zoom Level | 1.4x | Default | Select a zoom level's look sensitivity to modify. Changes apply to all weapons with the selected value. |
| 1.6x | |||
| 2.5x | |||
| 3.0x | |||
| 5.0x | |||
| 6.0x | |||
| 10.0x | |||
| 1.4X to 10.0X Sensitivity | 0.1 | Minimum | Set the mouse sensitivity while zoomed in with a 1.4x scope (e.g. MA40 AR). |
| 1.0 | Default | ||
| 2.0 | Maximum | ||
| Mouse Acceleration | |||
| Mouse Acceleration | ✗ | Default | Set whether moving the mouse faster will increase mouse look movement. |
| ✓ | |||
| Minimum Acceleration Rate | 0 | Default | If mouse acceleration is enabled, set the lower threshold at which acceleration starts. |
| 100 | Maximum | ||
| Maximum Acceleration Rate | 1 | Minimum | If mouse acceleration is enabled, set the upper limit at which acceleration ends. |
| 100 | Default | ||
| 800 | Maximum | ||
| Acceleration Scale | 0 | Default | If mouse acceleration is enabled, set the acceleration scaling curve. |
| 100 | Maximum | ||
| Acceleration Power | 0 | Minimum | If mouse acceleration is enabled, set the intensity of the scaling curve. |
| 1 | Default | ||
| 100 | Maximum | ||
Notes[edit]
Sources[edit]
| |||||||||||


