
H2:Uprising
From Halopedia, the Halo wiki
|
Prev: |
|
|
Next: |
|
| Uprising | |
|---|---|

| |
|
Game: |
|
|
File name (?): |
|
|
Player: |
|
|
Date: |
|
|
Location: |
The surface of Installation 05, near the Control Room. |
|
Objective(s): |
Take revenge upon the Brute traitors and reach the canyon floor |
|
Par Time: |
00:15:00 (Master Chief Collection) |
|
Par Score: |
9,000 (Master Chief Collection) |
 |
Halopedia has a walkthrough guide for this level; see H2:Uprising/Walkthrough. |
| “ | This is certain: The Brutes shall pay for the blood they have spilled. | ” |
Uprising is the thirteenth campaign level of Halo 2, and the twelfth playable one. The level follows the Arbiter as he is teleported to the vicinity of the Control Room, only to discover Jiralhanae treachery against his own kind. Whereas the next level, High Charity, returns to John-117 as the protagonist, the Arbiter's storyline is continued directly in The Great Journey.
In Halo 2 for Windows Vista, upon completing this level on Normal, Heroic, or Legendary will award the player the achievement "Uprising" and 30 Gamerscore.
Transcript[edit]
{Cutscene} {Anniversary Cutscene}
The view shows a view of Delta Halo's Control Room.
Original version:
Arbiter Thel 'Vadamee is seen arriving on a cliff face via teleporting from the Gravemind. He then turns to his left and finds an abandoned Okarda'phaa-pattern plasma rifle, lying on a rock stained with Sangheili blood. He picks it up and readies himself on the path ahead.
Anniversary version:

A teleportation portal induced by the Gravemind is seen appearing on a cliff face, as Arbiter Thel 'Vadamee appears and falls through. He gathers himself before seeing the portal close behind him and turns to see the path ahead of him. He pauses with a shocked look in his eyes as he picks up, and examines, a Okarda'phaa-pattern plasma rifle, before walking forward.
{Gameplay}
Oh, So That's How it Is[edit]
Brute shot grenades are seen going off in the distance, followed by plasma rifle bursts firing in the air.
- Jiralhanae #1: "Weaklings!"
'Vadamee encounters a badly wounded Sangheili lying on the ground with an energy sword lying next to him.
- Sangheili #1: (weakly) "The Brutes have betrayed us... the Councilors..."
The Sangheili dies. A Jiralhanae is seen shooting at another dead Sangheili nearby.
- Jiralhanae #1: "Let's just throw them over the edge!"
- Jiralhanae #2: "Where's the fun in that?"
Another Jiralhanae approaches the two other Jiralhanae.
- Jiralhanae #1 "I already checked there!"
- Jiralhanae #3: "Just making sure..."
If the player chooses to fight head on, alerting the trio of Jiralhanae:
- Jiralhanae #2: (sarcastically) "So, you've come to save your friends!"
After killing the trio of Jiralhanae silently or not, the Arbiter continues on, finding a larger Jiralhanae pack, led by a Jiralhanae Captain.
If the player chooses to ambush the trio of Jiralhanae and assassinates them without alerting the nearby Jiralhanae pack, after a while:
- Jiralhanae Captain: (growls) "Go see what's taking them so long!"
Eventually, the Jiralhanae pack discover 'Vadamee.
- Jiralhanae Captain: "He's still just an Elite. Go! Kill him!"
'Vadamee manages to fight his way up to the doors of a structure. A cloaked Special Operations Sangheili arrives from the door and helps 'Vadamee to kill any remaining Jiralhanae. He returns to the doors, and looks at a dead Sangheili.
- Special Operations Sangheili: "By the Prophets ... what have these Brutes done?"
The Sangheili turns and looks at 'Vadamee, then tightens his fist in anger.

- Special Operations Sangheili: "They have shed our brothers' blood... and for that, they must die!"
Covenant Orbital insertion pods land on the canyon, unveiling Sangheili reinforcements: a Sangheili Zealot and two Sangheili Minors.
- Special Operations Sangheili: "A Zealot! So much for a stealthy advance."
- Sangheili Zealot: "Bah! Over so soon?"
If the player chooses to move into the structure before the rest of the Sangheili reinforcements do:
- Sangheili Zealot: "Arbiter! Save some for the rest of us!"
If the player chooses to wait until the reinforcements enter the structure:
- Sangheili Zealot: "Make haste! There are more Brutes to kill!"
The Sangheili continue through two hallways, go through a door, and head into a cave with Forerunner platforms. Two Unggoy stationed on the upper levels of the cave notice the doors open, become spooked and flee.
- Sangheili Zealot: "Ha ha! Long have I waited for this!"
- Jiralhanae #4: "Not all dead? Raise the alarms!"
The Sangheili group fight their way through many Jiralhanae and Kig-Yar continue on to the upper level, where the two Unggoy are under attack from a group of Kig-Yar. Soon a group of Jiralhanae and Yanme'e enter from a door on the upper level. The Arbiter and his team manage to kill all Covenant present. They move on into a room, where a pair of Jiralhanae and several Kig-Yar are holding their position. The Sangheili eliminate them and move on. In the corner of the room, a single Unggoy can be seen cowering among a few Unggoy corpses.
If the player chooses to approach the cowering Unggoy:
- Cowardly Grunt: "Please ... no hurt! Me like Elites! Brutes stinky bad-bad! Me stay here, make sure no Brutes come behind, mighty Arbiter!" (Chuckles nervously)
The Sangheili group head through a hallway with dead Sangheili, Unggoy, and weapons scattered about. One of the Sangheili crouches next to the dead bodies.
- Special Operations Sangheili #1: "Start the journey... be at peace."
Alternatively:
- Sangheili Minor #1: " ...And yet I live."
or
- Sangheili Zealot: "He is no more."
If one of the Jiralhanae escapes the previous encounter, he runs ahead to warn the others.
- Jiralhanae #5: "Elite resistance! Warn the others!"
'Vadamee and his allies go into a multi-leveled room, where more Covenant forces consisting of Jiralhanae and Kig-Yar await. The Sangheili catch them by surprise and easily defeat them. A Sangheili Minor armed with a carbine joins the group.
The Sangheili move through another corridor scattered with dead Sangheili, Unggoy, and more weapons. The room after the corridor is occupied by more Jiralhanae and Kig-Yar, including a Jiralhanae-operated Shade turret. Another fight starts as the two forces meet, and more Jiralhanae enter the room to aid their allies. They are all taken out. The Sangheili move on, to a large door.
Step Aside, Let The Man Through[edit]
As the door to the outside opens, several Jiralhanae and Kig-Yar are taken by surprise as the Sangheili charge at them.
As the Sangheili head forward, a Jiralhanae Captain rides a Ghost into the area and disembarks. A pack of Jiralhanae follow, some wielding human shotguns and augmented by a Kig-Yar Sniper. They clash with the Sangheili force. The Covenant are soon eliminated. A few more Ghosts sit unused near the position. The Arbiter pilots one of them, and the Sangheili follow.
'Vadamee takes the vanguard and surprise-attacks the nearby Jiralhanae camp head-on. The Sangheili follow, as a big battle takes place between the two sides. After the initial garrison is defeated, Covenant reinforcements appear. 'Vadamee and his allies defeat them and move on to the next camp, where a cowering Unggoy is being threatened by a Kig-Yar. The Sangheili eliminate the Kig-Yar, and the Unggoy mounts a nearby Shade turret to aid the Sangheili. More Jiralhanae-controlled Ghosts and even a Spectre try to stop the Sangheili forces, but fail.
A small Kig-Yar camp awaits in the next area, and is easily taken care of by the Sangheili. Some of the Sangheili take the opportunity to pilot the Ghosts throughout the camp. A Phantom dropship flies overhead, but pays no attention to the conflict below.
After going down a steep hill with a waterfall, another Jiralhanae camp awaits on a shallow river with several methane recharge stations placed at the front to block the Sangheili, and a few Kig-Yar Snipers as support. As the Sangheili forces approach the camp, the Jiralhanae try to kill them by detonating the methane recharge stations. This ploy fails, and the Sangheili crush the defenses and follow the river to the next area.

Fight Club[edit]
The river stops at a waterfall, and in front of a Forerunner structure guarded by multiple Jiralhanae and two Wraiths. A huge battle begins, with more Jiralhanae coming out from the structure. In addition, many Kig-Yar Snipers try to engage the Sangheili from long range, but they too are defeated. Once most of the area is cleared of Jiralhanae, two more Covenant orbital insertion pods land and reinforce the Sangheili. The group moves on into a room, which appears to have been used as an armory by the Jiralhanae. Many weapons and equipment, both human and Covenant are stored all over the room. One of the Sangheili Minors stops, and looks around.
- Sangheili Minor #2: "What vulgar taste! Even as trophies, these weapons are worthless!"
If the player gets a multi-kill with the rocket launcher.
- Sangheili Minor #2: "Perhaps I spoke too soon."
The Sangheili break through another line of Jiralhanae forces and approach a cave. More Covenant troops and two Jiralhanae-controlled Ghosts come through the cave in a final effort to stop the Sangheili. They fail. There is a door at the end of the cave. 'Vadamee heads through it alone.
{Cutscene} {Anniversary Cutscene}
'Vadamee exits the door. He spots a Wraith approaching him slowly. The Arbiter readies his weapon (a carbine in Anniversary). The Wraith stops in front of him. The hatch opens to reveal Rtas 'Vadumee. The Arbiter calms and lowers his weapon
- Rtas 'Vadumee: (Surprised) "By the rings, Arbiter!? The Councilors! Are they-"
- Thel 'Vadamee: "Murdered... by the Brutes."
- Rtas 'Vadumee: (Angrily pounding his fist on the Wraith) "Vile, disloyal beasts! The Prophets were fools to trust them!"
They look up and see two Phantoms flying over them. One flies over the Control Room while the second stops above the platform of the Installation 05 Control Room. Tartarus emerges from the gravity lift, with Commander Miranda Keyes and 343 Guilty Spark in captivity. Four Jiralhanae guards awaits behind the Control Room door. Tartarus stops momentarily, sniffs the air, and continues into the Control Room. Tartarus enters, and the doors slams shut behind him with a loud bang. Fades to black.
Level ends
Trivia[edit]
Glitches[edit]
- If the dying Sangheili with the Energy Sword at the beginning of the level is meleed as the quote "The Brutes have betrayed us... The Councilors..." plays, then his mouth will start moving to the words.
- One can receive unlimited Plasma Pistols on this level. First give a Grunt a Fuel Rod Gun or a Rocket Launcher then drive in a vehicle toward him, he will dive out of the way and drop his weapon and pull out a Plasma Pistol with 100% ammo.
- If the Grunts that joined the forces in the first cavern room are still with the player when they gets to the three-leveled room, one will notice that they will not follow any further. Even if pushed toward and off the edge, they will not follow the crowd like the Elites will if they are pushed down. The Grunts, however, will appear again when the player reaches to the second chapter, near the door.
- Sometimes, the Zealot will stop moving no matter how far the player goes, if the player switches weapons with him, he will start climbing up an imaginary boundary and stay at the top.
- At the top of the mountains by where the Wuzum-pattern Spectre comes, when the player gets to the end of a pathway in the mountain, they can spot two trees mysteriously floating like the one in Halo: Combat Evolved campaign level Two Betrayals.
- If the player walks by a certain tree they will see part of the Arbiter's body and if they shoot it the player will take damage.
- It is possible to gain two extra Spec Ops Elite allies near the beginning of the level, at the expense of two Grunts. When the first Spec Ops Elite begins to say, "By the Prophets, what have these Brutes done?" rush into the next room so that the Zealot and two minor Elites can't drop down from the sky. Therefore, the player will only have the one Elite as an ally, plus the two Grunts. If the Grunts are killed, two extra Spec Ops with Plasma Rifles will appear, usually accompanying the first one. Be sure not to betray the Grunts outright, or the Elites will attack the player. After clearing the first room, go back and allow the Zealot and two Minor Elites to drop from the sky, however, the Zealot and two Minor Elites will not follow through out the rest of the level in this glitch.
- During the vehicle section of the level (before Fight Club), allies who are walking (notably the Sangheili Zealot) will get stuck near the waterfall, walking up and down, leaving the player along with the others who drive vehicles.
- It is possible to skip much of this level and start the next level prematurely by jumping out and around the level. A good example is Here
- This level contains several instances of the Thunderstorm skull not working properly. Even with the skull activated, two of the Brutes at the start of the level can still appear as Minors or Majors instead of Captains. Another example of this phenomenon affects several allied Grunts in the level Sacred Icon.
Mistakes[edit]
- At the start of the mission, there are stray Plasma Rifle shots seen coming from the next section. Interestingly enough, there is no weapon firing the shots. This can be seen if the player grenade jumps with the Sputnik skull activated.
- Driving a Ghost out the last door will trigger the cutscene with a Ghost in the background.
Easter eggs[edit]
- There are mysterious faces in the cave's entrance and cat faces at the exit.
- Just before "Step Aside, Let the Man Through", one can find a Grunt covering his head and shaking. When approached, he will say: "Please! No hurt! Me like Elites! Brutes stinky bad bad! Me stay here and make sure no Brutes come behind mighty Arbiter! [laughs nervously]... eh?" This Grunt is known as the Cowardly Grunt, and is one of the three Talking Grunts.
- The eleventh terminal is a Forerunner terminal in the first area of the chapter "Fight Club" after the waterfall, before crossing the stone bridge into the armory room with both human and Covenant weapons. The terminal can be found on the wall inside the second alcove.
References[edit]
- The ending cutscene is quite similar to the scene in Star Wars: Return of the Jedi, in which Han Solo is confronted with an AT-ST, only to be surprised by the fact that Chewbacca is controlling it.
- In this whole level, there are a total of Seven Sangheili, another seven reference.
- In one of the rooms that the Brutes wait there are seven in total.
Miscellaneous[edit]
- There was a cinematic cut from the beginning of this level in which the player would see Brutes lining up and killing Elite Councilors.
- Grunt allies surprisingly can be given the Rocket Launcher. The best way to do this is obtain the Thunderstorm Skull and play on Easy. Therefore the Grunts are Ultras and can take a lot of damage.
- At several points throughout the level, enemies will run ahead to alert groups further along. (Most notably the Brute that will run into the top of the three-leveled room and yell "Elite resistance, warn the others!")
- This level and The Great Journey are the only levels in Halo 2 where a Zealot Elite appears on any difficulty. They are also the only levels where Zealots appear as allies in the whole trilogy.
- When beginning the mission, go to the second rock to the north east, after that turn a little bit left to see the other wall. There is grass forming a bird head and if you look higher up there are horns, which might mean this is another devil bird like the one in Zanzibar.
- This is the only level in the entire Halo series that is just a "revenge" mission. There are no orders or guidelines to follow, just settling the score with the Brutes as you make your way through the Forerunner complexes.
- In the Fight Club part, there is a Brute with a Shotgun that, if not killed, can be seen trying out the Shotgun on the wall.
- After the Three-Leveled room, passed the corridor with the dead Elites (one has an Energy Sword) and Grunt bodies, the player will reach the room with the Shade turret. On the upper level, there will be a scared Grunt. If the Grunt is located at the left of the door the player comes from, there will be a Fuel Rod Gun beside him. If the Grunt is located anywhere else, the Fuel Rod Gun won't appear.
- It is possible (with the Thunderstorm Skull) to have up to 5 Ultra Elites throughout the level. Their strong energy shield and skill with the Energy Sword make them near-lethal when facing a pack of Brutes.
- At the end of this level, both weapons and even the 3 frag grenades found in the Jiralhanae Encampment will carry over to the final level The Great Journey. However, if you start a new level from the main menu or if you equip yourself with a Fuel Rod Gun or Rocket Launcher by the end of this level, your weapons will revert to the default Plasma Rifle and Plasma Pistol in The Great Journey.
Gallery[edit]
Halo 2[edit]
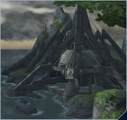 Preview of the level in Halo 2 menu.
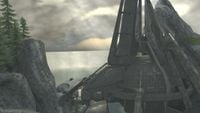 A view of Installation 05's Control Room.
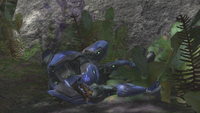 The dying Sangheili Minor who notifies the Arbiter of the Jiralhanae.
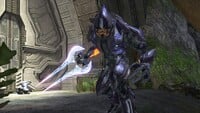 A SpecOps Sangheili with an energy sword.
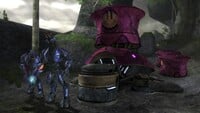 Two Sangheili Minors next to a recharge station.
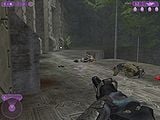 First-person view of the Arbiter at a Forerunner structure.
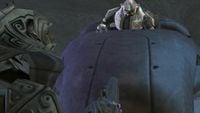 The Arbiter meets Rtas 'Vadumee outside the Control Room.
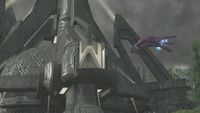 A Jiralhanae-controlled Phantom lands at the Control Room door.
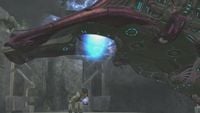 The Phantom drops off Tartarus, Keyes, and 343 Guilty Spark at the Control Room.
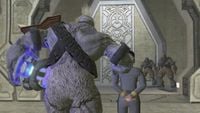 Tartarus taking Keyes and 343 Guilty Spark into the Control Room.


Halo 2: Anniversary[edit]
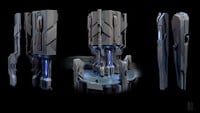 Concept art for a Forerunner platform on the level.
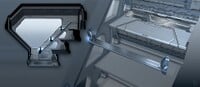 Concept art for the "stair room" on the level.
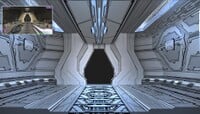 Concept art for the "weapons room" on the level.
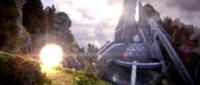 The Arbiter being teleported to a cliff overlooking Installation 05's Control Room.
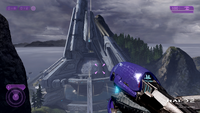 First-person view of the Arbiter looking at the ring's Control Room.
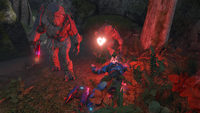 Jiralhanae firing at dead Sangheili.
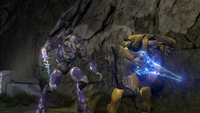 Two Sangheili allies in the caverns.
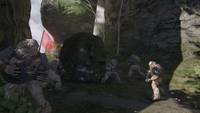 A pack of Jiralhanae securing an area.
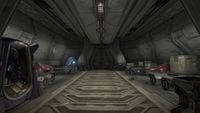 An armory set up by the Jiralhanae.
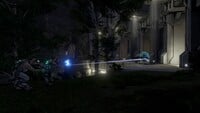 Kig-Yar Snipers firing at Sangheili.
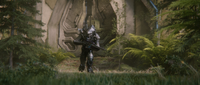 The Arbiter on the surface of Installation 05.
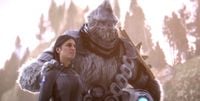 Tartarus taking Keyes and 343 Guilty Spark into the Control Room.


Sources[edit]
- ^ Halo 2 Editing Kit, game file
H2EK\tags\scenarios\solo\08a_deltacliffs\08a_deltacliffs.scenario
| |||||||||||||||||||||||||||||||


