Halo 5: Guardians skulls
From Halopedia, the Halo wiki

Halo 5: Guardians skulls are game modifiers featured in Halo 5: Guardians with the appearance of a human skull. The skulls are the same from Halo: Reach and Halo 4. Just like in previous installments like Halo 3 and Halo: Combat Evolved Anniversary, skulls are collectibles that the player will be awarded with achievements for finding the first of them and all of them, and can also be accessed in the campaign menu after claiming them in the levels in which they're found.[1]
Campaign Skulls
Score Attack Reference
Unlike previous games, the skull score multipliers in Halo 5: Guardians are added onto each other.
| Skull Name | Multiplier | Short Description |
|---|---|---|
| Iron | 3× | Death on Co-op = Revert to last checkpoint. Death on Solo = Restart mission. |
| Black Eye | 1.5× | No auto-shield regeneration and Overshields. Only melee attacks cause shields to recharge. |
| Tough Luck | 1.5× | Grenades, Needler fire, projectiles (ie. Rocket Launcher, Fuel Rod Cannon), and vehicular charges are evaded more skillfully by the AI. Enemies go Berserk more often, and Grunts will run away for a shorter period of time, turn around, and attack again the player. |
| Catch | 1.5× | NPCs throw many more grenades at an alarming rate. NPCs always drop two grenades upon death. |
| Fog | 1.5× | Motion Tracker is fully disabled. |
| Blind | 2.5× | The entire heads-up display, first person arms, and first person weapon are completely hidden. |
| Famine | 2× | Dropped weapons have much less ammunition/charge. |
| Thunderstorm | 1.5× | All enemies are promoted to higher ranks. (More experience) |
| Tilt | 2× | Enemy defensive resistances/weaknesses are amplified. |
| Mythic | 2.5× | All NPC health allocation is doubled. |
IWHBYD (I Would Have Been Your Daddy)

Level: Osiris
Icon: A skull marked with a double helix.
Effect: Rare dialogue is more common, and vice versa.
Directions:
- Go to the very first Forerunner door on the level before using the Artemis Tracking System for the first time.
- Look to the left towards a ledge and clamber onto it.
- Look towards the air battle, and there will be a triangular ledge on which the skull lies.
Black Eye

Level: Blue Team
Icon: A skull marked with a smaller skull with a bruise under one eye.
Effect: Your energy shields will not recharge until you perform a melee hit on an enemy. The Energy Sword and Gravity Hammer's RT attacks count as melee attacks. The shockwave created by the Gravity Hammer will also recharge your shield. The shield down sound effect is removed as well. In addition, unlike in Halo 2, Overshields are completely nullified, and any revived characters, along with their revivers, will have only health and no shields if their shields have been wiped out. Health will not be immediately restored after reviving a teammate either. AI-controlled teammates can still recharge their shields, however.
Point Multiplier: 1.5×
Directions:
- In the reactor room, go to the far left of the reactor, where there are a few ammo boxes and a pipe, clamber onto the pipe.
- Walk all the way to the end of the pipe, which will lead you to a small, dark room. Be careful of Covenant forces from below and to the right, though, especially on Heroic or Legendary.
- On the floor there should be a breakable piece of ground. Ground Pound onto it, and that should make you fall to another room.
- Once inside, go towards the left, there should be a small pipe with the skull resting on it for you to pick up.
Iron
Level: Glassed
Icon: A skull marked with a hammer.
Effect: If you die while playing solo, you will respawn at the very beginning of the level. If any player dies while playing Co-op, all players will respawn to the last checkpoint. This is similar to what would happen when playing Co-op on Legendary in Halo 2, but it is slightly harsher on the players. In addition, the abilities to save from last checkpoint and manually revert to last checkpoint are disabled.
Point Multiplier: 3×
Directions:
- Play through the mission on Legendary difficulty until you reach the part where Sloan suggests Fireteam Osiris to obtain a Corp Scorpion on the way to Meridian Station.
- After you gain access to the Corp Scorpion and go through some arched rocks, you may see a cargo ship flying and being pursued by a Phaeton.
- Shoot at the Phaeton until you destroy it.
- An alternate strategy is to obtain an Spartan Laser and have another Spartan drive the Scorpion. As the Spartan Laser has hitscan properties, unlike the Scorpion's weapons, using it to destroy the Phaeton is much easier.
- When you destroy the Phaeton, you will hear the Grunt Birthday Party sound effect which means the skull will appear in one of three places, shown in the video above.
Blind

Level: Unconfirmed
Icon: An eye with the pupil crossed out.
Effect: Your entire Heads-Up Display is disabled. You can't see your weapon, first person arms, shield and health meters, motion tracker, or ammo/grenades. However, you can still see the sprint aiming reticle, radio tags from other characters, and the boost gauge when riding a Covenant vehicle.
Point Multiplier: 2.5×
Directions:
- After entering the underground facility, you'll find a forklift which you have to climb.
- Climb a bow that's next to the wall and look behind you where there is a cat walk.
- Climb said cat walk and go to the end of it.
- At the end, you will find a small cave where you need to crouch. Just walk inside.
- You will find the skull sitting in there.
Thunderstorm
Level: Evacuation
Icon: A skull marked with a lightning bolt.
Effect: All enemies and allies are promoted to the highest available rank:
Specialists (e.g. Grunt Imperial), Rangers, Promethean Soldiers, and Promethean Knights are unaffected.
Point Multiplier: 1.5×
Directions: For you to get the skulls you need to destroy 5 cones in under 2 minutes.
- The first of the cones is located close to the door where the level Glassed ends; after you go through it, you have to go the left where a rock ledge and a metal stairway are, you'll find the first cone next to boxes with a blanket on them.
- Second cone is before you go inside the tunnel where Governor Sloan says "This is Governor Sloan broadcasting on all frequencies. People, if you are still planetside, make your way to the space elevator right now. Final shuttles are departing with or without you." There, you will find, to the right next to a set of stairs, the second cone for you to destroy.
- Third is where the Prometheans destroy the bridge; next to a destroyed Warthog, you will find the third cone.
- Fourth will be around the section with a yellow pillar and a few boxes.
- Fifth and final cone will be next to a destroyed cargo ship and a red box covered with a blanket.
- Once you have destroyed the cones, you must go to almost the end of the level where the Guardian begins throwing pulses. There, you will find the skull partially submerged into the ground, but with its top exposed for you to see.
Cone 1.

Cone 2.
Cone 3.
Cone 4.
Cone 5.


Grunt Birthday Party

Level: Reunion
Icon: A skull marked with a candle.
Effect: If a Grunt is shot in the head with any headshot-capable weapon, a popping sound is heard, colorful confetti explodes out of it, and a sound clip of children cheering from the game Hurray! can be heard in the background. When the Grunt's head explodes, their backpack also usually explodes. The following weapons can trigger this effect:
- Magnum
- Battle Rifle
- DMR
- Railgun
- Sniper Rifle (including campaign version of Nornfang)
- Carbine
- Beam Rifle
- LightRifle
- Binary Rifle
Directions:
- In the section of the mission on a cliff where there are some Covenant examining a crashed Phantom simply, walk towards the right and go inside the tunnel.
- After coming out of it, you will see a small Forerunner platform holding some Covenant boxes and even an Energy Sword. Walk left and see a Grunt (can be any type) singing and holding the skull.
- Walk behind the Grunt, and it will say "[Action Button] Punt" for you to kick the Grunt off the ledge. The skull will then appear in front of you, on the platform.
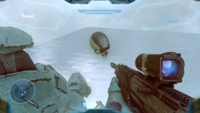
The skull once dropped, ready for Fred-104 to pick up.

Fog

Level : Reunion
Icon: A skull marked with a swirl of fog.
Effect: Your motion tracker is disabled completely.
Point Multiplier: 1.5×
Directions:
- When Cortana says: "The Gateway to the Forerunner Domain. You'll be the first organics to enter since the fall of the Forerunners. I admit, after the crash here, I didn't think I'd see you again." simply walk right where you can see a Guardian in the sky.
- Walk towards a Forerunner structure similar to a Beam emitter.
- Go all the way through the path on it.
- At the end of it you will find the skull there for you to claim.
Mythic

Level: Swords of Sanghelios
Icon: A skull marked with a circle with a smaller circle in it.
Effect: All vehicles and NPCs have twice the amount of health and shields.
Point Multiplier: 2.5×
Directions:
- After you get out of the Sangheilli temple and you see the chapter name: "Hornet's Nest", you will see some dropships flying by.
- Look backwards and look towards a collapsed column and begin to climb it.
- Once you're in the top of it look to the left where you will see a small ceiling and now you will have to jump to reach it.
Note: You might have to do some trick jumping such as sprinting-jump-aiming-thrust forward-clamber. Being equipped with an Energy Sword is helpful, even more so if you are playing as Olympia Vale in co-op, who can jump higher and move faster than her other allies.
Catch

Level: Enemy Lines
Icon: A skull marked with an image of a Plasma Grenade.
Effect: All AI-controlled units throw grenades more often, where applicable. It should be noted that characters will throw an unlimited amount of grenades at their enemies. The skull actually does seem to increase the number of Suicide Grunts.
Point Multiplier: 1.5×
Directions:
- Once you've gained access to the Phaeton, land on the left platform of the Kraken and go through the entrance there.
- Once you see a small ledge that sometimes has Jackal Snipers, turn left.
- Board one of the Banshees in the hangar that you will find there, and fly it to an alcove that is somewhat hidden in the ceiling on the left.
- Once in there, you will simply find the skull on the left of it, in a corner.
Cowbell

Level: Battle of Sunaion
Icon: A skull marked with a cowbell.
Effect: Physics impulses are increased. Explosions and melee attacks launch characters and objects farther, but the damage is not affected.
Directions:
- Where the Warden Eternal appears, simply walk towards the Guardian.
- Fall onto a ledge with a bunch of debris pointing towards the ocean.
- Walk to the part close to the ocean, and you will find the skull there, buried partially into the ground.
- Getting out without dying may require jumping off, immediately turning right, activating Smart-Link, and clambering back onto the platform.
Tilt

Level: Genesis
Icon: A skull marked with a smaller skull with a hole in its head.
Effect: All enemy weaknesses and resistances double. Thus Covenant and Forerunner weapons deal more damage to shields but less to health, while UNSC weapons do less damage to shields but remarkably more to health.
Point Multiplier: 2×
Directions:
- After defeating the first Warden Eternal, go to the hill that is on the right which is the tallest of them.
- Climb it all the way to the top.
- The skull will be there waiting on the edge of the hill.
Famine

Template:Article Quote Level: The Breaking
Icon: A skull marked with a smaller skull. The smaller skull seems to have a line between it and some dots (food). This describes the obvious traits of a famine: without teeth.
Effect: All weapons that are dropped by enemies or are scripted to spawn on the ground (e.g. near a crashed Pelican or group of dead bodies) have halved or reduced ammunition or charge. This also affects many special weapons (e.g. Open Hand). However, weapons found in cases still have the standard amount of ammo.
Point Multiplier: 2×
Directions:
- After Cortana intervenes in the Warden's attack, simply go into the structure and enter the small curved corridor sitting behind a smaller alcove with a Forerunner console. Watch out for Soldier Snipers with Binary Rifles and Soldier Officers with Splinter Turrets, though.
- In the middle of the corridor is a small structure on which the skull lays. It sits inbetween and in front of two weapons caches.
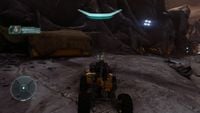
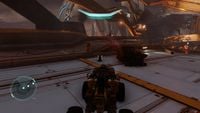
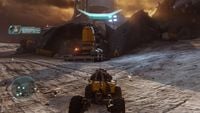
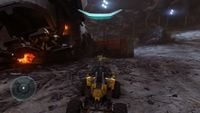
Tough Luck

Level: Guardians
Icon: A skull marked with a three-leafed clover.
Effect: Enemies dodge grenades, needles, slow moving projectiles, and vehicle assaults with a greater success rate. In addition, enemies go berserk more often, and Grunts run away for a shorter period of time before turning around and again attacking the players.
Point Multiplier: 1.5×
Directions:
- Method A: Go behind the Gamma Core to a Forerunner door, climb the chunks of snow that are on the right of it and walk all the way towards the crashed Pelican, then to the left you'll see some blocks of ice in them, and the Tough Luck skull. Make sure to jump, aim, boost forward, and clamber.
- It is recommended to obtain the Vorpal Talon in front of and above the Alpha Core as it provides extra mobility (longer stabilizer duration, higher jump height, and an additional thruster pack use between cooldowns), which will prove useful for obtaining the skull through this method. These benefits become even more pronounced when playing as Olympia Vale due to her base attributes giving her higher jump height and movement speed.
- Method B: On the Alpha Core, next to the Mantis is another path which you can go through so you can reach the crashed Pelican, jump onto the snowy ledge holding the skull, and claim the skull.
- Either method requires you to watch out for enemy Covenant forces from below, including two Shade Turrets.
Trivia
- Until one of Halo 5: Guardians's updates, you could not revive teammates nor be revived when the Iron skull was turned on.


