The Covenant (level)
From Halopedia, the Halo wiki
|
Prev: |
|
|
Next: |
|
| The Covenant | |
|---|---|

| |
|
Game: |
|
|
Player: |
|
|
Date: |
|
|
Location: |
|
 |
Halopedia has a walkthrough guide for this level; see The Covenant (level)/Walkthrough. |
Template:Article Quote The Covenant is the title of the eighth campaign mission of Halo 3. The level takes place on The Ark. In this level, you must stop Prophet of Truth from firing the rings. Before reaching Truth, the UNSC and Covenant Separatist forces must deactivate three towers powering the defensive barrier protecting the Prophet's citadel and face off against a massive vehicular Covenant force, including two Scarabs at one time. Finally, united by the common purpose of stopping the rings, the Flood offer an alliance with Master Chief and the Arbiter Thel 'Vadam, only to betray them once Truth is dead.
Upon completing it on the Normal, Heroic, or Legendary difficulties, the player will earn the Last Stand achievement and 40 Gamerscore. Earning over 50,000 points in the campaign meta-game on this level will give the player the Vanguard achievement and 10 Gamerscore points. It is the longest level in Halo 3 and possibly in the entire Halo series. It is the last level in which you fight the Covenant (excluding the cowering Grunt on the final level). It is also one of only two levels that is cut into three rally points, rather than two -- the other is the previous mission, The Ark. This level is significant as it is the Covenant's last stand. After the Covenant have been defeated, there is only one last threat the UNSC have to deal with: the Flood. It is also the first level in which you can use the Spartan Laser. The IWHBYD Skull is found on this level, as well as the Thunderstorm Skull. (Click here for details on how to acquire them).
Transcript
Trident
Three teams. Three towers.

Five Pelicans fly in. They are followed by two Separatist Phantoms. Behind them is the carrier Shadow of Intent. The view changes to a large energy barrier surrounded by Covenant Loyalists
- Commander Keyes (COM): "We hit these three generators, and the barrier will fall?"
- 343 Guilty Spark (COM): "A small section, yes."
A Grunt spots the flight formation as it approaches the mainland, jumps, and cowers.
Miranda Keyes (COM): Good enough. Johnson, drop the Chief at the first generator, then head to the third. The Elites will punch right down the middle."
- Sergeant Johnson (COM): "Roger that."
The Pelicans and Phantoms break formation. Two Pelicans, including Hocus' bird carrying the Chief, head towards Tower 1. Anti-Air fire erupts around them.
- Hocus (COM): "Charlie Foxtrot! Tower One approach has active Triple-A!"
Gunfire hits one of the engines of the following Pelican, forcing it to collide into Hocus' Pelican, tossing the Warthog it carried out onto the ground. The second Pelican swerves out of control.
- Damaged Pelican Pilot (COM): "MAYDAY! I can't control her!" (Pelican drops out of sight, followed by the sound of a crash and a muffled explosion)
- Hocus (COM): "Pelican down, Pelican down!"
- ODST Sergeant (Stacker) (COM) "Brace yourselves; we're going in a little hot!"
Chief grabs a Spartan Laser and jumps off the Pelican with the ODSTs
{Gameplay}
- ODST Sergeant (Reynolds): "Pile out! Go go go! Up the beach! Kill that Wraith!
or
- ODST Sergeant (Stacker): "Pile out! Go go go! Alright, up the beach! Take out that Wraith!
- Commander Keyes (COM): "Roger that, Hocus. Get out of there!"
The Master Chief and his Squad secure the beach, and destroy the Anti-Air Wraith
- ODST (COM): "Beachhead secure, Commander. Hostile Anti-Air has been neutralized."
- Miranda Keyes (COM): "Hold position. I'm on my way. Shipmaster, begin diversionary bombardment."
- Shipmaster Rtas 'Vadum (COM): "I will beat the Prophet's shield like a drum. By the time the barrier falls, he will beg for mercy."
A Pelican drops off a Mongoose and Warthog for the Chief and his Squad. {If the existing squad have all died, replacements will also be dropped}
- Commander Keyes (COM): "Spark believes Truth can activate the rings at anytime. If he does, Earth... every being in the Galaxy... Halo will kill them all."
They mount up and head off for the first tower.
- Commander Keyes (COM): "Get to the first tower. Shut it down."

As the Chief drives up the hill towards the 1st generator, he sees the Separatists' Phantoms battling with the other Loyalists' Phantoms on tower 2.
- Sergeant Johnson (COM): "Ma'am, we're on the ground. Third Tower in sight."
Commander Keyes (Radio): "Good. The Arbiter and the Elites have touched down in No. 2." -(Co-op change) Commander Keyes (COM): "Good. The Elites have touched down in No. 2."
- ODST: "Objective in sight! Watch for heavy armor!"
Prowlers, Ghosts, a Wraith and a Shade turret stand in the Chief and his squad's way, but the squad eventually clears the armor and other resistance on the perimeter of the tower
- Commander Keyes (COM): "Chief. You've got to offline that tower."
Keyes' Pelican drops off weapons.
- Commander Keyes (COM): "Get inside that tower. Take it down!"
- ODST: "Perimeter secure. Get inside that tower! Stick together! Check your corners!"
Master Chief gets inside and secures the bottom floor. The ODST and/or Marines hold while the Chief secures the top floor and deactivates the tower. The Chief secures the top floor, after an encounter with a Brute Chieftain with a Gravity Hammer and its Brute Bodyguards.
- Commander Keyes (COM): "Chief, find the tower controls, and shut it down!"
The Master Chief deactivates Tower 1.
- Commander Keyes (COM): "Good work, Chief! That's one. The Arbiter should be just about to..."
-(Co-op change) Commander Keyes (COM): "Good work, Chief! That's one. The Elites should be just about to..."
Tower 2 shuts down.
- Commander Keyes (COM): "...that's two! It's all up to Johnson's team now."
Chief and Commander Keyes watch Tower 3 for a moment. It remains active.
- Commander Keyes (COM): "Get back outside, Chief. Wait for transport."
{Gameplay}
- Miranda Keyes (COM): "Johnson, come in... Over."
- Johnson (COM): "Brute reinforcements, ma'am (static)! We're pinned down!"
- Miranda Keyes (COM): "I'm on my way!"
- Sergeant Johnson (Radio): "Negative! Fire's too heavy! (to his squad) Everyone fall back! Now! (Static and cut-off)"
- Commander Keyes (COM): "Sergeant Major!"
No response.
- Commander Keyes (COM): "Johnson! Can you hear me?! (No response) Chief, you need to link up with the Arbiter and proceed directly to the Third Tower. Make your way back to the beach."
-(Co-op change) Commander Keyes (COM): "Chief, you need to link up with the Elites and proceed directly to the Third Tower. Make your way back to the beach."
The Chief hurries back to the elevator, and heads back down. After clearing another of group of Jackals and Grunts attacking the Marines holding the lower floor, the Chief and his squad get back outside to their vehicles, or meet up with transport if they have no vehicles left.
- Marine Driver: "Get in, sir. We gotta get back to the beach."
The Chief and the Marines head back to the beach.
If You Want It Done Right...
Close air support.
- Hocus (COM): "Sir, I've got a flock of birds that need an escort. Take a Hornet; get those Pelicans safely to the Third Tower."
The Chief and his accompanying soldiers meet up with the Hornets and other Marines who held the beach. The Chief gets in a Hornet and the other Hornets assist to clear the airspace of Tower 2.
If the Chief tries to land the Hornet on the Second Tower.
- Thel 'Vadam (COM): "Second Tower is clear, Spartan, no need to land. Let us hasten to the Third Tower."
They proceed to Tower 3. They reach Tower 3 Airspace, with heavy resistance both in the air and on the ground.
- Pelican Pilot (COM): "Objective in sight, Commander...no sign of Johnson or his team."
- Commander Keyes (COM): "Understood. Chief, clear an LZ then get inside the tower."
After the UNSC airborne forces take out the Wraiths, the Separatist Phantoms arrive and drop off Thel 'Vadam and his Elites and assault the tower's entrance. The Chief assists the Elites, securing the outside of remaining armour and infantry. The Chief lands the Hornet and joins the Elites on the ground. The Marines from Pelicans and Hornets follow up, and secure the perimeter. They push on inside the tower, encountering a swarm of Drones, a pair of Hunters and a large pack of Brutes and their Grunt and Jackal subordinates. The Chief, 'Vadam and their allies overcome this defence and secure the bottom floor and the elevator.
- Thel 'Vadam: "Darken this tower and the barrier will fall. Go, Spartan! We have no time to waste."
'Vadam and Elites hold the lower level while the Master Chief heads up. The Chief secures the top floor, after encountering a War Chieftain wielding a plasma cannon with Brute Stalkers.
- Commander Keyes (COM): "Hit the switch, Chief, and the barrier will fall!"
The Chief deactivates the Third Tower.
The barrier falls. The Shadow of Intent advances.
- Ship master Rtas 'Vadum (COM): "Now, Prophet... your end has come."
A Slipspace rupture suddenly appears. High Charity emerges and plummets down to the Ark.
- Ship master Rtas 'Vadum (COM): "High Charity...?! By the Gods, brace for impact!"
Debris from High Charity strikes right through the Shadow of Intent's hull. A Flood Dispersal Pod then breaks apart in midair. Part of the pod crashes through the window right above the Chief. It stops as it hits the elevator window, glowing eerily. The Chief raises his rifle and prepares to engage the enemy he knows too well.
{Gameplay}
The Chief quickly eliminates the few hostiles that arrived in the pod.
- Commander Keyes (COM): "Shipmaster, what's your status?"
- Ship master Rtas 'Vadum (COM): "Significant damage! Weapon systems disabled!"
- Commander Keyes (COM): "Move to a safe distance! Stay away from the Flood."
- Ship master Rtas 'Vadum (COM): "Why would the Parasite come here?!"
- 343 Guilty Spark (COM):(Alarmed) "The Ark is out of range of all the active installations! Priority: We must contain this outbreak before-"
Keyes interrupts Guilty Spark.
- Commander Keyes (COM): "No! First, we stop Truth! Then we deal with the Flood."
The Chief links up with the Elites and the Arbiter under attack. After eliminating the Flood in the tower, they get outside to meet Marines engaged in combat with the Flood, and assist. A Separatist Phantom arrives to pick up Thel 'Vadam.
- 343 Guilty Spark: "Quickly, I must see the point of impact; assess the damage done to the Ark."
- Thel 'Vadam: "To the top of these hills, Oracle, and no higher! We cannot risk your capture by the Flood."
'Vadam takes 343 Guilty Spark with him. The Pelicans drop a M12G1 LAAV Warthog, a Mongoose, and a Scorpion for the assault on the Citadel. The Chief, Marines, and the remaining Elites mount up.
- Commander Keyes (COM): "Shipmaster's Carrier is out of commission, Chief. I need you to take down Truth. The Flood's just going to put pressure on him; accelerate his plans. Punch through the cliffs! Get inside that Citadel!"
Journey's End
Storm the Citadel.
The Assault Team gets through the snowy cliffs, where they first encounter few small Covenant emplacements.
- Pelican Pilot (COM): "Citadel in sight! Brutes are mobilizing everything they've got."
The Assault Team clears the cliff, facing Ghosts, Shade turrets and Prowlers. Once they are dealt with, a Wraith is the only thing standing in their path, and once taken out they meet with Hornet Gunships near the route down into the clearing.
- Marine Sergeant (Stacker) (COM): "Hornets inbound!"
Depending on choice, the Master Chief takes a Hornet and makes his way to the Citadel, when two Scarabs drop down from above.
- Pelican Pilot or Pete Stacker (COM) "I count two Scarabs! Repeat: TWO Scarabs!"
With the choice Chief chooses, the Assault Team backs him up: The Scorpion Tank fires from a far range, the Warthog and Mongoose move about under the Scarabs to assist Chief in taking their "legs" down, and the Hornets engage the Scarab from the air. But some Ghosts, Banshees and another Prowler help to defend the Scarabs.
The Chief takes out the first Scarab.
- Commander Keyes (COM): "First Scarab's down! All units, concentrate your fire on number two."
The Chief takes out the second Scarab.
- Miranda Keyes (COM): "Both Scarabs down, well done."
If any minor Covenant resistance is left.
- Miranda Keyes (COM): "Marines! Kill the stragglers!"
A Separatist Phantom arrives at the Platform leading to the entrance of the Citadel, dropping off Thel 'Vadam and 343 Guilty Spark (firing its main weapon at any remaining hostiles).
If the Chief isn't there when 'Vadam lands.
- Thel 'Vadam (COM): "Spartan, come to me. This platform hides a path!"
- Commander Keyes (COM): "Spark has found a way into the Citadel. He's waiting for you on the platform, Chief. Go!"
The Chief lands and meets 'Vadam and 343 Guilty Spark at the top of the Platform.
- Thel 'Vadam: "The Flood scales the citadel's far wall. Activate this bridge, Oracle! (Turning to the Chief) The Prophet will die by my hands, not theirs."
- 343 Guilty Spark: "Calamity! If only we had more time!"
The Chief and 'Vadam enter alone. The door they entered through closes and bolts up. The entrance is a large hallway with screens mounted along the walls.
- Cortana (Cortana Moment): "It asked, and I answered. (Her tone turns bitter) For a moment of safety, I loosed damnation upon the stars."
(During the Cortana moment if you look at the screens on the walls you will see Cortana pop up on the screens.)
- Prophet of Truth: "My faithful... stand firm..."
The screens light up. The Prophet of Truth is seen making another speech. The Chief and 'Vadam hurry to find a way up.
- Prophet of Truth: "Though our enemies crowd around us, we tread the blessed path! In a moment I will light the rings, and all who believe... shall be saved."
Master Chief and 'Vadam discover an elevator, with a screen in front of it, showing Johnson behind Truth, held aloft by a Brute. Johnson punches the Brute in the face to no effect.
- Commander Keyes (COM): "Chief, how close are you?"
They look up. The height is phenomenal.
- Master Chief: "Not close enough."
The view changes to the Control Centre with Truth.
- Sergeant Johnson: "That the best you got?"
A Brute Chieftain gives him an amused huff, then picks him up around the neck and begins to strangle him.
- Sergeant Johnson: "Oh, come on. Impress me!"
Truth turns round & sees what is happening.
- Prophet of Truth: "Stop, you imbecile! He wants you to kill him. (He turns back to The Ark's console, and speaks quietly) I'd prefer that you did not."
- Sergeant Johnson: "What's the matter, big shot? Can't start your own party?"
![Truth forcing Johnson to activate the Ark. [HBO Halo 3 Cutscene archive]](/File:Truth_and_Johnson.png)
- Prophet of Truth: "I admit, I need your help. (A Pelican appears on screen behind them, unnoticed and rapidly approaching the large window) But that secret dies with all the rest."
The Pelican breaks through the window and crashes onto the ledge next to them, crushing a Brute, sending his Spiker flying. Truth is thrown off-screen. (Players who look carefully can see Truth landing about the same spot as the Brute's Spiker.)
A Brute Captain gets up, but Keyes blasts it with her Shotgun.
- Commander Keyes: "Johnson! (Keyes ejects a shell from her shotgun) Sound off!"
- Sergeant Johnson: "(Coughing) Get out of here!"
- Commander Keyes: "Not without you!"
Brutes surround Miranda and Johnson. Miranda fires away at the Brutes with a Shotgun. Their armour spark from the shots, but the short-range weapon does not do severe damage to them, and they remain on their feet.
- Prophet of Truth: "You delay the inevitable. One of you will light the rings."
Miranda Keyes draws a Pistol and aims her weapons both ways.
- Prophet of Truth: "You cannot hope to kill them all!"
Keyes pauses and lowers her weapons. She looks at her pistol.
- Commander Keyes: "You're right..."
She reluctantly aims the pistol at Johnson.
- Sergeant Johnson: "Do it. Me...then you..."
Keyes hesitates, lowering her pistol slightly with sadness on her face.
- Sergeant Johnson: (urgently) "Now!"
Keyes straightens up and aims. Several spiker shots are heard. Keyes gasps in pain and drops her weapons. Johnson starts to run to her aid.
- Sergeant Johnson: "NO!"
A Brute Captain restrains Johnson, who still struggles, horrified. Miranda Keyes collapses and dies, with seven glowing spikes in her back. Truth walks on screen, gingerly holding a Spiker in hand.
- Prophet of Truth: "Your forefathers wisely set aside their compassion..."
He looks down at Miranda and tosses the Spiker away, and shakes a fist to emphasize his speech.
- Prophet of Truth: "...steeled themselves for what needed to be done."
Truth walks up to Johnson.
- Prophet of Truth: "I see now why they left you behind."
Sergeant Johnson is brought up to the control panel.
- Prophet of Truth: "You were weak--- and gods must be strong."
He forces Johnson's hand down on the panel with a smug look. Johnson, still overcome with grief and shock, doesn't resist. Instantly the Control Terminal begins to change and heighten. Six out of Seven Holographic Halo Rings light up one by one (Excluding Installation 04). At the end of the corridor, the Chief and Thel 'Vadam emerge from the lift. Two Pure Flood Tank Forms drop from above. The Master Chief draws his Assault Rifle and aims, and 'Vadam activates his Energy Sword.
- Gravemind (speaking through the Pure Flood Tank Forms): "Do not shoot, but listen! Let me lead you safely to our foe. Only you can halt what he has set in motion."
![[HBO Halo 3 Cutscene archive] From the cutscene at the end of "The Covenant/Journey's End".](/File:Infection_Forms_Covenant_Level.png)
They lower their weapons cautiously. Several Infection Forms scurry between their feet as the Master Chief and 'Vadam look at each other, obviously not trusting the Flood, but knowing they had no other choice.
Revelation
{Gameplay}
Master Chief, The Arbiter, and the Flood begin the assault on the Covenant. After crossing a bridge guarded by heavy weapons, they reach a room with holograms of Truth in the Forerunner systems.
- Prophet of Truth: "How could I have known the Parasite would follow?! Undoubtedly this is the Heretics' doing! A final, bitter curse. Clear evidence of treachery long hidden!"
At the second bridge, the Covenant forces make their final resistance. At the second room, Truth holograms make a final message.
- Prophet of Truth: "So far are we along the path, that I must strain to hear the clumsy patter of their pursuit. Know this my brothers. They may foul the way with their charred and broken bones, but they will not stop the Journey."
The resistance on the third bridge has already been decimated by the Flood. A light bridge is all that remains to reach Truth.
Master Chief and The Arbiter cross the light bridge, and come across Johnson, who is resting the dead Miranda Keyes on his lap by her head next to the Pelican. The pair stare into Miranda's empty eyes, until Johnson closes them gently.
- Sergeant Johnson: "Stop the rings. Save the rest."
The Chief continues to stare at Miranda while 'Vadam approaches the crawling form of Truth, his Energy Sword turned off but at the ready. He grabs Truth by his robes and points his currently harmless sword in his face.
- Prophet of Truth: (Weakly) "Can you see, Arbiter? The moment of salvation is at hand."
- Thel 'Vadam: (grabbing Truth by the throat) "It will not last."
- Prophet of Truth: "Your kind ... never believed in the promise of the sacred rings."
- Gravemind: (Speaking through Truth): "Lies for the weak. Beacons for the deluded."
At this moment, 'Vadam draws his Energy Sword back and activates it, ready to kill his former leader. The Master Chief points his Assault Rifle at Truth, in case he is completely taken by the Flood.
- Thel 'Vadam: "I will have my revenge, on a Prophet, not a plague!"
- Prophet of Truth: "My feet tread the path. I shall become a god!"
Tentacles begin to sprout on Truth as the Flood takes him.
- Gravemind: (Speaking through Truth): "You will be food - nothing more."
The Chief approaches the Ark's Control Panel, ready to deactivate it.
- Truth: (Realizing what the Chief is about to do) "NO!"
Chief deactivates the Ark. The Seven Holographic Halo Rings dim. A Flood body begins to stir.
- Prophet of Truth: (Now being held aloft by 'Vadam) "I... am... Truth! The 'voice' of the Covenant!"
'Vadam turns Truth away from him and grabs his neck viciously. Truth's crown falls off as he pitifully gasps for air, trying to grab 'Vadam's hands.
- Thel 'Vadam: "And so, you must be silenced."
'Vadam stabs his sword through Truth's back. It goes clean through him; the two points of the Energy Sword poke through his chest as he writhes and screams in pain. Flood spores shoot out of his mouth and the infection lets out a pitiful squeal.
'Vadam lets Truth's corpse fall to the floor. 'Vadam lets out a roar of triumph and deactivates his sword. The Chief looks at him and nods, acknowledging him for ending the life of the Prophet who declared war on humanity; they then turn to see Johnson carrying Miranda's body into the Pelican. Suddenly, the ground begins to tremble, and tentacles rise up out of the ground around them. Chief wields his Assault Rifle and 'Vadam reactivates his sword. They both stare up at the tentacles, which are now reaching high above them. The Gravemind laughs manically.
Johnson leaps into the Pelican cockpit and starts to take off. The Chief climbs onto the Control Panel of the Ark and jumps onto the Pelican's landing gear. Thel 'Vadam grabs the Chief's hand and just before the Pelican is out of the hole in the Control Room window that Miranda made, both are knocked off by the tentacles, sending the Pelican spiraling out of control. On the ring, the tentacles swerve around them and multiple Flood forms appear.
- Gravemind: "Now the gate has been unlatched, headstones pushed aside...corpses shift and offer room, a fate you must abide!"
'Vadam holds his sword at the ready, and the Chief takes aim. They come back to back.
- Thel 'Vadam: (almost exasperated) "We trade one villain for another."
The tentacles retreat and Combat Forms come up from the control panel.
{Gameplay}
- Sergeant Johnson (COM): "I can barely keep hold of her, Chief! No way I could pick you up! Head back to the lift... find a way down!"
Both heroes fight their way through hordes of Flood, which have betrayed them now that the Halo rings have been deactivated.
- Cortana (Cortana Moment): "I'm a thief... but I keep what I steal."
Master Chief and Thel 'Vadam make it back. The lift is not working, so they jump down a shaft at the back of the room.
The Chief lands at the bottom of the shaft, landing in a room not unlike the entrances to the three Shield Towers. He looks beside him as the Arbiter comes down, and then stands up. A flickering, spooky image of Cortana appears in the hallway, running. She starts to turn the corner and disappears, after a split second. The Chief casually walks around the corner as though amused by Cortana's antics, but 'Vadam is confused.
- Thel 'Vadam: "What do you see?"
With 'Vadam trailing far behind, the Chief looks around the corner. He sees a control panel. Cortana appears a second time, again for only a second, walking loftily (and spookily) towards it. She stops at the panel and disappears. The Master Chief goes to the panel and activates it.
A view screen slides open, the Chief and 'Vadam step out onto a balcony to watch as a massive structure rises up out of thick fog. It's a Halo Ring, incomplete, rising from inside the Ark's Core. Cortana's plan is becoming clear.
'Vadam turns and looks at the Chief.
- Thel 'Vadam: "A replacement. For the ring you destroyed."
- Master Chief: (To a blue glow behind him) "When did you know?"
Spark hovers up from behind the Chief and 'Vadam and comes up to the Chief.
- 343 Guilty Spark: (sounding, true to his name, guilty) "Just now - but... I had my hopes. What will you do?"
- Master Chief: "Light it."
- 343 Guilty Spark: "...Then we are agreed! A tactical pulse will completely eradicate the local infestation! I will personally oversee the final preparations."
He flies enthusiastically around the Chief and 'Vadam, who look at each other, and then flies off toward his new Halo, now talking to himself.
- 343 Guilty Spark: "Though it will take time to fabricate an activation index, I will see to the letter that..." (he becomes too far away and you can no longer hear him)
- Thel 'Vadam: "How will you light it?"
They both turn to look at High Charity, knowing that Cortana still has the Halo Index required to activate Installation-04.
Trivia
- When you are in the zone where the two Scarabs are, you can see a huge air battle over you with Pelicans, Hornets and a lot of Banshees squadrons. But if you look carefully, you can see that the battle is always repeated. You can look at this battle closer with the Theater mode or at the Secret Marine emplacement. If you look at the battle in the Theater mode, you can see that the Pelicans and the Hornets are badly textured, but the Banshees are fully textured with dynamic lighting on it.
- After playing Halo 3 ODST on your Xbox 360 memory device, at the start of the stage when you hop off the pelican you can hear gunnery buck yelling "up the beach, kill those wraiths" he appears as a normal odst with red shoulder pads.
Glitches

- If you start at Rally Point Alpha, and head back to the first tower, the elevator controls will be separated from the platform, and if you go up, you will be stuck, because the controls remain at the bottom of the lift. If you do not go up the lift, the Hornets you need to continue the level with will disappear.
- If you get to the texture fault where the hidden Marine is, you can see the other player's screen. If you drive into it, you will be erased out of the map.
- It is possible to get into the second tower that the Arbiter disabled using the Time Travel Glitch. The tower's interior is just an empty space with nothing inside, not even floors or walls as you can see in this here.
- The Disappearing on The Covenant glitch can be performed on this level.
- The Two Arbiters Glitch can be performed on this level.
- The Secret Marine Glitch can be performed on this level.
- Occasionally, when a Banshee pilot dies, or when you board one, the Brute will be holding a human Battle Rifle.
- If you destroy a Scarab's power core right after it lands, you and everyone else on the Scarab will be thrown across the map. It can be performed if you ride in a Hornet, and jump off when you are over the Scarab. Then, you must go through your enemies and melee the power core.
- You can jump over the chasm where you are supposed to activate a light bridge and reach Truth by using a Gravity Hammer and a Plasma Grenade. By grenade jumping backwards and using the Hammer at the peak of your jump, you can be propelled across the chasm, but if you land safely, the bridge will strangely activate on its own, and the cutscene will play.
Mistakes
- In the first cutscene, when the Warthog is knocked from the Pelican carrying John 117 during the beach approach, you can see that it is intact and undamaged when it hits the ground, but when you walk up to it in gameplay, it is destroyed and in pieces, most notably with the wheels missing. Also in the first cutscene, the Warthogs attached to the pelicans are clearly troop transports, yet when you survey their wreckage during gameplay, the models actually have destroyed LAAGs.
- During the first cutscene that takes place in the Citadel, the screens in the "foyer" show Johnson being held by a Brute Minor. Later in that cutscene, however, the Brute inexplicably changes into a Chieftain.
- When the Prophet of Truth is killed by the Arbiter during the cutscene, he loses his crown. However, when the gameplay resumes and Truth is dead on the floor, he is still wearing his crown.
- Near the end of the cutscene in which the Arbiter kills the Prophet of Truth, two Brute Flood Combat Forms are seen climbing over the Ark's controls to attack the Chief and the Arbiter. However, when gameplay resumes, it is two Elite Flood Combat Forms that are standing in front of the Ark's controls.
- When you deactivate the shield in the third tower where Johnson failed to do so, you are attacked by Flood who come crashing through a window. However, when the tower is seen from outside (in the area with the two Scarabs), the glass is intact.
- The Pelican that crashes at the start flies past the wreckage and lands at the waterfall -- it doesn't land where its crash site was positioned. Sometimes, its two pilots' bodies can be found in or around the water below the waterfall.
- If you watch the sky when the Scarabs fall down, you see that they fall from nowhere.
Easter Eggs
- The Thunderstorm and IWHBYD Skulls can be found on this level.
- The Siege of Madrigal song and Microsoft Sam can be heard on this level.
References
- When you use the elevator to ascend to the tops of the first and third shield towers, the Marathon symbol can be seen in the middle of the elevator control panels.
- The first chapter of the level is named "Trident". This refers to the three towers and the Citadel. There are three spikes on a trident -- a metaphor for the towers. The handle that the spikes lead up is a metaphor for the Citadel.
- In the opening cutscene, there are 7 ally dropships in total.
Miscellaneous

- At the very end of the level (right after Truth gets killed by the Arbiter), if you turn around and look above the glass that Keyes' Pelican crashed through, there is a prominent Marathon symbol.
- There is a second Spartan Laser near the crashed Pelican at the beginning of the level. It is only there when you are playing on Easy or Normal difficulty.
- Bungie has stated that this is the longest level in the whole Halo Trilogy, partially because it is the Covenant's last stand against Humanity. It is also the only Campaign level where players can use Hornets.
- Hijacking the first Anti-Air Wraith in the level will make progressing up to the first tower a lot easier; you will also be able to bombard the Covenant forces hiding in the hallway just before the tower's entrance. A video of this can be found here: AA Wraith Glitch
- At the point where you reunite with the Arbiter and 343 Guilty Spark after defeating the Scarabs, if there are any surviving Covenant forces nearby, 343 Guilty Spark will attack them with the same energy beam he uses against you in the Control Room later in the game.
- This is the only level in which friendly dropships can be destroyed. The two Separatist Phantoms that appear outside the third tower can be destroyed. Their door-mounted Plasma Cannons can also be blown off from the ground, and are very useful against the Drones inside.
- At the beginning of the level, Gunnery Sergeant Pete Stacker is usually leading the ODST squad that joins the Master Chief in battle.
- This is the only level in the Halo Trilogy that involves a battle against two Scarabs at the same time.
- It is possible to get a Mongoose or a Warthog onto the one of the Scarabs in the Scarab fight. Bungie has conveniently placed ramps leading up to both Scarabs as soon as they land. Grab a Mongoose or a Warthog and just line up the Scarab when you jump.
- The platform at the end of the Citadel could be a large Marathon symbol, due to the break in the large platform in the front, and the smaller circle in the center.
- This is the second and last level to have ODSTs fight alongside with you.
- The Legendary symbol, granted for completing this level on Legendary, can be seen in the Campaign selection screen, and is one of the two symbols that is darker than the rest.
- There is a strange voice whispering through the walls of the third tower after you have defeated the Brute Stalkers and Chieftain. If you listen closely to the walls (particularly the wall closest to the activation panel), a faint voice can be heard whispering something inaudible to you. The voice has not yet been identified but the voice does resemble Gravemind's deep empowering voice. Some fans believe that it is foreshadowing the Flood's arrival only seconds later. Though the voice does resemble some sort of backwards song it is still unknown whether this voice is significant or not. However, it has not been confirmed that this strange voice is Gravemind's or just a fan's speculation. To some this voice may be a monitor or even 032 Mendicant Bias himself but to others it may be something more.
Gallery
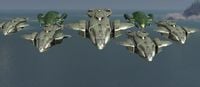
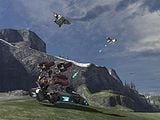
The UNSC and their Elite allies attack the Prophet of Truth.
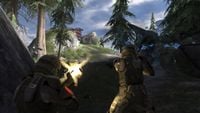
A team of ODSTs engage a Brute Chieftain after having had routed the pack.
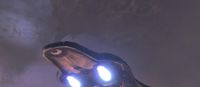
High Charity Comes To The Ark.
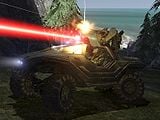
The Master Chief and two ODSTs in a Warthog.
The UNSC fighting Covenant Anti-Air emplacements.

A Banshee pilot with a Battle Rifle.
- Covenant Panorama 1.jpg
A panorama of the level.


| Preceded by The Ark |
Halo 3 Campaign Missions The Covenant |
Succeeded by Cortana |


