Rally Point
From Halopedia, the Halo wiki
| Rally Point | |
|---|---|

| |
| Map overview | |
|
Game: |
|
|
Map file name (?): |
|
| Lore information | |
|
Location: |
|
| Gameplay overview | |
|
Terrain: |
Road, Raised Platforms |
|
Recommended number of players: |
1-4 Players |
|
Recommended gametype(s): |
|
|
Par score: |
200,000 (Halo 3: ODST)[1] |
| “ | Fight with your back against the wall. | ” |
Rally Point is a Firefight map in Halo 3: ODST.
Universe and lore
- "Sector 10 inside the city of New Mombasa has seen better days. The air is heavy with acrid smoke parted only by the constant arrival of enemy drop ships. Lucky for you, the crossroads that converge on the entrance into ONI’s Alpha Site offer up a textbook choke point. The Covenant has come to claim access. You and your squad of ODST’s are going to stop them at all costs."
- — Bungie.net description.[2]
Rally Point is set in New Mombasa Sector 10; the New Mombasa island's southmost point aside from the Alpha Site. During the Battle of Mombasa, the area was used as a rally point for UNSC and NMPD forces being pushed back by the Covenant, intended to regroup at the Alpha Site. In the Halo 3: ODST campaign, this area can be encountered in the final defensive section of the level Kizingo Boulevard during the day, and as part of the open world Mombasa Streets at night.
Overview
Layout
Located in the center of New Mombasa, it is a small, asymmetrical map and features uneven terrain, with a network of roads and walkways around the entrance to the Alpha Site. Phantom dropships are able to drop Wraiths onto the map. The battlefield slopes upward towards the building, allowing a player to get a decent view of the enemies, while walkways connect different areas of the map.
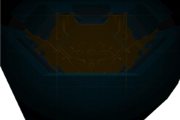
The map of Rally Point in VISR.
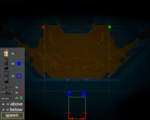
Weapon and ammo locations for both Day and Night variants.
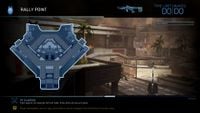
Map of Rally Point in Halo: The Master Chief Collection.
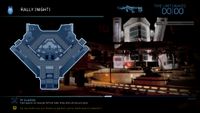
Map of Rally Point (Night) in Halo: The Master Chief Collection.


Strategies
Standard Firefight
- One of the harder firefight maps, the game can snowball rapidly if you or your team get trapped in spawn with enemies on both levels. Play cautiously and be ready to reinforce respawning teammates so they don't get spawncamped.
- Staying in the central plaza can be tempting due to the action, but this will likely get you quickly surrounded on higher difficulties.
- Stick to the walkways close to spawn on either side. Not only do they provide you a good vantage point of incoming waves, they also force enemies to take the stairs on either the close or far end of the map to approach you. When they are too far, they will often ignore you to try and close in even if you shoot them first.
- The main exception to the above advice is Drones, which can simply fly up to get a clear shot at you. Brute Jumpers can also do this albeit much more clumsily, as often they will miscalculate the height at least once.
- For Drone waves, it is highly recommended to fall back to inside spawn or at least close to it outside. The HMG Turrets can be very effective at stopping them up to Heroic, but will likely just get you killed on Legendary with no cover.
- If your entire team finds yourselves trapped in spawn, try falling back to the stairs connecting the two levels. This will force enemies to get in close for you to concentrate fire or use your grenades. Speaking of, use them liberally as it can be very hard to push out if Brutes or Hunters make it into spawn, especially on Legendary.
- Because the power weapons are both located on the far side of the map, an untimely Wraith can prove very tricky to deal with. It is highly recommended to simply board them and save the rocket launcher for Hunters or Chieftains, as Wraiths can be flanked fairly easily if a team coordinates well.
- A certain glitch can be used to drive the Wraith on this map, though it is of questionable value due to the lack of room and poor firing angles. Indeed, you may actually leave yourself at higher risk to grenades this way.
Floodfight
- Use Flamethrower wisely. The attack would be difficult to handle if the players didn't assign their defensive line accordingly.
- On nighttime, arm the Elites with Rocket Launcher. That would give players some space when encountering a difficult situation.
- Keep an eye on Flood Forms with Camouflage, especially the infected Brute Stalker Form. Always keep your VISR on regardless it is day or night.
Variants
Rally Point (Night)
Due to its geometry being shared with both a campaign level and the Mombasa Streets hub-world level, Rally Point is one of two maps (alongside Crater) to also receive a night variation of the map. The night variant features identical map geometry, with the primary difference being the night-time setting of the map as opposed to the afternoon setting of the standard map. The night setting imposes an additional challenge on the player, requiring more use of the VISR. The night-time variant features a number of small changes, including;
- Engineers spawn instead of Sniper Jackals
- Pupal Drones may spawn alongside their regular brethren
- The doors to the ONI building are closed.[citation needed]
The night variant of Rally Point otherwise features no differences from the standard version.[1]
Achievements
The following achievement can be unlocked on Rally Point in the original Xbox 360 release of Halo 3: ODST.
| Icon | Name | Description | Gamerscore |
|---|---|---|---|

|
Firefight: Rally Point | Score over 200,000 points in Firefight on Rally Point. | 10 |
Gallery

|
Browse more images in this article's gallery page. |
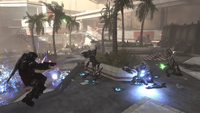
A battle in the main courtyard.
An ODST firing a Covenant carbine at Unggoy.
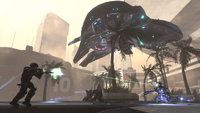
A Phantom deploying Unggoy.
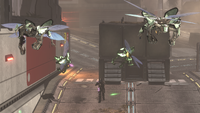
Yanme'e flying above an ODST.
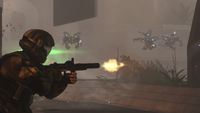
An ODST firing an M7S SMG at Yanme'e.
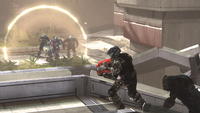
A pack of Jiralhanae taking cover in a bubble shield.
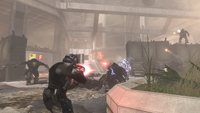
Jiralhanae Jumpers at the barricades.
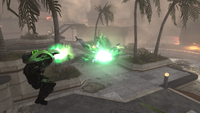
An ODST firing a fuel rod gun at Jiralhanae Stalkers.
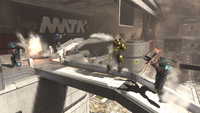
A battle near the NMTA sign.
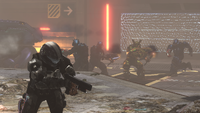
Jiralhanae prepare to attack an ODST.
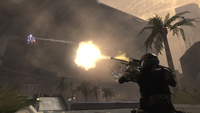
An ODST firing a sniper rifle at a Jiralhanae Jumper.
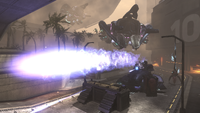
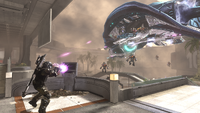
A Wraith firing its mortar while two Phantoms drop off Yanme'e.


Sources
- ^ a b Halo 3: ODST Official Strategy Guide, page 146-149
- ^ Bungie.net, Early Intel: Rally Point (Retrieved on Oct 13, 2014) [archive]
| |||||||||||||||||


