Apex: Difference between revisions
From Halopedia, the Halo wiki
BaconShelf (talk | contribs) mNo edit summary |
|||
| (13 intermediate revisions by 3 users not shown) | |||
| Line 1: | Line 1: | ||
{{ | {{Status|Canon}} | ||
{{Center|This article is about the [[Requiem]] location. For | {{Center|This article is about the [[Requiem]] location. For [[Trove]] location, see [[Apex Site]]; for the [[SPARTAN-IV Program|SPARTAN-IV]] fireteam, see [[Fireteam Apex]]}} | ||
{{Callsign}} | {{Callsign}} | ||
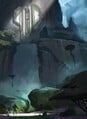
[[File:H4-SO-Location-Apex-02.png| | [[File:H4-SO-Location-Apex-02.png|thumb|300px|The area known as "Apex".]] | ||
The '''Apex''', designated '''Site Req//3490-9299'''<ref name="VIS">'''[[Halo 4: The Essential Visual Guide]]'''</ref> is the [[UNSC]] codename for a location on the [[Forerunner]] shield world [[Requiem]]. | The '''Apex''', designated '''Site Req//3490-9299'''<ref name="VIS">'''[[Halo 4: The Essential Visual Guide]]'''</ref> is the [[UNSC]] codename for a location on the [[Forerunner]] shield world [[Requiem]]. | ||
| Line 14: | Line 14: | ||
Several hours later, Dr. [[Catherine Halsey]]'s signal was detected to have been bounced from "[[Control]]" to "Apex," and Fireteam Crimson was sent to investigate it. With the help of several [[M808C Scorpion|Scorpion tanks]], Crimson was able to fight their way through the defending Covenant and Promethean forces and reach the terminal from which Halsey's signal had been bounced. [[Roland]] was able to determine that the signal was next bounced to "[[Lockup]]" and Crimson was extracted to continue their search in "Lockup."<ref>''Spartan Ops'', [[Key/Science Mountain|S109 Science Mountain]]</ref> | Several hours later, Dr. [[Catherine Halsey]]'s signal was detected to have been bounced from "[[Control]]" to "Apex," and Fireteam Crimson was sent to investigate it. With the help of several [[M808C Scorpion|Scorpion tanks]], Crimson was able to fight their way through the defending Covenant and Promethean forces and reach the terminal from which Halsey's signal had been bounced. [[Roland]] was able to determine that the signal was next bounced to "[[Lockup]]" and Crimson was extracted to continue their search in "Lockup."<ref>''Spartan Ops'', [[Key/Science Mountain|S109 Science Mountain]]</ref> | ||
[[Fireteam Forest]] were sent to secure an area in "Apex," but the Pelican carrying the fireteam was shot down. [[Gustavo Esposito]] and three surviving members of Fireteam Forest were later discovered by Fireteam Crimson. Together, the two teams disabled a [[ | [[Fireteam Forest]] were sent to secure an area in "Apex," but the Pelican carrying the fireteam was shot down. [[Gustavo Esposito]] and three surviving members of Fireteam Forest were later discovered by Fireteam Crimson. Together, the two teams disabled a [[Kmiro'sish-pattern Lich|Lich]] in the region, taking its power core to replace that of the [[Za'zayara-pattern Harvester|Harvester]] located [[Harvester (location)|elsewhere]] on Requiem.<ref>''Spartan Ops'', [[Exodus (Spartan Ops)/Seize the Power|S1010 Seize the Power]]</ref> | ||
==Trivia== | ==Trivia== | ||
*In ''[[Invasion (Spartan Ops)/Backup|Backup]]'', the back of the cave the player lands in is sealed off which is not the case in later levels. This is presumably done for gameplay reasons as it keeps the player contained to the part of "Apex" the mission takes place in. | *In ''[[Invasion (Spartan Ops)/Backup|Backup]]'', the back of the cave the player lands in is sealed off which is not the case in later levels. This is presumably done for gameplay reasons as it keeps the player contained to the part of "Apex" the mission takes place in. | ||
*In ''[[Key/Clean Up|Clean Up]]'', its stated that Halsey's signal has been tracked from "[[Control]]" to "[[Lockup]]." However, in the next level [[Fireteam Crimson]] are deployed at "Apex" where the signal is ''again'' detected to have been sent to "Lockup." It is only after the fight at "Apex" that Crimson gets sent to "Lockup." | *In ''[[Key/Clean Up|Clean Up]]'', its stated that Halsey's signal has been tracked from "[[Control]]" to "[[Lockup]]." However, in the next level [[Fireteam Crimson]] are deployed at "Apex" where the signal is ''again'' detected to have been sent to "Lockup." It is only after the fight at "Apex" that Crimson gets sent to "Lockup." | ||
*During ''[[Key/Science Mountain|Science Mountain]]'', despite it being stated that the player can't get a [[M808C Scorpion|Scorpion tank]] through part of the level and they have to continue on foot, it is actually possible to do so. By facing away from the first tower near the point where the Scorpion has to be abandoned and then gunning it over the nearby ridge, the player can get the Scorpion over the obstacle and continue using the vehicle against the Covenant and Promethean forces though this is difficult to accomplish and can take several tries. Though there are similar obstacles along the path, there are ways around or over them, though they are much simpler than the first time. When the Scorpion nears the LZ where a replacement is dropped, the tank will reach a point where it will get stuck and can continue no further, requiring the player to use the replacement. Though the Scorpion can't be used to get into the LZ, it can get close enough that the player can use it to eliminate most of the enemy forces there, including a [[ | *During ''[[Key/Science Mountain|Science Mountain]]'', despite it being stated that the player can't get a [[M808C Scorpion|Scorpion tank]] through part of the level and they have to continue on foot, it is actually possible to do so. By facing away from the first tower near the point where the Scorpion has to be abandoned and then gunning it over the nearby ridge, the player can get the Scorpion over the obstacle and continue using the vehicle against the Covenant and Promethean forces though this is difficult to accomplish and can take several tries. Though there are similar obstacles along the path, there are ways around or over them, though they are much simpler than the first time. When the Scorpion nears the LZ where a replacement is dropped, the tank will reach a point where it will get stuck and can continue no further, requiring the player to use the replacement. Though the Scorpion can't be used to get into the LZ, it can get close enough that the player can use it to eliminate most of the enemy forces there, including a [[Ru'swum-pattern Phantom|Phantom]] and two Ghosts. | ||
==Gallery== | ==Gallery== | ||
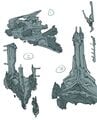
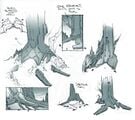
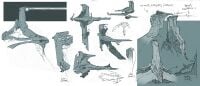
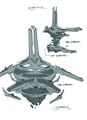
===Concept art=== | |||
<gallery> | |||
File:H4 ApexSite Overview Concept.jpg|Concept art of the hillside's overview. | |||
File:H4 ApexSite Building Concept.jpg|Concept art of the large Forerunner structure. | |||
File:H4_ApexSite_Entrance_Concept_1.jpg|Concept art for the Apex site structure's entrance. | |||
File:H4_ApexSite_Entrance_Concept_2.jpg|Concept art for the Apex site structure's entrance. | |||
File:H4_ApexSite_Entrance_Concept_3.jpg|Concept art for the Apex site structure's entrance. | |||
File:H4_ApexSite_Entrance_Concept_4.jpg|Concept art for the Apex site structure's entrance. | |||
File:H4_ApexSite_Entrance_Concept_5.jpg|Concept art for the Apex site structure's entrance. | |||
File:H4_ApexSite_Entrance_Concept_6.jpg|Concept art for the Apex site structure's exit. | |||
File:H4_ApexSite_Entrance_Concept_7.jpg|Concept art for the Apex site structure's exit. | |||
File:H4 FloatingIslands Concept 1.jpg|Concept art of the floating islands of the Apex site and its surroundings. | |||
File:H4 FloatingIslands Concept 2.jpg|Concept art of the floating islands of the Apex site and its surroundings. | |||
File:H4 FloatingIslands Concept 3.jpg|Concept art of the floating islands of the Apex site and its surroundings. | |||
File:H4 FloatingIslands Concept 4.jpg|Concept art of the floating islands of the Apex site and its surroundings. | |||
File:H4 FloatingIslands Concept 5.jpg|Concept art of the floating islands of the Apex site and its surroundings. | |||
File:H4 FloatingIslands Concept 6.jpg|Concept art of the floating islands of the Apex site and its surroundings. | |||
File:H4 FloatingIslands Concept 7.jpg|Concept art of the floating islands of the Apex site and its surroundings. | |||
File:H4 FloatingIslands Concept 8.jpg|Concept art of the floating islands of the Apex site and its surroundings. | |||
File:H4 FloatingIslands Concept 9.jpg|Concept art of the floating islands of the Apex site and its surroundings. | |||
File:H4 FloatingIslands Concept 10.jpg|Concept art of the floating islands of the Apex site and its surroundings. | |||
File:H4 FloatingIslands Concept 11.jpg|Concept art of the floating islands of the Apex site and its surroundings. | |||
File:H4 FloatingIslands Concept 12.jpg|Concept art of the floating islands of the Apex site and its surroundings. | |||
File:H4-Concept-Apex-1.jpg|Concept art of Apex. | |||
File:H4 ApexSite Concept 1.jpg|Concept art of Apex. | |||
File:H4 ApexSite Concept 2.jpg|Concept art of Apex. | |||
File:H4 ApexSite Concept 3.jpg|Concept art of Apex. | |||
File:H4 ApexSite Concept 4.jpg|Concept art of Apex. | |||
File:H4 ApexSite Concept 5.jpg|Concept art of Apex. | |||
File:H4 ApexSite Concept 6.jpg|Concept art of Apex. | |||
File:H4 ApexSite Concept 7.jpg|Concept art of Apex. | |||
File:H4 ApexSite Concept 8.jpg|Concept art of Apex. | |||
File:H4 ApexSite Concept 9.jpg|Concept art of Apex. | |||
</gallery> | |||
===Screenshots=== | |||
<gallery> | <gallery> | ||
File:H4-SO-S1E10-Apex-01.jpg|One view of "Apex." | File:H4-SO-S1E10-Apex-01.jpg|One view of "Apex." | ||
File:H4-SO-S1E10-Apex-02.jpg|Another view of "Apex." | File:H4-SO-S1E10-Apex-02.jpg|Another view of "Apex." | ||
| Line 29: | Line 64: | ||
File:H4-SO-Location-Apex-03.jpg|View of the other unusual structures in "Apex." | File:H4-SO-Location-Apex-03.jpg|View of the other unusual structures in "Apex." | ||
File:H4-SO-S1E10-Apex-03.jpg|A view of the mysterious structures in "Apex." | File:H4-SO-S1E10-Apex-03.jpg|A view of the mysterious structures in "Apex." | ||
File:HTMCC-H4 SO ApexScorpions.png|Fireteam Crimson's Scorpions fighting Covenant troops in "Apex". | |||
</gallery> | </gallery> | ||
| Line 37: | Line 73: | ||
==Sources== | ==Sources== | ||
{{Ref/Sources}} | {{Ref/Sources}} | ||
[[Category:Requiem locations]] | [[Category:Requiem locations]] | ||
Latest revision as of 13:07, December 21, 2023
| This article's title is a callsign, an alias, or a nickname, as no proper name for the subject has been revealed. |

The Apex, designated Site Req//3490-9299[1] is the UNSC codename for a location on the Forerunner shield world Requiem.
Background[edit]
Referred to as "Apex" by Spartan Command, this site appeared to have once been a translocation outlier, offering individuals and machines easy access across Requiem's many environments through its incredibly large portal generator network. Scientists have since theorized that this site had other functions, as the data acquired from initial scans offered deep insight into the Forerunners' translocation technology.[2]
History[edit]
In 2558, Fireteam Crimson was sent to this location to deactivate several portals being used by the Covenant and to capture it for the UNSC. They were interrupted however when Promethean and Covenant forces launched a surprise attack on the UNSC Infinity, and all Spartan forces were recalled to defend the ship. Crimson fought through several waves of Covenant and Promethean forces to reach a landing zone.[3] After successfully defending the ship, Crimson was sent back to "Apex" to finish their mission. Crimson succeeded in shutting down all of the portals in the area and clearing out all of the Covenant troops. After securing the area, Fireteam Lancer were sent in to guard Apex.[4]
Several hours later, Dr. Catherine Halsey's signal was detected to have been bounced from "Control" to "Apex," and Fireteam Crimson was sent to investigate it. With the help of several Scorpion tanks, Crimson was able to fight their way through the defending Covenant and Promethean forces and reach the terminal from which Halsey's signal had been bounced. Roland was able to determine that the signal was next bounced to "Lockup" and Crimson was extracted to continue their search in "Lockup."[5]
Fireteam Forest were sent to secure an area in "Apex," but the Pelican carrying the fireteam was shot down. Gustavo Esposito and three surviving members of Fireteam Forest were later discovered by Fireteam Crimson. Together, the two teams disabled a Lich in the region, taking its power core to replace that of the Harvester located elsewhere on Requiem.[6]
Trivia[edit]
- In Backup, the back of the cave the player lands in is sealed off which is not the case in later levels. This is presumably done for gameplay reasons as it keeps the player contained to the part of "Apex" the mission takes place in.
- In Clean Up, its stated that Halsey's signal has been tracked from "Control" to "Lockup." However, in the next level Fireteam Crimson are deployed at "Apex" where the signal is again detected to have been sent to "Lockup." It is only after the fight at "Apex" that Crimson gets sent to "Lockup."
- During Science Mountain, despite it being stated that the player can't get a Scorpion tank through part of the level and they have to continue on foot, it is actually possible to do so. By facing away from the first tower near the point where the Scorpion has to be abandoned and then gunning it over the nearby ridge, the player can get the Scorpion over the obstacle and continue using the vehicle against the Covenant and Promethean forces though this is difficult to accomplish and can take several tries. Though there are similar obstacles along the path, there are ways around or over them, though they are much simpler than the first time. When the Scorpion nears the LZ where a replacement is dropped, the tank will reach a point where it will get stuck and can continue no further, requiring the player to use the replacement. Though the Scorpion can't be used to get into the LZ, it can get close enough that the player can use it to eliminate most of the enemy forces there, including a Phantom and two Ghosts.
Gallery[edit]
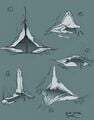
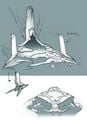
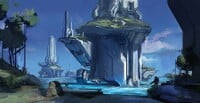
Concept art[edit]
Concept art of the hillside's overview.

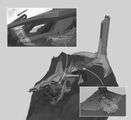
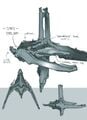
Concept art of the large Forerunner structure.
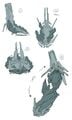
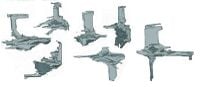
Concept art for the Apex site structure's entrance.
Concept art for the Apex site structure's entrance.
Concept art for the Apex site structure's entrance.
Concept art for the Apex site structure's entrance.
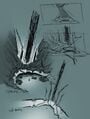
Concept art for the Apex site structure's entrance.
Concept art for the Apex site structure's exit.
Concept art for the Apex site structure's exit.
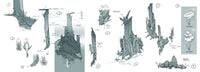
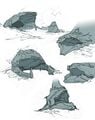
Concept art of the floating islands of the Apex site and its surroundings.
Concept art of the floating islands of the Apex site and its surroundings.
Concept art of the floating islands of the Apex site and its surroundings.
Concept art of the floating islands of the Apex site and its surroundings.

Concept art of the floating islands of the Apex site and its surroundings.
Concept art of the floating islands of the Apex site and its surroundings.

Concept art of the floating islands of the Apex site and its surroundings.
Concept art of the floating islands of the Apex site and its surroundings.
Concept art of the floating islands of the Apex site and its surroundings.
Concept art of the floating islands of the Apex site and its surroundings.
Concept art of the floating islands of the Apex site and its surroundings.
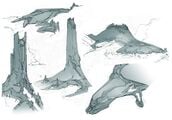
Concept art of the floating islands of the Apex site and its surroundings.
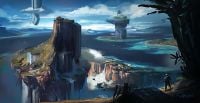
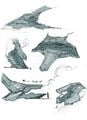
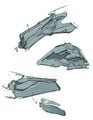
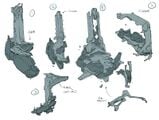
Concept art of Apex.

Concept art of Apex.

Concept art of Apex.

Concept art of Apex.

Concept art of Apex.

Concept art of Apex.
Concept art of Apex.
Concept art of Apex.

Concept art of Apex.
Concept art of Apex.


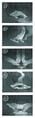
Screenshots[edit]
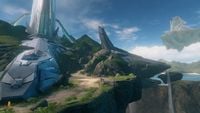
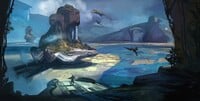
One view of "Apex."

Another view of "Apex."
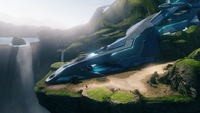
The "foot" of the Forerunner structure.

View of the other unusual structures in "Apex."
A view of the mysterious structures in "Apex."
Fireteam Crimson's Scorpions fighting Covenant troops in "Apex".


List of appearances[edit]
- Halo 4
- Spartan Ops (First appearance)
Sources[edit]
- ^ Halo 4: The Essential Visual Guide
- ^ Halo Waypoint: Requiem
- ^ Spartan Ops, S107 Backup
- ^ Spartan Ops, S108 Unfinished Business
- ^ Spartan Ops, S109 Science Mountain
- ^ Spartan Ops, S1010 Seize the Power


