High Charity (level): Difference between revisions
From Halopedia, the Halo wiki
m (→Walkthrough) |
General5 7 (talk | contribs) No edit summary |
||
| Line 167: | Line 167: | ||
'''Cortana:''' "Don't make a girl a promise.... | '''Cortana:''' "Don't make a girl a promise.... | ||
'''Cortana:''' "(Sadly).... | '''Cortana:''' "(Sadly)....if you know you can't keep it." | ||
''Cortana watches the Forerunner ship rise, and exit through the top of High Charity, where Brute-controlled and Elite-controlled ships are continuing to destroy one another. Soon the Forerunner ship exits via Slipspace.'' | ''Cortana watches the Forerunner ship rise, and exit through the top of High Charity, where Brute-controlled and Elite-controlled ships are continuing to destroy one another. Soon the Forerunner ship exits via Slipspace.'' | ||
| Line 174: | Line 174: | ||
Don't just stand around watching Truth's dropships vanish into the distance, because a [[Pelican]] full of Combat Forms just landed behind you. A small group of [[Jiralhanae|Brutes]] and [[Unggoy|Grunts]] will appear from within the tower to engage them if you go up towards the Pelican. Alternatively, you can walk towards the door and wait for the enemies to spawn, and then flee back to cover, allowing the Covenant to combat the [[Flood]]. Otherwise the [[Flood]] will come streaming down to corner you on the platform, and with a only a Carbine and Plasma Pistol. Snipe any Flood in the chest with your [[Type-51 Carbine|Carbine]]. Reload whenever there's a lull in the fight. Swap your plasma pistol for whatever you find, cause its useless against the Flood. If you're lucky, you'll find a dropped [[Energy Sword]] with about 75 percent charge. If you stick long enough behind your cover, an Elite Combat Form with an Energy Form will charge. | Don't just stand around watching Truth's dropships vanish into the distance, because a [[Pelican]] full of Combat Forms just landed behind you. A small group of [[Jiralhanae|Brutes]] and [[Unggoy|Grunts]] will appear from within the tower to engage them if you go up towards the Pelican. Alternatively, you can walk towards the door and wait for the enemies to spawn, and then flee back to cover, allowing the Covenant to combat the [[Flood]]. Otherwise the [[Flood]] will come streaming down to corner you on the platform, and with a only a Carbine and Plasma Pistol. Snipe any Flood in the chest with your [[Type-51 Carbine|Carbine]]. Reload whenever there's a lull in the fight. Swap your plasma pistol for whatever you find, cause its useless against the Flood. If you're lucky, you'll find a dropped [[Energy Sword]] with about 75 percent charge. If you stick long enough behind your cover, an Elite Combat Form with an Energy Form will charge. | ||
Cut down any Flood forms if you get the sword, but don't use it against the [[Covenant]], as it drains the charge | Cut down any Flood forms if you get the sword, but don't use it against the [[Covenant]], as it drains the charge four times faster. Remember that only killing something will drain the sword's battery, so you can almost kill an enemy with it, finish it off with another weapon, and not drain any battery. Once the area around the downed Pelican is clear, scavenge the wreckage for grenades and a [[Shotgun]] if you can find it. If you need heavier firepower, take a [[Rocket launcher]]. While there are no vehicles to shoot down, it might come in handy when getting rid of large groups of enemies. You're main enemies in this level are [[Combat Form|Combat Forms]] and Brutes, with a touch of Elites along the way. | ||
Anyway, the best weapons to have is a sword and shotgun. Sword for Flood, and some shotgun to teach those Brutes a fatal lesson. If you wish, you can pick up a [[Beam Rifle]] for later long-range work. Once you're set, head through the only door off the platform, which leads to a sloping room. Four Brutes will appear from the other side, so lob a plasma grenade and hope you've stuck one of them as you duck back behind the small wall near the entrance. Lob another, if you've got one. Hopefully, two Brutes will remain, who will be engaged by Combat Flood. Retreat back to the platform to gain some breathing room if things get hot, then charge back in and take a shotgun to anything still moving. | Anyway, the best weapons to have is a sword and shotgun. Sword for Flood, and some shotgun to teach those Brutes a fatal lesson. If you wish, you can pick up a [[Beam Rifle]] for later long-range work. Once you're set, head through the only door off the platform, which leads to a sloping room. Four Brutes will appear from the other side, so lob a plasma grenade and hope you've stuck one of them as you duck back behind the small wall near the entrance. Lob another, if you've got one. Hopefully, two Brutes will remain, who will be engaged by Combat Flood. Retreat back to the platform to gain some breathing room if things get hot, then charge back in and take a shotgun to anything still moving. | ||
Don't worry if [[Cortana]] says, "We don't have time for this, [[Master Chief|Chief]], | Don't worry if [[Cortana]] says, "We don't have time for this, [[Master Chief|Chief]]", because there's no timer. You could probably loiter around for five hours and Truth's Forerunner ship still won't leave till you're aboard, unlike the Warthog Run at the end of [[Halo: CE]]. | ||
Anyway, back to the battle. Head through the door at the opposite end of the sloping room and get on the lift and ascend. Move forwards and grab a beam rifle and head up the ramp. A Drone swarm will flutter past the windows of your location and head towards the platform on the left to engage three of four Combat Forms. Zoom to 10x and snipe all the [[Yanme'e|Drones]]. Another swarm will appear. Snipe to your heart's content. When only the Combat Forms remain, head back into the corridor and recover whatever weapon you exchanged for the beam rifle. If your playing on [[Legendary]], you will see more drones pass though the door to attack. Make sure to leave as soon as the last drone falls. | Anyway, back to the battle. Head through the door at the opposite end of the sloping room and get on the lift and ascend. Move forwards and grab a beam rifle and head up the ramp. A Drone swarm will flutter past the windows of your location and head towards the platform on the left to engage three of four Combat Forms. Zoom to 10x and snipe all the [[Yanme'e|Drones]]. Another swarm will appear. Snipe to your heart's content. When only the Combat Forms remain, head back into the corridor and recover whatever weapon you exchanged for the beam rifle. If your playing on [[Legendary]], you will see more drones pass though the door to attack. Make sure to leave as soon as the last drone falls. | ||
Afterward, walk up to the hologram on the platform and turn on the light bridge. Check if the other platform is mostly clear. Once you feel it's safe to go, cross the light bridge and activate the other light bridge and cross it. Once you arrive on the next platform move toward the door near the wall. But get your close-ranged weapon ready! Combat forms will be leaping out of there any moment. Before entering the hallway past the door, be sure to walk over the shotgun if you need a close-range weapon or have a shot gun on low ammo. | |||
When you enter the hallway, you'll notice that Flood spores are obscuring your view. You can turn on your flashlight, but for the plan that is recommended, It's not useful. In the following passages, Flood will constantly spawn, so the best advice that can be given is to keep on moving. You will soon enter a passageway with a lower middle and two sides that are slightly higher then the rest. It's recommended to jump up top because Brutes usually walk across the middle part. Go through the hallway and you will reach another one-except they'll be a lot more Covenant in here. Once again, jump on the slightly rise path and continue to the other side of the door. | When you enter the hallway, you'll notice that Flood spores are obscuring your view. You can turn on your flashlight, but for the plan that is recommended, It's not useful. In the following passages, Flood will constantly spawn, so the best advice that can be given is to keep on moving. You will soon enter a passageway with a lower middle and two sides that are slightly higher then the rest. It's recommended to jump up top because Brutes usually walk across the middle part. Go through the hallway and you will reach another one-except they'll be a lot more Covenant in here. Once again, jump on the slightly rise path and continue to the other side of the door. | ||
| Line 187: | Line 187: | ||
You'll enter a room where the air is clearer and that's packed with Covenant. It's recommended to just keep on the path and cross the room. Staying there to long will bet the Covenant's attention and will spawn the Flood. You will enter another room, almost the exact same as the other-but this room is filled with the Flood. Once again, keep to the path and only shoot if something is to close for comfort. You'll enter a winding hallway, but it'll be empty. Take a right and get on the elevator. Activate it and wait for the elevator to finish it's ascent. | You'll enter a room where the air is clearer and that's packed with Covenant. It's recommended to just keep on the path and cross the room. Staying there to long will bet the Covenant's attention and will spawn the Flood. You will enter another room, almost the exact same as the other-but this room is filled with the Flood. Once again, keep to the path and only shoot if something is to close for comfort. You'll enter a winding hallway, but it'll be empty. Take a right and get on the elevator. Activate it and wait for the elevator to finish it's ascent. | ||
Here, an epic battle between the Flood and the Covenant will take place. Stay back and wait for the battle to more or less finish, and then jump into battle. If you waited long enough, most of the combatants will already be dead and the survivors will be seriously injured-thus this | Here, an epic battle between the Flood and the Covenant will take place. Stay back and wait for the battle to more or less finish, and then jump into battle. If you waited long enough, most of the combatants will already be dead and the survivors will be seriously injured - thus, this will be an easy battle. Once you are the only living creature there, Cortana will open the doors and you can proceed. When you enter the Room, make sure to near the glowing table thing-there's an energy sword there, but it's easy to miss. You can also take the beam rifle if you want, but do note that this is sacrificing medium range. Go on the elevator and get your fingers ready to battle. | ||
Once you reach the top, you'll notice Flood and the Covenant fighting directly opposite to your position. If you're playing on Normal difficulty levels,then feel free to just run right across the platform to the other side, and you'll be done with the level. If you're on Legendary, then you have to be the last survivor in order for you to be able to finish, unless you are very lucky. | Once you reach the top, you'll notice Flood and the Covenant fighting directly opposite to your position. If you're playing on Normal difficulty levels,then feel free to just run right across the platform to the other side, and you'll be done with the level. If you're on Legendary, then you have to be the last survivor in order for you to be able to finish, unless you are very lucky. | ||
| Line 194: | Line 194: | ||
===Glitches=== | ===Glitches=== | ||
*The Flood Juggernaut's data (such as model, textures, etc.) are stored on this .map file, although it only has spawn points on Quarantine Zone and The Oracle, where its data is not present. | *The Flood Juggernaut's data (such as model, textures, etc.) are stored on this .map file, although it only has spawn points on Quarantine Zone and The Oracle, where its data is not present. | ||
*When you get to the last room with the green beam across the room to the ship, you can get on the beam by just going on top of one of the Covenant boxes and then jump on the beam and walk forward, but you will have to stop because if you go more forward the cutscene appears. | *When you get to the last room with the green beam across the room to the ship, you can get on the beam by just going on top of one of the Covenant boxes and then jump on the beam and walk forward, but you will have to stop because if you go more forward, the cutscene appears. | ||
*If you knock a Combat Form off the side of the ramps of the Phantom dock, it will climb up the walls, similar to the ones that do the same during the elevator ride in The Oracle. But, they cannot jump into the deck. | *If you knock a Combat Form off the side of the ramps of the Phantom dock, it will climb up the walls, similar to the ones that do the same during the elevator ride in The Oracle. But, they cannot jump into the deck. | ||
*Some | *Some Flood biomass can be destroyed. It must be small, and will just disappear and leave a bit of Flood blood. | ||
====Mistakes==== | ====Mistakes==== | ||
*There is still a [[Phantom]] docked on the landing pad at the start of the level, but an energy field prevents you from walking on the back fins. It should also be noted that it has no weaponry, pronged plasma turrets or anything. | *There is still a [[Phantom]] docked on the landing pad at the start of the level, but an energy field prevents you from walking on the back fins. It should also be noted that it has no weaponry, pronged plasma turrets or anything. | ||
*Your starting weapon, a [[Carbine]], starts with a total of 78 rounds, | *Your starting weapon, a [[Carbine]], starts with a total of 78 rounds, whereas a normal carbine has a maximum of 72. | ||
====Easter Eggs==== | ====Easter Eggs==== | ||
*The [[Halo_2_Skulls#Iron|Iron Skull]] can be found on this level. | *The [[Halo_2_Skulls#Iron|Iron Skull]] can be found on this level. | ||
*A dead body of a Brute that looks just like [[Tartarus]] can be found on this level in one of the many rooms | *A dead body of a Brute that looks just like [[Tartarus]] can be found on this level in one of the many rooms; he has the exact same shoulder piece (which is easy to recognize). | ||
*In the Step of Silence (the place with the glass shards hanging from the ceiling after the corridor where you first hear [[Truth]] over the loudspeaker) there is an unknown and hard-to-see switch that looks just like the switches used to activate the gondolas on the level [[Delta Halo]]. To see it (with the best view), bring a [[Particle Beam Rifle]] and head to the platform on the other side of the chamber (across from where you entered). Once you get there, head to the glowing panel in the platform (it points to the center of the room). Look to your left at the platform and the door where the [[Drones]] come from (when you reach the platform). Look at that platform's glowing panel, zoom in to 5x, and look up slightly. You should see the switch around there, and you can zoom in to 10x and see the switch in closer detail. However, there is no known way to get to it (unless by mod) and activate it, so its purpose is unknown. | *In the Step of Silence (the place with the glass shards hanging from the ceiling after the corridor where you first hear [[Truth]] over the loudspeaker) there is an unknown and hard-to-see switch that looks just like the switches used to activate the gondolas on the level [[Delta Halo]]. To see it (with the best view), bring a [[Particle Beam Rifle]] and head to the platform on the other side of the chamber (across from where you entered). Once you get there, head to the glowing panel in the platform (it points to the center of the room). Look to your left at the platform and the door where the [[Drones]] come from (when you reach the platform). Look at that platform's glowing panel, zoom in to 5x, and look up slightly. You should see the switch around there, and you can zoom in to 10x and see the switch in closer detail. However, there is no known way to get to it (unless by mod) and activate it, so its purpose is unknown. | ||
| Line 224: | Line 224: | ||
*On [[Legendary]] it is possible to see some invisible [[Flood Combat Form|Elite combat forms]] and [[Flood Combat Form|Human combat forms]] walking around. | *On [[Legendary]] it is possible to see some invisible [[Flood Combat Form|Elite combat forms]] and [[Flood Combat Form|Human combat forms]] walking around. | ||
*This is by far the shortest level in [[Halo 2]]. | *This is by far the shortest level in [[Halo 2]]. | ||
*This is the last level in the game to feature any Human | *This is the last level in the game to feature any Human vehicle, as well as the last level to have Flood. | ||
*This is the last mission to feature in Halo 2, the [[Master Chief]]. | *This is the last mission to feature in Halo 2, the [[Master Chief]]. | ||
*This is the only level you see the [[Prophet of Mercy]] in person although he is dead. | *This is the only level you see the [[Prophet of Mercy]], in person although he is dead. | ||
*This is the last mission to have the | *This is the last mission to have the Flood that doesn't have the [[Brute Combat Form]] or any Pure forms. | ||
*This is the last level that it is possible to see the [[Flood Juggernaut]]. | *This is the last level that it is possible to see the [[Flood Juggernaut]]. | ||
Revision as of 20:21, May 11, 2009
|
Prev: |
|
|
Next: |
|
| High Charity | |
|---|---|

| |
|
Game: |
|
|
Player: |
|
|
Date: |
|
|
Location: |
Inside High Charity |
 |
Halopedia has a walkthrough guide for this level; see High Charity (level)/Walkthrough. |
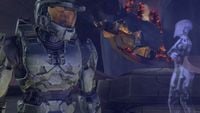
High Charity is the penultimate Halo 2 campaign level. As the Master Chief, you must battle your way through the Flood-infested High Charity to stop the Prophet of Truth before he boards the Forerunner Ship. This is the last level you get to play as the Master Chief in Halo 2. This level is also the only time when Master Chief sees the Flood in combat in Halo 2, and also the only level in the game where you have no allies aiding you. You can find the Iron Skull is on this level.
Usable Weapons
- Battle Rifle
- Particle Beam Rifle
- Brute Plasma Rifle
- Brute Shot
- Covenant Carbine
- Energy Sword
- Magnum
- Plasma Pistol
- Plasma Rifle
- Shotgun
- SMG
- Sniper rifles
Vehicles
- Pelican (non-drivable)
- Phantom (non-drivable)
- The Frigate In Amber Clad (non-drivable)
- The Forerunner Ship Dreadnought (non-drivable)
Transcript
Cross Purposes
The Master Chief drops down a grav-lift in time to see the Phantoms containing the Brute Chieftain Tartarus and the Prophet of Truth fly away. He walks over to High Prophet of Mercy, who has yet to be killed by the Infection Form.}
Master Chief: "Your pal. Where's he going?"
Prophet of Mercy: "Earth... to finish what we started. And this time, none of you... will be left behind..."
The Prophet of Mercy soon collapses dead . Master Chief picks up the Flood form, squeezes it, therefore killing it before it can use his body. Cortana's hologram appears on Mercy's throne.
Cortana: "That structure at the center of the city! It's a Forerunner Ship... and Truth is heading straight for it! If he leads the Covenant fleet to Earth, they won't stand a chance. You have to stop him!"
Master Chief: "That Brute has the Index. And Miranda and Johnson. He can activate the ring."
The view shows In Amber Clad crashed into a nearby tower.
Cortana: "If he does, I'll detonate In Amber Clad's reactor just like we did the Autumn's. The blast will destroy this city and the ring. Not a very original plan, but we know it'll work." {MC reaches for her} "No. I don't want to chance a remote detonation. I need to stay here..."
A Pelican crashes on the platform, and soon the Flood Combat Forms inside the dropship run out.
{Gameplay}
Cortana: "Flood controlled dropships are touching down all over the city! That creature beneath the Library... that 'Gravemind'... used us. We were just a diversion. In Amber Clad was always its intended vector. There's a conduit connecting this tower to the ship. Head back inside. I'll lead you to it."
If the Chief wastes time fighting...
Cortana: "We don't have time for this, Chief. Truth's Phantom is nearing the Forerunner Ship."
The Chief soon reaches a Gravity lift leading upstairs.
Cortana: "I'll disable this lift once you reach the top. That'll slow them down... I hope."
After the Chief reaches to the top.
Prophet of Truth (Loudspeaker): "Shall we let the Flood consume our holy city? Turn High Charity into another of their wretched hives? No enemy has ever withstood our might. The Flood too shall fail."
Cortana: "I'll do what I can to slow the launch sequence. There's something inside the ship... a presence that's fighting back! For a Covenant construct, it's unusually formidable."
If the Chief stays in the room with the sniper rifles for too long...
Cortana: "No time to admire the ceiling Chief. Truth's phantom has reached the Forerunner ship."
Once the Chief leaves the place where Gravity platforms are.
Please, Make Yourself at Home
Prophet of Truth (Loudspeaker): "The parasite did not defeat the Forerunners... and it shall not defeat us."
Gravemind: "Arrogant creature! Your death will be instantaneous, while we suffer the progress of infinitude!"
Once the Chief reaches a part of a tower.
Cortana: "The security systems in this part of the tower are particularly robust."
Prophet of Truth (Loudspeaker): "Whosoever is gripped by fear, take heed. I am the Prophet of Truth. ...And I am not afraid. Noble Mercy is here at my side. His wise counsel ever in my ears."
Gravemind: "We exist together, now... Two corpses in one grave."
Once the Chief reaches a Sanctum.
Cortana: "Apparently, these are the Prophet Hierarch's quarters. Their inner sanctum."
Prophet of Truth (Loudspeaker): "This crisis will not be the end of us. It is but one last hurdle before the journey and salvation!"
The Chief enters the Inner Sanctum amidst a fight between several Covenant defenses and Flood forms.
Cortana: "Brute and Elite ships are engaging one another all around High Charity. I'm running out of options, Chief! I can't stall the launch sequence much longer. The next lift will take you up to the conduit. Hurry!"
Once the Chief reaches the top via another Gravity lift.
Once More, with Feeling

Cortana: "I knew the Covenant was good at re-purposing Forerunner technology, but this is amazing... they've been using the Forerunner ship's engines as an energy source for the city. The ship isn't so much launching as it is disengaging; uncoupling itself from High Charity's power grid- Stopping Truth, that's all that matters!"
Prophet of Truth (Loudspeaker): "Now is the time of our unworlding, in a moment we shall all become... as gods."
Cortana: "You know the plan- You've got to catch Truth, I've got to handle the Index. Go!"
Prophet of Truth (Loudspeaker): "If you will falter, know this... one final effort is all that remains."
Cortana: "Forget about the Flood, you've got to get aboard!"
If the Chief continues to stall and not board the ship.
Cortana: "I can't go with you!"
Cortana: "I have to stay here, Chief!"
Cortana: "Chief, leave me!"
Cortana: "We're out of time, Chief! Get on the conduit!"
Cortana: "Jump in, now!"
(Chief enters conduit on a large green beam of light. The Forerunner ship starts to launch, and Chief enters through a large portal, landing with scrapes flickering off his armor.)
Cortana: "Chief, when you get to Earth, good luck."
Master Chief: "After I'm through with Truth..."
Cortana: "Don't make a girl a promise....
Cortana: "(Sadly)....if you know you can't keep it."
Cortana watches the Forerunner ship rise, and exit through the top of High Charity, where Brute-controlled and Elite-controlled ships are continuing to destroy one another. Soon the Forerunner ship exits via Slipspace.
Walkthrough
Don't just stand around watching Truth's dropships vanish into the distance, because a Pelican full of Combat Forms just landed behind you. A small group of Brutes and Grunts will appear from within the tower to engage them if you go up towards the Pelican. Alternatively, you can walk towards the door and wait for the enemies to spawn, and then flee back to cover, allowing the Covenant to combat the Flood. Otherwise the Flood will come streaming down to corner you on the platform, and with a only a Carbine and Plasma Pistol. Snipe any Flood in the chest with your Carbine. Reload whenever there's a lull in the fight. Swap your plasma pistol for whatever you find, cause its useless against the Flood. If you're lucky, you'll find a dropped Energy Sword with about 75 percent charge. If you stick long enough behind your cover, an Elite Combat Form with an Energy Form will charge.
Cut down any Flood forms if you get the sword, but don't use it against the Covenant, as it drains the charge four times faster. Remember that only killing something will drain the sword's battery, so you can almost kill an enemy with it, finish it off with another weapon, and not drain any battery. Once the area around the downed Pelican is clear, scavenge the wreckage for grenades and a Shotgun if you can find it. If you need heavier firepower, take a Rocket launcher. While there are no vehicles to shoot down, it might come in handy when getting rid of large groups of enemies. You're main enemies in this level are Combat Forms and Brutes, with a touch of Elites along the way.
Anyway, the best weapons to have is a sword and shotgun. Sword for Flood, and some shotgun to teach those Brutes a fatal lesson. If you wish, you can pick up a Beam Rifle for later long-range work. Once you're set, head through the only door off the platform, which leads to a sloping room. Four Brutes will appear from the other side, so lob a plasma grenade and hope you've stuck one of them as you duck back behind the small wall near the entrance. Lob another, if you've got one. Hopefully, two Brutes will remain, who will be engaged by Combat Flood. Retreat back to the platform to gain some breathing room if things get hot, then charge back in and take a shotgun to anything still moving.
Don't worry if Cortana says, "We don't have time for this, Chief", because there's no timer. You could probably loiter around for five hours and Truth's Forerunner ship still won't leave till you're aboard, unlike the Warthog Run at the end of Halo: CE. Anyway, back to the battle. Head through the door at the opposite end of the sloping room and get on the lift and ascend. Move forwards and grab a beam rifle and head up the ramp. A Drone swarm will flutter past the windows of your location and head towards the platform on the left to engage three of four Combat Forms. Zoom to 10x and snipe all the Drones. Another swarm will appear. Snipe to your heart's content. When only the Combat Forms remain, head back into the corridor and recover whatever weapon you exchanged for the beam rifle. If your playing on Legendary, you will see more drones pass though the door to attack. Make sure to leave as soon as the last drone falls.
Afterward, walk up to the hologram on the platform and turn on the light bridge. Check if the other platform is mostly clear. Once you feel it's safe to go, cross the light bridge and activate the other light bridge and cross it. Once you arrive on the next platform move toward the door near the wall. But get your close-ranged weapon ready! Combat forms will be leaping out of there any moment. Before entering the hallway past the door, be sure to walk over the shotgun if you need a close-range weapon or have a shot gun on low ammo.
When you enter the hallway, you'll notice that Flood spores are obscuring your view. You can turn on your flashlight, but for the plan that is recommended, It's not useful. In the following passages, Flood will constantly spawn, so the best advice that can be given is to keep on moving. You will soon enter a passageway with a lower middle and two sides that are slightly higher then the rest. It's recommended to jump up top because Brutes usually walk across the middle part. Go through the hallway and you will reach another one-except they'll be a lot more Covenant in here. Once again, jump on the slightly rise path and continue to the other side of the door.
You'll enter a room where the air is clearer and that's packed with Covenant. It's recommended to just keep on the path and cross the room. Staying there to long will bet the Covenant's attention and will spawn the Flood. You will enter another room, almost the exact same as the other-but this room is filled with the Flood. Once again, keep to the path and only shoot if something is to close for comfort. You'll enter a winding hallway, but it'll be empty. Take a right and get on the elevator. Activate it and wait for the elevator to finish it's ascent.
Here, an epic battle between the Flood and the Covenant will take place. Stay back and wait for the battle to more or less finish, and then jump into battle. If you waited long enough, most of the combatants will already be dead and the survivors will be seriously injured - thus, this will be an easy battle. Once you are the only living creature there, Cortana will open the doors and you can proceed. When you enter the Room, make sure to near the glowing table thing-there's an energy sword there, but it's easy to miss. You can also take the beam rifle if you want, but do note that this is sacrificing medium range. Go on the elevator and get your fingers ready to battle.
Once you reach the top, you'll notice Flood and the Covenant fighting directly opposite to your position. If you're playing on Normal difficulty levels,then feel free to just run right across the platform to the other side, and you'll be done with the level. If you're on Legendary, then you have to be the last survivor in order for you to be able to finish, unless you are very lucky.
Trivia
Glitches
- The Flood Juggernaut's data (such as model, textures, etc.) are stored on this .map file, although it only has spawn points on Quarantine Zone and The Oracle, where its data is not present.
- When you get to the last room with the green beam across the room to the ship, you can get on the beam by just going on top of one of the Covenant boxes and then jump on the beam and walk forward, but you will have to stop because if you go more forward, the cutscene appears.
- If you knock a Combat Form off the side of the ramps of the Phantom dock, it will climb up the walls, similar to the ones that do the same during the elevator ride in The Oracle. But, they cannot jump into the deck.
- Some Flood biomass can be destroyed. It must be small, and will just disappear and leave a bit of Flood blood.
Mistakes
- There is still a Phantom docked on the landing pad at the start of the level, but an energy field prevents you from walking on the back fins. It should also be noted that it has no weaponry, pronged plasma turrets or anything.
- Your starting weapon, a Carbine, starts with a total of 78 rounds, whereas a normal carbine has a maximum of 72.
Easter Eggs
- The Iron Skull can be found on this level.
- A dead body of a Brute that looks just like Tartarus can be found on this level in one of the many rooms; he has the exact same shoulder piece (which is easy to recognize).
- In the Step of Silence (the place with the glass shards hanging from the ceiling after the corridor where you first hear Truth over the loudspeaker) there is an unknown and hard-to-see switch that looks just like the switches used to activate the gondolas on the level Delta Halo. To see it (with the best view), bring a Particle Beam Rifle and head to the platform on the other side of the chamber (across from where you entered). Once you get there, head to the glowing panel in the platform (it points to the center of the room). Look to your left at the platform and the door where the Drones come from (when you reach the platform). Look at that platform's glowing panel, zoom in to 5x, and look up slightly. You should see the switch around there, and you can zoom in to 10x and see the switch in closer detail. However, there is no known way to get to it (unless by mod) and activate it, so its purpose is unknown.
References
- The darkly lit room decorated with glowing blue crystals is the Step of Silence.
- The Prophet of Truth talks over the loudspeakers from time to time during the level, one of these times he says that "one final effort is all that remains". This line is repeated by Admiral Hood in Halo 3. This line originates from dialog recording sessions conducted pre-Halo where Jaime Griesemer is directing Jason Jones in a painful attempt at a Scottish accent. An mp3 of the clip is available on Bungie.net media player [1]. One Final Effort is also the name of a song on the Halo 3 Original Soundtrack. It is played when you are on the snowy part of the level The Covenant and when you are fighting the two Scarabs.
- The "presence" Cortana is "fighting" is possibly Mendicant Bias, the Forerunner AI from the Terminals in Halo 3.
Miscellaneous
- The Flood mass in the Pelican's cockpit isn't a Proto-Gravemind, it's just Flood biomass. Although, there is a possibility that the biomass was a Proto-Gravemind due to the evidence that there are tentacles and roots protruding from it but it may have been destroyed during the Flood infected Pelican's rough landing.
- In the beginning of the level, Pelicans will appear around the area. They can be approached, jumped on, and shot at but not boarded.
- The part where you have to engage multiple Drone swarms with a Particle Beam Rifle that go battle the three or four Flood combat forms these Drones have a purple exoskeleton that is unique to only this level.
- Just like in Gravemind, the spires that appear in the Sanctum of the Hierarchs can fall if the anti-gravity generator is destroyed. Like in Gravemind, this can not only be used to provide some cover, but also kill any Brutes, Grunts or Flood (with the right timing). You will also notice that one of them has already fallen, once the elevator reaches the top. (These will provide protection from Covenant and Flood fire.)
- During the part where you reach a canyon-like indoor area, if you look out the window, you can see strange tentacles, said to be just another part of Gravemind.
- This is the only level where you can see a Flood Combat Form with a Brute Shot and Brute Plasma Rifle on Halo 2.
- Even though Elites don't appear, there are only three dead Elite bodies.
- This is the last level with Frag Grenades.
- This is the last Halo 2 level which is not set on Delta Halo.
- On Legendary it is possible to see some invisible Elite combat forms and Human combat forms walking around.
- This is by far the shortest level in Halo 2.
- This is the last level in the game to feature any Human vehicle, as well as the last level to have Flood.
- This is the last mission to feature in Halo 2, the Master Chief.
- This is the only level you see the Prophet of Mercy, in person although he is dead.
- This is the last mission to have the Flood that doesn't have the Brute Combat Form or any Pure forms.
- This is the last level that it is possible to see the Flood Juggernaut.
Images
Cortana and the Chief look at the Frigate In Amber Clad.

The Forerunner Dreadnought resting In High Charity.
- Ship7.jpg
The Forerunner Dreadnought leaving as Cortana watches.

The Ship outside of High Charity.

The interior of High Charity.


References
- ^ Bungie.net News: Bungie Day Memories
| Preceded by Uprising |
Halo 2 Campaign Missions High Charity |
Succeeded by The Great Journey |


