The Maw Walkthrough
From Halopedia, the Halo wiki
| Halo: Combat Evolved | ||
|---|---|---|
|
Prev: |
||
|
Next: |
||
| The Maw | ||

| ||
| Level overview | ||
|
Player(s): |
||
|
Objective(s): |
Destroy and escape from the Pillar of Autumn | |
|
Location(s): |
Inside the crash site of the UNSC Pillar of Autumn | |
| Gameplay overview | ||
|
Default weapons: |
||
|
Enemies: |
||
Weapons[edit]
Usable[edit]
- Pistol
- Assault Rifle
- Shotgun
- Rocket Launcher
- Plasma Pistol
- Okarda'phaa-pattern plasma rifle
- Needler
- Plasma Grenade
- Fragmentation Grenade
- M41 LAAG
- Shade
Non-usable[edit]
Vehicles[edit]
- Warthog
- Banshee (requires standing on top of Warthog when waiting for Echo 419 and pressing the action button at the right moment when the Banshee passes by overhead)
- Pelican (non-drivable)
- Spirit (non-drivable)
- Longsword (non-drivable)
- Halcyon-class Cruiser UNSC Pillar of Autumn (non-drivable)
Equipment[edit]
Part One: And the Horse You Rode In On[edit]
You begin this level with a plasma rifle. If you wait around in the first area long enough, four Sentinels will appear and float in from outside. While they're outside, they won't fight back, so take as many out as you can. Once they're inside, the rest should fall to your plasma rifle easily. Move into the tunnels and look for a hole in the floor. Infection forms will come pouring out of it to greet you. Wait for the carnage to die down below, before dropping down the ladder.
There should be a diagonal support; you can peek over to shoot at a group of Sentinels. Duck behind it if your shields get low. There are more infection forms in this area, so make sure to pop them all before moving down the hall. Peeking around the corner to your right, you'll see a group of Flood. Fire off a couple of shots at one of them, throw a grenade, and then run backwards back down the hall gunning them down as they round the corner after you. Throw another grenade or so if necessary. There should be a shotgun and a pistol among the wreckage. Pick them up. You can also wipe off a few Sentinels, but have one or two living, run to were the Flood are, then run top speed to the ladder and climb up so the Flood and Sentinels can fight each other.
As you move towards the next area, a door will be smashed open with a ton of Flood behind it. Move to the left of the door, so they won't be able to see you when it opens. Bounce a frag grenade into their midst, then follow up with your trusty shotgun. There is a lot of Flood here; so another grenade thrown far back into the hall and slightly around the corner would be a good idea. Your shotgun will finish the job nicely. If it’s on legendary; it's a good idea to throw two grenades in the door.
Next comes the mess hall, which is quite difficult. Open the door into the next area, but don't go through. Pop the infection forms first. Now you can just barely peek in and zoom in with your pistol to your left. A Hunter should come storming into the hall and start taking down the Flood. Aim for that bright orange back, and start shooting. If just one pistol round gets past his armor, he's dead. Another Hunter will smash through a door to your right, but he'll soon retreat into the mess hall if you don't kill him first. Follow him and shoot him in the back as he battles the Flood. Grab the health pack only if you need it (remember, there are two here) and a few grenades here if you need to. You have to do all this very quickly so you can take advantage of the confusion in the next area. If you're having trouble, don't worry about killing the Hunters, as you can fight them later. It is better if you get rid of them quickly, though. If you look at one of the walls near the health packs you can see a menu. There is another way of killing Hunters that is also kind of easy, but you have to get perfect timing. Take a shotgun or a pistol and get really close to the Hunter. The Hunter will bend down and try to ram into you. Walk backwards so the Hunter doesn't hit you. The Hunter will try to ram into you, and then it will jump up and swing its shield in the air, also trying to hit you with the shield, so just keep backtracking, and when the shield is in the air, its stomach is unprotected, so just fire at it. It might take two or three tries, but it'll work, and usually, you don't even lose any health.
Once safely on the other side of the Covenant, you have a few options. You could just move on to the bridge and leave these enemies behind. However, you can go back in and use our pistol to pick off the SpecOps Grunts. Then you can rush the SpecOps Officer Elite and blast him a few times with the shotgun. Be careful. This type of Elite makes use of grenades extensively and with worrying accuracy.
Another group of Covenant will enter the room now, so run back to where you originally entered this area. If any Hunters still are still alive, use the multiple doors to the mess hall to get behind them and nail them in the back. Again, peek out and use your pistol to pick off the Grunts. These Elites can be a problem. They throw grenades, too. If you are within reach of a Needler, you can use that to get rid of some of them. A generous amount of grenades thrown in their direction will often make them retreat into the hallway they came out of. This leaves you in control of the mess hall, so grab a Needler and a bunch of grenades and take them out from relative safety. Once this group is dead, you can scavenge this area thoroughly. Keep your shotgun and pistol. Another way of clearing off the Covenant (it is highly recommended doing this strategy on legendary) is by temporarily trade your shotgun for plasma pistol, and "noob" combo the Elites and pistol snipe the Grunts. If you don't know what noob combo is, it is a charged plasma pistol to kill all the shields and get a headshot to kill the Elite. It would also be smart to keep the plasma pistol and trade the pistol for shotgun because of the sentinels. In legendary, the pistol is not very good against the Flood, because they always respawn.
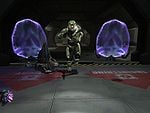
There's a health pack on the way to the bridge, but don't grab it until you really need it. There is an elite waiting for you just around the corner, so either stick him or fill him full of needles. Before you trigger the cut scene, drop your pistol in a safe place, and pick up a Covenant weapon. Any will do.
If you skip the cut scene (actually, just the part where the Sentinels come), you'll still have the indestructible display in front of you for cover. It also stays if you die and restart here. Either way, use it for cover and unleash your Covenant weapon on the Sentinels. Pick up your pistol and head out.
The mess hall is now closed off and a new area full of Flood has opened. Blasts through the first one you see with your shotgun, then leave a grenade for the others as you retreat. The rest will file out of the door after you. Shotgun and grenade as usual. Now move in the ammo room, which isn't nearly as full of ammo as its name suggests, through the pile of assault rifles and approach the far door. Wait for the battle to die down before going through. There should be two Hunters and an Elite left sitting in a pile of grenades. Throw one of your own to soften them up.
Again, you have a couple of options. You could leave the Hunters and the elite (and the health pack they're sitting on) behind, or you could kill them. Killing them is actually very easy if you take advantage of a nice little feature in the programming. Move into the next hall and you should trigger a load point. Now go back to the hunters and you should trigger another one on the way. Basically since the hunters were unloaded from memory, they forgot they saw you. So if you're sneaky, you can peek in and shoot them in a weak spot and try to stick the elite, because he is really annoying in legendary. If they see you, just unload/load them again. This is a great trick for enemies near load spots throughout the game, though it's kind of cheap. If you're too honorable for such a thing, you can always do it the old-fashioned way, huge amounts of damage or dancing with them until they make themselves vulnerable. Anyway, dispose of them, and then scavenge what you can from this hallway. Grab a Covenant weapon before you go. There are Sentinels ahead.
By now you know the routine. First kill the Sentinels, and then the Flood. Retrieve your old weapon after that. There are two groups of Sentinels here to mow down. For these sentinels, I like sticking them in legendary. It is very effective, but only if you have plasma grenades.
The next area is the cryo chamber. There is a battle going on in here, so stay back and let the carnage ensue. If you want to make things easier, you can just run straight up the ladder and skip this whole battle, but then you wouldn't get to kill this entire group of Flood, so throw a grenade into the group of Flood, finish them with your shotgun, and blast the Sentinels.
If you wait while they're fighting, locate a health pack nearby. You'll have to jump over those same pipes you jumped over when you first started playing Halo. It's on the left, but as usual don't get it until you really need it.
When the battle dies down, go into the cryo chamber and finish off any Sentinels with the shotgun. Climb up the ladder, then move towards the next area, and you should trigger another wave of Flood to enter the room below you. (If you keep at least one of the Sentinels alive, these Flood will not spawn. Try to keep it on the opposite side of the central glass walkway from you.) Drop a grenade down then drop down yourself (after the grenade goes off) and blast a hole through them running through the doors they entered through. Retreat all the way over the pipes to where the health pack is. They should be easy to take out from the safety of these halls.
Once they are finished, go back up the ladder and move into the control room overlooking the cryo chamber. There are two more Sentinels here. The shotgun is very effective at this close of a range, but be careful of the explosion when they die. The health pack here should be reserved for later use. There's a tough battle waiting in the next hall. On your right as you enter the control room is a door to another little room. This is a great place to hide, reload, and recharge in the upcoming battle. On your left as you entered is a hall full of flood. Ridiculous amounts of flood will come pouring down this hallway. Use your shotgun at medium range and your pistol and grenades at long range and just keep firing. Aim for the carrier flood (the ones that explode). And watch out for Flood with rocket launchers. Fall back to your hiding room as often as necessary. Some Flood will follow you all the way back here, but at least not all of them will. There will be short breaks allowing you to move forward and pick up ammo before falling back. Eventually they will stop coming. You can try just running through this hall with guns blazing and you'll face fewer enemies, but I'll have to advocate the safer route in this walkthrough. Grab the health pack now if you managed to conserve it throughout the onslaught.
Move down the hall scavenging and cleaning up any stragglers and pick up a rocket launcher. Keep going straight and you'll find an overshield tucked away in a dead-end. A group of flood will spawn in this room as you leave, so run quickly out of this room, turn left, and move into the maintenance tunnels. You can kill these Flood if you want, but it just makes even more spawn in their place.
There are several exits from the tunnels. The far left exit dumps you out into a room with a lot of dead elites and plasma grenades on the ground. The far right exit is blocked, but there's a health pack here along with some frag grenades. Fill up on these goodies while the battle rages outside. There are sentinels and tons of Covenant. When the sentinels are dead run outside. A few more sentinels will come out, and run back into your hiding place. Keep doing this and eventually the flood will come out. Hide again and have them fight. If it slows down and there are still Covenant and Flood, then just run out, chuck a plasma at the Flood, and hide again. Keep doing this until they have mainly died off. Just use the rest of the rocket ammo and keep the rocket launcher. It'll make the armory easier. Follow the path around and you should come out and see two energy shields in front of you. Head out, pump a few shotgun shells into anything nearby, and take a left. Follow the big red arrows on the ground towards the armory.
You should enter the armory. Fill up a shotgun and a rocket launcher and get ready to kill some stuff. Towards the back of the room some Active Camo flood will come after you. They hurt just as much as the visible ones and look even cooler. You're in a room full of shotgun shells and rockets. I think you know what to do. In legendary, it would be a good idea to just pick up the ammo and run. The invisible flood are as good as normal flood, but invisible. That's why I told you earlier to keep the rocket. Head off to engineering when you're through here.
When you're in the armory, make sure you have a shotgun. If you do not want to fight the Camo Flood, get the SG and the rocket launcher. Then head to engineering. Also, if you run low on ammo you can come back and reload your weapons.
Part 02: Light Fuse, Run Away[edit]
(When you go to the door on the left to the engine room, grenade jump with a frag. then on Level Two, jump on the reactor and activate it to destroy the reactor.)
The checkpoints are spread out so try not to die too much. At this point conserving ammo is pointless, so blast away with the shotgun as long as it takes. You can always go back to the armory to restock. There are also eight health packs on the sides of computers on the first floor of the engine room.
When you have the choice of going right or left, go right. Enter the engine room and go up the ramp to your right. Turn left and head all the way back through the door to Level Two. Follow the path up until you reach Level Three. You can hit the switches in any order. It doesn't make much of a difference.
After you hit each switch, jump onto the retracting pipe and ride it back across the room. Drop down for cover, switch to your rocket launcher, and carefully aim a rocket at the bright slits as they're opening up. Make sure you score a hit before moving on. If you miss and have no ammo left a well-placed grenade can blow up it up.
For one of the vents, there's a set of three barrels you can use to get back up to Level Three without having to go back through the halls. Jump on the blue one turned on its side. Then jump on the yellow one that's right side up. Next jump on the exhaust coupling (the big square pipe). From here you can just barely jump up onto Level Three where the computers are. It helps to run along the left side of the pipe when you make the jump so you don't get pushed off if you miss.
Once you're done, Cortana will show you where you to go. Follow her lead, but be careful. Riding the elevator is a couple of grunts with fuel rod guns and a few elites. As the elevator is coming down, aim your rocket launcher for maximum destruction. The elites may survive the rocket, but not your grenades and shotgun. Don't be afraid to retreat here, as the timer has not yet started. Once everything is dead, move onto the elevator. You should still have at least one rocket and one grenade left. They might be necessary. A few shotgun shells would be good too. Reload everything, switch to your shotgun, and get ready.
Part 03: Warning: Hitchhikers May Be Escaping Convicts[edit]
Grab the first warthog on the right. You should get a health pack on the way. If at any point you flip your Warthog, get back in and keep driving as quickly as possible. Only shoot something if it's directly in your path.
Stay in the middle as you enter the first big room. Drop down under the floor, but as you go back up this ramp, steer slightly to one side. When you exit you'll see why. Go around this obstacle then continue down the middle of the path for the rest of this room.
The first hallway is rather uneventful. Line your hog up to one side so your off-centre entering the next room.
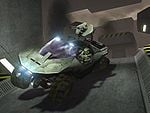
The centre way in this room flips me more often than not, so I'm going to suggest the tunnels to the side. Lean even more to your chosen side as you exit these tunnels to get around a wall, then back to the middle to exit. This room and the next hallway are full of sentinels, so when you leave, you might want to take a second to recharge. Better to waste the time recharging than die.
The next hallway has a short cut through it. Go to the left of the first column, then to the right of the second column, then swing around and take the hall to your left. If you're having a lot of trouble getting in, don't worry about it. It's more important to keep moving.
The third big room has a wall blocking your way as soon as you enter. Come in at a steep angle and stay close to one of the walls. There's a catwalk here on either side that the warthog can drive on that gets you through the room quickly. After steering around the big wall, you could also take the off-centre tunnel down, and then head back to the middle for the rest of the room. Either way works fine.
The third hall is pretty simple. Get yourself straightened out for the next room.
The fourth room is nasty. Head through the middle and you'll eventually be stuck with a bunch of pillars in your way. Slalom around them. Go to the left of the first one, then to the right of the next, then to the left, etc. until you're through. Head back to the middle for the rest of this room.
After all that, the rest of this run is a breeze. The next hallway leads you to Foehammer, but don't stop and wait for her. We all know what happens here. Keep on trucking.
The next winding hallway has another helpful short cut on the right. Again it's after the second column. Halfway through the short-cut tunnel on your right is another tunnel that leads to the Thirsty Grunt Easter egg, but you can come back to visit it after you beat the game. You'd better keep moving.
Soon you'll be warned of a big jump ahead.
You have two choices now:
- Line yourself up as evenly as you can and floor it. No chance for corrections in mid-flight. There are actually two jumps right in a row here, so keep straight. There's another Easter egg here right after the first jump, but this one takes even more time, so come back for it later. A good tactic is to floor it, then ease up on the pedal when you're in the air. This will prevent your Hog from flipping over and losing life and time.
- Or to be completely on the safe side, if you're playing on Easy or Legendary, you can look in circles whilst falling to prevent any damage being inflicted by falling onto the lower floor under the lift. NOTE: This may not work in versions of Halo without the "Xbox Classics" on it.
- Another technique is to steer hard left or right just before your front wheels leave the ramp. This will flick the Warthog into a flat spin, which will prevent your from tumbling end over end or rolling, and should enable you to land flat and usually pointing straight ahead.
Keep straight and steady and soon you'll see the hangar opening up before you.
The end is in sight, but a bunch of junk blocks your Warthog. You'll have to run the rest of the way. There are a lot of nasty things to hinder your escape, but you can avoid most of them by getting out of the middle area and running alongside it. Few of the combatants will notice you out here.
If you think you're not going to make it, or just want to have some fun, park your warthog right up against the obstacles and get out. Switch to your rocket launcher and throw a grenade under the warthog. Just after the grenade goes off, shoot the warthog with a rocket and you'll send it flying over the obstacles. Now you can get back in and ride to your longsword in style.
Halo: Combat Evolved Ending (Easy/Normal/Heroic)[edit]
The only difference in the endings on higher difficulties is when the level is completed on Legendary which features the Hugging Elite cutscene.
| Preceded by Keyes |
Campaign Walkthroughs The Maw |
Succeeded by none |
