
Halo: Campaign Evolved skulls
From Halopedia, the Halo wiki
"WE'VE GOT A NEW CONTACT, UNKNOWN CLASSIFICATION!" This article may contain information based upon upcoming, unreleased, or recently-released content, and may not be fully complete. Additionally, the information may be subject to change if it is based on pre-release material. Please update it as soon as any relevant and accurate material is available.
|

Skulls are a collectible in the campaign mode of Halo: Campaign Evolved.[1][2][3]
Overview[edit]

The skulls are hidden throughout campaign missions; once picked up, the skulls unlock gameplay-modifiers in the menu that either increases difficulty or grants additional perks/upgrades.[2] Halo: Campaign Evolved has more skulls than any prior Halo game,[4] with 42 available for unlock and use.[5][6] The skulls broadly fall under two categories: 26 Legacy skulls—skulls from the original Halo: Combat Evolved Anniversary as well as other ones introduced in Halo: The Master Chief Collection—and 16 new skulls with unique effects, some of which modify gameplay elements to resemble the original Halo: Combat Evolved.[2]
There are 39 collectible skulls to be retrieved across 13 missions; three skulls are hidden in each of the ten original campaign missions,[1] while nine can be found in the three missions depicting Operation: METEORITE.[2] The skulls are in different locations to their equivalents in Anniversary due to the increased number of skulls and altered level layouts.[7] As a hint, each skull emits a ghostly hissing sound as an audio cue, growing louder in volume as players approach the skull.
After players have found two skulls, they will unlock three additional skulls (Adaptation, Reload, and Armistice) as well as the Campaign Remix feature,[2] which allows players to randomise weapon behaviours, enemy placements, player attributes, environmental effects, and more.[5]
A specifically-curated selection of 17 skulls must be found in order to unlock the game's official LASO difficulty. Despite the name, Campaign Evolved's iteration of LASO does not require all 42 skulls to be enabled as unlike prior games many skulls now make the game easier. Details on LASO in Campaign Evolved can be found here.[7]
List of new skulls[edit]
Adaptation[edit]

- "Randomizes the enemy factions present in the mission."
Unlock requirement: Unlock any two skulls.[2]
Effects: Randomises the spawns for enemy AI during campaign levels. Automatically enabled in Campaign Remix mode.
Armistice[edit]

- "Enemy factions never fight one another."
Unlock requirement: Unlock any two skulls.[2]
Effects: Aligns all enemy AI on the same team, so that Covenant, Flood, and Sentinels do not fight each other (particularly if spawned together via Adaptation skull). Automatically enabled in Campaign Remix mode.
Efficient[edit]

- "Enemies killed while the player is at full health drop more ammo."
Unlock location: On the level Heavy Burden, during "Tunnel Vision" chapter, after reactivating the gondola's power; the skull is located in back corner on the left platform in the second room.
Effects: Enemies drop more spare ammunition if killed when the player has full health.


Endurance Spec[edit]

- "UNSC vehicles cannot be damaged."
Unlock location: On the level The Truth and Reconciliation, during the "Into the Belly of the Beast" chapter, in the ship's second large room, the cargo bay; the skull is located on the pillar closest to the locked door. Players can jump from the upper floor, and then between pillars to reach the skull.
Effects: Changes the UNSC vehicles (the Warthog and Scorpion) so they can't be damaged, mimicking their behaviour in the original Combat Evolved.


Floor is Lava[edit]

- "Take continuous damage whenever touching the "ground"."
Unlock location: On the level Halo, during the "Reunion Tour" chapter, where the player rescues a group of marines at a rock slide; the skull is located on top of one of the large rocks. Players need to jump between the rocks to reach the skull, starting from the large rock where the marine sniper is located.
Effects: The player takes damage when they touch the floor.


Give & Take[edit]

- "Firing your weapon drains your shield, but dealing damage to enemies recharges it."
Unlock location: On the level Halo, during the "Reunion Tour" chapter, where the player rescues three groups of marines; the skull is located inside the large cave in the middle of region.
Effects: Firing the weapon drains the player's shield, while dealing damage to enemies recharges it.


Hip Fire[edit]

- "All weapon zoom functionality is disabled."
Unlock location: On the level The Silent Cartographer, during the "Shafted" chapter, inside the Cartographer facility; the skull is located in a small platform in the shaft around the U-shaped ramp immediately after fighting a pair of Hunters.
Effects: Mimics traditional Halo gameplay by disabling all weapon zoom functionality.

Johnny Ammo Seed[edit]

- "When reloading you lose the ammo remaining in the discarded clip."
Unlock location: On the level Boarding Action, during the "Change of Plans" chapter, after clearing the training room that hosts a gravity bridge; the skull is located is in the upper walkways in the previous room, which is now accessible from the door in the training room's upper floor. Upon entry into the previous room's upper walkways, the door across the room unlocks and reveals four Elites wielding energy swords.
Effects: Mimics the reload behaviour seen in tactical shooters, where discarding a magazine also means discarding any remaining rounds in that magazine.


Leadhead[edit]

- "Headshots no longer provide extra damage or instant kills."
Unlock location: On the level Boarding Action, during the "Forge Reconnaissance" chapter, in the room holding a raised platform with a gravity lift in its center; this room precedes the large hangar bay near the end of the level. The skull is located at the end of the hallway through the door left of the gravity lift, though the door unlocks only during the third and final wave.
Effects: Disables headshots.


Magnified[edit]

- "AR holds 60-round magazines."
Unlock location: On the level The Pillar of Autumn, during the "Reveille" chapter; the skull is located on top of the first weapon rack in the middle of the armory, just before the injured marines.
Effects: Changes the magazine and firing properties of the Assault Rifle to mimic the original weapon in Combat Evolved.

Perspective[edit]

- "Changes the player camera to third-person."
Unlock location: On the level The Pillar of Autumn, in the ship's bridge; the skull is located on the floor of the domed viewport.
Effects: Lets the player play in third-person.
The concept of a third-person skull was originally considered for inclusion in Halo 3: ODST.[8]

Pop[edit]

- "Shooting Flood in their weak point causes them to explode."
Unlock location: On the level The Library, during the "Wait, It Gets Worse!" chapter; the skull is located on a ledge directly opposite to the locked door leading into the main chamber. Players can climb a nearby ramp, then jump to the ledge from one of the decorative columns.
Effects: Makes Flood enemies explode if shot in their weak points.


Reload[edit]

- "Randomizes the pre-placed weapons for the mission."
Unlock requirement: Unlock any two skulls.[2]
Effects: Randomises weapon placements on a mission. Automatically enabled in Campaign Remix mode.
Speed Limit[edit]

- "Disables sprint."
Unlock location: On the level The Pillar of Autumn, during the "Reveille" chapter; the skull is located on upper walkway opposite to the optical diagnostics station. Players can crouch-jump to one of the canisters in the back of the room to reach the walkway.
Effects: Disables sprint, mimicking traditional Halo gameplay.

Stowed Reload[edit]

- "Weapons reload while stowed."
Unlock location: On the level The Maw, during the "...And the Horse You Rode In On" chapter; the skull is located at the tip of a horizontal beam in the far-left corner of the cryo bay.
Effects: Mimics the speedy reload exploit present in the original Halo: Combat Evolved; swapping weapons reloads them.

Temperamental[edit]

- "Allies will attack the player more quickly if the player kills a friendly."
Unlock location: On the level The Most Dangerous Game, during the "Prisoner's Dilemma" chapter; the skull is located at the center structure in the outdoor area after having rescued the marine prisoners. The skulls only spawns after clearing the area, and after the player has damaged the Elite HVT in all three of his previous appearances: on the raised platform to the right in the woodlands, at the entrance to the prison facility after the large bridge, and on the upper ledge in this very same outdoor area, where he is marked on the HUD.
Effects: Enemy AI gets more aggressive when the player kills their allies.


List of Legacy skulls[edit]
Acrophobia[edit]

- "The Corps: now issues rifles AND wings."
Unlock location: On the level The Silent Cartographer, atop the Marathon-shaped structure near the center of the island where the first Hunter pair is fought; the skull is located at the top of the structure, where the horizontal beam meets the natural terrain. Players can scale the structure by jumping on the small decorative ledges along its side.
Effects: Allows the player to fly by holding the jump button.


Angry[edit]

- "Enemies fire their weapons faster and more frequently."
Unlock location: On the level Assault on the Control Room, during the "Rolling Thunder" chapter; the skull is located on top of one the three rib-like beams above the artificial trench underneath the twin-bridge.
Effects: Enemy AI becomes more aggressive.

Bandana[edit]

- "Infinite ammo and grenades."
Unlock location: On the level The Silent Cartographer, near the main Cartographer facility's entrance; the skull is located in the cave to the right of the entrance.
Effects: Grants the player unlimited ammo and grenades.


Black Eye[edit]

- "Your shields will only recharge when you melee enemies."
Unlock location: On the level Two Betrayals, during the "Breaking Stuff to Look Tough" chapter; the skull is located in an alcove of Flood biomass underneath the twin-bridge.
Effects: The player's energy shields only recharge when they melee enemies.


Blind[edit]

- "HUD and weapons do not appear on screen."
Unlock location: On the level Keyes, during the "Upstairs, Downstairs" chapter; the skull is located at the end of the large hallway that connects the cargo bay to the gravity lift bay. Players can access the hallway from the cargo bay, where the door opens to release a group of Flood attacker forms. Inside the hallway, players need to jump over a destroyed Wraith and supply cases to reach the skull.
Effects: Disables the HUD and first-person weapon. This is distinct from the disable HUD option in the settings menu, which still leaves the weapon on-screen.

Boom[edit]

- "Explosion radius is increased by 2x."
Unlock location: On the level The Maw, during the "Light Fuse, Run Away" chapter; the skull is located on a small ledge on the right side of the engineering room. Players can jump down to the ledge from the upper walkway.
Effects: Doubles explosion radius.

Catch[edit]

- "Enemies throw and drop more grenades."
Unlock location: On the level Keyes, during the "Under New Management" chapter; the skull is located in the middle of the gravity lift and ascends with the player into the ship, though it only spawns if the player reaches this point in the level on Heroic within three minutes after the level begins (with the timer carrying over when reloading checkpoints). Playing the level with Acrophobia skull enabled will disable the skull's spawn, though players can enable other skulls as well as any of the difficulty modifiers.
Effects: Enemies throw and drop more grenades.

Cowbell[edit]

- "Mass of all objects is reduced, making them more easily displaced."
Unlock location: On the level Assault on the Control Room, during the "If I had a Super Weapon..." chapter; the skull is located in the center fin protruding from the control room's exterior structure, just directly underneath the bridge.
Effects: Objects weigh less, meaning they are flung further when moved.

Eye Patch[edit]

- "All auto-aim is disabled for all weapons."
Unlock location: On the level Heavy Burden, during the "Best Served Cold" chapter; the skull is located next to a locked door on a narrow upper walkway running parallel to a large bridge leading towards the ship's bridge.
Effects: Disables auto-aim.


Famine[edit]

- "Weapons dropped by enemies contain half the ammo."
Unlock location: On the level The Library, during the "Fourth Floor: Tools, Guns, Keys to Super Weapons" chapter; the skull is located in an alcove of Flood biomass immediately to the left after entering the tunnels, the entrance of which is directly opposite of the elevator.
Effects: All weapons dropped by enemies have their ammo reserves halved.

Fog[edit]

- "Motion tracker is disabled."
Unlock location: On the level 343 Guilty Spark, during the "Well Enough Alone" chapter; the skull is located on a small hill to the left before crossing the tree-bridge that leads to the containment facility.
Effects: Disables the motion tracker.

Foreign[edit]

- "Players cannot use weapons from another faction."
Unlock location: On the level The Truth and Reconciliation, during the "Into the Belly of the Beast" chapter, on the bottom floor of the ship's hangar; the skull is located in the hallway in the further corner on the right from the entry point. Players can access the hallway when enemies spawn in and exit through the doors in either corner of the hangar bay.
Effects: The player can only use human weapons (the Assault Rifle, Magnum, SMG, Battle Rifle, Shotgun, Sniper Rifle, Frag Grenade, and Rocket Launcher).

Ghost[edit]

- "Enemies no longer flinch when taking fire."
Unlock location: On the level The Most Dangerous Game, during the "Hunters Hunted" chapter, after crossing the gravity bridge and going through through a cavern with a large door at its end; the skull is located at one of the braziers above after crossing the doorway. Players can jump along the natural terrain on left side of the area to reach the brazier.
Effects: Enemies do not flinch when being shot.

Grunt Birthday Party[edit]

- "Grunt headshots produce legendary celebrations."
Unlock location: On the level Heavy Burden, during the "Two-Fisted Cyborg Justice" chapter, in a large three-floored chamber; the skull is located on a rock column in the center of the chamber.
Effects: Grunts explode in a celebration and confetti when they die to a headshot.

Grunt Funeral[edit]

- "Grunts die in a blaze of plasma."
Unlock location: On the level Halo, during the "Reunion Tour" chapter, where the player rescues a group of marines at a beacon tower; the skull is located at the bottom of the split of the delta-shaped structure, where the energy pulse is emitted. Players need to use a grenade jump to reach the skull.
Effects: Grunts die in a Plasma Grenade explosion when killed.

Iron[edit]

- "Dying in co-op resets you to your last checkpoint. Dying in solo restarts the level."
Unlock location: On the level The Truth and Reconciliation, during the "The Truth and Reconciliation" chapter, at the bottom of the ship's gravity lift; the skull is located on a small ledge near the cliff edge facing a natural bridge in the horizon. The ledge is located near two cactus-like plants with a tree standing between the two.
Effects: Dying in co-op resets you to your last checkpoint. Dying in solo restarts the level.


IWHBYD[edit]

- "It would have been your dialogue."
Unlock location: On the level Assault on the Control Room, during the "I Would Have Been Your Daddy..." chapter; the skull is in a small alcove in the underground tunnel section, to the left after crossing the bridge. Players will need to jump on the Scorpion to reach the small alcove.
Effects: NPCs play humorous dialogue more often.


Malfunction[edit]

- "Upon respawn a random element of your HUD no longer appears."
Unlock location: On the level Boarding Action, during the "Away Team" chapter; the skull is located on at the top of the wall directly facing the docked Spirit. Players need to progress through the level as usual until fighting the first pair of Hunters before leaving hangar bay; from there, they need to jump to the circular platform where Johnson was previously situated to provide covering fire, then traverse across the bay to reach the top of the wall next to the docked Spirit.
Effects: Elements of the HUD are randomly disabled upon respawn. In each instance, it could be one of the following: weapon crosshair (including the crosshair and ammo counter in the smart-link interface), shield/health meter, weapon/ammunition counter, grenade counter, and motion tracker (not applicable if Fog is enabled).


Mythic[edit]

- "Enemies have increased health."
Unlock location: On the level Two Betrayals, during the "Breaking Stuff to Look Tough" chapter; the skull is at the end of a series of hallways and rooms near the second phase pulse generator. Players need to activate the control panel at the top of the central structure outside the second phase pulse generator in the second canyon. The control panel unlocks the door on the platform opposite of the platform leading to the second phase pulse generator. Players then need to clear each area of enemies before interacting with a control panel to proceed to the next area. At clearing the third area, the skull will spawn in the inactive phase pulse generator in the middle of the room.
Effects: Enemies have increased health.


Piñata[edit]

- "Punching enemies makes them drop inert grenades."
Unlock location: On the level Keyes, during the "The Captain" chapter, in the ship's bridge; the skull spawns and drops from the Proto-Gravemind after the player melees Keyes' face.
Effects: Enemies drop Plasma Grenades when melee'd.

Recession[edit]

- "Every shot expends twice the normal amount of ammo."
Unlock location: On the level The Most Dangerous Game, during the "Vacation Destination" chapter; the skull is located in a chamber behind a large door directly facing the bridge where the first Wraith is fought. Players need to destroy the two plasma batteries on the two braziers, which then opens the door.
Effects: Every shot expends double the normal amount of ammo, effectively halving each weapon's magazine or battery capacity.


That's Just... Wrong[edit]

- "Enemies have increased awareness of the player."
Unlock location: On the level 343 Guilty Spark, kill the Crazy Marine early in the level. He drops the skull upon death. Alternatively, return to the room after the first encounter with the Flood; the marine will have disappeared, leaving only the skull behind.
Effects: Enemies are more easily able to detect the player.

They Come Back[edit]

- "Flood Combat Forms reanimated by Infection Forms are much more dangerous."
Unlock location: On the level 343 Guilty Spark, during the "343 Guilty Spark" chapter; the skull is located on a ledge at the far end of the area around the tower structure. Players need to follow along the edge of the area until they reach a fallen tree with numerous branches and twigs. The skull can be found on a rock to the left at top of this tree trunk.
Effects: Reanimated Combat Forms deal greatly increased damage.

Thunderstorm[edit]

- "Upgrades the rank of most enemies."
Unlock location: On the level The Maw, during the " Warning: Hitchhikers May Be Escaping Convicts" chapter; the skull is located near the start of the Warthog run. After crossing the two large chambers, players will need to make a U-turn through the wreckage into a series of large tunnels; while driving through the first two smaller tunnels, the skull can be found in the middle of some flames on the right wall in the middle of the second small tunnel.
Effects: Enemies are promoted to higher ranks. Grunts and Jackals will always spawn as Majors. Elites will always spawn as Officers or Ultras. Infected Elites will almost always spawn as infected Officers.

Tilt[edit]

- "Enhances both positive and negative damage multipliers."
Unlock location: On the level The Library, during the "The Library" chapter; the skull is located at where Sentinels are re-introduced to the player, immediately after exiting the first of many trench-like service tunnels in the level (occupied by Flood carrier forms here). Players can reach the skull by jumping to the incline structure directly to the right of the tunnel's exit.
Effects: Plasma weaponry becomes more effective at damaging energy shields and less effective at damaging health, and ballistic weapons experience the inverse.

Tough Luck[edit]

- "Enemies always go berserk, constantly dive out of the way, and rarely run away from a fight."
Unlock location: On the level Two Betrayals, during the "The Gun Pointed at the Head of the Universe" chapter in the control room exterior; the skull is located at the top of the large fin above the control room entrance, directly in front of the blue energy beam.
Effects: Enemies dodge out of the way of attacks more often.

Visual modifiers[edit]


Additionally listed in the Skull menu are a new category, Visual Modifiers. These optional skulls are unlocked once Campaign Remix mode becomes available and can apply visual overhauls while playing the game. Only one Visual Modifier can be used at a time, and only in Remix mode.[9]
Default[edit]

- "No visual modifiers."
Unlock requirement: Default.
Effects: Default effect with no additional modifiers.
Nightvision[edit]

- "Nightvision is always on."
Unlock requirement: Unlock any two skulls.[2]
Effects: The entire level is blanked in a night vision effect like the one normally available for the Sniper Rifle scope. Enemies are outlined similar to VISR in Halo 3: ODST.
Spore Visibility[edit]

- "Level visuals are blanketed in a heavy Floodified fog."
Unlock requirement: Unlock any two skulls.[2]
Effects: The entire level is blanketed in Flood spores, reducing visibility at medium-long range.
Production notes[edit]
- The name of the Johnny Ammo Seed skull is a play on John Appleseed, an American folk hero. On Steam, the description for the Frugal Fire achievement mistakenly calls it the "Johnny Ammo Tree" skull.
- Several skull locations serve as tongue-in-cheek references to their names or gameplay modifiers:
- The Floor is Lava: Acquired by navigating across rocks without touching the ground, mimicking the real-world "the floor is lava" game.
- Magnified: Located on a weapon rack in an armory; the skull replaces the standard Assault Rifle with its 60-round variant.
- Perspective: Found in the bridge viewport of the Autumn; the skull toggles the game to a third-person perspective.
- Boom: Located in the engineering room, where John-117 triggers the chain reaction that destroys both the ship and Installation 04.
- Catch: Positioned in the middle of a gravity lift beam, allowing players to "catch" it mid-air. Additionally, the skull only spawns after meeting a prerequisite requirement, serving as a "catch" to its acquisition.
- Famine: Ironically located in an area covered in an abundance of Flood biomass.
- Fog: Found in the swamp, an environment shrouded in thick fog that reduces player visibility.
- Foreign: Located aboard an alien vessel Truth and Reconciliation, while also matching its original location from Halo: Combat Evolved Anniversary.
- Piñata: Acquired by meleeing Captain Keyes' face on the Proto-Gravemind, mirroring how the skull's modifier causes enemies to drop grenades when hit with melee attacks. This is also a reference to John-117 retrieving Keyes' neural interface in the original version of the level Keyes.
- Recession: Found in an armory stocked with an abundance of weapons, directly contrasting the skull's effect of doubling ammunition consumption.
- That's Just... Wrong: Unlocked by killing a traumatized ally, making the skull's name an apt reaction to the player's action.
- They Come Back: Located on the level that introduces the Flood attacker forms and their ability to be reanimated by pod infectors.
Gallery[edit]
Icons[edit]
 Skull.
 Locked.
 Revise (unused).
 Icons for all the skulls in Campaign Evolved.


Development images[edit]
 A Halo Studios developer texturing a skull in Substance Painter.
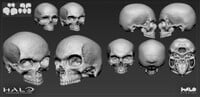 The high-poly ZBrush sculpt for the skull asset.


Screenshots[edit]
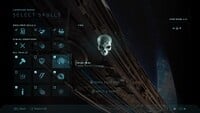 The skull menu.
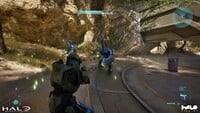 Third-person view as enabled by the Perspective skull.
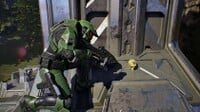 The Master Chief looking at the Grunt Funeral skull.
 An Unggoy is killed with a headshot while the Grunt Birthday skull is enabled.
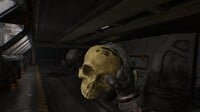 First-person view of John-117 holding the Magnified skull.


Sources[edit]
- ^ a b Halo: Campaign Evolved marketing, Halo: Campaign Evolved First Look: Skulls, Remix & Co-Op
- ^ a b c d e f g h i j Halo Waypoint, Skulls & Campaign Remix | Halo: Campaign Evolved (Retrieved on Jun 10, 2026) [archive]
- ^ Halo Support, Collectibles in Halo: Campaign Evolved (Retrieved on Aug 3, 2026) [archive]
- ^ Entertainment Weekly, Halo team talks new Combat Evolved remake, crossing over to PS5, and addressing 25 years of player feedback (exclusive) (Retrieved on Oct 24, 2025) [archive]
- ^ a b Halo Waypoint, Introducing Halo: Campaign Evolved (Retrieved on Oct 24, 2025) [archive]
- ^ Halo: Campaign Evolved marketing, Halo: Campaign Evolved Roundtable Reveal
- ^ a b YouTube - Halo, Co-Op, Remix, & LASO Livestream - Halo: Campaign Evolved (Retrieved on Jul 16, 2026)
- ^ YouTube - Lord Zedd, Halo 3: ODST - Unused Skulls (Retrieved on Jun 11, 2026)
- ^ Halo Support, Halo: Campaign Evolved Campaign Remix (Retrieved on Aug 3, 2026) [archive]
| |||||||||||||||||||||||||


