Sacred Icon (Level)
From Halopedia, the Halo wiki
|
Prev: |
|
|
Next: |
|
| Sacred Icon | |
|---|---|
| File:SacredIconRelease16001200.jpg | |
|
Game: |
|
|
Player: |
|
|
Date: |
|
|
Location: |
The Surface of Installation 05, near the library. |
 |
Halopedia has a walkthrough guide for this level; see Sacred Icon (Level)/Walkthrough. |
Template:Article Quote Sacred Icon is a Halo 2 campaign level. As Thel 'Vadamee, you make your way through a wall filled with Sentinels and Flood, ending in an open-air Elite encampment. You must defend it successfully from the Flood onslaught before the next level Quarantine Zone starts. This is the first and only level where Jackals will be your allies, This is also the first of two levels with Human enemies ever in the whole series.
Transcript
Chapter 1: Uncomfortable Silence
{fade in on Covenant-looking structure}
{text: Sanctum of the Hierarchs, Covenant Holy City, High Charity}
{camera pans down, we see a large hallway with rows of Honor Guards, Thel 'Vadamee walks through, close up of 'Vadamee}
{'Vadamee watches as the Jiralhanae take Honor Guard equipment from the Elites, Brutes fight each other for choice parts, 'Vadamee walks through a large doorway, past Honor Guard Brutes to where the Prophet of Truth and Mercy speak with Rtas 'Vadumee}
Rtas 'Vadumee: "This is unprecedented... Unacceptable."
Prophet of Truth: "A Hierarch is dead, Commander."
Rtas 'Vadumee: "His murderer was within our grasp. If you had not withdrawn our Phantoms ..."
Prophet of Truth: (slightly indignantly) "Are you questioning my decision?"
Rtas 'Vadumee: "No, holy one! I only wish to express my concern that the Brutes..."
{Prophet of Truth holds up a hand for silence}
Prophet of Truth: "Re-commissioning the guard was a radical step, but recent events have made it abundantly clear that the Elites can no longer guarantee our safety."
Rtas 'Vadumee: "I shall relay ... your decision ... to the Council."
{Rtas 'Vadumee and his Elites leave. Rtas 'Vadumee nods to 'Vadamee, who returns the nod. Prophet of Truth speaks to the Arbiter}
Prophet of Truth: "Politics ...(small sigh)... How tiresome. Do you know, Arbiter, the Elites have threatened to resign, quit the High Council, because of this... {Searches for a correct term} exchange of hats?"
Thel 'Vadamee: "We have always been your protectors."
Prophet of Truth: "These are trying times ... for all of us."
Prophet of Mercy: "Even as the humans' annihilation filled us with satisfaction, the loss of one of the Sacred Rings wreaked our hearts with grief."
Prophet of Truth: "Putting aside our sorrow, we renewed our faith in the prophecy that other rings would be found. And see how our faith has been rewarded."
{They turn to a large view screen of Delta Halo}
Prophet of Mercy: "Halo! Its divine wind will rush through the stars, propelling all who are worthy along the path to salvation."
Prophet of Truth: "How to start this process? For ages, we searched for one who might unlock the secrets of the ring. An Oracle. And with your help, we found it."
{They turn toward 343 Guilty Spark, who seems to have been suspended in a gravity beam}
Prophet of Mercy: "With appropriate humility, we piled the Oracle with questions. And it, with clarity and grace, has shown us the key."
{triggers a hologram of the Index}
Prophet of Truth: "You will journey to the surface of the ring, and retrieve this Sacred Icon. With it, we shall fulfil our promise."
Prophet of Mercy: "Salvation for all!"
Prophet of Truth: "And begin the Great Journey."
{Fade to black, fade in on Delta Halo. A Phantom flies toward the surface. Cuts to Phantom interior.}
Tartarus: "Once the shield is down, we'll head straight to the Library. I do not wish to keep the Hierarchs waiting."
{Focus on 'Vadamee, zoom in as he speaks.}
Thel 'Vadamee: "The human who killed the Prophet of Regret ... Who was it?"
Tartarus: "Who do you think?"
Thel 'Vadamee: "The Demon is here?"
{Focus on Tartarus}
Tartarus: {Affirmative Snort} "Why?" {Re-focus on 'Vadamee} "Looking for a little payback?"
{'Vadamee draws a Carbine and holds it}
Thel 'Vadamee: "Retrieving the Icon is my only concern."
Tartarus: {skeptical laugh} "Of course."
{Cut to exterior panoramic view of Delta Halo's Library, with the Sentinel Wall in the foreground. The Phantom flies towards the Sentinel Wall and stops over a landing. 'Vadamee drops from the Phantom, which then flies off. Behind 'Vadamee, an Enforcer rises up and slowly advances. 'Vadamee whirls around and fires three shots from his Carbine, to little effect. Suddenly, the Enforcer is hit by a sustained burst of plasma fire and loses its right-back leg. The Phantom flies by and away, and the Enforcer chases after it}
Tartarus: "Lower the shield, Arbiter!" {Cut to mug shot of 'Vadamee} "I'll pick you up when you're finished." {Fade to white, game play starts}
On the first room, there are some Constructors repairing an entrance. If you destroy one, some Sentinels will appear (if on Legendary difficulty, the Sentinels will appear automatically) and will only leave if you destroy their "Door".
(After you jump into the passageways moving downward, and the first room, you meet a Grunt, who greets you)
(After you enter the next room, you will find a group of Grunts and Jackals fighting Sentinels. After you defeat the Sentinels and cut off any more from entering, a Grunt might speak to you)
Grunt: "Arbiter ... our savior!" (Pause) "Stupid Jackal, say thank you!"
(If you stare at the Grunt long enough, or just wait around)
Grunt: "If hungry, eat Jackal!"
(When you move into the next room)
Tartarus: (Through your COM link) "You're getting close to one of the shield generators. Many of my Brutes have fallen attempting to take it down, let's see if you fare better."
(When you stand near the Grunt running toward you)
Grunt: "Big scary thing! Run away! Please! Don't make me go back!"
(When you reach the Shield Generator)
Tartarus: "You've reached the power source, Arbiter."
(An Enforcer descends from above)
Tartarus: "It is useless to attack the Enforcer at the front, especially when it's shields are up. Stay in the shadows, wait until it loses interest, then strike the beast when it's back is turned."
(After you destroy the Enforcer)
Tartarus: "You've reached the power source. Overload the locks holding it in place."
(After you overload (or push them to save ammo) the first three locks)
Tartarus: "One more, Arbiter."
(After you overload the last one)
Tartarus: "Release the power source. Now, find a way to remove it from it's cradle."
(Use the holo-panel, the platform will then start moving and the door in front of you will open)
Chapter 2: Buyer's Remorse
(If you look up, you will see the bright-green shield surrounding the Library fading away, followed by Tartarus's Phantom flying lower towards the other side of the wall)
Tartarus: "Our path to the Library's clear. I'll pick you up on the ledge ahead."
(The door of the approaching wall opens to another Enforcer firing on the Phantom)
Tartarus: (Growls) "Blasted machines! Make your own way through the wall, Arbiter!"
(The Phantom leaves, followed by an attack by Sentinels, Sentinel Majors and a break-out of Flood-Infected Humans)
(Once you get through the wide-opened door in the wall, you will reach a piston at the other end.)
(As you proceed through one of the hallways below, your COM link will pick up a Marine's transmission)
Marine Sergeant: (Over COM link) Proceed to the objective, we'll hold out as long as we can! (Screams painfully) Get it off me! Suppressive fire, suppressive fire!
(After you reach the next bottom floor)
Marine Sergeant: (Over COM link) Negative ma'am! They are not Covenant ...
Marine: Cover that doorway!
(Once you reach the bottom of the wall)
Chapter 3: 100,000 Years War
(As soon as the doorway opens, a sentinel production facility can be seen in the distance as it is shot down by Wraith Mortars and crashes further into the Quarantine Zone)
(When you walk on the snow, pods will land in the canyon)
Elite: "Forerunners be praised, the Arbiter!?"
(When you defeat the wave of Flood)
Elite: "This Quarantine Zone has been compromised, we must do what we can against the Flood. Our Commander has landed further in, let us join him."
(Once you cross the bridge and through a tunnel, you will meet the Spec Ops Commander, Rtas 'Vadumee)
Rtas 'Vadumee: "Arbiter! What are you doing here?"
(Rtas 'Vadumee is interrupted by screeches of the Flood)
Elite: "The Flood is upon us!"
Rtas 'Vadumee: "We must hold this camp until reinforcements arrive."
(When you keep fighting the Flood, a Phantom will descend from above, firing on any remaining Flood in the zone)
(Level Ends)
Trivia
Glitches
- Because Sacred Icon is the first part of a two-part level, your weapons will carry over to Quarantine Zone, unless one of your weapons is a Rocket Launcher. If you finish Sacred Icon with a Rocket Launcher you will start Quarantine Zone with a Covenant Carbine and an Energy Sword.
- Invincibility can be obtained via a glitch in the part where players fall down one of the tubes to see the Phantom for the first time.
- When you hear the Marines on the radio for the first time stating they will hold the Flood off, look out the window to the right of you. Three Marines will be fighting a big wave of Infection Forms and Human Combat Forms. If they manage to kill all the Infection Forms, when you follow the path, you will trigger something and the Marines will drop dead. At the second place where Marines argue over radio, three Marines will drop dead after you go around some of the crates.
- If you look at any of the dead Marines or Brutes throughout the level, you can see their eyes blink from time to time.
- In Co-op, during the part where you first encounter the Enforcer, if a Flood hits you the exact time you are hit by an Enforcer's rocket you will sometimes be sent across the map onto the top of the area you just came from. However, you cannot return to the area so you must restart the level.
- You can do the Unlimited Plasma Pistol glitch on this level.
- A little bit after you enter the Flood wall, it is possible to get two Sentinel Beams at once.
- During the fight with the first Enforcer, if you blow off all its attacking parts, you'll start getting hit by an Invisible Sentinel Beam coming from the Enforcer.
- If you proceed to power-up all Absorbers without destroying the Enforcer, it (with all Sentinel Launchers and Sentinels) will self-destruct just before the door starts to open.
- When you reach the section where you first do battle with the Flood, your Jackal (if still alive) may drop its shield and its weapon, though this is a very rare occurrence. (This glitch is made easier if the Jackal is holding a Covenant Carbine).
- In the beginning of this level, turn to the east and you may see a Jackal corpse with Grunt blood. A similar corpse was seen in 343 Guilty Spark, with the same blood.
- You can make a Flood form freeze by jumping over it repeatedly.
- An unarmed Jackal can be found here by lag. More about it is found in the Unarmed Grunt section in Glitches, Tricks and Cheats.
- Since Jackals are your allies in this level, you can give them Carbines to hold with their shield, and if you fire a charged plasma pistol shot to them, they will drop the carbine and have a full plasma pistol.
- The Charging Needler Glitch can be performed on this level.
- If you have a Sentinel Beam, you can active a Piston with at least 2 melee hits. But you'll have to be close to the Piston.
- Sometimes the first Grunt you see in the level is invincible.
Miscellaneous
- You can also give the Jackals many other weapons such as Covenant Carbines, SMGs, Needlers, Magnums and Battle Rifles.
- At times you may get two Jackals and one Grunt instead of one Jackal and two Grunts. And on some occasions one Jackal and three Grunts. However, this is quite rare.
Mistakes
- When a game play starts, for some unknown reason, your Carbine will be maxed out and even though you fire 3 rounds into the Enforcer, your carbine will have a full magazine. This is similar to when the Arbiter shoots at the Heretic Leader's banshee, and no rounds or charge is expended on the weapon.
- Notice when sliding down the last Piston in the level, there will be snow in the tunnel even though you're inside of a fully concealed tunnel. The snow could possibly be Flood ash.
- There's a Battle Rifle located in the weapons cache at the exit of the destroyed Sentinel Constructor Factory an ammunition level surpassing the limit of '108' that ranges as far as '236' bullets. Could this be a possible '7' reference, Bungies favorite number? (6+3=9-2=7)
- When you get to the first dead brute there wll be a plasma rifle near his body instead of a brute plasma rifle.
- There's a Carbine that can hold '96' rounds of ammo instead of the '72' limit.
- The Forerunner Hand can be found in this level. It has six digits (2 index fingers, 2 middle fingers and 2 thumbs).
- When out on one of the balconies in which Enforcers and Flood are in combat, off on the far corner of the adjacent structure is a door that is clearly discolored to a bright green. Whether it was an error or intentionally done as a joke, is unknown. Either way, it is interesting to find and not difficult to see, although focusing on it is difficult as the Flood and Enforcers continue to attack you and each other.
- In the beginning of the level, you can see the lake where Master Chief kills the High Prophet of Regret.
- After you are dropped off by the Phantom, there are patches of Flood blood near the Grunt which indicates the Flood has made it far enough to the point of escaping (before grabbing In Amber Clad).
- Originally, Bungie had planned for there to be an additional level after Sacred Icon called "Forerunner Tank." It was cut, however, due to deadlines[1].
- The weapon that fires from the Phantom at the beginning of the level is a cross between the Battle Rifle and Plasma Rifle hybrid.
- In the first part of this level, all Covenant Carbines that are laying on the floor hold extra rounds.
- There is a small weapon cache hidden in the second room. There is a dead Brute, some plasma grenades and a Carbine that has over 25 extra rounds.
- If you look back outside in the beginning of the level when the Phantom drops you, you can see High Charity.
- This is the first of two levels in the Halo trilogy where you can use the blue Sentinel Beam.
- When you get out of the tunnel at the beginning of the "100,000 Years War" part, if you look at The Library you can see a Sentinel Constructor Factory being destroyed by Wraith shots.
- There is speculation on why the Arbiter is able to use the Forerunner systems on this and other levels. The Forerunners made it to where no one but themselves and the Humans would be able to use the systems on the Installations that they created, but it is shown that the Arbiter can use them as well. This is likely an oversight made by Bungie and the Halo creators. Examples of this is when the Arbiter takes down the Containment shield on the Sacred Icon and when Rtas 'Vadumee activates the Gondola on the Quarantine Zone. It's possible that Forerunners allowed minor systems to be used by any species, like when the Covenant lock a Forerunner door in The Silent Cartographer level, but made sure only Reclaimers could do major things such as activating a Halo or retrieving the Index.
- All the dead Brutes you come across in the level are lying in a pool of blue (Grunt) blood. Same with Jackals that are dead before you arrive. Similar to some dead Covenant found in the level 343 Guilty Spark.
- This is the only level in the Halo Trilogy that features pistons.
- In the beginning cutscene, when the Enforcer is about to attack the Arbiter, the Enforcer does not have its primary shields activated.
Easter Eggs
- The Mythic Skull can be found on this level.
- Throughout the level you can find weapons containing more rounds than their capacities, including Battle Rifles, Pistols and Needlers .
Images

A Phantom Heads To Delta Halo.
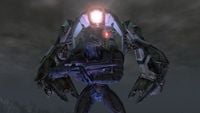
An Enforcer sneaks up on the Arbiter.


| Preceded by Regret |
Halo 2 Campaign Missions Sacred Icon |
Succeeded by Quarantine Zone |
- ^ Halo 3 Essentials, Disc 2, Halo 2 Audio Commentary.


