Crow's Nest (Base)
From Halopedia, the Halo wiki
Template:Ratings Template:Base Infobox Crow's Nest[1] is a United Nations Space Command base close to the town of Voi[2]. It was a command center for local UNSC Defense Forces in Kenya during the Second Battle of Earth, and later the Battle of Voi. The base was under command of Commander Miranda Keyes.
Background
The Base is located inside a hill about 24 kilometers west from Voi, Kenya, a few kilometers north of the Tsavo Highway. The Crow's Nest was built for a war in the 20th century. Because of its age, the base often frustrated UNSC personnel because it required constant maintenance and had outdated technology like its door controls.
It was probably used during the Battle of Voi for its proximity to what the UNSC thought was the Ark, but was in reality the Portal, as well as the fact that its underground location provided relative protection from aerial bombardment.
History
Early History
Crow's Nest was originally created for a 20th Century conflict, probably either one of the World Wars, or else one of the African wars of liberation or Cold War/War on Terror conflicts. It is not known, but it can be presumed that it was used during the 21st century and during the Interplanetary War. During the occupation of Earth in November 2552-January of 2553, it became a base of guerilla warfare for human forces in East Africa, because of its prime location, which is deep in the African jungle.
Battle of Voi
- Main article: Battle of Voi
During the Battle of Voi, the Crow's Nest was used as a command base for forces in the area, such as contingents in Mombasa, Arusha, as well as the jungles and savanna.
Many wounded marine survivors from encounters with covenant patrols were sent to the base for medical treatment. The few able-bodied soldiers were organized into fire teams, but were spread thin throughout the base.
When SPARTAN-117 arrived at the base, Fleet Admiral Hood briefed him, and the command staff at the base, including the Arbiter and Sergeant Major Avery Johnson about a low-level assault on Covenant Loyalist warships stationed over the so called "Ark". Though their communication systems were hacked into and received a transmission of the Prophet of Truth.
Battle of the Crow's Nest
- Main article: Battle of the Crow's Nest
SPARTAN-117, Gunnery Sergeant Pete Stacker, Gunnery Sergeant Reynolds, and the Arbiter then organized a defense of the base. First, they attacked infantry, mainly Grunts and Jackals in a large roadway containing numerous supply trucks and armament. They then engaged one of the base's hangars controlled by Covenant Loyalist forces, with support by Type-52 "Phantom" Troop Carriers. When they retook control of that hangar, it allowed many Marines to escape from the base.
Return to the Ops Center
After the fight in the South Hangar, the Master Chief was called back to the Ops Center by Sergeant Major Avery Johnson. On his way, he and other soldiers were attacked by a vicious swarm of Drones. When Chief returned to the Ops Center, Miranda Keyes was explaining to Sergeant Johnson, Sergeant Reynolds and some Marines about how she had placed a bomb in the Ops Center and had planned for the detonation to happen only after all Marines had been evacuated from the base, destroying any more Covenant Loyalists still inside. However, word was received that the Barracks were under attack by Brutes, trapping a considerable amount of Marines inside. Sgt. Johnson led the Chief to the Motor Pool, where he fought through a dozen Brutes and a Chieftain to get to the trapped marines.
The Ventilation Hub
Directly after clearing the Motor Pool, John-117 headed toward the Rally Point Alpha (near the entrance to the Barracks) where he would meet up with the Arbiter. However the access tunnel to the barracks was sealed off by a collapse, the only way through was down a shaft into a ventilation hub, which was discovered to be filled with Drones. The battle against the Drones was short, their numbers decimated quickly by the Chief. Exiting the vents the Master Chief had made it through to the Arbiter. Then the next fight began.
Barracks and the Landing Pad
The Master Chief and the Arbiter cleared out the Barracks, rescuing Sergeant Stacker and several Marines from the Brutes. They then took an elevator up to Landing Pad Bravo, where they were confronted with two waves of Jump Pack Brutes, and then a swarm of Drones, which were destroyed by a Pelican drop ship. Subsequently, Johnson notified SPARTAN-117 and Commander Miranda Keyes that the Brutes had disarmed the bomb in the Ops Center, and that Master Chief needed to re-arm it. So, John-117 set out by himself back to the Ops Center. He traveled through another road, like the one mentioned before, full of burnt out Warthogs and dead Marines, and eventually into the Motor Pool, where he was attacked by Grunts and Jackals.
Re-Arming The Bomb and the Escape
Master Chief came into the Ops Center and found a squad of Brutes and Grunts guarding the bomb. With the squad distracted by the Prophet of Truth giving them orders through the bases screen, Master Chief easily killed the Covenant, and re-armed the bomb. Now, he had to escape. He went back down into the armory, through a couple of hallways, and through the road leading to the South Hangar, where a number of Grunts, Jackals, and Drones were fleeing towards the South Hangar. Master Chief followed them back into the hangar, and escaped the base via a previously blocked-off service elevator as the bomb detonated. The elevator slammed into the basement of the Crow's Nest, where he met up with other trapped Marines who needed to get to the town of Voi, near New Mombasa. All the Covenant inside the base were killed.
Current Status
The Crow's Nest was reported destroyed when the bomb armed by Master Chief detonated. However, the motor pool and the cave leading to the Tsavo Highway are still intact, received minor damages after the explosion. The smoking hangars leading into the Crow's Nest are still visible from the outside.
Locations
- Operations Center
- Armory
- Pipe Room
- South Hangar
- Motor Pool
- Barracks
- Landing Pad Bravo
- Service Elevator
- Basement
- Ventilation hub
Trivia
- In this base there is a door that opens automatically. It is located by where the Jackal Marksman appear and later where two Marines walk out of.
- The level is similar to the Halo 2 level, Cairo Station. Though instead of disarming a bomb, John-117 activates one.
- There are two skulls in the Crow's Nest. The first skull, Black Eye is found by standing on the pipes in the Ops Center. The second, Grunt Birthday Party, is found when you get through the Drone infested ventilation hub, into a small room overlooking the external ventilation intake.
- You can unlock the Used Car Salesman achievement by destroying the bottom turret off of one of the Phantoms that comes into the hanger.
- The Multiplayer map named Rat's Nest was based off of this level.
- The small rats throughout the level appear as friendlies on your Motion Sensor.
- The Crow's Nest and Voi are the only specific locations that are each featured in two different levels in the Halo 3 campaign.
- If you go through the door leading to where the Warthog is blown up and then go all the way down this road and kill all the Brutes, Jackals and Grunts you will see two Marines talking through a door. This is actually a Easter egg with some of the characters from the machinima Red vs Blue. If you are playing on Normal you will hear Jason Saldaña (Tucker) and Matt Hullum (Sarge, Doc). If you play on Heroic you will hear Geoff Ramsey (Grif) and Gus Sorola (Simmons). If you play on Legendary you will hear Burnie Burns (Church) and Joel Heyman (Caboose).
- Crows Nest is an old 20th Century base.
Related Articles
- United Nations Space Command
- Voi, Kenya
- Rat's Nest - a multiplayer level with similar terrain to the Crow's Nest mission.
Images
- H3 Holdout 2.jpg
The Pelican bay of the base.
- H3 Holdout 1.jpg
The interior of the base.
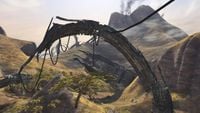
The mountain the base is inside.

Sources
- ^ Halo 3, level Sierra 117
- ^ Tsavo Highway


