Second Battle of Mombasa: Difference between revisions
From Halopedia, the Halo wiki
m (Reverted edits by CommanderTony (Talk); changed back to last version by Ajax 013) |
m (Reverted edits by Ajax 013 (Talk); changed back to last version by CommanderTony) |
||
| Line 1: | Line 1: | ||
{{Era|H3}} | {{Era|H3}} | ||
{{battle | {{battle | ||
|prev=[[Battle of Voi]] | |prev=[[Battle of Voi]] | ||
| Line 11: | Line 8: | ||
|conflict=[[Human-Covenant war]] | |conflict=[[Human-Covenant war]] | ||
|date=November [[2552]](during [[7]] days) | |date=November [[2552]](during [[7]] days) | ||
|place=[[ | |place=[[Mombasa]], [[Kenya]], [[Earth]] | ||
|result= [[United Nations Space Command]] victory | |result= [[United Nations Space Command]] victory | ||
|side1= [[United Nations Space Command]] | |side1= [[United Nations Space Command]] | ||
|side2= [[Covenant Loyalists]] | |side2= [[Covenant Loyalists]] | ||
|commanders1= | |commanders1=*[[Lieutenant]] [[Pawel Czernek]] | ||
*[[Master Chief Petty Officer|MCPO]] [[John-117|SPARTAN John-117]] | |||
|commanders2=Unknown | |commanders2=Unknown | ||
|forces1= *[[77th Marine Regiment|77<sup>th</sup> Marine Regiment]] | |forces1= *[[UNSC Marine Corps]] | ||
*[[506th Tank Regiment|506<sup>th</sup> Tank Regiment]] | **[[77th Marine Regiment|77<sup>th</sup> Marine Regiment]] | ||
|forces2= *[[Brutes]] | **[[506th Tank Regiment|506<sup>th</sup> Tank Regiment]] | ||
*[[ | **[[7th ODST Battalion|7<sup>th</sup> ODST Battalion]] | ||
*[[ | |forces2= *[[Covenant Army|Covenant Loyalist Army]] | ||
*[[ | **[[Brutes (Jiralhanae)]] | ||
**[[Hunters (Lekgolo)]] | |||
**[[Grunts (Unggoy)]] | |||
**[[Jackals (Kig-yar)]] | |||
|casual1=Unknown, probaly heavy | |casual1=Unknown, probaly heavy | ||
|casual2=Unknown, probaly heavy | |casual2=Unknown, probaly heavy | ||
}} | }} | ||
The '''Second Battle of New Mombasa''' was a bloody engagement between [[UNSC]] and [[Covenant Loyalist]] forces <ref>http://halo3.com/believe/test/shell.html</ref>. | |||
==Background== | |||
It appears that the [[Battle of Mombasa]] did not end with its destruction. Later, during the [[Second Battle of Earth]] [[Human]] and [[Covenant]] forces clashed again in its ruins, both forces surging forward to capture it and whatever prize or tactical value it may of held. | |||
Elements from both the [[506th Tank Regiment]] and the [[77th Marine Regiment]] battled furiously for it, with snipers from both sides taking a heavy toll upon the enemy. Ultimately, the battle lasted [[Seven]] days, with the UNSC forces in a desperate situation. With ammo becoming scarce and all hope seeming lost, that is when [[John-117]] stepped into the battle. | |||
==Timeline== | |||
==Battle for the Landing Zone== | ===Battle for the Landing Zone=== | ||
The Second Battle of [[Mombasa]] was started on the outskirts of the battlezone, where UNSC and Covenant forces engaged each other bitterly for control of a Landing Zone. The UNSC never gained full control of it, always being pushed back by the Covenant when ever they seemed to secure it and Visa Versa. | The Second Battle of [[Mombasa]] was started on the outskirts of the battlezone, where UNSC and Covenant forces engaged each other bitterly for control of a Landing Zone. The UNSC never gained full control of it, always being pushed back by the Covenant when ever they seemed to secure it and Visa Versa. | ||
===The Northern Bridge Falls=== | |||
==The Northern Bridge Falls== | Despite a valiant defense by the Marines, there was no way they could hold the bridge for any longer. With Brute forces surging over it and hitting the Marines vulnerable flanks, there was only one choice. At 14:00 the order came through the destroy the bridge, so to force the enemy forces down into the Valley where UNSC Trenches lay to slaughter the enemy with fire from elevated positions. However, this was not to be as the Covenant forces had already began to surge down there with the destruction of the Bridge. | ||
Despite a valiant | |||
===The Hill=== | |||
The most ferocious and bloody bottleneck in the battle, the UNSC forces sent to defend it took 2/3 casualties. After second bridge was destroyed, the trenches at the foot of here, a last ditch defensive measure, came under heavy attack, garnering heavy Marine casualties. | |||
===Snipers=== | |||
Snipers from both sides battle for control, with UNSC Snipers fighting on one end of the destroyed southern bridge and Covenant Jackal snipers halting Marines outside the Landing Zone before being sent into a route by UNSC infantry and tanks. | |||
===The 506th arrive=== | |||
Tasked with securing a road to the southern bridge span, the 506th Tank Regiment plowed forward, taking heavy casualties. Though outnumbered, they took their objective, leaving a path for the second wave of UNSC infantry to follow. | |||
===John's Gambit=== | |||
== | It was at the top of the "Hill" bottleneck that [[John-117]], launched a gambit to retake the hill for the UNSC forces, by allowing himself to be captured by [[Brute]] forces there. | ||
==Images== | |||
<gallery> | |||
Image:Halo3 panoramaA 001-1-.jpg|Marine fire teams defeat Brute forces outside of the LZ. | |||
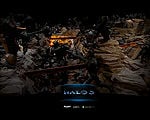
Image:Halo3 diorama 1352-1-.jpg|The Brute advance is halted by the destruction of the northern bridge. | |||
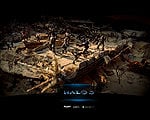
Image:Halo3 panoramaC 001-1-.jpg|Marines fall under the relentless advance of the Covenant War Machine. | |||
Image:Halo3 diorama 0749-2-.jpg|The snipers of the 77th Marines pick off Brutes from their elevated position. | |||
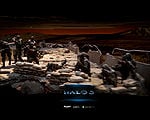
Image:Halo3 panoramaB 006-1-.jpg|The Scorpions of the 506th Tank Regiment arrive. | |||
Image:Halo3 panoramaD 001-1-.jpg|John prepares to launch his attack. | |||
</gallery> | |||
[[ | ==Related Articles== | ||
*[[Human-Covenant War]] | |||
*[[First Battle of Earth]] | |||
**[[Battle of Mombasa]] | |||
*[[Second Battle of Earth]] | |||
**[[Battle of Voi]] | |||
==Sources== | |||
== | <references/> | ||
Revision as of 16:37, September 15, 2007
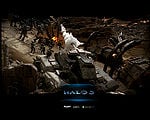
Template:Battle The Second Battle of New Mombasa was a bloody engagement between UNSC and Covenant Loyalist forces [1].
Background
It appears that the Battle of Mombasa did not end with its destruction. Later, during the Second Battle of Earth Human and Covenant forces clashed again in its ruins, both forces surging forward to capture it and whatever prize or tactical value it may of held.
Elements from both the 506th Tank Regiment and the 77th Marine Regiment battled furiously for it, with snipers from both sides taking a heavy toll upon the enemy. Ultimately, the battle lasted Seven days, with the UNSC forces in a desperate situation. With ammo becoming scarce and all hope seeming lost, that is when John-117 stepped into the battle.
Timeline
Battle for the Landing Zone
The Second Battle of Mombasa was started on the outskirts of the battlezone, where UNSC and Covenant forces engaged each other bitterly for control of a Landing Zone. The UNSC never gained full control of it, always being pushed back by the Covenant when ever they seemed to secure it and Visa Versa.
The Northern Bridge Falls
Despite a valiant defense by the Marines, there was no way they could hold the bridge for any longer. With Brute forces surging over it and hitting the Marines vulnerable flanks, there was only one choice. At 14:00 the order came through the destroy the bridge, so to force the enemy forces down into the Valley where UNSC Trenches lay to slaughter the enemy with fire from elevated positions. However, this was not to be as the Covenant forces had already began to surge down there with the destruction of the Bridge.
The Hill
The most ferocious and bloody bottleneck in the battle, the UNSC forces sent to defend it took 2/3 casualties. After second bridge was destroyed, the trenches at the foot of here, a last ditch defensive measure, came under heavy attack, garnering heavy Marine casualties.
Snipers
Snipers from both sides battle for control, with UNSC Snipers fighting on one end of the destroyed southern bridge and Covenant Jackal snipers halting Marines outside the Landing Zone before being sent into a route by UNSC infantry and tanks.
The 506th arrive
Tasked with securing a road to the southern bridge span, the 506th Tank Regiment plowed forward, taking heavy casualties. Though outnumbered, they took their objective, leaving a path for the second wave of UNSC infantry to follow.
John's Gambit
It was at the top of the "Hill" bottleneck that John-117, launched a gambit to retake the hill for the UNSC forces, by allowing himself to be captured by Brute forces there.
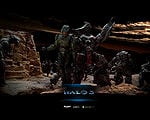
Images
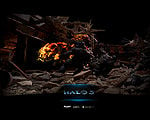
Marine fire teams defeat Brute forces outside of the LZ.
The Brute advance is halted by the destruction of the northern bridge.
Marines fall under the relentless advance of the Covenant War Machine.
The snipers of the 77th Marines pick off Brutes from their elevated position.
The Scorpions of the 506th Tank Regiment arrive.
John prepares to launch his attack.


