ONI Alpha Site/Walkthrough: Difference between revisions
From Halopedia, the Halo wiki
(spelling) |
|||
| (31 intermediate revisions by 18 users not shown) | |||
| Line 1: | Line 1: | ||
{{Status|Gameplay}} | |||
This is a walkthrough for the Level [[ONI Alpha Site]] It is written for play on [[Legendary]] difficulty and has notes for lower difficulties. | |||
This is the second mission that you play as [[Taylor H. Miles|Dutch]], with [[Michael Crespo|Mickey]] as your ally. Your mission is to defend the ONI Alpha Site facility and deny access to the Covenant. This mission is one big firefight. Your starting weapons are the [[Weapon/Anti-Vehicle Model 6 Grindell/Galileian Nonlinear Rifle|Spartan Laser]] and the [[M7S Caseless Submachine Gun|Silenced SMG]]. There is no subtlety or sneakiness to this level. You cannot avoid the enemy in any part of the game, so knowing your weapons, their capabilities and how to best use your [[Non-Playable Character|NPCs]] is really important. There are no "good" Skulls for this mission, but Black Eye, Tilt and Mythic will make this level feel nearly impossible to beat and incredible when you do. | |||
__TOC__ | |||
== Boom Goes the Dynamite!!! (Or, Why I love my job!) == | |||
As you start this mission, you're running away from the Covenant. Get used to it, most of this mission is running away. Arm the charges, then head for the left hand tower and set them off, blowing the bridge and killing everything. You can run around shooting at enemies and eventually Mickey will detonate the charges, but on Legendary, you can't afford to waste the ammo. Head over to one of the [[M68 Gauss Cannon|Gauss turrets]], and take out the [[Zurdo-pattern Wraith|Wraith]] on the other end of the bridge, you'll end up shooting two [[Type-26 Ground Support Aircraft|Banshees]] too. You could skip this, but occasionally some Plasma Mortars will make it over the wall. Don't risk it, take a few seconds and clear your enemies. Once done, head under the wall with Mickey. | |||
== | == You Wanna Piece of This!! (Or, Come get Some!) == | ||
Under the wall, Melee the [[Kig-yar|Jackals]] before heading out. Bring up the Spartan Laser and quickly dispatch the two [[Mgalekgolo|Hunters]]. If you're lucky a few others will stray into the beam. Start running. Head towards the building shooting and tossing grenades. It will give you a little relief when you're running to the shelters. Once on the first tier, swap your Silenced SMG for an [[MA5B ICWS Assault Rifle|MA5C]]. There's plenty around and on legendary difficulty there will be plenty of dead Marines to get ammo from. The MA5C is better at close range than the Silenced SMG and has a better melee. On lower difficulties, stick to the Silenced SMG, the Marines are heartier and won't die so you can't get more ammo, plus the Silenced SMG deals death pretty well on lower difficulties. As you withdraw, use lots of grenades if you have them, as there are plenty around. Once you're at the top, stay away from the [[AIE-486H Heavy Machine Gun|turrets]] as getting behind a stationary emplacement at this point is instant death, run down the stairs, grab the [[M41 SSR MAV/AW Rocket Launcher|Rocket Launcher]] behind the wall and give it to Mickey. He'll do a lot more damage with that than the Silenced SMG. Run back and grab your Spartan Laser. There seems to be three ways to trigger the recall into the building: | |||
#Running around killing indiscriminately until a certain amount of time has passed. | |||
#Killing the [[Brute Chieftain|Chieftain]] with the [[Gravity hammer (fiction)|Gravity Hammer]] (this one is really hard so don't bother unless you're really sure you can get him). | |||
#Destroying the Wraiths. If you're playing on Legendary, you should be able to kill a Wraith with one shot from a Spartan Laser. Target the one on the left first, then run to the right and kill the second one. This should trigger the recall. Before you run in, on the ground on the right side behind the barrier at the top there's another full Laser, and another at the top on the center balcony, grab either one. If you think you can get away with it, grab a turret too. Head inside. | |||
== Bring the Rain!!! (Or, Lead Showers and Bloody Flowers) == | |||
Once you're inside, head over to the center and drop your second turret towards the back stairs; it will be safe there and you can come back for it later. Take your place at the second turret. Follow the directions of Mickey and the NMPD officer, but don't be beholden to them, keep sweeping left and right. You can kill the [[Unggoy|Kamikaze Grunts]] and [[Kig-Yar|Jackals]], but watch out for the [[Jiralhanae|Brutes]] with [[Type-25 Grenade Launcher|Brute Shots]]. Hop off the turret and wade into the fray, using grenades and your [[Assault Rifle]]. The Brutes seem to focus on the center, so if you stay to the top you can sneak around and assassinate them from behind. This isn't foolproof though, so stay alert. Between Mickey and yourself, you should be able to end the frontal assault quickly. Next, grab one of the turrets and watch for the [[Kez'katu-pattern Phantom|Phantom]] to drop its troops behind you. Use the turret to clear the Brutes and then finish the rest off with your MA5C, taking out the Jackals and Grunts. Mickey's rockets will do plenty of damage to help you out. Once you're done, trade a Brute Shot for your MA5C, keep your Spartan Laser and the other turret. Grab any grenades you can find and head on to the elevator. | |||
== | == Enjoy a Firefight on Our Beautiful Rooftop Patio.. == | ||
Before you start the elevator, drop your turret and swap your Brute Shot for the Silenced SMG on the floor. Pick up the turret (it can disappear), and activate the elevator. Drop the turret near the door and stay clear of Mickey and the cop as they shoot their rockets and grenades at the [[Yanme'e|Drones]], clean up what they miss. As you reach the top, go back for the Brute shot and pick up the turret. The heavy weapons will make short work of the jump Brutes here and you can then focus on the Chieftain. Between your laser and Mickey's rockets, he won't last very long. Hop on the [[D77C-NMPD Pelican Dropship|Pelican]] and watch the fireworks... | |||
== Legendary Notes== | |||
*Machine Gun Turrets outside the building plus user playing on Legendary equals dead user. Stationary emplacements are quick death, by grenade, Wraith, Brute Shot, Beam Rifle, or some combination thereof. Removing one from an emplacement and running around with it is slow and there's too much climb, though if you stand still, it mows down Brutes faster than a Sniper Rifle, but standing still on this level can easily be equated with death. | |||
*Machine Gun Turrets inside the building plus user playing on Legendary equals victory. Using the turret inside the ONI building and knowing when to get off (preferably before grenades hail down upon you) will clear out all of the minor annoyances and some of the big Gorilla looking ones. Ripping it off and running around will quickly finish off Brutes with short controlled bursts. An extra turret if you can get one from outside without dying is a great assist for the roof. | |||
*Don't take out the banshees at the bridge part with your Spartan Laser. Those banshees hardly ever harm you, and the laser shots you use on them would be a waste, as you need them for the next section. | |||
*On the way up the lift, hide behind the door/glass section, if you don't want to get shot by the Drones. | |||
*When the enemies start flooding into the ONI building, make sure you keep strafing from left to right and back again. If you keep your attention fixed on one side without paying attention to the other, you will definitely die. | |||
*Since Mickey is invulnerable, make sure he has the Rocket Launcher, with unlimited ammo he's an invaluable assett to staying alive. | |||
== | ==Notes for Lower Difficulties== | ||
*Staying at one of the Machine Gun Turret emplacements outside is death, but with four turrets available, you can easily mow down enemies on lower difficulties until the recall is triggered. You may even be able to snag the Chieftain and his Gravity Hammer. | |||
*Taking the Sniper Rifle from the tower isn't recommended, but on lower difficulties it's easier to learn how to shoot on the move without the scope to assist you. | |||
*On lower difficulties if you don't assault the Chieftain on the roof, eventually the pelican will show up and burn into his shields and armor leaving him exposed for you to finish off. | |||
*The description of Normal is perfect for this level. Burn enough ammo and you will win. | |||
{{Quote|Face firm resistance from competent, determined enemies, but burn through enough ammo and you will eventually triumph.|Description from ''[[Halo 3]]'' and ''[[Halo 3: ODST]]''}} | |||
== Gallery == | |||
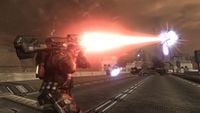
<gallery>File:Odst_onialphasite02.jpg|Taking out the enemies before blowing up the bridge will gain you a Killing Frenzy or higher. | |||
File:Odst_onialphasite01.jpg|The banshees are not that much of a threat, but you can take them out anyways. | |||
File:Odst_onialphasite06.jpg|Be careful about taking out the Chieftain on all difficulties! | |||
</gallery> | |||
{{succession box | |||
|before = ''[[Kizingo Boulevard/Walkthrough|Kizingo Boulevard]]'' <br /> | |||
|title = Halo 3: ODST Campaign Walkthrough for: | |||
|years = '''''Coastal Highway''''' | |||
|after = ''[[NMPD HQ (Level)/Walkthrough|NMPD HQ]]'' | |||
}} | |||
[[Category:Halo 3: ODST walkthroughs]] | |||
= | |||
[[Category: | |||
Latest revision as of 04:13, January 5, 2023
This is a walkthrough for the Level ONI Alpha Site It is written for play on Legendary difficulty and has notes for lower difficulties.
This is the second mission that you play as Dutch, with Mickey as your ally. Your mission is to defend the ONI Alpha Site facility and deny access to the Covenant. This mission is one big firefight. Your starting weapons are the Spartan Laser and the Silenced SMG. There is no subtlety or sneakiness to this level. You cannot avoid the enemy in any part of the game, so knowing your weapons, their capabilities and how to best use your NPCs is really important. There are no "good" Skulls for this mission, but Black Eye, Tilt and Mythic will make this level feel nearly impossible to beat and incredible when you do.
Boom Goes the Dynamite!!! (Or, Why I love my job!)[edit]
As you start this mission, you're running away from the Covenant. Get used to it, most of this mission is running away. Arm the charges, then head for the left hand tower and set them off, blowing the bridge and killing everything. You can run around shooting at enemies and eventually Mickey will detonate the charges, but on Legendary, you can't afford to waste the ammo. Head over to one of the Gauss turrets, and take out the Wraith on the other end of the bridge, you'll end up shooting two Banshees too. You could skip this, but occasionally some Plasma Mortars will make it over the wall. Don't risk it, take a few seconds and clear your enemies. Once done, head under the wall with Mickey.
You Wanna Piece of This!! (Or, Come get Some!)[edit]
Under the wall, Melee the Jackals before heading out. Bring up the Spartan Laser and quickly dispatch the two Hunters. If you're lucky a few others will stray into the beam. Start running. Head towards the building shooting and tossing grenades. It will give you a little relief when you're running to the shelters. Once on the first tier, swap your Silenced SMG for an MA5C. There's plenty around and on legendary difficulty there will be plenty of dead Marines to get ammo from. The MA5C is better at close range than the Silenced SMG and has a better melee. On lower difficulties, stick to the Silenced SMG, the Marines are heartier and won't die so you can't get more ammo, plus the Silenced SMG deals death pretty well on lower difficulties. As you withdraw, use lots of grenades if you have them, as there are plenty around. Once you're at the top, stay away from the turrets as getting behind a stationary emplacement at this point is instant death, run down the stairs, grab the Rocket Launcher behind the wall and give it to Mickey. He'll do a lot more damage with that than the Silenced SMG. Run back and grab your Spartan Laser. There seems to be three ways to trigger the recall into the building:
- Running around killing indiscriminately until a certain amount of time has passed.
- Killing the Chieftain with the Gravity Hammer (this one is really hard so don't bother unless you're really sure you can get him).
- Destroying the Wraiths. If you're playing on Legendary, you should be able to kill a Wraith with one shot from a Spartan Laser. Target the one on the left first, then run to the right and kill the second one. This should trigger the recall. Before you run in, on the ground on the right side behind the barrier at the top there's another full Laser, and another at the top on the center balcony, grab either one. If you think you can get away with it, grab a turret too. Head inside.
Bring the Rain!!! (Or, Lead Showers and Bloody Flowers)[edit]
Once you're inside, head over to the center and drop your second turret towards the back stairs; it will be safe there and you can come back for it later. Take your place at the second turret. Follow the directions of Mickey and the NMPD officer, but don't be beholden to them, keep sweeping left and right. You can kill the Kamikaze Grunts and Jackals, but watch out for the Brutes with Brute Shots. Hop off the turret and wade into the fray, using grenades and your Assault Rifle. The Brutes seem to focus on the center, so if you stay to the top you can sneak around and assassinate them from behind. This isn't foolproof though, so stay alert. Between Mickey and yourself, you should be able to end the frontal assault quickly. Next, grab one of the turrets and watch for the Phantom to drop its troops behind you. Use the turret to clear the Brutes and then finish the rest off with your MA5C, taking out the Jackals and Grunts. Mickey's rockets will do plenty of damage to help you out. Once you're done, trade a Brute Shot for your MA5C, keep your Spartan Laser and the other turret. Grab any grenades you can find and head on to the elevator.
Enjoy a Firefight on Our Beautiful Rooftop Patio..[edit]
Before you start the elevator, drop your turret and swap your Brute Shot for the Silenced SMG on the floor. Pick up the turret (it can disappear), and activate the elevator. Drop the turret near the door and stay clear of Mickey and the cop as they shoot their rockets and grenades at the Drones, clean up what they miss. As you reach the top, go back for the Brute shot and pick up the turret. The heavy weapons will make short work of the jump Brutes here and you can then focus on the Chieftain. Between your laser and Mickey's rockets, he won't last very long. Hop on the Pelican and watch the fireworks...
Legendary Notes[edit]
- Machine Gun Turrets outside the building plus user playing on Legendary equals dead user. Stationary emplacements are quick death, by grenade, Wraith, Brute Shot, Beam Rifle, or some combination thereof. Removing one from an emplacement and running around with it is slow and there's too much climb, though if you stand still, it mows down Brutes faster than a Sniper Rifle, but standing still on this level can easily be equated with death.
- Machine Gun Turrets inside the building plus user playing on Legendary equals victory. Using the turret inside the ONI building and knowing when to get off (preferably before grenades hail down upon you) will clear out all of the minor annoyances and some of the big Gorilla looking ones. Ripping it off and running around will quickly finish off Brutes with short controlled bursts. An extra turret if you can get one from outside without dying is a great assist for the roof.
- Don't take out the banshees at the bridge part with your Spartan Laser. Those banshees hardly ever harm you, and the laser shots you use on them would be a waste, as you need them for the next section.
- On the way up the lift, hide behind the door/glass section, if you don't want to get shot by the Drones.
- When the enemies start flooding into the ONI building, make sure you keep strafing from left to right and back again. If you keep your attention fixed on one side without paying attention to the other, you will definitely die.
- Since Mickey is invulnerable, make sure he has the Rocket Launcher, with unlimited ammo he's an invaluable assett to staying alive.
Notes for Lower Difficulties[edit]
- Staying at one of the Machine Gun Turret emplacements outside is death, but with four turrets available, you can easily mow down enemies on lower difficulties until the recall is triggered. You may even be able to snag the Chieftain and his Gravity Hammer.
- Taking the Sniper Rifle from the tower isn't recommended, but on lower difficulties it's easier to learn how to shoot on the move without the scope to assist you.
- On lower difficulties if you don't assault the Chieftain on the roof, eventually the pelican will show up and burn into his shields and armor leaving him exposed for you to finish off.
- The description of Normal is perfect for this level. Burn enough ammo and you will win.
- "Face firm resistance from competent, determined enemies, but burn through enough ammo and you will eventually triumph."
- — Description from Halo 3 and Halo 3: ODST
Gallery[edit]

Taking out the enemies before blowing up the bridge will gain you a Killing Frenzy or higher.
The banshees are not that much of a threat, but you can take them out anyways.
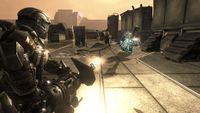
Be careful about taking out the Chieftain on all difficulties!


| Preceded by Kizingo Boulevard |
Halo 3: ODST Campaign Walkthrough for: Coastal Highway |
Succeeded by NMPD HQ |


