Category:Images of Installation 05
From Halopedia, the Halo wiki
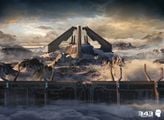
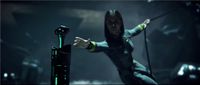
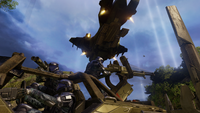
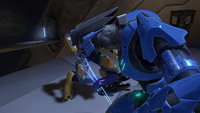
Images featuring Installation 05, also known as Delta Halo, as seen in Halo 2.
Subcategories
This category has the following 18 subcategories, out of 18 total.
I
- Images of Ascension (11 F)
- Images of Backwash (15 F)
- Images of Beaver Creek (9 F)
- Images of Coagulation (32 F)
- Images of Cold Storage (19 F)
- Images of Containment (11 F)
- Images of Desolation (6 F)
- Images of Lockdown (34 F)
- Images of Lockout (29 F)
- Images of Pegasus (8 F)
- Images of Relic (13 F)
- Images of Remnant (31 F)
- Images of Sanctuary (5 F)
- Images of Shrine (24 F)
- Images of Skyward (10 F)
- Images of Uplift (7 F)
- Images of Warlock (6 F)
- Images of Zenith (32 F)
Media in category "Images of Installation 05"
The following 200 files are in this category, out of 379 total.
(previous page) (next page) 1222027470 Enforcer fight.jpg 1,440 × 803; 138 KB
 AerialDelta.png 1,920 × 1,080; 2.37 MB
 Arbitercdr meet.jpg 1,365 × 768; 155 KB
 Arbiterinjured.jpg 1,365 × 768; 163 KB
 Coelest.jpg 650 × 473; 23 KB
 Control Room3.jpg 1,535 × 1,139; 1.62 MB
 Control1.jpg 1,365 × 768; 127 KB
 Covie1.jpg 1,365 × 768; 157 KB
 D-Halo.jpg 1,365 × 768; 137 KB
 Delta Halo Waypoint 2.jpg 542 × 542; 46 KB
 Delta Halo Waypoint.jpg 708 × 398; 75 KB
 Delta Halo.jpg 1,600 × 1,200; 405 KB
 Deltahalo.jpg 1,280 × 720; 251 KB
 Dgodt Visr Foltz.PNG 1,220 × 1,190; 1.29 MB
 Enforcer sneak.jpg 1,365 × 768; 138 KB
 Enforcer.jpg 1,019 × 575; 43 KB
 Fired.jpg 1,280 × 720; 101 KB
 Goingtoactivatehalo.JPG 1,280 × 720; 333 KB
 Gravemindcapture.jpg 1,362 × 1,266; 1.38 MB
 H2 - Delta Halo door 1.png 1,920 × 1,080; 2.44 MB
 H2 - Delta Halo door 2.png 1,920 × 1,080; 1.67 MB
 H2 - Quarantine Zone door 1.png 1,920 × 1,080; 2.06 MB
 H2 - Quarantine Zone door 2.png 1,920 × 1,080; 1.5 MB
 H2 - Shade Quarantine Zone.png 1,518 × 1,048; 1.43 MB
 H2 - Shade rear.png 1,406 × 1,080; 1.44 MB
 H2 343 and reclaimers.jpg 1,365 × 768; 130 KB
 H2 Arbiter and Rtas QuarantineZone.jpg 1,019 × 574; 47 KB
 H2 Arbiter Gondola Phantom.jpg 1,022 × 573; 39 KB
 H2 BansheeControlRoom.jpg 1,920 × 1,080; 455 KB
 H2 Compare beams.png 345 × 313; 161 KB
 H2 ConceptArt MasterChiefTakingCover.png 3,840 × 2,160; 5.79 MB
 H2 Containment Shield.jpg 1,365 × 768; 161 KB
 H2 Delta Halo Tank.jpg 1,600 × 1,200; 822 KB
 H2 DeltaHalo BrownStealthSangheili.png 1,920 × 1,080; 2.84 MB
 H2 DeltaHalo Building Concept.jpg 1,123 × 875; 136 KB
 H2 DeltaHalo JackalSniper.jpg 2,394 × 2,160; 1.94 MB
 H2 DeltaHalo LightEye.jpg 3,840 × 2,160; 600 KB
 H2 Elite Honor Guard.png 1,932 × 2,160; 3.7 MB
 H2 FloodCarrierForm 2.jpg 1,591 × 1,643; 1.26 MB
 H2 Gravemind Closeup.png 1,366 × 705; 1.03 MB
 H2 halo surfaceland.jpg 1,700 × 1,080; 756 KB
 H2 Hard Drop.jpg 1,018 × 575; 68 KB
 H2 header - Delta Halo.png 396 × 373; 242 KB
 H2 header - Quarantine Zone.png 396 × 373; 172 KB
 H2 header - Regret.png 396 × 373; 180 KB
 H2 header - Sacred Icon.png 396 × 373; 211 KB
 H2 header - The Great Journey.png 396 × 373; 190 KB
 H2 header - Uprising.png 396 × 373; 198 KB
 H2 Main Temple Vaporized.jpg 1,021 × 576; 43 KB
 H2 PodInfector Closeup.jpg 1,463 × 775; 492 KB
 H2 Recharge Station and Elites.jpg 1,920 × 1,080; 390 KB
 H2 ringbirds.jpg 664 × 347; 82 KB
 H2 Rtas Vadumee Rally.jpg 1,920 × 1,080; 450 KB
 H2 SacredIcon EnergyAlley.jpg 2,017 × 1,307; 1.6 MB
 H2 SacredIcon ReleaseChamber.jpg 1,600 × 1,200; 867 KB
 H2 Sangheili Shielding.jpg 1,040 × 1,680; 1,020 KB
 H2 Scarab Threatening.jpg 1,920 × 1,080; 638 KB
 H2 Scorpion UE8-14.jpg 1,554 × 1,000; 573 KB
 H2 SentinelLauncher Destroyed.jpg 1,082 × 1,082; 503 KB
 H2 Shade Turret-crop.png 600 × 599; 615 KB
 H2 Tartarus Betrays Arbiter.jpg 1,018 × 573; 50 KB
 H2 Tartarus Hits Johnson.jpg 1,021 × 575; 47 KB
 H2 TB-SB-1 DeltaHalo.png 1,251 × 759; 1.28 MB
 H2 Type-B Capsule Empty.png 954 × 1,080; 1.26 MB
 H2 Type-B Capsule Full.png 954 × 1,080; 1.2 MB
 H2 Type-B Capsule Label.png 954 × 1,080; 625 KB
 H2 Type-B Capsules.png 1,920 × 1,080; 2.63 MB
 H2 Wallpaper Master Chief and ODST.png 1,600 × 1,200; 2.19 MB
 H2 Wallpaper Tartarus and Brutes.png 1,600 × 1,200; 2.84 MB
 H2 warthogguys.jpg 1,680 × 1,212; 1.54 MB
 H2 Weaponless Brute.jpg 286 × 377; 11 KB
 H2-Delta Halo Quadwings.jpg 800 × 600; 56 KB
 H2-EnforcerSentinel-ScanScreen.jpg 2,240 × 1,120; 2.19 MB
 H2-SpectreturretHUD.png 1,138 × 640; 1.16 MB
 H2-T32HUD.png 1,138 × 640; 1.06 MB
 H2-T33FRGHUD.jpg 290 × 217; 13 KB
 H2-WraithHUD.png 1,138 × 640; 1.14 MB
 H2A - Arbiter and 'Vadum.png 1,173 × 491; 1.19 MB
 H2A - Arbiter and former guardsmen.jpg 1,280 × 540; 150 KB
 H2A - Arbiter attacking Johnson.jpg 1,280 × 540; 54 KB
 H2A - Arbiter.png 1,280 × 820; 1.53 MB
 H2A - Arrival of High Charity.jpg 1,280 × 541; 80 KB
 H2A - Battle of Delta Halo.jpg 1,280 × 543; 98 KB
 H2A - Chief outrunning plasma.jpg 1,280 × 544; 92 KB
 H2A - Delta Halo activated.jpg 1,280 × 541; 103 KB
 H2A - Delta Halo.jpg 1,920 × 1,080; 1.33 MB
 H2A - DeltaHalo.jpg 1,920 × 1,080; 269 KB
 H2A - Enforcer.jpg 1,280 × 543; 160 KB
 H2A - Fist of Rukt on Arbiter.jpg 1,280 × 544; 107 KB
 H2A - Gravemind saves MC.jpg 1,031 × 540; 58 KB
 H2A - Great Schism.jpg 1,279 × 539; 84 KB
 H2A - GuiltyJohnsonMiranda.png 1,920 × 808; 1.35 MB
 H2A - Halo Array hologram.jpg 1,280 × 542; 125 KB
 H2A - HEVs deployed.jpg 1,280 × 539; 49 KB
 H2A - HEVs over Delta Halo.jpg 1,280 × 541; 91 KB
 H2A - Hierarchs with Vadum.jpg 1,280 × 540; 128 KB
 H2A - In Amber Clad approaches Halo.png 1,920 × 810; 913 KB
 H2A - In Amber Clad heading for Delta Halo.jpg 1,280 × 542; 146 KB
 H2A - Inevitable betrayal.jpg 1,280 × 543; 110 KB
 H2A - Library.jpg 1,280 × 544; 179 KB
 H2A - LibraryConcept.png 1,920 × 1,080; 3.51 MB
 H2A - Make More Noise.jpg 1,280 × 541; 111 KB
 H2A - Mean Jackal.jpg 1,280 × 542; 199 KB
 H2A - Prophet of Regret hologram.jpg 1,280 × 542; 171 KB
 H2A - RegretGravemind.jpg 1,060 × 808; 268 KB
 H2A - Rtas and Thel.jpg 1,280 × 541; 134 KB
 H2A - Rtas rallying troops.jpg 1,280 × 543; 112 KB
 H2A - Scarab console.jpg 1,280 × 542; 100 KB
 H2A - ScarabConcept.png 1,920 × 1,080; 4.46 MB
 H2A - Spark with Hierarchs and Arbiter.jpg 1,280 × 539; 170 KB
 H2A - T27 Shade 1.jpg 1,920 × 1,080; 630 KB
 H2A - T27 Shade 2.jpg 1,920 × 1,080; 647 KB
 H2A - Tartarus capturing Keyes.jpg 1,280 × 536; 86 KB
 H2A - Tartarus with Keyes and Spark.jpg 1,071 × 541; 97 KB
 H2A - Tartarus with Rukt.jpg 899 × 542; 111 KB
 H2A - Temple.jpg 1,652 × 960; 523 KB
 H2A Aggressor.png 3,840 × 2,160; 9.17 MB
 H2A Base Beam Hud1.png 1,280 × 720; 1.21 MB
 H2A Base Beam Hud2.png 1,280 × 720; 1,020 KB
 H2A Base Beam Hud4.png 1,280 × 720; 1,017 KB
 H2A Base Beam.png 254 × 118; 46 KB
 H2A Brute Minor.png 3,840 × 2,160; 13.55 MB
 H2A Brute Pack.png 3,840 × 2,160; 11.91 MB
 H2A Compare beams.png 263 × 239; 84 KB
 H2A ConstructorAndPiston.png 3,840 × 2,160; 6.49 MB
 H2A ConstructorSacredIcon.png 3,840 × 2,160; 7.96 MB
 H2A ControlRoom Concept.jpg 1,300 × 692; 165 KB
 H2A ControlRoom Platform Concept.jpg 1,404 × 1,600; 578 KB
 H2A CovenantDropPod Back.png 1,920 × 1,080; 2.98 MB
 H2A CovenantDropPod Closed.png 1,920 × 1,080; 2.85 MB
 H2A CovenantDropPod Open.png 1,920 × 1,080; 2.85 MB
 H2A CovenantDropPod Top.png 1,920 × 1,080; 3.46 MB
 H2A Cutscene SanctumHaloView.png 1,920 × 818; 1.68 MB
 H2A DeltaHalo BrownStealthSangheili.png 419 × 660; 705 KB
 H2A DeltaHalo Loadscreen.png 1,920 × 1,080; 2.99 MB
 H2A DeltaHalo LZ Concept.jpg 848 × 996; 385 KB
 H2A DeltaHaloLZ Ruins Concept.jpg 640 × 640; 127 KB
 H2A DeltaHaloRuins Concept.jpg 640 × 640; 94 KB
 H2A DeltaStructure.png 1,920 × 1,080; 4.01 MB
 H2A EliteInCover.png 3,840 × 2,160; 7.24 MB
 H2A EncampmentBattle.png 3,840 × 2,160; 8.2 MB
 H2A FirinMahLazer.png 3,840 × 2,160; 7.91 MB
 H2A Gold Beam Hud1.png 1,280 × 720; 1,020 KB
 H2A Gold Beam Hud2.png 1,280 × 720; 1,023 KB
 H2A Gold Beam Hud3.png 1,280 × 720; 1 MB
 H2A Gold Beam Hud4.png 1,280 × 720; 1.01 MB
 H2A Gold Beam.png 204 × 173; 57 KB
 H2A gold sent beam.png 158 × 153; 34 KB
 H2A Gold Sentinel.png 302 × 256; 141 KB
 H2A Gravemind Loadscreen.png 1,920 × 1,080; 2.14 MB
 H2A Gravemind.jpg 1,656 × 1,034; 678 KB
 H2A HuntersDeploying.png 1,920 × 1,080; 2.58 MB
 H2A Jiralhanae Captain.png 1,280 × 720; 830 KB
 H2A JohnVsRegret.jpg 1,404 × 1,236; 724 KB
 H2A Library.png 4,083 × 2,025; 4.28 MB
 H2A LikeAPostcard.png 1,920 × 1,080; 2.68 MB
 H2A MarineSnipingJackal.png 1,920 × 1,080; 3.03 MB
 H2A NeedlerSentinel.png 678 × 722; 793 KB
 H2A ODSTAttack.png 1,920 × 1,080; 3.42 MB
 H2A ODSTsFighting.png 1,920 × 1,080; 4.09 MB
 H2A QuarantineZone Loadscreen.png 1,920 × 1,080; 2.42 MB
 H2A Rangmejo.jpg 542 × 305; 86 KB
 H2A Recharge Station and Elites.jpg 1,920 × 1,080; 425 KB
 H2A Recharge Station.jpg 1,920 × 1,080; 509 KB
 H2A Regret Loadscreen.png 1,920 × 1,080; 2.44 MB
 H2A SacredIcon Loadscreen.png 1,920 × 1,080; 2.06 MB
 H2A ScarabStandoff.png 1,920 × 744; 1.76 MB
 H2A SentinelBois.png 3,840 × 2,160; 9.48 MB
 H2A SentinelFactory Entrance Concept.jpg 1,007 × 1,443; 387 KB
 H2A Silver sent.png 321 × 218; 143 KB
 H2A SpecOps Sangheili.png 1,280 × 720; 1.59 MB
 H2A TankBeatsEverything.png 1,920 × 1,080; 3.44 MB
 H2A Terminals - Great Schism.png 1,882 × 800; 1.49 MB
 H2A Terminals - Murder of the Councilors.jpg 1,916 × 814; 586 KB
 H2A TheGreatJourney Loadscreen.png 1,920 × 1,080; 2.33 MB
 H2A Type-B Capsule Empty.png 954 × 1,080; 1.31 MB
 H2A Type-B Capsule Full.png 954 × 1,080; 1.5 MB
 H2A Type-B Capsule Label.png 954 × 1,080; 1.24 MB
 H2A Type-B Capsules.png 1,920 × 1,080; 3.27 MB
 H2A Uprising Loadscreen.png 1,920 × 1,080; 2.78 MB
 H2A WraithsGuardingBridge.png 1,920 × 1,080; 2.89 MB
 H2A-Arbiter&Co.jpg 1,923 × 822; 594 KB
 H2A-Arbiter&Johnson.jpg 1,921 × 818; 382 KB
 H2A-Arbiter&Prophets.jpg 1,920 × 823; 243 KB
 H2A-bogdan-marica-05-control-room.jpg 1,500 × 833; 333 KB
 H2A-Control room.png 1,920 × 1,080; 3.04 MB
 H2A-GravemindWithCaptives.jpg 3,840 × 1,630; 385 KB
 H2A-HowYaDoing.jpg 1,280 × 545; 205 KB
 H2A-In Amber Clad Quarantine Zone.png 1,920 × 1,080; 1.55 MB
 H2A-InfectedHumans.png 1,280 × 720; 1.14 MB
 H2A-JohnNeedlers.jpg 1,920 × 1,080; 340 KB
 H2A-JohnWithGravemind.jpg 1,280 × 545; 228 KB
 H2A-KeyesWithSMG2.jpg 708 × 398; 19 KB
 H2A-KigYarMinor.png 1,920 × 1,080; 3.56 MB
 H2A-Library-Wall.jpg 1,920 × 1,410; 532 KB
 H2A-Miranda.jpg 1,921 × 820; 376 KB
 H2A-ODSTsWarthog.png 1,280 × 720; 1.22 MB
 H2A-Photobombing Minor.png 1,280 × 720; 1.23 MB
 H2A-Quadwing.png 1,158 × 514; 716 KB
 H2A-Ricochet.png 1,920 × 1,080; 3.01 MB


