Category:Images of 343 Guilty Spark
From Halopedia, the Halo wiki
Images featuring 343 Guilty Spark.
Media in category "Images of 343 Guilty Spark"
The following 114 files are in this category, out of 114 total.
 343 GS.jpg 1,365 × 768; 85 KB
 343 Guilty Spark (Rampant).png 609 × 620; 362 KB
 343 Guilty Spark John 117 Meet-up.jpg 1,920 × 832; 177 KB
 343 Guilty Spark Johnson carry.jpg 1,280 × 720; 305 KB
 343 Guilty Spark Seperatist UNSC.jpg 1,920 × 832; 234 KB
 343 Guilty Spark.png 680 × 660; 440 KB
 343.JPG 1,272 × 1,080; 116 KB
 343GS rampant.jpg 1,920 × 1,080; 684 KB
 Alone Alone Alone.jpg 1,600 × 900; 699 KB
 AmogusMJOLNIR.jpg 1,920 × 1,080; 166 KB
 Ark.JPG 1,920 × 832; 324 KB
 Chakas.JPG 693 × 1,673; 142 KB
 Chief Index.jpg 1,280 × 600; 491 KB
 ChiefSparkCEA.png 1,359 × 576; 1.47 MB
 Control Room.jpg 1,365 × 576; 181 KB
 Damaged Monitor.jpg 1,536 × 1,152; 118 KB
 DeathofAveryJohnson.jpg 3,840 × 1,634; 748 KB
 DJC-343GSForcefield.jpg 1,920 × 1,080; 361 KB
 E32007-1.jpg 3,840 × 1,634; 920 KB
 Enc22 Chakas.jpg 1,920 × 2,485; 579 KB
 Enc22 Concept ChakasAndFriends.jpg 1,440 × 1,800; 499 KB
 Enc22 Spark.png 787 × 1,061; 1.04 MB
 Final meeting 7.png 3,840 × 1,634; 6.85 MB
 First Signs of Rampancy.jpg 1,366 × 768; 127 KB
 Floodgate - Cutscene.jpg 3,840 × 1,634; 583 KB
 GS-Heretic.jpg 1,365 × 768; 153 KB
 GuiltySparkAnniversary.png 1,280 × 541; 1.4 MB
 H2 343 and reclaimers.jpg 1,365 × 768; 130 KB
 H2 343GS Explains Ark.jpg 1,021 × 574; 36 KB
 H2 AlphaMoon Storyboard Outro 4.jpg 1,256 × 1,638; 384 KB
 H2 AlphaMoon Storyboard Outro 5.jpg 1,260 × 1,634; 452 KB
 H2 AlphaMoon Storyboard Outro 6.jpg 1,260 × 1,634; 388 KB
 H2 AlphaMoon Storyboard Outro 7.jpg 1,260 × 1,638; 450 KB
 H2 AlphaMoon Storyboard Outro 8.jpg 1,264 × 1,634; 478 KB
 H2 AlphaMoon Storyboard Outro 9.jpg 1,248 × 1,626; 435 KB
 H2 AlphaMoon Storyboard Outro 10.jpg 1,252 × 1,626; 416 KB
 H2 AlphaMoon Storyboard Outro 11.jpg 1,256 × 1,630; 332 KB
 H2 Phantom Dropoff.jpg 1,021 × 576; 48 KB
 H2 Sacred Icon Revealed.jpg 1,920 × 1,080; 431 KB
 H2 Tartarus Hits Johnson.jpg 1,021 × 575; 47 KB
 H2 Tartarus Leads.jpg 1,007 × 567; 70 KB
 H2-343GuiltySpark-Extraction.png 1,120 × 1,120; 1,010 KB
 H2-343GuiltySpark-Wallpaper.jpg 1,600 × 1,200; 679 KB
 H2A - 343 Guilty Spark.jpg 3,840 × 1,634; 350 KB
 H2A - Guilty Spark close-up.jpg 2,440 × 1,634; 266 KB
 H2A - GuiltyJohnsonMiranda.png 1,920 × 808; 1.35 MB
 H2A - Halo Array hologram.jpg 1,280 × 542; 125 KB
 H2A - Spark with Hierarchs and Arbiter.jpg 1,280 × 539; 170 KB
 H2A - Spark, Thel, and Sesa.jpg 1,280 × 540; 125 KB
 H2A - Tartarus and Spark.jpg 1,280 × 540; 83 KB
 H2A - Tartarus with Keyes and Spark.jpg 1,071 × 541; 97 KB
 H2A Cutscene 343Stasis.png 1,920 × 816; 2.02 MB
 H2A SesaAndTheHeretics.jpg 1,500 × 635; 153 KB
 H2A Spark.png 1,731 × 1,731; 2.51 MB
 H2A-Arbiter&Sesa-02.jpg 1,920 × 820; 666 KB
 H2A-SevenRings.jpg 1,280 × 545; 276 KB
 H2A-Tartarus&Co.jpg 1,921 × 822; 510 KB
 H2Aterm-Sesa and GS 3.jpg 1,280 × 544; 283 KB
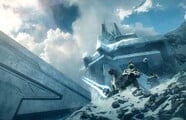
 H3 Ark CartographerEntrance.png 1,920 × 1,080; 2.65 MB
 H3 ChiefSparkBattle.png 3,840 × 2,160; 7.08 MB
 H3 ForerunnerAutoTurret Firing Unggoy.jpg 1,920 × 1,080; 159 KB
 H3 Guilty Spark firing his laser.jpg 1,024 × 500; 92 KB
 H3 GuiltySparkDies.gif 480 × 270; 3.01 MB
 H3 Guitly Spark Debris.png 1,920 × 1,080; 3.96 MB
 H3 Terminal 3.jpg 1,920 × 1,080; 396 KB
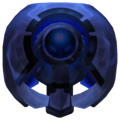
 H3-343GuiltySpark.png 1,220 × 1,140; 913 KB
 H3-John-117 343 Arbiter in front Installation 08.jpg 3,840 × 1,634; 1.24 MB
 Halo Evolutions cover.jpg 404 × 603; 67 KB
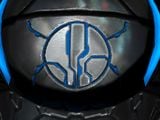 Halo3-343GS-MantleSymbol-Eld.jpg 1,536 × 1,152; 116 KB
 Halo3Mythos.jpg 1,920 × 1,240; 620 KB
 HaloCE-343GuiltySpark.png 600 × 600; 371 KB
 HaloP 20- 2009.jpg 493 × 668; 254 KB
 HCE 343GS Concept Render.jpg 614 × 570; 93 KB
 HCEA Terminal 7 Spark Fantasy.jpg 1,366 × 768; 114 KB
 HCEA Terminal Monitors.png 726 × 464; 213 KB
 HCEA-343GuiltySpark.png 880 × 800; 648 KB
 HINF - Charm icon - Guilty Charm.png 320 × 320; 86 KB
 HLC Let's Get Tactical.jpg 1,200 × 650; 353 KB
 HM Bornstellar-Cryptum.jpg 5,550 × 3,534; 2.23 MB
 HPOL-AlternateSpark.jpg 3,840 × 2,160; 1.27 MB
 HR Spark.PNG 766 × 1,072; 1.4 MB
 HTMCC Achievement ForgedinFire.png 1,920 × 1,080; 1.24 MB
 HTMCC Achievement LoreMaster.png 1,920 × 1,080; 2.28 MB
 HTMCC Achievement MultiplayerChampion.png 1,920 × 1,080; 1.66 MB
 HTMCC Achievement StickWithItALittleLonger.png 1,920 × 1,080; 1.48 MB
 HTMCC Achievement Veteran.png 1,920 × 1,080; 1.48 MB
 HTMCC Avatar 343GuiltySpark 1.png 996 × 912; 634 KB
 HTMCC H2A Achievement ReedtheStrategy.png 1,920 × 1,080; 1.17 MB
 HTMCC H2A Achievement SkulltakerGhost.png 1,920 × 1,080; 1.97 MB
 HTMCC Monitor Emoticon.png 54 × 54; 10 KB
 HTMCC-H2A 343GuiltySpark.png 1,570 × 1,630; 1.7 MB
 InstallationMonitors.jpg 1,366 × 768; 105 KB
 Interfacing.jpg 1,361 × 574; 189 KB
 LC 003 library.png 723 × 473; 639 KB
 LibraryArrivalCEA.jpg 1,360 × 575; 74 KB
 Lightfuseandcrouch.jpg 800 × 600; 43 KB
 Mercy Discussing Index.png 2,560 × 1,440; 3.86 MB
 MirrandaBruteMan.jpg 1,288 × 1,100; 651 KB
 Monitor Installation04.jpg 1,536 × 1,152; 151 KB
 MonitorsTerminal.jpeg 2,497 × 1,395; 240 KB
 PointOfLight Cover Art.jpg 1,920 × 1,413; 3.42 MB
 ProphetsOracle.jpg 1,917 × 815; 423 KB
 Rampant343.jpg 1,920 × 1,080; 214 KB
 Refumee & Spark.png 1,206 × 584; 766 KB
 RenegadesArt.jpg 1,120 × 1,771; 173 KB
 Rocket League Guilty Spark.png 769 × 344; 432 KB
 Sanctum of the hierarchs 343gs.png 411 × 565; 332 KB
 Spark Armiger.jpg 255 × 360; 92 KB
 Spark Construct Communicate.jpg 1,024 × 576; 228 KB
 Spark installation 00 cartographer.jpg 1,920 × 832; 233 KB
 Spark lazer Keg-yar.jpg 1,366 × 583; 102 KB
 Sparkandpals.jpg 1,365 × 768; 159 KB
 TwoBetrayalsAnniversary.png 1,280 × 541; 1.41 MB
 VeteransDay2023.png 1,676 × 942; 1.53 MB

.png)


