Category:Images of Installation 05: Difference between revisions
From Halopedia, the Halo wiki
Shazamikaze (talk | contribs) (Created page with "Images featuring Installation 05, also known as '''Delta Halo''', as seen in ''Halo 2''. Category:Images of Halos") |
Sith Venator (talk | contribs) No edit summary |
||
| Line 1: | Line 1: | ||
Images featuring [[Installation 05]], also known as '''Delta Halo' | Images featuring [[Installation 05]], also known as '''Delta Halo'''. | ||
[[Category:Images of Halos]] | [[Category:Images of Halos]] | ||
Revision as of 06:16, August 15, 2015
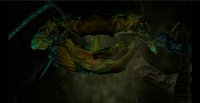
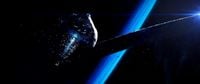
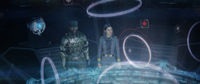
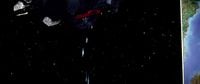
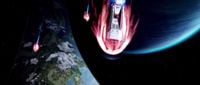
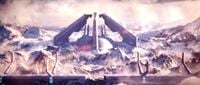
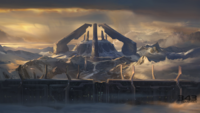
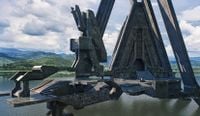
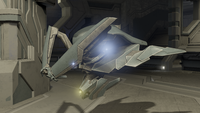
Images featuring Installation 05, also known as Delta Halo.
Subcategories
This category has the following 18 subcategories, out of 18 total.
I
- Images of Ascension (11 F)
- Images of Backwash (15 F)
- Images of Beaver Creek (9 F)
- Images of Coagulation (32 F)
- Images of Cold Storage (19 F)
- Images of Containment (11 F)
- Images of Desolation (6 F)
- Images of Lockdown (34 F)
- Images of Lockout (29 F)
- Images of Pegasus (8 F)
- Images of Relic (13 F)
- Images of Remnant (31 F)
- Images of Sanctuary (5 F)
- Images of Shrine (24 F)
- Images of Skyward (10 F)
- Images of Uplift (7 F)
- Images of Warlock (6 F)
- Images of Zenith (32 F)
Media in category "Images of Installation 05"
The following 200 files are in this category, out of 452 total.
(previous page) (next page) 1222027470 Enforcer fight.jpg 1,440 × 803; 138 KB
 AerialDelta.png 1,920 × 1,080; 2.37 MB
 Arbitercdr meet.jpg 1,365 × 768; 155 KB
 Arbiterinjured.jpg 1,365 × 768; 163 KB
 Coelest.jpg 650 × 473; 23 KB
 Control Room3.jpg 1,535 × 1,139; 1.62 MB
 Control1.jpg 1,365 × 768; 127 KB
 Covie1.jpg 1,365 × 768; 157 KB
 D-Halo.jpg 1,365 × 768; 137 KB
 Delta Halo Waypoint 2.jpg 542 × 542; 46 KB
 Delta Halo Waypoint.jpg 708 × 398; 75 KB
 Delta Halo.jpg 1,600 × 1,200; 405 KB
 Deltahalo.jpg 1,280 × 720; 251 KB
 Dgodt Visr Foltz.PNG 1,220 × 1,190; 1.29 MB
 Enforcer sneak.jpg 1,365 × 768; 138 KB
 Enforcer.jpg 1,019 × 575; 43 KB
 Fired.jpg 1,280 × 720; 101 KB
 Goingtoactivatehalo.JPG 1,280 × 720; 333 KB
 Gravemindcapture.jpg 1,362 × 1,266; 1.38 MB
 H2 - Delta Halo door 1.png 1,920 × 1,080; 2.44 MB
 H2 - Delta Halo door 2.png 1,920 × 1,080; 1.67 MB
 H2 - Quarantine Zone door 1.png 1,920 × 1,080; 2.06 MB
 H2 - Quarantine Zone door 2.png 1,920 × 1,080; 1.5 MB
 H2 - Shade Quarantine Zone.png 1,518 × 1,048; 1.43 MB
 H2 - Shade rear.png 1,406 × 1,080; 1.44 MB
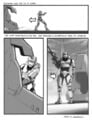
 H2 343 and reclaimers.jpg 1,365 × 768; 130 KB
 H2 Arbiter and Rtas QuarantineZone.jpg 1,019 × 574; 47 KB
 H2 Arbiter Gondola Phantom.jpg 1,022 × 573; 39 KB
 H2 BansheeControlRoom.jpg 1,920 × 1,080; 455 KB
 H2 Compare beams.png 345 × 313; 161 KB
 H2 ConceptArt MasterChiefTakingCover.png 3,840 × 2,160; 5.79 MB
 H2 Containment Shield.jpg 1,365 × 768; 161 KB
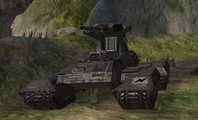
 H2 Delta Halo Tank.jpg 1,600 × 1,200; 822 KB
 H2 DeltaHalo BrownStealthSangheili.png 1,920 × 1,080; 2.84 MB
 H2 DeltaHalo Building Concept.jpg 1,123 × 875; 136 KB
 H2 DeltaHalo JackalSniper.jpg 2,394 × 2,160; 1.94 MB
 H2 DeltaHalo LightEye.jpg 3,840 × 2,160; 600 KB
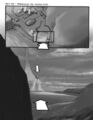
 H2 DeltaHalo V1 Storyboard Intro 5.jpg 1,254 × 1,644; 223 KB
 H2 DeltaHalo V1 Storyboard Intro 6.jpg 1,248 × 1,644; 250 KB
 H2 DeltaHalo V1 Storyboard Intro 7.jpg 1,254 × 1,644; 246 KB
 H2 DeltaHalo V1 Storyboard Intro 9.jpg 1,248 × 1,659; 191 KB
 H2 DeltaHalo V1 Storyboard Intro 12.jpg 1,256 × 1,626; 171 KB
 H2 DeltaHalo V1 Storyboard Intro 13.jpg 1,264 × 1,642; 240 KB
 H2 DeltaHalo V1 Storyboard Intro 14.jpg 1,264 × 1,634; 242 KB
 H2 DeltaHalo V1 Storyboard Intro 15.jpg 1,252 × 1,630; 209 KB
 H2 DeltaHalo V1 Storyboard Intro 19.jpg 1,256 × 1,630; 251 KB
 H2 DeltaHalo V1 Storyboard Intro 20.jpg 1,256 × 1,634; 197 KB
 H2 DeltaHalo V1 Storyboard Intro 23.jpg 1,252 × 1,634; 145 KB
 H2 DeltaHalo V1 Storyboard Intro 24.jpg 1,252 × 1,634; 199 KB
 H2 DeltaHalo V1 Storyboard Intro 25.jpg 1,256 × 1,634; 283 KB
 H2 DeltaHalo V1 Storyboard Intro 26.jpg 1,248 × 1,622; 185 KB
 H2 DeltaHalo V1 Storyboard Intro 27.jpg 1,260 × 1,630; 173 KB
 H2 DeltaHalo V1 Storyboard Intro 29.jpg 1,252 × 1,634; 242 KB
 H2 Elite Honor Guard.png 1,932 × 2,160; 3.7 MB
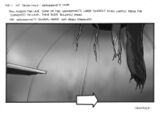 H2 Epilogue Storyboard 1.jpg 1,634 × 1,224; 170 KB
 H2 Epilogue Storyboard 2.jpg 1,630 × 1,256; 311 KB
 H2 Epilogue Storyboard 4.jpg 1,260 × 1,638; 361 KB
 H2 FloodCarrierForm 2.jpg 1,591 × 1,643; 1.26 MB
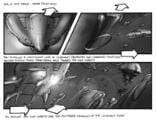
 H2 FloodHulk Storyboard Outro 1.jpg 1,257 × 1,635; 313 KB
 H2 FloodHulk Storyboard Outro 10.jpg 1,248 × 1,641; 315 KB
 H2 FloodHulk Storyboard Outro 11.jpg 1,240 × 1,638; 288 KB
 H2 ForerunnerTank Midbreak Storyboard 1.jpg 1,275 × 1,658; 281 KB
 H2 ForerunnerTank Midbreak Storyboard 2.jpg 1,260 × 1,642; 264 KB
 H2 ForerunnerTank Midbreak Storyboard 3.jpg 1,256 × 1,634; 244 KB
 H2 ForerunnerTank Midbreak Storyboard 4.jpg 1,256 × 1,634; 213 KB
 H2 ForerunnerTank Midbreak Storyboard 5.jpg 1,252 × 1,634; 250 KB
 H2 ForerunnerTank Storyboard Intro 2.jpg 1,260 × 1,634; 199 KB
 H2 ForerunnerTank Storyboard Intro 3.jpg 1,252 × 1,626; 180 KB
 H2 ForerunnerTank Storyboard Intro 4.jpg 1,272 × 1,646; 245 KB
 H2 ForerunnerTank Storyboard Outro 1.jpg 1,264 × 1,638; 295 KB
 H2 ForerunnerTank Storyboard Outro 4.jpg 1,264 × 1,630; 293 KB
 H2 ForerunnerTank Storyboard Outro 5.jpg 1,264 × 1,634; 334 KB
 H2 ForerunnerTank Storyboard Outro 6.jpg 1,264 × 1,634; 286 KB
 H2 ForerunnerTank Storyboard Outro 7.jpg 1,260 × 1,634; 256 KB
 H2 ForerunnerTank Storyboard Outro 13.jpg 1,256 × 1,630; 305 KB
 H2 ForerunnerTank Storyboard Outro 14.jpg 1,256 × 1,630; 324 KB
 H2 ForerunnerTank Storyboard Outro 15.jpg 1,268 × 1,642; 280 KB
 H2 Gravemind Closeup.png 1,366 × 705; 1.03 MB
 H2 GreatJourney V1 Storyboard Intro 1.jpg 1,252 × 1,634; 409 KB
 H2 GreatJourney V1 Storyboard Intro 2.jpg 1,260 × 1,634; 469 KB
 H2 GreatJourney V1 Storyboard Intro 3.jpg 1,256 × 1,638; 332 KB
 H2 GreatJourney V1 Storyboard Intro 4.jpg 1,252 × 1,634; 425 KB
 H2 GreatJourney V1 Storyboard Intro 5.jpg 1,252 × 1,638; 432 KB
 H2 GreatJourney V1 Storyboard Intro 6.jpg 1,260 × 1,634; 435 KB
 H2 GreatJourney V1 Storyboard Intro 7.jpg 1,256 × 1,634; 413 KB
 H2 GreatJourney V1 Storyboard Intro 8.jpg 1,264 × 1,634; 310 KB
 H2 GreatJourney V1 Storyboard Intro 9.jpg 1,260 × 1,638; 328 KB
 H2 GreatJourney V1 Storyboard Intro 10.jpg 1,256 × 1,630; 344 KB
 H2 GreatJourney V1 Storyboard Intro 11.jpg 1,256 × 1,634; 354 KB
 H2 GreatJourney V1 Storyboard Outro 1.jpg 1,256 × 1,630; 312 KB
 H2 GreatJourney V1 Storyboard Outro 2.jpg 1,260 × 1,638; 317 KB
 H2 GreatJourney V1 Storyboard Outro 3.jpg 1,252 × 1,630; 285 KB
 H2 GreatJourney V1 Storyboard Outro 4.jpg 1,260 × 1,630; 275 KB
 H2 halo surfaceland.jpg 1,700 × 1,080; 756 KB
 H2 Hard Drop.jpg 1,018 × 575; 68 KB
 H2 header - Delta Halo.png 396 × 373; 242 KB
 H2 header - Quarantine Zone.png 396 × 373; 172 KB
 H2 header - Regret.png 396 × 373; 180 KB
 H2 header - Sacred Icon.png 396 × 373; 211 KB
 H2 header - The Great Journey.png 396 × 373; 190 KB
 H2 header - Uprising.png 396 × 373; 198 KB
 H2 Main Temple Vaporized.jpg 1,021 × 576; 43 KB
 H2 PodInfector Closeup.jpg 1,463 × 775; 492 KB
 H2 QuarantineZone V1 Storyboard Outro 1.jpg 1,263 × 1,638; 292 KB
 H2 QuarantineZone V1 Storyboard Outro 2.jpg 1,263 × 1,632; 288 KB
 H2 QuarantineZone V1 Storyboard Outro 3.jpg 1,257 × 1,635; 279 KB
 H2 QuarantineZone V1 Storyboard Outro 4.jpg 1,260 × 1,638; 289 KB
 H2 QuarantineZone V1 Storyboard Outro 5.jpg 1,254 × 1,650; 328 KB
 H2 QuarantineZone V1 Storyboard Outro 12.jpg 1,254 × 1,629; 348 KB
 H2 QuarantineZone V1 Storyboard Outro 13.jpg 1,254 × 1,656; 326 KB
 H2 QuarantineZone V1 Storyboard Outro 14.jpg 1,257 × 1,644; 387 KB
 H2 QuarantineZone V1 Storyboard Outro 15.jpg 1,257 × 1,647; 285 KB
 H2 QuarantineZone V1 Storyboard Outro 16.jpg 1,251 × 1,647; 238 KB
 H2 QuarantineZone V1 Storyboard Outro 17.jpg 1,260 × 1,626; 182 KB
 H2 Recharge Station and Elites.jpg 1,920 × 1,080; 390 KB
 H2 ringbirds.jpg 664 × 347; 82 KB
 H2 Rtas Vadumee Rally.jpg 1,920 × 1,080; 450 KB
 H2 SacredIcon EnergyAlley.jpg 2,017 × 1,307; 1.6 MB
 H2 SacredIcon ReleaseChamber.jpg 1,600 × 1,200; 867 KB
 H2 SacredIcon V1 Storyboard Intro 4.jpg 1,268 × 1,650; 304 KB
 H2 SacredIcon V2 Storyboard Intro 6.jpg 1,254 × 1,629; 326 KB
 H2 SacredIcon V2 Storyboard Intro 9.jpg 1,260 × 1,635; 302 KB
 H2 SacredIcon V2 Storyboard Intro 12.jpg 1,256 × 1,642; 295 KB
 H2 SacredIcon V2 Storyboard Intro 13.jpg 1,256 × 1,646; 317 KB
 H2 Sangheili Shielding.jpg 1,040 × 1,680; 1,020 KB
 H2 Scarab Threatening.jpg 1,920 × 1,080; 638 KB
 H2 Scorpion UE8-14.jpg 1,554 × 1,000; 573 KB
 H2 SentinelLauncher Destroyed.jpg 1,082 × 1,082; 503 KB
 H2 Shade Turret-crop.png 600 × 599; 615 KB
 H2 Tartarus Betrays Arbiter.jpg 1,018 × 573; 50 KB
 H2 Tartarus Hits Johnson.jpg 1,021 × 575; 47 KB
 H2 TB-SB-1 DeltaHalo.png 1,251 × 759; 1.28 MB
 H2 Type-B Capsule Empty.png 954 × 1,080; 1.26 MB
 H2 Type-B Capsule Full.png 954 × 1,080; 1.2 MB
 H2 Type-B Capsule Label.png 954 × 1,080; 625 KB
 H2 Type-B Capsules.png 1,920 × 1,080; 2.63 MB
 H2 Wallpaper Master Chief and ODST.png 1,600 × 1,200; 2.19 MB
 H2 Wallpaper Tartarus and Brutes.png 1,600 × 1,200; 2.84 MB
 H2 warthogguys.jpg 1,680 × 1,212; 1.54 MB
 H2 Weaponless Brute.jpg 286 × 377; 11 KB
 H2-Delta Halo Quadwings.jpg 800 × 600; 56 KB
 H2-EnforcerSentinel-ScanScreen.jpg 2,240 × 1,120; 2.19 MB
 H2-SpectreturretHUD.png 1,138 × 640; 1.16 MB
 H2-T32HUD.png 1,138 × 640; 1.06 MB
 H2-T33FRGHUD.jpg 290 × 217; 13 KB
 H2-WraithHUD.png 1,138 × 640; 1.14 MB
 H2A - Arbiter and 'Vadum.png 1,173 × 491; 1.19 MB
 H2A - Arbiter and former guardsmen.jpg 1,280 × 540; 150 KB
 H2A - Arbiter attacking Johnson.jpg 1,280 × 540; 54 KB
 H2A - Arbiter.png 1,280 × 820; 1.53 MB
 H2A - Arrival of High Charity.jpg 1,280 × 541; 80 KB
 H2A - Battle of Delta Halo.jpg 1,280 × 543; 98 KB
 H2A - Chief outrunning plasma.jpg 1,280 × 544; 92 KB
 H2A - Delta Halo activated.jpg 1,280 × 541; 103 KB
 H2A - Delta Halo.jpg 1,920 × 1,080; 1.33 MB
 H2A - DeltaHalo.jpg 1,920 × 1,080; 269 KB
 H2A - Enforcer.jpg 1,280 × 543; 160 KB
 H2A - Fist of Rukt on Arbiter.jpg 1,280 × 544; 107 KB
 H2A - Gravemind saves MC.jpg 1,031 × 540; 58 KB
 H2A - Great Schism.jpg 1,279 × 539; 84 KB
 H2A - GuiltyJohnsonMiranda.png 1,920 × 808; 1.35 MB
 H2A - Halo Array hologram.jpg 1,280 × 542; 125 KB
 H2A - HEVs deployed.jpg 1,280 × 539; 49 KB
 H2A - HEVs over Delta Halo.jpg 1,280 × 541; 91 KB
 H2A - Hierarchs with Vadum.jpg 1,280 × 540; 128 KB
 H2A - In Amber Clad approaches Halo.png 1,920 × 810; 913 KB
 H2A - In Amber Clad heading for Delta Halo.jpg 1,280 × 542; 146 KB
 H2A - Inevitable betrayal.jpg 1,280 × 543; 110 KB
 H2A - Library.jpg 1,280 × 544; 179 KB
 H2A - LibraryConcept.png 1,920 × 1,080; 3.51 MB
 H2A - Make More Noise.jpg 1,280 × 541; 111 KB
 H2A - Mean Jackal.jpg 1,280 × 542; 199 KB
 H2A - Prophet of Regret hologram.jpg 1,280 × 542; 171 KB
 H2A - RegretGravemind.jpg 1,060 × 808; 268 KB
 H2A - Rtas and Thel.jpg 1,280 × 541; 134 KB
 H2A - Rtas rallying troops.jpg 1,280 × 543; 112 KB
 H2A - Scarab console.jpg 1,280 × 542; 100 KB
 H2A - ScarabConcept.png 1,920 × 1,080; 4.46 MB
 H2A - Spark with Hierarchs and Arbiter.jpg 1,280 × 539; 170 KB
 H2A - T27 Shade 1.jpg 1,920 × 1,080; 630 KB
 H2A - T27 Shade 2.jpg 1,920 × 1,080; 647 KB
 H2A - Tartarus capturing Keyes.jpg 1,280 × 536; 86 KB
 H2A - Tartarus with Keyes and Spark.jpg 1,071 × 541; 97 KB
 H2A - Tartarus with Rukt.jpg 899 × 542; 111 KB
 H2A - Temple.jpg 1,652 × 960; 523 KB
 H2A Aggressor.png 3,840 × 2,160; 9.17 MB
 H2A Base Beam Hud1.png 1,280 × 720; 1.21 MB
 H2A Base Beam Hud2.png 1,280 × 720; 1,020 KB
 H2A Base Beam Hud4.png 1,280 × 720; 1,017 KB
 H2A Base Beam.png 254 × 118; 46 KB
 H2A Brute Minor.png 3,840 × 2,160; 13.55 MB
 H2A Brute Pack.png 3,840 × 2,160; 11.91 MB
 H2A Compare beams.png 263 × 239; 84 KB
 H2A ConstructorAndPiston.png 3,840 × 2,160; 6.49 MB
 H2A ConstructorSacredIcon.png 3,840 × 2,160; 7.96 MB
 H2A ControlRoom Concept.jpg 1,300 × 692; 165 KB
 H2A ControlRoom Platform Concept.jpg 1,404 × 1,600; 578 KB
 H2A CovenantDropPod Back.png 1,920 × 1,080; 2.98 MB
 H2A CovenantDropPod Closed.png 1,920 × 1,080; 2.85 MB
 H2A CovenantDropPod Open.png 1,920 × 1,080; 2.85 MB


